1
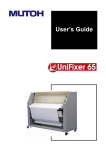
User’s Guide
30kg Take-up system
User’s Guide 30kg Take-up system
COPYRIGHT NOTICE
COPYRIGHT © March 2012 Mutoh Belgium nv all rights reserved.
Mutoh reserves the right to modify the information contained in this manual at any time without prior notice.
This document may not be reproduced by any means, in whole or in part, without written permission of the
copyright owner.
This document is furnished to support the 30kg Take-up system for DrafStation Pro, ValueJet 1204, ValueJet
1304, ValueJet 1304W, ValueJet 1324, ValueJet 1614, ValueJet 1624, and ValueJet 1604 W. In
consideration of the furnishing of the information contained in this document, the party to whom it is given,
assumes its custody and control and agrees to the following:
The information herein contained is given in confidence, and any part thereof shall not be copied or
reproduced without written consent of Mutoh Belgium nv.
This document or the contents herein under no circumstances shall be used in the manufacture or
reproduction of the article shown and the delivery of this document shall not constitute any right or license to
do so.
01 March 2012
Published: Mutoh Belgium nv, Archimedesstraat 13, B-8400 Oostende, BELGIUM
www.mutoh.eu
www.mutoh.be
2
AP-75105 - Rev 1.1 – 01/03/2012
User’s Guide 30kg Take-up system
IMPORTANT NOTICE
For users in Europe
This is a Class A product approved for industrial environments.
In a domestic environment this product may cause radio interference in which case you may be required to
take adequate measures.
Change the direction of the receiving antenna or feeder.
Trademarks mentioned in this guide
•
•
•
•
•
•
MUTOH, DrafStation Pro, ValueJet 1204, ValueJet 1304, ValueJet 1304W, ValueJet 1324, ValueJet
1614, ValueJet 1624, and ValueJet 1604 W are registered trademarks or product names of Mutoh
Belgium nv.
Windows95, Windows98, Windows NT4.0, Windows2000, Windows XP, Windows Vista, Windows 7 and
MS-DOS are registered trademarks or product names of Microsoft Corporation.
Other company and product names may be registered trademarks or product names.
Notes
The product and the contents of this publication may be changed without prior notification.
MUTOH Belgium nv has made the best efforts to keep this publication free from errors, but if
you find any uncertainties or misprints, please call us or the reseller from which you bought this
equipment.
MUTOH Belgium nv shall not be liable for any damages or troubles resulting from the use of this
equipment or this guide.
WEEE regulations
Environmental information
Disposal of your old product
Your product is designed and manufactured with high quality materials and components, which
can be recycled and reused.
When this crossed-out wheeled bin symbol is attached to a product it means the product is
covered by the European Directive 2002/96/EC
Please inform yourself about the local separate collection system for electrical and electronic
products.
Please act according to your local rules and do not dispose of your old products with your normal
household waste. The correct disposal of your old product will help prevent potential negative
consequences for the environment and human health.
3
AP-75105 - Rev 1.1 – 01/03/2012
User’s Guide 30kg Take-up system
4
AP-75105 - Rev 1.1 – 01/03/2012
User’s Guide 30kg Take-up system
Table of contents
1
Safety instructions ..................................................................................................... 7
2
Product overview ........................................................................................................ 9
2.1 Part names and functions ....................................................................................... 9
2.1.1 Front side ............................................................................................................ 9
2.1.2 Rear side ........................................................................................................... 10
2.1.2.1 For a VJ 1204 - VJ 1304 – VJ 1304W - VJ 1324 & DrafStation Pro............ 10
2.1.2.2 For a ValueJet 1614 – ValueJet 1624 & ValueJet 1604 W ......................... 11
2.2 In-the-box contents ............................................................................................... 12
2.2.1 VJ 1204 - VJ 1304 – VJ 1304W - VJ 1324 – DrafStation Pro ........................... 12
2.2.1.1 30kg Take-up system kit ............................................................................. 12
2.2.2 ValueJet 1614 – ValueJet 1604W – ValueJet 1624 .......................................... 13
3
Installation procedure .............................................................................................. 15
3.1 Installing the front tensioning system .................................................................... 15
3.1.1 On a VJ 1204 - VJ 1304 – VJ 1304W - VJ 1324 - Drafstation Pro ................... 15
3.1.2 On a VJ 1614 - VJ-1624 - VJ 1624 .................................................................... 19
4
Calibration procedure .............................................................................................. 25
4.1 Calibration ............................................................................................................ 25
4.2 Adjustment procedure ........................................................................................... 27
5
Operating the system ............................................................................................... 29
5.1 Connecting the power cable ................................................................................. 29
5.2 Switching the power ON/OFF ............................................................................... 29
5.3 Loading roll media ................................................................................................ 29
5.4 Adjusting the tension ............................................................................................ 30
5
AP-75105 - Rev 1.1 – 01/03/2012
User’s Guide 30kg Take-up system
6
AP-75105 - Rev 1.1 – 01/03/2012
User’s Guide 30kg Take-up system
1 SAFETY INSTRUCTIONS
Important
BE SURE TO READ THE TERMS IN THE NEXT CHAPTER THOROUGHLY BEFORE INSTALLING AND
OPERATING THE SYSTEM FOR YOUR OWN SAFETY.
All safety related terms are bundled and categorized in three types.
Safety terms
Important
Caution
Notes
Details
Must be followed carefully to avoid death or serious bodily injury
Must be observed to avoid bodily injury (moderate or light) or damage to your equipment
Contains important information and useful tips on the operation of your printer
•
Do not stand on or place heavy objects on the unit in order to prevent bending of the extrusion bar.
•
Do not attempt to plug in electrical plugs with wet hands. Doing so may result in electrical shock.
•
Do not use thinner, benzene, alcohol or other active agents. Doing so may result in damage or paint
peeling from the casing.
•
Be careful not to spill water inside the winder. Doing so may result in a short circuit.
•
Never open the covers fixed with screws. Doing so may result in electrical shock or a malfunctioning in
the unit.
•
When loading roll media, place the roll on a desk or other flat surface. Do not leave the media roll
standing straight. This might damage the edge of the media roll.
7
AP-75105 - Rev 1.1 – 01/03/2012
User’s Guide 30kg Take-up system
8
AP-75105 - Rev 1.1 – 01/03/2012
User’s Guide 30kg Take-up system
2 PRODUCT OVERVIEW
2.1 PART NAMES AND FUNCTIONS
2.1.1 Front side
N°
Name
Function
1
Left bracket
2
Cross brace
3
Left roll media holder
4
Right roll media holder
5
Power switch
Support bracket
Holds the media holders and enables them to slide to the
requested place
Holds the media
Holds the media. This side contains the driving mechanism to
wind up the printed media
To switch ON and OFF the Winder
6
Right bracket
Support bracket
9
AP-75105 - Rev 1.1 – 01/03/2012
User’s Guide 30kg Take-up system
2.1.2 Rear side
2.1.2.1
N°
1
2
3
()
For a VJ 1204 - VJ 1304 – VJ 1304W - VJ 1324 & DrafStation Pro
Name
Scroller
flange
Scroller receiver
Function
supports the movable flanges
Fixed flange
Movable flange.
This system is pre mounted and not included in the kit. But works as one system with the winder.
10
AP-75105 - Rev 1.1 – 01/03/2012
User’s Guide 30kg Take-up system
2.1.2.2
N°
1
2
()
For a ValueJet 1614 – ValueJet 1624 & ValueJet 1604 W
Name
Scroller support
Scroller support lever
Function
Movable 2-3” compatible core holders.
To lock or unlock the scroller supports.
This system is pre mounted and not included in the kit. But works as one system with the tensioning winder.
11
AP-75105 - Rev 1.1 – 01/03/2012
User’s Guide 30kg Take-up system
2.2 IN-THE-BOX CONTENTS
2.2.1 VJ 1204 - VJ 1304 – VJ 1304W - VJ 1324 – DrafStation Pro
N°
1
2
3
4
2.2.1.1
Description
Media slider right
Media slider left
Media slider
30kg Take-up system kit
Quantity
1
1
1
1
30kg Take-up system kit
N°
1
2
3
4
5
6
7
8
9
10
11
12
13
14
Description
Power cable
Hexagon socket spring M4
Stopper plate
Hexagon key (ø 5mm)
Roller support closing bracket
Slot nut
Adjustment tooling rollfeed
Connection plate
Pet adjusting strip rollfeed
Spacer plate
Power adapter
User’s Guide (This document)
Hexagon key (ø 3mm)
Hex hole spring flat M6
Quantity
1 EU 1 UK
14
2
1
2
2
1
2
1
10
1
1
1
4
12
AP-75105 - Rev 1.1 – 01/03/2012
User’s Guide 30kg Take-up system
2.2.2 ValueJet 1614 – ValueJet 1604W – ValueJet 1624
N°
1
2
3
4
2.2.2.1
Description
Media slider right
Media slider left
Cross brace extrusion
30kg Take-up system kit
Quantity
1
1
1
1
30kg Take-up system kit
N°
1
2
3
5
6
7
8
9
10
11
12
13
14
15
16
Description
Power cable
Hexagon socket spring M4
Stopper plate
Hexagon hole spring flat M5
Slot nut
Adjustment tooling rollfeed
Slip connection plate
Pet adjusting strip rollfeed
Spacer plate
Power adapter
User’s Guide (This document)
Hexagon key (ø 5mm)
Hexagon key (ø 4mm)
Hexagon key (ø 3mm)
Hex hole spring flat M6
Quantity
1 EU 1 UK
14
2
4
2
1
2
1
10
1
1
1
1
1
4
13
AP-75105 - Rev 1.1 – 01/03/2012
User’s Guide 30kg Take-up system
14
AP-75105 - Rev 1.1 – 01/03/2012
User’s Guide 30kg Take-up system
3 INSTALLATION PROCEDURE
3.1 INSTALLING THE FRONT TENSIONING SYSTEM
3.1.1 On a VJ 1204 - VJ 1304 – VJ 1304W - VJ 1324 - Drafstation Pro
Step 1 : Slide the closing bracket (1) over the stand; make sure that the closing bracket is pushed properly
against the stand.
Step 2 : If the closing bracket is positioned properly, slide the support bracket (2) onto the closing bracket.
Make sure that the support bracket its flange is properly positioned against the closing bracket and
the stand.
Step 3 : When correctly positioned, fix the support bracket by hand (on both sides) onto the closing bracket
using 4 screws (M4).
Step 4 : Once the two brackets are connected, slide them against the wheel bracket.
15
AP-75105 - Rev 1.1 – 01/03/2012
User’s Guide 30kg Take-up system
Step 5 : At both sides, screw the slotnut (M5) very loosely on the brackets (Make sure the slotnut can still
move a bit upwards).
•
Notes
In case you are installing the 30kg Take-up system on a ValueJet 1204, you don’t need to use
the middle screw.
16
AP-75105 - Rev 1.1 – 01/03/2012
User’s Guide 30kg Take-up system
Step 6 : Slide the extrusion bar over the first slotnut and then on the second. Make sure to support the
extrusion bar so that no brackets are bent.
Step 7 : At both sides, tighten the screws of the slot nut so that the extrusion bar can no longer move.
17
AP-75105 - Rev 1.1 – 01/03/2012
User’s Guide 30kg Take-up system
Step 8 : Slide both the left and right media slider on the cross brace extrusion.
Step 9 : Attach a stopper plate (1) at both sides of the cross brace extrusion and fix them with 2 screws
(M6).
Step 10 : Refer to the next chapter to calibrate the tensioning bar and scroller assembly.
18
AP-75105 - Rev 1.1 – 01/03/2012
User’s Guide 30kg Take-up system
3.1.2 On a VJ 1614 - VJ-1624 - VJ 1624
Step 1 :
There are 2 possibilities in the first step.
a. In case you have a Japanese stand (light grey)
i. At both sides, fix the support bracket onto the stand using 4 screws (M4).
19
AP-75105 - Rev 1.1 – 01/03/2012
User’s Guide 30kg Take-up system
b. In case you have a European stand (dark grey)
ii. At the left leg, screw the bracket in the 2 screw holes shown in the picture below.
20
AP-75105 - Rev 1.1 – 01/03/2012
User’s Guide 30kg Take-up system
iii. At the right leg, fix the bracket using 2 x M5 screws.
21
AP-75105 - Rev 1.1 – 01/03/2012
User’s Guide 30kg Take-up system
Step 2 :
At both sides, screw the slotnut (M4) very loosely on the brackets (Make sure the slotnut can still
move a bit upwards).
22
AP-75105 - Rev 1.1 – 01/03/2012
User’s Guide 30kg Take-up system
Step 3 :
Slide the extrusion bar over the first slotnut and then on the second. Make sure to support the
extrusion bar so that no brackets are bent.
Step 4 :
At both sides, tighten the screws of the slot nut so that the extrusion bar can no longer move.
23
AP-75105 - Rev 1.1 – 01/03/2012
User’s Guide 30kg Take-up system
Step 5 :
Slide both the left and right media slider on the cross brace extrusion.
Step 6 :
Attach a stopper plate (1) at both sides of the cross brace extrusion and fix them with 2 screws.
Step 7 :
Refer to the next chapter to calibrate the tensioning bar and scroller assembly.
24
AP-75105 - Rev 1.1 – 01/03/2012
User’s Guide 30kg Take-up system
4 CALIBRATION PROCEDURE
Tools needed
•
•
•
•
•
Synthetic paper strip
Adjustment plate
Hexagon key
Tape
(not included in winder kit)
Pencil
(not included in winder kit)
4.1 CALIBRATION
Step 1 :
Load an empty core between the front media sliders.
Step 2 :
Raise the pressure rollers of the printer.
Step 3 :
Raise the pressure rollers of the printer and load the paper strip.
Step 4 :
Create a straight loop with the synthetic paper strip around the empty core at the front of the
printer.
Step 5 :
Guide the other end of the strip under the pressure rollers to the back of the machine and move
the strip to the left side of the machine. Create a little tension on the strip to be sure it is straight.
Step 6 :
Place the adjustment plate at the front of the printer against the pressure rollers.
25
AP-75105 - Rev 1.1 – 01/03/2012
User’s Guide 30kg Take-up system
Step 7 :
Draw a line on the strip.
Step 8 :
Move the strip to the right side.
Step 9 :
Draw a line for the second time. The following two situations can be obtained.
The lines overlap each other
► well adjusted
The lines do NOT overlap each other
► perform the adjustment procedure as described in the next chapter
26
AP-75105 - Rev 1.1 – 01/03/2012
User’s Guide 30kg Take-up system
4.2 ADJUSTMENT PROCEDURE
Depending on the result of the calibration, the 30kg Take-up system must be adjusted until it is positioned
horizontally to obtain a straight winding flow.
Follow the procedure below to adjust the scroller bar.
Step 1 :
Evaluate on basis of the drawn lines how the bar is positioned compared to the print platform.
Situation 1
Situation 2
Line 1 = left side calibration line
Line 2 = right side calibration line
Line 1 = left side calibration line
Line 2 = right side calibration line
In this situation, the right side of the scroller bar is
higher than the left side.
In this situation, the left side of the scroller bar is higher
than the right side.
Raise the left side of the 30kg Take-up system.
Raise the right side of the 30kg Take-up system.
Step 2 :
Raise the 30kg Take-up system as follows:
a. Loosen the 3 screws (1) holding the roller support bracket a bit.
b. Add an adjustment plate (2) underneath the roller support bracket.
c. Tighten the 3 screws again.
Step 3 :
Verify the adjustment by following the calibration procedure once again.
27
AP-75105 - Rev 1.1 – 01/03/2012
User’s Guide 30kg Take-up system
28
AP-75105 - Rev 1.1 – 01/03/2012
User’s Guide 30kg Take-up system
5 OPERATING THE SYSTEM
5.1 CONNECTING THE POWER CABLE
Step 1 :
Be sure that the power is switched OFF. (Switch is in the middle position)
Step 2 :
Connect the power cable to the AC inlet (1).
Step 3 :
Insert the other side of the power cable in the power socket.
5.2 SWITCHING THE POWER ON/OFF
Step 1 :
Push the switch on top of the driving mechanism to power ON.
Step 2 :
As you will notice, pushing the switch to one side will make the tension winder roll up the media.
Pushing it to the other side will enable you to roll off media.
5.3 LOADING ROLL MEDIA
Step 1 :
Power ON the printer.
Step 2 :
Be sure to position the switch in the middle position (= OFF).
Step 3 :
Raise the pressure rollers of the printer.
Step 4 :
Load a roll of media at the back of the printer.
Step 5 :
Unwind some media and guide it under the pressure rollers to the front of the printer.
29
AP-75105 - Rev 1.1 – 01/03/2012
User’s Guide 30kg Take-up system
Step 6 :
Lower the pressure rollers of the printer
Step 7 :
Load an empty core between the front media sliders. Be sure that the core is at least as wide as
the media.
Step 8 :
Guide the media to the empty core and tighten the media with some tape.
Loosen the screws to move the roll units left and right until the media core fits in between.
Step 9 :
Switch ON the 30kg Take-up system and feed forward to roll up some media.
Step 10 : Initialize the media as described in the User’s Guide of the printer
5.4 ADJUSTING THE TENSION
Once the media is loaded properly, it might happen that there is too much slack (when rolling up) or too
much tension on the media (when rolling off).
Step 1 :
•
•
To achieve the correct tension, rotate the adjustment wheel (1).
When rotating the wheel clockwise, the tension increases
When rotating the wheel counter clockwise, the tension decreases
30
AP-75105 - Rev 1.1 – 01/03/2012