1
1. Installation
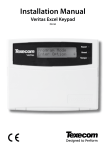
The Veritas Excel remote keypad is only suitable for use with the Texecom Veritas Excel
and Veritas R8Plus control panels. The Veritas RKP remote keypad is suitable for use
with all Texecom Veritas control panels.
Mounting
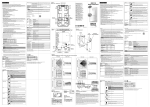
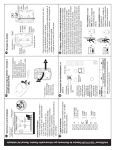
Open the keypad by carefully inserting a small flat-blade screwdriver into each slot at
the base of the unit. Gently push the screwdriver to ease the retaining clips upward,
DO NOT LEVER OR TWIST. Excessive force is NOT required. The front flap and front
cover can now be removed.
Mount the keypad using at least two appropriate countersunk screws (no larger than
No. 8). A keyhole slot has been provided to assist mounting and aid levelling.
Wiring
It is strongly recommended that the system is completely powered down (mains and
battery) before wiring a keypad. Connect the keypad to the control panel using 4-core
cable as follows:
Keypad
Control Panel
+ or 12v
+
- or 0v
-
T
T
R
R
Up to six keypads may be connected in parallel (star) or series (daisy-chain) or any
combination.
!
When using long cable runs or connecting keypads in series (daisy-chain)
ensure that the voltage at the keypad is no less than 10.0V.
When using 6-core or 8-core cable always use the spare cores to “double-up”
on 0V. This will allow longer cable runs particularly when connecting keypads in
series (daisy-chain). As a rule ‘trebling-up’ on 0V will be more beneficial than
‘doubling-up’ on 12V and 0V.
2
INS037-7