Download User Manual EN
Transcript
EN
User Manual
Getting Started
Quick Start Guide
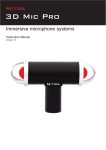
The GroovTube is a unique device that enables breathing and oral motor skills to be visible
and then analysed in an amusing and motivational way.
It converts breathing modes into real-time image effects to assist individuals who
experience breathing, speech, or oral motor disabilities.
The GroovTube device is connected to an iPad and it is very simple to use.
Just inhale or exhale into the mouthpiece of the GroovTube and the airflow is recorded and
converted into visual effects for use with various apps that have been specially developed
for the purpose.
It is strongly recommend that you first read tkis manual throughout before starting to use
the GroovTube.
Step 1. Locate and remove the required
items from the case.
Step 2. Connect the GroovTube to the IN
port of the MIDI interface.
Step 3. Connect the MIDI to lightning cable
to the opposite side of the MIDI interface.
Step 4. Connect the other end of this cable
to the iPad.
Step 5. Place the bacterial filter
mouthpiece on the white connecting tube.
Step 6. Activate the GroovTube using the
on-off button next to the cable.
Step 7. Turn on the iPad.
Step 8. The GroovTube is now ready for
use.
3
System Components Required
In order to use the GroovTube the following items are required:
1.
2.
3.
4.
5.
6.
GroovTube with cable and removeable handles
Bacterial filter mouthpiece
MIDI-interface
MIDI to lightning connector cable
iPad with lightning connector
AC adapter (not displayed)
All these components are included in the starter kit, with the exception of the iPad.
If you have an older model iPad the earlier type MIDI to 30-pin cable is available as an
additional option.
2.
5.
1.
3.
2
4.
Initial Use
Turning off the GroovTube and storing it
Connecting the hardware
After each session, close all apps and store the GroovTube in the storage case.
To exit the session please follow this procedure:
Step 1. Select and remove the components from the case and prepare your iPad.
Step 1. Double-click the HOME button (square on the iPad). You can see all the programs
that are open. Swipe the app’s screenshot up and off the screen. (Fig. 1).
These steps are illustrated on the previous page.
Step 2. Connect the GroovTube to the IN port of the iRig MIDI interface.
Step 3. Connect the iPad cable to the other side of the MIDI interface.
Step 4. Connect the other end of this cable to the iPad.
Step 5. Place the bacterial filter mouthpiece on to Groovtube.
Please ensure that you wash your hands prior to working with the GroovTube!
Avoid touching the front of the mouthpiece with hand. If you are using an extender
mouthpiece on top of the bacterial filter mouthpiece place this without touching the front or
back of it with your hands. Connect it firmly.
NOTE: each user will use his or her own bacterial filter mouthpiece. These can be stored
in the supplied plastic containers that have lids. Depending on the requirement of the user
you can place an extender mouthpiece on top of the bacterial filter mouthpiece. Please
observe a strict routine of the hygiene protocol. The extender mouthpieces are reusable.
They can be cleaned with alcohol. For the correct hygiene protocol, see pages 5/6.
Step 2. Turn the iPad off by pressing the SLEEP / WAKE button for a few seconds (Fig. 2).
Step 3. Turn the GroovTube off. You should hear a closing beep.
Step 4. Disconnect the lightning connector from the iPad. The connection of this cable with
the MIDI interface can remain.
Step 5. Disconnect the cable coming out of the GroovTube from the MIDI interface.
Step 6. Remove the bacterial filter mouthpiece and store it in a container cup with lid
intended for this purpose. NOTE: Please ensure that the hygiene protocol is followed
strictly as described on pages 5/6!
Step 6. Store all the materials in the storage case.
Fig.1 Swipe to close apps
Fig. 2. SLEEP/WAKE knop
Step 6. Activate the GroovTube using the on-off button (lower button on underside).
Step 7. Turn on the iPad.
Step 8. The hardware is now ready for use. Now follow the instructions below.
Using the GroovTube
When the hardware is connected the GroovTube is ready for use. The apps needed to use
the GroovTube are available for free in the App store. You will need to log in with an Apple
ID in order to download them.
To ensure that the apps function properly it is important that you carry out the
following procedure for every use:
Step 1. Connect the GroovTube to the iPad as described above.
If you do not use the GroovTube for some time, it will switch itself off automatically.
Charging the battery of the GroovTube
Step 3. Turn on the GroovTube. You should hear a beep and the LEDs light up. These leds
also light up when you inhale or exhale.
Ensure that you use only the supplied charger for GroovTube! Connect the GroovTube to
the supplied AC power adapter. Connect charger to the GroovTube by inserting charger
plug into input jack. During charging an indication LED on the GroovTube will light up.
When charging is complete, this light goes out.
Step 4. Open the app that you would like to use.
Keep the battery of the GroovTube in optimum condition
Step 2. Turn on the iPad with the SLEEP / WAKE button.
You are now ready to start using the GroovTube.
4
Store and charge your batteries in a cool area. Temperatures above normal room
temperature will shorten battery life. The rechargeable battery performs best when it is
used regularly. All batteries gradually lose their charge. If you store the GroovTube for
long periods of time without using it, recharge the batteries ones a month. This practice will
prolong battery life.
5
Hygienic protocol for hospital environment
Hygienic protocol for non-hospital environments
Hand hygiene**
Always wash your hands before and after working with the GroovTube to prevent crosscontamination.
Hand hygiene**
Always wash your hands before and after working with the GroovTube to prevent crosscontamination.
Work place and GroovTube hardware
Clean and disinfect your work surface, before between and after client service.
Clean and disinfect the Groovtube device before between and after client services,
especially the handles. Use a dry cloth with a little isopropyl alcohol or alcohol pads. Avoid
wiping the MIDI and power ports.
Work place and GroovTube hardware
Clean and disinfect your work surface, before between and after client service.
Clean and disinfect the Groovtube device before between and after client services,
especially the handles. Use a dry cloth with isopropyl alcohol or alcohol pads. Avoid wiping
the MIDI and power ports.
Bacterial filter mouthpiece
To prevent cross-contamination always use the green bacterial filter mouthpiece (type
DAR™ Infant)***.
Use a new bacterial filter mouthpiece for every new session. Do not touch the front of the
mouthpiece with hands.
Bacterial filter mouthpiece
To prevent cross-contamination always use the green bacterial filter mouthpiece (type
DAR™ Infant)***
Each patient uses his own filter mouthpiece that needs to be stored in a container cup with
lid. The filter mouthpiece needs to be replaced at least once a month. The container cup
needs to be dated with a sticker and also be replaced at least once a month. Do not touch
the front of the mouthpiece with hands.
Extender Mouthpieces
(Only in case if you are using an extender mouthpiece on top of the Bacterial filter
mouthpiece)
Extender mouthpieces can be re-used after appropriate sterilisation. Suggested methods
include autoclaving or immersion for 5 minutes in a sealed bath of 70% alcohol and then air
drying.
Periodic cleaning and charging
The following items have to be cleaned at least once a week:
The inside of the storage case, iPad****, cables, connectors, GroovTube handles, power
adapter and MIDI interface. Unplug all cables and turn off iPad. Use a dry cloth with a little
isopropyl alcohol or alcohol pads. The blue GroovTube handles are detachable from the
black housing. Unlock them from the back, slide the handles off, and clean them as well.
After cleaning allow the items to air dry for a minute. Avoid wiping the MIDI and power
ports.
Also clean the white GroovTube connecting piece. Press on the blue ring of the white
connecting piece holder and take out the white tube. Immerse the white tube in alcohol
(70%) for 5 minutes.
Air dry the white tube for one minute then put it back in place.
Charge the batteries of the iPad and Groovtube just before the periodic cleaning in a dry
and clean place.
*
**
***
****
6
The GroovTube is a Class I medical device (CE)
Hand hygiene is defined as hand washing or washing hands and nails with soap
and water or using a waterless hand sanitizer.
(type DAR™ Infant) Pediatric Electrostatic Filter HME 355U5427
We advise to use a screen protector on the iPad
Extender Mouthpieces
(Only if you are using an extender mouthpiece on top of the Bacterial filter mouthpiece)
Each patient uses his own extender mouthpiece that needs to be stored in a separate
container cup with lid.
You can reuse the extender mouthpieces after cleaning: immerse the extender
mouthpieces in alcohol (70%) for 5 minutes and then dried to the air.
Periodic cleaning and charging
The following items have to be cleaned at least once a week:
The inside of the storage case, iPad****, cables, connectors, GroovTube handles, power
adapter and MIDI interface. Unplug all cables and turn off iPad. Use a dry cloth with a little
isopropyl alcohol or alcohol pads. The blue GroovTube handles are detachable from the
black housing. Unlock them from the back, slide the handles off, and clean them as well.
After cleaning allow the items to air dry for a minute.
Also clean the white GroovTube connecting piece. Press on the blue ring of the white
connecting piece holder and take out the white tube. Immerse the white tube in alcohol
(70%) for 5 minutes.
Air dry the white tube for one minute then put it back in place.
Charge the batteries of the iPad and Groovtube just before the periodic cleaning in a dry
and clean place.
*
**
***
****
The GroovTube is a Class I medical device (CE)
Hand hygiene is defined as hand washing or washing hands and nails with soap
and water or using a waterless hand sanitizer.
(type DAR™ Infant) Pediatric Electrostatic Filter HME 355U5427
We advise to use a screen protector on the iPad
7
Finally
Contact us
We hope that you and your users will have a lot of fun and enjoyment when using the
GroovTube. There are some practical solutions to try if any malfunctions should occur.
Please take a look at our website www.groovtube.nl. There you can find most of the
answers to frequently asked questions and download the latest version of this manual.
What to do in cases of faults or failure?
In case of malfunction in the operation of the system, there are a number of possible
solutions:
• Close the apps completely and restart the iPad again.
• Make sure all connections are properly made and that the iPad and Groovtube are
sufficiently charged.
• To locate malfunctions you can use the indicator LED-lights on the GroovTube and on
the MIDI-interface
Contact information
AudioRhoon, Ruud van der Wel
Marskramer 17, 3161 ND, Rhoon
The Netherlands
E-mail: [email protected]
Website: www.groovtube.nl
Please also note the contact details of your local supplier.
If the problems continue to exist then please contact your supplier. Contact information is
listed on the rear cover of this manual.
Warnings
We ask you to respect the following general points:
• Do not allow the GroovTube to get wet and therefore do not use it near to water or in a
wet / damp environment.
• Use only the supplied adapter to charge the battery of the GroovTube.
• Always use the GroovTube under expert supervision.
• Always follow the cleaning protocol.
• The bacterial filter mouthpiece contains a small removable cap, keep this away from
small children as this can be a choking hazard.
• Keep the extender mouthpiece away from small children beacuse it can be a choking
hazard.
• Ensure that extender mouthpieces are placed firmly in the bacterial filter mouthpiece.
If these come loose, there is a choking hazard risk.
• Check for damaged parts. Observe if the handle develops any sharp edges or other
damage.
8
VERSION 4, FEBRUARY 2015. ALL RIGHTS RESERVED
9


