1
Zero Gravity Rig Operating Instructions
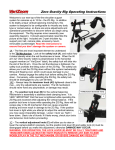
Welcome to our new top-of-the-line shoulder support
system for cameras up to 15 lbs., the ZG Rig. In addition
to its totally unique vertical balancing mechanism, this
system is designed to be configurable to virtually any body
type or camera setup, so there are some adjustments and
operational parameters to discover before you begin using
the equipment. The Rig comes in a folded position, so
you should unfold it to approximately resemble the picture
at the right. Included are: shoulder rig, support pod, belt,
camera plate, accessory mount, removable counterweight.
Please read the instructions to ensure that you don’t
damage the system/camera or harm yourself.
1A – The first and most important element to understand is the
vertical balancing/tilt mechanism. Look at the safety lock (A), and
notice how it slides laterally when the red thumbscrew is loose.
When the tilt arm (w/ “Zero Gravity” label) is perpendicular to the
horizontal support member (w/ “VariZoom” label), the safety lock
will slide into the slot of the tilt arm. Once the red thumbscrew is
tightened, the safety lock prohibits the tilting action of the ZG Rig.
The safety lock allows you to set the ZG Rig down without the
system inadvertently tilting and flopping over, which could cause
damage to your camera. Always engage the safety lock before
setting the ZG Rig down. Conversely, while operating the ZG Rig,
the safety lock should be disengaged so you can tilt freely.
1A2 – Always keep the tensioner knob (A2) tight enough to take
up any slack or play in the tilt mechanism. The tilt arm should never
wobble – it should just rotate smoothly on the tilt axis.
1B – The position lock lever (B) for the vertical balancing
mechanism is essentially a stainless steel clamping lever. It is
VERY IMPORTANT that this lever is tightened while operating the
ZG Rig and loosened while adjusting the vertical balance. If the
position lock lever is loose while operating the ZG Rig, there will be
excess play in the tilt mechanism that can cause unwanted shaking
and even result in damage to the ZG Rig. If the position lock lever
is tight while you attempt to adjust the vertical balance, you may
cause irreparable damage. Loose = lever up; Tight = lever down.
Basic rule of thumb: if it feels wrong, check your locks and
tensioner knob before proceeding.
A
A2
C
B
1C – The vertical adjustment knob (C) will allow you to raise or lower the camera platform
precisely, but the position lock lever (B) and safety lock (A) must be disengaged before you
make this adjustment, otherwise DAMAGE MAY OCCUR.
2 - MOUNTING THE CAMERA - Make sure the safety lock is engaged
on the tilt mechanism. Attach the support belt to your waist, holster in
front. Mount your camera to the camera plate, tightening the screw
thoroughly. Slide the plate into the receiver and secure the plate
locking lever. Insert the brass tip of the support pod into the socket at
the end of the curved bar. Angle the pod roughly 30° downward and
raise the entire assembly over your shoulder, carefully inserting the
lower end of the support pod through the plastic D-ring and into the
holster. Unlock the support pod knobs to engage spring action.
3 - ACCESSORIES – If you wish to use the accessory mount
(D) for attaching lights, monitors, mics, etc., go ahead and
attach it and mount the accessories before proceeding with
adjustments or balancing. This mount allows you to keep
accessories off your camera and aids in balancing the weight of
the Rig. Four ¼”-20 holes are provided, and the mount rotates
to allow fine positioning.
D
4 - BALANCING – Once it’s fully loaded, you can focus on adjusting and balancing
the unit. Think of the balancing as an X-Y-Z affair. Start by adjusting the position
of the camera plate so it is balanced front-to-back. Then adjust the position of the
camera platform left-right by loosening the knob directly below and moving the
platform until it feels relatively balanced and doesn’t lean to one side. You can
also affect the side-to-side balance by adjusting the counterweight position (E)
at the rear of the shoulder arch. These are the familiar ‘X-Y’ adjustments.
Now comes the ‘Y’ adjustment that is unique to the ZG Rig – the
vertical balance adjustment. As mentioned previously, you must
disengage the safety lock (A) and position lock lever (B) in order to
adjust the vertical balance. Loosen the tensioner knob to the
minimum setting – the loosest point where the knob is still slightly
tight against the washer/bearing set and there is no wobble in the tilt
mechanism.
E
C
B
Test the vertical balance of the camera as-is by tilting it straight up
(or as close as possible) and see if it has a tendency to drift up or
down. If it drifts down, you need to raise the camera platform by
turning the vertical adjustment knob (C) counter-clockwise (left). If it drifts up, you need to lower
the camera platform by turning the vertical adjustment knob clockwise (right).
Once the vertical balance is set, tighten the position lock lever (B) and set the tensioner knob to
your preferred level of resistance. You should be able to tilt effortlessly and the tilt mechanism
should hold any angle unaided.
5 - ADJUSTMENT – If you haven’t already done so, now would be a good time to fine tune the
ergonomic adjustments of the Rig. There are several points of adjustment that should enable
you to wear the Rig with comfort and stability. The photos on the following page highlight some
of these adjustment points.
The most commonly used adjustments:
(F) = slide up/down, pivot side-to-side; ALSO: change angle of insertion from
standard custom angle to right angle (straight up) and/or reverse tightening lever.
(G) = adjust position of camera mount closer/further and also adjust the angle of
the shoulder arch relative to body centerline
(H) = adjust the in-out position of support pod
socket to change the relative height and angle
of the Rig, as well as the relative loading of the
spring pod
H
G
F
(I) = ADVANCED: shift the tilting pivot point in or out, depending on
preference; further out gives more tilt range and distance to camera,
while closer in brings camera closer and reduces tilt range; to shift
pivot point, simply remove protective plastic cap (and SAVE IT) from
unused hole, revealing a radial bearing; remove tensioner knob with
external bearing/washer assembly, then remove entire tilt assembly (it
is press-fit tightly, so it will take effort), finally insert tilt assembly axle
through alternate bearing, pressing firmly until large black washer is
flush, then thread tensioner knob assembly back through, tightening
firmly; finally, move safety lock mechanism to the corresponding spot
and cover unused bearing hole with plastic cap
(J) = serrated clutch allows locking incremental adjustment
of angle at which stainless rod intersects horizontal support
member to allow greater freedom in positioning and bring
camera extremely close in some configurations;
ADVANCED: clutch can be separated and inverted so it
mounts to the top instead of bottom, creating a 3.25”
downward shift of the entire forward assembly (for lower
camera mount)
J
I
6 - OPERATION – Overall, operating the ZG Rig is pretty intuitive. Because there are so many
different ways to configure the Rig, it’s mostly up to the user to determine good shooting habits.
One thing to keep in mind is that the spring-loaded support pod can be used with one or two
sections locked. In other words, if you need less spring action (e.g., for a lighter camera), leave
one of the sections locked, or if you want no spring action, leave both locked. You may even
decide that you need to hold the entire unit up high for an extended period (such as shooting
over a crowd), and in this case, fully extending the pod sections and locking them in place could
be your best move. For most shooting, however, you will probably use a single configuration, so
spend some time figuring out the most comfortable and functional setup for your needs.
7 – STORAGE/TRANSPORT – We recommend folding the unit and storing it in the supplied
carrying bag to keep it clean and protected.
Sample configurations:
Common setup w/ optional Vlock plate in place of weight
Close/High right-angle setup
for DSLR camera
Low, left-swept setup w/ external
monitor on accessory mount
TIPS AND SUGGESTIONS
- When using a heavier camera setup (over 8lbs), try to keep the camera closer to the tilt
arm, make sure the tensioner knob is adequately tightened, and experiment with the
position of the support pod socket.
- If you have any questions or problems with the ZG Rig after reading the instructions,
please contact VariZoom directly (512-219-7722).
WARNINGS:
1 – DO NOT OPERATE THE ZG RIG WITH ANY OF THE LOCKING JOINTS LOOSE, AS
DAMAGE OR INJURY COULD RESULT.
2 – ALWAYS STORE AND HANDLE THE SPRING-LOADED SUPPORT POD IN A FULLY
LOCKED STATE (KNOB TIGHTENED THOROUGHLY). ONLY LOOSEN THE KNOBS
WHEN THE SUPPORT POD IS MOUNTED UNDER THE WEIGHT OF THE ZG RIG.
3 – DO NOT RUN WHILE OPERATING THE UNIT.
4 – EXERCISE CAUTION WHEN ADJUSTING THE POSITION OF THE POD SOCKET (fig. H)
– DO NOT LOOSEN THE LOCKING SCREW MORE THAN ½ TURN, AS THE TIP OF THE
SCREW ALSO ACTS AS A SAFETY STOP, AND IF YOU BACK THE SCREW OUT TOO
FAR, THE POD SOCKET COULD SLIP OFF THE END OF THE SUPPORT BAR.