
1
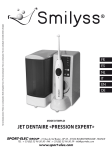
GARANTIE
Für dieses Gerät übernehmen wir eine Garantie von 12 Monaten ab
Kaufdatum. Während der Garantiezeit beseitigen wir durch Reparatur oder
Austausch Sämtliche Schäden, die auf Material oder Herstellungsfehler
zurückzuführen sind. Schäden, die auf unsachgemäßen Gebrauch
zurückzuführen sind (Gerät bleibt pausenlos an das Netz angeschlossen,
Betrieb mit falscher Spannung, falschem Stecker, Bruch usw.) normale
Abnutzung und Mängel, die Gebrauchstauglichkeit des Gerätes nicht beeinflussen, sind von der Garantie ausgenommen. Bitte nicht fachmännisch ausgeführte Reparaturen oder der Verwendung ungeeigneter Ersatzteile liegt kein
Garantiefall vor. Die Garantie wird nur wirksam, wenn der Garantieschein
beim Kauf des Gerätes vom Händler gestempelt und unterschrieben wurde.
Im Garantiefall senden Sie bitte das Gerät und die Garantiekarte an unsere
Kundendienststelle. Alle andere Ansprüche sind von der Garantie
ausgeschlossen, es sei denn, sie wären Änderseitig gesetzlich festgelegt.
GARANTIA
Damos una garantía de 12 meses a los productos que distribuímos a
partir de la fecha de compra. Durante la duración de la garantía, está
cubierta de forma gratuita la reparación de los defectos de fabricación o
de los materiales, reservándonos el derecho a decidir si ciertas piezas
deben ser reparadas o cambiadas o incluso si el equipo completo debe ser
reemplazado. Los daños ocasionados por un empleo indebido (golpe,
conexión a corriente continua, error de voltaje, ...). el desgaste normal por
su uso, están excluídos de la garantía. La garantía caduca cuando se
realizan reparaciones por personas no homologadas por el fabricante o
si las piezas de recambio no son de la misma marca. La garantía sólo será
válida cuando el sello del fabricante y la fecha de compra aparezcan en
el bono de garantía. Cualquier otra forma de acceso a la cobertura de la
garantía está excluída, salvo disposiciones legales en contra.
WARRANTY
This appliance is guaranteed for 12 months from the date of purchase.
During the period of the guarantee, the distributor will take responsibility for
defects occur, the appliance will be repaired or exchanged as the
distributor deems necessary. Damage arising from improper use or normal
wear and defects, which do not materially affect the performance of the
appliance, is not covered under this guarantee. The guarantee is not valid
if unauthorized repairs have been attempted or if replacement parts used
are not approved by the supplier. The guarantee is valid only if it is stamped
and signed by the retailer at the time of the purchase. For all claims made
during the period of the guarantee, send the appliance and the warranty
card to your retailer. All other claims are excluded from the guarantee
unless specifically prohibited by law.
CARTE DE GARANTIE / GARANTIE-KARTE / WARRANTY CARD / GARANTIA
12 MOIS / 12 MONATE / 12 MONTHS / 12 MESES / 12 MAANDEN
JET DENTAIRE
HC-5305
......................................................................................................................................
Adresse /Anschrift/
Adress / Dirección / Adres
......................................................................................................................................
Ville
Stadt
......................................................................................................................................
Code Postal /Postleitzahl /
Place
......................................................................................................................................
Ciudad
Stad
CACHET DU REVENDEUR / STEMPEL VOM HÄNDLER /
STAMP OF RETAILER / SELLO DEL VENDEDOR /
STEMPEL VAN DE VERKOPER
Postcode / Código Postal / Postcode
DATE D'ACHAT / EINKAUFSDATUM / DATE OF PURCHASE/
FECHA DE COMPRA / VERKOOPSDATUM
En cas de panne retournez l'appareil accompagné de cette carte de garantie à votre revendeur
Im Garantiefall, senden Sie bitte das Gerät mit der Garantiekarte an unsere Kundendienstelle
In case of damage, please return appliance and warranty card to your retailer
En caso de defectos, por favor entregue al vendedor el equipo junto con esta garantía.
In geval van defect stuur het artikel terug naar de verkoper vergezeld van deze garantiekaart
SPORT-ELEC® Institut - 31 Rue du Val Breton - BP 35 - 27520 Bourgtheroulde -Infreville FRANCE
TEL : + 33 (0)2 32 96 50 50 - FAX : + 33 (0)2 32 96 50 59
[email protected]
MDE 1001
Made in P.R.C
Nom /Nahme/
Name / Nombre / Naam
JET DENTAIRE
HYGIENE EXPERT
GARANTIE
We verzekeren een garantie van 12 maanden op de producten die wij
verdelen vanaf de datum van aankoop. Gedurende deze garantietijd
garanderen wij het herstellen van fabricagefouten of het materiaal, we
behouden het recht te beslissen of sommige delen moeten worden hersteld
of vervangen of indien het gans toestel moet vervangen worden.
Beschadigingen door verkeerd gebruik, (stoten, verkeerde aansluiting,
vergissing in het voltage, kalkafzetting...),normaal slijtage, dat de goede
werking en de waarde van het toestel niet benadeligt, sluit elke vorm van
garantie uit. De garantie is ongeldig indien herstellingen werden
uitgevoerd door niet officieel erkende of indien er vervangingsstukken
werden gebruikt van een ander merk. De garantie zal enkel verzekerd zijn
indien op de garantiekaart de datum van aankoop, de stempel en de
handtekening van de winkel staan of indien u het cassabon kan
voorleggen. Elke andere aanspraak op garantie is uitgesloten, behalve
indien het wettelijk voorschrift het tegenstelde specifieert.
Not contractual pictures /•Photos non contractuelles / Nicht vertragliche Fotos / Poze noncontractuale / Fotos no contractuales / Foto non contrattuali / A termék eltérhet a fényképt
GARANTIE
Nous accordons une garantie de 12 mois sur les produits que nous distribuons
à partir de la date d'achat. Pendant la durée de la garantie, nous prendrons
gratuitement à notre charge, la réparation des vices de fabrication ou de
matières, en se réservant le droit de décider si certaines pièces doivent
être réparées ou échangées ou encore si l'appareil lui-même doit être
échangé. Les dommages occasionnés par une utilisation inadéquate, (choc,
branchement sur courant continu, erreur de voltage, détartrage...), l'usure
normale ne portant préjudice ni au bon fonctionnement, ni à la valeur de
l'appareil, excluent toute prétention à la garantie. La garantie devient
caduque si des réparations ont été effectuées par des personnes non agréées
ou si des pièces de rechange ne provenant pas de la même marque ont été
utilisées. La garantie ne sera valable que si la date d'achat ainsi que le cachet
et la signature du magasin figurent sur la carte de garantie ou sur
présentation du ticket de caisse. Toute autre forme de prétention à la garantie
est exclue, sauf si des dispositions légales spécifient le contraire.
NOTICE D'EMPLOI
Réf : HC-5305
SPORT-ELEC® Institut - 31 Rue du Val Breton - BP 35 - 27520 Bourgtheroulde - Infreville- FRANCE
TEL : + 33 (0)2 32 96 50 50 - FAX : + 33 (0)2 32 96 50 59 - [email protected]
5
Fig 1
- immédiatement après utilisation.
- Ne laissez pas le cordon pendre sur le rebord d'une table, sur
des arêtes vives ou entrer en contact avec des surfaces chaudes.
Fig 2
3
- Tenez l'appareil à l'écart de toutes sources de chaleur.
6
- Utilisez une rallonge pour votre cordon seulement si elle est
appropriée et en parfait état.
4
- Ne débranchez jamais en tirant sur le cordon.
- Les enfants ne reconnaissent pas les dangers qui émanent d'un
appareil électrique. Ne laissez pas l'appareil à la portée des
enfants.
7
Fig 3
- N'immergez jamais l'appareil dans l'eau ou dans d'autres
liquides.
1
- N'utilisez pas l'appareil à l'extérieur.
DESCRIPTIF
2
1. - base
2. - contrôle de pression
3. - réservoir
4. - bouton «arrêt eau»
5. - compartiment de rangement
6. - 4 têtes irrigatrices pour 4 utilisateurs
7. - bouton marche/arrêt
- Ne posez pas l'appareil lorsqu'il est en fonctionnement.
- N'utilisez pas d'accessoires autres que ceux fournis avec votre
appareil, il pourrait en résulter un danger.
- Débranchez la prise de courant lorsque vous n'utilisez pas votre
appareil, avant de monter ou de démonter les accessoires ou avant
tout nettoyage.
Caractéristiques techniques :
Alimentation secteur : 230 V ~ 50 Hz
Puissance : 46 W
Indice de protection : IPX7
CE
- Nettoyez l'appareil simplement à l'aide d'un chiffon sec ou
légèrement humide. N'utilisez pas d'éponges métalliques ou de
produits abrasifs pour son nettoyage.
- Ne faites pas fonctionner l'appareil en présence d'explosifs ou
de fumées.
- ATTENTION : Pour éviter tout risque de feu ou
d'électrocution, ne pas démonter l'appareil - Toute
intervention ou réparation doit être effectuée par un
réparateur agréé.
MODE D'EMPLOI
PRECAUTIONS D'USAGE LIEES A L'UTILISATION D'UN
APPAREIL ELECTRIQUE:
Lors de l'utilisation d'appareils électriques, il est nécessaire de
respecter quelques consignes de sécurité afin d'éviter tout
accident.
Il est recommandé d’alimenter l’appareil par l'intermédiaire d'un
dispositif à courant différentiel résiduel (DDR) ayant un courant
nominal de déclenchement n'excédant pas 20 m A.
- N'utilisez pas votre appareil, ou ne le branchez pas
immédiatement si :
- Celui-ci est endommagé.
- Le cordon d'alimentation ou la prise sont endommagés
- Vous avez remarqué un fonctionnement anormal après incident
- Avant la mise en marche de votre jet dentaire, lisez attentivement
ce mode d'emploi, il contient des informations importantes
concernant l'utilisation, la sécurité et l'entretien de votre appareil.
- Des réparations non professionnelles peuvent être à l'origine de
dangers pour l'utilisateur.
- Si le câble d'alimentation est endommagé, il doit être remplacé
par le Fabricant, son Service Après-vente ou une personne de
qualification similaire, afin d'éviter un danger.
- Conservez cette notice pour vous y reporter ultérieurement si
nécessaire.
- Pour prendre connaissance de la notice, reportez-vous aux
figures explicatives.
- Votre appareil est prévu pour un usage domestique. Une utilisation
non adéquate et non conforme au mode d'emploi annule la garantie
et ne peut engager la responsabilité du fabricant.
- Utilisez cet appareil uniquement avec du courant alternatif
230 V, vérifiez avant de le brancher que la tension du réseau
correspond à celle mentionnée sur la plaque signalétique du
produit. L'appareil ne doit être branché que sur un réseau
électrique dont l'installation est conforme aux normes de sécurité.
COMMENT UTILISER LE JET DENTAIRE ? (Figure 1)
NETTOYAGE ET ENTRETIEN
1 - Enlevez le réservoir (3). Faites attention à bien tenir la base
(1) en place d'une main, tandis que vous soulevez le réservoir de
l'autre main. Remplissez le réservoir d'eau tiède et ajouter le
produit d'hygiène buccale si vous le souhaitez. Replacez-le
réservoir sur la base.
1 - Enlevez tout liquide de l'appareil après l'usage.
2 - Mettez la fiche dans une prise de courant. Dans le cas où la
prise de courant est contrôlée par un interrupteur, veillez à ce que
celui se trouve dans la position 'on'.
Note : Avant le premier usage : rincez l'appareil en laissant
passer un réservoir complet d'eau. Si l'appareil est utilisé avec
une eau dentifrice , il faut rincer l'appareil avec de l'eau pure après
chaque utilisation afin d'enlever des restes éventuels.
Si l'appareil n'a pas été utilisé pendant un certain temps, il est à
conseiller, pour des raisons hygiéniques, de suivre les instructions
pour l'emploi initial et de laisser passer un réservoir complet d'eau.
3 - Choisissez une tête irrigatrice (6) . Enlevez le jet de la base
et attachez la tête irrigatrice. (Figure 2).
4 - Réglez le contrôle de pression sur la base de l'appareil (2) au
minimum en position 1 lors du premier emploi. Vous pouvez
augmenter la pression en position 2 ou 3.
5 - Avant de brancher l'appareil, contrôlez que le bouton 'arrêt
eau' (4) sur la base se trouve dans la position 'off'. Mettez
l'appareil en marche en appuyant sur le bouton marche/arrêt (7)
du jet, penchez-vous sur le lavabo et mettez la tête irrigatrice
dans votre bouche. Mettez le bouton 'arrêt eau' dans la position
'on' afin de commencer le processus de nettoyage.
Note : Gardez votre bouche légèrement ouverte et tenez votre
coude à hauteur de votre bouche, de sorte que l'eau puisse
couler dans le lavabo.
6 - Dirigez l'eau le long de votre gencive et aussi entre vos dents.
Ne jamais pointer la tête irrigatrice directement vers votre
gencive.(Figure 3) Pour un meilleur résultat, il est à conseiller de
commencer sur les dents du fonds et d’aller vers l'avant. Consultez
votre dentiste pour des conseils complémentaires.
7 - Après utilisation, mettez le bouton 'arrêt eau' dans la position
'off' sur la base et sur le jet. Enlevez la tête irrigatrice et
replacez-la dans le compartiment de rangement. Enlevez tout
liquide de l'appareil. Débranchez l’appareil de la prise de
courant.
Note : quand l'appareil est utilisé avec une solution d'hygiène
buccale, un réservoir complet d'eau devra être passé à travers
après chaque emploi afin de rincer et d'enlever les restes de
cette solution.
2 - Rincez la tête irrigatrice et le jet quelques secondes sous l'eau.
Note : veillez à tourner le jet sens dessus dessous pendant le
rinçage. Attention : veillez à ce que l'eau n'entre pas à l’intérieur
du jet.
3 - Replacez la tête irrigatrice dans le compartiment de rangement
après le nettoyage. Remettez le jet sur la base.
4 - Débranchez l’appareil de la prise de courant.
5 - Nettoyez la base régulièrement avec un chiffon doux. La base
doit être complètement sèche avant de rebrancher la fiche dans
la prise de courant.
MESURES DE SECURITE MEDICALES
Veuillez bien tenir compte des mesures de sécurité suivantes, afin
de garantir votre sûreté.
1. Contactez votre dentiste avant d'utiliser le jet dentaire si vous
avez subi une opération orale ou periodontale.
2. Consultez votre dentiste en cas de saignements excessifs des
gencives. De même si les saignements persistent après 2 semaines.
CE - (EMC:2004/108/CE)
- (LVD:2006/95/CE)
RoHs (2002 /95 /EC) : Le produit est fabriqué sans matériaux
pouvant avoir un effet néfaste sur l'écologie
Lorsque vous vous séparez de votre produit en fin de vie, veillez
à respecter la réglementation nationale. Nous vous remercions
ainsi de le déposer à un endroit prévu à cet effet afin
d'assurer son élimination de façon sûre dans le respect de
l'environnement.
Note : NE JAMAIS laisser l'appareil dans la position 'on' quand
celui-ci n'est pas utilisé. La pression d'eau accumulée pourrait
endommager l'appareil. Mettez toujours le bouton 'arrêt eau'
(4) et le bouton 'marche/arrêt' (7) dans la position 'off' quand
l'appareil n'est pas utilisé.
- Eviter d'utiliser l'appareil dans une pièce embuée.
- TOUTE DETERIORATION RESULTANT DU NON-RESPECT DE CES
PRECAUTIONS D'USAGE ENTRAINE AUTOMATIQUEMENT LA
SUPPRESSION DE LA GARANTIE
- Eteignez et débranchez votre appareil dans les cas suivants :
- en cas d'anomalie pendant l'utilisation,
- avant tout nettoyage, entretien ou maintenance,
CONSERVEZ CES INSTRUCTIONS
3
FR
4
FR
5
- im Falle der Anomalie während der Benutzung,
- vor jeder Reinigung, Wartung und Pflege
- sofort nach Benutzung.
Abb 2
Abb 1
3
- Lassen Sie das Kabel nicht von der Ecke des Tisches abhängen.
- Halten Sie das Kabel von Heißen Flächen fern.
6
4
- Benutzen Sie eine Kabelverlängerung nur wenn es nötig ist und
achten Sie darauf dass sie die Voltangabe übereinstimmt
- Um das Gerät auszuschalten, halten Sie die Steckdose. Ziehen
Sie nie auf das Kabel.
7
- Besondere Vorsicht soll genommen sein, als dieses Gerät in der
Nähe der Kinder oder der Behinderten benutzt ist.
Abb 3
- Tauchen Sie nie das Gerät, dessen Kabel und Steckdose in
Wasser oder andere Flüssigkeit und nie bespritzen Sie ihn.
1
BESCHREIBUNG
- Benutzen Sie nicht das Gerät draußen.
2
- Stellen Sie nicht das Gerät, wenn er im Funktionieren ist
1 - Ladebasis
2- Wasserdruck-Kontrolle
3 - Wasserbehälter
4 - Wasser Ein-/Ausschalter
5 - Aufbewahrungsbox für 4 Aufsteckdüsen
6 - 4 Aufsteckdüsen
7 - Ein-/Ausschalter
- Benutzen Sie keine Zubehörteile andere als diejenigen, die mit
Ihrem Gerät geliefert sind, es könnte sich daraus eine Gefahr
ergeben. Ziehen Sie den Stecker immer aus der Steckdose wenn
Ihr Gerät funktioniert nicht, wenn Sie die Aufsätze wechseln und
vor jeder Reinigung.
- Wischen Sie das Gerät mit einem weichen, feuchten Tuch.
BENUTZEN SIE NIE AGGRESSIVE PUTZMITTEL, STAHLWOLLE
ODER ANDERE SCHEUERMITTEL UM DAS GERÄT ZU SÄUBERN
Technische Eigenschaften :
Betrieb: Netzanschluß : 230 V ~ 50 Hz
Leistung: 46 W
Schutzhinweis: IPX7
CE
- Benutzen Sie nicht das Gerät in der Nähe der Aerosolprodukte
oder Sauerstoffes.
- ACHTUNG : um jedes Risiko von Feuer oder
Stromstößen zu
vermeiden, zerlegen Sie Ihr Gerät nicht - Jede
Reparatur von einem zugelassnen Mechaniker ausgeführt werden darf.
BEDIENUNGSANLEITUNG
BEIM GEBRAUCH EINES ELEKTRISCHEN GERÄTES
MÜSSEN IMMER VORSICHTSMASSNAHMEN BEACHTEN
WERDEN:
Während der Benutzung von Elektrogeräten ist es
notwendig, einige Sicherheitsanweisungen zu achten,
um jeden Unfall zu vermeiden. Es ist wichtig, die
Bedienungsanleitung vor erster Benutzung sorgfältig
durch zu lesen und sie für jede folgende Benutzung zu
bewahren.
Wir empfehlen das Gerät mit Hilfe eines Differentials mit Strom
zu versorgen, dessen Nominalverluststrom 20 m A nicht übersteigt.
- Vor dem Betrieb Ihrer Munddusche, lesen Sie diese
Bedienungsanleitung aufmerksam, sie enthält wichtige
Informationen, die die Benutzung, die Sicherheit und die Pflege
Ihres Gerätes betreffen.
-
Verwenden Sie das Gerät unter keinen Umständen:
Wenn es ein beschädigtes Kabel ausweist
Wenn es hingefallen ist oder beschädigt wurde
Wenn es nicht ordnungsgemäß funktioniert
Wenn es ins Wasser gefallen ist.
- Nicht berufliche Reparaturen können am Anfang der Gefahren
für den Benutzer sein.
- Wenn das Zuleitungskabel dieses Gerätes beschädigt ist, soll es
durch den Hersteller, sein Kundendienst oder die Person
gleichartiger Qualifikation ersetzt sein, um eine Gefahr zu
vermeiden, da Spezialwerkzeug erforderlich ist.
- Bewahren Sie diese Bedienungsanleitung, um Sie dort später falls
nötig zu übertragen.
- Dieses Gerät ist nur für einen ausschließlich häuslichen Gebrauch
geeignet gewesen, nie, es für einen anderen Gebrauch zu
benutzen. Eine Benutzung, die nicht angemessen und nicht der
Gebrauchsanweisung entsprechend ist, hebt die Garantie auf
und kann die Verantwortlichkeit vom Hersteller nicht verpflichten.
- Um Bekanntschaft der Bedienungsanleitung zu nehmen, beziehen
Sie sich auf die erklärenden Abbildungen
- Benutzen Sie dieses Gerät nur mit dem Wechselstrom 230 Volt.
Überprüfen Sie vor Benutzung, daß die Netzspannung
derjenigen gut entspricht, die auf dem beschreibenden Fleck des
Produktes erwähnt ist. Das Gerät soll in einem elektrischen Netz
angeschlossen sein, dessen Einrichtung den Sicherheitsnormen entspricht.
- Vermeiden Sie, das Gerät in einem beschlagenen Zimmer zu benutzen.
ANWENDUNGSHINWEISE (Abbildung 1)
REINIGUNG
1 - Nehmen Sie den Wasserbehälter weg (3). Versuchen Sie,
die Ladebasis (1) mit einer Hand fest zu halten, während Sie
den Wasserbehälter mit der anderen Hand heben. Füllen Sie
den Wasserbehälter mit warmem Wasser und stellen Sie ihn auf
dem Gerät zurück.
1 - Nach Gebrauch, entleeren Sie jede Flüssigkeit, die im Gerät
bleibt.
2 - Schließen Sie den Stecker in der Netzdose an. Falls die
Netzdose von einem Schalter kontrolliert ist, achten Sie darauf,
daß derjenige sich in der Position 'ON' findet.
Note: Vor anfänglichem Gebrauch, spülen Sie das Gerät ab.
Lassen Sie den Wasserpaß durch den vollen Wasserbehälter
verbringen. Wenn das Gerät mit einem Mundwasser benutzt
wurde, muß man das Gerät mit reinem Wasser nach jeder
Benutzung abspülen, um eventuelle Reste wegzunehmen. Wenn
das Gerät während langer Zeit nicht benutzt gewesen ist, ist es
empfohlen, aus hygienischen Gründen, den Bedienungsvorschriften
anfänglich zu folgen und einen vollständigen Wasserbehälter
passieren zu lassen.
3 - Wählen Sie eine der Aufsteckdüsen (6). Nehmen Sie den
Griff der Basis weg und fügen Sie die Aufsteckdüse darin ein, so
daß sich der gefärbte Kopf in derselben Richtung findet wie die
Wasserdruck-Kontrolle. (Abbildung 2).
Note: Wenn das Gerät mit einem Mundwasser benutzt wurde,
muß man den Wasserbehälter mit reinem Wasser nach jeder
Benutzung abspülen, um eventuelle Reste wegzunehmen.
2 - Spülen Sie die Aufsteckdüse und den Griff einzeln während
einiger Sekunden unter fließendem Wasser ab.
Note : Achten Sie, den Griff drunter und drüber während der
Abspülung zu drehen. Achten Sie darauf, daß Wasser nicht im
Griff abzutropfen.
3 - Stellen Sie die Aufsteckdüse nach der Reinigung in die
Aufbewahrungsbox zurück. Reichen Sie den Griff auf den
Ladebasis ein.
4 - Ziehen Sie den Stecker aus der Steckdose.
5 - Reinigen Sie die Ladebasis regelmäßig mit einem sanften
Lumpen. Der Ladebasis soll vollständig trocken sein, bevor den
Stecker in der Steckdose anzuschließen.
MEDIZINISCHE SICHERHEITSMAßNAHMEN
4 - Legen Sie den Wasserdruck-Kontrolle auf der Ladebasis zu
minimaler Position (drehen Sie im Uhrzeigersinn) während erster
Benutzung. Sie können den Druck schrittweise erhöhen, um die
bequemste Lage zu finden.
5 - Bevor das Gerät anzuschließen, prüfen Sie, ob sich den
Wasserein-/Ausschalter (4) auf dem Griff in der Position ' OFF '
findet. Starten Sie das Gerät mit dem Druck auf dem
Ein-/Ausschalter ( 7 ) der Ladebasis, beugen Sie sich über das
Waschbecken und legen Sie die Aufsteckdüse in Ihren Mund. Legen
Sie den Wasser Ein-/Ausschalter in der Position ' ON ' (in der
Richtung nach dem Kopf) um den Massage- und Reinigungsprozeß
zu beginnen.
Note: Bleiben Sie Ihr Mund leicht geöffnet und halten Ihren
Ellbogen an Mund-Niveau, so daß das Wasser ins Becken
zurücklaufen kann.
6 - Leiten Sie Wasser längs Ihres Zahnfleisches (Abbildung 3) und
auch zwischen ihren Zähnen. Richten Sie nie die Düse direkt zu
Ihrem Zahnfleisch. Für ein besseres Ergebnis ist es empfohlen, mit
ihren hinteren Zähnen anzufangen und vorwärts zu arbeiten.
Sehen Sie Ihren Zahnarzt für weitere Empfehlungen auf Gebrauch.
7 - Ein Mal beendet, legen Sie den «Wasserein-/Ausschalter» in
die Position ' OFF ' und schalten Sie das Gerät aus. Nehmen Sie
die Aufsteckdüse weg, mit dem Drück auf den Knopf (6) und
stellen Sie sie in die Aufbewahrungsbox zurück. Nehmen Sie
jede Flüssigkeit des Geräts weg. Ziehen Sie den Stecker aus der
Steckdose.
Berücksichtigen
Sie
bitte
folgende
Sicherheitsmaßnahmen wirklich, um Ihre Sicherheit
zu garantieren.
1. Beraten Sie bitte Ihren Zahnarzt, bevor Sie die Munddusche
zu benutzen, wenn Sie eine mündliche oder periodontale
Operation erfahren haben.
2. Beraten Sie Ihren Zahnarzt im Fall einer übermäßigen Blutung
des Zahnfleisches . Ebenso, wenn diese Blutung nach 2 Wochen
weitergeht.
CE - (EMC:2004/108/CE)
- (LVD:2006/95/CE)
RoHS (2002/95/EC) : Das Produkt ist ohne gefährliche Baustoffe
hergestellt.
Wenn Sie sich am Ende seiner Lebensdauer von Ihrem Produkt
trennen, beachten Sie bitte die gesetzlichen Bestimmungen.
Daher sind wir Ihnen dankbar, wenn Sie es bei einer zu
diesem Zweck vorgesehen Stelle deponieren, um seine sichere
Beseitigung im Sinne der Umwelt zu gewährleisten.
Note: Lassen Sie das Gerät nie in der Position 'ON' zurück, wenn
es nicht benutzt ist. Der Wasserdruck wird sich zu bilden
fortsetzen und wird das Gerät beschädigen können.
Legen Sie immer den Wasser «Ein-/Ausschalter» ( 4 ) und den
«Ein-/Ausschalter» ( 7 ) in der Position ' OFF ' wenn das Gerät
nicht benutzt ist.
- JEDE VERSCHLECHTERUNG DIE SICH AUS DER
NICHTBEACHTUNG DIESES GEBRAUCHTVORSICHTS ERGIBT,
SCHAFFT AUTOMATISCH DIE GARANTIE AB.
BEWAHREN SIE DIESE BEDIENUNGSANLEITUNGAUF
- Schalten Sie Ihr Gerät aus und ziehen Sie den Stecker immer aus
der Steckdose in den folgenden Fällen :
5
D
6
D
5
Fig 2
Fig 1
3
- Do not let hang the cord on the edge of a table, on sharp surfaces
or to come into contact with hot surfaces.
- Keep the apparatus away of heat sources.
6
- Use a extension for your cord only if it is suitable and in perfect
state.
4
- Never disconnect while pulling on the cord.
7
Fig 3
- Children do not recognize the dangers emanating from an
electrical appliance.Do not leave the apparatus under operation
within the range of children.
- Never immerse the apparatus in water or in others liquidate.
1
- Do not use the apparatus outside.
DESCRIPTION
1 - base
2 - pressure control
3 - tank
4 - “water stop” button
5 - storage
6 - 4 irrigating heads
7 - on/off button
2
TECHNICAL FEATURES :
Power sector : 230 V - 50 Hz
Power : 46 W
Protection index : IPX7
CE
- Do not pose the apparatus when it is under operation.
- Do not use accessories other than those provided with your
apparatus, a danger could result from it. Disconnect the socket
when you do not use your apparatus, before mounting or to
dismounting the accessories or before any cleaning.
- Simply clean the apparatus using a dry or slightly wet rag. Do
not use metal sponges or abasiv products for cleaning.
- Do not make function the apparatus in presence of explosives
or of fumes.
- CAUTION : o avoid any risk of fire or electrocution, not
to dismount the apparatus.
Any intervention or repair must be carried out by an
approved repairer.
INSTRUCTION MANUAL
PRECAUTIONS OF USE IN ELECTRICAL APPLIANCE
CONTEXT :
During the use of electrical appliance, it is necessary to respect some
security instructions in order to avoid any accident. Please read
carefully the instruction manual before using the apparatus, and store
it somewhere safe for any future need.
It is recommended to use the appliance on a electrical
installation using a differential with nominal current loss which
doesn’t exceeds 20m A.
- Before starting your dental jet, please read carefully the
following instructions. They contain important information
concerning the use, the safety and the maintenance of your
apparatus.
- Please store this instruction manual somewhere safe for any
future need.
- Please refer to the explanatory figures while reading this manual.
- Only use this with AC current 230 V, check before
connecting your device that the tension of your electrical network
corresponds to the one mentioned on your product. The device
should be connected only on one electrical supply network whose
installation is in conformity with the standards of safety.
- Do not use your apparatus, disconnect it or do not connect it
immediately if :
- it is damaged
- the electrical cord or the socket is damaged
- you noticed an abnormal fonctionning after incident
- Non-professional fix-ups can be at the origin of dangers to the user.
- If the electric cable is damaged, it must be replaced by the
Manufacturer, his After-sales service or a person with similar
qualification, in order to avoid any danger.
- Your apparatus is planned for domestic use. A non-adequate
use and non-conform to the instructions cancels the guarantee
and cannot engage the responsibility of the manufacturer.
HOW TO USE THE ORAL IRRIGATOR ? (Figure 1)
CLEANING AND MAINTENANCE
1 - Remove the water tank (3). When removing water tank use
one hand to firmly hold the base of the unit (1) in place, and with
the other hand, lift the water tank straight up. Fill with lukewarm
water and add mouthwash solution if you want. Reinstall the
water tank onto the unit.
1 - After use, empty any liquid remaining in the unit.
Note : If the unit is used with a mouthwash solution, a full water
tank of water should be run through after each use to rinse it and
remove any traces of mouthwash.
Note : Prior to initial use, rinse the unit by letting a full water tank
of water pass through it. If the unit is used with a mouthwash
solution, it should be rinsed with clean water after each use to
remove any traces of mouthwash. If the unit has not been used
for an extended period of time, to maintain hygiene it is
recommended that you follow the directions for initial use,
letting a full water tank of water pass through.
2 - Select an irrigator tip for your personal use (6). Lift the
irrigator handle out of the base and attach the irrigator tip to the
irrigator handle. (Figure 2).
3 - Adjust the pressure control (2) on the base unit to minimum
pressure (position 1) for first-time use. Increase the pressure over
time using position 2 or 3.
4 - Before turning the unit on, check that the ‘water stop’ (4)
switch on tthe irrigator handle is in the ‘off’ position (away from
the tip). After turning the unit on by pressing the ‘on/off’ (7) button on the base unit, lean over the sink and position the tip in your
mouth. Move the water stop switch to on (towards the tip) to
begin the cleaning process.
Note : Keep your mouth slightly open and hold your elbow at
mouth level so that the water can run back into the sink
.
5 - Direct the flow along the gumline (Figure 3) and also between
your teeth. Do not point the irrigator tip directly at your gums. For
best results, begin with your back teeth and work forward. Consult
your dental professional for further recommendations on use.
6 - When finished, move the ‘water stop’ switch to the off position
and turn off the unit. Remove the irrigator tip and replace in the storage. Empty any liquid remaining in the unit. Unplug the unit.
Note : NEVER leave the unit on when not in use. Water pressure
will continue to build and may cause damage to the unit. You must
turn the water stop switch and the power switch to the “O”
position when not in use.
2 - Rinse the irrigator tip and the irrigator handle separately for
several seconds under running water.
Note : Be sure to point the irrigator handle downward
(upside down) when rinsing.
Do not allow water to drain into the irrigator handle.
3 - After cleaning, place the irrigator tip back in the
storage and the irrigator handle on the base. Unplug the unit.
4 - Clean the base periodically with a soft cloth or paper towel.
The base must be dry before plugging it into an electrical outlet.
MEDICAL SAFEGUARDS
Please note the following safeguards for your continued safety.
Similar to starting any new oral hygiene product, contact your
dentist before using Oral Irrigator if you had oral or
periodontal surgery.
Contact your dentist if excessive bleeding occurs or if bleeding
continues after 2 weeks.
CONNECTING THE UNIT TO A POWER SOURCE
Plug the cord into any standard electrical outlet. If a wall switch
controls the outlet, be sure it is turned on.
Caution
The supply cord cannot be replaced. If the cord is damaged the
appliance should be scrapped.
Check the cord occasionally for any damage. Should this be the
case, unplug the charging unit immediately and take it to a
service centre. Your service centre will replace the complete
charging unit. The charging unit cannot be repaired for safety
reasons.
A damaged or non-functioning unit may no longer be used.
CE - (EMC:2004/108/CE)
- (LVD:2006/95/CE)
RoHs (2002 /95 /EC) : This product is manufactured without
materials which could have a harmful effect on ecology.
When you bin your product at the end of its lifetime, be sure
to respect the national ecology regulations.
We thus thank you for depositing it in a place provided for
that purpose, in order to secure its elimination in an environmentally respectfull way.
- Avoid using the apparatus in a damp room.
- TOANY DETERIORATION RESULTING FROM THE
NON-APPLIANCE OF THESE PRECAUTIONS OF USE
AUTOMATICALLY SUPPRESSES THE GUARANTEE
SAVE THESE INSTRUCTIONS
- Always disconnect and switch off your device in the following
cases : in the event of anomaly during use, before any cleaning
or maintenance, and after use.
7
USA
8
USA
Fig 1
5
6
- Nu lasati cordonul aparatului sa intre in contact cu suprafete calde
sau fierbinti.
Fig 2
3
- Feriti aparatul de surse de caldura.
- Nu folositi un prelungitor decat daca acesta este in stare
perfecta de functionare.
4
- Nu scoateti din priza aparatul tragand de cordon.
- Copii nu constientizeaza pericolul ce-l reprezinta un aparat
electric. Nu-l lasati la indemana copiilor.
7
Fig 3
1
1
2
3
4
5
6
7
-
1. Scoateti tot lichidul din aparat dupa folosire.
Nota : daca aparatul a fost folosit cu o solutie pentru igiena
bucala, un rezervor plin cu apa trebuie consumat pentru curatarea
resturilor acestei solutii.
2 - Bransati aparatul la opriza de curent.
Nota : Inainte de prima utilizare: umpleti rezervorul cu apa.
Daca aparatul este folosit cu apa pentru intretinerea dintilor, trebuie clatit aparatul cu apa pura dupa fiecare utilizare inainte de
a indeparta resturile. Daca aparatul nu a fost folosit mai mult timp
va sfatuim, din motive igienice, sa urmariti instructiunile si sa
folositi un rezervor de apa.
4 - Puneti butonul de control al puterii aflat la baza aparatului la
minimum (pozitie 1). Puteti mari presiunea dupa ce va gasiti o
pozitie confortabila. (pozitie 2, pozitie 3)
- Curatarea se face cu un tifon umed. Nu folositi produse abrazive
sau metalice la curatare.
- Asigurati-va inainte de bransare la priza ca aparatul este
perfect uscat.
- Nu folositi aparatul in preajma substantelor explozibile.
3. Plasati capatul de irigare in compartimentul de aranjare dupa
ce l-ati curatat.
5 - Inainte de bransarea aparatului, verificati daca butonul
‘oprit/pornit’ al apei se gaseste in pozitia «OFF» (O). Puneti
aparatul in functiune apasand butonul ‘pornit/oprit’(4) al jetului
dentar pe «I» de la baza, si puneti capul irigabil in gura d-vs. Puneti
butonul «oprit/pornit»(7) al apei in pozitia ‘ON’ (I).
Nota: Tineti gura lejer deschisa si tineti-va coatele la inaltimea
gurii, din momentul in care apa incepe sa curga la chiuveta.
5. Curatati baza cu o tesatura moale. Baza trebuie sa fie
complet uscata inainte de a repune fisa in priza de curent.
MASURI DE SECURITATE MEDICALA
Trebuie sa tineti cont de urmatoarele masuri de securitate :
1. Consultati-va dentistul inainte de a utiliza jetul dentar daca ati
suferit o operatie orala.
2. Consultati-va medicul dentist in cazul unei sangerari excesive
la nivelul gingiilor. De asemenea daca aceste sangerari
contiuna si dupa 2 saptamani.
CE - (EMC:2004/108/CE)
- (LVD:2006/95/CE)
Rohs (2002 /95 /EC) : Produsul este fabricat fara material care
poate avea o influenta nefasta asupra ecologiei
6 - Dirijati apa pentru curatarea gingiilor si a dintilor d-voastra.
Nu pozitionati niciodata capatul irigativ direct pe gingiile d-voastra.
Pentru un rezultat mai bun este bine sa incepeti cu dintii din fata
si apoi si cu restul dintilor.
Consultati dentistul d-voastra pentru informatii utile cu privire la
modul de folosire.
. DE INDATA ce produsul Dumneavoastra si-a incheiat ciclul de
viata si nu-l mai folositi, urmariti respectarea prevederilor nationale
in acest sens. Noi va suntem recunoscatori pentru depozitarea
intr-un mediu prevazut pentru acest lucru asigurand astfel eliminarea
lui intr-o maniera sigura de protejare a mediului.
- ATENTIE : Pentru a evita riscul electrocutarii, nu demontati
aparatul. Orice interventie trebuie efectuata de catre un specialist.
PRECAUTII DE UTILIZARE A UNUI APARAT ELECTRIC :
-
- Inainte de folosirea periutei de dinti cititi cu atentie aceste
instructiuni pentru ca contin informatii importante in ceea ce
priveste folosirea , siguranta si intretinerea aparatului.
Nu mai folositi aparatul si se scoate imediat din priza daca :
Acesta este spart sau deteriorat.
Cordonul sau priza sunt deteriorate.
Ati remarcat o functionare anormala dupa incident.
CARTE DE GARANTIE 12 LUNI
- Reparatiile nespecializate pot reprezenta un pericol.
NUME
JET DENTAR
HC-5305
..........................................................................................................................................................................
- Daca cablul de alimentare este deteriorat, el trebuie inlocuit de
Fabricant, Serviciul Dupa-vanzare sau o persoana cu calificarea
respectiva, inainte de a reprezenta un pericol.
Adresa
..........................................................................................................................................................................
- Pastrati instructiunile pentru o consultare ulterioara.
- Pentru mai multe detalii consultati figurele explicative.
- Este recomandat ca aparatele sa fie alimentate prin intermediul
unui dispozitiv cu un curent diferential rezidual (DDR) avand un
curent nominal de declansare nu mai mare de 20 m A.
- Aparatul este conceput pentru folosire la domiciliu, utilizarea
neadecvata afecteaza modul de functionare.
- Utilizati acest aparat numai cu un curent alternativ de 230 V,
verificati inainte de folosire daca tensiunea retelei corespunde celei
mentionate pe placa sinaleptica a produsului. Aparatul nu se va
folosi la o retea electrica ce nu respecta toate normele de securitate.
-
2. Scoateti capatul de irigare si clatiti-l timp de cateva secunde
sub dus.
4. Scoateti fisa din priza de curent.
- Partile ce se fixeaza trebuie sa fie montate astfel incat sa nu existe
posibilitatea caderii in apa.
- Nu folositi alte accesorii decat cele furnizate aparatului. Scoateti
din priza aparatul dupa utilizare, inainte de a monta, demonta
accesoriile, inainte de curatare.
CARACTERISTICI TEHNICE :
ALIMENTARE LA PRIZA : 230 V ~ 50 HZ
PUTERE : 46 W
INDICE DE PROTECTIE : IPX7
CE
1 - Scoateti rezervorul (3). Cu atentie tineti aparatul la baza (1)
cu o mana, in timp ce ridicati rezervorul cu cealalta mana.
Umpleti rezervorul cu apa si asezati-l pe aparat.
3 - Gasiti un capat irigatoriu (6) si plasati-l la baza aparatului iar
capatul colorat (Figura 2)
- Nu puneti jos aparatul in functiune.
baza
control presiune
rezervor
buton 'oprire apa'
compartiment de pastrare
4 capuri de irigare
buton pornit/oprit
CURATARE SI INTRETINERE
- Nu scufundati niciodata aparatul in apa sau in alte lichide.
- Nu folositi aparatul in exterior.
2
DESCRIERE
MOD DE FOLOSIRE (Figura 1)
..........................................................................................................................................................................
Oras
Cod Postal
..........................
STAMPILA DISTRIBUITORULUI
DATA ACHIZITIEI
Inchideti si scoateti din priza aparatul in urmatoarele situatii :
in caz de anomalii in timpul utilizarii,
in timpul curateniei, intretinerii aparatului,
imediat dupa folosire.
In cazul unor probleme returnati aparatul insotit de aceasta carte de garantie distribuitorului :
PROTEC IDEAL RELAX S.R.L., BUCURESTI, tel/fax : 0 21.317.63.03
www.sport-elec.ro
SPORT-ELEC® Institut - 31 Rue du Val Breton - BP 35 - 27520 Bourgtheroulde Infreville - FRANCE
TEL : + 33 (0)2 32 96 50 50 - FAX : + 33 (0)2 32 96 50 59 - [email protected]
9
RO
10
RO
5
Fig
1
- Apague y desconecte su equipo en los siguientes casos : en caso
de anomalía durante su empleo, antes de cualquier limpieza o
mantenimiento, inmediatamente después de su empleo
Fig 2
3
- No deje el cable sobre el borde de una mesa, sobre aristas vivas
o que entre en contacto con superficies calientes.
6
- Mantenga el equipo alejado de las fuentes de calor.
4
- No emplee una alargadera a no ser que esté en perfecto estado
y sea la adecuada.
- No desconecte nunca el equipo tirando del cable
7
Fig 3
- No deje el equipo al alcance de los niños.
1
- No sumerja nunca el equipo en agua o en otros líquidos
COMO EMPLEAR EL CEPILLO DENTAL (Figura 1)
LIMPIEZA Y MANTENIMIENTO
1 - Levante el depósito (3). Tenga cuidado de sostener bien la base
(1) con una mano mientras levanta el depósito con la otra. Rellene
el depósito con agua tibia y agua dentífrica si quieres. Colóquelo
en el equipo.
1 - Elimine cualquier líquido después de su uso.
Observación : cuando el equipo se emplee con una solución
higiénica bucal es preciso hacer pasar un depósito completo de
agua limpia después de cada uso con el fin de enjuagar y limpiar
cualquier esto de esta solución.
2 - Conecte el equipo a la corriente.
Observación : antes del primer uso : limpie el equipo dejando
pasar un depósito completo de agua. Si el equipo se emplea con
un agua dentífrica, es preciso enjuagar el equipo con agua
limpia después de cada empleo con el fin de eliminar los
eventuales restos. Si el equipo no se va a emplear durante un cierto
tiempo, se aconseja que por razones higiénicas se sigan las
instrucciones de empleo inicial dejando pasar un depósito
completo de agua.
2 - Limpie el cabezal irrigador y el mango de forma separada
durante algunos segundos con agua corriente.
Observación : gire el mango hacia arriba y hacia abajo durante
la limpieza. Atención : procure que no entre el agua en el mango
.
3 - Coloque el cabezal irrigador en el compartimento después
de la limpieza. Ponga el mango sobre su base.
4 - Desconecte el cable de la toma de corriente.
- No utilice el equipo en el exterior
DESCRIPCION
1 - base
2 - control de presió
3 - depósito
4 - botón parada agua
5 - compartimento
6 - 4 cabezales irrigadores
7 - botón marcha/paro
2
3 - Elija un cabezal irrigador (6). Levante el mango y conecte el
cabezal (Figura 2).
- No apoye el equipo cuando esté en funcionamiento
- No emplee otros accesorios que no sean los suministrados con
su equipo ya que podría ser peligroso.
- Desconecte el equipo de la corriente cuando no lo vaya a
emplear, antes de montar o desmontar los accesorios y antes de
cualquier limpieza.
Características técnicas :
- Limpie el equipo simplemente con la ayuda de un paño seco o
ligeramente húmedo. No emplee esponjas metálicas o productos
abrasivos para su limpieza.
Fuente de alimentación : 230 V - 50 Hz
Potencia : 46 W
Indice de protección : IPX7
CE
- No haga funcionar el equipo en presencia de explosivos o de
humos
PRECAUCIONES POR EL EMPLEO DE UN EQUIPO
ELECTRICO
Durante el empleo de equipos eléctricos, es necesario respetar
algunas consignas de seguridad con el fin de evitar cualquier
accidente. Lea atentamente el manual de instrucciones antes de
emplear el equipo y consérvelo para una eventual consulta.
Se recomienda que los equipos se conecten mediante un
dispositivo de corriente diferencial residual (DDR) que tenga una
corriente nominal de activación que no exceda los 20 m A.
- Antes de la puesta en marcha del cepillo dental, lea
atentamente este manual de instrucciones.
Contiene información importante relacionada con el empleo,
la seguridad y el mantenimiento de su equipo.
- Conserve este manual para una eventual consulta posterior si
fuera necesaria.
- Con el fin de comprender mejor este manual, observe las
figuras explicativas.
- Emplee este equipo sólo con corriente alterna de 230 V. Verifique
antes de conectarlo que la tensión de la red se corresponde con
la señalada en la placa del producto. El equipo no debe ser
conectado en una red eléctrica cuya instalación no sea
conforme a las normas de seguridad.
- ATENCION : con el fin de evitar cualquier riesgo de
fuego o electrocución, no desmonte el equipo. Cualquier
intervención o reparación se debe realizar por un
centro homologado.
- No emplee el equipo, desconéctelo o no lo conecte si :
- Presenta un daño
- El cable de alimentación o la toma de corriente presentan daños.
- Ha observado un funcionamiento anómalo después de un incidente.
4 - Ponga el control de presión en la posición de mínimo
(posición 1) durante su primer empleo. Puede ir aumentando la
presión con el fin de encontrar la posición más cómoda (posición
2 or 3).
5 - Con el fin de conectar el equipo, verifique si el botón “parada
agua” (4) del mango se encuentra en la posición OFF. Ponga el
equipo en marcha apretando el botón marcha/paro (7) de la
base, inclínese sobre el lavabo e introduzca el cabezal irrigador en la boca. Posicione el botón ´parada agua´ en la
posición ´ON´ con el fin de comenzar el proceso de limpieza.
Observación : Mantenga la boca ligeramente abierta y coloque
el codo a la altura de la boca de forma que el agua se caiga
dentro del lavabo.
6 - Dirija el agua a lo largo de la encía (Figura 3) y también entre
los dientes. No toque la encía directamente con el cabezal
irrigador. Para un mejor resultado se aconseja comenzar con los
dientes de atrás e ir avanzando hacia los de delante. Puede
consultar a su dentista para un mejor empleo.
5 - Limpie la base regularmente con un paño suave. La base
debe estar completamente seca antes de conectar el enchufe a
la corriente.
MEDIDAS DE SEGURIDAD MEDICAS
Tenga bien en cuenta estas medidas de seguridad con el fin
de garantizar su seguridad.
1 - Consulte a su dentista antes de emplear el cepillo dental si
ha sido sometido a una operación oral o peridontal.
2 -- Consulte a su dentista en el caso de un sangrado excesivo
de las encías. También si el sangrado continúa durante 2
semanas.
CE - (EMC:2004/108/CE)
- (LVD:2006/95/CE)
Rohs (2002 /95 /EC) : El producto está fabricado sin
materiales que pudieran tener un efecto nocivo sobre el medio
ambiente.
- Las reparaciones realizadas por personal no profesional puede
acarrear riesgos para el usuario.
- Si el cable de alimentación está dañado debe ser reemplazado
por el Fabricante, su Servicio Post-venta o una persona de
cualificación similar con el fin de evitar cualquier peligro.
Cuando vaya a eliminar el producto respete la reglamentación
nacional.•Depositelo en un lugar previsto con el fin de
asegurar su eliminación de manera segura para el medio
ambiente.
- Su equipo ha sido diseñado para un uso doméstico. Su
utilización no adecuada y no conforme a este manual de
instrucciones anula la garantía y no puede ser solicitada la
responsabilidad del fabricante.
- Evite el empleo del equipo en una habitación empañada.
- CUALQUIER DETERIORO QUE RESULTE DE NO HABER
RESPETADO ESTAS PRECAUCIOENS DE EMPLEO IMPLICA
AUTOMATICAMENTE LA SUPRESION DE LA GARANTIA.
CONSERVE ESTAS INSTRUCCIONES.
11
ES
12
ES
Abra1
- Ne rakja vagy tárolja olyan helyen a készüléket, ahonnan
fürd kádba vagy mosdókagylóba eshet. Ne dobja vagy merítse
vízbe vagy más folyadékba.
Abra 2
5
3
- A vízbe esett készüléket ne próbálja kivenni. Azonnal húzza ki
a hálózatból.
6
4
- Ne használja a készüléket, ha az elektromos kábel vagy a
konnektor sérült, nem m ködik megfelel en, ha leesett vagy ha vízbe
esett.
- A készüléket és a kábelt tartsa távol a f tött felületekt l.
7
- Ha a készülék nem m ködik megfelel en, ne próbálja
megjavítani. Átvizsgálásra és javításra vigye vissza a
kiskeresked höz, vagy a Sport-Elec márkakeresked höz.
- A készüléket csak a használati utasításban szerepl célokra
használja.
-A készülék csak háztartási használatra való.
- A készüléket mindig húzza ki a hálózatból használat után,
tisztítás el tt, illetve amikor tartozékot akar fel- vagy leszerelni.
Abra 3
1
2
1
2
3
4
5
6
7
-
Tölt aljzat
Nyomásszabályozó
Víztartály
Vízadagoló gomb
Tartály
4 db színes zuhanyfej
KI/BE kapcsológomb
AZ ELEKTROMOS SZÁJZUHANY HASZNÁLATA (Àbra
1)
papírtörl vel. Az aljzatnak teljesen száraznak kell lennie miel tt
a hálózatba csatlakoztatná.
1 - Vegye le a víztartályt (3): egyik kezével tartsa határozottan a
helyén az aljzatot (1), a másikkal egyenesen húzza felfelé a
tartályt. A tartályt töltse meg langyos vízzel. Helyezze vissza a
tartályt.
GYÓGYÁSZATI TANÁCSOK
A biztonságos alkalmazás érdekében kérjük, hogy figyeljen a
következ kre :
A szájzuhany használatát megel z en kérje ki fogorvosa tanácsát, ha korábban szájsebészeti m tétje vagy fogszabályzója volt.
Túlzott fogínyvérzés esetén kérje fogorvosa tanácsát. Akkor is
forduljon fogorvosához, ha a fogíny vérzése két hétnél tovább
fennáll.
Figyelem: Miel tt használni kezdené a készüléket, öblítse át
egy egész tartálynyi vízzel Ha a készüléket szájöblít folyadékkal
használjuk, a tartályt tisztára ki kell öblíteni, hogy a szájöblít t
teljesen el tudjuk távolítani. Ha a készüléket huzamosabb ideig
nem használtuk, higiénés célból érdemes ugyanúgy tekinteni,
mint ha el ször használnánk: egy tartály vízzel át kell öblíteni.
2 - Válasszon zuhanyfejet(a fejek színesek, hogy többen is tudják
használni a készüléket). Vegye le az aljzatról a zuhany nyelét és
helyezze fel a zuhanyfejet úgy, hogy az azonos irányba nézzen
a vízadagoló gombbal(2. Ábra).
3 - Az aljzaton található vízsugár szabályozót az els használat
alkalmával állítsa minimum állásra(az óra járásának megfelel en
forgassa el a gombot). Fokozatosan növelje a nyomást, amíg
az Önnek legkellemesebb szintet el nem éri.
RIZZE MEG EZT A HASZNÁLATI UTASÍTÁST
4 - Miel tt bekapcsolná a készüléket gy z djön meg arról, hogy
a vízadagoló gomb „KI”(OFF) (4) állásban van. Ha az aljzaton
a gomb elfordításával bekapcsolta a készüléket, hajoljon a
mosdókagyló fölé és helyezze a zuhanyfejet a szájába. A
vízadagoló gombot tolja „BE” állásba (7)(a zuhanyfej irányába)
és megkezdheti a tisztítást és a masszázst.
5- Figyelem:tartsa enyhén nyitva a száját, könyöke legyen a
szájával egy vonalban, így a víz a mosdókagylóba folyik vissza.
Vezesse végig a vízsugarat az íny mentén, illetve a fogak között.
A zuhanyfejnek nem szabad az ínyhez érnie. A leghatékonyabb
az, ha a zápfogaktól haladunk a metsz fogak felé. A
használatot érint egyéb kérdésekkel forduljon fogorvosához.
HASZNÁLATI UTASÍTÁS
ELEKTROMOS KÉSZÜLÉKEK HASZNÁLATÁVAL KAPCSOLATOS BIZTONSÁGI TEENDőK
A balesetek elkerülése érdekében az elektromos készülékek
használatakor be kell tartani néhány biztonsági szabályt. Kérjük,
hogy a készülék használatba vétele el tt olvassa el figyelmesen
ezt a füzetet és rizze meg a kés bbi biztonságos használat
érdekében.
6 - Ha az direkt vízsugárról a hidromasszázs permetezésre kíván
váltani(vagy fordítva) forgassa el a zuhanyfejet(3. sz. ábra). A
direkt vízsugarat a célzott tisztításra, míg a hidromasszázs zuhanyt
az általánosabb tisztításra és masszázsra használhatja.
A KÉSZÜLÉK CSATLAKOZTATÁSA ELEKTROMOS
HÁLÓZATBA
Bármely szabványos konnektor megfelel . Ha az aljzathoz
falikapcsoló tartozik, az legyen bekapcsolva.
CE - (EMC:2004/108/CE)
- (LVD:2006/95/CE)
RoHS(2002/95/EC) Ennek a készüléknek a gyártásához csak
olyan anyagokat használtak fel, amelyek nem károsítják a
környezetet.
Ajánlások: A készüléket a nemzeti el írásoknak megfelel en
dobja ki, amikor az élettartama lejárt.
Erre a célra kialakított helyen adja le, hogy biztosítani lehessen
a kömyezetvédelmi el írásoknak
megfelel biztonságos megsemmisítést.
Figyelem: A fröcskölés elkerülése érdekében a vízsugarat a mosdókagyló fölött úgy állítsa át, hogy a zuhanyt vegye ki a szájából
és irányítsa lefelé.
- Miel tt csatlakoztatná a készüléket a hálózatba gy z djön meg
róla, hogy az adapteren feltüntetett feszültség megegyezik-e a helyi
feszültséggel.
- Gyermekekt l távol tartandó. Szoros felügyelet szükséges, ha a
készüléket gyermekek/en vagy fogyatékos személyek/en, vagy
az közelükben használják.
TISZTÍTÁS ÉS KARBANTARTÁS
1 - Használat után mindig ürítse ki a tartályt.
Figyelem: Ha a készüléket szájöblít folyadékkal használjuk, a tartályt tisztára ki kell öblíteni, hogy a szájöblít t teljesen el tudjuk
távolítani.
2 - Folyó vízzel öblítse le külön a zuhanyfejet és a zuhany nyelét.
Figyelem: a nyelet öblítés közben mindig lefelé fordítsa. A nyélbe
ne folyjon víz.
3 - Tisztítás után helyezze vissza a zuhanyfejet a tartóba, a nyelet
pedig az aljzatba.
4 - Id nként tisztítsa meg az aljzatot puha textíliával vagy
- Ne használja fürdés vagy zuhanyozás közben.
- Ne próbálja hálózathoz csatlakoztatni vagy kihúzni a készüléket,
ha vízben áll.
13
FALRA SZERELÉS
A készüléket hálózati csatlakozás közelébe úgy kell falra rögzíteni,
hogy használat közben ne eshessen le. El ször a tartólemezt
rakja fel a csomagban található tiplik és csavarok segítségével.
Azután csúsztassa rá a tartólemezre a készülék aljzatát.
Gondoskodjon róla, hogy a készülék legalább 60 cm távolságra
legyen a mosdókagylótól, kádtól és zuhanytól és ezekbe
semmiképpen se eshessen bele.
HU
14
HU
5
Fig 1
- vóór het reinigen of het onderhoud ,
- onmiddellijk na het gebruik.
- Draag er zorg voor dat het snoer niet blijft vasthaken aan een
tafelrand, uitstekende voorwerpen of een warme ondergrond raakt.
- Houd het apparaat verwijdert van warmtebronnen
Fig 2
3
6
- Wanneer u een verlengkabel gebruikt, zorg dan dat hij aangepast
en in perfekte staat is.
4
- Schakel het toestel nooit uit door aan het snoer te trekken
- Kinderen zijn zich niet altijd bewust van het gevaar bij het
gebruik van elektrische toestellen. Laat het dus niet onbewaakt in
de buurt van kinderen.
7
Fig 3
- Dompel het apparaat nooit in water of in een andere vloeistof.
1
- Gebruik het apparaat niet buiten
1 - voetstuk
2 - drukregelaar
3 - waterreservoir
4 - knop aan / uit
5 - opbergruimte
6 - 4 irrigatiekoppen
7 - knop aan / uit
2
- Leg het toestel nergens neer indien het nog in werking is
- Gebruik geen andere accessoires dan deze die bij het
apparaat geleverd werden, het kan gevaarlijk zijn. Trek de stekker
uit het stopcontact indien u het apparaat niet gebruikt, of alvorens
de accessoires te veranderen of te reinigen.
- Maak het toestel proper met een zachte of lichtbevochtigde
doek. Gebruik geen metalen sponsjes of schuurmiddelen bij het
schoonmaken.
Technische kenmerken :
Elektriciteitsnet : 230 V ~ 50 Hz
Kracht : 46 W
Beschermingsaanwijzing : IPX7
CE
- Stel het toestel niet in werking in de nabijheid van ontplofbare
pruducten of rook.
GEBRUIKSAANWIJZINGEN
VOORZORGSMAATREGEN BIJ HET GEBRUIK VAN
ELEKTRISCHE APPARATEN :
Bij het gebruik van elektrische apparaten, is het noodzakelijk de
veiligheidsvoorschriften te respecteren ten einde ongevallen te
voorkomen. Lees goed deze gebruiksaanwijzingen en bewaar dan
deze bijsluiter om eventueel later opnieuw te gebruiken.
Het is aanbevolen de apparaten te installeren op een
elektriciteitsnet met residuele diffirentiale stroom,
waarvan de nominale werkingswaarde de 30 mA niet
overschrijdt.
- Lees aandachtig de gebruiksaanwijzingen alvorens het toestel in
te schakelen, er worden belangrijke richtlijnen gegeven in verband
met het gebruik, de veiligheid en het onderhoud van het apparaat.
- LET OP : om brand te vermijden alsook elektrocutie mag u het
apparaat nooit zelf demonteren. Elke ingreep of
herstelling moet gebeuren door een officiëel erkende
hersteller.
- Gebruik het toestel niet en schakel het onmiddellijk uit in de
volgende gevallen :
- als het apparaat stuk is,
- indien het snoer of de stekker beschadigd zijn
- indien u merkt dat er iets niet in orde is na een val
- De herstellingen die uitgevoerd worden door een onvakkundige,
kunnen de oorzaak zijn van gevaar voor de gebruiker
- Een beschadigd snoer moet vervangen worden door de fabrikant,
de dienst na verkoop of door een persoon met een gelijkaardige
beroepsbekwaamheid om gevaar te vermijden.
- Bewaar deze bijsluiter om eventueel later opnieuw te gebruiken
- We refereren naar de bijhorende tekeningen die deze bijsluiter
toelichten .
- Gebruik dit apparaat enkel op stroom 230 Volt, controleer of
de netspanning overeenstemt met de gegevens vermeld op het
kenmerkend plaatje op het toestel. Het apparaat mag enkel
aangesloten worden op een netspanning waarvan de installatie
overeenstemt met de veiligheidsnormen.
- Schakel het toestel uit in de volgende gevallen :
- als er iets niet in orde is tijdens het gebruik ,
- Dit apparaat werd speciaal ontworpen voor huiselijk gebruik. Een
niet-aangepast of toegelaten gebruik (zie gebruiksaanwijzingen)
annuleren de garantie , de fabrikant kan niet aansprakelijk worden
gesteld.
Vermijd het gebruik van dit apparaat in een plaats waar veel
wasem is .
HOE MOETEN WE DE WATERSTRAAL GEBRUIKEN ?
(Figuur 1)
1 - Houd het voetstuk (3) goed vast met één hand terwijl u met
de andere hand het waterresevoir (1) wegneemt. Vul het met
lauw water en plaats het terug op het apparaat.
2 - Plaats de stekker in het stopcontact. Indien er een schakelaar
is, zet deze op 'on'
Nota : vóór het eerste gebruik : spoel het apparaat goed onder
stromend water. Indien het apparaat gebruik wordt met een
tandreinigend product in het water, dan moet u het apparaat na
elk gebruik goed te reinigen met zuiver water om alle eventele
resten te verwijderen.
Indien het apparaat lange tijd niet gebruikt wordt, is het aangeraden
dat u, omwille van de hygiëne, het toestel reinigt zoals voor het eerste
gebruik en dat u het waterreservoir volledig laat doorspoelen.
3 - Kies een kopstuk (6) Neem de steel van het voetstuk en plaats
de irrigatiekop zodanig op de steel dat het gekleurd deel in de
richting staat van de knop 'aan / uit' (figuur2)
4 - Plaats de drukregelaar zo laag mogelijk (draai in de richting
van de wijzers van een uurwerk) voor een eerste gebruik. Later
kan u de druk geleidelijk aan te vergroten ten einde voor u de
beste stand te vinden .
5 - Contoleer of de knop 'aan / uit' (4) op de steel in stand 'OFF'
staat, alvorens het apparaat in te schakelen. Zet het toestel aan door
op de knop te drukken 'aan / uit' (7) op het voetstuk, buig u over
de wastafel en plaats het kopstuk in de mond.
Plaats de knop op 'ON' om alzo de reiniging en de massage aan
te vatten.
Nota : houd de mond lichtjes open en houd uw elleboog ter hoogte
van uw mond, zodanig dat het water in de wastafel terecht komt.
6 - Richt en verplaats het water naar uw tandvlees en ook naar uw
tanden.(Figuur 3) Nooit volledig richten op uw tandvlees alleen. Om
een beter resultaat te bekomen is het aangeraden om te beginnen
bij de achterste tanden en om zo geleidelijk naar voor te komen
(Raadpleeg eventueel uw tandarts voor later richtlijnen wat het
gebruik betreft)
REINIGEN EN ONDERHOUD
1 - Verwijder al het vocht na gebruik van het toestel.
Nota : indien het apparaat werd gebruikt met een oplossing voor
hygiënische mondverzorging, dan is het nodig het waterreservaat
na elk gebruik goed door te spoelen ten einde het gebruikt
product volledig te verwijderen .
2 - Spoel apart het kopstuk en de steel onder stromend water
gedurende enkele seconden.
Nota : draai de steel tijdens het spoelen zodanig dat er geen
water 'in' de steel kan dringen
3 - Plaats het kopstuk in de voorziene bergruimte na het reinigen .
Plaats de steel terug op het voetstuk.
4 - Trek de stekker uit het stopcontact .
5 - Reinig het voetstuk regelmatig met een zachte doek. Het
voetstuk moet volledig droog zijn alvorens de stekker opnieuw in
het stopcontact te steken.
MEDISCHE VEILIGHEIDSVOORSCHRIFTEN BIJ HET
GEBRUIK VAN DE WATERSTRAAL
Gelieve met deze medische veiligheidsvoorschriften rekening te
houden, om zo uw veiligheid te garanderen.
1 - Indien u een mondoperatie hebt ondergaan raadpleeg dan
uw tandarts alvorens de waterstraal te gebruiken
2 - Raadpleeg ook uw tandarts indien het tandvlees erg bloedt of
bij gebruik van de waterstraal, na twee weken, nog steeds bloedt.
CE - (EMC:2004/108/CE)
- (LVD:2006/95/CE)
RoHs (2002 /95 /EC) : Het product werd ontworpen met materialen die geen schadelijke invloed
hebben op de ecologie.
7 - Bent u klaar, plaats dan de knop 'water aan / uit' op stand
“off” (4) en schakel het toestel uit.
Neem het kopstuk weg door een lichte druk op het knopje en plaats
het is de opbergruimte met deksel. Verwijder al het water uit het
apparaat. Trek de stekker uit het stopcontact.
Nota : laat het apparaat nooit op stand “on” als het niet gebruikt wordt.
De waterdruk blijft dan toenemen en zou het toestel kunnen
beschadigen.
Plaats de knop 'water aan / uit op (4) stand “off” als het toestel
niet gebruikt wordt.
Wanneer u zich tenslotte ontdoet van het apparaat , gelieve
dan de nationale reglementering te respecteren.
We zijn u dankbaar indien u het afzet op de daarvoor
voorziene plek om op deze wijze de natuur te beschermen.
ELKE BESCHADIGING VEROORZAAKT DOOR HET NIET
NALEVEN
EN
HET
RESPECTEREN
VAN
DE
VOORZORGSMAATREGELEN ZULLEN AUTOMATISCH DE
GARANTIE OPHEFFEN BEWAAR DEZE RICHTLIJNEN
15
NL
16
NL


![COMBI DENTAIRE [J38COMBI] User Manual - Sport](http://vs1.manualzilla.com/store/data/006192000_1-b89c22e293354a4f6a722dcbfffb8846-150x150.png)

![AROMA DIFFUSEUR [KW005] User Manual - Sport](http://vs1.manualzilla.com/store/data/006881279_1-4373b8b88dbc0ee34cb7bf987fe3d0e5-150x150.png)

