1
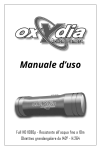
User Manual
Full HD 1080p - 10m Waterproof - 140° Wide Angle Lens - H.264
action camera provides simple operation, allowing
you to capture all those memorable moments. Its robust design,
encased in a stylish black metal finish, provides a durable,
waterproof action camera ideally suited to bikers, skiers,
surfers, hunters or any other activity that requires hands free
operation. Record your video in clear 1080p resolution and
simply download from the micro SD card onto PC/Mac.
Content
Precautions ....................................................... 4
Diagram .............................................................. 5
Features .............................................................. 6
Quick Guide ....................................................... 7
Trouble Shooting .............................................11
Specifications ...................................................12
Accessories ........................................................13
3
Precautions
1.
Do not use the camera in extremely hot, cold, dusty or
damp environment.
2.
The camera is shock resistant, NOT shock proof.
You should avoid dropping it.
3.
This camera is waterproof, but do not use it over 10
meters underwater. Also before using underwater, check
the O-rings, make sure the front & rear caps are closed
tight, avoiding any damage in water.
4.
The camera needs a micro SD card to work, insert card
before using.
5.
The life of battery varies according to the environment.
A colder environment will drain the battery faster.
Normal operating time is 2 hours.
6.
Check and charge the camera when you do not use it for
long period of time.
7.
Do not disconnect the camera from PC during uploading
or downloading, it may damage videos or the camera.
8.
We will not take responsibility for the data lost problem,
which can be caused by camera damage, repair or any
other reasons. Follow user manual and backup your data.
9.
Do not take apart the camera yourself, this will break
the tamper seal and void our warranty. If you have any
question or problem, please contact your dealer.
10. Do not use the camera in very dark or strong light, the image
may not be so good, and that act may even hurt Lens.
4
Diagram
1
3
O
R
4
2
5
7
9
8
10
11
6
5
1.
Button O On Off Power
Indicator
2.
Button R Record/Stop
Recording Indicator
3.
4.
5.
Lens
6.
Mic Indicator (E)
7.
Reset Button (F)
8.
Resolution Switch
9.
HDMI output
Card Slot
10. USB Connection
Mic Switch Button (D)
11. A/V Output/Mic-In Connection
Features
• 1080p HD digital recording with audio
• 720p@60FPS & WVGA@60FPS are selectable
• Low illumination, can take good image even in dusk
• H.264 compression, records approx 6:30 hours 1080p videos
on a 32GB micro SD card
• Rechargeable Li-ion Battery - more than 2 hours recording
time
• Built-in
microphone, also support external MIC-In to get
high quality voice recording
• Supports recording while charging
• Overwritten recording option
• Robust aluminum alloy casing, Shock resistant
• Waterproof, support working 10 meters underwater
• Date/Time stamp on digital video option
• Built-in vibrator
• Supports real time video output
• HDMI output, high definition Image playback on TV
6
Quick Guide
Insert Memory card
1. Inserts your micro SD or micro SDHD card (not included in
package, a Class 4 micro SD Card will work just fine for this
unit but you can use class 4 and above) into the camera
with the card’s printed side up.
2. Gently push the card into the card slot until it locks in place.
3. To eject the card, gently push the card to release.
Record
1. Keep the micro SD card in card slot.
2. Select the video resolution you prefer on back panel, then
close rear cap.
3. Press and hold button O until vibrator shakes then
release and wait 2 seconds, two indicators turn on, O is
red, R is green. The camera now is in standby.
Attention: It will turn off automatically alter 5 minutes if
no further action is taken when standby.
4. Press button R shortly, the vibrator shakes then green
indicator flashes, the camera is now recording.
5. Press button R again, green indicator stops flashing and
vibrator shakes twice, camera stops recording and saves
video file automatically.
6. Press and hold button O in standby mode until vibrator
shakes, the camera turns off.
External MIC-In (With optional microphone)
1. Keep the micro SD card in card slot and turn on camera.
2. Unscrew rear cap, insert external microphone into camera.
3. Press MIC switch button on back panel (with D mark), MIC
7
indicator (with E mark) turns on, now the voice recording
will be via external microphone, internal one does not
work at same time.
Attention: If no external MIC is inserted, or MIC is not
recognized, MIC switch and indicator will not work.
Playback on Computer
1. Make sure the camera turns off, keep the card in, then
connect camera with computer by USB cable provided In
package.
2. It shows “Found new hardware” on computer (note this
can take up to 30 seconds).
3. Open Removable Disc on computer, you will see video
files. Transfer to your computer to play the files. You can
copy or delete the files from the card.
4. Safely remove hardware and eject the disk, take out the
camera from computer.
Remarks:
This camera saves videos by MP4 format, can be played
by Windows Media Player™ & Quick Time™ player
directly. This camera records full HD videos, high bit rate.
If playback is not smooth, try other players or higher
configuration computers.
Real Time Video Output
1. Unscrew the rear cap, connect the camera and
monitor/TV/other display device with the RCA video
cable provided.
2. Turn on camera, the video will output real time. You can
adjust the camera installation, see what image you take on
display while recording.
3. Unplug the cable when you do not need, do not forget to
screw the rear cap well.
8
Playback on TV (With optional HDMI cable)
1. Unscrew the rear cap, connect the camera and TV with
the HDMI cable provided.
2. Turn camera into standby, the video will output real time.
3. Press and hold Button R 2 seconds until video file list
displays on TV, it is in playback mode now.
4. Select the file by Button R play or pause it by Button O.
5. During playing,
• Press Button R shorty, it will automatically jump to
the next file starts playing.
• Press and hold Button R 2 seconds, the camera
will return Video file list.
6. In the video file list interface, press Button R 2
seconds, the camera will return lo standby mode.
7. Then press and hold Button O approx 3 seconds, the
camera turns off.
Charging
1. Connect the camera to your PC/Iaptop/USB charger by
using the USB cable provided.
2. Once connected the red indicator on camera will turn
on then flash, the unit is charging now. (Also recording
while charging if you set AutoRecord=Y, please refer to
“Other settings”)
3. After around 3-4 hours when it stops flashing, it is full
charged.
4. Remove the camera.
Attention: 5 minutes after full charged, the camera
will turn off all indicators automatically if you do not
remove it.
9
Set Date/Time
1. Create a new “.txt” file, name it as “time.txt”
2. Set the correct date and time into the file according to the
following format: 2012/10/01 08:55:00
2012 is the year, 10 is the month, 01 is the day, 08 is the
hours, 55 is the minutes, 00 is the seconds.
3. Save file and immediately copy it into micro SD card.
4. Remove camera from computer, restart and record, the
date and time are set up successfully.
Other Settings
1. Insert the card, turn on then turn off the camera, it will
create the setup fie on card automatically.
2. Connect the camera with computer by USB cable.
3. Open the removable disc, find the file named “set.txt” in card.
4. Timestamp=Y
5. MaxRecordTime=30
6. AutoRecord=N
7. CycleRecord=N
8. Set TimeStamp, AutoRecord and CycteRecord by “Y” or “N”.
9. Set MaxRecordTime as 1 to 60 minutes, or “N” will disable
time limitation and 3.6GB will be the file size limit.
Timestamp = Y
With date/time stamp on video records.
Timestamp = N
Without date/time stamp on video records.
MaxRecordTime
Video recording section, support 1 to 60 minutes. Standard is
30 minutes. “N” will disable time limitation and 3.6GB will be
the file size limit
AutoRecord = Y
Auto mode, record when camera is switched on, save then
stop when camera stops.
AutoRecord = N
Manual mode, press button to record.
CycleRecord = Yes
Overwrite files in front and continue recording automatically when card is full.
CycleRecord = No
Stop recording then turn off when card is full.
10
Trouble shooting
Q: It does not work, what shall i do?
A: 1. Check if it has power.
2. Check if card is in.
3. Change another card for try or reset the camera.
Q: It is not able to charge, what should l do?
A:
1. Try to change another USB cable or AC adapter.
2. Try to reset.
3. Take the card out to try again.
4. Contact seller for help.
Q: How can l know the card is full?
A: The green indicator flashes quickly, vibrator shakes six times
then camera turns off automatically. That means the card is full.
Q: How can i know the power is low?
A: The red indicator flashes quickly, vibrator shakes four times
then camera turns off automatically. That means no enough
power to work.
Q: The camera is hot when using, what should I do?
A: As the camera is aluminum alloy waterproof sealing structure,
hard to be cooling itself, but that can be normal, no security
issue. Do not worry.
Q: The video and audio is out of step when play on PC, why?
A: 1. Copy the video files to computer, then try again.
2. Check if your player is latest version,update or try to play
videos by other players, such as VLC Media Player™ and
Storm Player™.
11
Specifications
Image Sensor
1/2.5 inch CMOS
View Angle
140 degrees
Recording Resolution
& Frame Rate
1920x1080 (1080p)/30fps
1280x720 (720p)/60fps
848x480(WVGA)/60fps
Video format
MP4
Compression
H.264
Video File Size
12Mb/second while 1080p
8Mb/second while 720p
8Mb/second while WVGA
Video Recording Section
1 to 60 minutes or 3.6GB max
USB Interface
USB 2.0
Memory
No flash built-in,
support micro SD card up to
32GB (not included)
Battery Capacity
1000mAh
Battery Working Time
2 hours
Battery Charging Time
3-4 hours
Dimension
100x30x30 mm
Weight
95 grams
Alert
LED + Vibration
Storage Temperature
~20°C~60°C
Working Temperature
~10°C~50°C
N.B.: Design and specifications are subject to change without notice.
12
Accessories
Suction Cup Mount
Arm Band
Head/Chest Strap
Velcro Mount
Handlebar Mount
Second Handlebar
Mount
Scope Mount
Adhesive Helmet Mount
Camera Holder Ring
13
Band Mount
Car Lighter Charger
External Microphone
Video Output Cable
USB 2.0 Cable
HDMI Cable
220V Wall Charger
Carrying Bag
14
Notes
15
www.starlane.com
STARLANE s.r.l.
Via Madonna delle Rose, 70
24061 Albano S. Alessandro (BG) - Italia
E-mail:
For commercial requests: [email protected]
For technical support: [email protected]
For updates of this manual consult www.starlane.com
Manual Version: Oxydia_002