1
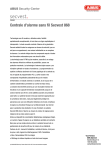
Lifeline 4000+ user guide
11/5/05
4:42 pm
Page 1
Our policy of continual development means that product specification and appearance may change without notice.
Tunstall Telecom Limited is a member of Tunstall Group Ltd. © 2005 Tunstall Group Ltd.
® TUNSTALL is a registered trade mark of Tunstall Telecom Limited.
Lifeline 4000+ user guide
11/5/05
4:42 pm
Page 2
Lifeline 4000+
user guide
Part Number D3607314B
Lifeline 4000+ user guide
11/5/05
4:42 pm
Page 3
Contents
2
Setting up
P3
Place Lifeline 4000+
P3
Connect Lifeline 4000+
P4
Test Lifeline 4000+
P5
Using Lifeline 4000+
P6
Requesting help
P6
Cancelling
P6
Answering a call
P7
Making a call
P8
Adjusting the volume
P9
The Away feature
P10
The Intruder alarm
P11
Zoning
P12
Radio triggers
P14
Medication Reminders
P15
Lifeline 4000+ in detail
P17
Understanding alarm calls
P19
Reliability
P21
Periodic calls
P21
Configuring Lifeline
Fast Dial Keys
P22
P22
Voice Announcement
P25
Problems and Answers
P27
Notices for Lifeline 4000+
P29
Further information
P30
Lifeline 4000+ user guide
11/5/05
4:42 pm
Page 4
Setting up
Three simple steps
1. Place Lifeline in a suitable position
2. Connect Lifeline to your telephone line and a power socket
3. Test Lifeline by pressing the radio trigger to raise an alarm
Locating Lifeline 4000+
Place Lifeline on a flat surface, or have it
mounted on a wall. Put it somewhere you
can easily reach. It should also be close
to a telephone socket and a power socket.
Attaching to a wall. If you decide to
attach your Lifeline to a wall then you will
find slots to grip the screws on the back
of Lifeline. There is a separate paper
template included in the packaging that
will show you where to drill the holes for
the screws.
Note: As most users do not mount Lifeline 4000+ on the wall the screws needed for mounting are not provided.
Lifeline is a robust piece of equipment, however, you should not:
• Place your Lifeline next to something that makes a lot of noise, such as next to a
television, radio or washing machine.
• Put it right next to your cooker, or close to any other heat source.
• Set Lifeline in a place where it will get damp, such as a bathroom, or near house
plants that are sprayed at any time.
• Place it very close to any large metal objects, such as microwave ovens, as large
pieces of metal stop the signals from the radio trigger reaching Lifeline.
• Put Lifeline on top of something soft, such as a carpet, as this can stop sound
reaching the microphone.
3
Lifeline 4000+ user guide
11/5/05
4:42 pm
Page 5
Connect Lifeline 4000+
1. First, connect your Lifeline to a telephone socket in your home using
the cable that came in the box with Lifeline. Do not connect Lifeline
to the telephone socket via a telephone adaptor.
2. You can then connect your ordinary telephone to Lifeline. If you do
not connect your other telephones through Lifeline, but use a
telephone adaptor instead, then Lifeline may have difficulty making
alarm calls if another telephone is being used for a call.
3. Next, connect the lead from the power transformer to the back of
your Lifeline, and then plug the transformer into a power socket.
4
Lifeline 4000+ user guide
11/5/05
4:42 pm
Page 6
4. When you connect your Lifeline to the
power the largest button on the top
of your Lifeline should light up.
Maximising Aerial Range
25 - 50 metres typical range
• To maximise aerial
range, ensure that it
is positioned behind
the back of the
Lifeline 4000+.
Test Lifeline 4000+
Once you have connected and programmed your Lifeline you can test it. Press
the button on the Fall Detector+ or radio trigger that came with your Lifeline,
and wait a few seconds. Lifeline will call your control centre. When your call is
answered tell the operator that you are testing your new Lifeline—the
operator will be pleased to hear from you.
Problems?
In the unlikely event that something does not work as you expect then consult
the Problems and Answers section towards the back of this guide.
5
Lifeline 4000+ user guide
11/5/05
4:42 pm
Page 7
Using Lifeline 4000+
Requesting help
If you need help simply press the button
on your Fall Detector+ or radio trigger.
This sends a signal to Lifeline which tells
it to call your control centre.
Alternatively, if you can easily reach your
Lifeline you can press the large alarm button.
Your home can also be fitted with
radio triggers and pull cords that raise
an alarm. The person who installs these
in your home will show you where they
are and how they work.
Cancelling
If you accidentally raise an alarm call (i.e.
you unintentionally press one of the
alarm buttons on your Lifeline or radio
trigger) you can cancel the alarm call by
waiting five seconds and then pressing
your Lifeline’s Cancel key. However, once
the call reaches a control centre pressing
the Cancel key will have no effect. This is
a safety feature. When the operator answers
your call simply explain that it was an error—
the operator will be pleased to hear from you.
6
Lifeline 4000+ user guide
11/5/05
4:42 pm
Page 8
Answering a call
When the phone rings you can answer it in any of the four following ways:
1. Pick up the handset of the
telephone attached to Lifeline.
2. Press the Speaker user key on the
top of your Lifeline. This is the user
key with Speaker written beside it
on the card insert or display.
3. Press the button on your radio
trigger or Fall Detector+. This method
of answering a call can be turned
off by an installer or your control
centre, and so you need to check
that it has been set to work on your
Lifeline. If you answer a call using
your radio trigger you will only be
able to carry on a hands-free
conversation if you are close enough to
hear and speak to your Lifeline. You
can end the call by pressing the button
on your radio trigger again.
4. Press the Cancel key on your
Lifeline. Press the Cancel key again
to end the call.
7
Lifeline 4000+ user guide
11/5/05
4:42 pm
Page 9
Making a call
You can make a call in the three following ways:
1. Press any of the Fast Dial keys on
the top of your Lifeline. These will
automatically call the friend or
contact whose name is displayed
beside the key.
2. Press the Speaker key, and then lift the flap and enter the telephone
number to call.
3. If you have a telephone plugged into your Lifeline you can use it to
make and take calls as normal. Simply lift the receiver and dial the
number.
8
Lifeline 4000+ user guide
11/5/05
4:42 pm
Page 10
Adjusting the volume
On the top of Lifeline there are two keys—one increases the volume and the
other decreases it. These keys adjust the volume of the ringing you hear
when someone calls you. If you need Lifeline to ring louder when someone
calls then press the Up key and you will hear Lifeline ring once for each time
you press.
You can also use these keys to adjust the volume of the caller’s speech.
If you cannot clearly hear someone who has called you then press the Up key
to increase the volume of their speech.
Up
Down
In short, if you are in the middle of a telephone conversation these volume
keys can be used to make the caller’s speech louder or quieter. Otherwise,
these keys adjust the volume of the ringing you hear when someone calls.
These changes are not temporary. If you increase the volume during a
call then you will find that your Lifeline 4000+ remains at this volume for
the following calls.
The Silence key
If you press the Silence key (if your Lifeline has one) then the person on the
other end of the telephone line will not be able to hear you, and you will not
be able to hear them. Press the key again to speak to the caller.
9
Lifeline 4000+ user guide
11/5/05
4:42 pm
Page 11
The Away feature
What is the Away feature?
Your Lifeline can be set up to detect high and low temperatures, when you
are inactive, or to discover and report a range of other incidents to your
control centre. For example, if you are feeling ill you might not get up in the
morning. If your Lifeline has been configured to detect inactivity it will
eventually call your control centre to let the staff know that you have not been
active. To do this reliably it needs to know whether you are in your home or
away from your home. Otherwise, your Lifeline might think that you are
inactive every time you go away to visit a friend or relative.
Going Away
To tell your Lifeline that you are
going to be away press the
Away key. You will hear the word
Away spoken, and the Away key
will light up.
Returning home
To tell your Lifeline that you have
arrived home press the A w a y key
again. You will hear the word
Home spoken, and the A w a y key
will turn its light off.
Returning home and raising an alarm
If you return home and raise an alarm by
pressing a button or pulling an alarm cord
(if one is fitted in your home) then your
Lifeline will make an alarm call even if A w a y
is turned on. After making the call it will
automatically switch the A w a y feature
off—it will return to its H o m e status.
10
Lifeline 4000+ user guide
11/5/05
4:42 pm
Page 12
Intruder Monitoring
Your Lifeline 4000+ can be used to provide an effective, simple to use intruder
alarm facility, which will alert a monitoring centre or personal recipient.
Arming the Intruder Function
When you leave your dwelling you should arm the intruder function. You can
do this in one of the following ways (depending on how your Lifeline 4000+
has been set up):• Press the INTRUDER button (once to fully arm the system).
• Press the optional blue button Amie ‘arm/disarm’ trigger (not supplied).
Whilst the intruder function is arming the INTRUDER button will flash. Exit
tones* will be heard (indicating the delay before the system is armed) and the
Lifeline 4000+ will announce “Away, Intruder on, arming full”. At the end of
the exit delay, the tones* will stop and the INTRUDER button will be illuminated.
The intruder function is now armed. The AWAY feature will be automatically
turned on (inactivity monitoring disabled).
If you need to re-enter the dwelling, simply disarm the system using one of
the following methods and re-arm the system when you are ready to leave.
Disarming the Intruder Function
When you walk back in to your dwelling, the Lifeline 4000+ will sound entry
tones* indicating that you should disarm the intruder function in order to
prevent an alarm from being raised.
You can do this in one of the following three ways depending on how your
Lifeline 4000+ has been set up:• Use the integral keypad to type in the 4-digit PIN number that was given to
you when the Lifeline 4000+ was installed (default 1234).
• If the option has been enabled, press your Amie personal trigger within 10
seconds of triggering the intruder system.
• Press the optional blue button Amie ‘arm/disarm’ trigger (not supplied).
When the intruder function has been disarmed, the entry tones* will stop
and the INTRUDER button will no longer be illuminated.
*The entry and/or exit tones may be switched off if required.
11
Lifeline 4000+ user guide
11/5/05
4:42 pm
Page 13
Zones
The intruder function can be set-up to only monitor specific areas (zones). For
example, if you live in a house with your bedroom upstairs, it is possible to
protect the downstairs area at night; while still being able to move around
upstairs without raising an alarm (only the downstairs zones are armed).
For further information on setting-up and using zones, please contact your
supplier.
Intruder Functionality and Inactivity Monitoring
If your Lifeline 4000+ has been set up to monitor for inactivity as well as
intruders, inactivity monitoring will automatically be suspended (for armed
zones) when the intruder system is armed. When the intruder system is
disarmed, inactivity monitoring will automatically be restored.
Trigger History
When you return to your dwelling and disarm the intruder function, the
Lifeline 4000+ will indicate on the display whether any sensors have been
tripped during your absence.
Generally this will show “Zones Triggered: No triggers”, this indicates that no
sensors were tripped. This message will be cleared after a few seconds.
If a sensor was tripped the Lifeline 4000+ will display a list, for 60 seconds, of
the zones that were triggered, whilst emitting an audible beep every few
seconds during this period.
12
Lifeline 4000+ user guide
11/5/05
4:42 pm
Page 14
Simple Set-up
An installer should configure the intruder system to your needs. However
there are some settings that you may need to change. In order to change any
settings, you will need to enter the programming mode on the Lifeline 4000+.
Programming mode
To enter programming mode, hold the green Cancel key until the beep is
heard (approximately 5 seconds) and then release the Cancel key. The Lifeline
4000+ will announce “programming mode” and the screen will now show
the text “Local Programming”.
Entry/Exit delay time
Perform the following steps to change the entry/exit delay:
1. Enter programming mode as described above.
2. Press the ‘Intruder’ feature key to go to the Intruder Programming menu.
3. Press the ‘Config’ feature key to go to the configuration menu.
4. Press the ‘Times’ key to enter the times menu.
5. Press the ‘Entry/exit’ feature key, a cursor will flash on the first digit of the
time value on the right hand side.
6. Use the integral keypad to type in the new three digit time value (in
seconds), for example 60 seconds would be ‘060’.
When the time value is accepted a beep will be heard and the cursor will
disappear. You can either press the cancel key or leave the Lifeline 4000+ to
timeout and return to the normal display.
Changing your PIN number
1. Enter programming mode as described above.
2. Press the ‘Intruder’ feature key to go to the Intruder Programming menu.
3. Press the ‘Config’ feature key to go to the configuration menu.
4. Press the PIN feature key.
5. Enter the old PIN (default 1234) via the numeric keypad (stars will appear
instead of numbers). If this is entered wrongly ’Invalid PIN’ will be shown.
6. Enter the new PIN via the numeric keypad.
7. Re-enter the new PIN. If the second number does not match the first
‘Unable to Confirm PIN’ will be shown.
If the PIN was successfully changed, the message ‘Pin programmed’ will be
shown, otherwise the PIN will not have been changed.
13
Lifeline 4000+ user guide
11/5/05
4:42 pm
Page 15
Radio Triggers
Amie+ and GEM+
The Amie+ and GEM+ radio triggers are light and waterproof. These triggers
have small but powerful batteries which mean that, with normal use, they
will last up to five years. They will normally work up to 50 metres away from
your Lifeline.
When you press the alarm button on either of these radio triggers the
small red light on each will light up for about three seconds after each button
press. However, if the battery is low this light will flash on and off when you
press the alarm button. If this happens you should contact your supplier or
control centre and they will arrange for a replacement trigger. If you raise an
alarm call to a control centre using a radio trigger with a low battery the
operator is automatically informed about the low battery in your trigger.
The radio triggers automatically check the battery status at regular intervals. If a
low battery is detected, then an automatic call will be raised to the Control
Centre and they will arrange for a replacement trigger.
Amie+
14
GEM+
Lifeline 4000+ user guide
11/5/05
4:42 pm
Page 16
Medication reminders
Up to six timed voice reminder messages can be
remotely recorded using a normal telephone. The
messages can be configured to repeat at precise
times either daily or once only, and can be
modified or deleted at any time provided the
person configuring the messages enters a
security PIN number.
When a timed message is due, the Lifeline 4000+ will emit a distinctive chime and
the user must press the "message" key to hear the message.
The PIN (Personal Identification Number)
You will need a valid PIN to begin configuring new messages on a Lifeline 4000+.
This can be normally obtained from the owner or the supplier of the Lifeline 4000+
(default PIN is 1234).
Accessing the configuration menu
• Use a normal telephone (or cellphone) to call the Lifeline 4000+. Someone
needs to take the call on the Lifeline 4000+ by pressing the "speaker" user key
and check that you have voice contact. If the call you make is answered by the
user on their normal telephone, they must "hang up" their handset after pressing
the speaker button on the Lifeline 4000+.
• Once this connection is established, press *
1 on your telephone keypad
• The Lifeline 4000+ will then prompt you (with a spoken phrase) to key in
your PIN
• Once this is keyed in, the unit will confirm the current time* on its internal
clock (with a spoken phrase)
• The unit will then prompt you with 4 menu options
• Follow the menu instructions to configure and record each message.
*If the time is incorrect, this can can modified using option 3 on the menu.
The unit can be configured to automatically adjust for British Summer Time (BST)
For further information on setting-up, please consult your supplier
15
Lifeline 4000+ user guide
11/5/05
4:42 pm
Page 17
Medication reminders Menu
"Note- The reminder functionality provided by Lifeline 4000+ may be a useful aid
to compliment professional medication compliance measures, however it should
not be relied upon as a medication compliance device. No guarantee of actual
compliance should be relied upon when using this functionality. Lifeline 4000+ is
not a medical device and Tunstall Group Ltd is not responsible for any outcome
associated with the programming or use of the reminder functionality."
16
Lifeline 4000+ user guide
11/5/05
4:42 pm
Page 18
Lifeline 4000+ in detail
Identifying callers. There are probably three or
four relatives, friends or contacts that you often
call. These numbers can be entered into Lifeline
so that you can call these individuals just by
pressing one of the user keys. When these people
call Lifeline will recognize the number (providing
your telephone service provider supports Caller
Line Identification). Lifeline will flash the key belonging
to the person who is calling.
Inactivity. Lifeline, when connected
to movement detectors,
will know if you have not been
active. When this inactivity monitoring
is turned on, Lifeline will
call your control centre if you
have not moved around your
home. The control centre staff
will then check to see if you need
any help.
Low temperatures. Lifeline can be
connected to one or more temperature
sensors. Your Lifeline can then raise an
alarm if the temperature drops too low or
rises too high. In this way Lifeline can help
to protect you and your property.
17
Lifeline 4000+ user guide
11/5/05
4:42 pm
Page 19
Fire alarms. Lifeline can be configured to
make an alarm call whenever a smoke or
heat detector senses a fire.
Witness protection and
domestic violence. If you are at risk,
because of domestic violence or
because you are due to give
evidence as a witness in a court
case, then Lifeline can be configured
so that it raises alarm calls without
making any announcements or
noise. Whenever you press a button,
pull an alarm cord or raise an alarm in any
other way, Lifeline will quickly and silently
make a call to your control centre.
18
Lifeline 4000+ user guide
11/5/05
4:42 pm
Page 20
Understanding alarm calls
Alarm calls can be raised when
you press a button or pull a
cord. They can also be made
when automatic sensors are set
off, such as smoke detectors.
Lifeline can call control centres
or individuals on normal
telephones. Individuals who
take alarm calls are referred to
as personal recipients.
Call Lists. Lifeline will not just call one telephone number. Lifeline can
be made to try a whole list of numbers. For example, if you press an alarm
button Lifeline might first call your friend in the next house. If there is no
answer then Lifeline might call your sister in the next village. If your sister is
not there to answer the call then Lifeline might call a control centre. The
friends, relatives and control centres Lifeline calls, and the order in which
the calls are made, can be programmed into Lifeline.
How should a personal recipient answer a call? Each Lifeline will
announce its own unique number when calling, to enable the person who
takes the call to recognize where it is from. Lifeline can alternatively announce
the name of the person who owns Lifeline if that has been recorded into it.
The person who takes the call must press a key on their telephone (any digit
from 0 to 9), otherwise your Lifeline will think that the call has not been
properly answered and will try another number.
Diverting personal recipient calls. Some personal recipients divert their
calls to a control centre when they are away from their telephone. Lifeline
4000+ can easily cope with this change. Although the Lifeline 4000+ is
expecting a personal recipient when it calls, as soon as it hears the control
centre it will automatically send the electronic tones the control centre
computers need to hear.
19
Lifeline 4000+ user guide
11/5/05
4:42 pm
Page 21
Different types of alarm. Lifeline will even call different
numbers depending on the type of alarm. If, for example,
you press an alarm button then Lifeline might be set to call
your friend next door. However, if one of your smoke
detectors is set off, and your Lifeline is configured to detect
this, then Lifeline might be set to call the control centre first.
Control centres and personal
recipients. When an individual (a
personal recipient) receives an alarm
call your Lifeline will announce who
is calling when the telephone is
answered. When Lifeline connects to
a control centre, however, it will send
a series of electronic tones that allow
it to communicate directly with the control centre’s computers. The computers at
the control centre display your details to the operator who answers your call.
Even if you could not speak the control centre would know where to send help.
Disconnecting existing calls. If an alarm call is raised then Lifeline will
disconnect any outgoing call so that it can make the alarm call. Unlike previous
alarm equipment, Lifeline can even disconnect some incoming calls in order
to make the alarm call. However, in order to do this reliably Lifeline should
be the only telephone directly connected to the outside telephone line. Other
telephones must be connected through Lifeline.
20
Lifeline 4000+ user guide
11/5/05
4:42 pm
Page 22
Reliability
What if I accidentally unplug Lifeline from the power supply? Lifeline will alert
you to the problem by announcing that there is no power, although this
feature can be turned off if you live in a region where power cuts in the
middle of the night are common. After a period of
time without power Lifeline will also telephone the
control centre and automatically let the control centre
know that it is without power. This time period can
be set by an installer to anywhere between one and
four hours. However, it is never precise there is a
random element, and this is to stop every Lifeline
in a town that suffers a power cut calling the control
centre at the same time. Lifeline will keep periodically
calling the control centre until power is restored.
What if I break my radio trigger? The radio
triggers are quite tough and difficult to break,
although it is possible to break a radio trigger given
enough force. It is also possible that the battery
will run down after five years. For this reason the
Tunstall PNC control centres allow their staff to
easily find out when you last used your radio
trigger. This is something that the control computers
record. If you have not used your radio trigger for a
while they may ring you up and ask you to test it.
Periodic calls
How does my control centre know if my Lifeline is not working
properly?
Your Lifeline can be set to make periodic calls to the control centre. This is a
call that is not heard by you, nor is it answered by an operator. Your Lifeline
will simply communicate directly with the control centre computers to let
them know that it is working correctly. If the control centre computers do
not receive this regular call then they will alert one of the call operators.
The control centre staff will then investigate the problem.
21
Lifeline 4000+ user guide
11/5/05
4:42 pm
Page 23
Configuring Lifeline
Your Lifeline can be configured to do many different tasks. This configuration
is usually undertaken by an installer or member of staff from your control
centre. However, there are some settings you can alter yourself.
Fast Dial Keys
Entering Fast Dials using the display
If your Lifeline has a display (instead of a card insert) then you can easily
edit the entry attached to any Fast Dial user key. To edit the name and
number attached to the Fast Dial user key you should follow these steps.
1. Press and hold down the Fast Dial
key you wish to edit.
2. Press key 5 under the flap. The
name and number attached to the
Fast Dial key will be displayed. You
can now release the Fast Dial user key.
3. Edit the name and number using the
numbers under the flap. The C key
under the flap will delete a number
or letter during editing. You can switch
between editing the name and editing
the number by pressing the B key.
Each number key under the flap has
several letters next to it. When editing
a name, keep pressing the key with the letter
you want until the letter is displayed.
22
Lifeline 4000+ user guide
11/5/05
4:42 pm
Page 24
4. Once you have finished editing press
the D key under the flap. This will
save your changes. Alternatively, you
can press the A key if you do not
want to save your changes.
5. You can then test the Fast Dial key by pressing it and it will show
the number you have entered.
Key Summary
B Switch between editing the name and editing the number.
C Delete a letter or number during editing.
D Save the changes you have made.
A Abort—do not save changes.
23
Lifeline 4000+ user guide
11/5/05
4:42 pm
Page 25
Entering Fast Dials without a display
If your Lifeline has a card insert instead of a display then you can still edit
the numbers attached to Fast Dial keys.
1. Press and hold down the
Fast Dial key you wish to edit.
2. Enter the number you want the key to call
using the number keys under the flap, but
remember to keep holding down the Fast Dial
user key.
3. Once you have finished entering the number release the Fast Dial
user key and the new number will be stored.
4. You can then test the key by pressing it and dialling the number you
have entered.
24
Lifeline 4000+ user guide
11/5/05
4:42 pm
Page 26
Voice Announcements
If one of your keys is displayed as Record then you will be able to record
some of the announcements your Lifeline uses. In particular, you can record
announcements for each of the Fast Dial user keys, as well as the
announcement that is played to personal recipients when they receive alarm
calls from your Lifeline.
Fast Dial announcements
You can record up to five seconds of speech for each Fast Dial key.
Normally, you should record the name of the person. If you record the name
Julie, Lifeline will announce Calling Julie when the Fast Dial is pressed. To
record an announcement for a Fast Dial user key you should do the following.
1. Hold the Fast Dial key down
and then press and hold the
Record user key. Your Lifeline
will beep to indicate that
recording has started, and the
volume key will flash during
recording.
2. Record a brief message, such
as the name of the person who
is called by the Fast Dial key, and then release the Fast Dial user
key when you have finished. Your Lifeline will then beep to indicate
that recording has ended.
3. To test the announcement press the Fast Dial key to make a call,
listen to the recording, and then cancel the call using the Cancel
button before the call is made.
Removing a Fast Dial and announcement. If you hold down a Fast
Dial user key and then press the Cancel key this will delete the name,
number and voice announcement attached to the key.
25
Lifeline 4000+ user guide
11/5/05
4:42 pm
Page 27
Personal Recipients
When Lifeline calls a personal recipient with an alarm it will announce the
number of the Lifeline that is calling. However, Lifeline can play a recorded
message instead, and this can make it easier for the recipient to recognize
the call.
To record an announcement hold down the # key under the flap and
then press and hold down the Record user key. You will then hear a highpitched beep and the volume key will flash—you should now record your
announcement. Once you have finished recording release the # key and
the Record user key—the recorded announcement will be stored.
Deleting a recorded announcement. To remove a personal recipient
announcement hold down the # key and press the Cancel button.
26
Lifeline 4000+ user guide
11/5/05
4:42 pm
Page 28
Problems and Answers
Most problems can be overcome with a few simple checks. If these checks
do not overcome the problem then contact your control centre. Alternatively,
you can contact Tunstall directly, and the staff will be pleased to help.
The alarm button on top of my Lifeline does not light up when the
power is turned on
1. Check that the transformer is plugged into the power socket.
2. Check that the wall socket is turned on. Do other electrical appliances
work when plugged into the same socket?
3. Check that the lead from the transformer is properly plugged into
your Lifeline.
The alarm button on top of my Lifeline continues to flash rapidly
If this rapid flashing continues for a long period (i.e. several minutes) this
indicates that there is a fault with your Lifeline. If this is the case then you
need to contact your supplier and explain the problem.
When I press the button on my Fall Detector+ or radio trigger my
Lifeline does not make an alarm call
1. Stand next to your Lifeline with your radio trigger and try to raise
an alarm. If your Fall Detector+ or radio trigger works when it is
close to your Lifeline, but not when it is further away, then contact your
supplier.
2. If pressing the button on your Fall Detector+ or radio trigger does not
make your Lifeline raise a call even when you are standing next to it, then try
raising a call by pressing the large alarm button on the top of your Lifeline. If
this does not work then the problem is with your Lifeline, not your Fall
Detector+ or other radio trigger (see the section below). If your Lifeline raises
a call when you press the large alarm button on the top of it, but does not
raise a call when you use your Fall Detector+ or radio trigger, then you need
to contact your supplier and explain the problem.
27
Lifeline 4000+ user guide
11/5/05
4:42 pm
Page 29
When I press the large alarm button on top of Lifeline it does not
raise an alarm
1. Is Lifeline plugged into the mains? Is the large red alarm button lit up as it
should be? If it is not then see the section above on this topic.
2. Is your Lifeline properly connected to the telephone line? Check the
connections between your Lifeline and the telephone socket.
3. Is there a fault with the telephone socket? Try raising an alarm with
your Lifeline plugged into a different telephone socket if one is available.
4. If your Lifeline is properly connected, is the telephone line faulty?
Pick up the handset of the telephone plugged into Lifeline and listen for a dial
tone. If you cannot hear one there may be a fault on the line.
5. Is the fault on the line inside your home or outside? Try disconnecting
all other telephones connected to the line and try raising an alarm again.
Since connecting Lifeline I cannot receive telephone calls
Disconnect all telephones with the exception of your Lifeline 4000+. Then
ask someone to call you. Your Lifeline unit should ring and you will be able
to answer the call by pressing the green Cancel button on your Lifeline.
If your Lifeline rings when it is the only telephone connected to the
telephone line then this may be because one of your other telephones is
faulty. Alternatively, this may be because you have been connecting too many
telephones to your telephone line.
You should not connect more than four telephones to any one telephone
line. Lifeline counts as one telephone. If you do, then your telephones may
not ring when someone calls. This maximum of four telephone devices
includes fax machines, computer modems and answering machines.
28
Lifeline 4000+ user guide
11/5/05
4:42 pm
Page 30
29
Lifeline 4000+ user guide
30
11/5/05
4:42 pm
Page 31
Lifeline 4000+ user guide
11/5/05
4:42 pm
Page 32
31