1
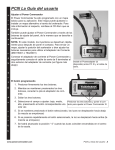
PCV user’s guide.
There is more information and instructions available on the supplied CD.
The Power Commander is shipped with a map for a completely stock bike unless it is special
ordered with a different map. If it is necessary to load a map for a different configuration
you will need to perform the following steps:
•
First you will need to insert the supplied CD into your computer. The CD is designed to
automatically start running upon inserting into the drive. It may take a few seconds for the
setup menu to appear. (If it does not begin to run after 30 seconds go to the "My
Computer" icon and double click it. Then double click the "CD drive" icon. Lastly, double
click "setup.exe". This will manually start the CD)
•
In order for the Power Commander to communicate with the computer the Power
Commander Control Center Software must first be installed. Click on "install software" in
the menu and follow the directions. (This will create a folder called C:Program Files /
Power Commander 5 that the software and maps will be stored in).
•
From the CD you will need to transfer the map database for your particular bike(s). Click
on "map database". Find your model from the list and click on the model. (This will automatically install all the maps for that model to the C:/Program Files/Power Commander 5
folder.)
’
s
G
u
i
d
e
Now that you have installed your Power Commander here is a brief overview on how to use the
unit.
e
The PCV maps are not the same as the PCIII maps. Load a map that has a .pvm file
extension only.
•
In order to send a map to the Power Commander you must first connect the USB cable
to the computer and to the Power Commander unit. Make sure that the cable is fully
seated into the Power Commander. There is a detent on the cable that could require
light pressure to fully engage the cable. Open the Power Commander software by double clicking the PCV icon on your desktop. Click on OPEN MAP FILE and select the map
you want to use from the database. Once the map is shown in the grid area click on
SEND MAP.
V
U
•
s
r
The latest software and maps can be found at
www.powercommander.com
P
C
The values in the map represent a percentage of fuel change over stock. If you see a
value of 10 in the map then at the throttle position and RPM range the bike will be 10%
richer than stock. If the value was a -10 then it would be 10% leaner than stock. You
have the ability to fine tune your fuel curve by altering these values. We recommend
leaving this to one of our Tuning Centers as they have the ability to accurately read the
air/fuel curve which allows them to optimize the fuel curve for every cell. Without having
the ability to read the air/fuel ratio of the bike it is impossible to accurately make fine
adjustments to your fuel curve.
•
If you disconnect the battery or disconnect the Power Commander from the bike it will not
lose the map. The only way to lose the map is to download another map to the unit.
www.powercommander.com
PCV User’s Guide - A
The Power Commander will come configured for Throttle Position, Speed and Gear position.
TPS CALIBRATION
It is important that the PCV software TPS read
0% when the bike is fully warmed up and at idle.
If it needs to be reset make sure the bike is fully
warmed up before resetting. With the engine off
click on Reset, open throttle to the stop and
close, then click OK. If your bike has fly-by-wire
throttle only reset the throttle position on a
dynamometer.
SPEED CALIBRATION
Type in your set target speed (recommended to
be at least 30mph) Get the back wheel spinning
to the set target speed and once the speed is
steady click on Calibrate then click OK.
’
s
G
u
i
d
e
If you should need to recalibrate any of these parameters go to DEVICE TOOLS CALIBRATE. The speed and gear position were setup with stock gearing and stock tires.
Changing either of these variables can affect the accuracy of these readings. If you
should need to recalibrate speed or gear it is necessary to get the bike either on a rear
wheel stand or on a dynamometer.
GEAR CALIBRATION
Once speed is calibrated you can then setup up
gear position if needed. Get the bike on a stand
or dynamometer and put the bike in first gear.
Hold the throttle steady and click on calibrate for
gear 1. Repeat this step for all gears.
If your bike is a 5 speed input values for 6th gear
that are less than that of 5th gear. Click OK
P
C
V
U
s
e
r
For the most accurate readings use a
dynamometer to calibrate speed.
www.powercommander.com
CONFIGURE
Engine temp - Displays engine temp either via the J1850
port or thru the 0-5v input
Pressure input - Offset base fuel map on 0-5v input
Map switch - enable this if using a map switch. Do not
select if using Auto tune
Quick shifter - adjustments of kill times. Gear dependent
adjustments can only be made if software displays gear
Startup fuel - adjusts for fuel during startup
Rev Xtend - turns rev Xtend ON/OFF
Auto tune - configures auto tune options
Harley ECM data - select J1850 data. Right click any
gauge on the main screen to display Harley data.
PCV User’s Guide - B
Engine temperature
For all other models the engine temperature
can be configured thru the analog input. The
more tables that are configured the more
accurate your reading will be. Input the voltage read at the header pin of the analog
input in relation to engine temperature
You can offset your fuel curve based on this
0-5v analog input. This is intended to be
used for boosted applications but can be
based on any 0-5v signal.
Input the voltage readings of the sensor you
are tapped into in relation to the reading you
want displayed in the software.
On all models other than Harley if you are
using the analog input to configure engine
temperature do NOT enable the pressure.
U
s
e
r
’
G
Pressure
s
u
i
d
e
On Harley models the engine temperature
will be displayed via the J1850 data. Click
enabled and the source of J1850.
Quick Shifter
P
C
V
If using a quick shifter make sure the
enabled box is checked.
If the gear setup has been configured the
PCV has the ability to adjust the kill times
per gear. Make the Mode Gear Dependent
in the drop down menu.
If gear is not setup the software will deliver
the same kill time for all gears.
Minimum RPM - lowest RPM that the shifter
can be activated
Shift Interval - period of time between shifts
that the software will activate. This reading is
in milliseconds.
www.powercommander.com
PCIII USB User’s Guide - C
Start up fuel
Start up fuel can be based on time or engine
temperature. Choose what mode from the
drop down menu.
Engine temp - the software will deliver a percentage of fuel over the fuel map based on
engine temperature. This can only be used
if engine temperature has been configured.
G
u
i
d
e
Time - from the first revolution of the crank
the software will deliver a set percentage of
fuel for a given amount of time in seconds
Each PCV from Dynojet comes configured
for use with the Autotune kit. These configuration settings are explained in more detail
with the instructions that come with the
Autotune kit.
P
C
V
U
s
e
r
’
s
Auto Tune
www.powercommander.com
Harley ECM data
The J1850 data is streamed thru every PCV
Harley Davidson model. This allows the software to display each channel listed.
The Speed and Engine Temperature channels are enabled as the unit is shipped from
Dynojet. To enable other channels check the
box next to the channel. These channels
can be displayed on the main software
screen by right clicking on any of the digital
gauges.
PCIII USB User’s Guide - D