1
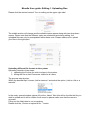
Moodle User guide: Editing 1. Uploading files
Please click the desired course! Turn on editing on the upper right side!
The middle section will change and the editable topics appear along with two drop-down
menus. Please note that the different topics are numbered and during editing, the
uploaded files can only be manipulated within these units. Please make sure to upload
your files in the right topic!
Uploading different file formats to the system:
Uploading consists of two steps:
1. uploading the file that you wish to share in the system,
2. linking the file so that it becomes visible for all users.
The process step by step:
Within the desired topic, choose „Add a resource” and select the option „Link to a file or a
web site”.
In the newly opened window, please fill out the „Name” field: this will be the title the file you
wish to upload and it will be visible for all users so please make sure that the name is
accurate.
Filling out the field below is not compulsory.
Please click the „Choose or upload a file...” button.
A new window will open and here you have to click the „Upload a file” button! If necessary,
you can create a new folder for your files by clicking the „Make a folder” button.
After selecting „Browse”, please choose the files that you wish to upload from your PC and
click the „Open” button. The maximum size of each individual file can not exceed 100 MB!
A message will be displayed after you have successfully uploaded your files and
consequently a list containing the uploaded files will appear.
The second step consists of making the file visible in the moodle course. For this, please
select the „Choose” button to the right side of the file you wish to share.
In the „Window” option please select „New window”.
This is necessary in order for our newly uploaded file to be opened in a new window.
Please select the „Save and return to course” button in order to save our settings.
The text typed in in the „Name” field will be displayed as the course name and by clicking
it, a new window will open containing the newly uploaded file wich will be available for all
the other users. Please verify that you have followed the above instructions correctly!
Explanation of the icons used in the editing mode:
Within the individual topics:
Moves unit to the right, can be used for visually separating the different
topics.
Moves unit to a different location. By clicking, you can select the desired
location by hiting the
icon.
Edit unit
Delete unit. This will not delete the file entirely just it’s availability in the
course!
Hide/show unit.
Icons to the right side:
Display only the current topic. By clicking it, the other topics will dissapear
and only the current one will be visible. By clicking again, all topics become
visible. This setting is individual so it will not influence the displayed topics
for other users!
Marking the topic as current. By selecting, you can visually emphasize the
desired topic.
Hide/show topic.
Move topic up.
Move topic up.