1
1
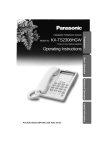
Integrated Telephone System
Operating Instructions
Model No.
KX-TS500HG
Getting Started
1-A Location of controls
VOLUME (^), (_)
Buttons (2-A)
DIALING MODE Selector
(1-B)
RINGER Selector
(1-B)
2
1-B Settings
1
2
2-A Making Calls
Connect the telephone line cord (1).
3
Set the DIALING MODE selector to TONE.
≥If you cannot dial, set to PULSE.
Connect the handset cord (2), then confirm
the dial tone.
1
GH
I
PQ
4
RS
TONE
7
TU
V
8
TO
NE
C
2
5
WXY
Z
0
DE
MN
1
F
3
4
O
6
9
R
DIALING MODE
Selector
Set the RINGER selector to HIGH, LOW or
OFF.
(Ex. “LOW” is selected.)
RINGER
HIGH
RINGER Selector
($) Button (3-B)
KX-TS500HGW
PLEASE READ BEFORE USE AND SAVE.
For your future reference
(R) Button
(3-A)
Button (2-A)
(found on the bottom of the unit)
Date of purchase
Name and address of dealer
≥When set to OFF, the unit will not ring.
∑ Handset . . . . . . . . . . . . . . . . . . . . . . . . . . . . . one
∑ Handset Cord . . . . . . . . . . . . . . . . . . . . . . . . . one
∑ Telephone Line Cord . . . . . . . . . . . . . . . . . . . one
3
4
3-B Temporary Tone Dialing
This equipment is designed for use on
Hungary only.
In the event of problems, you should contact
your equipment supplier in the first instance.
Manufactured by Panasonic
Communications (Malaysia) Sdn. Bhd.
Senai Malaysia
PQQX13969ZA F1003-0 D
To adjust the receiver volume (6 levels)
while talking
To increase, press (^).
To decrease, press (_).
≥After hanging up, the volume level will be saved.
(For Rotary or Pulse Service Users)
Press ($) before entering access numbers
which require tone dialing.
When the unit rings, lift the handset.
When finished talking, hang up.
Things You Should Know
“ Things You Should Know
4-A Wall Mounting
The unit can be mounted on a wall.
1
≥The dialing mode changes to tone. You can enter
numbers to access answering services, electronic
banking services, etc. When you hang up, the
mode will return to pulse.
≥Access numbers entered after pressing ($) will not
be included when redialing.
1999/5/EC
When finished talking, hang up.
To redial the last number dialed
Lift the handset. ➡ Press (\\\) .
1
2
Handset Cord
Special Features
Pressing (R) allows you to use special features
of your host PBX such as transferring an
extension call or accessing special telephone
services (optional) such as call waiting.
Dial a phone number.
2-B Answering Calls
Accessories (included)
3-A Recall Button
Serial No.
OFF
2
Handset
Lift the handset.
≥If you misdial, hang up and start again from
step 1.
PULSE
3
Telephone Line Cord
AB
JK
L
1
2
DIALING MODE
To Single-Line
Telephone Jack
Pulse-or-tone dialing capability
Operation
3
Press the tabs in the direction of the arrows
(1), then remove the wall mounting adaptor
(2).
Install screws using the wall template below.
Connect the telephone line cord. Mount the
unit, then slide down.
≥Fasten the cord to prevent it from being
disconnected.
2
Hooks
1
1
Screws
2
Tuck the telephone line cord inside the wall
mounting adaptor, and push it in the direction
of the arrow (1 and 2).
≥The word “UP WALL” should face upward.
8.3 cm
2
1
To Single-Line
Telephone Jack
“ Things You Should Know
4-B Troubleshooting
Problem
To temporarily set the
handset down during
a conversation, place
it as shown here.
4-C Safety Instructions
Remedy
The unit does not
work.
≥Check the settings (1-B).
The call cannot be
connected even if
you dialed
correctly.
≥Check whether the
DIALING MODE selector
setting is correct or not
(1-B).
The unit does not
ring.
≥The RINGER selector is
set to OFF. Set to HIGH
or LOW (1-B).
Take special care to follow the safety suggestions
listed below.
Installations
Environment
1) Do not use this unit near water—for example,
near a bathtub, washbowl, sink, etc. Damp
basements should also be avoided.
2) The unit should be kept away from heat sources
such as radiators, kitchen range, etc. It also should
not be placed in rooms where the temperature is
less than 5oC or greater than 40oC.
Placement
1) Do not place heavy objects on top of this unit.
2) Care should be taken so that objects do not fall
onto, and liquids are not spilled into the unit. Do not
subject this unit to excessive smoke, dust,
mechanical vibration or shock.
3) Place the unit on a flat surface.
4-D Specifications
Lightning surge
WARNING:
Power Source:
This unit has already been equipped with a built-in
lightning protection circuit. However, we recommend
that you install lightning protection on the telephone
line, if your area has a high incidence of lightning
strikes.
To install the above option, please contact your local
sales shop.
TO PREVENT FIRE OR SHOCK HAZARD, DO
NOT EXPOSE THIS PRODUCT TO RAIN OR ANY
TYPE OF MOISTURE.
Dimensions (H x W x D):
Approx. 96 mm x 150 mm x 200 mm
Mass (Weight):
Approx. 475 g
If trouble occurs, disconnect the unit from the
telephone line and connect to a known working
phone. If the known working phone operates
properly, do not reconnect the unit until the trouble
has been repaired. If the known working phone does
not operate properly, consult your telephone
company.
Dialing Mode:
Tone (DTMF)/Pulse
Operating Environment:
5 °C – 40 °C
≥Lightning damage is not covered in the warranty
even if lightning protection is installed.
Wall Template
8.3 cm
From telephone line
Specifications are subject to change without notice.