1
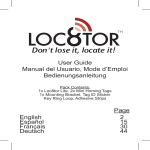
User Guide
Manual del usuario / Mode d'emploi / Bedienungsanleitung
- For Loc8tor models -
Loc8tor:
1 Loc8tor Handheld
2 Mini Homing Tag
1 Key ring loop / adhesive pack
Batteries included
Loc8tor plus:
1 Loc8tor Plus Handheld
3 Mini Homing Tags
1 Panic Homing Tag
2 Key ring loop / adhesive Pack
Batteries included
Index
English................................................................ 2-13
Español....................................................... ......14-27
Français.............................................................28-41
Deutsch............................................................. 42-54
INTRODUCTION
Welcome to Loc8tor, the great new product that helps you find your mislaid items and can even stop you losing
them in the first place*.
We've designed the Loc8tor to be versatile and easy to use, whether at home, out and about or on business.
Please take a few minutes to read through this User Guide to help you get the most out of your purchase.
Loc8tor has been manufactured to quality standards to run trouble free and comes supplied with a 12 month
warranty. Please visit our website at www.loc8tor.com for additional product information, contact details and
frequently asked questions.
We'd love to hear from you, what you like about Loc8tor and any suggestions you have to improve it. E-mail us
at [email protected] to have your say.
We hope you enjoy your new purchase and can now rest at ease, avoiding those frustrating moments of
mislaying your important items.
With best wishes.
Anthony Richards
Managing Director
*Loc8tor Plus - Comes supplied with Locate and Alert modes. Helps you find misplaced items and allows
invisible safety zones to be set around you to stop items going astray.
Loc8tor - Comes supplied with Locate mode. Helps you find misplaced items.
www.loc8tor.com
2
www.loc8tor.co.uk
CONTENTS
Quick Key Guide
Setting Up Your Loc8tor
Locate Mode - Find a mislaid item
Alert Mode* - Helps prevent items getting lost
Alert Activated
Mini Homing & Panic Homing Tags
Icons and Abbreviations
Menu Functions
Batteries
General Care
Changes
Warranty
Please Note
QUICK KEY GUIDE
Grey button
Shows list of registered Tags
that can be located
Red button
Turns ON or OFF all
Alert enabled Tags
(Loc8tor Plus only*)
Navigation ring
Moves cursor around
screen: left, right, up, down
Page
3
4
5
6
7
8
8
9
10
10
11
11
12-13
White button
Selects item
highlighted on
screen
Blue button
Loc8tor & Loc8tor Plus
Shows Tag list and low
battery warnings
Loc8tor Plus
Alert mode Tag settings
Yellow button
To register a new Tag
3
SETTING UP YOUR LOC8TOR
1. Insert batteries (2 x AAA)
With the Loc8tor buttons facing you push forwards and remove right hand side panel.
Insert batteries (See diagram in battery compartment for correct insertion) and replace
side panel.
Loc8tor has no ON or OFF button. To use press any button. It will automatically turn
ON.
1.
•
•
•
•
•
•
2. Register Tags
Pull out white strip in Tag to activate batteries
Tag beeps and red light flashes twice
Place Tag next to Handheld making sure all other Tags have been
moved more than an arms length away
Press Yellow register button on the Handheld then select yes
Follow on-screen instructions (see below Naming Tags)
Repeat process for each new Tag
•
•
•
•
3. Naming your Tags
Tags can be personalised with a name of your choice up to 10
characters long
Use navigation ring to highlight letters
Press White button to select
Press OK to finish
3.
4. Attach Tags
Depending on use Tags can be attached with adhesive strips, key ring loop or left loose.
Adhesive strips
Best used when attaching to a hard, flat surface. Peel off backing to attach.
Sticky tabs are not permanent but increase their bond with time. Ideally leave for a
Minimum of 10 minutes. Strongest bond after 24 hours.
To remove insert flat tool under Tag and gently twist / prise off.
Key ring loop
Best used to attach Tag to items such as key ring, bags and belt loop.
Push loop through the Tag hole and then pull ring through the loop.
4
4.
LOCATE MODE - FIND A MISLAID ITEM
LOST
•
•
•
•
•
•
•
•
•
Slide up lid and press Grey button (top left) to see list of Tags that can be located
Scroll down and select item to be found with White button
Scan area slowly turning full 360° circle
Once circle completed go back to direction of strongest audio and visual
signal
Walk in this direction - As you get nearer audio pitch and frequency of beeps
increase, lines on screen extend and signal strength numbers increase (1)
Whenever in doubt, repeat 360° circle
When signal strength lines get close to the top of the screen Tag is close by
Try pressing select button on Handheld to Mute (
Beep
) and listen for the Tag
When you are almost on top of Tag, screen changes to Zooming in mode to guide
you right in (2)
Select and press STOP when the item is found
FOUND
•
•
•
•
•
(1)
(2)
TIPS
Place the Tag on a surface and practice locating a few times to get a feel for how it
works
If you are ever unsure which direction to go in slowly repeat full 360° circle and
then go in direction with the strongest signal strength
Strongest signal is displayed when Handheld is pointing directly at Tag. Also try
moving Handheld up and down as Tag could be upstairs or downstairs
If you are close to a wall whilst getting a strong signal check the room next door
If no signal is displayed try moving position to a different area
5
ALERT MODE - HELPS PREVENT ITEMS GETTING LOST (Loc8tor Plus Model)
The Blue button (Tag Settings screen) controls your Alert settings. It enables you to decide what mode
each Tag is in, Locate or Alert, and to set the distance for your required safety zone (Near, Medium or Far)
for each Tag. Once you're happy with your settings simply press the Red button to activate Alert.
All Tags with a ( ) will now automatically be in Alert mode.
•
•
Setting up Alert (Blue Button - Tag Settings Screen)
•
•
Attach Tag in or on item to be protected
Press Blue button for Tag Settings screen. A list of all your Tags will be displayed
Selecting the Safety Range (1 )
Scroll to the right hand column in line with selected Tag
Use White button to select distance between Tag and your Handheld
N = Near, M = Medium, F = Far
•
•
Set Tag Mode
Scroll to column with dash (-) next to the Tag name
Press White button to make Tag alertable ( )
Repeat this process for each Tag
•
•
Using Alert Mode
Press Red button to turn Alert mode ON or OFF for all Tags with (
The Tag will beep to confirm Alert mode is ON.
) in Tag settings screen
(1)
Your Tags are now in Alert. Should any Tag set in Alert mode go out of the preset safety zone the
Loc8tor Plus will vibrate, set off an alarm and advise which Tag has gone astray
An A will appear in the bottom right hand corner when the Alert mode is on
! Important Alert mode usability statement ! - A constant link between Handheld and Tag ensures you are
notified immediately when Tags go out of range. However if used continuously will significantly reduce battery
life. When not needed turn Alert mode off using Red button.
6
ALERT ACTIVATED (Loc8tor Plus Model)
Should one of the Tagged items go out of your safety zone the Handheld will vibrate, let off an alarm and the 'Tag
Status' screen will automatically appear.
The Tag Status lists which Tag/s have activated an Alert and whether the Tag is currently out of your designated safety
zone. If a Tag has gone out of range but since returned to the safety zone, it also enables an Alert to be muted or
removed from the Alert list altogether.
Using the Tag Status Screen
Select
to
remove Tag
from Alert
enabled list
Identifies
which Tag
activated
the Alert
– Select
item to
Locate
that Tag
Mutes all current Alert alarms
When shown Alarm active for
that Tag
When
shown Alarm muted
If the Tag is out of the safety zone
an ‘!’ symbol will appear
If the Tag has gone out of the
safety zone but returned and now
safe an ‘A’ will appear
If a Panic Tag has been activated a
‘P’ will appear (see page 8)
Alert mode on
To turn all Alerts OFF press the Red button.
To individually remove each Tag from the Alert enabled list select the (
Note - To return to Tag Status screen go to Alert options on main menu
) and change to a (-).
Tag Status
7
MINI HOMING & PANIC HOMING TAGS
Both Mini Homing and Panic Homing Tags can be used to Locate items and if used with the Loc8tor Plus model used
in Alert mode.
The Panic Tag provides the additional function of enabling a child or dependant in need to activate an alert alarm to call
for help.
Activating a Panic Tag
For a Panic alarm to be activated, the Panic Tag must be set in Alert mode (
)
in the Tag Settings screen (Blue button) and the Alert mode switched on (Red
button)
To activate the Panic alarm, simply press the centre of the red button on the Panic
Tag. So long as the Panic Tag is within the set safety zone the Alert Alarm will be
activated - the Handheld will vibrate, let off an alarm and identify which Tag has
activated the Panic alarm
Homing Tag
Give or attach the Tag to the child / dependant as appropriate.
ICONS AND ABBREVIATIONS
Panic Tag
Throughout the menu system a
variety of icons are used to inform
on status. The screen shots
shown contain icons you can
expect to see whilst navigating
8
Look out for our Splash proof wrist strap that can help extend the range of
your Tag when attached to a child / dependant
MENU FUNCTIONS
Locate
- Same function as Grey button. Shows list of Tags that can be
located
Alert Options (Loc8tor Plus model only) (1)
Range Settings - Enables Near (N), Medium (M) and Far (F) range to be increased or
decreased as required
- Same function as Blue button
- Control screen informing which Tag has activated an Alert alarm and
the Tags current status
Alert ON / OFF - Same function as the Red button
Tag Settings
Tag Status
(1)
Tag Options (2)
Register Tag
Rename Tag
- Same function as Yellow button. Register a new Tag
- Select Tag from list to be renamed. Enter in new name followed by
OK
Unregister Tag - Select Tag from list to be unregistered
Place Tag next to Handheld and confirm Tag is to be unregistered
This enables a Tag to be used on a different Loc8tor Handheld
Settings (3)
Lock Keypad - Protects against buttons being accidentally pressed
To unlock press Red then Blue button
- Select to adjust volume whilst locating, for Alert alarm or the
Keypad. Left / right on navigation ring decreases / increases
volume. Up / Down on navigation ring switches between volume
control and bottom menu
System Info - System information screen
Handheld ID. - It is recommend you keep a note of your Loc8tor Handheld ID
Should your Handheld ever become lost you can re-program
a new Handheld to re-register any of your existing Tags
Language
- Select preferred language
Contrast
- Enables screen contrast to be made lighter or darker
(2)
Volume
Upgrade (4)
Help / Key Guide
-
Enables a Loc8tor Handheld to be upgraded to a Loc8tor Plus
(activates Alert mode). Contact place of purchase or visit
www.Loc8tor.com/upgrade for more details
- Quick guide to what each button does and the icons used
Help button also appears at the bottom of selected screens
(3)
(4)
9
•
•
BATTERIES
Handheld
To replace batteries use 2 x AAA 1.5 volt or equivalent (Also see
Setting up your Loc8tor on page 4)
A low battery icon will appear in the top right hand corner of the
screen when Handheld batteries are running low. Batteries are able
to be used until screen starts to fade.
Please Note - Battery life will vary depending on mode and frequency
of use.
•
Tags
To change the batteries - there is a hole which you can thread the
lanyard through. Put your thumb nail or other flat tool at this end into the split line (line going around
the middle of the Tag). Keeping your thumb / flat tool in the split line move it around to the middle of
the long side. The Tag will pop open.
with SR54 (silver oxide) 1.5v button cells or equivalent to provide best battery life, keeping
- Replace
the plus side face up nearest the lanyard hole.
- Replace the lid by putting one side in first then pushing shut.
- If batteries are correctly inserted Tag will beep when case is closed.
If you locate a Tag and its battery is low a low Tag battery icon will appear in the Tag Settings screen
• (Blue
button) on the very right hand side of the screen. The Icon will appear in line with the Tag that
needs to be changed. Replace Tag batteries when icon is displayed to ensure Tag does not become
lost.
GENERAL CARE
• The Loc8tor and Tags have not been designed to be waterproof. Please take care not to get wet.
• Never clean with water, detergent or cleaning agent - simply use clean, dry cloth.
On the reverse of the Handheld lid are two black lines. These are aerials and essential to the
• functioning
of your Loc8tor. Take care not to scratch.
and Handheld operational temperature is between 0˚c to + 55˚C. Storage temperature is between
• Tag
- 10˚c and + 60˚c.
10
CHANGES
The material in this User Guide is for information only and is subject to change without notice. Whilst reasonable
efforts have been made in the preparation of these instructions to ensure its accuracy, Loc8tor Ltd. assumes no
liability resulting from errors or omissions in this User Guide, or from the use of the information contained herein.
Loc8tor Ltd. reserves the right to make changes to the product design without reservation and without notification to
its users.
Terms & Conditions
Please contact place of purchase or Loc8tor website www.Loc8tor.com for full Terms and conditions.
WARRANTY
Loc8tor Ltd warrants to the original purchaser that this product shall be free from significant defects in material and
workmanship for 1 year beginning on the date of purchase as shown on your receipt.
Should the product need to be returned it must be sent back to the original place of purchase to be processed. Proof
of purchase must accompany the returned product. If purchased direct from Loc8tor Ltd. a returns authorisation
number is required prior to the product being returned to us. Product must be returned by signed delivery in suitable
protective packaging.
This warranty does not apply to any product that has been subject to abuse, misuse, negligence, tampering or has
been modified in any way.
Without prejudice to your rights Loc8tor Ltd. may replace a defective product or issue a credit against future
purchases.
No other warranties, express or implied are made. Loc8tor Ltd. shall not be liable for any special, incidental or
consequential damages whether or not the purpose for which you purchased the product was made known to Loc8tor
Ltd, the retailer or otherwise. Your statutory rights are not affected in any way
SEE PAGE 12 FOR ‘PLEASE NOTE’ POINTS
11
PLEASE NOTE
a. 183 metre / 600 feet range is based on clear line of sight. Actual range will vary depending on use, environment
and location.
b. Loc8tor is not a toy and should only be used by adults or with parental supervision.
c. Locate mode has been designed to help find your possessions. It should not be relied on to find people.
d. Alert mode has only been designed to act as an aid to warn against items getting misplaced or stolen. It is not a
replacement for parental supervision.
e. The Loc8tor Handheld works in one mode at a time. Whilst Locating an item Alert mode will be temporarily
switched off.
f. When a Tagged item goes out of the Far range in Alert mode it may be out of range to locate.
g. Usage of the Panic Tag button is limited to approximately 1,000 presses.
h. The Loc8tor is intended to be used in accordance with instructions.
i. BEWARE OF CHOKING HAZARD – KEEP LOOSE TAGS OUT OF THE REACH OF YOUNG CHILDREN.
HANDHELD
FCC ID: TUW-LOH11
IC: 6444A-LOH11
TAG
FCC ID: TUW-LOT11
IC: 6444A-LOT11
Designed in the UK. Made in China for Loc8tor Ltd in compliance with ISO 9001:2000 Certification
Head Office
Loc8tor Ltd, Devonshire House, 404 – 406 Finchley Road, London, NW2 2HZ
Customer Services UK: 0870 111 7777
Email: [email protected]
www.loc8tor.com www.loc8tor.es www.loc8tor.fr www.loc8tor.de www.loc8tor.co.uk
THE ENTIRE CONTENTS OF THIS BROCHURE © 2006, LOC8TOR LTD.
12
FCC STATEMENT
This equipment has been tested and found to comply with the limits for a Class B digital device, pursuant to part 15 of the
FCC Rules. These limits are designed to provide reasonable protection against harmful interference in a residential
installation. This equipment generates, uses and can radiate radio frequency energy and, if not installed and used in
accordance with the instructions, may cause harmful interference to radio communications. However, there is no
guarantee that interference will not occur in a particular installation. If this equipment does cause harmful interference to
radio or television reception, which can be determined by turning the equipment off and on, the user is encouraged to try
to correct the interference by one or more of the following measures:
•
Reorient or relocate the receiving antenna.
•
Consult the dealer or an experienced radio/TV technician for help.
•
Increase the separation between the equipment and receiver.
CAUTION - Changes or modifications not expressly approved by Loc8tor Ltd can void the users authority to operate
the Loc8tor.
13