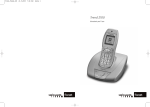
1
DENVER DDP-401
Digital cordless with handsfree Speakerphone, Caller
Display and Digital Answering Machine Facilities.
User guide
-1-
CONTENTS
TABLE OF CONTENTS
Location of controls … … … … … … … . . 3
Handset … … … … … … … … … … … … … . 3
Base unit … … … … … … … … … … … … … 4
Installation … … … … … … … … … … … . .
Unpacking … … … … … … … … … … … … .
Locating the base unit … … … … … … …
Getting connected … … … … … … … … …
Battery/Safety information … … … … … . .
Charge the batteries … … … … … … … …
On/Off-function … … … … … … … … … … .
Battery indicator … … … … … … … … … …
In-use time … … … … … … … … … … … … .
Range warning … … … … … … … … … … .
Headset Socket … … … … … … … … … …
Handset display … … … … … … … … … …
Settings … … … … … … … … … … … . 28
Handset ringer … … … … … … … … … 28
Handset language … … … … … … ..... 28
Handset keypad sound … … … … . 29
Base dialing mode … … … … … … .. 29
Direct call (baby phone feature) …..30
Handset Keypad Lock … … … … . …31
Handset babysit … … … … … … .. 31
Handset name … … … … … … … … .. 32
Base flash time … … … … … … … … 32
PIN code … … … … . … … … … … . 33
Base ringer … … … . … . … … … … … 34
Call barring … … … … … … … … … … . 35
PABX access code … … … … … … .. 36
3
5
5
5
6
6
7
7
7
8
8
9
Extending … … … … … … … … … … . . 38
DECT system … … … … … … .
38
Additional base unit … … … … … … . . 38
RFPI … … … … … … … … … … … . . 39
Additional handsets … … … … … .39
Register / Advance Register … … … . 40
Select base unit … … … … … … … … . 41
Deregister … … … … … … … … … … . 41
Internal call … … … … … … … … … … 42
Transferring calls … … … … … … … .. 42
Conference call … … … … … … … … . 43
Use … … … … … … … … … … … … … … … 10
Making an external call … … … … … … . . 10
Call timer … … … … … … … … … … … … . . 10
Answering incoming calls … … … … … . . 10
Speaker function … … … … … … … … … . 11
Volume control … … … … … … … … … … 11
Standby mode … … … … … … … … … … 12
Mute … … … … … … … … … … … … … … . 12
Page/Find handset … … … … … … … … . 12
Last number redial and CID log … … … 13
Phonebook Memory numbers … … … . 15
Others … … … … … … … … … … … … 44
Interference … … … … … … … … … … 44
Fault finding … … … … … … … … … … 44
Reset the handset PIN code … .. … . 45
Reset the handset … … … … … … . . 46
Reset the base unit … … … … … . 46
Reset the answering machine ….. 47
Quick reference guides … … … … … 48
Technical data … … … … … … … 50
Answering Machine … … … … … … … ...18
Answering machine modes … … … . 18
Light indicator … … … … … … … … . 19
Call screening functions. … … … … .. 19
Messages management … … … … .. 20
Outgoing message menu … … … … . 21
Answering machine setting menu … … 23
Voice prompt menu language … … … 26
Remote control … … … … … … … … 26
-2-
LOCATION OF CONTROLS
-3-
LOCATION OF CONTROLS
Ringer
Speaker
On/Off/Vol
Play/Stop
(DTAM indicator)
Del
FWD
BWD/Page
In-use indicator
Charge indicator
Line cord socket
Power supply socket
Microphone
Charging contacts
-4-
INSTALLATION
UNPACKING
In the box you should find the following items:
• Handset
• Powers supply
• Base unit
• Line cord
• 3 x NI-MH batteries (re-chargeable types)
• User guide
LOCATING THE BASE UNIT
It is essential to the overall range and performance that the base unit and handset can receive and
transmit good radio signals.
Place the base unit close to
• Telephone network socket
• AC main socket
The best location is in an upstairs room and central to the area to be covered. If you experience poor
range, try re-setting the base unit.
• Do not locate in direct sunlight or high humidity locations.
•
Do not locate close to: electrical equipment such as TV, computers, fridges, etc., or close to
radiators, metal pipes or window frames.
GETTING CONNECTED
1. Connect the power adaptor plug to the rear of the base unit and to an AC mains socket.
2. Connect the telephone line to the rear of the base unit and to a telephone network socket
3. Remove the battery cover from the bottom of the handset by applying gentle pressure to the bottom
of the cover and pushing away from the unit. Insert the supplied battery, observing correct polarity.
Replace the battery cover.
•
•
-5-
INSTALLATION
BATTERY
After initial charging the power adaptor must remain connected to the mains and base unit and main
power switched on. It is recommended that the handset is left on charge overnight to ensure maximum
in-use time. The batteries should hold their charge for 110 hours, depending on use. If the phone is not
to be used for a substantial period of time, i.e. holidays, disconnect the main power adaptor, when
power is reconnected it will be necessary to recharge the handset for 15 hours. The batteries will need
replacing if the batteries will not hold a charge for more than two hours. The rechargeable batteries
(NiMH) are cadmium-free and should be disposed of in a responsible and environmentally friendly
manner.
IMPORTANT!
From new, the batteries (supplied) must be charged for 15 hours without interruption. You can obtain
your replacement batteries from:
Consumer support department, __________________________
Telephone _____________________
The guarantee will be invalid if any problems arise as a result of the use of an incorrectly specified
battery.
CHARGE THE BATTERIES
When the battery is empty, calls cannot be made or received. When the battery is nearly empty the
battery indicator will show one dot and a warning tone will be heard.
SAFETY INFORMATION
This equipment is not designed for making emergency telephone calls when the power fails.
Alternative arrangements should be made for access to emergency services.
WARNING!
This electrical network is classified as according to criteria in the standard EN60-950.
The only way to power down this product is by unplugging the power cable from the electrical outlet.
Ensure the electrical outlet is located close to the apparatus and is always easily accessible. To be
able to make calls in the event of a power cut, it is recommended that this telephone be used as a
complement to another telephone that does not require mains power.
SAFTETY PRECAUTIONS
-
Do not allow the handset to come into contact with water.
Do not open the handset or the base station. This could expose you to high voltages. Contact
our after-sales service for all repairs.
Do not allow the charging contacts or the battery to come into contact with conductive material
such as keys, paper clips, rings, bracelets, etc.
Make sure you insert the batteries with their polarities in the correct position.
-6-
INSTALLATION
ON/OFF-FUNCTION
The button is used to switch the handset on. When the handset is switched off, battery power is
conserved and calls cannot be made or received.
To switch the handset off
1. Press the MENU button
2. The handset display will show PHONEBOOK
3. Press the p or q key until the display shows SWITCH OFF
4. Press the OK button to confirm
5. Your handset power will be switched off
Note: Switch the handset off before changing your new battery.
BATTERY INDICATOR
Fully charged
Half charge
Low battery. A warning beep will be heard.
IN-USE TIME
After initial charging the power adaptor must remain connected to the mains and base unit and mains
power switched on. It is recommended that the handset is left on charge overnight to ensure maximum
in-use time. The batteries should hold their charge for 110 hours in stand-by mode or 6 hours talk time,
depending on use.
-7-
INSTALLATION
RANGE WARNING
If the quality of received signal from the base station falls below a certain level.
Example: the handset is moved away from its transmission area from the base station, a “warning
tone” is issued to the user.
When the user moves towards the base station or leaves the radio shadow, the alarm is cleared.
If the handset is in the radio shadow the display will show RANGE OUT.
IMPORTANT: Due to radio interference in the environment, occasional loss of synchronization
between the handset and base may occur for a very short duration. The BASE will very quickly
change to another channel automatically to overcome the interference and restore the
synchronization.
During this short period handset display may show RANGE OUT then go back to normal.
HEADSET SOCKET
A headset can be attached to the headset socket on the left hand side. When a headset is connected
sound will not be audible through the handset speaker.
Note: Headset is an optional part. If you need to purchase please contact your agent.
-8-
INSTALLATION
HANDSET DISPLAY
Symbol
What this means when it appears
1. Battery Charge Level
This shows battery power level
2.
Setting Mode
You are setting the handset, base or phonebook function
3.
DTAM
Reserved not in use
4.
Internal Call
You are connected with other handsets
5.
External Call
You are connected to the telephone line
6.
Mute
Microphone mute
7.
CID
You received caller display messages
8.
Speaker phone
Your handset loud speaker is on
9.
Reception
Shows the strength of the signal link between handset and base
10. AM
Reserved not in use
11. PM
Reserved not in use
-9-
USE
MAKING AN EXTERNAL CALL
•
Dial the telephone number that you wish to call (the number will be visible on the display). If you
dial an incorrect digit, use the C button to erase it.
•
Press
•
To terminate the call, press
(the number will be dialed automatically).
CALL TIMER
The length of outgoing and incoming calls will be shown on the display approximately 4 seconds after
the call is terminated.
ANSWERING INCOMING CALLS
When an external call is received, the base unit and the handset will ring.
•
To take the call, press and release the button when the handset rings. When a phone call is
received the handset symbol will appear on the display.
•
To finish the call press the
button.
- 10 -
USE
SPEAKER FUNCTION
If you wish to switch hands free mode during a call. Press the handsfree button
be standing up and you must be maximum 1 meter from the handset.
The handset must
MAKING A CALL/CALL IN SPEAKER FUNCTION
•
Dial the number as normal.
•
Then the call is connected, press the
handset on a plane surface.
•
You can now talk through the microphone in the handset. To continue the call in the handset, press
the hands free button again.
•
To terminate the call, press the
. The hands free mode will now be connected. Put the
VOLUME CONTROL
The level in the handsets earpiece can be adjusted into three different levels during a call. You can
adjust either if you use headset, handset or hands free.
•
A call is connected in the handset.
•
Press the volume button, the display will show typically setting (VOL: LOW, VOL: MEDIUM,
VOL=HIGH)
•
Select your setting by pressing the volume button
•
Press the OK button or wait for a few seconds to enter call mode
- 11 -
USE
STANDBY MODE
When the handset is not in-use (standby mode) the LCD display will show the handset identity number
as well as the battery and antenna icon.
MUTE BUTTON
If during a telephone conversation, you wish to talk privately to a third party without the caller
button (the mute symbol will appear on the display). To resume the
overhearing, press and hold the
conversation, press and hold the
button on again.
PAGE/FIND HANDSET
To page or locate a missing handset, press the
30 seconds approximately.
To terminate this action, press twice on the
button on the base unit. The handset will ring for
button on the handset.
- 12 -
USE
LAST NUMBER REDIAL AND CALLER ID LOG
The telephones have an outgoing (last number redial) memory log. It can store up to 5 sets of outgoing
calls.
The user can review the LNR by pressing the p/RP button, Press the button
EXPLANATION OF CALLER ID
Caller display enables you to see who is calling from just before you answer a call and who has called
in your absence. Caller display only works when the service is implemented on your telephone line*.
When your telephone rings, the information of the incoming caller will appear on the display. If the
calling number matches the record in the phonebook of your handset, the name of the record will be
shown. Up to 10 incoming calls will be stored in the handset. The oldest number will be overwritten
automatically if the list is full.
WARNING
*Caller display is an optional telephone network service. This telephone will provide Caller Display information
provided the service is available on the telephone Network and any subscription charge (If required) has been
fulfilled. No information other than calling number will be displayed if the telephone network service provider
provides caller display information in Dual Tone Multi frequency mode. Check with your telephone Network
operator for full details.
If the Caller display service is not implemented on your telephone line, incoming call information will not be
displayed. If the handset is registered to a different base unit, any information in the call list will be lost.
Each entry in the caller list has:
• Caller name (up to 10 characters)
• Caller number (up to 20 digits)
REDIAL VIEWING CALLER DISPLAY NUMBERS
1. In the handset standby mode, press the CID button
The handset display shows number of unread CID record and total CID record.
NEW CALL
X/Y
2.
3.
4.
5.
6.
The number X indicates the unread CID record while the number Y indicates the total CID record.
Press the CID button repeatedly to scroll through the records
The number of the unread CID record will update while you are viewing the CID records.
Press the button to call back the number shown on the display
Press the MENU button to show TIME
Press the OK button to check the time of the incoming call.
Press the C button to go back to the previous state or press and hold the C button to go back to the
handset standby mode
- 13 -
USE
SAVE CALLER DISPLAY NUMBERS TO PHONE BOOK
1. In handset standby mode, press the CID button
The handset display shows number of unread CID record and total CID record
2. Press the CID button repeatedly to scroll through the records
3. Press the MENU button to show TIME
4. Press the CID button to show SAVE and press the OK button
NAME ?
5. Key in the name and press the OK button
Use the keys labeled with letters to write the name. Press once for the first labeled letter, twice for
the second and three times for the third etc. To insert a space or ‘–‘, press 1.
If you make a mistake, you can remove characters to the left of the cursor by pressing C as many
times as necessary.
6. Modify the number and press the OK button
Note: You are recommended to store the full telephone number with the STD code so that the
associated name can be displayed properly when CID comes.
ERASE CALLER DISPLAY NUMBERS
1. In handset standby mode, press the CID button
The handset display shows number of unread CID record and total CID record
2. Press the CID button repeatedly to scroll to record you want to erase
3. Press the MENU button to show TIME
4. Press the CID button until ERASE shows
5. Press the OK button to erase the CID record
ERASE ALL CALLER DISPLAY NUMBERS
1. In handset standby mode, press the CID button
The handset display shows number of unread CID record and total CID record
2. Press the CID button repeatedly to scroll to record you want to erase
3. Press the MENU button to show TIME
4. Press the CID button until ERASE ALL shows
5. Press the OK button to erase all CID records
- 14 -
USE
PHONEBOOK MEMORY NUMBERS
Your handset has 40 memories for storing telephone numbers up to 20 digits,
The name of the phone number can be stored with a maximum 10 characters.
Recalling a name and phone number
1.
2.
3.
4.
5.
6.
In handset standby mode, press the MENU button
Press p or q to scroll to PHONE BOOK and press the OK button
Press p or q to scroll to VIEW and press the OK button
If no numbers are stored a long beep will be heard
Key in the first letter of the name you are searching for
Use the keys labeled with letters to write the name. Press once for the first labeled letter, twice for
the second and three times for the third etc. To enter a space or ‘–‘, press 1.
Press p or q repeatedly until the desired name and number appears
Press the phone button
STORING MEMORY NUMBERS
1. Press the MENU button
2. Press p or q to scroll to PHONE BOOK and press the OK button
3. Press p or q to scroll to ADD ENTRY and press the OK button
NAME ?
4. Key in the name and press the OK button
Use the keys labeled with letters to write the name. Press once for the first labeled letter, twice
for the second and three times for the third etc. To insert a space or ‘–‘, press 1.
If you make a mistake, you can remove characters to the left of the cursor by pressing C as
many times as necessary.
NUMBER ?
5. Key in the number and press the OK button
Use the keys labeled with number to enter the number. To insert a pause, press the R button
6. Two short beeps will be heard and the handset will automatically return to the standby mode
- 15 -
USE
To search for a number in memory
1. Press the MENU button
2. Press p or q to scroll to PHONE BOOK and press the OK button
3. Press p or q to scroll to SEARCH and press the OK button
NAME ?
4. Key in the first letter(s) of the name you are searching for and press the OK button
Use the keys labeled with letters to write the name. Press once for the first labeled letter, twice for
the second and three times for the third etc. To insert a space or ‘–‘, press 1.
If you make a mistake, you can remove characters to the left of the cursor by pressing C as many
times as necessary.
5. Press p or q repeatedly until the desired name and number appears
You can hold the C button to go back to standby mode.
To modify a number in memory
1.
2.
3.
4.
5.
6.
7.
8.
9.
Press the MENU button
Press p or q to scroll to PHONE BOOK and press the OK button
Press p or q to scroll to EDIT and press the OK button
Key in the first letter of the name you are searching for
Use the keys labeled with letters to write the name. Press once for the first labeled letter, twice for
the second and three times for the third etc. To enter a space or ‘–‘, press 1.
Press p or q repeatedly until the name you want appears
Press the OK button
Modify the name and press the OK button
Use the keys labeled with letters to write the name. Press once for the first labeled letter, twice for
the second and three times for the third etc. To enter a space or ‘–‘, press 1.
You can remove characters to the left of the cursor by pressing C as many times as necessary.
Modify the number and press the OK button
Use the keys labeled with number to enter number. To insert a pause, press the R button
Two short beeps will be heard and the handset will automatically return to the standby mode
- 16 -
USE
To clear a stored number from memory
Press the MENU button
Press p or q to scroll to PHONE BOOK and press the OK button
Press p or q to scroll to ERASE and press the OK button
Key in the first letter of the name you are searching for
Use the keys labeled with letters to write the name. Press once for the first labeled letter, twice for
the second and three times for the third etc. To enter a space or ‘–‘, press 1.
5. Press p or q repeatedly until the name you want appears
6. Press the OK button
1.
2.
3.
4.
CONFIRM?
7. Press the OK button to confirm, two short beeps will be heard and the handset will automatically
return to standby mode
To clear all stored numbers from memory
Press the MENU button
Press p or q to scroll to PHONE BOOK and press the OK button
Press p or q to scroll to ERASE ALL and press the OK button
Key in the first letter of the name you are searching for
Use the keys labeled with letters to write the name. Press once for the first labeled letter, twice for
the second and three times for the third etc. To enter a space or ‘–‘, press 1.
5. Press p or q repeatedly until the name you want appears
6. Press the OK button
1.
2.
3.
4.
CONFIRM ?
7. Press the OK button to confirm, two short beeps will be heard and the handset will automatically
return to standby mode
- 17 -
ANSWERING MACHINE
EXPLANATION OF DIGITAL ANSWERING MACHINE
Digital Telephone Answering Machine enables you to answer the call automatically by the telephone
when you are not available to accept the call. The digital answering machine will announce an
outgoing message to the caller and record a message left by the caller. Up to 25 minutes speech
voice recording time can be used.
From the base you can:
Switch the answer machine to ANSWER AND RECORD, ANSWER ONLY or OFF
Listen to messages
Delete messages received
Record a personal outgoing message
Config the answering machine setting
DIGITAL ANSWERING MACHINE WARNING
All operations cannot be operated while incoming call ringing or recording caller’s message unless
declared. If you are performing any operation, any incoming call ringing will return the base to standby
mode immediately for the preparation of next recording. All operation previously running will be
stopped. No operation can be done until the ring expires for 9 seconds. An error tone will be heard if
any key is pressed within this period.
While recording the caller’s message, any call waiting incoming call will disturb the recording, tones
and noise will be heard from the message.
Operations of the remote control may affected by the background noise, sound quality, variation of
DTMF of the telephone that the user using. It is not guaranteed that all the telephones can perform all
the operations properly.
SWITCHING THE ANSWERING MACHINE MODES
When the base is powered up, the answer machine will default OFF.
In standby mode,
Answer and record:
Press the ON/OFF button to switch the answer machine on with recording.
The light on the PLAY button illuminates. An answer record sound (WING~~) should be heard.
The outgoing message will be switched to personal recorded answer record OGM if you have a
personal recorded answer record OGM, otherwise, the factory recorded answer record OGM will be
used.
- 18 -
ANSWERING MACHINE
Answer only:
If you want to switch the answer machine in answer only mode, press the ON/OFF button again.
The light on the PLAY button remains illuminates. An answer only sound (DO~DI~) should be
heard. The outgoing message will be switched to personal recorded answer only OGM if you have
a personal recorded answer only OGM, otherwise, the factory recorded answer only OGM will be
used.
Answer off:
If you want to switch the answer machine off, press the ON/OFF button again.
The light on the PLAY button goes out. An off sound (FLIK~~) should be heard.
If you can’t turn the answer machine into record mode and hear a warning beep while pressing the
ON/OFF button, the memory of the answer machine may be full, try to delete some messages and try
again.
The answer machine will automatically turn into answer only mode if your memory is full or you have
more than 59 messages. The following picture shows the order of the functions of the ON/OFF button:
Answer with record
Answer only
Answer off
MEANING OF THE GREEN LIGHT INDICATOR ON THE PLAY BUTTON
Green light indicator status Meaning
Lights Up
Answering machine is on with no new message
Slowly Flashing (^ ^ ^)
Answering machine is on with new message(s)
Rapidly Flashing (^^^^^^)
Answering machine is on and the memory is full
Double Flashing (^^ ^^ ^^ ) Answering machine is in use (not in standby mode)
Goes Out
Answering machine is off
Note: If the Answering machine is in OFF status, new message(s) and memory full indicator will not
work.
SWITCHING CALL SCREENING ON OR OFF
With call screening on, you can listen to the caller’s message via the base loudspeaker while the
answering machine is recording, without being heard. You can answer the call by the handset any time
you want. The answering machine will stop recording at once if you answer the call. This function
only works with answer record mode.
In standby mode,
Press the DEL button to switch the call screening on or off.
- 19 -
ANSWERING MACHINE
If the call screening is on, a call screening on sound (DING~~) should be heard. If the call screening is
off, a off sound (FLIK~~) will be heard.
TEMPORARY SWITCHING CALL SCREENING ON OR OFF
This function only provided if call screening is originally ON.
If your answering machine is in Answer and Record mode and call screening is on.
You can temporary switch call screening on or off while someone is leaving a message to you.
Press DEL button to switch the call screening on or off temporarily. You can switch off the
loudspeaker by switching call screening temporarily OFF.
The changes of call screening function only valid within that call. After the call, the call screening
function remains ON even if you temporarily switched it OFF.
CHANGE THE LOUDSPEAKER VOLUME WHILE CALL SCREENING
This function only provided if call screening is originally ON.
If your answering machine is in Answer and Record mode and call screening is on.
You can change the loudspeaker volume according to your preference while someone is leaving a
message to you.
The default loudspeaker volume is MEDIUM, press VOL button to change the volume from MEDIUM
-> LOW -> HIGH -> MEDIUM -> ….
LISTENING TO MESSAGES RECEIVED
In standby mode,
Press the PLAY button to listen the message received.
A voice indicates the total number of new messages you have received.
The base starts playing all new messages, starting with the latest one.
There should be time stamp before each message.
The default loudspeaker volume is MEDIUM, you can adjust the loudspeaker volume by pressing the
VOL button. The picture below shows the sequence of the volume setting.
Volume MEDIUM
Press VOLUME button
Press VOLUME button
Volume HIGH
Volume LOW
Press VOLUME button
- 20 -
ANSWERING MACHINE
Press the FWD button to jump to the next message.
Press the BWD button to jump to the previous message.
Press the PLAY button to stop message playback.
Press the FWD button and hold to increase the playback speed.
Press the BWD button and hold to decrease the playback speed.
Press the PLAY button and hold to play at normal speed.
The playback speed will return to normal if the next message starts.
When the base has finished playing the last message, it will stop automatically and return to standby
mode
DELETEING A MESSAGE
When the base is playing a message you wish to delete, press the DELETE button
A validation beep is issued confirming that the message has been deleted.
DELETEING ALL MESSAGES
When the base is in standby mode, press the DELETE button and hold.
A validation beep is issued confirming that all the messages have been deleted. Note that this function
will not delete any personal recorded OGMs.
A warning beep is heard if there is no message to delete.
ENTERING THE Outgoing Message (OGM) MENU
When the base is in standby mode, press the PLAY button and hold.
The base will enter the OGM menu and playback the OGM menu instructions for you.
The base will stay in the OGM menu mode 30 sec until you have further action.
There are two outgoing messages exists in the system, one for answer record, one for answer only.
You can personally record both outgoing messages to override the factory recordings. You can delete
your own recordings in order to return to factory recorded outgoing message.
PLAYBACK THE OUTGOING MESSAGES CURRENTLY USED
When the base is in OGM menu mode, press the PLAY button.
You will hear “Outgoing message for Answer and Record” from the base.
- 21 -
ANSWERING MACHINE
Press BWD or FWD button to change the outgoing message you want to listen. The system will
change between “Outgoing message for Answer and Record” and “Outgoing message for Answer
Only”.
Press the PLAY button to playback the outgoing message you selected.
If you have a personal outgoing message recorded, personal recordings will override the factory
default recording.
You cannot have any operations until the outgoing message has been finished playback. After
playback, the base will stay in the OGM menu mode 30 sec until you have further action.
RECORD A PERSONAL OUTGOING MESSAGE FOR ANSWER AND
RECORD MODE
When the base is in OGM menu mode, press the FWD button to record the outgoing message for
Answer and Record mode.
A start recording beep is heard. You can record your outgoing message after the beep.
If you have already have a recorded OGM for Answer and Record mode, the old one will be deleted
automatically. If the memory is full, you will hear an error beep and recording will be stopped.
To have better recording quality, record in a quiet area and speak to the base at a distance of 8-10
inches.
To manually end the outgoing message recording, press the STOP button once.
The base will automatically playback the message you just recorded.
After the playback, the base will stay in the OGM menu mode 30 sec until you have further action.
RECORD A PERSONAL OUTGOING MESSAGE FOR ANSWER ONLY MODE
When the base is in OGM menu mode, press the BWD button to record the outgoing message for
Answer Only mode.
A start recording beep is heard. You can record your outgoing message after the beep.
If you have already have a recorded outgoing message for Answer Only mode, the old one will be
deleted automatically. If the memory is full, you will hear an error beep and recording will be stopped.
To have better recording quality, record in a quiet area and speak to the base at a distance of 8-10
inches.
To manually end the outgoing message recording, press the STOP button once.
- 22 -
ANSWERING MACHINE
The base will automatically playback the message you just recorded.
After the playback, the base will stay in the OGM menu mode 30 sec until you have further action.
DELETING A PERSONAL OUTGOING MESSAGE
When the base is in OGM menu mode, press the DEL button.
You will hear “Outgoing message for Answer and Record” from the base.
Press BWD or FWD button to change the outgoing message you want to delete. The system will
change between “Outgoing message for Answer and Record” and “Outgoing message for Answer
Only”.
Press the PLAY button to delete the outgoing message you selected.
A validation beep is issued confirming that the selected outgoing message has been deleted. The
factory recorded outgoing message will be replaced for your outgoing message deleted.
The base will stay in the OGM menu mode 30 sec until you have further action.
EXITING THE OGM MENU
When the base is in OGM menu mode, press the ON/OFF button once.
The base will return to standby mode with an exit tone.
ENTERING THE ANSWERING MACHINE SETTING MENU
When the base is in standby mode, press the FWD button and hold.
The base will enter the setting menu and playback the instructions.
The base will stay in the setting menu mode 30 sec until you have further action.
SETTING THE WEEKDAY AND TIME
The answering machine provides the time stamp for each incoming message. Time and weekday
information is used when you playback the message.
When the base is in setting menu mode, press the DEL button.
- 23 -
ANSWERING MACHINE
You will hear the current time and weekday from the base. Wait until it has finished playback. Press
PLAY button to accept the setting and return to setting menu.
To change the setting, press FWD or BWD button.
You will hear 0, 10 or 20 from the base. This is the tenth digit of the hour.
Press BWD or FWD button to change the value. You will hear the new value each time you change.
Press the PLAY button to confirm the value of the tenth digit of the correct hour.
You will hear a number within 0-23 from the base. (dependent of the tenth digit you set) This is the
value of the hour.
Press BWD or FWD button to change the value. You will hear the new value each time you change.
Press the PLAY button to confirm the value of the correct hour.
You will hear 0, 10, 20, 30, 40 or 50 from the base. This is the tenth digit of the minute.
Press BWD or FWD button to change the value. You will hear the new value each time you change.
Press the PLAY button to confirm the value of the tenth digit of the correct minute.
You will hear a number with 0-59 from the base. (dependent of the tenth digit you set) This is the value
of the minute.
Press BWD or FWD button to change the value. You will hear the new value each time you change.
Press the PLAY button to confirm the value of the unit digit of the correct minute.
You will hear current setting of the weekday from the base.
Press BWD or FWD button to change the value. You will hear the new value each time you change.
Press the PLAY button to confirm the correct weekday.
You will hear the current time and weekday from the base. Wait until it has finished playback.
Press the PLAY button to confirm the correct time and weekday.
The base will automatically return to setting menu and wait for your further action
Note:
For those telephone line with Caller ID. The time will be automatically synchronized to
the telephone line provider to ensure the correctness. But the weekday won’t be changed.
- 24 -
ANSWERING MACHINE
SETTING THE NUMBER OF RINGS
The answering machine waits several rings before it answers calls. You can select the number of rings
that the answering machine waits to 3, 6, 9 or toll save.
When the base is in setting menu mode, press the FWD button.
You will hear the current setting of number of ring. Press PLAY button to accept the setting and return
to setting menu.
To change the setting, press FWD or BWD button.
You will hear the new value each time you change.
Press the PLAY button to confirm the setting.
The base will automatically return to setting menu and wait for your further action.
Toll save: To set the answer machine in toll save mode, select “Toll save” in the menu. The
answer machine will automatically switch between 3 rings and 9 rings dependent on whether is
there any new message. If there is any new message, it will answer any call in 3 rings, otherwise
in 9 rings.
SETTING THE RECORD QUALITY
The answering machine records messages according to the record quality setting. You can select the
record quality low, normal or high.
With high quality, the recording capacity for speech voice is about 15 minutes.
With normal quality, the recording capacity for speech voice is about 20 minutes.
With low quality, the recording capacity for speech voice is about 25 minutes.
When the base is in setting menu mode, press the BWD button.
You will hear the current setting of record quality. Press PLAY button to accept the setting and return
to setting menu.
To change the setting, press FWD or BWD button.
You will hear the new value each time you change.
Press the PLAY button to confirm the setting.
The base will automatically return to setting menu and wait for your further action.
The new setting will apply to the messages newly record.
- 25 -
ANSWERING MACHINE
EXITING THE ANSWERING MACHINE SETTING MENU
When the base is in setting menu mode, press the ON/OFF button once.
The base will return to standby mode with an exit tone.
SELECTING THE LANGUAGE of VOICE PROMPT MENU
When the base is in standby mode, press the ON/OFF button and hold until you heard your current
language setting.
Press PLAY button to accept the setting and return to standby mode.
To change the setting, press FWD or BWD button.
You will hear the new value each time you change.
Press the PLAY button to confirm the setting.
The base will return to standby mode with an exit tone.
REMOTE CONTROL OF THE ANSWER MACHINE
You can access to your answering machine via a simple telephone call if your answering machine is
either in recording mode or answer mode.
The base PINCODE is “1590” from new, this can be personalized using your handset to change your
base PINCODE. (see SETTING…PINCODE)
Switch your answering machine to Answer and Record mode or Answer Only mode.
On a telephone that use DTMF dial mode and has the 0-9, * and # key:
Dial your phone number, wait for answer.
Wait for the whole outgoing message and the beep sound finished. If your answering machine is
Answer Only mode, you will have about 5 seconds to input your operations before the telephone line is
dropped.
Press
* and then enter your BASE PINCODE, stop with a #.
If your PINCODE is correct, you will hear message playback just the same as you press PLAY button
on your base. If your PINCODE is not correct, you telephone line will be dropped. If you input your
- 26 -
ANSWERING MACHINE
PINCODE wrongly before press #, press * to clear all digits you have entered and re-enter your master
PINCODE from the beginning.
Use the telephone keys to consult your messages, here are the key definitions:
Key
3
5
Functions when playing messages
3
Delete (delete the message current playing)
STOP (stop playing the message)
Delete
4
5
BWD
Stop
6
FWD
0
Exit (onhook)
4
BWD (play the previous message)
6
FWD (play the next message)
0
Exit (exit the remote control and drop the telephone)
To change the setting of your answering machine, press 5 to stop all your playback.
Use the telephone keys to consult your setting, here are the key definitions:
Key
Functions when not playing messages
1
On/Off (->Answer and record -> Answer only -> Off ->)
7
Record the outgoing message for answer only mode (Press any digit to stop record,
will automatically playback after recording, no operations can be done while
playback. If the memory is full, the recording will be stopped.)
9
Record the outgoing message for answer and record mode (Press any digit to stop
record, will automatically playback after recording, no operations can be done while
playback. If the memory is full, the recording will be stopped.)
5
0
PLAY (playback the message)
Exit (exit the remote control and on-hook)
1
On/Off
5
Play
7
Record Answer
Only OGM
To minimize your telephone cost charge, make it an
habit to enter “0” before you on-hook.
- 27 -
9
Record Answer
0
and Record OGM
Exit (onhook)
SETTING
To change any of the telephone settings, press the MENU button first and then
Press the p or q button to select the desired function.
For details please refer to the quick reference guide.
To terminate and return to the standby mode, press and hold down the C button for two seconds.
HANDSET RINGER
The handset rings for internal and external calls. Different ringer melody and volume can be selected
for internal and external calls.
HANDSET RINGER MELODY AND RING LEVEL
You can change the ringer volume level in four levels, off, low, normal and high.
You can also change the ring signal melody four different types are available.
For easy identification, it is recommended that to use different melodies for external and internal calls.
1.
Press the MENU button.
2.
Press the p or q button until the display shows HANDSET
3.
Press the OK button
4.
Press the p or q button until the display shows INT RING ( internal ring ) or EXT RING ( external
ring )
5.
Press the OK button the display will show IRING X ( X is the melody type 1 – 4 )
6.
Select the desired melody by pressing p or q
7.
Press the OK button display will show INT RING OR EXT RING X Y
( Y is the ringer volume 1=OFF, 2=LOW, 3=MEDIUM, 4=HIGH )
8.
Select the ring level by pressing p or q
9.
Press the OK button to confirm, two short beeps will be heard
10. The handset will return to the standby mode automatically
HANDSET LANGUAGE
You can select the display language as your preferred language.
1. Press the MENU button
- 28 -
SETTING
2. Press the p or q button until the display shows HANDSET, press the OK button to confirm
3. Press the p or q button until the display shows LANGUAGE
4. Press the OK button
5. Press p or q to select your preferred language and press the OK button to confirm.
6. The handset will return to the standby mode automatically
HANDSET KEYPAD SOUND
From new, the handset keypad is programmed to emit a confirmation beep every time a key is pressed.
This beep can be turned off as desired.
1.
Press the MENU button.
2.
Press the p or q button until the display will show HANDSET
3.
Press the OK button
4.
Press the p or q button until the display shows KEY CLICK
5.
Press the OK button to toggle the selection, two short beeps will be heard
6.
The handset will return to the standby mode automatically
BASE DIALING MODE
From new, the base is programmed to dial out every digit in DTMF mode. This dial mode can be
changed to PULSE mode.
1.
Press the MENU button.
2.
Press the p or q button until the display shows BASE
3.
Press the OK button
4.
The display shows PIN :
5.
Enter the base PIN code (1590 from new)
6.
If the PIN code is accepted the display will show FLASH TIME
7.
Press the p or q button until the display will show DIAL MODE
8.
Press the OK button
- 29 -
SETTING
9.
Press the p or q button to set the dial mode to DTMF or PULSE mode.
10. Press the OK button to select, two short beeps will be heard.
11. The handset will show FLASH TIME and return to the base setting mode.
12. Press and hold C button for two seconds to return to standby mode.
Temporary DTMF dial:
If you set the base dialing method as PULSE mode, you can temporarily dial out DTMF during call.
During call, you can press and hold the * button to activate the feature. You will send out DTMF instead of
PULSE stream after activated throughout that call. The temporary DTMF dial will automatic inactivate after
each call.
HANDSET DIRECT CALL (baby call feature)
This feature enables the handset to be pre-programmed with an emergency number which can be
dialed automatically by pressing any button (except the Menu button). It is possible to answer calls
even if this feature is implemented. DIRECT will be displayed when the function is activated.
STORING AND ACTIVATION OF THE DIRECT CALL NUMBER
1.
Press the MENU button.
2.
Press the p or q button until the display shows HANDSET, Press the OK button to confirm
3.
The display will show DIRECT, Press the OK to confirm
4.
The display will show EMPTY if from new or your previous direct call number.
5.
Enter the direct call number with a maximum of 25 digits
6.
Press the OK button to enable the DIRECT CALL function
Note: To modify the direct call number, repeat steps 1 to 4, then press the C button to erase previously entered
digits.
ACTIVATING DIRECT CALL
1.
Press the MENU button
2.
Press the p or q button until the display shows HANDSET, Press the OK button to confirm
3.
The display will show DIRECT, Press the OK button to confirm
4.
The display will show the direct call number.
5.
Press the OK button to activate the DIRECT CALL feature
- 30 -
SETTINGS
DEACTIVATING DIRECT CALL
1.
Press the MENU button twice within half a second
2. You will hear two short beeps, the phone will return to standby mode automatically
HANDSET KEYPAD LOCK
The telephone has a function that allows you to disable all outgoing calls and/or all functions.
LOCKED will be displayed when the lock function is activated.
LOCKING / UNLOCKING THE PHONE KEYPAD
1.
Press the MENU button followed by the
2.
The display will show LOCKED.
3.
Press the MENU button followed by the
*
button
*
button to unlock the phone
HANDSET BABY SIT (only available with at least one optional handset)
You can use one handset as babysitter (monitoring handset) and monitor a room, i.e. a child’s
bedroom, for noises. When this function is enabled the handset will automatically pickup an internal
call and the caller can listen. You can also talk to the monitoring handset and your voice will be heard
from the speakerphone.
ACTIVATING / DEACTIVATING BABY SIT
1. Press the MENU button
2. Press the p or q button until the display shows HANDSET, Press OK to confirm
3. Pres the p or q button until the display shows BABYSIT
4.
Press the OK button to toggle your changes
5.
The display will show BABYSIT ON or BABYSIT OFF
6.
Your handset will return to standby mode automatically.
- 31 -
SETTINGS
HANDSET NAME
You can store a maximum of 8-digit alphanumeric character into the handset for identification. During
idle mode the handset name and ID number will be displayed.
STORING THE HANDSET NAME
1. Press the MENU button.
2. Press the p or q button until the display shows HANDSET, Press the OK button to confirm
3. Press the p or q button until the display shows HS NAME, Press the OK button to confirm
4. Enter alphanumeric characters with a maximum of 8 digits, Press the OK button to store
Note: To modify the Handset Name, repeat steps 1 to 3, and then press the C button to erase
previously entered digits.
BASE FLASH TIME
The base can be set to send either standard or long flash signal to the telephone line. The default
setting is country dependent. If an illegal setting is selected, flash will not be function.
CHANGING BASE FLASH TIME
1. Press the MENU button.
2. Press the p or q button until the display shows BASE
3. Press the OK button
4. The display shows PIN :
5. Enter the base PIN code (1590 from new)
6. If the PIN code is accepted the display will show FLASH TIME
7. Press the p or q button until the display will show FLASH TIME
8. Press the OK button
9. Press the p or q button to set the dial mode to FLASH or LONG FLASH.
13. Press the OK button to select, two short beeps will be heard.
14. The handset will show FLASH TIME and return to the base setting mode.
15. Press and hold C button for two seconds to return to standby mode.
- 32 -
SETTINGS
PIN-CODE
This telephone has following PIN codes (Personal Identification Number):
- Subscription PIN code, used to subscribe a new handset to a base station. It is only valid for
one subscription.
- BASE PIN code, used to access the base setting mode. The base setting mode is a special
mode, where a handset is used to control the settings of the base station and for system
administration tasks.
- Handset PIN code, used to reset the handset.
These PIN codes are all factory set to 1590. They can (and should) be changed by the user as soon
as possible to avoid fraudulent attacks on the system.
BASE UNIT PIN-CODE
The base unit PIN-code is used for accessing the base setting mode. From new the base unit PINcode is 1590. It is recommended that you change it with a new PIN-code. (1-8digits).
7.
Press the MENU button.
8.
Press the p or q button until the display shows BASE
9.
Press the OK button
10. The display shows PIN :
11. Enter the base PIN code (1590 from new)
12. If the PIN code is accepted the display will show FLASH TIME
13. Press the p or q button until the display shows CHANGE PIN
14. Press the OK button the display will show PIN :
15. Enter the new base PIN code (1-8 digits)
16. Press the OK button to confirm
17. The display will show PIN : again
18. Re-enter the new base PIN code (1-8 digits) followed by the OK button to confirm.
19. The handset will show FLASH TIME and return to the base setting mode.
20. Press and hold C button for two seconds to return to standby mode.
- 33 -
SETTINGS
HANDSET PIN-CODE
The handset PIN-code is used for resetting handset to default setting. From new the base unit PINcode is 1590. To prevent someone resets your handset, it is recommended that you change it with a
new PIN-code. (1-8digits).
1. Press the MENU button.
2. Press the p or q button until the display shows HANDSET
3. Press the OK button
4. Press the p or q button until the display shows PIN RESET
5. Press the OK button the display will show HS PIN :
6. Enter the old handset PIN code (1-8 digits), press the OK button to confirm
7. The display will show NEW PIN :
8. Enter the new handset PIN code (1-8 digits), press the OK button to confirm
9. The display will show RETYPE:
10. Re-enter the new handset PIN code (1-8 digits), press the OK button to confirm.
11. Two short beeps will be heard for success, the phone will return to standby mode automatically
BASE RINGER
The base only rings on incoming external calls, ringer melody and volume can be changed for
preference of users.
BASE UNIT RINGER MELODY
There are four settings available (TYPE 1 TO 4 melody) for the base unit ringer.
1.
Press the MENU button.
2.
Press the p or q button until the display shows BASE
3.
Press the OK button
4.
The display shows PIN :
5.
Enter the base pin code (1590 from new)
6.
If the base pin code is accepted the display will show FLASH TIME
- 34 -
SETTINGS
7.
Press the p or q button until the display shows MELODY
8.
Press the OK button the display will show B MELODY X (melody type 1 – 4)
9.
Select the desired melody by pressing p or q
10. Press the OK button to confirm.
11. The handset will show FLASH TIME and return to the base setting mode.
12. Press and hold C button for two seconds to return to standby mode.
BASE UNIT RINGER LEVEL
There are four setting available (off, low, medium and high) for the base unit ringer level.
1.
Press the MENU button.
2.
Press the p or q button until the display shows BASE
3.
Press the OK button
4.
The display will show PIN :
5.
Enter the base PIN code (1590 from new)
6.
If the base PIN code is accepted the display will show FLASH TIME
7.
Press the p or q button until the display shows VOLUME
8.
Press the OK button the display will show B VOLUME Y
9.
( Y is the ringer volume 1=OFF, 2=LOW, 3=MEDIUM, 4=HIGH )
10. Select the desired level by pressing p or q
11. Press the OK button to confirm
12. The handset will show FLASH TIME and return to the base setting mode.
13. Press and hold C button for two seconds to return to standby mode.
CALL BARRING
Call barring can be employed to restrict the use of the handset and stop users making expensive calls
to international numbers or to premium rate numbers. The base unit can barr up to 5 numbers (of 5
digits each) on each handset.
- 35 -
SETTINGS
SET BLOCK NUMBER
1.
Press the MENU button.
2.
Press the p or q button until the display shows BASE, Press the OK button to confirm
3.
The display will show PIN :
4.
Enter the base PIN code (1590 from new)
5.
If the base PIN code is accepted the display will show FLASH TIME
6.
Press the p or q button until the display shows BARRING, Press the OK button to confirm
7.
The display will show NO 1 or EMPTY (No 1 is the first barred number, if nothing show empty)
8.
Press the q button to scroll between the five barred numbers
9.
Enter the number you wish to bar (max. 5 digits). If you enter an incorrect digit, press the C button
to erase
10. Press the OK button to confirm, the display will show HS ------11. Enter the number of the handset that you wish this barr to valid. Press the corresponding key digit
for these handsets. Press again to take away the barr.
12. The handset will show FLASH TIME and return to the base setting mode.
16. Press and hold C button for two seconds to return to standby mode.
PABX ACCESS CODE
In some PABX which do not automatically obtain the exchange identification code to the public network,
Then you may need to program the public access code up to 4 digits.
If your dialed digits prefix matches with the PABX ACCESS CODE, your telephone will automatically
insert a dial pause after the exchange identification code.
STORING THE PABX NUMBER
1. Press the MENU button.
2. Press the p or q button until the display shows BASE, Press the OK button to confirm
3. The display will show PIN :
4. Enter the base PIN code (1590 from new), press the OK button to confirm
- 36 -
SETTINGS
5. Press the p or q button until the display shows PABX, press the OK button to confirm
6. The display will show EMPTY
7. Enter the access number with maximum of 4 digits, Press the OK button to store.
8. The handset will show FLASH TIME and return to the base setting mode.
9. Press and hold C button for two seconds to return to standby mode.
Note: To modify the PABX access code, repeat steps 1 to 5. Then press the C button to delete
previously entered digits.
TO ACTIVATE And DEACTIVATE PABX ACCESS CODE
1. Press the MENU button.
2. Pres the p or q button until the display shows BASE, Press the OK button to confirm
3. The display will show PIN :
4. Enter the base PIN code (1590 from new) , press the OK button to confirm
5. Press the p or q button until the display shows PABX, Press the OK to button confirm
6. If the display shows EMPTY this means the PABX ACCESS CODE is OFF
7. If the display shows a number this means the PABX ACCESS CODE is ON, you can use the C
button to delete the number, and then press the OK button to turn the PABX ACCESS CODE OFF.
8. The handset will show FLASH TIME and return to the base setting mode.
9. Press and hold C button for two seconds to return to standby mode.
- 37 -
EXTENDING
DECT-SYSTEM
The telephone can form the basis of a multi-handset DECT telephone system that will allow you to:
-
Register up to 7 handsets to the same base unit.
Register up to 4 base units to same handset.
Make an internal call and transfer calls from one handset to another handset that is connected
to the same base unit.
Register other GAP (Generic Access Profile) compatible handsets to the base unit.
ADDITIONAL BASE UNITS
By connecting several base units to one system, the range of each handset can be extended, but it is
critical that all base units are within range of each other. Otherwise it may be that dead spots occur
where reception is not possible. It is recommended that when a new base unit is located, a handset is
used to make a call and test the range.
It is also possible to locate one base unit at home and one base unit at work, and use one handset at
both locations.
The picture below illustrates a system with four base units ,A-D.
The overlapping circular lines show the range of each Base unit.
A
B
C
- 38 -
EXTENDING
RFPI
RFPI is a number that identify different DECT base unit. Each base unit has a unique RFPI number.
Viewing base RFPI
To display the RFPI of the base that the handset currently locked to.
1. Press the MENU button.
2. Press the p or q button until the display shows HANDSET, press the OK button to confirm
3. Press the p or q button until the display shows RFPI, press the OK button to confirm
4. RFPI number will be shown, press the OK button to return to standby mode.
ADDITIONAL HANDSETS
Adding additional handsets to the system allows all users to make full use of the call transfer and
intercom facilities. A maximum of one external call and one internal call can be processed at the
same time.
If an additional handset is added to the system, the batteries must be charged for 15 hours without
interruption. The registration procedure must be performed prior to use. The registration gives each
handset a specific identity number 1 to 7. This number is used for internal calls only. From new, the
handset is already registered to the base unit and has been allocated number 1.
- 39 -
EXTENDING
REGISTERING A HANDSET TO THE BASE UNIT
If an additional handset is added to the system, it must be registered to the base unit.
1. Press the BASE page button
and hold down (about 10 seconds) until the base beeps twice.
2.
Press the MENU button on the handset.
3.
Press the p or q button until the display shows HANDSET, Press the OK button
4.
Press the p or q button until the display shows SUBSCRIBE
5.
Press the OK button the display will show SUB BASE :
6.
Select the base units number by pressing on the keypad 1-4
7.
After a few seconds, the display will show the base units ID code( RFPI)
8.
Press the OK button to confirm
9.
Enter the subscription PIN code (default 1590) when the text “PIN” is displayed
10. Press the OK button to confirm
11. The handset will enter standby mode after a few seconds
ADVANCED REGISTRATION
This is practical if the base unit is placed on a high place where you cannot reach it and press the page
button.
1.
Press the MENU button on the already registered handset.
2.
Press the p or q button until the display shows BASE , Press the OK button to confirm
3.
The display will show PIN :
4.
Enter the base PIN code (1590 from new) , Press the OK button to confirm
5.
Press the p or q button until the display shows ADD HS, Press the OK button to confirm
6.
Enter a four digit subscription PIN code when the text PIN : is displayed
7.
Press the OK button to confirm
8.
Press and hold the C button to enter standby mode
9.
Put down this registered handset and perform the operations below to the handset which you want
to register
- 40 -
EXTENDING
10. Press the MENU button on the handset.
11. Press the p or q button until the display shows HANDSET, Press the OK button
12. Press the p or q button until the display shows SUBSCRIBE
13. Press the OK button the display will show SUB BASE :
14. Select the base units number by pressing on the keypad 1-4
15. The base units ID code (RFPI) will be shown on the display, press the OK button to confirm
16. Enter the subscription PIN code assigned in step 6 when the text “PIN” is displayed
17. Press the OK button to confirm
18. The handset will enter standby mode after a few seconds
SELECT BASE UNIT
If the handset is registered to more than one base unit, you can select one base unit as a special base
unit irrespective of how many base units are registered.
1.
Press the MENU button
2.
Press the p or q button until the display shows HANDSET, Press the OK button to confirm
3.
Press the p or q button until the display shows BS SELECT, Press the OK button to confirm
4.
The display will show the current base setting BASE: 1 ( 1= base number one, 2 = base number
two …etc)
5.
Enter the desired base setting using the keypad digits 1-4, Press the OK button to confirm
6.
The handset will show FLASH TIME and return to the base setting mode.
7.
Press and hold C button for two seconds to return to standby mode.
DEREGISTER
A handset can be de-registered from a base unit as follows:
1.
Make sure that the other handset is in standby mode
2.
Press the MENU button on the already registered handset.
3.
Press the p or q button until the display shows BASE, Press the OK button to confirm
- 41 -
EXTENDING
4.
The display will show PIN :
5.
Enter the base PIN code (1590 from new), Press the OK button to confirm
6.
Press the p or q button until the display shows REMOVE HS, Press the OK button to confirm
7.
Press the handset identity number 1 to 7 which you wish to de-register
8.
Press the OK button to confirm
9.
The handset will show FLASH TIME and return to the base setting mode.
10. Press and hold C button for two seconds to return to standby mode.
INTERCOM CALL
When two or more handsets are registered to the same base unit it is possible to call handset to
handset. This call will not charged by your Network operator.
lNT button
1.
Press and hold the
2.
Enter the handset number of the handset you wish to call
3.
Press the talk button
to terminate the call
will appear on the display of the called handset. The ringer sound is also different from an
external call.
If an external call is received while an internal call is in progress, a reminder tone will be heard and
in the display on the handset will flash.
Press the talk button to terminate the Internal call and when you hear the ring signal in the handset you
can answer the incoming call by pressing the button again.
TRANSFERRING CALLS
An external call can be transferred from one handset to another (both handset must be registered to
the same base unit).
When an external call is connected, press and hold the INT button. Enter the handset identity number
of the handset to which the call is to be transferred. The called handset user can press the talk button
to take the call. The calling handset user presses the button to transfer the call.
If the call is not answered, press and hold the INT button on the calling handset to retrieve the call.
- 42 -
EXTENDING
CONFERENCE CALL
A conference call can be made between two handsets and one base unit.
An external call is connected. Press and hold the INT button and then the handsets number you wish
to call. If you wish to have a conference call, press and hold down # until the displayed.
- 43 -
OTHERS
INTERFERENCE
All cordless telephones are radio transmitters and receivers and such are subject to interference from a
wide range of sources.
Re-setting the base unit can improve reception substantially. An upstairs room is usually the best
location.
Electronic equipment like TV~, computers, etc. emit strong electromagnetic fields which can affect the
radio signals. Try not to locate your telephone next to this type of equipment and ensure that the power
line cords are separated from the electrical units
FAULT FINDING
INCOMING NUMBERS ARE NOT VISIBLE ON THE DISPLAY
- Have you subscribed to the caller display service?
- Is the phone connected to a PABX? Caller display is not available when connected to a PABX.
THE TELEPHONE DOES NOT WORK
-
Is the power adaptor connected correctly?
Is the line cord connected correctly?
Are the batteries in the handset charged?
Connect a different telephone to the same wall socket. If the other telephone does not work,
contact your Network operator.
Please disconnect the power adaptor and re-connect again and you should hear a beep tone from
your base.
NO DIALLING TONE
-
Have the batteries been charged?
Is the base connected to a mains power socket and mains power switched on?
Is the telephone line cord plugged into a telephone Network wall socket?
WHEN ON CALL, A WARNING TONE IS HEARD
-
The battery power may be low (recharge the handset)
The handset may be out of range, - try moving nearer to the base unit.
THE BASE UNIT DOES NOT RING
-
Check that the ringer is programmed on.
Is the base unit connected to a mains power socket and mains power switched on?
- 44 -
OTHERS
THE DISPLAY ON THE HANDSET IS BLANK
-
-
Is the handset switched off?
Is the mains power switched on?
THE BASE UNIT RINGS BEFORE THE HANDSET
-
This is normal for all cordless telephones.
THE HANDSET DOES NOT RING
-
Is the ringer programmed off?
MEMORY DIALLING DOES NOT WORK
-
Store a new number and try again
RESETTING HANDSET PIN CODE
This operation can only be performed with at lease two handsets are connected to the same base.
One handset can reset the handset PIN code of another handset. The handset PIN code is reset to
the factory value of 1590.
1.
Make sure the handset (named HS1) that you want to reset its handset PIN code is connected to
the base.
2.
Connect another handset (named HS2) to the same base.
3.
Press the MENU button on the HS2.
4.
Press the p or q button until the display shows BASE , Press the OK button to confirm
5.
The display will show PIN :
6.
Enter the base PIN code (1590 from new) , Press the OK button to confirm
7.
Press the p or q button until the display shows HS RESET, Press the OK button to confirm
8.
The handset display will show H RESET: ?, enter the HS1’s handset number. (The handset
number is shown on the display of the handset.)
9.
Press OK button to confirm. Two beeps sound will be heard if successful.
10. HS2 will show FLASH TIME and return to the base setting mode.
11. Press and hold C button for two seconds to return to standby mode.
- 45 -
OTHERS
RESETTING THE HANDSET
If this operation is performed all factory settings will be restored:
Ring signal level restored to 3
Internal ring signal type restored to type 3
External ring signal restored to type 4
Earpiece volume restored to low
Erase the direct call number
1.
Press the MENU button.
2.
Press the p or q button until the display shows HANDSET, press the OK button to confirm
3.
Press the p or q button until the display shows HS RESET
4.
Press the OK button to confirm
5.
The display will show HS PIN:, enter the handset PIN code and press the OK button to confirm
6.
The handset will return to standby mode automatically.
If a wrong handset PIN code is entered, a error tone will be heard. After the third wrong PIN input, the
handset returns to standby mode.
RESETTING THE BASE UNIT
The base unit can be reset if required. This reset also describes all connected handsets and sets the
base station into subscription mode. All factory settings will be restored also:
Base PIN code restored to1590
All call barring will be erased
Ring signal type restored to type 2
Ringer volume restored to high
1. Press the MENU button on the already registered handset.
2. Press the p or q button until the display shows BASE , Press the OK button to confirm
3. The display will show PIN :
4. Enter the base PIN code (1590 from new) , Press the OK button to confirm
5. Press the p or q button until the display shows BS RESET, Press the OK button to confirm
6. The handset display will show B RESET? Press the OK button to confirm
7. The connected handset display will show NOT SUB, further registration should be performed in
order to make the phone works.
- 46 -
OTHERS
RESETTING THE DIGITAL ANSWERING MACHINE
If you want to delete all the incoming messages and personal recorded outgoing message, you can reset
the digital answering machine with a simple operation. The reset will not reset the PIN code of remote
control, for resetting the master PINCODE, please refers to resetting master PINCODE in base.
To reset the digital answering machine:
Unplug the power of the base
Press the DEL button and hold.
Plug the power supply into the base while holding the DEL button.
Several delete tones will be heard if the operation is completed.
Release the DEL button
The base will return to standby mode automatically.
- 47 -
- 48 -
Quick Reference guide for Digital Answering Machine
Play Message:
Play button
FWD button
Play messages
BWD button
Delete button
Stop button
Play next message
Play previous message
Delete the current message listen
to and play next message
Stop the playback and return to
standby mode
Outgoing Message Menu:
Play button
OGM Menu
Press and Hold
FWD button
BWD button
Record outgoing message
for answer and record
Record outgoing
message for answer only
FWD/BWD button
Delete button
Play button
On/Off button
Delete outgoing
message for answer and
record or answer only
Select outgoing
message answer and
record or answer only
Listen the outgoing
message for answer and
record or answer only
Play button
Confirm delete or
playback
Exit to standby mode
Setting Menu:
FWD button
Setting Menu
Press and Hold
FWD button
Set the number of ring
FWD/BWD button
BWD button
Set the record quality
Change Setting
Delete button
Play button
Set time and weekday
Confirm the setting
On/Off button
Exit to standby mode
- 49 -
TECHNICAL DATA
Standby time
>100 hours
Talk time
6 hours (Speaker Phone Off)
Handsfree about 1 hour
Range
Up to 300m in open space
Up to 50m in buildings
Phonebook Memory
40 sets
Message Record Time
15-25 minutes
Battery
3 x 1.2 V AAA 550mAh NiMH type
Weight
Handset: 110 g (including battery)
Size( WxHxD)
.
Handset: WxHxD = 48 x 113 x 22 mm
Base: WxHxD =108x149x57 mm
A policy of continuous product improvement, and so reserves the right to make changes to the product
and functions without notice.
- 50 -