1
4 Commissioning
3. Environment and
Recycling
Your local contractor must implement the
commissioning: Fill the cylinder to prevent
damage to the compressor and radiators. For
filling, open the water valve, until water flows
out.
Recycling of obselete appliances
Appliances with this label must not be
disposed off with the general waste.
They must be collected separately and disposed off according to local regulations.
Open the safety valve, until water flows out
free of bubbles. Then close the safety valve.
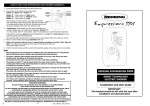
– Starting the WWK 300: Set switch 1 to ON.
4. Guarantee
– Supplementary heater: Press push button
2; the indicator lamp inside the push button lights up
For guarantees please refer to the respective terms and conditions of supply for your
country.
– Set the temperature selector 3 Fully clockwise.
The installation, electrical connection and first operation of this appliance should be carried out by a qualified
installer.
– Set the time at clock 4.
The company does not accept liability for
failure of any goods supplied which are not
installed in accordance with the manufacturer‘s instructions.
Inform the user that water may drip from the
safety valve whilst the water is being heated
up.
5 Shutting the equipment down
Puul the mains plug
for reasons of frost protection and good hygiene, drain the cylinder if it is taken out of use
for longer periods
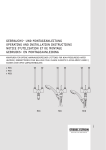
Fitting the plug-in connector
The plug-in connectors are equipped with a
retainer with stainless steel serrations and
an O-ring for sealing. In addition, they are
designed with the "Twist and secure" function.
By simply turning the screw cap manually, the
pipe is secured in the connector, and the Oring is pushed against the pipe to seal it.
Making the connection
The fitting must be in its released state before
inserting the pipe. In this position, there is a
small gap between the screw cap and fitting
body.
Push the pipe past the O-ring until it bottoms
out inside the connector. Tighten the screw
cap unit it meets the casing. This presses
the O-ring against the pipe and secures the
connector.
Gap between the screw
cap and the casing
(released position)
ca. 33 mm
Releasing the connection
Turn the screw cap back until a small gap
appears. Turn the retainer back by hand and
hold it in position. The pipe can now be pulled
out again.