1
Table of Contents
Index
Operating, Maintenance
and Installation Instructions
401-845A, 401-846A, 401-847A, 401-848A, 401-849A, 401-879A,
401-956A, 411-016A, 411-035A, 411-036A, 411-037A, 411-038A,
411-163A, 411-164A, 411-165A, 411-166A, 411-167A and 411-168A
PTO Pump Accessory for Single-Section
Air-Pro® Planters and Fan Update Kit
Manufacturing, Inc.
www.greatplainsmfg.com
Read the installation manual entirely. When you see this symbol, the
subsequent instructions and warnings are serious - follow without exception.
Your life and the lives of others depend on it!
UT
CA
ION
or
ry e:
ju
In agith
d am w
oi D ly
av ne on TO
Toachi te P
m
M pera
rp
*O 0
54
B
Rev.
30C
818-1
34617
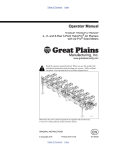
Cover illustration shows only selected components for one kit. Manual illustrations may
show various Yield-Pro® planter models and configurations where installation details
are identical for the immediate topic.
ORIGINAL INSTRUCTIONS
© Copyright 2014
EN
Printed 2014-06-16
Table of Contents
Index
401-885M
Table of Contents
Index
Table of Contents
Index
Great Plains Manufacturing, Inc.
Cover
Index
iii
Table of Contents
Important Safety Information ......................................1
PTO-Specific Hazards....................................................1
Using PTO Safely...........................................................2
Safety Decals .................................................................4
Introduction ..................................................................6
Description of Unit ..........................................................6
Suitable Applications ..................................................6
Kits Covered...................................................................6
Related Documents........................................................6
Related Parts..................................................................6
20-Spline Coupler...................................................6
21-Spline Coupler...................................................6
Using This Manual..........................................................7
Definitions...................................................................7
Call-Outs ....................................................................7
Owner Assistance ..........................................................7
PTO Operation ..............................................................8
Tractor Requirements.....................................................8
540 rpm Tractor Requirements...................................8
540 rpm PTO Clearance.........................................8
1000 rpm Tractor Requirements.................................9
1000 rpm Type 2 PTO Clearance...........................9
1000 rpm Type 3 PTO Clearance.........................10
Hitching with PTO.........................................................11
Hitching with 540 rpm PTO.......................................11
Prepare Tractor ....................................................11
Mount Pump .........................................................11
Secure Pump........................................................11
Hitching with 1000 rpm PTO.....................................12
Install Coupler.......................................................12
Prepare Tractor ....................................................13
Mount Pump .........................................................13
Check Hydraulics .........................................................14
Check Oil Level ........................................................14
Inspect Hoses and Fittings .......................................14
Starting the Pump.........................................................15
About the Flow Control Valve.......................................16
Setting Meter Pressurization ........................................17
General Steps for all Kits..........................................17
Ground Drive Meter Pressure...................................18
Hydraulic Drive Meter Pressure................................19
PTO Unhitching ............................................................20
Dismount 540 rpm Pump..........................................20
Dismount 1000 rpm Pump........................................20
PTO Troubleshooting ................................................ 21
PTO Maintenance....................................................... 22
Oil and Filter Change ................................................... 22
Oil Fill ....................................................................... 22
Oil Specification ................................................... 22
Oil and Filter Change ............................................... 22
Lubrication and Scheduled Maintenance..................... 23
Appendix A - Installation........................................... 25
Before You Start .......................................................... 25
Compatible Planters..................................................... 25
One PTO pump kit is always required. Older planters
may also require a fan update kit. Each kit
updates one planter.......................................... 25
Fan Motor Compatibility ........................................... 25
Configuration Compatibility ...................................... 26
2025A/2525A Compatible Kits ................................. 26
YP425A Compatible Kits.......................................... 26
YP625A Compatible Kits.......................................... 26
YP825A/AR Compatible Kits.................................... 26
Other Single-Section Air-Pro® Implements .............. 26
Tools Required............................................................. 27
Call-Outs .................................................................. 27
Pre-Delivery and Other Options................................... 27
Prepare Planter............................................................ 27
Prepare Fan ................................................................. 28
Disconnect Existing Fan Hoses ............................... 28
Disconnect 2-Port Fan ......................................... 28
Disconnect 3-Port Fan ......................................... 29
Open Fan Screen..................................................... 29
Dismount or Relocate Sensor Bracket ..................... 30
Update Fan Motor .................................................... 31
Recover Motor Fittings ......................................... 31
Release Impeller .................................................. 31
Dismount Fan ....................................................... 32
Remove 3-Port Hydraulic Motor ........................... 32
Mount 2-Port Hydraulic Motor .............................. 33
Re-Mount Fan ...................................................... 33
Install New Impeller Bushing ................................ 34
Install Motor Fittings and Loop ............................. 35
Re-Mount Fan Inlet Screen .................................. 35
Re-Install RPM Sensor Bracket ........................... 36
Install Fan Cooler......................................................... 37
Install Fan Cooler ..................................................... 37
Break Down Cooler Assembly ............................. 37
Install Cooler Shroud............................................ 37
© Copyright 2013, 2014 All rights Reserved
Great Plains Manufacturing, Inc. provides this publication “as is” without warranty of any kind, either expressed or implied. While every precaution has been
taken in the preparation of this manual, Great Plains Manufacturing, Inc. assumes no responsibility for errors or omissions. Neither is any liability assumed for
damages resulting from the use of the information contained herein. Great Plains Manufacturing, Inc. reserves the right to revise and improve its products as
it sees fit. This publication describes the state of this product at the time of its publication, and may not reflect the product in the future.
Trademarks of Great Plains Manufacturing, Inc. include: Singulator Plus, Swath Command, Terra-Tine.
Registered Trademarks of Great Plains Manufacturing, Inc. include:
Air-Pro, Clear-Shot, Discovator, Great Plains, Land Pride, MeterCone, Nutri-Pro, Seed-Lok, Solid Stand,
Terra-Guard, Turbo-Chisel, Turbo-Chopper, Turbo Max, Turbo-Till, Ultra-Till, Verti-Till, Whirlfilter, Yield-Pro.
Brand and Product Names that appear and are owned by others are trademarks of their respective owners.
Printed in the United States of America
2014-06-16
Cover
Index
401-885M
iv
Single-Section PTO Pumps
Table of Contents
Orient Cooler Elbows ........................................... 38
Re-Assemble Fan Cooler..................................... 38
Modify Fan Cage.................................................. 38
Attach Cooler Hoses & Close............................... 39
Reconnect Hitch Hoses ............................................... 40
Install Oil Reservoir...................................................... 41
Determine Reservoir Location.................................. 41
Reservoir on Row Unit Tool Bar............................... 42
Identify Row Location........................................... 42
Support Row Unit ................................................. 43
Mount Row Unit Reservoir ................................... 43
Reservoir on Fertilizer Sub-Frame ........................... 44
Reservoir on Mainframe Truss................................. 45
Reservoir Under Main Seed Box.............................. 46
Reservoir on Tongue at Hitch .................................. 47
Install Flow Control Valve ............................................ 48
Determine Control Location ..................................... 48
Install Controls on Fan Mast .................................... 49
Install Controls on Fertilizer Frame .......................... 50
Install Controls on Upper Frame Tube ..................... 51
Install Controls on Forward Tool Bar........................ 52
Install Hoses ................................................................ 54
General Hose Installation......................................... 54
401-845A and 411-163A Flow Control Hydraulics ... 54
401-885M
Index
Great Plains Manufacturing, Inc.
401-846A and 411-164A Flow Control Hydraulics....55
401-847A and 411-165A Flow Control Hydraulics....56
401-848A and 411-166A Flow Control Hydraulics....57
401-849A and 411-167A Flow Control Hydraulics....58
401-879A and 411-168A Flow Control Hydraulics....59
411-016A Flow Control Hydraulics ...........................60
Connect Hoses .....................................................60
411-035A and 411-036A Flow Control Hydraulics....61
411-037A and 411-038A Flow Control Hydraulics....62
Replace/Add Fittings.............................................63
Connect Remaining Hoses ...................................63
Charge and Test...........................................................64
Close-Out .....................................................................64
Appendix R - Reference .............................................65
Torque Values ..............................................................65
Hydraulic Fitting Torque............................................66
Connector Identification ........................................66
Abbreviations................................................................67
Parts Lists.....................................................................68
Kits and This Manual ................................................68
New Parts in Kits ......................................................68
Existing Parts Affected..............................................70
Index ............................................................................73
Table of Contents
Index
2014-06-16
Great Plains Manufacturing, Inc.
Table of Contents
Index
1
Index
401-885M
Important Safety Information
PTO-Specific Hazards
Even if you are experienced in PTO operations, review
the “Using PTO Safely” topic on page 2. Topics in this
manual dealing with PTO hazards include this PTO alert
symbol and the standard alert symbol below.
PTO hazards include:
▲ Entanglement:
resulting in abrasions, lacerations, crushing,
dismemberment or death. Loose clothing, cuffs, frays, laces,
coattails, drawstrings, hair or scarves are taken up by a
PTO faster than you can react, and with overpowering
torque.
▲ Flailing machinery:
resulting from an unsecured torque arm, resulting in serious
injury or death.
▲ High pressure fluid sprays:
due to hydraulic hose failure, resulting from PTO shaft
over-speed or damaged hoses.
Look for Safety Symbol
The SAFETY ALERT SYMBOL indicates there is a
potential hazard to personal safety involved and extra
safety precaution must be taken. When you see this
symbol, be alert and carefully read the message that
follows it. In addition to design and configuration of
equipment, hazard control and accident prevention are
dependent upon the awareness, concern, prudence and
proper training of personnel involved in the operation,
transport, maintenance and storage of equipment.
Be Aware of Signal Words
Signal words designate a degree or level of hazard
seriousness.
DANGER indicates an imminently hazardous situation
which, if not avoided, will result in death or serious injury.
This signal word is limited to the most extreme situations,
typically for machine components that, for functional
purposes, cannot be guarded.
WARNING indicates a potentially hazardous situation
which, if not avoided, could result in death or serious
injury, and includes hazards that are exposed when
guards are removed. It may also be used to alert against
unsafe practices.
CAUTION indicates a potentially hazardous situation
which, if not avoided, may result in minor or moderate
injury. It may also be used to alert against unsafe
practices.
2014-06-16
Table of Contents
2
Single-Section PTO Pumps
Table of Contents
Index
Great Plains Manufacturing, Inc.
Using PTO Safely
The accessories covered by this manual rely on PTO power to
operate, and require an adjustment at the planter while the
PTO is running. The PTO pump is designed to work on a stub
shaft PTO, and leaves no exposed shaft in use.
▲ Use only a tractor with an approved master shield for the
PTO.
▲ Use all guards provided for the tractor PTO. Have minimal
or NO shaft exposed after connecting the PTO pump.
✔
▲ Use only a rear-facing PTO. The provided hoses and torque
arms are not designed for use with a tractor-front or
tractor-side PTO.
▲ Use only the correct (540 or 1000) rpm PTO, or an
adjustable PTO set to the correct rpm (maximum).
Running at a higher speed could result in equipment failure,
and serious injury.
▲ Use only a PTO with the correct shaft, and for 1000 rpm,
matching Great Plains coupler:
13⁄8 inch (35 mm) 6-spline
13⁄4 inch (44.5 mm) 20-spline and 826-777C coupler
13⁄8 inch (35 mm) 21-spline and 826-778C coupler
CAUTION
To avoid Injury or
Machine Damage:
*Operate only with
540 rpm PTO
818-130C Rev. B
✔
6
▲ Do not use any other adaptor, coupler, driveline, extender
or external gearbox.
CAUTION
To avoid Injury or
Machine Damage:
·Operate only with
1000 rpm PTO
818-240C Rev. A
✔
20
CAUTION
To avoid Injury or
Machine Damage:
·Operate only with
1000 rpm PTO
818-240C Rev. A
✔
21
▲ Use only a “live” or “independent” PTO. If the PTO only
operates when the tractor is in motion, there is no safe way
to set the fan speed.
▲ Ensure that all involved personnel are trained on PTO
operations and hazards. Always know where all team
members are before, during and after PTO operations.
826-777C
826-778C
▲ Allow only essential personnel near the PTO during setup,
adjustment, operation and disconnection.
▲ Prior to PTO setup, remove any stray wire, rope or twine
found nearby. Should a loose end encounter the PTO stub, it
is taken up at up to 14 feet per second, and could wrap
around someone and pull them in.
▲ Wear only snug-fitting clothes, with no scarves, loose
strings, cords, ties, and no frays, when working near a PTO.
▲ Tie long hair back or gather it up under a well-secured hat.
▲ Shut the tractor off for PTO connections or disconnections.
Do not trust your life to clutches and throw-outs.
▲ A PTO shaft is a hazard at any speed, even when well below
rated shaft rpm, coasting to a stop, or idling.
▲ Never step on or over the master shield or installed PTO
pump.
▲ Be extra vigilant if any tractor PTO controls are external,
and in proximity to the PTO.
▲ Elevate pump hose slack so that ground contact is not
possible during transport or field operations.
▲ Keep all PTO safety decals clean and legible. Replace any
that are faded or damaged.
401-885M
Table of Contents
Index
2014-06-16
Great Plains Manufacturing, Inc.
Table of Contents
Index
Important Safety Information
3
Prepare for Emergencies
▲ Be prepared if a fire starts.
▲ Keep a first aid kit and fire extinguisher handy.
▲ Keep emergency numbers for doctor, ambulance, hospital
and fire department near phone.
Be Familiar with Safety Decals
▲ Read and understand “Safety Decals” in the Operator
manual.
▲ Read all instructions noted on the decals.
▲ Keep decals clean. Replace damaged, faded and illegible
decals.
Avoid High Pressure Fluids
Observe normal precautions for hitch hydraulic
connections and disconnections. Escaping fluid under
pressure can penetrate the skin, causing serious injury.
▲ Avoid the hazard by relieving pressure before disconnecting
hydraulic lines.
▲ Wear protective gloves and safety glasses or goggles when
working with hydraulic systems.
▲ If an accident occurs, seek immediate medical assistance
from a physician familiar with this type of injury.
Practice Safe Maintenance
▲ Understand procedure before doing work. Use proper
tools and equipment. Refer to this manual for additional
information.
▲ Work in a clean, dry area.
▲ Lower the planter, put tractor in park, turn off engine, and
remove key before performing maintenance.
▲ Make sure all moving parts have stopped and all system
pressure is relieved.
▲ Inspect all parts. Make sure parts are in good condition
and installed properly.
▲ Remove buildup of grease, oil or debris.
▲ Remove all tools and unused parts from planter before
operation.
2014-06-16
Table of Contents
Index
401-885M
4
Single-Section PTO Pumps
Table of Contents
Index
Great Plains Manufacturing, Inc.
Safety At All Times
▲ Thoroughly read and understand the instructions in this
manual before operation. Read all instructions noted on the
safety decals.
▲ Be familiar with all implement functions.
▲ Operate machinery from the driver’s seat only.
▲ Do not leave implement unattended with tractor engine
running.
▲ Wear snug-fitting clothing to avoid entanglement with
moving parts.
Safety Decals
Safety Decals
Kit components are shipped with all safety decals in
place. They are intended to help you safely operate your
implement.
▲ Read and follow decal directions.
To install new decals:
1. Clean the area on which the decal is to be placed.
2. Peel backing from decal. Press firmly on surface,
being careful not to cause air bubbles under decal.
▲ Keep all safety decals clean and legible.
▲ Replace all damaged or missing decals. Order new decals
from your Great Plains dealer. Refer to this section for
proper decal placement.
▲ When ordering new parts or components, also request
corresponding safety decals.
Danger Decals
858-005C
DANGER
ROTATING DRIVELINE UT
CA
ION
or
ry e:
ju
In agith
d am w
oi D ly
av ne on TO
Toachi te P
m
M pera
rp
*O 0
54
CONTACT CAN CAUSE DEATH
KEEP AWAY!
DO NOT OPERATE WITHOUT-
B
Rev.
30C
818-1
All driveline guards, tractor
and equipment shields in place
PTO pump assembly securely
attached with torque arm and chain
34617
858-005C
Danger: Rotating Driveline
On chain plate of torque arm at pump, for pumps
with wide plates, otherwise on front face of oil
reservoir;
1 total
WA
R
NIN
G
HO
T FL
Rea
UID
d Own
Kee
er’s
to p trac
prev tor Manual
Kee ent at
IDLI BEF
prevp Rad dam
ORE
NG
iato age
SPE
Do ent over
r clea to Hyd ED operatin
NOT
g mac
opeheatingn and raul and
rate .
free ic Mot slow
hine
with
of or ly eng
.
fore
hydr
age
ign
aulic
PTO
mat
oil
ter
at
to
or
abo
ve
180
°F.
HA
ZA
RD
858-0
04C
OIL
CA
FIL
US
PA
HYE AN
CI
OFDRAUY HIG TY
FR 10W LIC H
=
PROM -30 FL QUAL 13
UID
DIR .
ITY .5
REEVEN T OIL
WI
150PLAC T OR MU TH MIN U.S.
ST
DA
ER
LE OP E FILMACO
BEA VIS AL G
VE ER
GENTAM CL CO
BA AL
L TO ATI TE
R TO INA EA SIT SE S
OL NG EL PU NT N
D
BA HO EM MP PAAN Y RA
D
R UR EN
TIN
BE S T AN RT FR
ICL EE G
FO OR AF D MO
ES
RE 2 TE
CH YE R EVTOR. TO
EK AR ER
INGS SE Y
OIL RV
ICE
858-0 LE
29C VE .
L
LL
IN
E
CAU
To
Macavoi
·Opehined Inju
1000rate Damry or
on ag
rpm ly w e:
PT ith
O
TION
818-2
40C
Rev.
A
DA
N
GE
R
RO
TA
CO TING
NTAC
DR
T CA IV
DO KE N CA ELIN
E
NO EP US
AW E DE All T OP
anddriv
AY ATH
elin ER
PTOequ e
ipm guaAT
atta pum
E !
boltche p ent rds, WI
d ass shie trac TH
s pro
with emb lds
tor OU
per torq
ly in plac
Tly
torque sec
ER
NG
DA
e
uedarmurel
y
and
clam
p
858-0
30C
ELIN
TH
IVE
DR SE DEA
ING CAU !
AY UTTAT
RO CT CANAW HO
WIT
NTA EP
or
place
CO KE ERATEtract
in
ds,ds rely chain
T OP guarshiel secu and
NO linement mblye arm
DO drive
34843
5C
858-00
torqu
All equip asse
and pumpwith
PTO hed
attac
IONor
CAUTInjuryge:
ma
avoid Da with
To chine only O
Ma rate m PT
·Ope00 rp
10
A
C Rev.
818-240
401-885M
Table of Contents
Index
36313
2014-06-16
Great Plains Manufacturing, Inc.
Table of Contents
Index
Important Safety Information
5
Warning Decals
858-004C
WARNING
HOT FLUID HAZARD
Read Owner’s Manual BEFORE operating machine.
Keep tractor at IDLING SPEED and slowly engage PTO
to prevent damage to Hydraulic Motor
Keep Radiator clean and free of foreign matter to
prevent overheating.
Do NOT operate with hydraulic oil at or above 180°F.
858-004C
Warning: Hot Fluid
On front face of oil reservoir;
1 total
34617
UT
CA
ION
or
ry e:
ju
In agith
d am w
oi D ly
av ne on TO
Toachi te P
ra m
rp
B
Rev.
30C
818-1
M pe
*O 0
Caution Decals
818-130C
CAUTION
To avoid Injury or
Machine Damage:
*Operate only with
540 rpm PTO
818-130C Rev. B
Caution: 540 RPM PTO
On chain plate of torque arm at 540 rpm pump;
1 total (540 rpm kits only)
UT
CA
ION
or
ry e:
ju
In agith
d am w
oi D ly
av ne on TO
Toachi te P
m
M pera
rp
*O 0
54
B
Rev.
30C
818-1
34617
818-240C
CAUTION
34843
To avoid Injury or
Machine Damage:
·Operate only with
1000 rpm PTO
R
GE
N
DA
ELIN
TH
IVE
DR SE DEA
ING CAU !
AY UTTAT
RO CT CANAW HO
WIT
NTA EP
or
place
CO KE ERATEtract
in
ds,ds rely chain
T OP guarshiel secu and
NO linement mblye arm
DO drive
5C
858-00
WA
R
torqu
All equip asse
and pumpwith
PTO hed
attac
ION
CAUT
or
uryge:
Injma
avoid Da with
To chine only O
Ma rate m PT
·Ope00 rp
10
NIN
G
A
C Rev.
818-240
818-240C Rev. A
36313
HO
T FL
Rea
d Own
UID
Kee
er’s
to p trac
prev tor Manual
Kee ent at
IDLI BEF
prevp Rad dam
ORE
NG
iato age
SPE
Do ent over
r clea to Hyd ED operatin
NOT
g mac
opeheatingn and raul and
rate .
free ic Mot slow
hine
with
of or ly eng
.
fore
hydr
age
ign
aulic
PTO
mat
oil
ter
at
to
or
abo
ve
180
°F.
HA
ZA
RD
858-0
04C
Caution: 1000 RPM PTO
OIL
CA
FIL
US
PA
HYE AN
CI
OFDRAUY HIG TY
FR 10W LIC H
=
PROM -30 FL QUAL 13
UID
DIR .
ITY .5
REEVEN T OIL
WI
150PLAC T OR MU TH MIN U.S.
ST
DA
ER
LE OP E FILMACO
BEA VIS AL G
VE ER
GENTAM CL CO
BA AL
L TO ATI TE
R TO INA EA SIT SE S
OL NG EL PU NT N
D
BA HO EM MP PAAN Y RA
D
R UR EN
TIN
BE S T AN RT FR
ICL EE G
FO OR AF D MO
ES
RE 2 TE
CH YE R EVTOR. TO
EK AR ER
INGS SE Y
OIL RV
ICE
858-0 LE
29C VE .
L
LL
E
TION
818-2
40C
Rev.
A
On chain plate of torque arm at pump, for pumps
with wide plates, otherwise on front face of oil
reservoir;
1 total (1000 rpm kits only)
2014-06-16
IN
CAU
To
Macavoi
·Opehined Inju
1000rate Damry or
on ag
rpm ly w e:
PT ith
O
Table of Contents
DA
N
GE
R
RO
TA
CO TING
NTAC
DR
T CA IV
DO KE N CA ELIN
E
NO EP US
AW E DE All T OP
anddriv
AY ATH
elin ER
PTOequ e
ipm guaAT
atta pum
E !
boltche p ent rds, WI
d ass shie trac TH
s pro
with emb lds
tor OU
per torq
ly in plac
Tly
torque sec
e
uedarmurel
y
and
clam
p
858-0
30C
Index
401-885M
6
Single-Section PTO Pumps
Table of Contents
Index
Great Plains Manufacturing, Inc.
Introduction
Description of Unit
U
One of 17 dealer- or field-installed kits convert the
hydraulic fan power source from tractor hydraulic remote
to tractor Power Take-Off (PTO). An additional kit
updates older fan motors for PTO compatibility.
B
R
F
D
L
Refer to Figure 1
Each Single-Section PTO Pumps kit includes:
• a flow control valve assembly 1 for setting fan rpm,
• a tethered 540 or 1000 rpm PTO pump 2 , with torque
arm and safety chain (no gearbox is required; a
coupler is required for the 1000 rpm pump),
• an oil reservoir 3 , with sight gauge, line filter and
6.5 gallon capacity (5.5 gallons/21 liters, used),
• an oil cooler 4 , mounted inside the fan, and;
• all interconnecting hoses (not shown).
There are separate kits for rigid and rotating planters,
pull-type and 3-point planters, planters with and without
fertilizer capability and ground drive vs. hydraulic drive.
4
UT
CA
ION
or
ry e:
ju
In agith
d am w
oi D ly
av ne on TO
Toachi te P
m
M pera
rp
*O 0
54
B
Rev.
30C
818-1
2
Figure 1:
PTO Kit Major Components
Suitable Applications
Related Documents
A PTO kit may be needed where:
401-885M
• the tractor has an Open Center hydraulic system;
• the tractor has no remote port for the fan; or,
118-999B
• the tractor is Closed Center, but the remotes offer
insufficient oil flow to reliably operate the fan.
118-999M
Kits Covered
401-651M
401-845A
401-846A
401-847A
401-848A
401-849A
401-879A
401-956A
411-016A
411-035A
411-036A
411-037A
411-038A
411-163A
411-164A
411-165A
411-166A
411-167A
411-168A
401-651B
YP4-6-8 PTO 540 3PT ASSY
YP4-6-8 PTO 540 NO FERT PULL
YP4-6-8 PTO 540 DRY FERT ASSY
YP4 PTO 540 LIQ FERT ASSY
YP6-8 PTO 540 LIQ FERT ASSY
YP8RW 3PT PTO 540 ASSY
YP4,6,8 FAN UPDATE
20A,25A PTO PUMP KIT
YP825R PTO HYD PUMP GND DV 540
YP825R PTO HYD PUMP GND DV1000
YP825R PTO HYD PUMP HYD DV 540
YP825R PTO HYD PUMP HYD DV1000
YP4-6-8 PTO 1000 3PT ASSY
YP4-6-8 PTO 1000 NO FERT PULL
YP4-6-8 PTO 1000 DRY FERT ASSY
YP4 PTO 1000 LIQ FERT ASSY
YP6-8 PTO 1000 LIQ FERT ASSY
YP8RW 3PT PTO 1000 ASSY
See “Compatible Planters” starting on page 25 for more
details. Kits for 2- and 3-section planters are covered in
separate manual 411-015M.
401-885M
3
118-999P
401-652P
401-652M
401-652P
401-923M
401-923B
401-923P
1
34617
PTO Operation, Maintenance and Installation
(this document)
Material Rate manual, 2025A and 2525A
Operator manual, 2025A and 2525A
Parts manual, 2025A and 2525A
Operator manual, YP425A, YP625A and
YP825A pull-type models
Material Rate manual, YP4/6/825A/3P
Parts manual, YP4/6/825A pull-type
Operator manual, YP425A3P, YP625A3P
and YP825A3P three-point models
Parts manual, YP4/6/825A 3-point
Operator manual, YP825AR rotating
Material Rate manual, YP825AR
Parts manual, YP825AR
Related Parts
The 1000 rpm PTO kits require one of two
tractor-specific couplers, not included with the PTO kit.
20-Spline Coupler
210 826-777C 1 3/4-20 PTO COUPLER
21-Spline Coupler
211 826-778C 1 3/8-21 PTO COUPLER
Table of Contents
Index
2014-06-16
Table of Contents
Great Plains Manufacturing, Inc.
Index
Introduction
7
Using This Manual
This manual familiarizes you with safety, operation,
adjustments, maintenance and assembly. Follow the
recommendations to ensure safe and efficient operation.
Definitions
The following terms are used throughout this manual.
Call-Outs
1 to
and
a to
11
to
9
z
53
Note: Paragraphs in this format provide useful
information related to the current topic.
101
Liability, Economic and Results Risks:
Paragraphs in this format present a crucial point of information
related to the current topic. Read and follow the directions to:
remain safe, avoid serious damage to equipment and ensure
desired field results.
Right-hand and left-hand as
used in this manual are
determined by facing the
direction the machine will
travel while in use unless
otherwise stated.
An orientation rose (shown at
right) depicts Up, Right, Back,
Down, Left and Front.
to
244
Single-character callouts identify
components in the currently referenced
Figure or Figures. Numbers and letters may
be reused for different items on other pages.
Two-digit callouts identify the same existing
parts throughout this manual. See page 70
for a list of these parts and their disposition.
Three-digit callouts identify the same new
parts throughout this manual. See page 68
for a list of these parts.
The information in this manual is current at printing.
Some parts may change to assure top performance.
U
R
F
L
D
B
Owner Assistance
If you need customer service or repair parts, contact a
Great Plains dealer. They have trained personnel, repair
parts and equipment specially designed for Great Plains
products. Your machine’s parts were specially designed
and should only be replaced with Great Plains parts.
For further assistance write to:
Product Support
Great Plains Mfg. Inc., Service Department
PO Box 5060 Salina, KS 67402-5060
Record your Air-Pro® PTO pump kit model number here
for quick reference:
Model Number:__________________________
Date Purchased: __________________________
785-823-3276
Your Great Plains dealer wants you to be satisfied with
your updated machine. If you do not understand any part
of this manual or are not satisfied with the service
received, please take the following actions.
1.
Discuss the matter with your dealership service
manager. Make sure they are aware of any
problems so they can assist you.
2.
If you are still unsatisfied, seek out the owner or
general manager of the dealership.
2014-06-16
Table of Contents
Index
401-885M
8
Single-Section PTO Pumps
Table of Contents
Index
Great Plains Manufacturing, Inc.
PTO Operation
Tractor Requirements
Tractor requirements are different for 540 rpm pumps
(below) and 1000 rpm pumps (page 9).
540 rpm Tractor Requirements
The 540 rpm Air-Pro® PTO pump accessories require a
tractor with:
6
Refer to Figure 2
• a rear-facing ASABE or ASAE Type 1 PTO stub
shaft 5 with master shield 6
shaft: 13⁄8 inch (35 mm) 6-spline,
clockwise rotation (as viewed from tractor rear, facing
forward),
• a “live” or “independent” PTO drive system, that can
be operated with the tractor stationary,
• a fixed or available shaft speed of 540 rpm, and an
available PTO power output of 5 hp (3.7 kW),
• a drawbar 7 that engages the torque arm of the PTO
pump assembly, and
• a chain anchor point 8 - a stable, non-moving
component of the tractor, within reach of the pump’s
torque arm chain.
540 rpm PTO Clearance
If the tractor PTO is not known to conform to Type 1
specifications, check the following pump-specific
clearance dimensions:
5
8
7
Figure 2:
Tractor PTO
34618
a
Refer to Figure 3
a. Shaft to master shield top:
3.5 inches (8.9 cm) minimum
or hinged lid
b
b.
Shaft to master shield sides:
5.0 inches (12.7 cm) minimum
c.
Shaft to drawbar top:
9 inches (22.8 cm) minimum
15 inches (38.1 cm) maximum
It may be necessary to invert an offset drawbar, or
relocate or remove any clevis installed on the
drawbar.
c
d. Shaft to ground:
16 inches (40.6 cm) minimum
d
CAUTION
To avoid Injury or
Machine Damage:
*Operate only with
540 rpm PTO
818-130C Rev. B
Figure 3:
Tractor PTO Clearances
401-885M
Table of Contents
Index
34623
2014-06-16
Great Plains Manufacturing, Inc.
Table of Contents
Index
PTO Operation
9
1000 rpm Tractor Requirements
540 rpm tractor requirements are on page 8. The
1000 rpm Air-Pro® PTO pump accessories require a
tractor with:
Refer to Figure 2
• a rear-facing ASABE or ASAE Type 2 or Type 3 PTO
stub shaft 5 with master shield 6
13⁄4 inch (44.5 mm) 20-spline
13⁄8 inch (35 mm) 21-spline
clockwise rotation (as viewed from tractor rear, facing
forward),
• a “live” or “independent” PTO drive system, that can
be operated with the tractor stationary,
• a fixed or available shaft speed of 1000 rpm, and an
available PTO power output of:
20 hp (15 kW): Air-Pro® with ground drive meters
40 hp (30 kW): Air-Pro® with hydraulic drive meters
• and a drawbar 7 that engages the torque arm of the
PTO pump assembly.
6
5
7
Figure 4:
Tractor PTO
1000 rpm Type 2 PTO Clearance
If the tractor PTO is not known to conform to Type 2
specifications, check the following pump-specific
clearance dimensions:
34842
a
Refer to Figure 3
a. Shaft to master shield top:
3.5 inches (8.9 cm) minimum
or hinged lid
b
b.
Shaft to master shield sides:
5.0 inches (12.7 cm) minimum
c.
Shaft to drawbar top:
9 inches (22.8 cm) minimum
15 inches (38.1 cm) maximum
It may be necessary to invert an offset drawbar, or
relocate or remove any clevis installed on the
drawbar.
d. Shaft to ground:
16 inches (40.6 cm) minimum
c
d
CAUTION
To avoid Injury or
Machine Damage:
·Operate only with
1000 rpm PTO
818-240C Rev. A
Figure 5:
Type 2 PTO Clearances
2014-06-16
Table of Contents
Index
34844
401-885M
10
Single-Section PTO Pumps
Table of Contents
Index
Great Plains Manufacturing, Inc.
1000 rpm Type 3 PTO Clearance
If the tractor PTO is not known to conform to Type 3
specifications, check the following pump-specific
clearance dimensions:
a
Refer to Figure 3
a. Shaft to master shield top:
5.9 inches (15.0 cm) minimum
or hinged lid
b
b.
Shaft to master shield sides:
7.0 inches (17.8 cm) minimum
c.
Shaft to drawbar top:
8.6 inches (22.0 cm) minimum
13.75 inches (35.0 cm) maximum
It may be necessary to invert an offset drawbar, or
relocate or remove any clevis installed on the
drawbar.
c
d
d. Shaft to ground:
16 inches (40.6 cm) minimum
CAUTION
To avoid Injury or
Machine Damage:
·Operate only with
1000 rpm PTO
818-240C Rev. A
Figure 6:
Type 3 PTO Clearances
401-885M
Table of Contents
Index
34845
2014-06-16
Great Plains Manufacturing, Inc.
Table of Contents
Index
PTO Operation
11
Hitching with PTO
Hitching procedures are different for 540 rpm pumps
(below) and 1000 rpm pumps (page 12).
Hitching with 540 rpm PTO
The pump may be installed before or after hitching the
planter to the tractor. With a 3-point planter, installing the
pump first may be easier.
2
Prepare Tractor
1. Back the tractor into close proximity to the planter
(within pump hose reach of the PTO shaft).
2.
Shut down the tractor and remove the key.
Entanglement and Crushing Hazard:
Never perform any mechanical adjustment, PTO setup or
hitching with the tractor running. Take no chances that the
PTO might become active. Entanglement or flailing equipment
can cause serious injury or death faster than you can react.
3
1
Refer to Figure 7
3. Make any necessary adjustment to the tractor
drawbar 1 . This might include:
inverting an offset drawbar, and/or
relocating a clevis assembly (not shown).
Figure 7:
Mount PTO Pump
34620
Entanglement and Flailing Equipment Hazards:
Do not use a driveline, shaft extension, adaptor or external
gearbox with the PTO pump. Use only a native 540 rpm
6-spline stub shaft. Extra fittings create entanglement hazards.
Fittings also destabilize the shaft, and may make it impossible
to adequately secure the pump against torque and shaft slip.
Mount Pump
4. Clear the PTO shaft 2 of any pins or wires that
might prevent the pump from fully seating on the
shaft.
5.
6
With hydraulic hoses to rear, and torque arm 3 to
right of drawbar, slide the pump assembly fully onto
the PTO shaft.
7
Secure Pump
Refer to Figure 8 (shown with pump off for clarity)
6. With the torque arm firmly against the drawbar:
loop the chain once 4 around the drawbar,
then through the anchor point 5 ,
then around the drawbar 1 at least once more,
then through the keyhole slot 7 in the torque plate.
5
Figure 8:
Route Pump Chain
The drawbar loops prevent pump rotation.
The anchor loop retains the pump on the PTO shaft.
2014-06-16
Table of Contents
4
Index
34622
401-885M
12
Single-Section PTO Pumps
Table of Contents
Index
Great Plains Manufacturing, Inc.
Refer to Figure 9
7. At least one full chain link must be exposed at the
slot 7 on the decal side of the torque arm plate.
If there are more than a few chain loops left at the
plate keyhole, route any excess chain through the
anchor point and/or around the drawbar.
8.
9.
R
GE
DAN
Do NOT use any pins, cross-bolts or wires to secure
the pump to the PTO shaft. Such fasteners are not
required for safe pump operation, and would add a
needless entanglement hazard.
7
Pull and twist the pump assembly to verify that the
chain is sufficiently taut to prevent excess pump
rotation or sliding along the PTO shaft.
ELIN H
T
IVE
DR E DEA
G
IN
AUS
TAT CAN C AY!
TO
U
R
W HO
CT
IT
PA
NTA
CO KEE ATEtrW
tor e
ac lac
R
, in p
s
E
a
P rd s ly ch in
T O gua hield ecureand
NO velineent s bly sarm
DO Alldderiquippmashstoemrque
85
8-00
5C
an pum wit
d
O
PTache
att
10. Complete normal planter hitching.
Figure 9:
Secure Pump Chain
34627
Hitching with 1000 rpm PTO
540 rpm hitching begins on page 11.
The 1000 rpm pump may be installed before or after
hitching the planter to the tractor.
Install Coupler
The 1000 rpm PTO kits require one of two
tractor-specific couplers, not included with the PTO kit:
243
211
210 826-777C 1 3/4-20 PTO COUPLER
211 826-778C 1 3/8-21 PTO COUPLER
Refer to Figure 10 (showing coupler 826-778C)
1. Loosen both set screws ( 243 and 244 ) at the narrow
end of the coupler. Note that they are different sizes.
2.
Rotate the coupler until the internal keyway aligns
with the key on the pump shaft. Slide the coupler
onto the pump shaft.
3.
Tighten both set screws to the Grade 5 torque
specification for each thread size.
244
To remove or exchange a coupler at a later time, first
dismount the pump assembly from the tractor PTO shaft,
then loosen both set screws.
401-885M
Table of Contents
Figure 10:
Secure Coupler to Pump
Index
36316
2014-06-16
Great Plains Manufacturing, Inc.
Table of Contents
Index
PTO Operation
13
Prepare Tractor
Refer to Figure 11
4. Completely remove the socket head cap screws
from the coupler 2 .
1
Note: If the coupler is not mounted, or you need to
change to a different coupler, see page 12.
5.
If space is constrained inside the tractor PTO shield,
rotate the coupler to an orientation that eases later
inserting and tightening of the cap screws.
6.
Back the tractor into close proximity to the planter
(within pump hose reach of the PTO shaft).
7.
Shut down the tractor and remove the key.
8.
Make any necessary adjustment to the tractor
drawbar 3 . This might include:
inverting an offset drawbar, and/or
relocating a clevis assembly (not shown).
9.
Clear the PTO shaft 4 of any pins or wires that
might prevent the pump from fully seating on the
shaft.
Entanglement and Crushing Hazard:
Never perform any mechanical adjustment, PTO setup or
hitching with the tractor running. Take no chances that the
PTO might become active. Entanglement or flailing equipment
can cause serious injury or death faster than you can react.
1
2
8
4
7
Mount Pump
10. With hydraulics hoses to rear, and torque arm 5 to
right of drawbar, slide the pump assembly fully onto
the PTO shaft 4 .
ER
NG
DA
INE
IVEL ATH
DR E DE
G
US
TIN N CA AY! TTA
RO ACT CA AW THOU
NT EP E WItor e
CO KE ERAT tracin plac clamp
rds,lds rely
guashie secu and
T OPeent
y arm
mbl
NO elin
ue
ipm
torq ued
equ p asse
DO All driv
torq
6
30C
858-0
with
and pum
d
erly
PTOche
attas prop
bolt
TION
CAU
or
jury e:
d In magth
avoi Da wi
To hine only O
Macrate m PT
·Ope00 rp
10
A
0C
Rev.
818-24
11. Insert one socket head cap screw 1 into the larger
counter-sunk clamping holes 7 in the aft end of the
coupler. The screw head fully seat, below the
surface of the coupler, in these holes.
3
Figure 11:
Mount PTO Pump
See NOTICE at right.
5
36317
12. Adjust the position of the coupler on the shaft until
the screw threads are in the shaft groove 6 . Thread
screw in until finger tight.
13. Insert the other socket head cap screw in the other
side of the coupler. Thread it until finger tight.
14. Pull and twist the pump assembly to verify that both
retention screws have engaged the PTO shaft grove
and prevent the pump from sliding along the PTO
shaft.
Entanglement and Flailing Equipment Hazards:
Do not use a driveline, shaft extension, adaptor or external
gearbox with the PTO pump. Use the pump, with a Great
Plains coupler, only on a native 1000 rpm 20- or 21-spline
stub shaft. Extra fittings create entanglement hazards. Fittings
also destabilize the shaft, and may make it impossible to
adequately secure the pump against torque and shaft slip.
15. Tighten both cap screws to 1⁄2-13 Grade 8 torque
specification (105 foot-pounds, 145 N-m).
16. Complete normal planter hitching.
2014-06-16
Equipment Damage Risk:
Use the clamping holes 7 . Do not use the drive-out holes 8
(the smaller forward holes that are threaded to the surface).
Drive-out holes are used only during dismount. The screws
only partially thread into these holes. These holes do not
adequately secure the pump to the shaft. The screws are likely
to fall out if these holes are used for pump mounting.
Table of Contents
Index
401-885M
14
Single-Section PTO Pumps
Table of Contents
Index
Great Plains Manufacturing, Inc.
Check Hydraulics
Check Oil Level
Refer to Figure 12
1. Verify that the planter is level front to back and side
to side.
2.
Inspect the sight gauge 8 on the pump system
reservoir tank. The oil level 9 must be aligned with
the center border of the OIL FILL LINE decal
(858-003C).
8
9
WARNING
Hot Surface and Hot Fluid Hazards:
Assess the tank temperature before adjusting oil level.
Draining excess hot oil could result in a severe burn. If the
PTO has been operated recently, the oil temperature could be
as high as 180°F (82°C).
3.
Add or drain oil as needed to obtain the correct
amount. Some adjustment is normally required with
a new system, or after a filter change.
OIL FILL LINE
CAPACITY = 5.5 U.S. GALS
USE ANY HIGH QUALITY MINERAL BASED
HYDRAULIC FLUID WITH A VISCOSITY RATING
OF 10W-30. OIL MUST BE CLEAN AND FREE
FROM DIRT OR CONTAMINANT PARTICLES TO
PREVENT DAMAGE TO PUMP AND MOTOR.
REPLACE FILTER ELEMENT AFTER EVERY
150 OPERATING HOURS OR 2 YEARS SERVICE.
LEVEL TOOLBAR BEFORE CHECKING OIL LEVEL
858-003C
Read Owner’s Manual BEFORE operating machine.
Keep tractor at IDLING SPEED and slowly engage PTO
to prevent damage to Hydraulic Motor
Keep Radiator clean and free of foreign matter to
prevent overheating.
Do NOT operate with hydraulic oil at or above 180°F.
858-004C
a
Note: The fill level dimension from tank bottom is:
a 9.15 inches (23.2 cm)
If the 858-003C decal requires replacement, adjust
the center border line to this height.
Figure 12:
Check Oil Level
Inspect Hoses and Fittings
4.
HOT FLUID HAZARD
34625
Check that all hydraulic fittings are tight and dry.
Inspect all hoses for damage, wear and fatigue.
Because the PTO pump system is closed, any
visible fluid may be an indication of a leak.
401-885M
Table of Contents
Index
2014-06-16
Great Plains Manufacturing, Inc.
Table of Contents
Index
PTO Operation
15
Starting the Pump
While the planter is stationary, it may be necessary to
briefly operate the pump for any of several reasons:
• verify system installation or PTO operation.
• verify oil level with system fully charged.
• set initial meter pressurization.
Refer to Figure 13
1. If the system is adjusted, leave the flow control
valve as-is.
2
1
If the system is not yet adjusted, close the flow
control valve to prevent fan motion. Turn the lock
disc 1 counter-clockwise to release the knob 2 .
Turn the knob fully clockwise to close the valve.
2.
Clear the hitch area of non-essential persons.
Check essential personnel for long hair, scarfs,
cords, frays, loose flaps and anything else that
might get entangled. Clear the area of dangling or
loose wires, straps, cord and other lines that might
become entangled and pull someone in.
3.
It is not necessary to run the PTO at the full 540 or
1000 rpm. You may run it any lower speed that
provides sufficient meter pressurization (page 17).
Figure 13:
Flow Control Valve
34626
Entanglement and Crushing Hazard:
Use extreme caution in the hitch area when the PTO is
operating.
Equipment Damage Risk:
Do not START the pump and fan suddenly at high PTO power.
Engage the PTO clutch slowly (if possible) and/or at low
engine rpm, and gradually increase PTO rpm. The hydraulic
fan can be damaged by sudden acceleration.
4.
• Check that tractor is in Park or Neutral.
• Check parking brake set.
• Set the tractor PTO controls for
540 or 1000a rpm gearing (if multi-speed) and
clockwise rotation (if bidirectional).
• Start tractor engine and set throttle to idle.
• Engage the PTO.
• Bring the tractor engine and PTO up to intended
field rpms.
5.
Check for hydraulic fluid leaks.
6.
Verify fluid level in tank (page 14).
High Pressure Fluid Hazard:
Watch for signs of fluid leaks. Escaping fluid under pressure
can have sufficient pressure to penetrate the skin causing
serious injury. Use a piece of paper or cardboard, NOT BODY
PARTS, to check for leaks. Wear protective gloves and safety
glasses or goggles when working with hydraulic systems. If an
accident occurs, seek immediate medical attention from a
physician familiar with this type of injury.
a. Operate above 540 rpm only with a 1000 rpm pump.
2014-06-16
Table of Contents
Index
401-885M
16
Single-Section PTO Pumps
Table of Contents
Index
Great Plains Manufacturing, Inc.
About the Flow Control Valve
The flow control valve adjusts the percent of PTO pump
output that is supplied to the planter hydraulic motors.
The total pump flow, in gpm or liters/min, is also directly
proportional to PTO shaft rpm.
Adjustment typically requires two persons. Pump oil flow
is ideally adjusted with all motors active under simulated
field workload, relying on Magnehelic® pressure gauge
readout, and in some cases seed monitor rpm readout.
On Great Plains Yield-Pro® single section planters, the
PTO pump supplies one or two hydraulic motors.
The table below summarizes the motor count/use and
readout resource available for the covered planters.
PTO
Kit
401-845A
411-163A
401-846A
411-164A
401-847A
411-165A
401-848A
411-166A
Planter
Model(s)
YP425A3P, YP625A3P,
YP825A3P Narrowa
Seed-only YP425A, YP625A,
YP825A
Dry fertilizer YP425A, YP625A,
YP825A
Liquid fertilizer YP425A
Liquid fertilizer YP625A,
YP825A
401-879A YP825A3P Widea
401-849A
411-167A
411-168A
2025A, 2525A
411-035A YP825AR ground drive
411-016A
411-036A
411-037A
411-038A
YP825AR hydraulic drive
Figure 14:
Flow Control Valve (YP825A)
34626
Seed
Drive
First
Motor
Second
Motor
Fan
Adjust
Valve
Location
Ground
Meter Fan
-
in. H2O
Fan mast
Ground
Meter Fan
-
in. H2O
Fan mast
Ground
Meter Fan
-
in. H2O
Fan mast
Ground
Meter Fan
-
in. H2O
Fan mast
Ground
Meter Fan
-
in. H2O
Fan mast
Ground
Meter Fan
-
in. H2O
Fan mast
Ground
Meter Fan
-
in. H2O
Upper Frame Tube
Ground
Meter Fan
-
in. H2O
Mainframe front
Hydraulic
Meter Fan
Seed Drive
in. H2Ob
Mainframe front
a. See page 25 for detailed compatibility information.
b. Fan rpm is reported by the monitor console on this configuration, and can be used as a reference.
401-885M
Table of Contents
Index
2014-06-16
Great Plains Manufacturing, Inc.
Table of Contents
Index
PTO Operation
17
Setting Meter Pressurization
General Steps for all Kits
Refer to Figure 15
Meter pressurization is set as for a standard planter,
using the PTO kit valve 1 rather than a lever for a tractor
hydraulic remote. This adjustment is normally made with
the seed meters full of seed.
2
90
60
3
Consult your planter Seed Rate manual for the correct
seed disk, meter inlet shutter setting, and recommended
initial pressure as reported by the Magnehelic® gauge 2 .
1.
Check that the Inlet Butterfly valve handle 3 is set
to 30°. If not, loosen the pivot bolt, reset handle, and
Re-secure bolt.
2.
Mount the PTO pump (page 11).
3.
Shut off the tractor and remove the key.
4.
Consult your planter Seed Rate manual for the
intended crop, noting:
• Range and Transmission sprockets required,
• correct Air-Pro® seed disk (not shown),
• initial inlet shutter setting (not shown), and
• initial meter pressurization.
30
0
848-020C
4
1
5.
Install seed disks. Leave rain covers off meters.
6.
Set meter inlet shutters per the Seed Rate manual.
7.
Open any slide gates under hoppers.
8.
Load enough seed to completely fill the meter inlet
tubes, and at least partially fill every hopper.
9.
Set out containers, under row unit seed tubes, to
collect seed metered during setup.
Figure 15: YP625A
Meter Pressure Adjustment
29842
25137
34626
Entanglement and Crushing Hazard:
Use extreme caution in the hitch area when the PTO is
operating.
10. Clear the hitch area of non-essential persons.
Check essential personnel for long hair, scarves,
cords, frays, loose flaps and anything else that
might get entangled. Clear the area of dangling or
loose wires, straps, cord and other lines that might
become entangled and pull someone in.
2014-06-16
Table of Contents
Index
401-885M
18
Single-Section PTO Pumps
Table of Contents
Index
Great Plains Manufacturing, Inc.
Ground Drive Meter Pressure
Configure the meter drive system sprockets for the
rate desired (see Seed Rate Manual).
2.
Per your planter Operator manual, hitch the planter.
Raise the planter. Install lift locks. This is to free the
meter ground drive wheel.
3.
4.
2
3
90
60
1.
30
0
• Check that tractor is in Park or Neutral.
• Check parking brake set.
• Set the tractor PTO controls for
540 or 1000 rpm gearing (if multi-speed) and
clockwise rotation (if bidirectional).
• Start tractor engine and set throttle to idle.
• Engage the PTO.
• Bring the tractor engine and PTO up to intended
field rpms.
848-020C
4
1
At the flow control valve, turn the lock disc 4
counter-clockwise to release the knob 1 . Slowly
turn the knob counter-clockwise to start the fan.
Bring the fan speed up until the Magnehelic® gauge
displays the suggested pressure for this crop.
5.
Turn the meter ground drive wheel forward several
turns, until all exposed cells in all seed disks contain
seed.
6.
Recheck the Magnehelic® gauge 2 . The reported
pressure is likely to have increased. Adjust the flow
control knob to bring the pressure reading back to
the recommended value. Tighten the lock disc.
7.
Shut down the PTO, and as desired, the tractor.
8.
Install rain covers on seed meters.
Figure 16: YP625A
Meter Pressure Adjustment
29842
25137
34626
Entanglement and Crushing Hazard:
Use extreme caution in the hitch area when the PTO is
operating.
The PTO pump is now ready for field work. Some
adjustment of meter pressure and inlet shutters may be
required, depending on seed and planting conditions.
Use the flow control valve, and not the butterfly valve, to
make pressure adjustments.
401-885M
Table of Contents
Index
2014-06-16
Great Plains Manufacturing, Inc.
Table of Contents
Index
Hydraulic Drive Meter Pressure
3
90
60
Adjustment Steps:
30
0
Refer to Figure 17
1. Have the DICKEY-john® Planter/Drill Control User
Level 2&3 manual at hand. Making changes to the
GROUND SPEED SETUP configuration requires
the Level 2 password.
2.
Have the Operator and Seed Rate manuals at hand,
so that meter setting and fan rpm targets are known
for the seed to be planted.
3.
Turn the IntelliAg® monitor system on.
Turn the Master switch off.
On the console, navigate to the
GROUND SPEED SETUP screen.
Record the ground speed constant:
4.
19
2
On these models, the PTO system drives two motors,
plumbed in parallel.
Source
Gspd Constant
PTO Operation
848-020C
1
4
Figure 17: YP825AR
Meter Pressure Adjustment
Digital Freq.
12345 (actual value varies)
29842
25137
36291
Set:
Source
Manual
Manual Gnd Spd 5.0 MPH (or as desired)
Implement Lift Disabled
5.
Hitch the tractor to be used, and install the PTO
pump. Raise the planter.
6.
Turn the lock disc 4 counter-clockwise to release
the knob 1 . Turn the knob fully clockwise to shut off
flow to the motors.
7.
Start the tractor, and seed monitor. Bring the PTO
up to expected field rpm (which is often not the full
1000 rpm).
8.
Turn the IntelliAg® Master switch on to engage the
hydraulic seed meter drive.
9.
With one person observing the Magnehelic®
pressure gaugea, turn the knob 1
counter-clockwise to obtain the pressure
recommended for this planter configuration, crop,
population and intended field speed.
Entanglement and Crushing Hazard:
Use extreme caution in the hitch area when the PTO is
operating.
10. Shut down the PTO. Set Master switch off.
11. On the console, navigate to the
GROUND SPEED SETUP screen.
Restore the original settings:
Source
Digital Freq.
Gspd Constant 12345 (actual value varies)
Implement Lift Enabled
12. If the planter has hydraulic drive, engage it for a
“FIVE REV TEST” or similar operation to create a
hydraulic motor load. Adjust PTO oil flow for target
fan speed plus 50 rpm.
Monitor meter pressurization when planting. If it is
different than during flow setup, perform the setup steps
again, and adjust the flow control valve for the
recommended pressure.
Secure the knob at this setting with the lock disc.
a. The monitor console also reports fan rpm. If you make a note of the fan rpm at the recommended pressure, you can use the console to
check air system status in the field.
2014-06-16
Table of Contents
Index
401-885M
20
Single-Section PTO Pumps
Table of Contents
Index
Great Plains Manufacturing, Inc.
PTO Unhitching
The pump may be dismounted before or after unhitching
the planter and tractor. With a 3-point planter,
dismounting the pump last may be easier, which is the
order shown on this page. For safety, have the tractor
completely shut down during PTO dismounting.
1.
At the tractor, shut down the PTO.
Note: The PTO may be shut down suddenly or gradually.
The fan circuit includes a bypass to recirculate
excess pressure during deceleration. The fan is
only sensitive to sudden acceleration.
2.
Do not approach the hitch area until the PTO shaft,
and the fan, have slowed to a complete stop.
3.
Mechanically unhitch the planter per the Operator
manual. Leave the PTO pump mounted at this time.
4.
Pull the tractor forward enough to allow access to
the PTO pump. Put the tractor in Park or Neutral.
Engage the parking brake. Shut the tractor down.
Remove the key.
Entanglement Hazard:
Remain clear of a rotating PTO shaft. Even when coasting to a
stop, a PTO shaft can have enough residual torque to inflict
serious or fatal injury.
Dismount 540 rpm Pump
Refer to Figure 9 on page 12
5.
Pass the free end of the pump chain forward
through the torque arm keyhole.
Hot Surface Hazard:
Remain clear of the pump reservoir during unhitching.
The oil may be hot enough to inflict a painful burn.
6.
Unwrap the chain from the anchor point and
drawbar.
7.
Slide the PTO pump off the PTO shaft. Store the
pump on the planter. Use the chain to secure it to
any available structure.
1
3
Dismount 1000 rpm Pump
Refer to Figure 18
5.
Loosen and remove the socket head cap screws
at the PTO coupler 2 .
6.
Slide the PTO pump off the PTO shaft.
1
If, after removing the cap screws, the coupler is still
grasping the PTO shaft too tightly to remove, use
the drive-out holes 3 to pry the clamping halves
apart. Insert the cap screws in the forward drive-out
holes. Tighten them alternately until the coupler is
free.
2
ER
NG
DA
INE
IVEL ATH
DR E DE
G
US
TIN N CA AY! TTA
RO ACT CA AW THOU
NT EP E WItor e
CO KE ERAT tracin plac clamp
rds,lds rely
guashie secu and
T OPeent
y arm
mbl
NO elin
ue
ipm
torq ued
equ p asse
DO All driv
torq
30C
858-0
with
and pum
d erly
PTOche
attas prop
bolt
TION
CAU
or
jury e:
d In magth
avoi Da wi
To hine only O
Macrate m PT
·Ope00 rp
10
A
0C
818-24
Figure 18:
Dismount 1000 rpm PTO Pump
401-885M
Table of Contents
Index
Rev.
36317
2014-06-16
Great Plains Manufacturing, Inc.
Table of Contents
Index
21
PTO Troubleshooting
Symptom
Seed meter pressure
too low
Cause
Remedy
Flow control adjusted too low.
Increase flow control (page 17).
Fan butterfly valve closed or set at too high Reduce to 30° (page 17).
an angle.
PTO rpm too low.
Bring up PTO rpm, but do not exceed
540 rpm.
Fan running in reverse (multiple possible
causes).
See “Fan running in reverse” below.
Pump cavitating.
Check oil level (page 14).
No blank disks in unused seed meters.
Install blank disks to balance pressure.
Seed inlet shutters open too wide.
Verify setting vs., rate charts. Adjust as
need for actual seed pool.
Oil filter clogged.
Replace oil filter and oil (page 22).
Magnehelic®
gauge disconnected or
sample line(s) leaking.
Check air gauging system.
Magnehelic® gauge uncalibrated.
Re-zero (see Operator manual).
Flow control valve failure or malfunction.
Repair or replace valve.
Fan seals damaged.
Repair or replace fan motor.
PTO rotation and fan or valve hoses
reversed (highly unlikely).
Set tractor controls for clockwise PTO.
Reconnect hoses.
Fan cooler plugged.
Clean or replace fan cooler.
Pressure gauge disconnected or sample
line(s) leaking.
Check air gauging system.
Magnehelic® gauge uncalibrated.
Re-zero (see Operator manual).
Seed variety may require adjustment.
Check all other possible pressure errors,
then fine tune pressure for one seed per
disk cell.
Oil filter clogged.
Replace oil filter and oil (page 22).
PTO rpm too high.
Adjust system for ideal pressure at lower
PTO rpm.
Fan butterfly valve angle too high.
Reduce to 30° (page 17).
Fan running in
reverse
PTO shaft turning counter-clockwise.
Set tractor controls for clockwise PTO.
Hoses reversed.
Check hose routing from pump to valve, to
tank and fan per Parts manual.
Fan doesn’t run at all
Low oil level in tank.
Top off tank. Check system for leaks.
Flow control valve closed.
Adjust valve (page 17).
Hoses misconnected.
Review installation (page 54).
Pressure correct on
Magnehelic®, but
skips or doubles
Oil overheating
2014-06-16
Table of Contents
Index
401-885M
22
Single-Section PTO Pumps
Table of Contents
Index
Great Plains Manufacturing, Inc.
PTO Maintenance
Oil and Filter Change
Oil Fill
Refer to Figure 19 and Figure 20
A dry or fully drained system may require as much as
6.5 gallons (25 liters) of oil to charge the cooler, pump,
motor, hoses, filter and valve, and leave 5.5 gallons
(21 liters) in the reservoir.
2
3
Before adding oil, check that the drain plug 1 is secure,
and that there are no signs of leaks in hoses or at any
system fittings.
Oil Specification
10W-30 good quality mineral base hydraulic fluid,
viscosity 70 to 250 SUS at 210°F (100°C).
Remove the filler cap 2 . Add oil until the oil level in the
tank, as observed on the sight gauge 3 , reaches the fill
line on the decal (the horizontal mid-border of the decal).
The fill line is:
9.15 inches (23.2 cm)
above the tank bottom. If the 858-003C decal requires
replacement, adjust the center border line to this height.
Operate the PTO system briefly, or until the tank level
stops changing. See “PTO Operation” on page 8 for
operations.
Recheck the sight gauge. As necessary, add oil to fill
line.
UT
CA
ION
or
ry e:
ju
In agith
d am w
oi D ly
av ne on TO
Toachi te P
m
M pera
rp
*O 0
54
B
Rev.
30C
818-1
Figure 19:
Oil Filler Cap and Filter
34617
Hot Surface and Hot Fluid Hazards:
Assess the tank temperature before adjusting oil level.
Draining excess hot oil could result in a severe burn. If the
PTO has been operated recently, the oil temperature could be
as high as 180°F (82°C).
Oil and Filter Change
At a regularly scheduled oil change, also change the
filter. At initial system flush, no filter change is required.
Refer to Figure 19 and Figure 20
1. Wait for the oil to cool before changing the oil.
2.
Place a container under the drain plug
reservoir, with at least a capacity of:
7 gallons (26 liters)
1
OIL
of the
FIL
CA
PA
CIT
Y=
US
HYE AN
OFDRAUY HI
FR 10W LICGH
QU
PROM -30. FLUI AL
DI
REEVEN RT OIL D W ITY
OR MUSITH MINE
15 PLAC T DA
0
A VI RA
LE OP E FI MACONTT BE
SC L
VE ER LT GE AM
CL OS BA
L TO AT ER TO
SE
IN EA
OLING EL PU AN N ITY D
BA HO EM MP T PA AN RA
TI
R UR EN
BE S T AN RT D FR NG
FO OR AF D ICLE EE
RE 2 TE MO S
CH YE R EVTO TO
EC AR ERR.
KINGS SE Y
OI RVIC
L
858 LE
E.
-003
VE
C
L
L
5.5
LIN
E
U.S
.G
AL
S
WA
RN
ING
HO
TF
Re
ad
LU
Ke Owne
ep
r’s
ID
to
pretracto Ma
Ke ven r at nual
ep
pre Ra t damaIDLINGBEFO
RE
Do vent diator ge
NO ove cle to HySPEE opera
T op rhe an
dra D
ting
era ating. and ulic and
te
fre Mo slowly machi
wit
e of tor
ne.
h hyd
en
for
ga
eig
rau
ge
n ma
lic
PT
oil
O
tte
at
r to
or
ab
ove
18
0°F
.
3.
Carefully remove the drain plug.
4.
Allow several minutes for oil in the filter to drain into
and out of the reservoir. Change filter as required.
See page 23 for filter size. Seat filter per
instructions on filter.
5.
Thread the plug back into the tank. Seating torque
is 27 to 43 foot-pounds (37 to 58 N-m).
HA
ZA
RD
858
-004
C
1
Figure 20:
Oil Drain Plug
401-885M
Table of Contents
Index
34688
2014-06-16
Table of Contents
Great Plains Manufacturing, Inc.
Index
PTO Maintenance
23
Lubrication and Scheduled Maintenance
Multi-purpose
spray lubricant
Multi-purpose
oil lubricant
Multi-purpose
grease lubricant
Inspection
50
Intervals
(operating hours)
at which service
is required
34208
Oil Filter
25 / 150
1 filter per planter
Type:
Great Plains 891-110C
Fleetguard HF6610
Pall HC 9540S UJ4H
Zinga HE-10
Change filter after first 25 hours, and then every 2 years
or 150 hours.
34617
IONor
UT
Pump/Fan Oil
300 or 4 Years
1 tank per planter
Type:
10W-30 Mineral-Based Oil
70 to 250 SUS at 210°F (100°C)
Quantity: 5.5 U.S. gallons (21 liters)
Change filter when changing oil, except at initial system
flush.
34617
IONor
UT
540 rpm Seal Kit
34634
600 or as needed
1 kit per planter
Type:
Great Plains 810-904C
Prince PMCK-PTO-1A
Consult the PTO Series Pump Parts Manual, available
from Prince Manufacturing Corp:
www.princehyd.com
2014-06-16
Table of Contents
Index
401-885M
24
Single-Section PTO Pumps
Table of Contents
Index
Great Plains Manufacturing, Inc.
1000 rpm Seal Kit
600 or as needed
1 kit per planter, includes snap ring and all seals
Type:
810-901C for Parker 350C pumps
Consult the
Service Manual
PGP/PGM315, 330, 350, 365
HY09-SM300/US,
available from Parker Hannifin Corporation:
www.parker.com
401-885M
34852
Table of Contents
Index
2014-06-16
Great Plains Manufacturing, Inc.
Table of Contents
Index
25
Appendix A - Installation
Before You Start
Most accidents are the result of negligence and
carelessness, usually caused by failure of the installer to
follow simple but necessary safety precautions. Allow no
one to install the Air-Pro® PTO pump before carefully
reading this manual.
Fasteners may be loosely assembled. Remove them
before mounting the component. Due to evolving
manufacturing practices, sub-assemblies may already be
completely pre-assembled. If so, check that fasteners are
tight, and skip the unneeded assembly steps.
Compatible Planters
One PTO pump kit is always required. Older planters
may also require a fan update kit. Each kit updates one
planter.
Fan Motor Compatibility
The YP425/625/825A/3P Single-Section PTO Pumps
kits require a 2-port fan hydraulic motor (having no case
drain). Older planters, having 3-port fan hydraulic motors
(with a case drain) cannot install a PTO kit unless the fan
is updated.
3
Check the planter serial number, or inspect the fan.
Planters manufactured with 3-port fans are:
Planter Model
Serial Number or Lower
(fan update never required)a
(fan update never required)a
B1008N
B1004M
B1043Q
B1006P
B1014S
B1007R
(fan update never required)
2025A
2525A
YP425A
YP425A3P
YP625A
YP625A3P
YP825A
YP825A3P
YP825AR
A Port
2
B Port
a. PTO kit for this model is compatible with a 3-port fan.
If the planter has a 3-port/case-drain fan motor, order
one fan update kit:
Kit
YP4,6,8 FAN UPDATE
Part Number
401-956A
Figure 21:
Top: Older 3-Port Fan Motor
Bottom: Current 2-Port Motor
Instructions for installing this kit are merged with the
instructions for the Single-Section PTO Pumps kits.
2014-06-16
Table of Contents
Index
29781
31754
401-885M
26
Single-Section PTO Pumps
Table of Contents
Index
Great Plains Manufacturing, Inc.
Configuration Compatibility
Refer to Figure 22 to distinguish between the liquid and dry
fertilizer options.
Before installing any kit, inspect the planter configuration
and serial number plate (for precise model number).
Refer to the Operator manual for plate location.
2025A/2525A Compatible Kits
PTO Pump Kit
Air-Pro® Precision Drills
540 rpm 1000 rpm
2025A
2525A
n/a
n/a
411-016A
411-016A
YP425A Compatible Kits
PTO Pump Kit
YP425A Planters
540 rpm 1000 rpm
YP425A (PT) Dry Fertilizer
s/n B1005M+
YP425A (PT) Liquid Fertilizer
YP425A (PT) without Fertilizer
YP425A3P
401-847A 411-165A
401-848A 411-166A
401-846A 411-164A
401-845A 411-163A
YP625A Compatible Kits
29909
31794
Other Single-Section Air-Pro® Implements
PTO Pump Kit
YP625A Planters
540 rpm 1000 rpm
YP625A (PT) Dry Fertilizer
YP625A (PT) Liquid Fertilizer
YP625A (PT) without Fertilizer
YP625A3P
Figure 22:
Top: Liquid Fertilizer Planter
Bottom: Dry Fertilizer Planter
401-847A
401-849A
401-846A
401-845A
411-165A
411-167A
411-164A
411-163A
Planter Model
YP625PD
YP625TD
YP925TD
YPE-825A
PTO Pump Kit
n/a
n/a
n/a
n/a
YP825A/AR Compatible Kits
YP825A Planters
PTO Pump Kit
540 rpm 1000 rpm
YP825A (PT) Dry Fertilizer
YP825A (PT) Liquid Fertilizer
YP825A (PT) without Fertilizer
YP825A3P, row spacings:
30 inch (76.2 cm) or less
36 inch (91.4 cm) or more
YP825AR ground drive
YP825AR hydraulic drive
401-885M
401-847A 411-165A
401-849A 411-167A
401-846A 411-164A
401-845A
401-879A
411-035A
411-037A
411-163A
411-168A
411-036A
411-038A
Table of Contents
Index
2014-06-16
Great Plains Manufacturing, Inc.
Table of Contents
Index
Appendix A - Installation
27
Tools Required
Pre-Delivery and Other Options
• a lift or hoist with a 100 pound \ 45 kg capacity
(600 pound \ 272 kg capacity for kits 401-845A,
401-847A, 401-847A and 401-848A)
• basic hand tools
If you are installing the Air-Pro® PTO Pump on a
newly-shipped planter, it may be more convenient to
install the PTO pump system during the pre-delivery
setup:
• 6 to 12 gallons of good quality 10-W30 mineral base
hydraulic fluid, viscosity from 70-250 SUS range at
210°F (100°C).
• Install the PTO pump system after installing the
tongue (pull-type only). The tongue must be in place
for hose re-routing.
• bucket for collecting oil
• Install the PTO pump system after mounting a fertilizer
sub-frame (option, pull-type only). This sub-frame
must be in place for flow control valve mounting, and in
some cases, reservoir mounting.
• hose marker, such as white electrical tape and
indelible marker
• power equipment with a compatible PTO for flushing
and charging the system
• the planter Operator and Parts manuals (see page 6)
• protective footwear if the planter has coulters or row
cleaners installed
Torque values for fasteners are shown on page 65.
Call-Outs
to
and
a to
1
11
101
to
9
z
53
to
241
2014-06-16
Single-character callouts identify
components in the currently referenced
Figure or Figures. Numbers and letters may
be reused for different items on other pages.
Two-digit callouts in the range 11 to 53
reference existing parts removed and
reused. They are listed on page 70.
Three-digit callouts in the range 101 to 241
reference new parts from the new parts list
beginning on page 68. The descriptions
match those on the parts, cartons, bags or
item tags, as well as descriptions your
updated Parts Manual.
• Install the PTO pump system before installing
frame-mounted row options. This improves foot room
and reduces sharp object hazards while working near
tool bars.
• Install the PTO pump system before installing
row-mounted coulters or row cleaners. This improves
foot room and reduces sharp object hazards while
working near tool bars.
• Install the PTO pump system before installing
markers. This eliminates an overhead sharp object
hazard, and improves working space at the
mainframe.
Prepare Planter
1.
Read and understand “Important Safety
Information” starting on page 1.
2.
Position the planter on a level surface in a well
lighted location suitable for the installation. A clear
surface beneath makes it easier to recover any
dropped parts. If markers are already installed,
choose an area with enough room to unfold them.
3.
Configure the planter for Parking, as instructed in
the planter Operator manual.
4.
If markers are already installed, unfold them.
5.
Unhitch the planter.
Table of Contents
Index
401-885M
28
Single-Section PTO Pumps
Table of Contents
Index
Great Plains Manufacturing, Inc.
Prepare Fan
Disconnect Existing Fan Hoses
Newer fans have 2 hoses to the hitch. Older fans have 3
hoses to the hitch (and require a fan update kit). For a
3-port fan, continue at “Disconnect 3-Port Fan” on
page 29.
Disconnect 2-Port Fan
A 2-port fan will be reconnected at a later step.
Refer to Figure 23
6. Set out an oil collection bucket near the hitch ends
of the hoses.
7.
Remove any hose handle housings
8.
Disconnect the hoses from the hitch fittings at the
JIC connectors 2 . Drain the hitch ends into the
bucket. Set the open hose ends in the bucket.
9.
Crack the JIC connections 3 at the upper ends of
the supply, return and any case drain hoses at the
fan. Leave the bypass hose 4 connected at the
check valve.
3
1.
10. When all hoses have completely drained, fully
disconnect them from the fan fittings.
1
4
2
11. For all models except YP825AR, release the hoses
from all clamps on their route. These clamps may
be reused for PTO system hoses.
For model YP825AR, leave the hoses on the
mainframe in place for the time being. Release and
remove fan hoses, and if present, seed meter
hydraulic drive hoses, from the hitch to the first
connection at the mainframe pivot.
Figure 23:
2-Port Fan Hoses
34676
Note: For a PTO pump installation, removed fan hoses,
their fittings and handles are not reused.
Continue at “Open Fan Screen” on page 29.
401-885M
Table of Contents
Index
2014-06-16
Table of Contents
Great Plains Manufacturing, Inc.
Index
Appendix A - Installation
29
Disconnect 3-Port Fan
For a 2-port fan, follow steps at “Disconnect 2-Port Fan”
on page 28.
A 3-port fan is replaced with a 401-956A at a later step.
Refer to Figure 23 on page 28 and Figure 24
12. Set out an oil collection bucket near the hitch ends
of the hoses.
13. Remove any hose handle housings
1.
a
c
14. Disconnect the hoses from the hitch fittings at the
JIC connectors 2 . Drain the QD ends into the
bucket. Set the open hose ends in the bucket.
15. If not installing a PTO kit, mark hoses at the pump.
Mark the hose at port a as “A”, and the hose at b
as “B”. No mark is required for the case drain c .
b
16. Crack the JIC connections 3 at the upper ends of
the hoses at the fan. When all hoses have
completely drained, fully disconnect them from the
fan fittings.
17. If also installing a PTO pump: release the hoses
from all clamps on their route. These clamps may
be reused for PTO system hoses.
Figure 24:
3-Port Fan Motor
34689
If not installing a PTO pump: release only the case
drain hose from clamps.
Note: For a PTO pump installation, the original fan hoses,
their fittings and handles are not reused.
Open Fan Screen
Refer to Figure 25
18. Remove and save four sheet metal screws
and one:
5
51c
5
51e 890-624C SCREEN FAN COVER
51e
U
B
R
F
D
L
Figure 25:
Open Fan Screen
2014-06-16
Table of Contents
Index
34631
401-885M
30
Single-Section PTO Pumps
Table of Contents
Index
Great Plains Manufacturing, Inc.
Dismount or Relocate Sensor Bracket
Refer to Figure 26
19. Inspect the fan cage for presence of a:
17 401-537D DJ FAN SENSOR MOUNT BRKT
If there is no sensor bracket, or the bracket is
installed in the top and bottom holes a , skip to
step 22. The bracket may or may not have a sensor
installed.
21
U
B
R
F
20. This step presumes that there is a sensor
bracket 17 , and it is mounted in one of the lateral
holes sets b . Remove and save two sets of
fasteners securing the bracket, and two sets at the
top and bottom holes a , four sets total:
D
28
31
L
a
51
b
b
b
21 802-005C HHCS 1/4-20X1 GR5
28 804-006C WASHER LOCK SPRING 1/4 PLT
31 804-075C WASHER FLAT 1/4 USS PLT
17
If also performing a fan motor update, skip to
step 22 (do not relocate sensor at this time).
51c
21. If the fan already has a 2-port hydraulic motor (no
fan update being performed), relocate the sensor
bracket 17 to a vertical orientation, using hole
set a . Secure it with two sets of saved fasteners.
b
a
Figure 26:
Prepare Fan Cage
22. Remove and save two or four sets of fasteners at
lateral holes b :
34631
21 802-005C HHCS 1/4-20X1 GR5
28 804-006C WASHER LOCK SPRING 1/4 PLT
31 804-075C WASHER FLAT 1/4 USS PLT
If performing a fan motor update, the screen cage is
completely loose at this point. Remove and save it.
If not installing a 401-956A fan motor update, continue at
“Install Fan Cooler” on page 37.
401-885M
Table of Contents
Index
2014-06-16
Great Plains Manufacturing, Inc.
Table of Contents
Index
Appendix A - Installation
31
Update Fan Motor
39
If not installing a 401-956A fan motor update, continue at
“Install Fan Cooler” on page 37.
35
Recover Motor Fittings
Refer to Figure 27
Note: The recirculation loop hose 47 is likely to be full of
oil. Have the oil collection bucket and a rag at hand.
Disconnect the higher of the two JIC connections
first.
23. Remove and save one each:
37
32
34
35
47
811-088C
810-037C
811-077C
811-078C
841-196C
AD 3/4MORB 3/4MJIC
VALVE LINE CHECK
TE 3/4MORB 3/4MJIC 3/4MJIC
TE 3/4MJIC
HH1/2R2 024 3/4FJIC
39
34
32
37
and two:
39 811-150C EL 3/4FJIC 3/4MJIC
47
The remaining fittings are not re-used.
Figure 27:
Recover Fittings
Release Impeller
If not installing a 401-956A fan motor update, continue at
“Install Fan Cooler” on page 37.
19
34631
11
Refer to Figure 28
24. Locate the impeller hub bushing:
52 890-891C BUSHING, JA X 20 MM
1
inside the fan housing. Remove three:
11 HHCS #10-24x1 INCH GRADE 8 FULL THREAD
25. Thread the cap screws 11 into the threaded holes 1
in the bushing 52 . Screw them in until they contact
the impeller. Drive them one turn at a time, in a
rotating pattern, until the bushing is free. Recover
and save the bushing, screws and one:
52
19 800-373C SQ KEY 6MM X 35MM
The impeller may now be loose inside the fan
housing.
Figure 28:
Fan Impeller Hub Bushing
The bushing and screws are not reused.
2014-06-16
Table of Contents
Index
34683
401-885M
32
Single-Section PTO Pumps
Table of Contents
Index
Dismount Fan
If not installing a 401-956A fan motor update, continue at
“Install Fan Cooler” on page 37.
Refer to Figure 29
26. Disconnect the duct hose at the outlet
shown).
27. At the mount plate
53 ,
2
Great Plains Manufacturing, Inc.
53
20 16
(duct not
28
remove and save one:
24
20 801-081C SCREW HEX SELF TAP 1/4-20X3/4
28. Prepare to support the weight of the fan assembly,
which may be as much as 70 pounds (32 kg).
29. At the fan mount weldment 16 , starting at the
bottom, remove and save five:
2
28 804-006C WASHER LOCK SPRING 1/4 PLT
24 802-224C HHCS 1/4-20X1 1/4 GR5
The fan/motor assembly is now loose. Move it to a
workbench or similar flat surface, with the fan inlet
facing down.
Figure 29:
Dismount Fan
Remove 3-Port Hydraulic Motor
If not installing a 401-956A fan motor update, continue at
“Install Fan Cooler” on page 37.
25
Refer to Figure 30
30. Remove and save two:
30
25 803-014C NUT HEX 3/8-16 PLT
30 804-013C WASHER LOCK SPRING 3/8 PLT
four:
34681
33
29
29 804-011C WASHER FLAT 3/8 USS PLT
two:
15
22 802-079C HHCS 3/8-16X1 1/4 GR5
The following items are not reused:
53 890-899C VOLVO HYD MOTOR MOUNT PLT
15 23907 HUB/MOTOR PLATE SEAL (2B)
33 810-556C PARKER F-11 FAN MOTOR
53
29
22
Figure 30:
Remove 3-Port Motor
401-885M
Table of Contents
Index
34680
2014-06-16
Table of Contents
Great Plains Manufacturing, Inc.
Index
Appendix A - Installation
33
Mount 2-Port Hydraulic Motor
If not installing a 401-956A fan motor update, continue at
“Install Fan Cooler” on page 37.
Refer to Figure 31
31. Select one each new:
235 890-892C HYDRAULIC MOTOR MOUNT PLT
Set this on the work surface with the raised rim up.
Note that there are 8 holes. Motor installation uses
the 2 holes that are aligned with midpoints of the six
edges (shown as dashed arrows). Do not use holes
aligned with corners, or (if present) circular holes.
180
235
32. Select two sets:
22 802-079C HHCS 3/8-16X1 1/4 GR5
29 804-011C WASHER FLAT 3/8 USS PLT
Place a flat washer 29 on each bolt 22 . Insert
these,
from below, through the two edge-centered slotted
holes.
33. Select one new:
180 810-273C HYD MOTOR 7/8ORBF
Orient the new motor 180 , shaft down,
29
to mate with
22
the bolts positioned at step 32.
34. Select two each saved
Figure 31:
Mount 2-Port Motor
29 804-011C WASHER FLAT 3/8 USS PLT
30 804-013C WASHER LOCK SPRING 3/8 PLT
25 803-014C NUT HEX 3/8-16 PLT
34678
Secure the motor 180 , centered on the plate 235 ,
using flat washers 29 , lock washers 30 and nuts 25
on the bolts from step 32.
Re-Mount Fan
If not installing a 401-956A fan motor update, continue at
“Install Fan Cooler” on page 37.
14
235
Refer to Figure 38
35. Place the mount plate 235 and motor assembly on
the LH fan housing 14 . Align the plate so that motor
Port A is toward fan top, and Port B is toward fan
bottom (direction of fan exhaust port).
20
16
28
24
36. Select one saved:
20 801-081C SCREW HEX SELF TAP 1/4-20X3/4
Secure the back corner of the plate to the fan
housing with this screw.
37. Select five sets saved:
28 804-006C WASHER LOCK SPRING 1/4 PLT
24 802-224C HHCS 1/4-20X1 1/4 GR5
Support the weight of the fan/motor assembly at the
mast mount weldment 16 . With the fan exhaust
pointing down, secure the assembly to the mount
with the bolts and lock washers.
38. Reconnect the duct hose at the outlet
shown).
2014-06-16
2
2
U
F
(duct not
Table of Contents
B
R
D
L
Figure 32:
Mount 2-Port Motor
Index
34679
401-885M
34
Single-Section PTO Pumps
Table of Contents
Index
Great Plains Manufacturing, Inc.
Install New Impeller Bushing
If not installing a 401-956A fan motor update, continue at
“Install Fan Cooler” on page 37.
Refer to Figure 33 (shown with fan RH housing transparent)
39. Select one new:
12
180
234 890-396C BUSHING - FAN
The bushing 234 includes three screws:
242 HHCS #10-24x1 INCH GRADE 8 FULL THREAD
These screws may be loose in a package, or may
be threaded into the drive-out holes of the bushing.
If threaded, remove them.
234
40. Make sure the surfaces of the bushing cone,
impeller central hole and impeller threaded holes
are free of any anti-seize compounds or other
lubricants.
41. Select one new:
120 168-094D HYD MOTOR 1/8 KEY
Place the impeller 12 onto the motor shaft 180 .
Place the cone end of the bushing 234 onto the
motor shaft. Rotate the bushing until the bushing
keyway and the motor shaft keyway align. Insert the
key 120 , making the outside end flush with the
bushing face.
Refer to Figure 34
42. Press the bushing 234 firmly into the impeller .
Check that the gap 3 between the bushing flange
and the impeller face is equal around the edge of
the bushing.
Equipment Failure Risk:
Mind the gap 3 . The flange to impeller face gap must not be
closed at any point, and must be as consistent as practical to
ensure proper key capture and minimize impeller run-out
during operation.
120
242
Figure 33:
Install New Bushing
34686
Equipment Failure Risk:
Do not lose these screws 242 . If any need replacement, use
Grade 8 or higher strength, rated for 60 inch-pounds torque.
Using weaker screws has a high risk of impeller separation
during operation, substantial equipment damage, and some
risk of personal injury.
234
180 242
12
43. Place the three screws 242 into the drilled
(clearance) holes of the bushing. Thread them into
the tapped holes of the impeller, until the screw
heads just make contact with the bushing.
3
3
44. Using a small hand wrench, tighten the screw
nearest the key to just hand tight.
45. Tighten the remaining two screws alternately to
hand tight.
120
46. Using a torque wrench, tighten all three screws, in
sequence, one full rotation per screw, until the
specified torque is reached:
60 inch-pounds (5 foot-pounds, 6.7 N-m)
47. Check that the impeller spins freely and without
excessive run-out. If not, re-adjust seating screws
and re-tighten to torque spec.
401-885M
Table of Contents
Figure 34:
Seat Bushing Screws
Index
34687
2014-06-16
Great Plains Manufacturing, Inc.
Table of Contents
Index
Appendix A - Installation
Install Motor Fittings and Loop
If not installing a 401-956A fan motor update, continue at
“Install Fan Cooler” on page 37.
35
U
B
R
Refer to Figure 35
48. Select two new:
F
199 811-502C AD 7/8MORB 3/4FJIC
180 ports.
Install these in the motor
L
D
49. Select one saved:
34 811-077C TE 3/4MORB 3/4MJIC 3/4MJIC
32
Install it at the Port A adaptor just installed, with the
MORB port facing to the back of the planter.
47
37
39
50. Select one saved:
35 811-078C TE 3/4MJIC
34
199
Install it at the Port B adaptor, with the MORB port
facing to the back of the planter.
51. Select two saved:
A Port
39 811-150C EL 3/4FJIC 3/4MJIC
Install these at both tees just installed, with the JIV
ends facing to planter front.
180
199
34
52. Select one saved:
32 810-037C VALVE LINE CHECK
With the flow direction indicator oriented as shown,
attach the check valve to the MORB port of the top
tee 34 . This valve allows flow from the top tee
(motor outlet) to the bottom tee (motor inlet) when
the impeller is spinning to a stop after hydraulic flow
is stopped from the tractor or PTO pump.
B Port
39
Figure 35:
2-Port Pump Fittings
31754
53. Select one saved:
37 811-088C AD 3/4MORB 3/4MJIC
Connect it to the back end of the check valve
47 841-196C HH1/2R2 024 3/4FJIC
Connect it from the lower tee 39 to the
B
R
54. Select one saved:
top tee
34 .
21
U
32 .
F
Re-Mount Fan Inlet Screen
If not installing a 401-956A fan motor update, continue at
“Install Fan Cooler” on page 37.
D
28
31
L
a
44
b
b
b
Refer to Figure 36
55. Select one saved:
51c 890-624C SCREEN FAN COVER
and four sets saved (or six if no sensor bracket
21 802-005C HHCS 1/4-20X1 GR5
28 804-006C WASHER LOCK SPRING 1/4 PLT
31 804-075C WASHER FLAT 1/4 USS PLT
Orient the screen cage with the rain shield 44
17
17 ):
51c
on
top. Secure it to the fan housing, at the lateral
holes b , using bolts 21 , lock washers 28 and flat
washers 31 . if no sensor bracket 17 , use all six
holes (sets a and b ).
2014-06-16
Table of Contents
b
a
Figure 36:
Re-Mount Fan Screen
Index
34631
401-885M
36
Single-Section PTO Pumps
Table of Contents
Re-Install RPM Sensor Bracket
If there is no sensor bracket, or if not installing a
401-956A fan motor update, continue at “Install Fan
Cooler” on page 37.
R
Refer to Figure 37
56. Select one saved:
F
Index
Great Plains Manufacturing, Inc.
21
U
17 401-537D DJ FAN SENSOR MOUNT BRKT
B
D
28
31
L
a
b
b
and two sets saved:
21 802-005C HHCS 1/4-20X1 GR5
28 804-006C WASHER LOCK SPRING 1/4 PLT
31 804-075C WASHER FLAT 1/4 USS PLT
With the bend in the bracket 17 toward the impeller
b
bushing, install the bracket at the top and bottom
holes a , using the bolts 21 , lock washers 28 and
flat washers 31 .
17
51c
Route any sensor lead present out the previously
existing hole in the fan screen.
If installing a fan motor update only, continue at step 66
on page 39.
401-885M
Table of Contents
b
a
Figure 37:
Re-Install Sensor Bracket
Index
34631
2014-06-16
Great Plains Manufacturing, Inc.
Table of Contents
Index
Appendix A - Installation
37
Install Fan Cooler
Refer to Figure 38
In normal use, the hydraulic fan circuit requires enough
power that, absent a tractor oil radiator or local cooler,
the oil would overheat. The Air-Pro® PTO pump kit
includes a cooler 121 (radiator) that installs inside the fan
cage.
121
U
B
R
Note: Do not disconnect the fan motor hoses during
cooler installation. Those hoses are disconnected
and reconnected during “Install Hoses” on
page 54.
F
Figure 38:
Fan Cooler General Location
D
L
34617
Install Fan Cooler
Break Down Cooler Assembly
Refer to Figure 39
The cooler assembly 121 must be partially disassembled
to have access to the shroud mounting holes.
181
165
121 122
57. Select one new:
121 401-833L 6IN HYD FAN COOLER ASSY
Remove and save four:
165 802-159C HHCS 5/16-18X1 GR5
Leave the nut clips 159 on the shroud
the shroud and cooler 181 :
122 .
Separate
159
122 401-834H 6 IN HYD FAN SHROUD
181 810-804C C12 HYD OIL COOLER
Figure 39:
Break Down Cooler
34632
Install Cooler Shroud
21
Refer to Figure 40 (shown with fan cage dismounted for
clarity of bolt hole assignment - the cage should already be
secured via top and bottom holes)
58. Select one new:
28
31
122
122 401-834H 6 IN HYD FAN SHROUD
and four sets saved:
21 802-005C HHCS 1/4-20X1 GR5
28 804-006C WASHER LOCK SPRING 1/4 PLT
31 804-075C WASHER FLAT 1/4 USS PLT
b
Attach the shroud through the fan cage holes, to the
fan housing, using the saved fasteners.
Figure 40:
Install Cooler Shroud
2014-06-16
Table of Contents
Index
34632
401-885M
38
Single-Section PTO Pumps
Table of Contents
Index
Great Plains Manufacturing, Inc.
Orient Cooler Elbows
Refer to Figure 41
59. Set the fan cooler 181 horizontally on a work
surface (mounting holes at top and bottom). This is
the orientation of the cooler after final installation.
181
50°
to
60°
Loosen the jam nuts of the elbow fittings 190 .
Rotate the inlet JIC ends to point at the angles
shown. When installed in the fan cage, these
orientations point roughly at top center and bottom
center of the cage.
190
Tighten the jam nuts (see page 66 for fitting torque).
Figure 41:
Orient Elbows
34636
Re-Assemble Fan Cooler
Refer to Figure 42
60. Select the:
181
181 810-804C C12 HYD OIL COOLER
165
and four sets saved:
165 802-159C HHCS 5/16-18X1 GR5
With the elbow fittings toward the cap end of the fan,
use the bolts 165 to re-attach the fan cooler 181 to
the shroud 122 at the nut clips 159 .
122
159
Figure 42:
Re-Assemble Cooler
34632
Modify Fan Cage
Refer to Figure 43
61. Prepare an exit opening in the fan cage for the
cooler hoses. The hole needs to be:
• located at bottom center of the fan cage,
• on the center-line of the MJIC elbow ports,
• wide enough for a 3/4 FJIC hose fitting, about:
11⁄4 inches or 3.2 cm),
• long enough for one hose diameter plus one
3/4 FJIC hose fitting, about
21⁄4 inches or 5.7 cm) total, and
• have a smooth edge. Making cuts (- - -) as
shown, and folding back the cage edges, to the
inside, provides an adequately smooth edge.
Figure 43:
Hose Opening in Cage
401-885M
Table of Contents
Index
2014-06-16
Table of Contents
Great Plains Manufacturing, Inc.
Index
Appendix A - Installation
39
Attach Cooler Hoses & Close
Refer to Figure 44
62. Select one new cooler inlet hose:
194 811-268C HH1/2R2 048 3/4FJIC
Route the hose through the hole prepared at
step 61. Connect it to the upper fitting on the cooler.
63. Mark the free end of this hose “PORT T”.
This step is particularly important for kits
401-848A, 401-879A, 411-166A and 411-168A,
which use identical hoses for inlet and outlet.
64. Select one new cooler outlet hose
(hose is kit dependent):
Kit
Outlet Hose
h
INLET
OUTLET
h
194
h
401-845A
195 811-269C HH1/2R2 036 3/4FJIC
401-846A
194 811-268C HH1/2R2 048 3/4FJIC
401-847A
195 811-269C HH1/2R2 036 3/4FJIC
401-848A
194 811-268C HH1/2R2 048 3/4FJIC
401-849A
203 811-773C HH1/2R2 066 3/4FJIC
401-879A
194 811-268C HH1/2R2 048 3/4FJIC
411-016A
197 811-291C HH1/2R2 072 3/4FJIC
411-035A
228 851-163C HH3/8R2 045 3/4FJIC MJIC
411-036A
228 851-163C HH3/8R2 045 3/4FJIC MJIC
411-037A
227 851-053C HH3/8R2 046 3/4FJIC
411-038A
227 851-053C HH3/8R2 046 3/4FJIC
411-163A
195 811-269C HH1/2R2 036 3/4FJIC
411-164A
194 811-268C HH1/2R2 048 3/4FJIC
411-165A
195 811-269C HH1/2R2 036 3/4FJIC
411-166A
194 811-268C HH1/2R2 048 3/4FJIC
411-167A
203 811-773C HH1/2R2 066 3/4FJIC
411-168A
194 811-268C HH1/2R2 048 3/4FJIC
Figure 44:
Cooler Hoses
Route the hose through the hole prepared at
step 61. Connect it to the lower fitting on the cooler.
5
51c
65. Mark the free end of this hose “FILTER”.
Note: The external ends of these hoses are not
connected at this time.
51e
Refer to Figure 45
66. Select one saved:
51e 890-624C SCREEN FAN COVER
and four saved sheet metal screws 5 .
Re-attach the cover to the cage 51c .
U
B
R
F
D
L
Figure 45:
Close Fan Cage
2014-06-16
34636
Table of Contents
Index
34631
401-885M
40
Single-Section PTO Pumps
Table of Contents
Index
Great Plains Manufacturing, Inc.
Reconnect Hitch Hoses
a
If not installing a 401-956A fan motor update, continue at
“Install Oil Reservoir” on page 41.
The steps below are for the fan motor update, when
installed without also installing a PTO kit.
Refer to Figure 46
67. Connect the hose b marked “B” to the elbow at
Port B of the new motor. Connect the hose a
marked “A” to the elbow at Port A of the new motor.
68. Re-assemble the QD fittings at the hitch ends of the
hoses. Re-install any hose handles provided. Install
a handle marked for retracted cylinder on the “B”
hose, and a handle marked for extended cylinder on
the “A” hose.
b
This completes installation of the 401-956A fan motor
update, when installed without also installing a PTO
pump.
401-885M
Table of Contents
Figure 46:
2-Port Fan Hoses to Hitch
Index
34676
2014-06-16
Great Plains Manufacturing, Inc.
Table of Contents
Index
Appendix A - Installation
41
Install Oil Reservoir
Determine Reservoir Location
Refer to Figure 47 (top pane is a composite view of all
tool bar/truss configurations)
69. Determine the reservoir mounting location based on
the planter configuration and kit:
Kit
Location
401-845A
1
401-846A
1
401-847A
1
401-848A
1
401-849A
2
401-879A
3
411-016A
4
411-035A
5
411-036A
5
411-037A
5
411-038A
5
411-163A
1
411-164A
1
411-165A
1
411-166A
1
411-167A
2
411-168A
3
Row Unit at Tool Bar
Row Unit at Tool Bar
Row Unit at Tool Bar
Row Unit at Tool Bar
Fertilizer Sub-Frame
Mainframe Truss
Below Main Seed Box
Tongue at Hitch
Tongue at Hitch
Tongue at Hitch
Tongue at Hitch
Row Unit at Tool Bar
Row Unit at Tool Bar
Row Unit at Tool Bar
Row Unit at Tool Bar
Fertilizer Sub-Frame
Mainframe Truss
Go To
3
w
1
2
page 42
page 42
page 42
page 42
page 44
page 45
page 46
page 47
page 47
page 47
page 47
page 42
page 42
page 42
page 42
page 44
page 45
4
5
OIL
CA
FIL
USE
HYD ANY
OF RAU HIG
FRO10W LIC H
PRE M -30. FLUQUA
DIR
LITY
REPVEN T OIL ID WIT
150 LAC T OR MU H MIN
DAM
ERA
A VIS
LEV OPEE FILT CONST BE
L BAS
EL RAT AGE TAM CLECOS
ER TO INA
TOO ING
ELE PUM NTAN ITY ED
LBA HOU
ANDRAT
MEN P PAR
R
ING
BEF RS T AND TIC FRE
OREOR AFT MO LES E
ER TOR
2 YEA
CHE
TO
EVE
CKI RS RY.
NG SER
OIL VIC
858-00
LEV E.
3C
EL
PA
CI
TY
L
= 5.5
LIN
E
U.S
. GA
LS
WA
R
HO
T FL
Read
UI
Keep Own
er’s
D
to
tracto Manu
preve
NIN
G
HA
ZA
RD
Keep nt r at
al
preve Radi damaIDLIN BEFO
Do nt ator ge G SPE RE
NOToverh cleanto Hydr ED opera
operaeatin and aulic and ting
mach
te g.
free Motoslowl
with
y enga ine.
of
foreigr
hydra
n matte ge PTO
ulic
oil
at
r to
or
abov
e 180°
F.
858-00
4C
Figure 47: Reservoir Locations:
Tool Bar or Truss
Below Main Box
Tongue at Hitch
2014-06-16
Table of Contents
Index
34657
36293
36295
401-885M
42
Single-Section PTO Pumps
Table of Contents
Index
Great Plains Manufacturing, Inc.
Reservoir on Row Unit Tool Bar
This topic applies only to kits 401-845A, 401-846A,
401-847A, 401-848A, 411-163A, 411-164A, 411-165A
and 411-166A. For other kits, find the topic starting page
in the table on page 41.
130
Refer to Figure 48
Kit covered by this page have this unique component:
OIL
130 401-842L HYD RES W/ FILTER ASSY
CAP
AC
This tank weldment has a single front-facing mount
plate 1 and straight bolts, designed to replace the
U-bolts of one row unit mount.
YP425A-0430
YP425A-0436
YP425A-0438
YP425A-0440
YP425A-0470
YP425A-0838
YP425A-0840
YP425A-08TR
YP425A-08TR36
YP425A3P-0430
YP425A3P-0436
YP425A3P-0438
YP425A3P-0440
YP425A3P-0470
YP425A3P-0836
YP425A3P-0838
YP425A3P-0840
YP425A3P-08TR
3
3
3
3
3
6
6
6
6
4
4
4
4
4
8
8
8
8
L
= 5.
LIN
5 U.
S.
E
GAL
S
WA
RN
ING
HO
TF
Rea
LU
ID
HA
ZA
RD
858-0
04C
1
• planters that have no fertilizer sub-frame
(excluding YP825A3P “wide row” models with a truss
mainframe),
• planters with dry fertilizer, or
• YP425A planters with liquid fertilizer.
Identify Row Location
70. Consult the table below for the row location. Rows
are counted from the implement left side, which is
row 1. Count individual rows (count each row of a
twin row separately).
Row
ITY
d
Kee Owner
to p trac ’s Man
prev
ual
Kee enttor at
prevp Rad dam IDLINGBEFOR
Do ent iato age
SPE E
NO ove r clea to Hyd ED ope
ratin
T operhe
atin n and rau and
g mac
lic
rate g.
free Mot slow
hine
with
of or ly eng
.
fore
hyd
age
rau
ign
lic
PTO
mat
oil
ter
at
to
or
abo
ve
180
°F.
The row unit reservoir location is used with:
YP425 Planter
FIL
US
HYE AN
OFDRAUY HIG
FR 10W-LIC H
PROM 30 FL QUAL
UID
DIR
REEVEN T. OIL WIITY
15 PLAC T OR MU TH MINE
DA
0
ST A
LE OP E FILMACONT
BE VIS RA
VE ER
AM CL COL BA
L TO AT TE GE TO
R
INA EA SIT SE
OLING EL PU NT
D
BA HO EM MP N ANY RA
PA
R
TIN
BEURSENT AN RT D FR
FO OR AF D ICL EEG
RE 2 TE MO ES
CH YE R EVTO TO
EC AR ERR.
KIN S SE Y
G
OIL RVICE
858-0LE
03C VE .
L
YP625 Planter
YP625A-0630
YP625A-0636
YP625A-0638
YP625A-0640
YP625A-0670
YP625A-1238
YP625A-1240
YP625A-12TR
YP625A-12TR36
YP625A3P-0630
YP625A3P-0636
YP625A3P-0638
YP625A3P-0640
YP625A3P-0670
YP625A3P-1236
YP625A3P-1238
YP625A3P-1240
YP625A3P-12TR
Figure 48:
Row Unit Reservoir 401-842L
Row
4
4
4
4
4
8
8
8
8
5
5
5
5
5
10
10
10
10
YP825 Planter
YP825A-0830
YP825A-0836
YP825A-0838
YP825A-0840
YP825A-0870
YP825A-16TR
YP825A-16TR36
YP825A-16TR38
YP825A-16TR40
YP825A3P-0830
YP825A3P-0836
YP825A3P-0838
YP825A3P-0870
YP825A3P-1636
YP825A3P-1638
YP825A3P-1640
YP825A3P-16TR
YP825A3P-0840
34658
Row
5
5
5
5
5
10
10
10
10
6
N/Aa
N/Aa
6
N/Aa
N/Aa
N/Aa
12
N/Aa
a. Not Applicable - these planter models use kit 401-879A (reservoir installation on truss, page 45).
401-885M
Table of Contents
Index
2014-06-16
Great Plains Manufacturing, Inc.
Table of Contents
Index
Appendix A - Installation
43
Support Row Unit
Refer to Figure 48
71. Use a grease pencil to mark, on the back of the tool
bar, the station of the designated row unit.
72. Use a hoist and multiple lines to support the weight
of the row unit.
73. Remove the two U-bolts 2 and four sets of washers
and nuts. These fasteners are not re-used.
130
Mount Row Unit Reservoir
74. Select one new:
170
130 401-842L HYD RES W/ FILTER ASSY
and four sets new:
175
162 802-105C HHCS 5/8-11X9 GR5
175 804-022C WASHER LOCK SPRING 5/8 PLT
170 803-021C NUT HEX 5/8-11 PLT
162
2
Figure 49:
Install Row Unit Reservoir
Continue at “Install Flow Control Valve” on page 48.
Table of Contents
B
R
With the decal side facing forward, align the mount
plate with the holes in the row unit mount. Verify row
unit station on the tool bar. Secure reservoir plate
and row unit mount to tool bar with bolts 162 , lock
washers 175 and nuts 170 .
2014-06-16
U
Index
F
D
L
34660
401-885M
44
Single-Section PTO Pumps
Table of Contents
Index
Great Plains Manufacturing, Inc.
Reservoir on Fertilizer Sub-Frame
This topic applies only to kits 401-849A and 411-167A,
and planter models:
• YP625A with liquid fertilizer, or
• YP825A with liquid fertilizer.
For other kits, find the topic starting page in the table on
page 41.
132
Refer to Figure 50
The fertilizer sub-frame reservoir location is used with
625A/825A planters that have a fertilizer sub-frame. It
applies to kits 401-849A and 411-167A, which have this
component unique to the fertilizer sub-frame location:
4
161
132 401-844L 6 8 FERT HYD RES W/ FILTER
This tank weldment has a two side-facing mount
plates 3 and straight bolts, designed to straddle the
center rib of the fertilizer sub-frame.
173
169
3
75. Select one new:
132 401-844L 6 8 FERT HYD RES W/ FILTER
and four sets new:
161 802-047C HHCS 1/2-13X6 GR5
173 804-015C WASHER LOCK SPRING 1/2 PLT
169 803-020C NUT HEX 1/2-13 PLT
Figure 50:
Fertilizer Reservoir 401-844L
34659
If the fasteners are pre-installed in the reservoir
assembly, completely remove them.
Refer to Figure 51 (which is a view from below left rear)
76. With the front face (which has the sight gauge 4 )
facing forward, lower the reservoir weldment down
over the forward end of the center rib 5 of the
fertilizer sub-frame. Position it as far forward on the
rib as possible.
U
F
77. Insert two bolts 161 through the top holes of the
weldment plates, routing them underneath all
hydraulic hoses 6 present.
Insert the remaining two bolts through the lower
side plate holes, and under the frame rib.
Secure all bolts with lock washers
173
and nuts
B
L
6
D
R
161
132
169 .
Continue at “Install Flow Control Valve” on page 48.
169
5
173
Figure 51:
Reservoir on Sub-Frame Rib
401-885M
Table of Contents
Index
34662
2014-06-16
Table of Contents
Great Plains Manufacturing, Inc.
Index
Appendix A - Installation
45
Reservoir on Mainframe Truss
This topic applies only to kits 401-879A and 411-168A,
and planter models:
YP825A3P-0836
YP825A3P-1636
YP825A3P-1640
YP825A3P-0838
YP825A3P-1638
YP825A3P-0840
140
4
For other kits, find the topic starting page in the table on
page 41.
Refer to Figure 52 and Figure 53
The truss-mount reservoir location is used with 3-point
“wide row” planters that have a truss weldment 1 above
the mainframe tool bar. It applies to kits 401-879A and
411-168A, which have the following component unique
to the truss location:
166
173
169
140 401-878L 3PT 8 ROW WIDE HYD RES W/FLTR
2
This tank weldment has two mount plates 2 (front- and
rear-facing) and straight bolts, designed to straddle the
truss tube.
Figure 52:
Truss-Mount Reservoir 401-878L
34663
78. Select one new:
140 401-878L 3PT 8 ROW WIDE HYD RES W/FLTR
and four sets new:
166 802-377C HHCS 1/2-13X7 1/2 GR5
173 804-015C WASHER LOCK SPRING 1/2 PLT
169 803-020C NUT HEX 1/2-13 PLT
If the fasteners are pre-installed in the reservoir
assembly, completely remove them.
U
B
R
F
79. With the front face (which has the sight gauge 4 )
facing forward, lower the reservoir weldment down
over the right side of the truss tube, at a distance of:
27 inches (68.6 cm)
from hitch center-line to reservoir mount center-line.
D
L
140
1
80. Insert two bolts 161 through the holes of the
weldment plates, underneath the truss tube.
Secure the bolts with lock washers
nuts 169 .
173
and
Continue at “Install Flow Control Valve” on page 48.
3
Figure 53:
Reservoir to Truss
2014-06-16
Table of Contents
Index
34664
401-885M
46
Single-Section PTO Pumps
Table of Contents
Index
Great Plains Manufacturing, Inc.
Reservoir Under Main Seed Box
This topic applies only to kit 411-016A and planter
models 2025A and 2525A. For other kits, find the topic
starting page in the table on page 41.
U
6
F
D
169
L
173
141 411-017L LB PTO TANK
This tank weldment has a forward mount plate 1 and a
rear mount base 2 , secured to the planter by U-bolts to
the right of the hitch. The forward mount plate rests on
the upper frame tube 3 . The rear mount base rests on
the angle brace 4 . The rear base has two sets of bolt
holes. The LH holes are shown with the U-bolt. An
alternate U-bolt location is shown at 5
B
R
141
6
Refer to Figure 54 and Figure 47 on page 41
The under-box reservoir location is used with 3-point box
planters. It applies to kit 411-016A, which has the
following component unique to the under-box location:
1
OIL
FIL
US CAP
HYE AN AC
OFDRAUY HIG IT
FR 10W-LIC H Y
L
174
LIN
= 5.
5 U.
S.
PROM 30 FL QUAL
UID
DIR
REEVEN T. OIL WIITY
150PLAC T OR MU TH MIN
DA
ST A ER
LE OP E FILMACONT
BE VIS AL
VE ER
AM CL CO BA
L TO AT TE GE TO
R
INA EA SIT SE
OLING EL PU NT
D
BA HO EM MP N ANY RA
PA
R
TIN
BEURSENT AN RT D FR
FO OR AF D ICL EEG
RE 2 TE MO ES
CH YE R EVTO TO
EC AR ERR.
KIN S SE Y
G
OIL RVICE
858-0LE
03C VE .
L
E
GAL
S
WA
R
NIN
G
HO
TF
Rea
LU
d
Kee Owner
to p trac ’s Man
prev
ual
Kee enttor at
prevp Rad dam IDLINGBEFOR
Do ent iato age
SPE E
NO ove r clea to Hyd ED ope
ratin
T operhe
atin n and raul and
g mac
rate g.
free ic Mot slow
hine
with
of or ly eng
.
fore
hyd
age
raul
ign
PTO
ic
mat
oil
ter
at
to
or
abo
ID
HA
ZA
RD
ve
180
4
°F.
858-0
04C
5
The tank weldment also has top brackets 6 , which may
be used to re-secure air system pipe brackets.
2
81. Examine the configuration of the planter.
Temporarily remove some air system piping to allow
access to the installation site.
82. Select one each new:
178
178
141 411-017L LB PTO TANK
which includes (and may have pre-installed):
one each new:
3
178 806-159C U-BOLT 1/2-13 X 5 1/32 X 4 1/2
176 806-144C U-BOLT 1/2-13 X 3 1/32 X 3
Figure 54:
Under-Box Reservoir 411-017L
and four sets new:
36298
174 804-016C WASHER FLAT 1/2 SAE PLT
173 804-015C WASHER LOCK SPRING 1/2 PLT
169 803-020C NUT HEX 1/2-13 PLT
Position the reservoir so that the bolt holes of the
front plate 1 straddle the upper frame tube 3 , at
least one set of rear base 2 bolt holes straddle the
angle brace 4 .
Secure the front plate with U-bolt 178 , flat
washers 174 , lock washers 173 and nuts 169 .
Secure the rear base with U-bolt 176 , flat
washers 174 , lock washers 173 and nuts 169 .
83. Re-install any removed air system pipes.
Continue at “Install Flow Control Valve” on page 48.
401-885M
Table of Contents
Index
2014-06-16
Great Plains Manufacturing, Inc.
Table of Contents
Index
Appendix A - Installation
47
Reservoir on Tongue at Hitch
This topic applies only to kits 411-035A, 411-036A,
411-037A and 411-038A for planter model YP825AR.
For other kits, find the topic starting page in the table on
page 41.
148
2
Refer to Figure 55
On the model YP825AR planter, the reservoir mounts on
the hitch weldment.
OIL
CA
USE
HYD ANY
OF RAU HIG
FRO10W LIC H
FIL
PA
CI
TY
L
= 5.5
LIN
PRE M -30 FLUQUA
DIR
LITY
REPVEN T. OIL ID WIT
150 LAC T OR MU H MIN
DAM
ST A ERA
LEV OPEE FILT CONTA
BE VIS L
EL RAT AGE
BAS
ER TO MINCLECOSIT
TOO ING
ELE PUM
ANTAN Y ED
LBA HO
ANDRAT
ME
PAR
R
URS NT P AND
ING
BEF
TIC FRE
OREOR AFT MO LES E
ER TOR
2 YEA
CHE
TO
EVE
CKI RS RY.
NG SER
OIL VIC
858-00
LEV E.
3C
EL
U.
S.
E
GA
LS
WA
R
NIN
G
HO
T FL
Read
UI
Keep Own
er’s
to
tract
Man
preve
ual
Keep nt or at
BEF
preve Radi dam IDLIN
ORE
Do nt ator age G SPE
NOToverh cleanto Hydr ED oper
oper eatin and aulic and ating
mach
ate g.
free Motoslow
with
ine.
ly
of
enga
foreigr
hydra
n matt ge PTO
ulic
oil
er
at
to
or
abov
D
HA
ZA
RD
163
84. Remove the cotter pin (not shown) and hose
post 1 . These parts are not re-installed. The
function of this post (hose storage) is replaced by
the keyhole openings in the new tank mount.
85. Select one new:
e 180°
F.
858-00
4C
1
148 411-039L 825R HYD TANK RES ASSY
and four sets new:
3
163 802-128C HHCS 1/2-13X2 GR5
173 804-015C WASHER LOCK SPRING 1/2 PLT
169 803-020C NUT HEX 1/2-13 PLT
If the fasteners are pre-installed in the reservoir
assembly, completely remove them.
173
With the reservoir sight gauge 2 to Front, install the
reservoir assembly on the rear 4 holes 3 of the
tongue adjustment plate.
169
U
B
R
F
D
L
Figure 55:
Tongue Reservoir 411-039L
2014-06-16
Table of Contents
Index
36296
401-885M
48
Single-Section PTO Pumps
Table of Contents
Index
Great Plains Manufacturing, Inc.
Install Flow Control Valve
U
For model YP825AR with hydraulic seed meter drive, a
flow control valve is already installed. Continue at “Install
Hoses” on page 54.
Determine Control Location
B
R
1
F
D
2
L
Refer to Figure 56 (top view is a composite view of
YP4/6/825A/3P configurations, excluding YP825AR)
86. Determine the reservoir mounting location based on
the planter and configuration:
Kit
401-845A
401-846A
401-847A
401-848A
401-849A
401-879A
411-016A
411-035A
411-036A
411-037A
411-038A
411-163A
411-164A
411-165A
411-166A
411-167A
411-168A
Location
Fan Mast
1 Fan Mast
2 Fertilizer Sub-Frame
1 Fan Mast
2 Fertilizer Sub-Frame
2 Fan Mast
3 Upper Frame Tube
4 Forward Tool Bar
4 Forward Tool Bar
Valve already installeda
Valve already installeda
1 Fan Mast
1 Fan Mast
2 Fertilizer Sub-Frame
1 Fan Mast
2 Fertilizer Sub-Frame
2 Fan Mast
1
Go To
page 49
page 49
page 50
page 49
page 50
page 49
page 51
page 51
page 51
n/a
n/a
page 49
page 49
page 50
page 49
page 50
page 49
3
4
a. On model YP825AR with hydraulic drive, the fan flow
control valve is factory-installed as part of the shared
meter-drive/fan circuit.
Figure 56: Flow Control Locations:
Subframe / Fan Mast
Upper Frame Tube
Forward Tool Bar
401-885M
Table of Contents
Index
34657
36293
36300
2014-06-16
Great Plains Manufacturing, Inc.
Table of Contents
Index
Appendix A - Installation
49
Install Controls on Fan Mast
This page applies only to kits 401-845A, 401-846A,
401-879A, 411-163A, 411-164A, and 411-168A. For
other kits, find the topic starting page in the table on
page 48.
124
Refer to Figure 57 (a view from below right front)
87. Remove and save the two forward flanged:
27
27 803-360C NUT HEX FLG 3/8-16 GR8 ZNYCR
88. Select one new:
124 401-835S RIGID PLNTR HYD FL CNTRL ASSY
The valve assembly has port letters stamped on the
valve body. Orient the assembly so that ports M & T
are on top, and ports T & P are on the bottom.
Secure the valve assembly to the air tank U-bolts
with the saved nuts 27 .
Continue at “Install Hoses” on page 54.
U
F
R
B
D
L
Figure 57:
Flow Controls on Fan Mast
2014-06-16
Table of Contents
Index
34666
401-885M
50
Single-Section PTO Pumps
Table of Contents
Index
Great Plains Manufacturing, Inc.
Install Controls on Fertilizer Frame
U
These instructions apply to kits 401-847A, 401-848A,
401-849A, 411-165A, 411-166A and 411-167A. For
other kits, find the topic starting page in the table on
page 48.
B
R
F
126
Refer to Figure 58
89. Select one each new:
D
L
126 401-837K FERT FRAME FLOW CONTROL ASSY
177 806-150C U-BOLT 3/8-16 X 7 1/32 X 6 GR5
and two sets new:
172 804-013C WASHER LOCK SPRING 3/8 PLT
168 803-014C NUT HEX 3/8-16 PLT
177
If the fasteners are pre-installed in the valve
assembly, completely remove them.
90. Place the U-bolt 177 , from the rear at the front
sub-frame tube as close to the hitch as possible.
91. The valve assembly 126 has port letters stamped on
the valve body. Orient the assembly so that ports
T & P are toward the front, and M & T toward the
back. Secure the valve assembly to the U-bolts with
the lock washers 172 and nuts 168 .
168
172
Continue at “Install Hoses” on page 54.
Figure 58:
Flow Controls on Sub-Frame
401-885M
Table of Contents
Index
34668
2014-06-16
Great Plains Manufacturing, Inc.
Table of Contents
Index
Appendix A - Installation
51
Install Controls on Upper Frame Tube
85
These instructions apply to kit 411-016A. For other kits,
find the topic starting page in the table on page 48.
Refer to Figure 59
92. Select one each new:
142 411-018L LB FLOW CONTROL ASSY
179 806-165C U-BOLT 3/8-16 X 5 1/32 X 4 1/4
8-0
04
C
U
B
R
F
L
D
and two sets new:
168
172 804-013C WASHER LOCK SPRING 3/8 PLT
168 803-014C NUT HEX 3/8-16 PLT
If the fasteners are pre-installed in the valve
assembly, completely remove them.
172
93. Place the U-bolt 179 , from below at the upper frame
tube, approximately centered between the hitch top
link plates and the left hand 2-point plates.
94. The valve assembly 142 has port letters stamped
on the valve body. Orient the assembly so that ports
T & P are toward the front, and M & T toward the
back. Secure the valve assembly to the U-bolts with
the lock washers 172 and nuts 168 .
142
Continue at “Install Hoses” on page 54.
179
Figure 59:
Flow Controls on Upper Frame Tube
2014-06-16
Table of Contents
Index
36304
401-885M
52
Single-Section PTO Pumps
Table of Contents
Index
Great Plains Manufacturing, Inc.
Install Controls on Forward Tool Bar
These instructions apply to kits 411-035A and 411-036A.
For other kits, find the topic starting page in the table on
page 48.
Refer to Figure 60 (in which the orientation rose presumes
that the mainframe is in the unfolded position; if folded, the
front of the mainframe is actually to implement right)
95. Select one each new:
U
B
R
F
D
L
146 411-031K YP825R FLOW CONTROL ASSY
177 806-150C U-BOLT 3/8-16 X 7 1/32 X 6 GR5
and two sets new:
172 804-013C WASHER LOCK SPRING 3/8 PLT
168 803-014C NUT HEX 3/8-16 PLT
146
If the fasteners are pre-installed in the valve
assembly, completely remove them.
96. Place the U-bolt 177 , from the rear at approximately
the center of the forward tool bar on the mainframe.
177
97. The valve assembly 146 has port letters stamped
on the valve body. Orient the assembly so that ports
T & P are toward the front, and M & T toward the
back. Secure the valve assembly to the U-bolts with
the lock washers 172 and nuts 168 .
172
168
Figure 60:
Flow Controls on Forward Tool Bar
401-885M
Table of Contents
Index
36306
2014-06-16
Great Plains Manufacturing, Inc.
Table of Contents
Index
2014-06-16
Table of Contents
Index
Appendix A - Installation
53
401-885M
54
Single-Section PTO Pumps
Table of Contents
Install Hoses
Index
Great Plains Manufacturing, Inc.
Kit
Page
Kit
Page
General Hose Installation
401-845A
401-846A
54
55
56
57
58
59
60
61
61
411-037A
Hose routing and connections vary by kit. There are
separate pages for each unique hose configuration.
62
62
54
55
56
57
58
59
401-847A
The new hoses may be installed in any order. Secure
them with any available clamps along their routes.
401-848A
401-849A
Continue at the page for your kit.
401-879A
411-016A
411-035A
411-036A
411-038A
411-163A
411-164A
411-165A
411-166A
411-167A
411-168A
401-845A and 411-163A Flow Control Hydraulics
195
811-269C
194
841-196C
215
811-268C
841-847C
A
221
811-773C
220
203
M
841-815C
B
T
T
R
GE
N
DA
ELIN
TH
IVE
DR SE DEA
ING CAU !
AY UTTAT
RO CT CANAW HO
WIT
NTA EP
or
place
CO KE ERATEtract
in
ds,ds rely chain
T OP guarshiel secu and
NO linement mblye arm
torqu
equip asse
DO All drive
195
5C
858-00
P
and pumpwith
PTO hed
attac
ION
CAUT
or
uryge:
Injma
avoid Da with
To chine only O
Ma rate m PT
·Ope00 rp
10
811-269C
A
C Rev.
818-240
Figure 61:
401-845A and 411-163A Hydraulic Hose Routing
401-845A and 411-163A
Hydraulic Connections
Elbow at Reservoir Outlet
Reservoir Outlet to Pump Inlet
Pump Outlet to Valve Port P
Valve Port M to Fan Motor Inlet B
Fan Motor Outlet A to Valve Port T
Valve Port T to Cooler Inlet
Cooler Outlet to Oil Filter
401-885M
34671
36312
Hose Identification
Callout
Hose
220
841-815C
EL 1 5/16FJIC 1 5/16MJIC
221
841-847C
HH1R4 90 1 5/16FJIC
203
811-773C
HH1/2R2 066 3/4FJIC
195
811-269C
HH1/2R2 036 3/4FJIC
215
841-196C
HH1/2R2 024 3/4FJIC
195
811-269C
HH1/2R2 036 3/4FJIC
194
811-268C
HH1/2R2 048 3/4FJIC
Table of Contents
Index
Hose Description
2014-06-16
Table of Contents
Great Plains Manufacturing, Inc.
Index
Appendix A - Installation
55
401-846A and 411-164A Flow Control Hydraulics
194
811-268C
194
841-196C
215
811-268C
A
841-556C
222
217
R
GE
N
DA
ELIN
TH
IVE
DR SE DEA
ING CAU !
AY UTTAT
RO CT CANAW HO
WIT
NTA EP
or
place
CO KE ERATEtract
in
ds,ds rely chain
T OP guarshiel secu and
NO linement mblye arm
torqu
equip asse
DO All drive
M
841-848C
T
B
5C
858-00
and pumpwith
PTO hed
attac
ION
CAUT
or
uryge:
Injma
avoid Da with
To chine only O
Ma rate m PT
·Ope00 rp
10
A
C Rev.
818-240
T
195
811-269C
P
Figure 62:
401-846A and 411-164A Hydraulic Hose Routing
401-846A and 411-164A
Hydraulic Connections
Reservoir Outlet to Pump Inlet
Pump Outlet to Valve Port P
Valve Port M to Fan Motor Inlet B
Fan Motor Outlet A to Valve Port T
Valve Port T to Cooler Inlet
Cooler Outlet to Oil Filter
2014-06-16
34672
36312
Hose Identification
Callout
Hose
222
841-848C
HH1R4 144 1 5/16FJIC
217
841-556C
HH1/2R2 144 3/4FJIC
195
811-269C
HH1/2R2 036 3/4FJIC
215
841-196C
HH1/2R2 024 3/4FJIC
194
811-268C
HH1/2R2 048 3/4FJIC
194
811-268C
HH1/2R2 048 3/4FJIC
Table of Contents
Index
Hose Description
401-885M
56
Single-Section PTO Pumps
Table of Contents
Index
Great Plains Manufacturing, Inc.
401-847A and 411-165A Flow Control Hydraulics
811-268C
194
811-073C
188
194
841-849C
811-268C
223
A
811-807C
204
220
M
841-815C
B
P
R
GE
N
DA
ELIN
TH
IVE
DR SE DEA
ING CAU !
AY UTTAT
RO CT CANAW HO
WIT
NTA EP
or
place
CO KE ERATEtract
in
ds,ds rely chain
T OP guarshiel secu and
NO linement mblye arm
torqu
equip asse
DO All drive
T
5C
858-00
186
and pumpwith
PTO hed
attac
ION
CAUT
or
uryge:
Injma
avoid Da with
To chine only O
Ma rate m PT
·Ope00 rp
10
A
C Rev.
818-240
811-059C
Figure 63:
401-847A and 411-165A Hydraulic Hose Routing
401-847A and 411-165A
Hydraulic Connections
Elbow at Reservoir Outlet
Reservoir Outlet to Pump Inlet
Pump Outlet to Valve Port P
Valve Port M to Fan Motor Inlet B
Tee at Fan Motor Outlet A
Valve Port T to Fan Motor Tee
Fan Motor Tee to Cooler Inlet
Cooler Outlet to Oil Filter
401-885M
34673
36312
Hose Identification
Callout
Hose
220
841-815C
EL 1 5/16FJIC 1 5/16MJIC
223
841-849C
HH1R4 168 1 5/16FJIC
204
811-807C
HH1/2R2 120 3/4FJIC
186
811-059C
HH1/2R2 080 3/4FJIC
188
811-073C
TE 3/4MJIC 3/4MJIC 3/4FJIC
186
811-059C
HH1/2R2 080 3/4FJIC
194
811-268C
HH1/2R2 048 3/4FJIC
194
811-268C
HH1/2R2 048 3/4FJIC
Table of Contents
Index
Hose Description
2014-06-16
Table of Contents
Great Plains Manufacturing, Inc.
Index
Appendix A - Installation
57
401-848A and 411-166A Flow Control Hydraulics
811-268C
194
811-073C
188
194
811-268C
811-807C
A
204
224
841-850C
M
R
GE
N
DA
B
P
ELIN
TH
IVE
DR SE DEA
ING CAU !
AY UTTAT
RO CT CANAW HO
WIT
NTA EP
or
place
CO KE ERATEtract
in
ds,ds rely chain
T OP guarshiel secu and
NO linement mblye arm
DO drive
5C
858-00
torqu
All equip asse
and pumpwith
PTO hed
attac
IONor
CAoidUTInjmaurygeth:
av Da wi
To chine only O
Ma rate m PT
·Ope00 rp
10
A
C Rev.
818-240
T
186
811-059C
Figure 64:
401-848A and 411-166A Hydraulic Hose Routing
401-848A and 411-166A
Hydraulic Connections
Reservoir Outlet to Pump Inlet
Pump Outlet to Valve Port P
Valve Port M to Fan Motor Inlet B
Tee at Fan Motor Outlet A
Valve Port T to Fan Motor Tee
Fan Motor Tee to Cooler Inlet
Cooler Outlet to Oil Filter
2014-06-16
34674
36312
Hose Identification
Callout
Hose
224
841-850C
204
811-807C
HH1/2R2 120 3/4FJIC
186
811-059C
HH1/2R2 080 3/4FJIC
188
811-073C
TE 3/4MJIC 3/4MJIC 3/4FJIC
186
811-059C
HH1/2R2 080 3/4FJIC
194
811-268C
HH1/2R2 048 3/4FJIC
811-268C
HH1/2R2 048 3/4FJIC
194
Table of Contents
Index
Hose Description
HH1R4 198 1 5/16FJIC
401-885M
58
Single-Section PTO Pumps
Table of Contents
Index
Great Plains Manufacturing, Inc.
401-849A and 411-167A Flow Control Hydraulics
811-268C
194
811-073C
194
188
811-268C
811-807C
A
204
222
M
841-848C
B
R
GE
N
DA
P
ELIN
TH
IVE
DR SE DEA
ING CAU !
AY UTTAT
RO CT CANAW HO
WIT
NTA EP
or
place
CO KE ERATEtract
in
ds,ds rely chain
T OP guarshiel secu and
NO linement mblye arm
DO drive
5C
858-00
torqu
All equip asse
and pumpwith
PTO hed
attac
IONor
CAoidUTInjmaurygeth:
av Da wi
To chine only O
Ma rate m PT
·Ope00 rp
10
A
C Rev.
818-240
T
186
811-059C
Figure 65:
401-849A and 411-167A Hydraulic Hose Routing
401-849A and 411-167A
Hydraulic Connections
Reservoir Outlet to Pump Inlet
Pump Outlet to Valve Port P
Valve Port M to Fan Motor Inlet B
Tee at Fan Motor Outlet A
Valve Port T to Fan Motor Tee
Fan Motor Tee to Cooler Inlet
Cooler Outlet to Oil Filter
401-885M
34675
36312
Hose Identification
Callout
Hose
222
841-848C
HH1R4 144 1 5/16FJIC
204
811-807C
HH1/2R2 120 3/4FJIC
186
811-059C
HH1/2R2 080 3/4FJIC
188
811-073C
TE 3/4MJIC 3/4MJIC 3/4FJIC
186
811-059C
HH1/2R2 080 3/4FJIC
194
811-268C
HH1/2R2 048 3/4FJIC
194
811-268C
HH1/2R2 048 3/4FJIC
Table of Contents
Index
Hose Description
2014-06-16
Table of Contents
Great Plains Manufacturing, Inc.
Index
Appendix A - Installation
59
401-879A and 411-168A Flow Control Hydraulics
194
194
841-847C
841-196C
811-268C
811-268C
215
221
A
811-773C
220
203
M
841-815C
T
B
T
R
GE
N
DA
195
ELIN
TH
IVE
DR SE DEA
ING CAU !
AY UTTAT
RO CT CANAW HO
WIT
NTA EP
or
place
CO KE ERATEtract
in
ds,ds rely chain
T OP guarshiel secu and
NO linement mblye arm
torqu
equip asse
DO All drive
5C
858-00
and pumpwith
P
PTO hed
attac
ION
CAUT
or
uryge:
Injma
avoid Da with
To chine only O
Ma rate m PT
·Ope00 rp
10
811-269C
A
C Rev.
818-240
Figure 66:
401-879A and 411-168A Hydraulic Hose Routing
401-879A and 411-168A
Hydraulic Connections
Elbow at Reservoir Outlet
Reservoir Outlet to Pump Inlet
Pump Outlet to Valve Port P
Valve Port M to Fan Motor Inlet B
Fan Motor Outlet A to Valve Port T
Valve Port T to Cooler Inlet
Cooler Outlet to Oil Filter
Continue at “Charge and Test” on page 64.
2014-06-16
34669
36312
Hose Identification
Callout
Hose
220
841-815C
EL 1 5/16FJIC 1 5/16MJIC
221
841-847C
HH1R4 90 1 5/16FJIC
203
811-773C
HH1/2R2 066 3/4FJIC
195
811-269C
HH1/2R2 036 3/4FJIC
215
841-196C
HH1/2R2 024 3/4FJIC
194
811-268C
HH1/2R2 048 3/4FJIC
194
811-268C
HH1/2R2 048 3/4FJIC
Table of Contents
Index
Hose Description
401-885M
60
Single-Section PTO Pumps
Table of Contents
Index
Great Plains Manufacturing, Inc.
411-016A Flow Control Hydraulics
36
Refer to Figure 67
98. Select one new:
191 811-147C CR 3/4MJIC
At the fan return line, remove one:
36 811-079C TE 3/4FJIC 3/4MJIC 3/4MJIC
Replace the tee
36
with the cross
191 .
191
Figure 67:
2025A/2525A Fan Fittings
29781
Connect Hoses
811-518C
811-268C
811-291C
200
194
197
OIL
FIL
CA
PA
CI
TY
USE
HYD ANY
OF RAU HIG
FRO10W LIC H
PRE M -30 FLUQUA
DIR
LITY
REPVEN T. OIL ID WIT
150 LAC T OR MU H MIN
DAM
ST A ERA
LEV OPEE FILT CONTA
BE VIS L
EL RAT AGE
BAS
ER TO MINCLECOSIT
TOO ING
ELE PUM
ANTAN Y ED
LBA HO
ANDRAT
ME
PAR
R
URS NT P AND
ING
BEF
TIC FRE
OREOR AFT MO LES E
ER TOR
2 YEA
CHE
TO
EVE
CKI RS RY.
NG SER
OIL VIC
858-00
LEV E.
3C
EL
L
= 5.5
LIN
U.
S.
E
GA
LS
WA
R
NIN
G
HO
T FL
Read
UI
Keep Own
er’s
D
to
tract
Man
preve
or
HA
ZA
RD
ual
Keep nt at
preve Radi dam IDLIN BEFORE
Do nt ator age G SPE
NOTover cleanto Hydr ED oper
ating
operheat
and aulic and
mach
ate ing.
free Motoslow
with
ine.
ly
of
enga
forei r
hydr
ge
gn
aulic
PTO
matt
oil
er
at
to
or
abov
e 180°
F.
858-00
4C
841-462C
49
221
M
P
197
841-847C
R
GE
N
DA
T
ELIN
TH
IVE
DR SE DEA
ING CAU !
AY UTTAT
RO CT CANAW HO
WIT
NTA EP
or
place
CO KE ERATEtract
in
ds,ds rely chain
T OP guarshiel secu and
NO linement mblye arm
DO drive
811-291C
197
811-291C
IONor
CAoidUTInjmaurygeth:
av Da wi
To chine only O
Ma rate m PT
·Ope00 rp
10
47
841-196C
5C
858-00
torqu
All equip asse
and pumpwith
PTO hed
attac
A
C Rev.
818-240
Figure 68:
411-016A Hydraulic Hose Routing
401-879A
Hose Identification
Hydraulic Connections
Reservoir Outlet to Pump Inlet
Pump Outlet to Valve Port P
Valve Port M to Fan Motor Inlet at Check Valve
Fan Motor Outlet at Tee to Valve Port T
Fan Motor Outlet at Tee to Cooler Inlet
Cooler Outlet to Oil Filter
Fan Motor Case Drain to Reservoir
Fan Motor Bypass Loop
Continue at “Charge and Test” on page 64.
401-885M
36307
Callout
Hose
221
841-847C
HH1R4 90 1 5/16FJIC
49
841-462C
HH1/2 R2 114 3/4FJIC 3/4MORB
197
811-291C
HH1/2R2 072 3/4FJIC
197
811-291C
HH1/2R2 072 3/4FJIC
194
811-268C
HH1/2R2 048 3/4FJIC
197
811-291C
HH1/2R2 072 3/4FJIC
200
811-518C
HH1/4R1 070 9/16FJIC
47
841-196C
HH1/2R2 024 3/4FJIC
Table of Contents
Index
Hose Description
2014-06-16
Table of Contents
Great Plains Manufacturing, Inc.
Index
Appendix A - Installation
61
411-035A and 411-036A Flow Control Hydraulics
851-163C
228
OIL
CA
811-237C
PA
CI
TY
L
= 5.5
E
LS
WA
R
HO
T FL
Read
UI
Keep Own
er’s
D
to
tracto Manu
preve
811-073C
811-268C
851-031C
LIN
U.S
. GA
40
50
FIL
USE
HYD ANY
OF RAU HIG
FRO10W LIC H
PRE M -30. FLUQUA
DIR
LITY
REPVEN T OIL ID WIT
150 LAC T OR MU H MIN
DAM
ERA
A VIS
LEV OPEE FILT CONST BE
L BAS
EL RAT AGE TAM CLECOS
ER TO INA
TOO ING
ELE PUM NTAN ITY ED
LBA HOU
ANDRAT
MEN P PAR
R
ING
BEF RS T AND TIC FRE
OREOR AFT MO LES E
ER TOR
2 YEA
CHE
TO
EVE
CKI RS RY.
NG SER
OIL VIC
858-00
LEV E.
3C
EL
NIN
851-163C
G
228
HA
ZA
RD
Keep nt r at
al
preve Radi damaIDLIN BEFO
Do nt ator ge G SPEERE
opera
NOToverh cleanto Hydr
D
operaeatin and aulic
and ting
mach
te g.
free Motoslowl
with
y enga ine.
of
foreigr
hydra
n matte ge PTO
ulic
oil
at
r to
or
abov
e 180°
F.
858-00
4C
194
188
811-664C
851-164C
229
41
811-967C
42
M
216
P
47
841-281C
5C
858-00
and pumpwith
PTO hed
attac
ION
CAUT
or
uryge:
Injma
avoid Da with
To chine only O
Ma rate m PT
·Ope00 rp
10
216
T
R
GE
N
DA
ELIN
TH
IVE
DR SE DEA
ING CAU !
AY UTTAT
RO CT CANAW HO
WIT
NTA EP
or
place
CO KE ERATEtract
in
ds,ds rely chain
T OP guarshiel secu and
NO linement mblye arm
torqu
equip asse
DO All drive
201
841-196C
841-281C
A
C Rev.
818-240
811-663C
228
851-163C
Figure 69:
411-035A and 411-036A Hydraulic Hose Routing
411-035A and 411-036A
Hydraulic Connections
Reservoir Outlet to Pump Inlet
Pump Outlet to Pivot Pressure Hose
Pivot Pressure Hose to Riser Pressure Hose
Riser Pressure Hose to Valve Port P
Valve Port M to Motor Inlet Elbow
Valve Port T from Motor Outlet Tee
Motor Outlet Tee to Cooler Inlet
Cooler Outlet to Return Riser Hose
Return Riser Hose to Return Pivot Hose
Return Pivot Hose to Reservoir Return Hose
Reservoir Return Hose to Reservoir Inlet
Motor Bypass Loop
Continue at “Charge and Test” on page 64.
2014-06-16
36309
36312
Hose Identification
Callout
Hose
229
851-164C
HH1R4 60 1 5/8FJIC
201
811-663C
HH3/8R2 225 3/4FJIC
41
811-664C
HH3/8R2 38 3/4FJIC
42
811-967C
HH3/8R2 185 3/4FJIC
216
841-281C
HH3/8R2 96 3/4FJIC
216
841-281C
HH3/8R2 96 3/4FJIC
194
811-268C
HH1/2R2 048 3/4FJIC
228
851-163C
HH3/8R2 045 3/4FJIC MJIC
40
811-237C
HH3/8R2 174 3/4FJIC
50
851-031C
HH3/8R2 041 3/4FJIC
228
851-163C
HH3/8R2 045 3/4FJIC MJIC
47
841-196C
HH1/2R2 024 3/4FJIC
Table of Contents
Index
Hose Description
Status
New
New
Left in place
Left in place
New
New
New
New
Left in place
Left in place
New
Left in place
401-885M
62
Single-Section PTO Pumps
Table of Contents
Index
Great Plains Manufacturing, Inc.
411-037A and 411-038A Flow Control Hydraulics
36088
YP825AR Hydraulic Drive
Existing Plumbing
810-898C Valve Detail
34
39
M
45
43
T
P
T
47
LS
39
40
DA
NG
ER
ROT
ATIN
CONT
G
ACT DRIV
CAN
DO KEE CAUSELIN
ENOT P
All
OPERAWAE DEAT
anddrivelin
PTOequipm
ATE Y! H
e guards
attache
pump ent
WITH
bolts
shields
, tractor
d assemb
properl
with
OUTtorque in
38
ly
place
y torqued
securel
arm
y
and
CAUT
ION
To
Macavo
·Op hineid Inju
100erate Damry or
only age
0 rpm
with:
PTO
clamp
858-030C
818-240C
Rev.
A
35
188
229
851-164C
39
34
194
811-268C
811-664C
851-031C
41
50
43
811-980C
40
851-053C
811-237C
227
38
201
811-663C
228
811-125C
202
851-163C
202
Figure 70:
411-037A and 411-038A Hydraulic Hose Routing
401-885M
Table of Contents
Index
36318
2014-06-16
Great Plains Manufacturing, Inc.
Table of Contents
Index
Appendix A - Installation
63
Replace/Add Fittings
99. Select one new:
188 811-073C TE 3/4MJIC 3/4MJIC 3/4FJIC
Refer to Figure 70 on page 62
100. At the fan return line, disconnect:
34 811-077C TE 3/4MORB 3/4MJIC 3/4MJIC
39 811-150C EL 3/4FJIC 3/4MJIC
Insert the tee
188
at this connection.
101. Select one new:
202 811-725C EL 90 3/4MJIC
Refer to Figure 70 on page 62
102. Locate the existing tee 35 that connects the return
line riser hose 40 to the hydraulic drive motor return
hose 43 and one of the valve port T hoses 38 .
Remove that tee
35 .
It is not re-used.
Use a new elbow 202 to connect the hydraulic drive
motor return hose 43 and the valve port T hose 38 .
103. Select one each new:
202 811-725C EL 90 3/4MJIC
227 851-053C HH3/8R2 046 3/4FJIC
Use the elbow 202 to connect the hose 227 to the
existing return riser hose 40 , and the cooler outlet.
Connect Remaining Hoses
Only hoses that are added, removed or disturbed are
identified.
411-037A and 411-038A
Hydraulic Connections
Pump Outlet to Pivot Pressure Hose
Pivot Pressure Hose to Riser Pressure Hose
Valve Port T to Motor Return Elbow
New Drive Motor Return Elbow
Drive Motor Return Hose to New Elbow
Second Fan Motor Outlet Tee
Motor Outlet Tee to Cooler Inlet
Cooler Outlet to Return Riser Hose Elbow
New Return Riser Elbow
Return Riser Hose to Return Pivot Hose
Return Pivot Hose to Reservoir Return Hose
Reservoir Return Hose to Reservoir Inlet
Reservoir Outlet to Pump Inlet
Part Identification
Callout
Part
Part Description
201
811-663C HH3/8R2 225 3/4FJIC
41
811-664C HH3/8R2 38 3/4FJIC
38
811-125C HH3/8R2 082 3/4FJIC
202
811-725C EL 90 3/4MJIC
43
811-980C HH3/8R2 047 3/4FJIC
188
811-073C TE 3/4MJIC 3/4MJIC 3/4FJIC
194
811-268C HH1/2R2 048 3/4FJIC
227
851-053C HH3/8R2 046 3/4FJIC
202
811-725C EL 90 3/4MJIC
40
811-237C HH3/8R2 174 3/4FJIC
50
851-031C HH3/8R2 041 3/4FJIC
228
851-163C HH3/8R2 045 3/4FJIC MJIC
229
851-164C HH1R4 60 1 5/8FJIC
Status
New
Left in place
Re-connect
New
Re-connect
New
New
New
New
Left in place
Left in place
New
New
Continue at “Charge and Test” on page 64.
2014-06-16
Table of Contents
Index
401-885M
64
Single-Section PTO Pumps
Table of Contents
Index
Great Plains Manufacturing, Inc.
Charge and Test
Close-Out
104. Fill the system per “Oil Fill” on page 22.
106. Remove any part numbering tags or grease pencil
markings.
105. Operate the system, performing an initial valve
adjustment if possible. See “PTO Operation” on
page 8.
401-885M
Table of Contents
Index
2014-06-16
Table of Contents
Great Plains Manufacturing, Inc.
Index
65
Appendix R - Reference
Torque Values
Bolt Head Identification
Bolt Head Identification
Bolt
Size
Bolt
Size
Grade 2
in-tpia
Grade 5
N-mb
ft-lbd
N-m
1
7.4
5.6
1
⁄4-28
8.5
6
5⁄
16-18
15
16-24
3⁄ -16
8
3⁄ -24
8
7
⁄16-14
7
⁄16-20
1
⁄2-13
1
⁄2-20
9
⁄16-12
9⁄ -18
16
5
⁄8-11
5⁄ -18
8
3⁄ -10
4
3
⁄4-16
7
⁄8-9
7
⁄8-14
⁄4-20
5⁄
Grade 8
ft-lb
pitchc
5.8
8.8
10.9
Class 5.8
Class 8.8
Class 10.9
N-m
N-m
N-m
ft-lb
N-m
11
8
16
12
M 5 X 0.8
4
3
6
5
9
7
13
10
18
14
M6X1
7
5
11
8
15
11
11
24
17
33
25
M 8 X 1.25
17
12
26
19
36
27
17
13
26
19
37
27
M8X1
18
13
28
21
39
29
27
20
42
31
59
44
M10 X 1.5
33
24
52
39
72
53
mm x
ft-lb
ft-lb
ft-lb
31
22
47
35
67
49
M10 X 0.75
39
29
61
45
85
62
43
32
67
49
95
70
M12 X 1.75
58
42
91
67
125
93
49
36
75
55
105
78
M12 X 1.5
60
44
95
70
130
97
66
49
105
76
145
105
M12 X 1
90
66
105
77
145
105
75
55
115
85
165
120
M14 X 2
92
68
145
105
200
150
95
70
150
110
210
155
M14 X 1.5
99
73
155
115
215
160
105
79
165
120
235
170
M16 X 2
145
105
225
165
315
230
130
97
205
150
285
210
M16 X 1.5
155
115
240
180
335
245
150
110
230
170
325
240
M18 X 2.5
195
145
310
230
405
300
235
170
360
265
510
375
M18 X 1.5
220
165
350
260
485
355
260
190
405
295
570
420
M20 X 2.5
280
205
440
325
610
450
225
165
585
430
820
605
M20 X 1.5
310
230
650
480
900
665
250
185
640
475
905
670
M24 X 3
480
355
760
560
1050
780
1-8
340
250
875
645
1230
910
M24 X 2
525
390
830
610
1150
845
1-12
370
275
955
705
1350
995
M30 X 3.5
960
705
1510
1120
2100
1550
11⁄8-7
480
355
1080
795
1750
1290
M30 X 2
1060
785
1680
1240
2320
1710
11⁄8-12
11⁄4-7
11⁄4-12
13⁄8-6
13⁄8-12
11⁄2-6
11⁄2-12
540
395
1210
890
1960
1440
M36 X 3.5
1730
1270
2650
1950
3660
2700
680
500
1520
1120
2460
1820
M36 X 2
1880
1380
2960
2190
4100
3220
750
555
1680
1240
2730
2010
890
655
1990
1470
3230
2380
a. in-tpi = nominal thread diameter in inches-threads per inch
1010
745
2270
1670
3680
2710
b. N· m = newton-meters
1180
870
2640
1950
4290
3160
1330
980
2970
2190
4820
3560
c. mm x pitch = nominal thread diameter in mm x thread pitch
d. ft-lb = foot pounds
Torque tolerance + 0%, -15% of torquing values. Unless otherwise specified use torque values listed above.
2014-06-16
Table of Contents
Index
25199m
25199
401-885M
66
Single-Section PTO Pumps
Table of Contents
Index
Great Plains Manufacturing, Inc.
Hydraulic Fitting Torque
Connector Identification
1
Refer to Figure 71 (a hypothetical fitting)
Leave any protective caps in place until immediately prior
to making a connection.
1
2
3
NPT - National Pipe Thread
Note tapered threads, no cone/flare, and no O-ring.
Apply liquid pipe sealant for hydraulic applications
(do not use tape sealant, which can foul filters).
JIC - Joint Industry Conference (SAE J514)
Note straight threads 4 and the 37° cone 5 on
“M” fittings (or 37° flare on “F” fittings). Use no
sealants (tape or liquid) on JIC fittings.
ORB - O-ring Boss (SAE J514)
Note straight threads 5 and elastomer O-ring 7 .
Prior to installation, to prevent abrasion during
tightening, lubricate O-ring with clean hydraulic fluid.
Use no sealants (tape or liquid) on JIC fittings.
ORB fittings that need orientation, such as the ell
depicted, also have a washer 8 and jam nut 9
(“adjustable thread port stud”). Back jam nut away
from washer. Thread fitting into receptacle until
O-ring contacts seat. Unscrew fitting to desired
orientation. Tighten jam nut to torque specification.
401-885M
9
8
7
4
5
5
2
3
Figure 71:
Hydraulic Connector ID
31282
Fittings Torque Values
Fitting
1⁄
NPT
16 JIC
9⁄ ORB w/jam nut
16
9⁄ ORB straight
16
3⁄ JIC
4
3⁄ ORB w/jam nut
4
3⁄ ORB straight
4
4
9⁄
Table of Contents
Index
Ft-Lbs
N-m
1.5-3.0 turns past finger tight
18-20
24-27
12-16
16-22
18-24
24-32
27-39
37-53
20-30
27-41
27-43
37-58
2014-06-16
Great Plains Manufacturing, Inc.
Table of Contents
Index
Appendix R - Reference
67
Abbreviations
3PT
8RW
AD
ASABE
ASAE
ASSY
BRKT
CI
cm
CNTRL
CR
DJ
EL
FERT
FJIC
FL
FLG
FORB
GAL
GD
Gnd
GR5,8
Gspd
H2O
HEX
HH
HHCS
hp
HYD
IMPL
in., IN
INST
JA
JIC
2014-06-16
Three Point (hitch)
Eight Row
Adaptor
American Society of Agricultural and Biological
Engineers
American Society of Agricultural Engineers
Assembly
Bracket
Cubic Inches
Centimeters
Control
Cross
DICKEY-john®
Elbow
Fertilizer
Female JIC
Flow
Flanged
Female ORB
Gallon
Ground Drive
Ground
Grade 5, Grade 8
Ground Speed
Water
Hexagonal
Hydraulic Hose
Hex Head Cap Screw
Horsepower
Hydraulic
Implement
Inch
Installation
Bushing size
Joint Industry Conference
kW
LB PTO
LH
LIQ
Kilowatts
Linear Box PTO
Left Hand
Liquid
MAN
Manual
MJIC
Male JIC
mm, MM Millimeter
MNT
Mount
MORB
Male ORB
MORB
Male ORB
MPH
Miles Per Hour
N-m
Newton-meters
ORB
R-Ring Boss
ORBF
FORB
PL
Plug
PLNTR Planter
PLT
Plated or Plate
PTO
Power Take-Off
QD
Quick Disconnect
RES
Reservoir
REV
Revolution
RH
Right Hand
RPM
Revolutions Per Minute
RW
SAE
Society of Automotive Engineers (standard)
SQ
Square
SUS
Saybolt Universal Seconds
TE
Tee
USS
United States Standard
W, W/
with
WLDMNT Weldment
X
by
YP
Yield-Pro®
ZNYCR Zinc Chromate
Table of Contents
Index
401-885M
68
Single-Section PTO Pumps
Table of Contents
Index
Great Plains Manufacturing, Inc.
Parts Lists
Kits and This Manual
Call
-out
Part
Number
Part Description
101
102
103
104
105
106
107
108
109
401-885M
401-845A
401-846A
401-847A
401-848A
401-849A
401-879A
401-956A
411-016A
MAN INST/OPERATE PTO IMPL PUMP
YP4-6-8 PTO 540 3PT ASSY
YP4-6-8 PTO 540 NO FERT PULL
YP4-6-8 PTO 540 DRY FERT ASSY
YP4 PTO 540 LIQ FERT ASSY
YP6-8 PTO 540 LIQ FERT ASSY
YP8RW 3PT PTO 540 ASSY
YP4,6,8 FAN UPDATE
20A,25A PTO PUMP KIT
Call
-out
Part
Number
Part Description
110
111
112
113
114
115
116
117
118
119
411-035A
411-036A
411-037A
411-038A
411-163A
411-164A
411-165A
411-166A
411-167A
411-168A
YP825R PTO HYD PUMP GND DV 540
YP825R PTO HYD PUMP GND DV1000
YP825R PTO HYD PUMP HYD DV 540
YP825R PTO HYD PUMP HYD DV1000
YP4-6-8 PTO 1000 3PT ASSY
YP4-6-8 PTO 1000 NO FERT PULL
YP4-6-8 PTO 1000 DRY FERT ASSY
YP4 PTO 1000 LIQ FERT ASSY
YP6-8 PTO 1000 LIQ FERT ASSY
YP8RW 3PT PTO 1000 ASSY
New Parts in Kits
Call
-out
Part
Number
Part Description
Call
-out
Part
Number
Part Description
120
121
122
123
124
125
126
127
128
129
130
131
132
133
134
135
136
137
138
139
140
141
142
143
144
145
146
147
168-094D
401-833L
401-834H
401-835L
401-835S
401-836H
401-837K
401-839H
401-840H
401-841S
401-842L
401-843S
401-844L
401-850V
401-851V
401-852V
401-853V
401-854V
401-876H
401-877S
401-878L
411-017L
411-018L
411-019V
411-029H
411-030L
411-031K
411-032V
HYD MOTOR 1/8 KEY
6IN HYD FAN COOLER ASSY
6 IN HYD FAN SHROUD
4,6,8 PTO HYD PUMP ASSEMBLY
RIGID PLNTR HYD FL CNTRL ASSY
PTO PUMP TORQUE ARM WLDMNT
FERT FRAME FLOW CONTROL ASSY
HYD RES ROW UNIT MNT WLDMNT
HYD RES FERT FRAME MNT WLDMNT
HYD RES TANK ASSY
HYD RES W/ FILTER ASSY
HYD RES FERT FRAME MNT ASSY
6 8 FERT HYD RES W/ FILTER
HOSE BUNDLE PTO PUMP 401-845A
HOSE BUNDLE PTO PUMP 401-846A
HOSE BUNDLE PTO PUMP 401-847A
HOSE BUNDLE PTO PUMP 401-848A
HOSE BUNDLE PTO PUMP 401-849A
3PT 8 ROW WIDE HYD RES WLDMNT
3PT 8 ROW WIDE HYD RES ASSY
3PT 8 ROW WIDE HYD RES W/FLTR
LB PTO TANK
LB FLOW CONTROL ASSY
LB PTO HOSE BUNDLE
LINEAR BOX PTO TANK
YP825R PTO HYD PUMP ASSEMBLY
YP825R FLOW CONTROL ASSY
HOSE BUNDLE PTO PUMP YP825R GD
148
149
150
151
152
153
154
155
156
157
158
159
160
161
162
163
164
165
166
167
168
169
170
171
172
173
174
175
411-039L
411-040S
411-041S
411-042V
411-056H
411-062L
411-824D
411-825D
421-166D
421-219D
421-300D
800-120C
802-022C
802-047C
802-105C
802-128C
802-138C
802-159C
802-377C
803-008C
803-014C
803-020C
803-021C
804-009C
804-013C
804-015C
804-016C
804-022C
825R HYD TANK RES ASSY
825R HYD TANK RES SUB ASSY
LB PTO TANK BASE ASSY
HOSE BUNDLE PTO PUMP YP825R HD
825R HYD TANK RES WLDMNT
HYD PUMP ASSY 3.19 1 5/16MJIC
FLOW CONTROL MNT PLT NO FERT
FLOW CONTROL MNT PLT FERT
PTO PUMP TORQUE PLT
LB PTO PUMP CONTROL MNT
FLOW CONTROL MNT PLATE
NUT CLIP U-TYPE 5/16-18
HHCS 3/8-16X1 1/2 GR5
HHCS 1/2-13X6 GR5
HHCS 5/8-11X9 GR5
HHCS 1/2-13X2 GR5
HHCS 5/16-18X2 1/4 GR5
HHCS 5/16-18X1 GR5
HHCS 1/2-13X7 1/2 GR5
NUT HEX 5/16-18 PLT
NUT HEX 3/8-16 PLT
NUT HEX 1/2-13 PLT
NUT HEX 5/8-11 PLT
WASHER LOCK SPRING 5/16 PLT
WASHER LOCK SPRING 3/8 PLT
WASHER LOCK SPRING 1/2 PLT
WASHER FLAT 1/2 SAE PLT
WASHER LOCK SPRING 5/8 PLT
401-885M
Table of Contents
Index
2014-06-16
Great Plains Manufacturing, Inc.
Table of Contents
Call
-out
Part
Number
Part Description
176
177
178
179
180
181
182
183
184
185
186
187
188
189
190
191
192
193
194
195
196
197
198
199
200
201
202
203
204
205
206
207
208
209
210
211
212
213
214
215
216
217
218
219
220
221
806-144C
806-150C
806-159C
806-165C
810-273C
810-804C
810-813C
810-897C
810-901C
810-904C
811-059C
811-063C
811-073C
811-088C
811-091C
811-147C
811-203C
811-205C
811-268C
811-269C
811-279C
811-291C
811-488C
811-502C
811-518C
811-663C
811-725C
811-773C
811-807C
811-857C
811-967C
818-130C
818-240C
818-619C
826-777C
826-778C
831-101C
831-111C
841-003C
841-196C
841-281C
841-556C
841-653C
841-814C
841-815C
841-847C
U-BOLT 1/2-13 X 3 1/32 X 3
U-BOLT 3/8-16 X 7 1/32 X 6 GR5
U-BOLT 1/2-13 X 5 1/32 X 4 1/2
U-BOLT 3/8-16 X 5 1/32 X 4 1/4
HYD MOTOR 7/8ORBF
C12 HYD OIL COOLER
PRESSURE FLOW CONTROL VALVE
HYD PUMP PARKER 350C 3.19CIR
SEAL KIT, HYD PUMP PARKER 350C
SEAL KIT 831-101C
HH1/2R2 080 3/4FJIC
EL 3/4MJIC 3/4MORB
TE 3/4MJIC 3/4MJIC 3/4FJIC
AD 3/4MORB 3/4MJIC
EL 3/4MJIC 1 1/16MORB
CR 3/4MJIC
PL 3/4MORB HOLLOW HEX
AD 3/4MJIC 1 1/16MORB
HH1/2R2 048 3/4FJIC
HH1/2R2 036 3/4FJIC
HH1/2R2 060 3/4FJIC
HH1/2R2 072 3/4FJIC
AD 3/4FORB 3/4FORB
AD 7/8MORB 3/4FJIC
HH1/4R1 070 9/16FJIC
HH3/8R2 225 3/4FJIC
EL 90 3/4MJIC
HH1/2R2 066 3/4FJIC
HH1/2R2 120 3/4FJIC
PL 3/4MORB
HH3/8R2 185 3/4FJIC
DECAL CAUTION 540 RPM
DECAL CAUTION 1000 RPM
DECAL HYD VALVE KNOB ADJUSTMNT
1 3/4-20 PTO COUPLER
1 3/8-21 PTO COUPLER
PTO PUMP 3.6 CI/REV.
PTO PUMP 5.7 CI/REV.
HH3/8R2 105 3/4FJIC
HH1/2R2 024 3/4FJIC
HH3/8R2 96 3/4FJIC
HH1/2R2 144 3/4FJIC
EL 45 1 5/16MORB 1 5/16MJIC
EL 45 3/4MJIC 1 1/16MORB
EL 1 5/16FJIC 1 5/16MJIC
HH1R4 90 1 5/16FJIC
2014-06-16
Index
Call
-out
Part
Number
222
223
224
225
226
227
228
229
230
231
232
233
234
235
236
237
238
239
240
241
242
243
244
841-848C
841-849C
841-850C
841-919C
841-975C
851-053C
851-163C
851-164C
851-207C
858-003C
858-004C
858-005C
890-396C
890-892C
891-109C
891-110C
891-313C
891-314C
891-315C
891-316C
NPN
NPN
NPN
Table of Contents
Index
Appendix R - Reference
69
Part Description
HH1R4 144 1 5/16FJIC
HH1R4 168 1 5/16FJIC
HH1R4 198 1 5/16FJIC
AD 7/8FJIC 3/4MORB
EL 1 5/16MORB 7/8MJIC
HH3/8R2 046 3/4FJIC
HH3/8R2 045 3/4FJIC MJIC
HH1R4 60 1 5/8FJIC
EL 1 5/8MORB 1 5/16MJIC
DECAL 5.5GAL OIL FILL LINE
DECAL HOT FLUID PTO RES
DECAL DANGER PTO PUMP
BUSHING - FAN
HYDRAULIC MOTOR MOUNT PLT
FILTER HEAD
FILTER ELEMENT SPIN ON
CHAIN WELD 1/4 GR 43 X 24 LINK
1/4 CHAIN THREADED LINK
5IN HYD SIGHT LEVEL GAUGE
HYD FILL CAP WITH SCREEN
HHCS #10-24x1 INCH GRADE 8 FULL THREAD
3/8-16X1/2 SOCKET HEAD SET SCREW
5/16-18X3/8 SOCKET HEAD SET SCREW
401-885M
70
Single-Section PTO Pumps
Table of Contents
Index
Great Plains Manufacturing, Inc.
Existing Parts Affected
CallPart
out Number
Part Description
Part Disposition
11
<none>
12
17089
13 FAN IMPELLER
13
21121
6 FAN HOUSING RH SIDE
14
23320
6 FAN HOUSING LH SIDE
15
23907
HUB/MOTOR PLATE SEAL (2B)
16
401-203H
YP FAN MOUNT WLDMNT
17
401-537D
DJ FAN SENSOR MOUNT BRKT
18
401-656H
FAN MOUNT WELDMENT
19
800-373C
SQ KEY 6MM X 35MM
20
801-081C
SCREW HEX SELF TAP 1/4-20X3/4
21
802-005C
HHCS 1/4-20X1 GR5
22
802-079C
HHCS 3/8-16X1 1/4 GR5
23
802-167C
HHCS 1/4-20X1 1/2 GR5
24
802-224C
HHCS 1/4-20X1 1/4 GR5
25
803-014C
NUT HEX 3/8-16 PLT
26
803-230C
NUT HEX FLANGE 1/4-20 PLT
27
803-360C
NUT HEX FLG 3/8-16 GR8 ZNYCR
28
804-006C
WASHER LOCK SPRING 1/4 PLT
29
804-011C
WASHER FLAT 3/8 USS PLT
30
804-013C
WASHER LOCK SPRING 3/8 PLT
31
804-075C
WASHER FLAT 1/4 USS PLT
32
810-037C
VALVE LINE CHECK
33
810-556C
PARKER F-11 FAN MOTOR
34
811-077C
TE 3/4MORB 3/4MJIC 3/4MJIC
35
811-078C
TE 3/4MJIC
36
811-079C
TE 3/4FJIC 3/4MJIC 3/4MJIC
37
811-088C
AD 3/4MORB 3/4MJIC
38
811-125C
HH3/8R2 082 3/4FJIC
39
811-150C
EL 3/4FJIC 3/4MJIC
40
811-237C
HH3/8R2 174 3/4FJIC
41
811-664C
HH3/8R2 38 3/4FJIC
42
811-967C
HH3/8R2 185 3/4FJIC
43
811-980C
HH3/8R2 047 3/4FJIC
44
817-624C
FAN INLET RAIN SHIELD
45
841-006C
HH3/8R2 087 3/4FJIC
46
841-042C
HH3/8R2 249 3/4MORB 3/4FJIC
47
841-196C
HH1/2R2 024 3/4FJIC
48
841-461C
HH1/4 R2 114 9/16 FJIC 9/16MOR
49
841-462C
HH1/2 R2 114 3/4FJIC 3/4MORB
401-885M
HHCS #10-24x1 INCH GRADE 8 FULL THREAD
Removed. Not re-used if motor replaced.
Removed and re-installed.
If removed, not re-used.
2
Table of Contents
If present, removed and re-installed.
If removed, not re-used.
Removed and re-installed.
Removed and re-installed.
Removed and re-installed.
Removed and re-installed.
Removed and re-installed.
Removed and re-installed.
Removed and re-installed.
Removed and re-installed.
Removed and re-installed.
Removed and re-installed.
Removed and re-installed.
Removed and re-installed.
Removed and re-installed.
If removed, not re-used.
If removed, re-installed.
If removed, not re-used.
Removed and not re-used.
If removed, re-installed.
Left in place.
If removed, re-installed.
Status depends on kit.
Left in place.
Status depends on kit.
One end re-connected.
If removed, not re-used.
One end re-connected.
One end re-connected.
If removed, re-installed.
Removed and not re-used.
Two removed. One re-used.
Index
2014-06-16
Table of Contents
Great Plains Manufacturing, Inc.
CallPart
out Number
Part Description
50
851-031C
HH3/8R2 041 3/4FJIC
51
890-624C
SCREEN FAN COVER
52
890-891C
BUSHING, JA X 20 MM
53
890-899C
VOLVO HYD MOTOR MOUNT PLT
2014-06-16
Index
Table of Contents
Appendix R - Reference
71
Part Disposition
Left in place.
Removed and re-installed.
If removed, not re-used.
If removed, not re-used.
Index
401-885M
72
Single-Section PTO Pumps
401-885M
Table of Contents
Index
Great Plains Manufacturing, Inc.
Table of Contents
Index
2014-06-16
Table of Contents
Great Plains Manufacturing, Inc.
Index
73
Index
A
filter change ..................................... 22
filter, oil ............................................ 23
fire ...................................................... 3
flailing ................................................ 1
Fleetguard ....................................... 23
flow control valve .............. 6, 15, 16
N
G
O
gearbox .............................................. 2
ground clearance ................ 8, 9, 10
Gspd Constant ................................. 19
oil ......................................................22
oil cooler .............................................6
oil fill level .........................................14
oil filter ..............................................22
oil reservoir .........................................6
oil specification ........................ 22, 23
oil temperature ........................ 14, 22
oil, hydraulic .....................................23
open center ........................................6
options ..............................................27
ORB .................................................66
order of installation ...........................27
O-Ring Boss .....................................66
abbreviation ...................................... 67
acceleration, sudden ........................ 15
adaptor ............................................... 2
address .............................................. 7
Air-Pro® ............................................. 9
alert symbol, PTO .............................. 1
anchor point ....................................... 8
ASABE ........................................ 8, 9
ASAE .......................................... 8, 9
B
H
butterfly valve ................................... 17
C
callouts ...................................... 7, 27
capacity, oil ................................ 6, 23
capacity, system ............................... 22
CAUTION, defined ............................. 1
chain ....................................... 11, 12
check for leaks ................................. 15
clearance, PTO pump .........8, 9, 10
clevis ...................................8, 9, 10
closed center ...................................... 6
closeout ............................................ 64
clothing ............................................... 2
compatibility ..................................... 25
cooler, oil ............................................ 6
coulters ............................................ 27
coupler ............................................... 2
cross-bolt ......................................... 12
customer service ................................ 7
D
DANGER, defined .............................. 1
decal replacement .............................. 4
decals
caution
540 RPM PTO ........................ 5
danger
rotating driveline ..................... 4
warning
hot fluid ................................... 5
decal, safety ....................................... 4
DICKEY-john® ................................. 19
Document Family ............................... 6
drain plug ......................................... 22
drawbar adjustment ................ 11, 13
drawbar clearance ...............8, 9, 10
driveline .............................................. 2
dry fertilizer ...................................... 26
E
entanglement ..................................... 1
existing parts .................................... 70
extender ............................................. 2
F
fan update kit ................................... 25
fertilizer sub-frame ........................... 27
fill level ............................................. 14
filler cap ............................................ 22
2014-06-16
hair ..................................................... 2
HC 9540S UJ4H, filter ..................... 23
HE-10, filter ...................................... 23
HF6610, filter ................................... 23
high pressure fluid ............................. 1
high pressure fluids ........................... 3
hitching ....................................11, 12
hoist ................................................. 27
hose handle ..................................... 40
hp ....................................................... 9
hydraulic connectors ........................ 66
hydraulic oil ...................................... 22
hydraulic safety .................................. 3
I
independent .................................8, 9
independent PTO ............................... 2
inlet shutter ...................................... 17
IntelliAg® ......................................... 19
J
JIC ................................................... 66
Joint Industry Conference ................ 66
J514 ................................................. 66
K
keyhole ....................................11, 12
knob ................................ 15, 18, 19
kW ..................................................... 9
L
lead, sensor ..................................... 36
leak checks ...................................... 15
left-hand (defined) ............................. 7
level ................................................. 14
lift ..................................................... 27
liquid fertilizer ................................... 26
live ...............................................8, 9
live PTO ............................................. 2
lock disc .......................... 15, 18, 19
lubrication ........................................ 23
M
Magnehelic® .................................... 17
maintenance .................................... 23
maintenance safety ............................ 3
markers ............................................ 27
master shield ............... 2, 8, 9, 10
medical assistance ............................ 3
meter pressurization ........................ 17
Table of Contents
National Pipe Thread .......................66
new parts ..........................................68
Note (defined) ....................................7
Notice (defined) ..................................7
NPT ..................................................66
P
Pall ...................................................23
part lists ............................................68
phone number ....................................7
pin ....................................................12
plug, drain ........................................22
power, PTO ................................. 8, 9
pressurization, meter ........................17
PTO alert symbol ...............................1
PTO pump ..........................................6
PTO safety .........................................2
PTO speed .......................................15
PTO troubleshooting ........................21
PTO, defined ......................................6
pump ................................................15
pump, PTO .........................................6
Q
QD ....................................................40
R
rain cover ..........................................17
Range sprocket ................................17
reservoir, oil ........................................6
right-hand (defined) ............................7
row cleaners .....................................27
S
SAE J514 .........................................66
safety decal ........................................4
safety symbol .....................................1
scarf ...................................................2
scheduled maintenance ...................23
seed disk ..........................................17
seed, load .........................................17
sensor lead .......................................36
serial number ...................................25
service ................................................7
shaft diameter ............................. 8, 9
shaft, PTO ..........................................2
401-885M
74
Single-Section PTO Pumps
shutter, inlet ..................................... 17
side PTO ............................................ 2
sight gauge ...................................... 14
slide gate ......................................... 17
specification, oil ............................... 22
speed, PTO ...................................... 15
spline ....................................2, 8, 9
stub shaft .................................... 8, 9
sub-frame ......................................... 27
sudden acceleration ......................... 15
support ............................................... 7
SUS ........................................ 22, 23
symbol, alert, PTO ............................. 1
symbol, safety .................................... 1
system capacity ............................... 22
T
tables
fittings torque ............................. 66
temperature, oil ....................... 14, 22
three-point ........................................ 11
tongue .............................................. 27
tools ................................................. 27
torque arm .............................. 11, 13
torque values ................................... 65
Transmission sprocket ..................... 17
troubleshooting ................................ 21
Type 1 ......................................... 8, 9
Type 3 ................................................ 9
U
unhitching ........................................ 20
W
WARNING, defined ............................ 1
wire .................................................. 12
Y
YP425A ...........................16, 25, 26
YP425A-0430 .................................. 42
YP425A-0436 .................................. 42
YP425A-0438 .................................. 42
YP425A-0440 .................................. 42
YP425A-0470 .................................. 42
YP425A-08TR .................................. 42
YP425A-08TR36 .............................. 42
YP425A-0838 .................................. 42
YP425A-0840 .................................. 42
YP425A3P ......................16, 25, 26
YP425A3P-0430 .............................. 42
YP425A3P-0436 .............................. 42
YP425A3P-0438 .............................. 42
YP425A3P-0440 .............................. 42
YP425A3P-0470 .............................. 42
YP425A3P-08TR ............................. 42
YP425A3P-0836 .............................. 42
YP425A3P-0838 .............................. 42
YP425A3P-0840 .............................. 42
YP625A ...........................16, 25, 44
YP625A-0630 .................................. 42
YP625A-0636 .................................. 42
YP625A-0638 .................................. 42
YP625A-0640 .................................. 42
YP625A-0670 .................................. 42
YP625A-12TR .................................. 42
401-885M
Table of Contents
Index
YP625A-12TR36 ..............................42
YP625A-1238 ...................................42
YP625A-1240 ...................................42
YP625A3P ...............................16, 25
YP625A3P-0630 ...............................42
YP625A3P-0636 ...............................42
YP625A3P-0638 ...............................42
YP625A3P-0640 ...............................42
YP625A3P-0670 ...............................42
YP625A3P-12TR ..............................42
YP625A3P-1236 ...............................42
YP625A3P-1238 ...............................42
YP625A3P-1240 ...............................42
YP625TD ..........................................26
YP825A ................. 16, 25, 26, 44
YP825AR ...... 25, 26, 28, 47, 62
YP825A-0830 ...................................42
YP825A-0836 ...................................42
YP825A-0838 ...................................42
YP825A-0840 ...................................42
YP825A-0870 ...................................42
YP825A-16TR ..................................42
YP825A-16TR36 ..............................42
YP825A-16TR38 ..............................42
YP825A-16TR40 ..............................42
YP825A3P ...................... 16, 25, 26
YP825A3P-0830 ...............................42
YP825A3P-0836 ......................42, 45
YP825A3P-0838 ......................42, 45
YP825A3P-0840 ......................42, 45
YP825A3P-0870 ...............................42
YP825A3P-16TR ..............................42
YP825A3P-1636 ......................42, 45
YP825A3P-1638 ......................42, 45
YP825A3P-1640 ......................42, 45
YP925TD ..........................................26
Z
Zinga ................................................23
Numerics
133-415M, manual ..............................6
168-094D, key ..................................34
2-port fan ..........................................25
2025A ............................. 16, 25, 46
23907, seal .......................................32
2525A ............................. 16, 25, 46
3-point ..............................................11
3-port fan ..........................................25
401-537D, bracket ...................30, 36
401-651M, manual ..............................6
401-652M, manual ..............................6
401-652P, manual ...............................6
401-833L, cooler asy ........................37
401-834H, shroud .............................37
401-835S, valve ................................49
401-837K, valve ................................50
401-842L, reservoir .................42, 43
401-844L, reservoir ..........................44
401-845A, kit 6, 16, 26, 39, 41,
42, ............................. 48, 49, 54
401-846A, kit 6, 16, 26, 41, 42,
48, ......................................49, 54
Table of Contents
Index
Great Plains Manufacturing, Inc.
401-847A, kit 6, 16, 26, 39, 41,
42, ............................ 48, 50, 54
401-848A, kit 6, 16, 26, 39, 41,
42, ............................ 48, 50, 54
401-849A, kit 6, 16, 39, 41, 44,
48, ..................................... 50, 54
401-878L, reservoir .......................... 45
401-879A, kit 6, 16, 39, 41, 42,
45, ............................ 48, 49, 54
401-885M, manual ............................. 6
401-923B, manual .............................. 6
401-923M, manual ............................. 6
401-923P, manual .............................. 6
401-956A, fan update ....................... 40
401-956A, fan update kit .................. 25
401-956A, kit ............................. 6, 29
411-016A, kit 6, 16, 39, 41, 46,
48, ..................................... 51, 54
411-017L, reservoir .......................... 46
411-017L, tank ................................. 46
411-018L, valve ................................ 51
411-031K, valve ............................... 52
411-035A, kit 6, 16, 39, 41, 47,
48, .............................................. 54
411-036A, kit 6, 16, 39, 41, 47,
48, .............................................. 54
411-037A, kit 6, 16, 39, 41, 47,
48, .............................................. 54
411-038A, kit 6, 16, 39, 41, 47,
48, .............................................. 54
411-039L, reservoir .......................... 47
411-163A, kit 6, 16, 26, 39, 41,
42, ............................ 48, 49, 54
411-164A, kit 6, 16, 26, 39, 41,
42, ............................ 48, 49, 54
411-165A, kit 6, 16, 26, 39, 41,
42, ............................ 48, 50, 54
411-166A, kit 6, 16, 26, 39, 41,
42, ............................ 48, 50, 54
411-167A, kit 6, 16, 26, 39, 41,
44, ............................ 48, 50, 54
411-168A, kit 6, 16, 26, 39, 41,
45, ............................ 48, 49, 54
800-373C, key .................................. 31
801-081C, screw ..................... 32, 33
802-005C, bolt ........30, 35, 36, 37
802-047C, bolt .................................. 44
802-079C, bolt ......................... 32, 33
802-105C, bolt .................................. 43
802-128C, bolt .................................. 47
802-159C, bolt ......................... 37, 38
802-224C, bolt ......................... 32, 33
802-377C, bolt .................................. 45
803-014C, nut 32, 33, 50, 51, 52
803-020C, nut ........44, 45, 46, 47
803-021C, nut .................................. 43
803-360C, nut .................................. 49
804-006C, washer 30, 32, 33, 35,
.............................................. 36, 37
804-011C, washer ................... 32, 33
804-013C, washer 32, 33, 50, 51,
....................................................... 52
804-015C, washer ..44, 45, 46, 47
2014-06-16
Great Plains Manufacturing, Inc.
804-016C, washer ............................ 46
804-022C, washer ............................ 43
804-075C, washer ..30, 35, 36, 37
806-144C, U-bolt .............................. 46
806-150C, bolt ........................ 50, 52
806-159C, U-bolt .............................. 46
806-165C, U-bolt .............................. 51
810-037C, check valve ............ 31, 35
810-273C, motor .............................. 33
810-556C, motor .............................. 32
810-804C, cooler .................... 37, 38
811-059C, hose ..............56, 57, 58
811-073C, tee ........56, 57, 58, 63
811-077C, tee .................31, 35, 63
811-078C, tee ......................... 31, 35
811-079C, tee .................................. 60
811-088C, adaptor .................. 31, 35
811-125C, hose ............................... 63
811-147C, cross ............................... 60
811-150C, elbow .............31, 35, 63
2014-06-16
Table of Contents
Index
811-237C, hose .......................61, 63
811-268C, hose ...39, 54, 55, 56,
57, ........... 58, 59, 60, 61, 63
811-269C, hose ..... 39, 54, 55, 59
811-291C, hose .......................39, 60
811-502C, adaptor ........................... 35
811-518C, hose ............................... 60
811-663C, hose .......................61, 63
811-664C, hose .......................61, 63
811-725C, elbow .............................. 63
811-773C, hose .............. 39, 54, 59
811-807C, hose .............. 56, 57, 58
811-967C, hose ............................... 61
811-980C, hose ............................... 63
818-130C, decal ................................ 5
818-230C, decal ................................ 5
826-777C, coupler .............. 2, 6, 12
826-778C, coupler .............. 2, 6, 12
841-196C, hose ...31, 35, 54, 55,
59, ......................................60, 61
Table of Contents
Index
Index
75
841-281C, hose ................................61
841-462C, hose ................................60
841-556C, hose ................................55
841-815C, elbow ............ 54, 56, 59
841-847C, hose .............. 54, 59, 60
841-848C, hose ....................... 55, 58
841-849C, hose ................................56
841-850C, hose ................................57
851-031C, hose ....................... 61, 63
851-053C, hose ....................... 39, 63
851-163C, hose .............. 39, 61, 63
851-164C, hose ....................... 61, 63
858-003C, decal ...................... 14, 22
858-004C, decal .................................5
858-005C, decal .................................4
890-396C, bushing ...........................34
890-624C, screen ........... 29, 35, 39
890-891C, bushing ...........................31
890-892C, plate ....................... 32, 33
891-110C, filter .................................23
401-885M
76
Single-Section PTO Pumps
401-885M
Table of Contents
Index
Great Plains Manufacturing, Inc.
Table of Contents
Index
2014-06-16
Table of Contents
Index
Table of Contents
Index
Table of Contents
Index
Great Plains Manufacturing, Inc.
Corporate Office: P.O. Box 5060
Salina, Kansas 67402-5060 USA