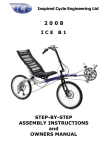
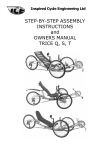
1
Inspired Cycle Engineering Ltd
ICE TRIKES OWNERS MANUAL
Contents:
Page:
1. Introduction ........ 1
2. Assembly ........... 1
3. Initial Test Ride ... 11
4. Adjusting ........... 12
5. Riding ............... 15
6. Maintenance ........ 17
7. Accessories ........ 18
8. Contacts ............ 21
1. Introduction.
This manual has been written to help you set up and use your trike. We hope you
enjoy owning and riding it as much as we like making these great machines.
We have included some Tips, which we have learned the hard way. They are well
worth taking special note of.
Chris, Neil and the ICE team
2. Assembly
Assembly tools required:
2mm Hex Key
3mm Hex Key
4mm (ball ended is better) Hex Key
5mm Hex Key
6mm Hex Key
10mm wrench
19mm box wrench
19mm wrench
Chain link remover
Sharp knife
Small flat screwdriver
TIP - It is best if you can work on a bench or a table at waist height to avoid
too much bending down. If you have to work on the ground put down some
newspaper to avoid the chain, which is protected by grease, from picking up dirt.
Your trike has been assembled at our works and then taken apart and wrapped for
safe and economic shipment. First of all, open the box, unwrap and lay out the pieces.
2.1 Fit and set the handlebars to an approximate position.
Slacken off the two clamps, insert the handlebars and adjust to an upright position
then lightly tighten at this stage.
2.2 Fit front wheels
Identify the left hand and right hand wheels which are labelled on coloured tape in
the spokes. Locate the front wheel 12mm axle bolts and 12mm nylock nuts. Slide an
axle bolt through the hub from the outside of the wheel (the side with the five webs
on the hub flange), then fit the small brake plate spacer over the axle with the small
shoulder on the spacer against the bearing in the hub. Slide on the large black brake
plate. Now slide the bolt with the complete wheel assembly through the kingpost,
locating the single hole in the black brake plate onto the 6mm diameter pin which is
part of the kingpost steering arm.
2
Tip – make sure the brake plate is located on the pin as this stops the plate
rotating and so makes the brake work.
With everything located, add the 12mm spring washer and M12 nylock nut and tighten
onto the bolt which is protruding on the inside of the kingpost. A 19mm box wrench
and 19mm wrench is the best way to tighten the front wheels.
Repeat the fitting procedure for the other wheel.
2.3 Connecting the front brakes.
Locate the brake cable adjusting piece into the lower slot in the brake plate and then
squeeze the brake arm on the brake plate to locate the brake cable clamping barrel
into the brake arm. The brake on that side should now work and you can apply the
parking brake by squeezing the brake lever and pushing in the button on the side of
the lever.
2.4 Fitting the rear section to the cruciform.
Slide the rear section into the cruciform. Evenly tighten the two frame bolts, until
the bolts just bite. Align the rear section by eye to make it vertical (stand back a
few feet to get a better view). Tighten the two bolts by ¼ turn alternately until the
rear section is just clamped enough to prevent it moving around (you will need to
adjust this later).
3
2.5 Fit the seat to the lowest
position
Place the seat on to the trike and see if it
lines up with the two mounting cups. Get the
seat to fit by sliding the rear frame triangle
in or out. The 3 position upper seat mount
should be set in the lowest position during
this adjustment. Hold the seat on with 4
plastic clips (which are already attached to
the seat) and tighten. Check to see if the
rear section is upright and then tighten the
two rear section main clamp bolts evenly and
tightly.
2.6 Fit the front boom to an approximate position.
Fit the front boom into the frame taking care not to damage the plastic shim located
inside the front of the main frame. Position to approximately a hands span from front
mech post to main cruciform end.
4
2.7 Fit pedals
(your own if not ordered from us) – the right hand pedal and thread tighten in the
normal direction, the left-hand pedal has a left hand thread.
2.8 Set handlebars
Sit on and adjust the bars to a position that feels comfortable. Check width
clearance between hands and wheels, check clearance between brake levers and
frame full lock. Tighten handlebar clamp bolts.
2.9 Set front boom
Set the leg length by sitting on and placing your heel on the pedal and adjusting the
boom so that your leg is almost straight when the pedal is at its furthest from you.
Set the front boom upright (by eye) then tighten the 2 clamp bolts.
2.10 Connect the front changer
Thread the front gear cable outer casing through the
guide on the side of the frame and up towards the
end of the front boom. Thread the inner wire
through the cable outer and then through the loose
cable guide tube (Chrome noodle). Pass the cable
guide up through the hole in the front boom check it
is seated correctly and then pull through any slack
cable and clamp the inner wire at the front changer.
TIP – make sure the left hand shifter is set to
the “1” position in the indicator window (smallest
gear setting) and the cable and outer casing are located properly in the cable
stops.
TIP - Do not trim any cables until you are happy with the various settings of
front boom and gears.
2.11 Connect the rear changer
Fit the short length of gear outer casing into the rear changer and around to the
cable stop on the right hand frame chain stay. Thread the inner wire cable through
the outer casing. Check the cable is located correctly in the cable guide and then
connect and clamp the cable at the rear changer whilst gently pulling through any
slack in the system. TIP – make sure the right hand shifter is set to the “8”
position in the indicator window (smallest sprocket setting) and the cable and
outer casing are located properly.
5
2.12 Check the chain tube lengths
Mount the chain tube assembly and pulley
onto the frame and check for clearance
between the tubes and the front chainset
and between the lower tube and the rear
changer.
If the top chain tube at the front is too long,
shorten by cutting the tube at the front end
to the required length with a sharp knife.
If the lower front tube is too long, adjust
the front position of the tube by loosening the tube clamp at the pulley and sliding
the lower tube rearward to the required position at the front and re-clamp the tube.
Check that the rear changer can pivot
forwards fully and cannot hit the end of the
lower chain tube. Cut any excess plastic tube
from the rear end of the lower tube.
6
2.13 Fit the chain
Remove pulley and chain tube assembly from the trike. Put the R pin supplied (or a
bobby pin) through one end of the two chains supplied. Hold the assembly vertical and
drop a chain down each tube (around the pulley and down the other tube) with the R
pins preventing the chains from dropping right through.
Add two more R pins to the bottom ends of the chains. Refit the chain tube set
and pulley to the trike making sure the tab on the frame is engaged in the pulley
plate. Also make sure the Pulley clamping bolt is tight.
7
Twist the right hand rear changer to the “9” so that the rear changer lines up with
the smallest rear sprocket.
Twist the left hand front changer to the “1” position so that the front changer lines
up with the smallest front chainring.
Thread the bottom chain up through the derailleur and over the cassette.
TIP - make sure the chain is correctly routed through the rear changer cage
and goes the correct side of the tab on the changer between the two jockey
wheels.
Connect to the top chain using the quick connect links supplied. Remove the safety pin
in the top and bottom chain at the rear of the trike.
Now at the front of the trike, pull the top chain through the top chain tube. Pass the
chain through the front changer cage, around the small chain ring and then connect to
the lower return chain at the front using the quick connect link.
Now set the chain to length by adding or removing a section of chain between the
rear changer and the lower chain tube with a chain rivet tool as below. Find one of
the connecting links between the rear derailleur and the lower chain tube. Open the
link and then work out how much chain to remove. Use an R pin to help stop the chain
going back up the chain tube.
8
Make sure you leave enough chain so that it can run from largest chain ring to largest
cassette sprocket.
Leave just enough slack so that the rear changer jockey wheels are pointing forward
but so that they can still move up a fraction. Then check that there is not too much
slack when using the smallest chain ring and smallest cassette sprocket.
TIP – get an extra pair of hands to help with this. Make sure that any links you
alter with the chain link remover are not stiff on the rivets. If in doubt, remove
fewer links than you think as removing links is easier than riveting links back in.
Use the quick disconnect link to open the chain and then punch out links and quick
connect back together. The chain comes with spare joining links so keep these
handy for possible future use.
9
2.14 Check the gear shifting
Check the rear gears are shifting correctly. Raise the rear wheel off the ground by
getting a helper to hold it up or standing an object under the left side dropout so
that the pedals can be turned making the chain turn the rear wheel. Gently twist the
right hand shifter up through the gears one click at a time whilst turning the pedals.
Take care on the rear cassette that the chain does not jump between the largest
sprocket and the spokes. This is prevented by one of the two small limit screws on
the rear changer which is factory set but can be adjusted if required. Set the left
front shifter to the “1” position and the right rear shifter to the “9” whilst turning
the pedals then check that there is no excessive slack in the gear cables. Slack must
be removed by unclamping, pulling through and re-clamping the gear cables. Check the
rear changer indexing by turning the right hand (rear) shifter 1 click to the “8”
position whilst turning the pedals and checking that the rear changer has shifted the
chain to the second from smallest sprocket. Adjust shifting by carefully turning the
cable adjuster at the back of the trike on the rear changer until the chain runs
smoothly on the second from smallest sprocket. Now check for smooth changing up
through the range. Make any minor adjustments by turning the cable adjuster.
Check the front gears are shifting correctly. Adjust the cage limit screws if
required.
2.15 Check the brakes
Squeeze the brake levers hard and check that the front brakes appear to be
operating correctly.
2.16 Fit the Flag
Place the flag in the flag holder hole in the left or right side at the top of the seat
frame.
10
2.17 Check nuts and bolts
Generally check all nuts and bolts to make sure everything is tight.
3.0 INITIAL TEST RIDE
CAUTION: If your feet fall from the pedals when you are riding then they could
be dragged under the cross axle of the trike. Therefore the trike should only be
ridden with your feet securely attached to the pedals, either with special shoes
and pedals which you clip into or toe clips and straps.
You will not need to put your feet down until you want to get off so being clipped
on is comfortable and lets your legs relax
when you are not pedalling.
Getting on and off the trike.
Stand in front of the cross axle with one
foot on either side of the front boom.
Now bend down and reach back to hold the
side of the seat to help lower yourself as you
sit. Try not to push or pull on the handle
bars as you get on and off.
Start on a flat piece of road or drive preferably away from traffic. The front brakes
are independent so the left brake operates the left front wheel and the right brake
operates the right wheel. Sit on, clip in and make sure you know where the brakes are
and that they stop you moving. Before you have ridden more than a few yards check
the front brakes. MAKE SURE YOU CAN STOP!
Steering is very easy and natural and you will soon become unaware of the movements
required.
Gear changing. As with any derailleur system you can only change gear when you are
pedalling and moving forward. It is easier to change if you are not putting a lot of
force on the pedals, particularly when changing from a high to a low gear. The rear
changer is operated by the right changer, and the front using the left changer. You
should not try to change into the lowest gear (largest rear sprocket) unless you are
on the middle or lowest (smallest) chain wheel, because the chain will put strain on
the rear changer. TIP - Try to get into the habit of not crossing over the gears
at the extremes – don’t run on the biggest chain ring and the biggest rear
sprocket or the smallest chain ring and the smallest rear sprocket. This will help
prolong the life of the transmission. Also try to anticipate hills and change to a
lower (easier) gear before you get onto the steep part of the hill hence avoiding
changing gear under pressure.
11
4.0 ADJUSTING
Fine-tuning for leg length, seat angle, handle bar width / angle, brake lever reach,
tyre pressure etc are all well worth taking time to set to your personal preference.
TIP - Experiment but always go for a reasonable (a mile or two) test ride to
decide if an adjustment is right for you.
4.1 Leg length
A small adjustment can be quite noticeable, just like adjusting the saddle on a
conventional bike.
• Change gear to the smallest chain ring.
• Unclamp the front shifter cable.
• Undo the two clamp bolts under the front boom (very loose).
• Slide the front boom in or out by twisting and pulling or pushing TIP – It is
easier to move the boom if you get a helper to sit on the trike with
both front brakes on.
• Check the boom is vertical by eye.
• Tighten the two clamp bolts under the front boom.
• Re clamp the front shifter cable TIP – make sure the left hand shifter is
set pointing to the “1” position (smallest gear setting) and the cable and
outer are located properly and the slack is removed from the cable
when you clamp it.
•
If you have moved the boom by more than approximately 5mm you will need
to check that you have the correct chain length (see Chain length
adjustment - section 4.3).
4.2 Seat Angle Adjustment
The seat has 3 positions of adjustment
• Loosen and remove the long bolt running through the upper seat adjuster.
• If you want to make the seat more reclined set it to the holes closest to
the seat location cup.
Refit the bolt and tighten the seat mount making sure the rack mounting rods are
also in place.
12
4.3 Chain Length
You may need to adjust the chain length after changes to the front boom length, or
wear in the chain after a significant amount of use.
TIP - You can cause excessive wear or even complete failure of the rear changer
if you increase the length of the front boom without checking to see if the
chain is long enough.
• Change gear so that the chain is running on the smallest chain ring at the
front and the smallest
sprocket at the rear.
• The chain will now be at its
slackest and you will see that
the rear changer cage has
sprung back and up to take up
the slack.
• Check to see that the chain
now runs as per this picture:
• Add or remove links until the
chain tension looks like the
picture. TIP- split the chain between the rear changer and the return
chain tube. Put R pins through the chain to prevent it from accidentally
sliding up inside the black return tube when the chain is split. TIP make sure you have not twisted the chain through 180 degrees before
joining it back together. TIP - make absolutely sure that any chain
links which you rivet back in are not stiff - this can cause some very
odd (and not obvious) problems with the chain running freely through
the chain tubes.
• Finally, change gear so that
the chain runs on the largest
front chain ring and the
largest rear sprocket and
check to see if there is still
some travel left in the rear
changer as per this picture:
13
4.4 Brakes
The front brakes are operated independently by each main brake lever. The left
lever operates the left brake , the right lever operates the right brake.
• Test the brakes whilst riding slowly to check that both levers feel the same
and that they do not touch the handle bar grips when squeezed tightly.
• The parking brakes are applied by pressing in the small buttons on the side
of the levers whilst squeezing the brakes on.
• The brake cable tension can be adjusted either on the threaded barrels on
the brake levers or on the adjusters located on the brake plates.
TIP – periodic removal and greasing of the brake cables helps increase
their life and gives smoother operating brakes.
4.5 Gears
Refer to the separate gear manufacturer instructions as supplied with your trike and
see section 2.14.
4.6 Mesh Seat Cover
When new both the seat cover and the straps stretch a little, and in the first few
weeks of use you may need to re-tension the seat by tightening up the straps. In
time it will settle down. For maximum comfort you may need to tighten the cover
more in some places than in others.
Do not over tighten any one strap as they cannot be slackened other than cutting the
strap.
14
5.0 RIDING
CAUTION (again): If your feet fall from the pedals when you are riding then
they could be dragged under the cross axle of the trike. Therefore the trike
should only be ridden with your feet securely attached to the pedals, either with
special shoes and pedals which you clip into or toe clips and straps.
You will not need to put your feet down until you want to get off so being clipped
on is comfortable and lets your legs relax when you are not pedalling.
5.1 Getting on and off the trike.
Stand in front of the cross axle with one
foot on either side of the front boom.
Now bend down and reach back to hold the
side of the seat to help lower yourself as
you sit. Try not to push or pull on the
handle bars as you get on and off.
5.2 Tyre Pressures
These should be about 70-80 psi all round for normal use though they can be varied
within the maximum and minimum ratings as shown on the tyre side walls. Softer
tyres will give a more comfortable ride on bumpy roads. Very high pressures do not
necessarily mean better speed…experiment.
5.3 Stopping in a low gear
As with an ordinary bicycle it is best to get into the habit of finishing your journey in
an easy gear so that you can pull away easily when you start again.
5.4 Relax
Whilst riding sit back and relax. DO NOT PULL ON THE HANDLEBARS, just hold
them lightly. The trike will tend to steer itself in a straight line depending on the
road surface and camber.
TIP – The steering of the trike runs on ball bearings so it is very smooth and
requires minimal effort to steer. The gear cables run forward and backwards
and the spring effect in these cables tend to make the trike slowly turn to the
left if you let go of the handlebars completely. This is normal and we do not
recommend riding without holding at least one of the handle bars or you will not
have proper control of the trike.
15
5.5 Brakes
Normal braking should be done with both levers together and evenly for excellent
stopping power.
5.6 Hill climbing.
A recumbent trike or bike tends not to climb a hill as fast as a lightweight bike whose
rider can get off the saddle to use his/her weight to get extra effort. It will climb
in comfort at a lower speed and in a lower gear. You should never need to get off and
push, even when carrying a heavy load.
5.7 Descending a hill.
Caution, Take care on your first down hill rides until you gain experience. You
will find you can go fast and with confidence once you are used to the way the
machine handles. Because there is less air drag in the recumbent position you will go
faster than a bike. You have powerful brakes with good stopping power.
CAUTION, the brakes are powerful and if they are applied sharply on some of our
models with higher seats, you can cause the rear wheel to rise up and the frame can
tip so far that the front touches the ground.
5.8 Ground clearance.
When going over very rough ground the underside of the frame could touch the
ground. If you think there is a chance that the underside of the frame may hit an
obstacle, get off first and look under the trike to see how close things are getting.
You will quickly learn to recognise terrain that your trike can easily handle. If you do
contact the underside of the frame then, it's unlikely any serious damage will be done
(other than scratching the paint) but check to make sure everything is OK.
16
6.0 MAINTENANCE
TIP - as with any cycle, a small amount of regular care will prolong the life of
your trike and its components. The simplest thing you can do is to regularly give
a quick drop of oil to all of the moving parts especially after riding in heavy rain.
Always keep the chain and chain tubes oiled.
6.1 Adjusting the track.
To avoid excessive tyre wear the front wheels
must be kept parallel. Tracking only needs to be
checked if you suspect damage through an
accident, or if unusual wear starts on one or both front wheels.
• Use a long ruler or a piece of rod to measure between the inside of the
tyres at the front of the tyres, and then at the rear. The distance should
be the same, or up to 2mm less at the front.
• If the tracking is out of adjustment, loosen the two lock nuts on one track
rod and rotate the rod (a small rotation gives a fairly large change in track).
TIP - note that the lock nuts at each end of the track rods have left
and right handed threads (the left hand threaded nuts have a small
notch to identify them). Because there is a left hand thread at one end
and a right hand thread at the other you can adjust the track very
precisely. Tighten up the lock nuts when the distance is right.
6.2 Lubricating the chain.
At regular intervals, and always after riding in wet weather, you should lubricate the
chain.
6.3 Lubricating the bearings.
Rear wheel, head set and pedal bearings on your trike will need greasing from time to
time depending on riding conditions as with any conventional cycle.
6.4 Serial No.
The serial number is marked on the under side of the main cross joint.
17
6.5 Recommended Minimum Tools and Spares
6.5.1 Get you home kit
•
•
•
•
•
•
•
•
Tyre levers
Spare inner tube
Puncture repair kit
Mini Pump
Small adjustable spanner
3, 4, 5, 6mm Hex Keys
Small Phillips screwdriver
Spare Chain link
6.5.2 Full Touring Kit
- All of the above plus at least these items:
• 8mm spanner.
• 9mm spanner.
• 10mm spanner.
• 19mm box spanner.
• 19mm spanner.
• 8mm Hex Key (for Shimano Cranks).
• Chain link extractor tool.
• Spare gear cable.
• Spare brake cable.
7.0 ICE OPTIONAL ACCESSORIES
7.1 Front Mudguards
Front mudguards fit onto the steering pivots and can be quickly removed by one bolt
in each unit.
• To fit the mudguards, remove the bolt and washer from the top of the
steering pivots and then clamp the mudguards directly onto the top of the
steering pivot re-using the bolt and washer.
TIP – The mudguard clamping bolts do need to be done up tight to prevent
the mudguards from pivoting round in use.
18
• To remove a mudguard, loosen and remove the single clamping bolt and
washer at the top of the steering pivot on each wheel.
• Cover the exposed mounting hole by re-fitting the bolt and washer.
7.2 Computer
A computer can be fitted with the aid of an optional mounting kit. The computer
bracket clamps onto the bottle bosses on the main frame (just in front of the main
cross joint).
The sensor is fitted to the kingpost mount and set to line up with the magnet clamped
to the spokes.
Secure the cable to the frame along the underside of the cross axle using electrical
tape.
“Handle bar” bag side mount
This optional item allows a standard “handle
bar” bag to be mounted beside the seat. The
mount is clamped around the seat frame
cross rail and adjusted to the desired
position.
7.3 Lights.
Front lights may be fitted to the front
changer tube utilising the optional ICE front
light mount. Rear lights can be mounted to
the rear of the carrier, or on the rear seat
stay or seat cross rail.
19
7.4 Extra water bottle mount.
An extra water bottle mount can be fitted to the seat frame by using the option ICE
bottle cage mount and a bottle cage.
7.5 Neck rest
The optional neck rest can be fitted to the frame. The rest is adjustable for height
and is designed to suit a wide range.
Key rings are included with the trike. Keep an
extra one on your bike keys and if someone asks
where you got your trike, please give them a
keyring which has our tel number and web
address on it. Call us if you need more key rings.
20
8.0 Recumbent/Trike forums on the Internet
Now that you have your new trike, why not share your experiences
with others on some of the internet forums?
IHPVA Lists
There is a trikes specific mailing list run by the IHPVA (International Human
Powered Vehicle Association). The list generates one or more emails daily (in digest
mode). You can subscribe to the trikes mailing list at
http://www.ihpva.org/mailman/listinfo/trikes
The same page will also let you unsubscribe and change your subscription options.
Bent Rider Online.
The BentRiderOnline website is a valuable source of information. They operate a
message board (forum) that is moderated and is free to join. You will need to
register before you can post a message, but the forum is available for anyone to
read. To register, point your browser to www.bentrideronline.com and click on the
'Message Board' link at the top of the page. On this new page, you will find links to
the FAQ (Frequently Asked Questions) and the registration page. Follow the simple
instructions and you will be registered to participate in the discussion. There is a
Trikes specific forum under Speciality Discussions, and you will find a number of
Trice and ICE owners there.
Velo Vision
Velo Vision is a magazine, published in the UK, covering specialised bikes, cycling as
transport and human power. We'd have to agree when they say "It's a quarterly
dose of cycle inspiration." To get to the forum, point your browser to
http://www.velovision.co.uk/forum/
follow the link to 'VV discussion' To register, click on the 'Log In' link and then
follow the link to 'Need a Login? Register Here'. The registration is painless and
allows you to post on the forum. This forum is not arranged by subject, but just has
a list of the topics presently under discussion.
uk.rec.cycling
uk.rec.cycling is an unmoderated Usenet group. This is a friendly gathering of
enthusiasts who discuss a wide range of subjects, usually related to cycling in the UK.
There are a number of recumbent riders and trike owners who are regular
contributors to the group. To join the group, you will have to set up a Usenet (News)
account with your Internet Service Provider. This is usually free. Your provider will
be able to provide you the details of how to configure your email software to access
the group. Alternatively, you can access the group through the Google search engine
page. Point your browser to
http://groups-beta.google.com/group/uk.rec.cycling and read the posts at your
leisure. You can post to the group if you follow the Google Groups registration
process.
21
Contact ICE
You can find us at:
Inspired Cycle Engineering Ltd
Unit 9b.Spencer Carter Works,
Tregoniggie Industrial Estate,
FALMOUTH,
Cornwall TR11 4SN
England
Telephone & FAX 01326 378848. (+44-1326-378848 outside UK).
or by e-mail [email protected]
29th Sept 2005
22