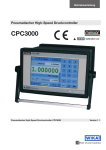
1
PCS 410, 400 & PCS 50 User Manual
Version 3.2
November 2007 Part No. DOC-MN-PCS400/50-00
PCS 400/410 and 50 User Manual
Contents
Introduction ................................................................................................................................................. 1
Home Page................................................................................................................................................... 3
Your PCS Off-hook ................................................................................................................................... 5
Making a Call ............................................................................................................................................... 6
Answering a Call ......................................................................................................................................... 7
End a Call ..................................................................................................................................................... 8
Call Status ..................................................................................................................................................... 9
Place a Call on Hold ................................................................................................................................. 10
Transfer a Call ........................................................................................................................................... 10
Add a Note to a Call ................................................................................................................................. 13
Redial a number ........................................................................................................................................ 13
Displaying a Web Page or Directory ...................................................................................................... 15
Parking a Call ............................................................................................................................................. 15
Call Pick up ................................................................................................................................................ 16
Switch to Hands Free ............................................................................................................................... 18
Mute a Call ................................................................................................................................................. 18
Changing the Volume............................................................................................................................... 18
Incoming Call History .............................................................................................................................. 19
Missed Calls ............................................................................................................................................... 21
Conferencing ............................................................................................................................................. 23
User Configuration ................................................................................................................................... 25
Call Waiting ................................................................................................................................................ 26
Call Forwarding ......................................................................................................................................... 28
Out of Office Message ............................................................................................................................. 31
Do Not Disturb ........................................................................................................................................ 33
Entering Further Numbers...................................................................................................................... 35
Speed Dials (Favourites) .......................................................................................................................... 36
Changing your Ring Tunes ...................................................................................................................... 40
Using with the System Directories ......................................................................................................... 43
Users Directory ......................................................................................................................................... 45
Departments .............................................................................................................................................. 48
Contacts ...................................................................................................................................................... 53
Voicemail.................................................................................................................................................... 63
Hot Desking .............................................................................................................................................. 74
System Administration ............................................................................................................................. 76
Icons in Brief ............................................................................................................................................. 79
Keyboard Short cuts ................................................................................................................................. 87
Index ........................................................................................................................................................... 91
5 Series/V3.2/1107/2
-i-
Contents
PCS 400/410 and 50 User Manual
-1-
PCS 400/410 and 50 User Manual
Introduction
SpliceCom’s range of Proactive Communication Stations (PCS) delivers the ultimate in service to
the desktop for those seeking the real business benefits that can be gained from the convergence
of voice, data, video and web enabled applications. When used in conjunction with the
maximiser, PCS allows the relevant information from your core business applications to be
“pushed” to the desktops of those who need it in a timely and controlled manner, totally
independent of the type of telephone you may wish to deploy.
The PCS 400/410 is an IP hard phone, providing all the
facilities associated with a top of the range digital phone for
making and receiving calls. It then extends the control and
information associated with these calls through an
integrated, full-size VGA (Video Graphics Array), LCD
touch screen. Where business phones have traditionally
provided context sensitive keys around a small display to
aid use, the PCS 400/410 provides a far larger, context
sensitive screen. Graphical icons are used to control
telephony functions in the same intuitive manner you
associate with mobile phones.
The PCS 50 application delivers ALL of the benefits associated with the PCS 400/410 desktop
station to those who wish to use traditional telephones or IP soft phones. Supplied as standard
with every maximiser system, PCS 50 can be run on any PC or laptop computer running
Microsoft Windows, Apple Mac OS X or Linux operating systems.
The PCS 50 application can run as an IP soft phone, where the
PC becomes the telephone. The PC must have multi-media
capabilities with a headset and microphone connected.
Alternatively, the PCS 50 application can be configured to
partner SpliceCom’s PCS 100, PCS 10, PCS 5 or an existing
analogue handset where the voice path is connected via the
handset but the application assists the user to handle calls
quickly and efficiently.
5 Series/V3.2/1107/2
-1-
Introduction
PCS 400/410 and 50 User Manual
-2-
PCS 400/410 and 50 User Manual
Introduction
PCS 50 is also the key component in SpliceCom’s unique
Extension Anywhere feature set for remote, mobile and home
based employees. IP Extension Anywhere sees it used as an
IP Softphone (as an alternative to PCS 400/410 or PCS 100,
Analogue Extension Anywhere utilises PCS 50 as a “Partner”
to an existing home phone, whist GSM/Mobile Extension
Anywhere uses the same arrangement to allow a standard
mobile phone to become an fully integrated “maximiser”
extension - wherever a wireless (or standard) VPN service is
available.
5 Series/V3.2/1107/2
-2-
Introduction
PCS 400/410 and 50 User Manual
-3-
PCS 400/410 and 50 User Manual
Home Page
The display on your PCS when first connected to the maximiser system is called your Home
Page. This is a web page, the link to which is specified by your System Administrator. Your
Home Page can be linked to a web page stored on the Internet, on your company’s intranet or
on the telephone system’s internal web server. By default, your Home Page points to a web page
stored on your telephone system’s internal web server. Your System Administrator can edit this
web page to suit your company’s needs.
At the bottom of your Home Page you are provided with a context-sensitive tool bar, which will
give you different icons depending on the feature or screen you are currently using.
Call Control Toolbar
Home Page
Redial
Favourites
(please refer to p13)
(please refer to p36)
Users
Contacts
(please refer to p53)
(please refer to p45)
More
Options
Speaker
Messages
(please refer to p63)
While using your PCS you can return to your Home Page and the Call Control toolbar at any
time, depending on the screen you are currently working in, by either:
Selecting the Exit icon or pressing Esc
or
5 Series/V3.2/1107/2
-3-
Home Page
PCS 400/410 and 50 User Manual
-4-
PCS 400/410 and 50 User Manual
Home Page
By selecting the Home icon.
By default, between 7 pm and 8 am each day a screen saver will replace your Home Page. Touch
or click on the screen to return to your Home Page. However, the time that the screen saver will
appear can be changed by your System Administrator or it could appear after a specific idle time.
Please refer to your System Administrator for further information.
When using a PCS 50:
• The PCS 50 window can be resized by pointing the mouse at edge of the window and
dragging in the direction required.
• The PCS 50 can be minimised to the System Tray. Please refer to page 76 for further
details.
When using a PCS 400/410 the stylus LED will flash to indicate the status of the phone as
follows:
• Dialling – on
• Alerting – flash 250/250 mSec
• Busy – flash 500/250 mSec
• Hold – flash 250/2000 mSec
• Connected – on
• Call Waiting – flash 250/250 mSec
The stylus LED is also used to indicate that a new voicemail message has been received. Please
refer to page 63 for further information.
Please note: all actions in a “bold” typeface indicate key entries on a Windows/Mac OS X PC
keyboard.
5 Series/V3.2/1107/2
-4-
Home Page
PCS 400/410 and 50 User Manual
-5-
PCS 400/410 and 50 User Manual
Call Handling
Your PCS Off-hook
When your PCS is off-hook the following Dial Pad will appear allowing you to make calls, view
the Directories, change the volume etc. All the icons displayed are explained in further detail in
the appropriate section of this User Guide.
Park icons
Contacts
Favourites
Departments
Users
Pick Up
Redial
Mute
Volume Down
Speaker On
Volume Up
Incoming Call
History
Headset Operation
When a headset is connected to the PCS 400/410 the handset will operate in hands free mode.
The Speaker icon will indicate if the phone is on or off-hook. Lift the handset to override this
operation. Please refer to page 16 for further details.
5 Series/V3.2/1107/2
-5-
Call Handling
PCS 400/410 and 50 User Manual
-6-
PCS 400/410 and 50 User Manual
Call Handling
Making a Call
1
Lift the handset or select the Speaker icon
2
You will be presented with the Dial Pad
3
Dial the number required (internal or external number)
4
The Call Status screen will appear displaying whom you are ringing, your
name and any other information held on the system if available.
If you have started to make a call, have changed your mind and wish to stop the
call either replace your handset or select the Speaker icon or select the Reject
Call icon.
Making an Internal Call to a User (another extension)
1
Lift the handset or select the Speaker icon
2
You will be presented with the Dial Pad
3
Dial the extension number required
1
From the Call Control Toolbar, select the Users icon. A list of the Users on
your system will appear.
2
Use the Search facilities to find the User you require (please refer to page 43
for further assistance).
3
Select the User required and select the Dial icon or press Enter
4
The Call Status screen will appear displaying the extension you are ringing
and your name.
Alternatively;
For further information on working with the Users Directory please refer to page 45.
Making an Internal Call to a Department
1
2
Lift the handset or select the Speaker icon. You will be presented with the
Dial Pad
Dial the extension number of the Department required
or
2
3
5 Series/V3.2/1107/2
Select the Departments icon. A list of the Departments on your system will
appear.
Use the Search facilities to find the Department you require (please refer to
page 43 for further assistance).
-6-
Call Handling
PCS 400/410 and 50 User Manual
-7-
PCS 400/410 and 50 User Manual
Call Handling
4
Select the Department required.
5
Select the Dial icon or press Enter. The Call Status screen will appear
displaying the extension and Department you are ringing and your name.
For further information on working with Departments please refer to page 48.
Making an External Call
1
2
Lift the handset or select the Speaker icon. You will be presented with the
Dial Pad
Dial the external number required.
Alternatively;
1
From the Call Control toolbar select the Contacts icon. A list of Contacts
stored on your system’s database will be displayed.
2
Use the Search facilities to find the Contact you require (please refer to page
43 for further assistance).
3
Select the Contact required.
4
Select the Dial icon or press Enter. The Call Status screen will appear
displaying the Contact you are ringing and your details.
For more information regarding the use of the Contacts database please refer to page 52.
Entering additional digits
If you are required to enter further digits once a call as been made, for
example, when using an auto attendant, click on the Dial icon at the bottom
of the Call Status screen to access the Dial Pad.
Use the Exit icon to return to Call Status if required.
Answering a Call
You will be informed of an incoming call via the following:
PCS 400/410 –
PCS 50
your handset will ring and your stylus LED will flash.
– your PCS will ring and the caller’s details will be displayed via floating text on
your PC screen together with the name of the called User or Department. (To
enable or disable this feature please refer to page 76.)
5 Series/V3.2/1107/2
-7-
Call Handling
PCS 400/410 and 50 User Manual
-8-
PCS 400/410 and 50 User Manual
Call Handling
1
On receiving a call the Call Status screen will appear displaying:
• the incoming number or caller’s name (if known by the system),
• your name or Department name or your colleague’s name if their calls
are forwarded to you
• any other information held on the system if available.
2
To answer the call, lift your handset or select the Answer icon or press
Enter.
or
2
2
If you do not wish to answer the call select the Reject Call icon and the call
will be cancelled or passed to your Forward on Busy number (if set) or
passed to voicemail (if enabled).
or
Select the Messages icon to pass your caller to voicemail (if enabled). This
will perform the same function as the Reject Call icon however if you have a
Forward on Busy number set this takes priority. Therefore, the Messages
icon gives you the choice to either pass the caller to the Forward on Busy
number via the Reject Call icon or to voicemail via the Messages icon
PCS 50 users - please note: your Preference setting will determine when Call Status will be
displayed when you receive a call. Therefore if the default functionality as described above does
not occur please refer to page 76 or to your System Administrator for further details.
All incoming calls will be listed in your Incoming Call History, please refer to page 19 for further
information.
For further information on Departments please refer to page 48 and on Forwarding please refer
to page 28.
End a Call
Select the Reject Call icon
or
Replace the handset.
or
Press Esc
or
Select the Speaker icon.
5 Series/V3.2/1107/2
-8-
Call Handling
PCS 400/410 and 50 User Manual
-9-
PCS 400/410 and 50 User Manual
Call Handling
Note – When using a PCS 400/410:• The Speaker icon will only end the call if used in hands free mode otherwise this icon will
switch from handset to hands free mode – please refer to page 16 for further details.
• If a call is made or answered using the handset, when the distant end clears the call the Call
Status screen will remain allowing you to pick up a parked call (see page 15 for further details)
or allow you to make another call by pressing the Speaker icon. Replace your handset if this
is not required.
Call Status
While in the progress of any call the following screen will be displayed giving you the status and
details of your call. You will also be given the ability to place a call on hold, transfer a call etc as
described in the next part of this User Manual.
Park icons
Transfer
Remote
Person/
Number
Reject Call
Local
Person/
Number
Call Notes
New Call
Call History
Add Note
Speed Dials
Look Up
Record Call
Information
Mute
Volume Down
Volume Up
Favourites
Dial Pad
Speaker On
If you are receiving a call the Remote Person/Number section displays the caller’s information
and the Local Person/Number section displays the recipient’s information, this may be your
details, a colleague’s details when their calls are forwarded to your extension, or Department
details (please refer to page 48 for further details on working with Departments).
5 Series/V3.2/1107/2
-9-
Call Handling
PCS 400/410 and 50 User Manual
- 10 -
PCS 400/410 and 50 User Manual
Call Handling
If you are making a call the Remote Person/Number section displays the details of number you
are calling and the Local Person/Number section displays your details.
You can increase the size of the Remote Person/Number pane, Local Person/Number pane,
Call Notes pane and Call History pane by clicking or pressing within the required pane. This will
allow you to view additional information available. Press or click within the pane to return to the
original size. Alternatively use the scroll bars to scroll through the information.
Place a Call on Hold
Select the New Call icon. You will be presented with the Dial Pad.
To retrieve the call, select the Exit icon.
Transfer a Call
Announced Transfer
1
Place the call on hold (select the New Call icon).
2
Dial the number required (internal or external number).
3
Wait for the call to be answered and announce the caller.
4
To transfer the original call select the Transfer icon (or replace your handset
or press Enter or select the Speaker icon). You will no longer have control
of the call.
or
4
To return to the original call select the Reject Call icon or press Esc (or wait
for the other end to hang up)
or
4
To return to the original call and place the second call on hold, select the
Switch icon.
5
Use the Switch icon to switch between the two calls.
6
Finally, select the Transfer icon to connect the two calls (regardless of which
call you are currently connected to).
or
5 Series/V3.2/1107/2
- 10 -
Call Handling
PCS 400/410 and 50 User Manual
- 11 -
6
PCS 400/410 and 50 User Manual
Call Handling
Select the Reject Call icon or press Esc to clear the call you are currently
connected to and return to the other call (or wait for the other end to hang
up).
If you are the user transferring the call or the intended recipient of the transferred call, before a
call is transferred your Call Notes pane in Call Status will display the following message:
“I have [caller’s name if recognised by the system] on hold – [name of User transferring the call]
– [time and date]”
For example:
Unannounced transfer (Blind Transfer)
1
Select the Transfer icon or press Enter.
2
Dial the number required (internal or external number).
3
The call will be automatically transferred to this number. You will no longer
have control of the call.
If you are a recipient of an unannounced transfer answer the call in the normal way. Call Status
will display the name of the original caller and the Call History pane will display who transferred
the call to you.
Note: If using a PCS 50, the floating text will display the name of the original caller.
Transfer a Call via your Favourites
Firstly, you must set up your Favourites list – further details on working with Speed Dials are
available from page 36. Once available your Favourites list can be used to quickly and easily
transfer calls without having to remember the number.
5 Series/V3.2/1107/2
1
Select the Favourites icon.
2
Click on the Speed Dial required.
3
The original call will be placed on hold and the new call will be made.
4
Select the Transfer icon or press Enter when ready.
- 11 -
Call Handling
PCS 400/410 and 50 User Manual
- 12 -
PCS 400/410 and 50 User Manual
Call Handling
Transfer a Call via the Directories
If you do not know the number of the person to whom you wish to transfer the call you can
look up the information in one of the directories available.
1
Select the Look Up icon
2
Select either Users or Departments or Contacts.
3
Select the name required.
4
Select the Dial icon or press Enter. The original call will be placed on hold
and the new call will be made.
5
Select the Transfer icon or press Enter when ready.
or
or
If you wish to return to the call handling icons after pressing the Look Up
icon select the More Options button.
If you wish to return to the call handling icons after selecting a directory
select the Exit icon.
Further information on working with these directories can be found on the following pages:
Contacts – page 52, Users – page 43 and Departments - page 48.
Call History
The Call History pane within Call Status will display a list of the internal users that have handled
the call. So that when a call is transferred among several users each user will be able to view who
has previously dealt with the caller.
5 Series/V3.2/1107/2
- 12 -
Call Handling
PCS 400/410 and 50 User Manual
- 13 -
PCS 400/410 and 50 User Manual
Call Handling
Add a Note to a Call
During a call you may wish to make notes about the call, for example, the caller’s name, the
details of his enquiry etc. This information not only acts as an aide memoir for you but will also
be passed to another User of a PCS when the call is transferred.
1
Click on the Add Note icon.
2
Enter any text required in the Note box.
(PCS 400/410 – if a keyboard is not available select the More
button to access the on-screen keyboard. Select OK when
ready.)
…
3
Click on Add to Call
4
The text together with the name of the originator of the note and the date
and time will appear in the Call Notes pane of Call Status.
5
This information will be passed on with the call if transferred.
The Call Notes pane can be enlarged by pressing or clicking within the pane. Press or click
within the pane to return to the original size.
Please note: If the Add to Contact button is displayed this means the call has been made to or
received from a number stored on the Contacts database. For further information please refer to
page 54.
Redial a number
A call made from your PCS will be logged in the Redial Number list and the number can be
redialled.
5 Series/V3.2/1107/2
1
From the Call Control toolbar select the Redial icon (this icon is also
available within the Dial Pad).
2
The Redial Number list will appear.
3
The date and time of when you made the call will be displayed, together
- 13 -
Call Handling
PCS 400/410 and 50 User Manual
- 14 -
PCS 400/410 and 50 User Manual
Call Handling
with the Name of the User/Contact, if this information is available, and the
number that you dialled.
4
Select the call to be redialled (by clicking in the Time column).
5
Select the Dial icon or press Enter and the call will be made (or double click
the entry).
6
The Call Status screen will appear displaying whom you are ringing, your
name and any other information held on the system if available.
Please note:
•
The last 18 calls made will be displayed.
•
The Green icon represents an answered call
•
The Red icon
represents a call that was not answered
To delete an entry select the Delete icon or press Delete.
The Further Numbers icon will allow you to dial another number, eg mobile
number, stored for a User or Contact if the number is recognised by the
system.
The New Contact icon will allow you to either create a new Contact where
the external number will automatically populate the Telephone field or view
the User Details for the internal number selected.
For further information on Using the User Directory please refer to page 45 and for further
information on Working with Contacts please refer to page 52.
Select the Exit icon or press Esc to exit from the Redial Number list.
5 Series/V3.2/1107/2
- 14 -
Call Handling
PCS 400/410 and 50 User Manual
- 15 -
PCS 400/410 and 50 User Manual
Call Handling
Displaying a Web Page or Directory
Using a Web Page
Each User of the telephone system including yourself can be configured so that a specific web
page is displayed when you make a call and/or receive a call. This could be a web page accessed
via the Internet or stored on your company’s Intranet or the telephone system’s internal web
server. This could be useful if you wish to have access to sales information when talking to
customers or access to company information when in a conversation with a specific member of
staff. The web page can be displayed either by the press of a button when you choose or
automatically before a call is answered or after a call is answered
To display the configured web page, select the Information icon.
If a web page appears automatically when you make a call to or receive a call
and you wish to view Call Status select the Exit icon.
Please refer to your System Administrator for further details.
Displaying a Directory
Each User of the telephone system including you can be configured so that either the Users or
Departments directory or your Favourites (Speed Dials) will automatically appear after a call you
have made or received is answered. This is particularly useful if you need to be able to quickly
and easily transfer calls.
If a directory is displayed after a call you have made or received is answered please refer to the
relevant section in this manual to find out how to handling the call using this directory –
Favourites - page 38, Users - page 46 and Departments - page 50.
If you do not wish to use the Directory displayed select the Exit icon to
return to Call Status.
Please refer to your System Administrator for further details.
Parking a Call
This facility allows calls to be put on hold in a system area so that the call can be picked up from
any other extension on the system. The PCS provides four Park icons to access Park slots 1, 2, 3
and 4. If a call is parked via one of these Park icons all users of a PCS 400/410, 100, 50 and
Operators Console will see the call parked and can retrieve the call if required.
Park a Call
1
5 Series/V3.2/1107/2
Select one of the four Park icons.
- 15 -
Call Handling
PCS 400/410 and 50 User Manual
- 16 -
2
PCS 400/410 and 50 User Manual
Call Handling
The details of the caller will be displayed on the Park icon.
Pick up a Parked Call
1
Lift your handset or select the Speaker icon and you will be presented
with the Dial Pad.
2
Select the relevant Park icon
Please note:
- If you pick up a parked call while in the progress of another call, this call will be
automatically parked in the next available slot.
- To pick up a parked call via an analogue handset please refer to your System Administrator
for the relevant short code.
- If you are unable to pick up a call parked by a colleague you may be operating within a
different “Company” to your colleague. Please refer to your System Administrator for
further details.
- If you belong to a “Company” this Company may be configured with a Park Timeout. This
means that when you park a call it will be represented to you after the time configured. By
default, this is set to 5 minutes. A represented call can be answered in the normal way.
Please refer to your System Administrator for further details.
- By default the four Park icons displayed in Call Status are configured to access Park slots 1,
2, 3 and 4. However if you wish the icons to access alternative Park slots in order to create
either group or “private” park slots please refer to your System Administrator for further
assistance.
Call Pick up
You can pick up a call ringing on another extension via the Pick Up screen. This is useful if, for
example, you wish to answer your colleague’s phone when they are not at their desk.
5 Series/V3.2/1107/2
1
Lift your handset or select the Speaker icon.
2
Select the Pick Up icon.
3
Each ringing extension will be displayed.
4
Click on the relevant icon to pick up the call.
- 16 -
Call Handling
PCS 400/410 and 50 User Manual
- 17 -
PCS 400/410 and 50 User Manual
Call Handling
Please note:
• If you are currently on a call when you pick up a ringing call your original call will be
parked in the first available park slot. Please refer to page 15 for further information on
parking a call.
• If you are a member of a “Company” (a feature of the telephone system) you will only be
able to pick up calls from extensions that are members of the same company and you will
need to add the relevant extensions to your Speed Dials list. Please refer to your System
Administrator for further information on Companies and please refer to page 36 for
information on Speed Dials.
The Call Pick Up screen will also display calls ringing for a Department and the number of calls
waiting to be answered. Click on the relevant icon to pick up the call. You do not have to be a
member of the Department to pick up a Department call.
For further information on Departments please refer to page 48.
5 Series/V3.2/1107/2
- 17 -
Call Handling
PCS 400/410 and 50 User Manual
- 18 -
PCS 400/410 and 50 User Manual
Call Handling
Switch to Hands Free
(PCS 400/410 only)
You may wish to switch between hands free and handset operation without interrupting the call.
From handset to hands free – select the Speaker icon and replace the handset
From hands free to handset – lift the handset
Please note: If you select the Speaker icon while in hands free mode you will end the call.
Mute a Call
(PCS 400/410 and PCS 50 as an IP Phone only)
You may wish to prevent the caller from hearing your conversation with another colleague, for
example.
Select the Mute icon to mute your call.
Select the Mute icon to turn this feature off.
Changing the Volume
(PCS 400/410 and PCS 50 as an IP Phone only)
You can change the ringing volume and conversation volume at any time during or before a call.
Changing the Volume before a call
or
1
Select the Speaker icon.
2
Select the Volume Up or Down icons as required.
Select the Exit icon to return to your Home Page.
Changing the Volume during a ringing call
1
5 Series/V3.2/1107/2
The Call Status screen will appear when a call is received.
- 18 -
Call Handling
PCS 400/410 and 50 User Manual
- 19 -
or
2
Select the Volume Up or Down icons as required.
3
The ringing volume will increase or decrease.
PCS 400/410 and 50 User Manual
Call Handling
Changing the Volume during a call
or
1
Answer the call in the normal way.
2
Select the Volume Up or Down icons as required.
3
The volume of your handset will increase or decrease.
Incoming Call History
Incoming internal and external calls that you have answered will be logged in your Incoming Call
History.
View your Incoming Call History
From the Call Control toolbar select the Messages icon to view the
Incoming Call History.
The green icon indicates an answered call.
5 Series/V3.2/1107/2
- 19 -
Call Handling
PCS 400/410 and 50 User Manual
- 20 -
PCS 400/410 and 50 User Manual
Call Handling
The time and date of the call will be displayed; together with the caller’s number and, if this
number is recognised by the system, the Name of the caller.
The Mailbox column will indicate the recipient of the call (this is relevant if you are a member of
a Department – pleaser refer to page 48 for further details, or a colleague has forwarded his calls
to your extension).
Entries are listed in date and time order with the newest at the top.
Each column displayed in the Incoming Call List can be resized by pointing at the line to the
right of the column title with your mouse, finger or stylus. A double headed arrow shape will
appear. Hold down your mouse/finger/stylus and move the column to the left or right.
Your last 10 answered calls will be listed. If this number is exceeded the oldest will be deleted.
The Further Numbers icon will allow you to dial another number, eg mobile
number, stored for a User or Contact if the number is recognised by the
system.
The New Contact icon will allow you to either create a new Contact where
the external number will automatically populate the Telephone field or view
the User Details for the internal number selected.
For further information on Using the User Directory please refer to page 45 and for further
information on Working with Contacts please refer to page 52.
The Incoming Call History will also display your missed calls (please refer to page 21 for further
details) and your Voicemail messages (please refer to page 63 for further details).
Select the Exit icon or press Esc to return to your Home Page.
Redial a previous caller
Each incoming call answered by your PCS will be logged in your Incoming Call History. The
number received with these calls can be dialled directly from this list.
1
From the Call Control toolbar select the Messages icon. The Incoming Call
History will appear.
2
Select the call to be dialled (by clicking under the Time column).
3
Select the Dial icon or press Enter and the call will be made.
or
3
Double click the number and the call will be made.
If the caller’s number has been withheld or not received by the system this facility will not be
available. The Number column will indicate if the caller’s telephone number has been received.
5 Series/V3.2/1107/2
- 20 -
Call Handling
PCS 400/410 and 50 User Manual
- 21 -
PCS 400/410 and 50 User Manual
Call Handling
Delete an Incoming Call
The Incoming Call History will display the last 10 answered calls and will delete the oldest once
this number has been exceeded, however you can manually delete an entry if required.
1
From the Call Control toolbar select the Messages icon. The Incoming Call
History will appear.
2
Select the call to be deleted (by clicking under the Time column).
3
Select the Delete icon.
Select the Exit icon or press Esc to return to your Home Page.
Nuisance Calls
If the Nuisance Number icon appears within the Incoming Call List screen
this means your telephone system has been configured to allow you to black
list incoming external numbers as follows:
1
From the Call Control toolbar select the Messages icon. The Incoming Call
History will appear.
2
Select the call (by clicking under the Time column) which displays the
external number you wish to black list.
3
Select the Nuisance Number icon.
You will no longer receive a call from this external number; the caller will either be routed to
another User or Department to handle the call or played a message. Please refer to your System
Administrator for further information.
Missed Calls
When a call has been received by your PCS that you did not answer this call will be logged as a
missed call. The Missed Call icon will be displayed. If you are using a PCS 50 the icon on your
Task Bar will also flash.
View your Missed Calls
From the Call Control toolbar select the Missed Call icon. The Incoming
Call History will appear.
5 Series/V3.2/1107/2
- 21 -
Call Handling
PCS 400/410 and 50 User Manual
- 22 -
PCS 400/410 and 50 User Manual
Call Handling
The red icon indicates a missed call.
The time and date of the call will be displayed; together with the caller’s number and, if this
number is recognised by the system, the Name of the caller.
Entries are listed in date and time order with the newest at the top.
The Mailbox column will indicate the recipient of the call (this is relevant if you are a member of
a Department – please refer to page 48 for further details).
Your last 10 missed calls will be displayed. If this number is exceeded the oldest will be deleted.
Select the Exit icon or press Esc to return to your Home Page.
You can return to this list at any time by selecting the Messages icon.
Return a Missed Call
or
1
From the Call Control toolbar select the Missed Call icon or Messages icon.
The Incoming Call History will appear.
2
Select the call to be returned (by clicking under the Time column).
3
Select the Dial icon or press Enter and the call will be made (or double click
the entry).
or
5 Series/V3.2/1107/2
- 22 -
Call Handling
PCS 400/410 and 50 User Manual
- 23 -
3
PCS 400/410 and 50 User Manual
Call Handling
Double click the number and the call will be made.
If the caller’s number has been withheld or not received by the system this facility will not be
available. The Number column will indicate if the caller’s telephone number has been received.
Delete a Missed Call
The Incoming Call History will display the last 10 missed calls and will delete the oldest once this
number has been exceeded, however you can manually delete an entry if required.
or
1
From the Call Control toolbar select the Missed Call icon or Messages icon.
The Incoming Call History will appear.
2
Select the call to be deleted (by clicking under the Time column).
3
Select the Delete icon.
Select the Exit icon or press Esc to return to your Home Page.
Conferencing
Creating a Conference call
The conferencing facility allows you to create a 3-way conversation between yourself and two
internal and/or external calls. (Please note that this feature must be enabled on your telephone
system. Please refer to your System Administrator if this feature is not available.)
5 Series/V3.2/1107/2
1
Lift the handset or select the Speaker icon. You will be presented with the
Dial Pad.
2
Dial the first number required (internal or external number).
3
Once the call has been answered, place the call on hold (select the New Call
icon).
4
Dial the second number required (internal or external number).
5
Once the call has been answered, select the Conference icon. The two calls
and you are now in a 3-way conversation.
- 23 -
Call Handling
PCS 400/410 and 50 User Manual
- 24 -
PCS 400/410 and 50 User Manual
Call Handling
Cancel a Conference call
You may wish to cancel the conference and return to a 2-way conversation with your two calls.
Select the In Conference icon. You will return to the call displayed in Call
Status.
Use the Switch icon to switch between the two calls. Each call can then be
transferred or ended in the normal way.
If you select the Reject Call icon while on a conference call you will hang up
the call displayed in Call Status and return to a 2-way conversation with the
other call.
End a Conference call
Select the Speaker icon or replace the handset. All calls will be cancelled.
Note: When used on the PCS 400/410 the Speaker icon will only end the call if used in hands
free mode otherwise this icon will switch from handset to hands free mode – please refer to page
16 for further details.
5 Series/V3.2/1107/2
- 24 -
Call Handling
PCS 400/410 and 50 User Manual
- 25 -
PCS 400/410 and 50 User Manual
User Configuration
Configuration of your extension settings and details can be changed via the User Configuration
form.
1
From the Call Control toolbar select the More Option icon.
2
Select the User Preferences icon.
When using a PCS 400/410 an on-screen keyboard can be displayed with this form via the
following methods:
…
Beside any field where text can be entered the More button is available. By pressing
this button the on-screen keyboard will be displayed. Select OK or Cancel to finish.
Alternatively, the on-screen keyboard can be permanently displayed as follows:
1
Select the More Options icon twice.
2
Select the Keyboard Off icon.
Select the Keyboard On icon to turn off the on-screen keyboard
Please note: if the Speed Dials tab and Ring Tunes tab are the only tabs that appear in your User
Configuration form you have been given restricted access to this dialogue box. Please refer to
your System Administrator for further information.
5 Series/V3.2/1107/2
- 25 -
User Configuration
PCS 400/410 and 50 User Manual
- 26 -
PCS 400/410 and 50 User Manual
User Configuration
Calibration
(PCS 400/410 only)
This facility will allow you to ensure that the stylus is pointing to the correct place on the screen.
Call Waiting
The Call Waiting feature allows you to receive a second call while connected to another call.
Turn on Call Waiting
1
Select the User Preferences icon.
2
Select the General tab.
3
From the Call Waiting list box select Enabled.
4
Select OK.
Handling a waiting call
1
5 Series/V3.2/1107/2
When a second call is received you will hear an intermittent beep in your
handset and the Call Waiting message will appear on the screen. This
message will disappear after a few seconds or alternatively click on the
message.
- 26 -
User Configuration
PCS 400/410 and 50 User Manual
- 27 -
PCS 400/410 and 50 User Manual
User Configuration
2
The Switch icon will appear on the right hand side of the screen. Select the
Switch icon to view the caller’s details. Your first call will be placed on
hold.
3
Select the Answer icon or press Enter to answer the second call.
or
3
Select the Reject Call icon and the call will be cancelled or passed to your
Forward on Busy number (if enabled) or passed directly to voicemail (if
enabled). You will be returned to your previous call.
When you have two calls active on your phone you can:
Use the Switch icon to switch between the two calls.
Select the Conference icon to create a 3-way conference with you and the
two calls.
If you choose to ignore a call waiting on your phone, ie you do not select the Switch icon, the
caller will be automatically passed to your Forward on No Answer number (if set) or to
voicemail (if enabled), otherwise the call will continue to ring on your extension.
If you select the Switch icon and choose not to answer or choose to reject the call waiting the
caller will be automatically passed to your Forward on No Answer number (if set) or to
voicemail (if enabled) and you will be returned to your previous call.
5 Series/V3.2/1107/2
- 27 -
User Configuration
PCS 400/410 and 50 User Manual
- 28 -
PCS 400/410 and 50 User Manual
User Configuration
Turn off the Intermittent Beep
When Call Waiting is enabled you may not wish to hear the intermittent beep when a second call
is received and may wish to be informed visually on the PCS only. This tone can be turned off
as follows:
1
Select the User Preferences icon.
2
Select the General tab.
3
From the Call Waiting list box select No Tone.
4
Select OK.
When the No Tone option is turned on the Call Waiting message will appear on the screen and
the Switch icon will become available both which indicate you have received a second call.
Handle the call as described above.
Turn off the Intermittent Beep in the headset only
(PCS 50 as a partner only)
When Call Waiting is enabled you may not wish to hear the intermittent beep in your headset
when a second call is received but may still wish to hear the beep via the PCS 50. This feature
can be set as follows:
1
Select the User Preferences icon.
2
Select the General tab.
3
From the Call Waiting list box select Phone Tools.
4
Select OK.
Please note: your PC must have a sound card in order for you to hear the intermittent beep.
Turn off Call Waiting
1
Select the User Preferences icon.
2
Select the General tab.
3
From the Call Waiting list box select None.
4
Select OK.
Call Forwarding
You may wish to forward your calls to another colleague or an external number, eg your mobile,
while you are out of the office, not at your desk or on another call.
5 Series/V3.2/1107/2
- 28 -
User Configuration
PCS 400/410 and 50 User Manual
- 29 -
PCS 400/410 and 50 User Manual
User Configuration
Please note:
•
When Follow Me or Forwarding has been set your PCS or analogue handset will provide
a broken dial tone to remind you that this feature has been enabled.
•
If your calls are forwarded to an internal extension and that extension is not answered or
busy the caller will be passed to your voicemail and the call will be logged as a missed call
on your PCS.
Using Follow Me
This facility allows you to configure your extension so that your calls follow you to an internal
extension or to an external number, eg your mobile, when you are, eg working at another desk,
working at home etc.
Turn on Follow Me
5 Series/V3.2/1107/2
1
Select the User Preferences icon.
2
Select the General tab.
3
From the Follow Me list box select either:
• Personal – all calls to your extension and direct line number will be
forwarded
• Dual Personal – all calls to your extension and direct line number will
be forwarded, however your extension will also ring. This will ensure
that you pick up the call wherever you are.
• All – all calls to your extension, direct line number and any
Department calls will be forwarded
• Dual All – All calls to your extension, direct line number and any
Department calls will be forwarded, however your extension will also
ring. This will ensure that you pick up the call wherever you are.
4
In the Follow Me Number field enter the internal or external number to
which calls are to be forwarded.
5
Select OK.
- 29 -
User Configuration
PCS 400/410 and 50 User Manual
- 30 -
PCS 400/410 and 50 User Manual
User Configuration
Please note: When you have Dual Personal or Dual All set you can set a different ring tune to
play on your PCS to remind yourself that this feature has been set. Please refer to page 40 for
further details.
(For information on Working as a member of a Department please refer to page 48.)
Turn off Follow Me
1
Select the User Preferences icon.
2
Select the General tab.
3
From the Follow Me list box select None.
4
Select OK.
Using Forward on Busy
You may wish to forward your calls only when you are on an existing call.
1
Select the User Preferences icon.
2
Select the Forwarding tab.
3
In the Forward on Busy Number field enter the internal or external number
to which calls are to be forwarded.
4
To set this feature select the Forward on Busy tick box.
5
Select OK.
To turn off this feature un-tick the Forward On Busy tick box
When this feature is set, if you do not wish to answer an incoming call and
wish the call to be passed to your Forward on Busy number select the Reject
Call icon.
5 Series/V3.2/1107/2
- 30 -
User Configuration
PCS 400/410 and 50 User Manual
- 31 -
PCS 400/410 and 50 User Manual
User Configuration
Using Forward on No Answer
You may wish to forward your calls only when you are unable to answer your phone when, for
example, you have left your desk temporarily or are in a meeting.
1
Select the User Preferences icon.
2
Select the Forwarding tab.
3
In the Forward on No Answer Number field enter the internal or external
number to which calls are to be forwarded.
4
To set this feature select the Forward on No Answer tick box.
5
Select OK.
By default, your extension will ring for 20 seconds before your extension is considered not
answered. Your System Administrator will be able to tell you if this default setting has been
changed.
To turn off this feature un-tick the Forward On No Answer tick box
Receiving a Forwarded Call
If a colleague’s calls have been forwarded to your extension when you receive a forwarded call
the colleague’s details will be displayed in the Call Status screen to enable you to identify and
answer the call correctly.
When using a PCS 50 the floating text displayed on your PC screen when a call is received will
also display your colleague’s name when their calls have been forwarded to you. (To enable or
disable this feature please refer to page 76.)
Out of Office Message
When you are unable to answer your phone you may wish to inform your colleagues of your
whereabouts and when you will be available. An Out of Office Message can be configured and
this will be displayed on your colleagues’ PCS when they attempt to call you.
Setting an Out of Office Message
5 Series/V3.2/1107/2
1
Select the User Preferences icon.
2
Select the General tab.
- 31 -
User Configuration
PCS 400/410 and 50 User Manual
- 32 -
PCS 400/410 and 50 User Manual
User Configuration
3
From the Out of Office list box select either:
• In Meeting
• At Lunch
• On Holiday
• Off Site
4
In the Out of Office text box enter the message that will accompany the
above message eg “until Monday”, “until 3 pm” etc.
5
Select OK.
Making a call to a colleague with an Out of Office message
If a colleague has an Out of Office message set this information will appear in the Notes section
of the Call Status screen. This feature will not change the manner in which your call is handled.
5 Series/V3.2/1107/2
- 32 -
User Configuration
PCS 400/410 and 50 User Manual
- 33 -
PCS 400/410 and 50 User Manual
User Configuration
Remove an Out of Office message
1
Select the User Preferences icon.
2
Select the General tab.
3
From the Out of Office list box select “In the Office”.
4
Select OK.
You do not need to remove the text from the Out of Office text box. This text can remain to be
used next time you turn on an Out of Office message.
Do Not Disturb
The Do Not Disturb feature allows you to set your extension as permanently busy. This is
useful if, for example, you are in a meeting and do not wish to be disturbed.
Turn on Do Not Disturb
1
Select the User Preferences icon.
2
Select the General tab.
3
Select the Do Not Disturb tick box.
4
Select OK.
Your calls will be automatically passed to voicemail (if enabled) or to your Forward on Busy
number if configured. The call will be logged in your Missed Calls list.
When viewing the Users Directory other users of a PCS will be informed that you have Do Not
Disturb set. Please refer to page 45 for further details.
5 Series/V3.2/1107/2
- 33 -
User Configuration
PCS 400/410 and 50 User Manual
- 34 -
PCS 400/410 and 50 User Manual
User Configuration
Please note: When Do Not Disturb has been set:
1
Your PCS or analogue handset will provide a broken dial tone to remind
you that this feature has been enabled.
2
Your Speaker icon will be displayed with a blue background
Turn off Do Not Disturb
1
Select the User Preferences icon.
2
Select the General tab.
3
Un-tick the Do Not Disturb tick box.
4
Select OK.
Setting a Do Not Disturb Exception Number
If you wish to set Do Not Disturb but need to receive a call from a specific colleague or external
number you can set this number as a Do Not Disturb Exception.
1
Select the User Preferences icon.
2
Select the DND Exceptions tab.
3
In the Do Not Disturb Exception Number field (at the bottom) enter the
internal or external number required.
4
Select Add.
PCS 50 only
PCS 400/410 only
3
Select Add.
4
In the DND Exception field enter the internal or external number required.
5
Select OK.
6
The number will appear in the DND Exceptions list.
7
Select OK
This now means that whenever you set Do Not Disturb you will not receive any calls except
from your Do Not Disturb Exception numbers.
5 Series/V3.2/1107/2
- 34 -
User Configuration
PCS 400/410 and 50 User Manual
- 35 -
PCS 400/410 and 50 User Manual
User Configuration
Remove a Do Not Disturb Exception Number
1
Select the User Preferences icon.
2
Select the DND Exceptions tab.
3
Select the number to be removed.
4
Select Del.
5
Select OK.
When you turn off Do Not Disturb you do not need to delete your Exception numbers at the
same time. These numbers can stay in the list to be used next time you turn on Do Not Disturb.
Entering Further Numbers
Your home and mobile number can be entered on the telephone system as follows:
5 Series/V3.2/1107/2
1
Select the User Preferences icon.
2
3
Select the Numbers tab.
Enter your Home and/or Mobile number in the relevant field.
- 35 -
User Configuration
PCS 400/410 and 50 User Manual
- 36 -
PCS 400/410 and 50 User Manual
User Configuration
These numbers are used:
1
2
3
To identify you when you make a call from your home or mobile telephones. Your name
and details will appear in Call Status.
By the Users Directory (please refer to page 45 for further details)
By voicemail when accessing your messages from an external telephone (please refer to
your System Administrator for further details)
Please note that:
- you can not change your extension number
- if the Mobile and Home fields are grey then you are unable to edit these fields. Please
refer to your System Administrator for further details.
Please refer to page 67 for details on using the Assistant field.
Speed Dials (Favourites)
The Speed Dial section of your User Configuration form allows you to set up your own personal
list of regularly used telephone numbers (internal or external). Speed Dials are displayed in your
Favourites list and within Call Status. Speed Dials set up for internal extensions will also act as
Busy Lamp Fields (BLF), in other words they will indicate when that User is on the phone.
Creating a Speed Dial
1
Select the User Preferences icon.
2
Select the Speed Dial tab.
3
In the Description field enter any text (alpha-numeric characters only) that
will identify this Speed Dial.
4
In the Telephone Number field enter the number to be dialled (internal or
PCS 50 only:
5 Series/V3.2/1107/2
- 36 -
User Configuration
PCS 400/410 and 50 User Manual
- 37 -
PCS 400/410 and 50 User Manual
User Configuration
external number).
5
Select Add.
PCS 400/410 only:
3
Select Add
4
In the Description field enter any text (alpha-numeric characters only) that
will identify this Speed Dial.
5
In the Telephone Number field enter the number to be dialled (internal or
external number).
6
Select OK.
7
Select OK to finish.
Making a call with a Speed Dial
1
From your Call Control toolbar select the Favourites icon and your Speed
Dials will be displayed.
2
Select the Speed Dial required and a call will be made automatically.
If an internal Speed Dial is displayed with a red background this means the
User is currently busy.
(1)
5 Series/V3.2/1107/2
If an internal Speed Dial is flashing between a yellow and red background
this means that either the User’s extension is currently ringing or there are
calls queuing for that Department. The number of calls waiting to be
answered will be displayed.
- 37 -
User Configuration
PCS 400/410 and 50 User Manual
- 38 -
PCS 400/410 and 50 User Manual
User Configuration
Transfer a call via a Speed Dial
Your Speed Dials are displayed within Call Status to allow you to quickly and easily transfer a
call.
1
Select the Speed Dial required.
2
The original call will be placed on hold and the new call will be made.
3
Select the Transfer icon to complete the transfer.
For further information on transferring calls please refer to page 10.
5 Series/V3.2/1107/2
- 38 -
User Configuration
PCS 400/410 and 50 User Manual
- 39 -
PCS 400/410 and 50 User Manual
User Configuration
Assigning a Short Code to a Speed Dial
For the numbers that you dial regularly you may find it easier to assign a short code to a Speed
Dial so, for example, you could dial just 33 to ring 01639253492.
1
Select the User Preferences icon.
2
Select the Speed Dials tab.
3
In the Description field enter any text (alpha-numeric characters only) that
will identify this Speed Dial.
4
In the Short Code field enter the code you will use to quick dial the number.
5
In the Telephone Number field enter the number to be dialled (internal or
external number).
6
Select Add.
PCS 50 only
PCS 400/410 only
5 Series/V3.2/1107/2
3
Select Add.
4
In the Description field enter any text (alpha-numeric characters only) that
will identify this Speed Dial.
5
In the Short Code field enter the code you will use to quick dial the number.
6
In the Telephone Number field enter the number to be dialled (internal or
external number).
7
Select OK.
8
Select OK to finish.
- 39 -
User Configuration
PCS 400/410 and 50 User Manual
- 40 -
PCS 400/410 and 50 User Manual
User Configuration
Please note: Ensure that the Short Code that you use is not the same as a short code you are
already using for other system functionality provided by your System Administrator.
Amending a Speed Dial
1
Select the User Preferences icon.
2
Select the Speed Dials tab.
3
Select the Speed Dial to be amended.
4
Make the changes required in the Description, Short Code or Telephone
fields.
5
Select Update.
6
Select OK.
Delete a Speed Dial
1
Select the User Preferences icon.
2
Select the Speed Dials tab.
3
Select the Speed Dial to be deleted.
4
Select Delete.
5
Select OK.
Changing your Ring Tunes
By default, you will be able to recognise an incoming external call from an incoming internal call
by the ring tone that you hear. You may wish to change these ring tones.
1
Select the User Preferences icon.
2
3
4
5
6
Select the Ring Tunes tab.
From the Type list box select Internal or External.
From the Tune list box select the Tune required.
Select the Add button. The new entry will appear in the Ring Tunes list.
Select OK.
You may also wish to assign a ring tune to a specific number so that when you receive a call
from a specific colleague or customer, for example, you will be able to recognise their call
immediately.
5 Series/V3.2/1107/2
1
Select the User Preferences icon.
2
Select the Ring Tunes tab.
- 40 -
User Configuration
PCS 400/410 and 50 User Manual
- 41 -
3
4
5
6
7
PCS 400/410 and 50 User Manual
User Configuration
From the Type list box select Caller ID.
In the Telephone Number field enter the incoming number. This can be an
internal or external number.
From the Tune list box select the Tune required.
Select the Add button. The new entry will appear in the Ring Tunes list.
Select OK.
If you are a member of a Department you may wish to distinguish between a personal call and a
Department call.
1
Select the User Preferences icon.
2
Select the Ring Tunes tab.
3
From the Type list box select Destination.
4
In the Telephone Number field enter the relevant number. If you wish to
differentiate your personal calls from other calls enter your extension
number here. If you wish to differentiate calls to a specific Department,
enter the Department extension number here (please refer to your System
Administrator if you are unsure which number to use here).
5
From the Tune list box select the Tune required.
6
Select the Add button. The new entry will appear in the Ring Tunes list..
7
Select OK.
For further information on Working as a member of a Department please refer to page 48.
If you have Follow Me Dual Personal or Dual All set (please refer to page 29 for further details)
you may wish to have a different ring tune played on your extension to remind you that this
feature has been set.
5 Series/V3.2/1107/2
- 41 -
User Configuration
PCS 400/410 and 50 User Manual
- 42 -
PCS 400/410 and 50 User Manual
User Configuration
1
Select the User Preferences icon.
2
Select the Ring Tunes tab.
3
From the Type list box select Dual Ringing.
4
From the Tune list box select the Tune required.
5
Select the Add button. The new entry will appear in the Ring Tunes list.
6
Select OK.
The System Type is used for calls generated by the telephone system, for example voicemail callback. Please refer to your System Administrator for further information.
PCS 50 users - please note:
• Your PC must have a sound card in order to use the Ring Tunes facility and the selected
ring tune will be played over your PC’s speakers. If you are using the PCS 50 application
to partner your analogue handset your analogue phone will still use one of its pre-set
ringing cadences.
• If no ringing is required enter a tune number where no corresponding WAV file is stored
on your PC. By default, this will be Ring Tune 7, 8, 9. Please refer to your system
administrator for further information.
5 Series/V3.2/1107/2
- 42 -
User Configuration
PCS 400/410 and 50 User Manual
- 43 -
PCS 400/410 and 50 User Manual
Using with the System Directories
Provided with the maximiser system is the ability to set up a database of contact information
that can be accessed by your PCS. Your System Administrator is responsible for the
maintenance of this database and will be able to assist you with your queries. The next section of
this User Guide will explain how the PCS uses this database to provide directories of telephone
numbers to help you to quickly and easily make calls.
Each Directory is provided with a Search facility to help you find the information you require as
follows :
Select this icon the required number of times to search for the first letter of
the name eg for names beginning with L select the icon three times.
Page Up
Page Down
Line Up
Line Down
5 Series/V3.2/1107/2
- 43 -
Using the System Directories
PCS 400/410 and 50 User Manual
- 44 -
PCS 400/410 and 50 User Manual
Using the System Directories
Each column displayed in a directory can be resized by pointing at the line to the right of the
column title with your mouse, finger or stylus. A double headed arrow shape will appear. Hold
down your mouse/finger/stylus and move the column to the left or right.
Text Search
Alternatively, if you have a keyboard, type the name that you require and a text box will appear at
the bottom of the screen. As you type your search will be reduced until the name you require
appears at the top of the list.
5 Series/V3.2/1107/2
- 44 -
Using the System Directories
PCS 400/410 and 50 User Manual
- 45 -
PCS 400/410 and 50 User Manual
Users Directory
The Users Directory allows you to quickly and easily call a colleague without having to remember
their extension numbers. It also makes it easy to transfer and re-direct calls.
You can also use this directory to view information stored on the system database, for example, a
colleague’s mobile or home number. These numbers can be used to make a call or transfer a call
to a colleague’s home or mobile.
The User Directory will also display if an extension is busy (red icon
set (blue icon
) or has Do Not Disturb
).
To exit from the Users Directory select the Exit icon or press Esc.
Making a Call via the Users Directory
1
From the Call Control toolbar select the Users icon. A list of the Users on
your system will appear.
2
Use the Search facilities to find the User you require (see page 43 for further
assistance).
3
Select the User required.
4
Select the Dial icon or press Enter.
or
4
5 Series/V3.2/1107/2
Double click on the required User and the call will be made.
- 45 -
Users Directory
PCS 400/410 and 50 User Manual
- 46 -
PCS 400/410 and 50 User Manual
Users Directory
Transfer a Call via the Users Directory
1
Select the Look Up icon.
2
Select Users.
3
Select the User required then select the Dial icon or press Enter.
or
3
Double click on the User required.
4
The original call will be placed on hold and the new call will be made.
5
Select the Transfer icon or press Enter when ready.
For further information on transferring calls please refer to page 10.
Viewing User Details
When a User has been selected within the Users Directory the Information icon will appear
allowing you to view the details stored for that User on the telephone system.
1
From the Call Control toolbar select the Users icon. A list of the Users on
your system will appear.
2
Select the User required.
3
Select the Information icon.
When ready, select Cancel to exit from the dialogue box.
5 Series/V3.2/1107/2
- 46 -
Users Directory
PCS 400/410 and 50 User Manual
- 47 -
PCS 400/410 and 50 User Manual
Users Directory
Please note that you will only be able to amend your own details. Select OK to save any
changes.
Making a call to a User’s mobile or home number
1
2
From the Call Control toolbar select the Users icon. A list of the Users on
your system will appear.
Select the User required.
3
Select the Further Numbers icon.
4
If you wish to dial the Mobile number select the Mobile button, if you wish
to dial the Home number select the Home button etc.
Transferring a call to a User’s mobile or home number
1
Select the Look Up icon.
2
Select Users.
3
Select the User required.
4
Select the Further Numbers icon.
5
If you wish to dial the Mobile number select the Mobile button, if you wish
to dial the Home number select the Home button etc.
6
The original call will be placed on hold and the new call will be made.
7
Select the Transfer icon or press Enter when ready.
For further information on transferring calls please refer to page 10.
5 Series/V3.2/1107/2
- 47 -
Users Directory
PCS 400/410 and 50 User Manual
- 48 -
PCS 400/410 and 50 User Manual
Departments
Departments are a feature of the maximiser system that allows calls to be routed efficiently to a
group of Users by dialling one number either internally or externally.
The following describes the usage of your PCS when Departments are used on your maximiser
system.
Working as a member of a Department
Due to your role in your company you may have been placed in a Group on the maximiser
system. For example, if you are part of a Sales team you may be placed in a Sales Group, or part
of a Reception team or part of a Support team you may have been placed in a Group. The
purpose of creating Groups on your system is to ensure the efficient handling of incoming calls.
For example, you may wish to ensure all incoming calls to Reception can be shared among
several colleagues to ensure the calls are answered quickly, or you may wish to ensure that
support calls are shared equally among the Support team.
A Department determines the routing of a call to a Group and your System Administrator will
inform you if you will be receiving Department calls and how that Department is configured.
Receiving a Department Call
Instead of your details being displayed, Call Status will display the Department name together
with any other relevant information such as the extension number (click within the Local
Person/Number pane to view this information). This allows you to determine, before answering
the call, whether you are receiving a personal or Department call and allows you to answer the
call in the correct manner.
5 Series/V3.2/1107/2
- 48 -
Departments
PCS 400/410 and 50 User Manual
- 49 -
PCS 400/410 and 50 User Manual
Departments
When using a PCS 50 the floating text displayed on your PC screen when a call is received will
also display the name of the Department being called. (To enable or disable this feature please
refer to page 76.)
Changing the Ring Tune for a Department call
You may wish to recognise that you are receiving a Department call via a different ring tune.
This can be set up as follows:
1
Select the User Preferences icon.
2
Select the Ring Tunes tab.
3
From the Type list box select Destination.
4
In the Telephone Number field enter the Department extension number
here (please refer to your System Administrator if you are unsure which
number to use here.).
5
From the Tune list box select the Tune required.
6
Select the Add button. The new entry will appear in the Ring Tunes list.
7
Select OK.
For further information on Ring Tunes please refer to page 40.
Making an Call to a Department
You may wish to ring a Department in order to talk to any available member of, for example, the
Personnel department rather than ringing one specific member of that department only to find
they are not available and then having to ring another extension, etc.
1
Lift the handset or select the Speaker icon. You will be presented with the
Dial Pad.
2
Dial the extension number of the Department required.
or
2
Select the Departments icon. A list of the Departments on your system will
appear.
3
Use the Search facilities to find the Department you require (please refer to
page 43 for further assistance).
4
Select the Department required then select the Dial icon or press Enter.
or
5 Series/V3.2/1107/2
- 49 -
Departments
PCS 400/410 and 50 User Manual
- 50 -
PCS 400/410 and 50 User Manual
Departments
4
Double click the Department required and the call will be made.
5
The Call Status screen will appear displaying the extension and Department
you are ringing and your details.
To exit from the Departments Directory select the Exit icon or press Esc.
Transfer a Call via the Department Directory
1
Select the Look Up icon.
2
Select the Departments icon.
3
Select the Department required then select the Dial icon or press Enter.
or
3
Double click the Department required
4
The original call will be placed on hold and the new call will be made.
5
Select the Transfer icon or press Enter when ready.
For further information on transferring calls please refer to page 10.
Using a Web Page with a Department
A Department can be configured so that a web page relevant to that Department can be viewed
when you make a call to and/or receive a call for a Department. The web page can be displayed
either by the press of a button when you choose or automatically before a Department call is
5 Series/V3.2/1107/2
- 50 -
Departments
PCS 400/410 and 50 User Manual
- 51 -
PCS 400/410 and 50 User Manual
Departments
answered or after a Department call is answered. This could be a web page stored on the
Internet or on your company’s Intranet or on the telephone system’s internal web server. This is
useful if a script must be followed when answering a call or, for example, you wish to access
sales information to assist a caller.
To display the configured web page, select the Information icon.
If a web page appears automatically when you make a call to or receive a call
for a Department and you wish to view Call Status select the Exit icon.
Please refer to your System Administrator for further details.
Displaying a Directory for a Department call
A Department can be configured so that either the Users or Departments directory or your
Favourites (Speed Dials) will automatically appear after a call you have made to or received for a
Department is answered. This is particularly useful for a receptionist who needs to be able to
quickly and easily transfer calls.
When a Department call is answered if a directory is displayed please refer to the relevant section
in this manual to find out how to handling the call using this directory – Favourites - page 38,
Users - page 46 and Departments - page 50.
If you do not wish to use the Directory displayed select the Exit icon to
return to Call Status.
Please refer to your System Administrator for further details.
Incoming Call History
If you have been elected to deal with voicemail messages for a Department this will mean that
Department calls that you have answered will be listed in your Incoming Call History. You will
also be informed when a Department has missed a call. The Missed Call icon will flash in the
normal way.
For further information on using the Incoming Call History please refer to page 19 and for
information on handling missed calls please refer to page 21.
Please refer to page 72 for information on dealing with voicemail messages for a Department.
Call Pick up for a Department call
You can pick up a call ringing for a Department via the Pick Up screen. This is useful if, for
example, all the members of a particular Department are busy and you wish to assist with
answering the call. You do not have to be a member of the Department to pick up a
Department call.
5 Series/V3.2/1107/2
- 51 -
Departments
PCS 400/410 and 50 User Manual
- 52 -
PCS 400/410 and 50 User Manual
Departments
1
Lift your handset or select the Speaker icon.
2
Select the Pick Up icon.
3
Each Department with calls waiting to be answered will be displayed
together the number of calls.
4
Click on the relevant icon to pick up the call.
For further information on Call Pick Up please refer to page 16.
Creating a Speed Dial to a Department
A Speed Dial to a Department can be created via your User Configuration form and will be
displayed in your Favourites list and Call Status. The number of calls queuing for that
Department will be shown beside the Speed Dial icon. This facility provides you with a quick
and easy method of dialling a Department that you regularly contact and allows you to monitor
the number of calls waiting to be answered.
For information on how to create and use a Speed Dial please refer to the Speed Dials section
from page 36.
5 Series/V3.2/1107/2
- 52 -
Departments
PCS 400/410 and 50 User Manual
- 53 -
PCS 400/410 and 50 User Manual
Contacts
The Contacts Directory on the PCS will display the list of external contacts, for example,
customers, suppliers etc, entered on the database on your telephone system. This information
can be used to make calls quickly and easily, and identify incoming calls.
Receiving a call from a Contact
Call Status will display the name and number of the person calling. Handle the call in the normal
way.
Making a Call via the Contacts Directory
1
From the Call Control toolbar select the Contacts icon. A list of Contacts
stored on your system’s database will be displayed.
2
Use the Search facilities to find the Contact you require (please refer to page
43 for further assistance).
3
Select the Contact required then select the Dial icon or press Enter.
or
3
Double click the Contact required and the call will be made.
4
The Call Status screen will appear displaying the Contact you are ringing and
your name.
If you wish to search for a Contact via the company name, click on the Contact Name column
heading and each Contact will be displayed with the company name first. Click on the column
heading again to return to viewing the list by Contact Name only.
5 Series/V3.2/1107/2
- 53 -
Contacts
PCS 400/410 and 50 User Manual
- 54 -
PCS 400/410 and 50 User Manual
Contacts
To exit from the Contacts Directory select the Exit icon or press Esc.
Transfer a Call to a Contact
1
Select the Look Up icon.
2
Select Contacts.
3
Select the Contact required.
4
Select the Dial icon or press Enter.
5
The original call will be placed on hold and the new call will be made.
6
Select the Transfer icon or press Enter when ready.
For further information on transferring calls please refer to page 10.
Add a Note to a Contact
During a call text can be entered and displayed with the call, this can be useful when a call is
transferred the information is passed on (please refer to page 13 for further information). If the
call has been made or received from a Contact this text can also be stored permanently with the
Contact for future information. This text will be displayed whenever a call is received by this
Contact.
5 Series/V3.2/1107/2
1
Click on the Add Note icon.
2
Enter any text required in the Note box.
- 54 -
Contacts
PCS 400/410 and 50 User Manual
- 55 -
PCS 400/410 and 50 User Manual
Contacts
(PCS 400/410 – if a keyboard is not available select the More button to
access the on-screen keyboard. Select OK when ready.)
…
3
Click on Add to Contact.
4
The text plus the date and name of the originator of the note will appear in
the Call Status screen and will be passed on with the call if transferred.
Click within the Note area to enlarge this area.
This information will also be stored permanently with the Contact and next
time a call is received by or made to this Contact the text will appear in Call
Status.
Viewing Contact Details
All the information, for example address, telephone numbers etc, stored for a particular Contact
within the telephone system’s centralised database can be viewed.
5 Series/V3.2/1107/2
1
From the Call Control toolbar select the Contacts icon.
2
Select the Contact required.
3
Select the Information icon.
4
The Contact Details for the selected Contact will be displayed.
5
Select OK or Cancel to exit.
- 55 -
Contacts
PCS 400/410 and 50 User Manual
- 56 -
PCS 400/410 and 50 User Manual
Contacts
Making a Call to a Contact’s other stored numbers
1
From the Call Control toolbar select the Contacts icon. A list of Contacts
stored on your system’s database will be displayed.
2
Select the Contact required.
3
Select the Further Numbers icon.
4
If you wish to dial the Mobile number select the Mobile button, if you wish
to dial the Home number select the Home button etc.
Transferring a call to a Contact’s mobile or home number
5 Series/V3.2/1107/2
1
Select the Look Up icon.
2
Select Contacts.
3
Select the Contact required.
- 56 -
Contacts
PCS 400/410 and 50 User Manual
- 57 -
PCS 400/410 and 50 User Manual
Contacts
4
Select the Further Numbers icon.
5
If you wish to dial the Mobile number select the Mobile button, if you wish
to dial the Home number select the Home button etc.
6
The original call will be placed on hold and the new call will be made.
7
Select the Transfer icon when ready.
For further information on transferring calls please refer to page 10.
Amending the details within a Contact
Please note: you will only be able to make a change to a Contact’s details if given the required
permission. Please refer to your system administrator for further information.
1
From the Call Control toolbar select the Contacts icon.
2
Select the Contact required.
3
Select the Information icon.
4
The Contact Details for the selected Contact will be displayed. You can
amend or add information, and view and add Notes stored with this
Contact
5
Select OK to save any changes or Cancel to exit without saving the changes.
Create a new Contact
Please note: you will only be able to add a new Contact to the database if given the required
permission. Please refer to your system administrator for further information.
5 Series/V3.2/1107/2
1
From the Call Control toolbar select the Contacts icon.
2
Select the New Contact icon.
3
A blank Contact Details form will be displayed. Enter all the information
required.
4
If you wish to add any notes to this Contact select the Note button and
enter the text required.
5
When ready, select OK to save the new Contact or Cancel to cancel the new
entry.
- 57 -
Contacts
PCS 400/410 and 50 User Manual
- 58 -
PCS 400/410 and 50 User Manual
Contacts
(PCS 400/410 – if a keyboard is not available select the More button to
access the on-screen keyboard. Select OK when ready.)
…
Please note that a new Contact will be saved in the centralised database and therefore will be
available to your colleagues also using a PCS.
Create a new Contact during a Call
You can also add a new Contact to the database during a call. The caller’s incoming number will
be automatically entered in the Telephone number field and the further information can be
added while you are on the call.
Please note: you will only be able to add a new Contact if given the required permission. Please
refer to your system administrator for further information.
1
Select the Look Up icon.
2
Select the New Contact icon.
3
Enter any details required.
4
Select OK to save the new Contact or Cancel to cancel the new entry.
Use the More Options icon to return to the call handling icons.
If you end the call before completing the new entry the Contact Details form will stay open until
you select OK.
Create a new Contact from the Incoming Call History
If you have received a call from an external contact this call will be logged in your Incoming Call
History (please refer to page 19 for further details). The number listed can be used to create a
new Contact record and the number will be automatically entered into the Telephone number
field.
Please note: you will only be able to add a new Contact if given the required permission. Please
refer to your system administrator for further information.
5 Series/V3.2/1107/2
1
From the Call Control toolbar select the Messages icon to view the
Incoming Call History.
2
Select the call required (by clicking under the Time column).
3
Select the New Contact icon.
4
Enter any details required.
- 58 -
Contacts
PCS 400/410 and 50 User Manual
- 59 -
5
PCS 400/410 and 50 User Manual
Contacts
Select OK to save the new Contact or Cancel to cancel the new entry.
Create a new Contact from the Redial Number list
If you have made a call to an external contact this call will be logged in your Redial Number list
(please refer to page 13 for further details). The number listed can be used to create a new
Contact record and the number will be automatically entered into the Telephone number field.
Please note: you will only be able to add a new Contact if given the required permission. Please
refer to your system administrator for further information.
1
From the Call Control toolbar select the Redial icon to view the Redial
Number List
2
Select the call required (by clicking under the Time column).
3
Select the New Contact icon.
4
Enter any details required.
5
Select OK to save the new Contact or Cancel to cancel the new entry.
Delete a Contact from the database
Please note: you will only be able to delete a Contact if given the required permission. Please
refer to your system administrator for further information.
1
From the Call Control toolbar select the Contacts icon.
2
Select the Contact required.
3
Select the Information icon.
4
The Contact Details for the selected Contact will be displayed.
5
Select Delete.
Please note that the Contact will be deleted from the centralised database and therefore will no
longer be available to your colleagues.
Using a Web Page with a Contact
A Contact can be configured so that a web page relevant to that Contact is available when a call
is received from or made to this Contact. The web page can be viewed either by the press of a
button when you choose or automatically before a call to or from this Contact is answered or
after a call to or from this Contact is answered. This could be a web page stored on the Internet
or on your company’s Intranet or within the telephone system’s internal web server. This could
be useful if you wish to view your supplier’s web site when on a call, or you wish to view a
customer’s account information stored on your company’s intranet, for example.
5 Series/V3.2/1107/2
- 59 -
Contacts
PCS 400/410 and 50 User Manual
- 60 -
PCS 400/410 and 50 User Manual
Contacts
To display the configured web page, select the Information icon.
If a web page appears when you make a call to or receive a call from a
Contact and you wish to display Call Status select the Exit icon.
Configuring a Contact to display a web page
Please note: you will only be able to make a change to a Contact’s details if given the required
permission. Please refer to your system administrator for further information.
1
2
3
4
5
Open the Contact Details as described on page 55.
In the Web field enter the address to the web page required.
From the Auto URL list select either:
a. No Action – the web page can be displayed by pressing the Information icon
b. Show Info on Ring – the web page will be displayed when a call is made to
and/or received by this Contact
c. Show Info On Connect – the web page will be displayed once a call to and/or
from this Contact has been answered.
From DirAutoURL list box select either:
a. Bothway – the web page will be displayed when a call is made to this Contact and
when a call is received from this Contact
b. Incoming – the web page will only be displayed when a call is received from this
Contact
c. Outgoing – the web page will only be displayed when a call is made to this
Contact
Select OK to save the changes
Displaying a Directory for a Contact
A Contact can be configured so that either the Users or Departments directory or your
Favourites (Speed Dials) will automatically appear after a call to and/or from a Contact is
5 Series/V3.2/1107/2
- 60 -
Contacts
PCS 400/410 and 50 User Manual
- 61 -
PCS 400/410 and 50 User Manual
Contacts
answered. This is useful if, for example, a call from a customer needs to be handled quickly and
efficiently.
Handling a call when a Directory is displayed
If on answering a call from a Contact a directory is displayed please refer to the relevant section
in this manual to find out how to handle the call using this directory – Favourites - page 38,
Users - page 46 and Departments - page 50.
If you do not wish to use the Directory displayed select the Exit icon or
press Esc to return to Call Status.
Configuring a Contact to display a Directory
Please note: you will only be able to make a change to a Contact’s details if given the required
permission. Please refer to your system administrator for further information.
1
2
3
4
Open the Contact Details as described on page 55.
From the Auto URL list box select either,
a. Show Favourites on Connect – your Speed Dial list will appear after a call to
and/or from this Contact is answered
b. Show Users on Connect – the Users Directory will be displayed after a call to
and/or from this Contact is answered
c. Show Departments on Connect – the Departments Directory will be displayed
after a call to and/or from this Contact is answered.
From DirAutoURL list box select either:
a. Bothway – the directory will be displayed when a call is made to this Contact and
when a call is received from this Contact
b. Incoming – the directory will only be displayed when a call is received from this
Contact
c. Outgoing – the directory will only be displayed on a PCS when a call is made to
this Contact
Select OK to save the changes.
5 Series/V3.2/1107/2
- 61 -
Contacts
PCS 400/410 and 50 User Manual
- 62 -
PCS 400/410 and 50 User Manual
Contacts
Using an Ambiguous Number
When a company has a large DDI number range a Contact can be created that will match any
incoming call from this company so that you and your colleagues are always aware when a call is
received from this company.
A question mark (?) is used to specify which part of the telephone number will vary, eg an entry
of 01256387??? will match a call from 01256387385, 01256387370, 01256387291 etc.
Please note:
• Contacts containing a complete match to the incoming number will take priority over an
ambiguous number.
• You will only be able to add or amend a Contact if given the required permission. Please
refer to your system administrator for further information.
5 Series/V3.2/1107/2
1
Select the Contacts icon.
2
Select the New Contact icon.
3
A blank Contact Details form will be displayed.
4
In the Name field enter the company’s name.
5
In the Ambiguous field enter the company’s number using a ? where a digit
will be variable.
6
Select OK to save the new Contact.
- 62 -
Contacts
PCS 400/410 and 50 User Manual
- 63 -
PCS 400/410 and 50 User Manual
Voicemail
The voicemail facility allows your callers to leave a message if you are on the phone or do not
answer a call. However, this facility must be configured to enable you to use this service, please
refer to your System Administrator for further details.
Receiving a Message
If you are busy on a call or do not answer your phone the caller will be automatically passed to
your voicemail and will be able to leave a message. By default, your extension will ring for 20
seconds before your extension is considered not answered. Your System Administrator will be
able to tell you if this default setting has been changed.
If the caller has left a message the New Messages icon will appear on your
PCS and will flash until you have listened to the message.
PCS 400/410 users – Your stylus LED will also flash.
PCS 50 Partner - The broken dial tone provided by your analogue handset may also indicate that
you have a new message.
If your caller does not leave a message this call will be logged as a missed call. (Please refer to
page 21 for further details.)
Divert an incoming call to voicemail
If you do not wish to answer a call and wish to route the caller to your
voicemail, select the Messages icon within Call Status.
Please note that the Reject Call icon will also perform the same function unless you have
Forward on Busy set which means your caller will be diverted to this number. (Please refer to
page 30 for further information on the Forward on Busy facility.)
Retrieve a Message
1
5 Series/V3.2/1107/2
Select the New Messagesicon. The Incoming Call History will appear.
- 63 -
Voicemail
PCS 400/410 and 50 User Manual
- 64 -
5 Series/V3.2/1107/2
PCS 400/410 and 50 User Manual
Voicemail
2
A new message will be indicated by a blue envelope symbol.
3
Select this message (click under the Time column).
4
Select the Listen to Message icon (or double click on the message).
5
The message will be played and the screen on your PCS will display the time
and date of the call and details of the caller.
6
Select Exit to return to the Incoming Call History.
7
The Message will now be displayed with an open blue envelope as this is
now an old message and will be deleted after 7 days (unless manually saved).
8
Select Exit again or press Esc to return to your Home Page.
- 64 -
Voicemail
PCS 400/410 and 50 User Manual
- 65 -
PCS 400/410 and 50 User Manual
Voicemail
Message Handling
While listening to your messages the following icons help you to handle these messages:
Forward the message you are currently listening to
Delete the message you are currently listening to
Save the message you are currently listening to
Rewind message by 2 seconds
Forward message by 2 seconds
Play old messages
Play previous message
Play next message
Delete a Message
1
Select the Messages icon. The Incoming Call History will appear.
2
Select the message to be deleted (click under the Time column).
3
Select the Delete icon.
Save a Message
Once a new message has been listened to it becomes an old message and will be deleted after 7
days. However you can save the message and it will be stored until you decided to manually
delete the message.
5 Series/V3.2/1107/2
1
Select the Messages icon. The Incoming Call History will appear.
2
Select the message to be deleted (click under the Time column).
- 65 -
Voicemail
PCS 400/410 and 50 User Manual
- 66 -
3
PCS 400/410 and 50 User Manual
Voicemail
Select the Save icon.
Ring back the Caller
1
Select the Messages icon. The Incoming Call History will appear.
2
Select the message to be deleted.
3
Select the Dial icon and a call to the source of the message will be made.
This facility is available for internal and external numbers, however if the caller’s number has
been withheld or not received by the system this facility will not be available. The Number
column will indicate if the caller’s telephone number has been received.
If the incoming number is matched to a User or Contact stored within the
telephone system’s database the Further Numbers icon) will allow you to
dial another number, eg mobile number, stored for this User or Contact.
The New Contact icon will allow you to either create a new Contact where
the external number received with the call selected will automatically
populate the Telephone field or view the User Details for the internal call
selected.
For further information on Using the User Directory please refer to page 45 and for further
information on Working with Contacts please refer to page 52.
Changing your Greeting
A default message will be played to a caller when transferred to your voicemail. However you
may wish to record your own personal message.
Please note: the method detailed below is used to record your daily greeting which is deleted at
midnight. Your permanent greeting is then used until you record a new daily greeting. For
further information please consult your System Administrator.
5 Series/V3.2/1107/2
1
Select the Messages icon. The Incoming Call History will appear.
2
Select the Record Greeting icon. Your existing message will be played.
3
When requested record your new greeting.
4
Wait for the new greeting to be played back to you.
or
- 66 -
Voicemail
PCS 400/410 and 50 User Manual
- 67 -
PCS 400/410 and 50 User Manual
Voicemail
4
Press # and the new greeting will be played back to you.
5
Select Exit to finish and save the new greeting (or hang up)
or
5
If you wish to re-record the greeting select the Record icon and repeat steps
3 to 5.
or
5
If you wish to delete the new greeting and return to the previous greeting
select the Delete icon.
6
Select Exit to finish.
Using an Assistant telephone number
You may wish to give your callers the option to be transferred to a colleague rather than to leave
a message, this might be your assistant or another member of your team. The Assistant
telephone number feature can be configured as follows:
5 Series/V3.2/1107/2
1
From the Call Control toolbar select the More Options icon
2
Select the User Preferences icon.
3
From the User Configuration form select the Numbers tab.
4
In the Assistant field enter the extension number to which your callers will
be transferred.
5
Select OK.
- 67 -
Voicemail
PCS 400/410 and 50 User Manual
- 68 -
PCS 400/410 and 50 User Manual
Voicemail
Once this feature has been configured your caller can press 0 while listening to your greeting and
be transferred to your Assistant telephone number.
You will need to re-record your greeting to inform your callers that facility is available.
Please note that if the Assistant field is grey then you are unable to edit this field. Please refer to
your System Administrator for further details.
Forward a message
You may wish to forward a message to a colleague if the content is more relevant to another
member of staff, for example, or to a Group of Users, eg the Sales team (a Group must be
previously set up on your telephone system – please refer to your System Administrator for
further information.).
If you wish to save a message to and in future access the message via your email application you
can also forward a message to your email account. (This facility must be previously set up on
your telephone system – please refer to your System Administrator for further information.)
1
Select the Messages icon. The Incoming Call History will appear.
2
Select the message to be forwarded.
3
Select the Listen to Message icon.
4
Select the Forward Message icon and the following dialogue box will appear.
5
To forward the message to your email account select Email. The message
will be copied to your email account. Go to step 9.
or
5
To forward the message to a group of Users select Group. You will be given
a list of the Groups on your system. (Use the Search facilities as described
on page 43 to help you find the Group you require.)
or
5 Series/V3.2/1107/2
- 68 -
Voicemail
PCS 400/410 and 50 User Manual
- 69 -
PCS 400/410 and 50 User Manual
Voicemail
5
To forward the message to a specific User(s) select Users. You will be given
a list of the Users on your system. (Use the Search facilities as described on
page 43 to help you find the User you require.)
6
Select the User or Group you require and select the Add to Forward List
icon (or double click on the User or Group). The User or Group selected
will appear in the Forward List above.
7
Repeat steps 6 until all the Users or Groups required have been added to the
Forward List.
8
Select the Forward Message icon. The message will now be forwarded to all
the Users selected or to all the Users who are a member of the Groups
selected.
9
Select Exit to return to the Incoming Call History.
Leave a message for a colleague
You will automatically transfer to your colleague’s voicemail if they are busy or do not answer
their phone. However you can pre-empt this and transfer directly to their voicemail
1
Make a call to your colleague in the normal way.
2
Select the Messages icon.
3
Leave a message when requested.
Leave a message for a colleague without dialling the number first
1
From the Call Control toolbar select the Users icon. (Use the Search
facilities as described on page 43 to help you find the User you require.)
2
Select the User required.
3
Select the Further Numbers icon.
4
Select the Voicemail button.
5
Leave a message when requested.
Transfer a call to a colleague’s Voicemail
5 Series/V3.2/1107/2
1
Place the call on hold (select the New Call icon).
2
Dial the User’s extension number.
- 69 -
Voicemail
PCS 400/410 and 50 User Manual
- 70 -
PCS 400/410 and 50 User Manual
Voicemail
3
Select the Messages icon.
4
Replace your handset or select the Speaker icon.
1
Select the Transfer icon or press Enter. The call will be put on hold.
2
Select the Users icon. (Use the Search facilities as described on page 43 to
help you find the User you require.)
3
Select the User required.
4
Select the Further Numbers icon.
5
Select the Voicemail button. The caller will be transferred to the User’s
voicemail.
Alternatively,
Record a Call
During any call (internal or external or conference call) you can record the conversation. The
resulting recording will become a new voicemail message and can be accessed in the usual way.
(Please note that the use of this feature is controlled by your System Administrator. If the
Record icon is not available please refer to your System Administrator.)
During a call select the Record icon. Your conversation will be recorded
To end the recording either select the Record icon or end the call.
Retrieve a Recorded Call
5 Series/V3.2/1107/2
1
The New Messages icon will flash to indicate that you have a new message.
Select this icon to open the Incoming Call History.
2
A new message will be displayed. The Name column will indicate the name
of the caller if available.
3
Select the recording (click under the Time column).
4
Select the Listen to Message icon (or double click on the recording).
5
The recording will be played and the screen on your PCS will display further
details of the call if available.
- 70 -
Voicemail
PCS 400/410 and 50 User Manual
- 71 -
PCS 400/410 and 50 User Manual
Voicemail
Once listened to the recording becomes an old message and is deleted after
7 days. The recording can be saved or deleted in the normal way.
Record a Memo
You may wish to record a message to yourself, for example when you wish to record a reminder
to perform a particular task, for example book a meeting, phone a customer etc.
(Please note that the use of this feature is controlled by your System Administrator. If the
Record icon is not available please refer to your System Administrator.)
1
Select the Messages icon.
2
Select the Record icon
3
Record the message to yourself.
4
Select Exit to finish and save the recording (or hang up).
Retrieve a Memo
1
The New Messages icon will flash to indicate that you have a new message.
Select this icon to open the Incoming Call History.
2
A new message will be displayed. The Name column will display your name
to indicate that you created the recording.
3
Select the memo (click under the Time column).
4
Select the Listen to Message icon (or double click on the memo).
5
The recording will be played and the screen on your PCS will display your
details.
Once listened to the recording becomes an old message and is deleted after
7 days. The recording can be saved or deleted in the normal way.
Voicemail for Departments
Each Department must be configured to use the voicemail service provided by the maximiser
system. If voicemail has been enabled a call to a Department will automatically pass to voicemail
after the time specified by the Department’s configuration on the system. Please refer to your
System Administrator for further details.
5 Series/V3.2/1107/2
- 71 -
Voicemail
PCS 400/410 and 50 User Manual
- 72 -
PCS 400/410 and 50 User Manual
Voicemail
Retrieving Voicemail for a Department
If you have been elected to control voicemail messages for a Department (your System
Administrator will inform you if this is the case) you can retrieve and handle the messages in the
same way as your personal messages. However the Mailbox column will indicate in which
mailbox the message is stored.
Please note: if you have been elected to deal with messages for a Department you will also be
informed of calls answered and missed by the Department in your Incoming Call History, again
the Mailbox column will indicate the recipient of the call. For further information on working
with Departments please refer to page 48.
Leave a message for a Department
1
Make a call to the Department in the normal way.
2
Select the Messages icon.
3
Leave a message when requested.
Leave a message for a Department without dialling the number first
5 Series/V3.2/1107/2
1
Lift your handset or select the Speaker icon
2
Select the Departments icon. (Use the Search facilities as described on page
43 to help you find the User you require.)
3
Select the Department required.
3
Select the Further Numbers icon.
4
Select the Voicemail button.
- 72 -
Voicemail
PCS 400/410 and 50 User Manual
- 73 -
5
PCS 400/410 and 50 User Manual
Voicemail
Leave a message when requested.
Transfer a call to a Department’s Voicemail
1
Place the call on hold (select the New Call icon).
2
Dial the Department’s extension number.
3
Select the Messages icon.
4
Replace your handset or select the Speaker icon.
1
Select the Transfer icon or press Enter. The call will be put on hold.
2
Select the Departments icon. (Use the Search facilities as described on page
43 to help you find the Department you require.)
3
Select the Department required.
4
Select the Further Numbers icon.
5
Select the Voicemail button. The caller will be transferred to the User’s
voicemail.
Alternatively,
5 Series/V3.2/1107/2
- 73 -
Voicemail
PCS 400/410 and 50 User Manual
- 74 -
PCS 400/410 and 50 User Manual
Hot Desking
If you are a Hot Desking User, in other words a User who has been given the ability to log in to
any phone on the system because, for example, you need to move around the building or you are
rarely in the office and do not need a permanent telephone, you can log in to a PCS as follows.
You will need to know your extension number and Login Access Code, please refer to your
System Administrator for these details.
1
From the Call Control toolbar select the More Options icon twice.
2
Select the Log In icon.
3
Enter your extension number, an asterisk and your Login Access Code, eg
2040*1234.
4
Select the Log In icon or press Enter.
5
Once the system has logged you in your Home Page will be displayed and
you can make and receive calls in the normal way.
Log off
Once you have finished using the telephone that you are logged on to you may wish to log off.
Your extension becomes busy and your calls will passed to voicemail (if enabled) or to your
Forward on Busy number (if configured).
1
5 Series/V3.2/1107/2
From the Call Control toolbar select the More Options icon twice.
- 74 -
Hot Desking
PCS 400/410 and 50 User Manual
- 75 -
PCS 400/410 and 50 User Manual
Hot Desking
2
Select the Log In icon.
3
Select the Log Off icon or press Delete.
4
The phone will return to the User assigned to this extension dependent on
the configuration of the system.
Note: The system may be configured to automatically log you off after the extension is not used
for a specified amount of time. This is useful if you forget to manually log off. Please refer to
your System Administrator for further details.
If you access the log in screen by mistake wait for the PCS to return to your Home Page
5 Series/V3.2/1107/2
- 75 -
Hot Desking
PCS 400/410 and 50 User Manual
- 76 -
PCS 400/410 and 50 User Manual
System Administration
View the PCS set up information
1
From the Call Control toolbar select the More Options icon twice.
2
Select the Information icon.
3
The following information will be displayed:
• Software version
• IP address of the PCS 400/410 or the PC running PCS 50
• User currently logged in
• Extension number of the User
• IP address of the Call Server to which the PCS is connected
• IP address of the Call Server providing the User’s voicemail service.
4
When finished select OK.
Setting Preferences for a PCS 50
To access the Preference dialogue box, from the Menu bar, select File and then Preferences.
5 Series/V3.2/1107/2
- 76 -
System Administration
PCS User Manual
- 77 -
PCS 400/410 and 50 User Manual
System Administration
Using the PCS 50 as a partner to any handset: the Port, Partner Login Code, Hot Desk
Number and Hot Desk Code fields can be used to assist you if you are a hot desking User.
These fields can be configured to allow you to log on to more than one choice of handset and
your PCS 50 will automatically partner any of these handsets. This is useful if, for example, you
are a laptop user and when you come in to the office you log on to any available phone at any
available desk. Your PCS 50 can be configured once to partner any of these handsets. Please
refer to your system administrator for further information.
Proxy Server: the IP address of the proxy server to be used by the PCS 50 when viewing web
pages. Please refer to your system administrator for further information.
Minimize to System Tray: Enables or disables the ability to minimise the PCS 50 to the System
Tray by selecting the Close icon at the top right hand corner of the PCS 50 window. When a
call is received the application will automatically pop up then automatically minimise at the end
of a call. To manually pop up the PCS 50 window click on the icon in the System Tray. When
this feature is enabled use the File menu then Exit to close the application or right click on the
icon in the System Tray and select Exit, if required.
Start Minimized: This option, if selected, will automatically minimise the PCS 50 to the System
Tray when the application is opened. This feature will operate when the application is next
started and will also tick the Mimimize to System Tray option, if not already selected, and will
operate as described above.
Pop On Connect: this feature is used in conjunction with the Minimize to System Tray feature
and when the PCS 50 is used in partner mode. If enabled the application will pop up once the
call has been answered by the handset.
Floating Text: Enables or disables the floating text that appears on your PCS screen when a call
is received. Select the Colour button to change the default colour of this text.
Multiple Instances: Enables or disables the ability to run more than one PCS 50 as a partner to
an analogue phone, PCS 50 or 400 on your PC. This is useful when as part of your job role you
need to monitor a colleague’s phone, voicemail etc.
5 Series/V3.2/1107/2
- 77 -
System Administration
PCS 400/410 and 50 User Manual
- 78 -
PCS 400/410 and 50 User Manual
System Administration
Remote BLF: this option will enable or disable the busy lamp field feature when this PCS 50 is
used across, for example, a VPN connection. Please note: do not use this feature when this
PCS 50 is used on the local LAN.
Dedicated Console Mode: When enabled Call Status will not display until a call has been
answered. This is useful when the Auto URL On Ring feature is used for Department calls or
for calls from a specific Contact. The web page will not display on your PCS 50 until the call has
been answered. This means that if you are viewing a web page when a call is received this will
not be replaced by the web page specified by the Auto URL feature unless you decide to answer
the call. Please refer to your system administrator for further information.
Access Manager
You can administer the system with Manager via a PCS however you will require an
Administrator name and password to proceed.
1
From the Call Control toolbar select the More Options icon twice.
2
Select the Manager icon.
3
Enter the User Name and Password (if you require the onscreen keyboard,
select the Keyboard icon).
4
Select OK. Manager will open.
To return to your Home Page:
5 Series/V3.2/1107/2
1
From the Call Control toolbar select the More Options icon.
2
Select the Home icon.
- 78 -
System Administration
PCS 400/410 and 50 User Manual
- 79 -
PCS 400/410 and 50 User Manual
Icons in Brief
The following lists the function of each icon when displayed with a particular screen or when
performing a particular function.
Home Page
Home – return to your Home Page
Contacts – to access the Contacts directory
Favourites – to access your Speed Dials list
Users – to access the Users directory
Redial – to access the list of calls made from your extension via the Redial
Number list
More Options – to access the Web Page icons and User Preferences icon
Speaker (on-hook)
Messages – to access your Incoming Call History and voicemail messages
New Messages – indicates a new voicemail message has been received
Missed Call – indicates a call was received by your extension and not answered
Missed call and New Messages – indicates a missed call and a new voicemail
message has been received
Do Not Disturb on
5 Series/V3.2/1107/2
- 79 -
Icons in Brief
PCS 400/410 and 50 User Manual
- 80 -
PCS 400/410 and 50 User Manual
Icons in Brief
Browsing Web Pages
Accessed from the Call Control toolbar by pressing the More Options icon
once.
Back
Forward
Stop
Refresh
User Preferences – to access the User Configuration form
More Options – to access the Programming icons
System Administration
Accessed from the Call Control toolbar by pressing the More Options icon
twice.
Keyboard on – to turn off the on-screen keyboard
Keyboard off – to display the on-screen keyboard
Manager – access to system programming (log in information required)
Log In/Log Out – for Hot Desking Users
Information – displays phone set up information
Help
More Options – return to the Call Control toolbar
5 Series/V3.2/1107/2
- 80 -
Icons in Brief
PCS 400/410 and 50 User Manual
- 81 -
PCS 400/410 and 50 User Manual
Icons in Brief
Dial Pad
Park Slots – set by default for slots 1-4
Mute off
Mute on
Handset volume down
Handset volume up
Speaker On (off-hook)
Messages – to access your Incoming Call History and voicemail messages
Contacts – to access the Contacts directory
Favourites – to access your Speed Dials list
Departments – to access the Departments directory
Users – to access the Users directory
Pick Up – to access the list of currently ringing extensions via the Pick Up
screen
Redial – to access the list of calls made from your extension via the Redial
Number list
Receiving a Call
Answer – to answer an incoming call
Reject Call – to reject an incoming call, the call will pass to your Forward
on Busy number (if set) or to voicemail (if enabled)
Messages – to reject an incoming call and pass the caller to voicemail (if
enabled)
5 Series/V3.2/1107/2
- 81 -
Icons in Brief
PCS 400/410 and 50 User Manual
- 82 -
PCS 400/410 and 50 User Manual
Icons in Brief
Ringing volume down
Ringing volume up
Speaker (on-hook)
Information – to display the web page configured for this caller
Making a Call
Reject Call – to cancel the call being made
Messages – divert your internal call to your colleague’s voicemail
Speaker On (off-hook)
Handset volume down
Handset volume up
Information – to display the web page configured for this number
Answered Call
Park Slots – set by default for slots 1-4
Transfer – to transfer a call without announcing the call first
Reject Call – to end your current conversation
New Call – to place the current call on hold
Add Note – enter text to be displayed in the Call Notes pane of Call
Status
5 Series/V3.2/1107/2
- 82 -
Icons in Brief
PCS 400/410 and 50 User Manual
- 83 -
PCS 400/410 and 50 User Manual
Icons in Brief
Look up – access the Users, Departments and Contacts directories and
Favourites
Record Call – to record your current conversation
Recording in progress – to end the recording of your current conversation
Mute off
Mute on
Volume of conversation down
Volume of conversation up
Favourites – to access your Speed Dials list
Dial – to access the Dial Pad in order to enter additional digits
Speaker On (off-hook)
Information – to display the web page configured for this number
Call on Hold
Exit – to return to the call on hold
Multiple Calls
Transfer – to complete the transfer of a call
Conference – to create a 3-way conference
In Conference – to cancel the conference and return to 2-way
conversations
5 Series/V3.2/1107/2
- 83 -
Icons in Brief
PCS 400/410 and 50 User Manual
- 84 -
PCS 400/410 and 50 User Manual
Icons in Brief
Switch – toggle between the two connected calls
Look Up
Contacts – to access the Contacts directory
Users – to access the Users directory
Departments – to access the Departments directory
Favourites – to access your Speed Dials list
New Contact – create a new Contact using the incoming number from the
connected call
More Options – to return to the previous screen
Contacts / Users / Departments Directories
Search – scroll through the entries by selecting the first letter of the name
Dial – to dial the number associated with the selected entry
Further Numbers – all numbers/voicemail associated with the selected
Contact or User or Department are displayed and can be dialled by
clicking on the relevant button.
Information – view select User’s or Contact’s details
New Contact (Contacts only) – create a new Contact.
Page Up – scroll up through the entries
Page Down – scroll down through the entries
Line up
5 Series/V3.2/1107/2
- 84 -
Icons in Brief
PCS 400/410 and 50 User Manual
- 85 -
PCS 400/410 and 50 User Manual
Icons in Brief
Line down
Exit – to return to the previous screen
Favourites
Speed Dial – if configured for an internal extension this icon also indicates
that the User’s extension is free
Unavailable – the User’s extension is busy
Ringing – the User’s extension is currently ringing
Redial Number List
Dial – to dial the selected call
Messages – connect directly to selected User’s voicemail
Further Numbers – dial another number stored for the selected User or
Contact
Delete – delete the selected call
Create a New Contact - where the outgoing number for the selected call
automatically populates the Telephone number field or displays the User’s
details
Exit – to return to the Home Page
Incoming Call History
Missed call
Answered call
New voicemail message
Old voicemail message
5 Series/V3.2/1107/2
- 85 -
Icons in Brief
PCS 400/410 and 50 User Manual
- 86 -
PCS 400/410 and 50 User Manual
Icons in Brief
Dial – to ring back the caller
Further Numbers – dial another number stored for the selected User or
Contact
Listen to Message – to play the selected voicemail message
Record Greeting – to update your voicemail greeting
Record Memo – to record a message to yourself
Delete – to delete the selected call or message
Create a New Contact - where the incoming number for the selected call
automatically populates the Telephone number field or displays the User’s
details
Nuisance Number – to black list the external number selected
Exit – to return to the Home Page
Listening to a voicemail message
Forward the message you are currently listening to
Delete – to delete the message you are currently listening to
Save – to save the message you are currently listening to
Rewind by 2 seconds
Forward by 2 seconds
Play old messages
Play previous message
5 Series/V3.2/1107/2
- 86 -
Icons in Brief
PCS 400/410 and 50 User Manual
- 87 -
PCS 400/410 and 50 User Manual
Icons in Brief
Play next message
Exit – to return to Incoming Call History
Recording a Voicemail Greeting
Record – re-record greeting
Delete – to cancel the new greeting and return to the previous greeting
Exit – save the new greeting and return to the Incoming Call History
Hot Desking
Log in
Log off
Keyboard Short cuts
Home Page
Windows
F1
F2
F3
F4
F5
F6
F7
F8
F10
CTRL+M
Apple Mac
Cmd+1
Cmd+2
Cmd+3
Cmd+4
Cmd+5
Cmd+6
Cmd+7
Cmd+8
Cmd+0
Cmd+M
Go to Dial Pad
Go to Favourites
Go to Pick Up screen
Go to Redial Number list
Go to Contacts Directory
Go to Users Directory
Go to Departments Directory
Create a new Contact
Enter an Account Code
Go to Incoming Call History
Browsing Web Pages
CTRL+C Cmd+C
Backspace Backspace
5 Series/V3.2/1107/2
Copy to the clipboard
Back one page
- 87 -
Icons in Brief
PCS 400/410 and 50 User Manual
- 88 -
PCS 400/410 and 50 User Manual
Icons in Brief
Dial Pad
F1
F2
F3
F4
CTRL+M
Fn+F1
Fn+F2
Fn+F3
Fn+F4
Cmd+M
Pick up call from Park icon 1
Pick up call from Park icon 2
Pick up call from Park icon 3
Pick up call from Park icon 4
Go to Incoming Call History
Receiving a Call
Enter
CTRL+A
CTRL+V
Enter
Cmd+V
Answer a call
Answer a call
Divert an incoming call to voicemail
Answered Call
F1
F2
F3
F4
F5
F6
F7
F8
F10
CTRL+D
CTRL+I
CTRL+K
CTRL+N
CTRL+R
Esc
Fn+F1
Fn+F2
Fn+F3
Fn+F4
Cmd+5
Cmd+6
Cmd+7
Cmd+8
Cmd+0
Cmd+D
Cmd+I
Cmd+K
Cmd+N
Cmd+R
Esc
Park a call on Park icon 1
Park a call on Park icon 2
Park a call on Park icon 3
Park a call on Park icon 4
Go to Contacts Directory
Go to Users Directory
Go to Departments Directory
Create a new Contact using the number from the connected call
Enter an Account Code
View the Directory icons
View the configured web page
Access the Dial Pad in order to enter additional digits
Add a Note to a Call
To start and end recording of the current call
Clear current call
Multiple Calls
Enter
CTRL+A
CTRL+V
Enter
Cmd+A
Cmd+V
Transfer a call
Switch/toggle between the two connected calls
Create a Conference with the two connected calls
Contacts / Users / Departments Directories
Enter
CTRL+I
CTRL+S
Enter
Cmd+I
Cmd+S
F9
Cmd+9
5 Series/V3.2/1107/2
Dial the selected entry
View the selected User’s or Contact’s details
Further Numbers - access all numbers stored for the select User or
Contact or access the voicemail button for the selected User or
Department
Toggle between displaying Contacts by Company Name or Contact
Name
- 88 -
Icons in Brief
PCS 400/410 and 50 User Manual
- 89 -
Delete
Esc
Delete
Esc
PCS 400/410 and 50 User Manual
Icons in Brief
Delete the selected entry
Exit – return to the previous screen
Further Numbers
T
M
H
1
2
Alt+T
Alt+M
Alt+1
Alt+2
T
M
H
1
2
Alt+T
Alt+M
Alt+1
Alt+2
Dial the Telephone number
Dial the Mobile number
Dial the Home number
Dial the Spare1 number
Dial the Spare2 number
Send SMS to the Telephone number
Send SMS to the Mobile number
Send SMS to the Spare1 number
Send SMS to the Spare2 number
Redial Number list
Enter
CTRL+A
Enter
Cmd+A
CTRL+S
Cmd+S
CTRL+V
Delete
Esc
Cmd+V
Delete
Esc
Dial the selected entry
Create a Contact from the selected entry or view the selected User’s
details
Further Numbers - access all numbers stored for the select User or
Contact or access the voicemail button for the selected User or
Department
Connect directly to the selected User’s voicemail
Delete the selected entry
Exit – to return to the Home page
Incoming Call History
Enter
CTRL+A
Enter
Cmd+A
CTRL+G
CTRL+N
CTRL+P
CTRL+R
CTRL+S
Cmd+G
Cmd+N
Cmd+P
Cmd+R
Cmd+S
Delete
Esc
Delete
Esc
Dial the selected entry
Create a Contact from the selected entry or view the selected User’s
details
Record a new greeting
Generate a nuisance number from the entry selected.
Listen to the selected message
Record a memo
Further Numbers - access all numbers stored for the select User or
Contact or access the voicemail button for the selected User or
Department
Delete the selected entry
Exit – to return to the Home page
Listening to a voicemail message
CTRL+A
CTRL+B
CTRL+F
Cmd+A
Cmd+B
Cmd+F
5 Series/V3.2/1107/2
Forward by 2 seconds
Rewind by 2 seconds
Forward the message
- 89 -
Icons in Brief
PCS 400/410 and 50 User Manual
- 90 -
CTRL+N
CTRL+O
CTRL+P
CTRL+S
Delete
Cmd+N
Cmd+O
Cmd+P
Cmd+S
Delete
PCS 400/410 and 50 User Manual
Icons in Brief
Play next message
Play old messages
Play previous message
Save the message
Delete the message
Forwarding a voicemail message
Enter
Delete
CTRL+F
Enter
Delete
Cmd+F
Enter the selected User or Group to the Forward List
Delete the selected User or Group from the Forward List
Forward the message to the selected User(s) or Group(s)
Hot Desking
Enter
Delete
Enter
Delete
5 Series/V3.2/1107/2
Log in
Log off
- 90 -
Icons in Brief
PCS 400/410 and 50 User Manual
- 91 -
PCS 400/410 and 50 User Manual
Index
Add a Note
during a call.............................................................. 13
to a Contact ............................................................. 54
Ambiguous Number
Contacts ................................................................... 62
Announced Transfer.................................................... 10
Answer a call ................................................................... 7
answered call
icons.......................................................................... 82
keyboard short cuts ................................................ 88
Assistant
voicemail .................................................................. 67
Auto attendant
entering numbers while on call ............................... 7
Auto URL
automatically display a Directory .......................... 61
automatically display a web page .......................... 60
BLF
Speed Dials .............................................................. 36
Blind Transfer ............................................................... 11
Broken dial tone
Do Not Disturb ...................................................... 34
Follow Me/Forwarding ......................................... 29
voicemail .................................................................. 63
Busy Lamp Field
Remote BLF ............................................................ 78
Speed Dials .............................................................. 36
Calibration ..................................................................... 26
Call Control Toolbar ..................................................... 3
Call History ................................................................... 12
Call Notes...................................................................... 13
Call on hold
icons.......................................................................... 83
Call Pick up ................................................................... 16
Departments ............................................................ 51
Call Status ........................................................................ 9
Call Waiting ................................................................... 26
Column width
Directories ............................................................... 44
Incoming Call History ............................................ 20
Conferencing ................................................................ 23
Contacts......................................................................... 53
Add a Note .............................................................. 54
Ambiguous Number .............................................. 62
Auto URL .......................................................... 60, 61
automatically display a Directory .......................... 60
automatically display a web page .......................... 59
DirAutoURL ..................................................... 60, 61
Directory .................................................................. 53
Dedicated Console Mode............................................ 78
Departments ................................................................. 48
automatically display a directory ........................... 51
automatically display a web page .......................... 50
Call Pick up.............................................................. 51
Call Status ................................................................ 48
Directory .................................................................. 49
5 Series/V3.2/1107/2
Groups ..................................................................... 48
Incoming Call History ............................................ 51
Ring Tunes ............................................................... 49
voicemail .................................................................. 71
Dial Pad ........................................................................... 5
icons .......................................................................... 81
keyboard short cuts................................................. 88
Directories ..................................................................... 43
automatically display a Directory .......................... 15
column width........................................................... 44
Contacts ................................................................... 53
Departments ............................................................ 49
icons .......................................................................... 84
keyboard short cuts................................................. 88
Search ....................................................................... 43
Users ......................................................................... 45
Do Not Disturb ............................................................ 33
Do Not Disturb Exception Number......................... 34
End a call ......................................................................... 8
External Call.................................................................... 7
External Ring Tune ...................................................... 40
Favourites ...................................................................... 36
icons .......................................................................... 85
Floating Text
Preferences............................................................... 77
receiving a call ........................................................... 7
receiving a Department call ................................... 49
receiving a transferred call ..................................... 11
Forward on Busy .......................................................... 30
Forward on No Answer .............................................. 31
Forwarding .................................................................... 28
Further Numbers
Contacts ................................................................... 56
Incoming Call History ............................................ 20
keyboard short cuts................................................. 89
leave a message ........................................................ 69
leave a message for a Department ........................ 72
Redial Number List ................................................ 14
transfer to Department’s voicemail ...................... 73
transfer to voicemail ............................................... 70
User Configuration ................................................. 35
Users Directory ....................................................... 47
voicemail message ................................................... 66
Groups ........................................................................... 48
Hands Free
headset operation ...................................................... 5
switch between hands free and headset use ........ 18
Hang up a call ................................................................. 8
Headset operation .......................................................... 5
Hold ............................................................................... 10
Home Number ............................................................. 35
Home Page ...................................................................... 3
icons .......................................................................... 79
keyboard short cuts................................................. 87
Hot Desking .................................................................. 74
icons .......................................................................... 87
- 91 -
Index
PCS 400/410 and 50 User Manual
- 92 -
keyboard short cuts ................................................ 90
Icons .............................................................................. 79
Incoming Call History ................................................. 19
column width .......................................................... 20
Departments ............................................................ 51
icons.......................................................................... 85
keyboard short cuts ................................................ 89
Internal Call .................................................................... 6
Internal Ring Tune ....................................................... 40
IP address ...................................................................... 76
Keyboard short cuts .................................................... 87
Log In ............................................................................ 74
Log off ........................................................................... 74
Look Up
icons.......................................................................... 84
Making a call ................................................................... 6
icons.......................................................................... 82
Manager
system administration............................................. 78
Minimize to System Tray ............................................ 77
Missed Call .................................................................... 21
Departments ............................................................ 51
Mobile Number ............................................................ 35
multiple calls
icons.......................................................................... 83
keyboard short cuts ................................................ 88
Multiple Instances ........................................................ 77
Mute a call ..................................................................... 18
New Call ........................................................................ 10
New Messages .............................................................. 63
Nuisance Calls .............................................................. 21
On-screen keyboard..................................................... 25
Out of Office Message ................................................ 31
Park a Call ..................................................................... 15
Park icons ...................................................................... 15
PCS 400 ........................................................................... 1
Calibration ............................................................... 26
hands free................................................................. 18
headset operation ...................................................... 5
On-screen keyboard ............................................... 25
Stylus LED ................................................................ 4
PCS 50 ............................................................................. 1
Floating Text ............................................................. 7
Preferences .............................................................. 76
resize the window ..................................................... 4
Pick up
pick up a Department call ..................................... 51
pick up a parked call ............................................... 16
pick up a ringing extension.................................... 16
Pop On Connect .......................................................... 77
Preferences .................................................................... 76
Proxy Server.................................................................. 77
Put a call on Hold ........................................................ 10
Receiving a call
icons.......................................................................... 81
keyboard short cuts ................................................ 88
Record a call.................................................................. 70
Record a memo ............................................................ 71
Redial
5 Series/V3.2/1107/2
PCS 400/410 and 50 User Manual
Index
Incoming Call History ............................................ 20
Redial Number list .................................................. 13
Redial Number List
icons .......................................................................... 85
keyboard short cuts................................................. 89
Reject a call...................................................................... 8
Remote BLF.................................................................. 78
Resize the PCS 50 window ........................................... 4
Ring Tunes .................................................................... 40
Screen Saver .................................................................... 4
Search
Directories ............................................................... 43
Set up information ....................................................... 76
Short Code
Speed Dials .............................................................. 39
Show Departments on Connect ................................. 61
Show Favourites on Connect ..................................... 61
Show Users on Connect .............................................. 61
Speed Dials .................................................................... 36
Start Minimized ............................................................ 77
Stylus LED ...................................................................... 4
Switch between calls
call waiting ............................................................... 27
conferencing ............................................................ 24
transfer ..................................................................... 10
System Administration ................................................ 76
icons .......................................................................... 80
IP address................................................................. 76
Manager .................................................................... 78
Preferences............................................................... 76
Set up information .................................................. 76
System Ring Tune ........................................................ 42
Text Search
Directories ............................................................... 44
Transfer a call................................................................ 10
Unannounced transfer ................................................. 11
User Configuration....................................................... 25
Assistant ................................................................... 67
Calibration................................................................ 26
Call Waiting.............................................................. 26
Do Not Disturb ...................................................... 33
Follow Me ................................................................ 28
Forward on Busy..................................................... 30
Forward on No Answer ......................................... 31
Forwarding............................................................... 28
Further Numbers .................................................... 35
Out of Office Message ........................................... 31
Ring Tunes ............................................................... 40
Speed Dials .............................................................. 36
User Preferences........................................................... 25
Users Directory............................................................. 45
Voicemail ....................................................................... 63
Assistant ................................................................... 67
change your greeting............................................... 66
delete a message ...................................................... 65
Departments ............................................................ 71
forward a message to a colleague .......................... 68
forward message...................................................... 65
icons .......................................................................... 86
- 92 -
Index
PCS 400/410 and 50 User Manual
- 93 -
keyboard short cuts ................................................ 89
leave a message........................................................ 69
Message Handling ................................................... 65
play next message ................................................... 65
play old messages .................................................... 65
play previous message ............................................ 65
receiving a message................................................. 63
record a call.............................................................. 70
record a memo ........................................................ 71
retrieve a message ................................................... 63
rewind message ....................................................... 65
5 Series/V3.2/1107/2
PCS 400/410 and 50 User Manual
Index
ring back the caller .................................................. 66
save a message ......................................................... 65
transfer a call to voicemail ..................................... 69
Volume .......................................................................... 18
Web Page
Contacts ................................................................... 59
Departments ............................................................ 50
display a web page during a call ............................ 15
Home Page ................................................................ 3
icons .......................................................................... 80
keyboard short cuts................................................. 87
- 93 -
Index
PCS 400/410 and 50 User Manual
SpliceCom Limited The Hall Business Centre, Berry Lane, Chorleywood, Hertfordshire WD3 5EX
Tel: 01923 287700 Fax: 01923 287722 Email: [email protected] Website: www.splicecom.com