1
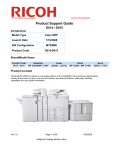
Printer User’s Guide Contents Getting started ............................................................................................................................................................ 2 Printer anatomy..........................................................................................................................................................2 Find out some essential information .................................................................................................................2 Download and install the printer drivers ........................................................................................................3 Enable file sharing on your computer...............................................................................................................3 Photocopying............................................................................................................................................................... 5 Scanning......................................................................................................................................................................... 5 Printing........................................................................................................................................................................... 6 Basic printing...............................................................................................................................................................6 Forcing black & white prints .................................................................................................................................6 Stapling...........................................................................................................................................................................7 Booklet production ....................................................................................................................................................7 Hole punching ..............................................................................................................................................................7 Choosing the paper feed tray ................................................................................................................................8 Choosing the output tray ........................................................................................................................................8 Printing to special paper.........................................................................................................................................9 Printing tabs.................................................................................................................................................................9 Saving print settings .................................................................................................................................................9 Tips for large print runs .......................................................................................................................................10 Using the document server................................................................................................................................. 10 Sending files from your computer to the document server...................................................................10 Scanning to the document server.....................................................................................................................11 Printing documents from the document server .........................................................................................11 Printing booklets .....................................................................................................................................................11 Folding paper ............................................................................................................................................................11 Connecting to the machine on the web ......................................................................................................... 12 Getting started Printer anatomy The names and uses for a lot of things can get confusing, so I’ll try to get them straight here: On top of the main printer body is the scanner. There’s a glass plate for photocopying irregular sized documents, but the lid to that also serves as a sheet feeder, so you don’t even need to open it to scan letter sized paper. Documents go into the sheet feeder face up. To the left of the main body (looking at it from the entrance to the printer room), there are three output trays. The top one is called the “Upper Tray”, obviously enough, and it’s where standard print and photocopy jobs go by default. The middle one is the “Shift Tray” and it can move down to accommodate up to 3000 pages, so we’ll be using this one for large print runs like the chemistry and ELJ binders. To the right of the main body is the Large Capacity Tray or LCT. This is where the printer takes paper from unless you specify otherwise. It holds several thousand sheets of paper, and can be topped up by flipping the cover up, pressing the button with a red light on it, and putting more paper on top of the stack. We need to make sure this one never jams, so please only ever put pristine white printer paper in here – if it even has the slightest crease, don’t put it in this tray. At the bottom of the main body are three numbered print trays. We’ll use these as follows: Tray 1 is for any special paper – sticky labels, certificates, nametags, scrap paper, etc. Because we’re using it for all the misc stuff, it’s a good idea to always physically check what’s in there before telling the printer to use it. Tray 2 is for paper to make booklets out of. This can be 11”x17” paper (if you want a 8½”x11” booklet) or 8½”x11” paper for a small booklet, but the key is that it has to be in landscape format. This printer can do many things, but it can’t rotate paper. Tray 3 is for tab stock only. Find out some essential information There are a couple of specific things you may need to know about your computer to be able to set things up right: • Which version of Mac OS X you are using. Click on the apple icon in the top‐left of your screen, and choose “About This Mac”. A window should pop up with “Mac OS X” in big text, and a version number under that. Mine is 10.5.5, and it’s the first two numbers that matter – everyone in this office is running 10.4.x or 10.5.x – write down which applies for you, and you can ignore the third number. • Your computer’s name. Click on the apple icon again and choose System Preferences. Click on “Sharing” and make a note of the computer name that comes up there. You can also change it if you like – I recommend making it include your own name so it’s obvious whose machine this is. Download and install the printer drivers If you haven’t already done so, you’ll have to download the appropriate printer driver from Ricoh’s website, and set up the printer. To do this, follow these simple steps: 1. Go to http://is.gd/29hD 2. Click on the appropriate Mac OS version for your computer (see above). 3. Download the “PPD Installer” appropriate to your version of Mac OS, by clicking on the icon in its row. 4. Double click on the file you just downloaded to run it – this will install the driver. 5. Go to System Preferences (click on the Apple icon in the top‐left of your display, and choose that from the menu), and click on “Print & Fax” 6. Click on the + sign below the list of already‐installed printers to install a new one. 7. Select “IP”, and manually type in the new printer’s address: XXXXXXXX 8. If it’s all working correctly, your computer should automatically pick up the printer’s model number – it’s “RICOH Aficio MP C7500 PS”, and if it doesn’t tell you that in the “Print Using” then try rebooting your computer and starting over from step 5. 9. Type “XXXX” in the “Name” box, and click “Add” 10. For this printer, we actually have several installable options, so choose the following: • Large Capacity Tray: “Large Capacity Tray” • Finisher: “Booklet Finisher SR4020” • Booklet Processor: “Installed” • Multi‐hole Punch Unit: “Installed” • [leave the others as “not installed”] 11. Click “continue”, and you’re good to go. 12. Test a basic double‐sided print to make sure it’s working properly. Enable file sharing on your computer If you want to be able to scan documents and have the scanner place them directly on your computer, you’ll have to set your computer up first. I do advise doing this – it’s only a small amount of hassle upfront, and then scanning will be a lot more convenient afterwards. On your own computer, if you are running Mac OS 10.4: 1. Go to System Preferences (you can get here from the apple icon in the top‐left of your screen) 2. Click “Sharing” (middle row of options) 3. Check the boxes for “Personal File Sharing” and “Windows Sharing”. On your own computer, if you are running Mac OS 10.5: 1. Go to System Preferences (you can get here from the apple icon in the top‐left of your screen) 2. Click “Sharing” (middle row of options) 3. Check the box for “File Sharing” 4. Click the “Options” button, which should bring up another window 5. Check all the boxes: 6. It will probably ask you for SMB account details – give it username “XXXXX” and password “XXXXX”. 7. Click “Done” On the printer itself: 1. Press the SCANNER button (to the left of the screen) 2. Press “Prg. Dest.” on the screen (towards the right) 3. Press the “Browse Network” button. You should see a button with the workgroup name appear. 4. Press this button. You should see a list of the computers that are currently switched on and have sharing set up the right way for this machine to see them. 5. If your computer is in the list, tap its button to choose it. If it is not in the list, then try going through the “On your own computer” instructions above, and if that doesn’t work then drop Eldan an email because something needs fixing. 6. Browse through to whichever folder you want scanned documents to be placed in. Note that on a lot of our computers, to see “Desktop” as an option, you first have to click on a folder with your username on it. 7. Once you’ve selected the folder, click OK. 8. Click OK again. 9. A screen should pop up with a keyboard on it – type what you want to save these settings under (e.g. mine are saved as “eldan’s laptop”) 10. Click OK twice again, and you should be done. The good news is you only have to do all this once. Photocopying This goes first because it’s simple. To photocopy a stack of pages, put them face up in the sheet feeder, press the “Copier” button to the left of the display, and choose options from there. If you just want one single‐sided copy, you can just press the big green start button. Scanning You can scan even while the printer is printing, so you don’t have to wait for print jobs to finish. First, make sure you’ve set your computer up by following the directions under “Enable file sharing on your computer” above. If you have, then the rest is easy: 1. Place the document you need to scan face up in the sheet feeder on top of the printer. 2. Press the “Scanner” button to the left of the display. 3. Choose your computer from the list of destinations on the screen. 4. Press the big green Start button. 5. By the time you’ve walked back to your computer, the document should be there as a new PDF file in the folder you selected when you set this up. Printing Please remember that this printer is primarily for the PT program assistants to use for big production runs. This doesn’t mean everyone else shouldn’t use it, but please do check with the program assistants before you do. Basic printing For basic print jobs, this printer works much like the others. Just check the print settings carefully the first time you use it, because on some people’s computers it seems to be defaulting to single‐sided printing. Forcing black & white prints Remember that it’s a lot cheaper for us to print black & white than pages with any colour in them at all. If you’re printing a document that has colour but doesn’t really need it (like this one), you can force it to print as black and white from the print menu. Choose “Printer Features” from the drop down menu, as below: You can switch between 4 feature sets, but the colour option is under the first one. Just switch “Color Mode” from “Color” to “Black and White”. Stapling If you want your documents stapled, you can choose this by going into the Printer Features, choosing feature set “General 3”, and choosing the options from there: The “2 at center” option doesn’t work from our computers (but there is a way to do this using the document server – see the “Using the Document Server” section below), but the others all do what they say. “2 at left” is a rough‐and‐ready way of making booklets, though there is also a more elegant way through the document server. No more than 50 sheets of paper can be stapled in this way. Booklet production We can produce booklets that are folded and stapled in the middle, but this requires the document server, so the instructions are in the “Using the document server” section below. Hole punching Hole punching works in a similar way to stapling. Chose feature set “General 3” from the Printer Features, and you should see a drop‐down menu lablled “Punch:”, which looks like the screen shot to the right. “3 at left” is what we normally need. The 2‐ and 4‐hole options are for European binders, because making these things standard would have just been too easy. Choosing the paper feed tray By default, this printer should always take paper from the Large Capacity Tray if you don’t specify otherwise. Sometimes it is useful to specify, for instance if you loaded special paper in tray 1, or just want to make absolutely certain it will use the LCT. You can do this by selecting “Paper Feed” from the drop‐down menu that initially says “Copies and Pages”: This brings up options that allow you to make all pages come from a specific tray, or set specific instructions for the first page (e.g. if you want the front cover to get printed on special paper). Choosing the output tray If you want to specify which output tray your print job goes to, you can do this from the “General 3” feature set. Use the same steps as for stapling, and just pick from the “Destination” menu (which should look like the image on the right). We have the 4020 model finisher, so the three options with “4020” in the name are available, but you should ignore the others. The “Shift Tray” is the high capacity output tray so should be specified for all long print runs. Printing to special paper Please use Tray 1 for all non‐standard paper, including sticky labels, nametags, card stock, scrap paper and odd sized paper. Load your paper into this tray face down (the opposite of our other printers). Then select it as the paper feed tray (see above), and specify the type of paper you’re printing to with the “Paper Type” drop‐
down menu. This should reduce the number of jams caused by cardstock, and improve the print quality we get on sticky labels. Printing tabs To print tabs, you first need to download the appropriate template from http://is.gd/aJDZ The “Portrait Tab Template” ones are correct for our printer, and you just need to choose the right number of tabs in a bank (5 is by far the most common). Then copy‐and‐paste all the pages if you need more tabs (e.g. if you need 15 tabs, use the 5‐tab template and copy the pages 3 times), and edit the text for each tab. If this is a job you’re likely to repeat, it’s worth saving the file as a Word document. Then print the file using the following steps: 1. Choose “Tray 3” for the paper feed (see “Choosing the paper feed tray” above). 2. Choose “Tab Stock” from the “Paper Type” menu (see “Printing to special paper” above). 3. Select “3 at left” from the “Punch” menu (see “Hole punching” above) to get holes in the right place. The printer is exceptionally fussy about tab stock, so here are a few key things to watch out for: • The bottom face of the tab is what will actually get printed on, so when loaded correctly it looks like the last tab is on top. • The loading of tab stock must be very precise, and if the tabs are at all curled they’re likely to jam. • The printer has no clever way of telling if you’ve only used 4 tabs out of a bank of 5, so the number of pages in the job you send must always be a multiple of the number of tabs in one bank (i.e. if we’re using tab stock that came in banks of 5, we must send jobs that contain 5, 10, 15, 20 or 25 pages even if the last few are blank). Otherwise it will print onto the wrong tabs. Saving print settings By now, you’ve probably realized that a lot of these functions require just the right set of options to be selected in the printer driver, and it’s kind of a hassle and easy to forget something. The good news is that you can save print settings fairly easily. Just set everything up right for the type of job you need, and then click on the “Presets” menu towards the top of the print window. Choose “Save As” and save the settings as something that will make sense to you later. In future, you can print using these settings by just choosing the name you saved under from that same menu, without messing around with all the details. Tips for large print runs This machine should be able print up to 3000 sheets unattended, but there are a few things to do to help it run smoothly. Here’s a checklist: • Fill the Large Capacity Tray (it can hold over 3000 sheets) • Make sure the printer is using the LCT (see instructions above – for a large job it’s probably worth manually specifying LCT to make sure) • Make sure the printer will send its output to the Shift Tray, which can hold 3000 sheets, instead of the default tray which can hold a few hundred (see instructions above) • Check the toner levels (see “Connecting to the machine on the web” section below) Using the document server You can use the printer’s built‐in document server to store jobs. This can be useful either if they need to be accessed in future by other people (this way they don’t need access to your computer), or to take advantage of some of the fancier things this machine can do. Sending files from your computer to the document server To send a job to be stored on the document server instead of immediately being printed, select “Job Log” from the print driver’s menu, change “Job Type” from “Normal Print” to “Document Server” and enter a filename, as in this screen capture: Scanning to the document server You can also save jobs on the document server by scanning in existing prints. To do this, put the pages you want to scan in the sheet feeder as normal, but don’t use the normal scan menu. Instead, press the “Document Server” button to the left of the LCD, then press the “Scan Original” button on the bottom‐left corner of the LCD, and then press the big green “Go” button. The document will be scanned as normal, but instead of being sent to someone’s computer, it will be stored on the printer itself. Printing documents from the document server 1. Press the “Document Server” button to the left of the LCD. 2. You should see a screen with thumbnails of the most recent documents. If yours is not on this screen, look for a button with a down arrow on the right‐
hand side of the LCD, and you can use this to scroll through older files. 3. Once you have found your document, you can select it. 4. Press the “To Printing Screen” button in the bottom‐right corner of the LCD. This should take you to a screen where you can choose print options, much like the photocopier options. 5. Choose the options you want (note that this method seems to print single‐
sided unless you explicitly tell it otherwise, so watch out for that), and send it to print. Printing booklets To print a document in booklet form, stapled and folded in the middle, first send it to the document server following the instructions above. Then print it from the document server as above, but in step 5 choose Tray 2, and the “Magazine” and center stapling options. Then don’t panic when it takes a while for anything to come out of the printer – it has to print every page of the first copy before it can spit any pages out. Note that “Booklet” won’t do what you think – it’s for files delivered in a very specific format (e.g. the first and last pages side‐by‐side) that some desktop publishing software generates, but nothing we use does. Tray 2 is for loading paper in landscape format, and by default we have 11”x17” paper in there, to make letter sized booklets. You can produce smaller booklets by loading 8½”x11” paper, but remember to always load it landscape‐format. There is a limit to the number of pages that can be stapled together like this, though I’m not yet sure what that limit is. If you try to print too many, the printer will warn you. Folding paper This machine will only center‐fold things; it would need some additional hardware to do trifolds. To get documents folded in the center, simply follow the booklet instructions above, but send no more than 4 pages – it will automatically not do any stapling because there’s only one sheet of paper per copy. Connecting to the machine on the web You can connect to this machine’s control panel via your web browser, by going to the URL: XXXXXX The first page that loads tells you how much toner there is and how much of what sort of paper is loaded into each tray. You can log in by clicking the “Login” link at the top‐right, and giving the user name “XXXXX” and password “XXXXX”. Once logged in you can also stop print jobs and delete things from the print server from here – this seems to be easier than doing it from the printer itself.