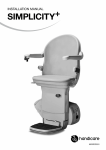
1
EN ISO 10535:1998 Revision 1 - Requirements and test methods.
Signed:
Manufacturer
Serial No :
Name :
Company :
Date:
Telephone :
IMPORTANT :
Please read this manual thoroughly before use
This product is protected under Patent : GB 2366722
NOTE: This bathift must not
be used beyond the safe working
load of: 140kg / 308lb / 22st.
By Authorised Installer
Please complete (in caps)
Signed:
This is to certify that this bathlift has been inspected and tested to the relevant requirements of:
This certificate must be signed by the authorised installer
after onsite commissioning and testing.
Please keep your Product Manual and Test certificate safe for future reference.
bath lift - user guide
Notes
Contents
Page 3
WARNING
• Please read this handbook
thoroughly prior to
using your bathlift.
• Release the GREY ‘Down’
button on the handset at
the bottom of the bath.
• Recharge the battery when
the RED light on the handset
is illuminated, or once a
week.
• Sit centrally on the belt and
do not lean back or forward
when moving.
• Release RED ‘Up’ button
when the belt is level with the
padded seat.
•
-
Getting started
Understanding your bathlift.
Pages 4 - 6 Using your
AquaLift
•
How to transfer into and out of the bath.
•
•
Operating your bathlift.
Handset control.
Pages 7 - 9
•
•
•
Page 10
•
•
•
•
Page 11
-
Product care
Battery care.
Belt care.
Troubleshooting.
-
After Care information
Warranty details.
Technical specifications.
Spare part references.
Contact details.
-
Notes
• Ensure the belt bar is
placed correctly into the grab
rail cradle, wound to the
right setting for the width of
your bath.
• Do not raise or lower the
belt without weight applied
and check that the belt is
taut before use.
Page 2
Page 11
Specifications
Getting started
Warranty terms and conditions
Your bathlift has a 12 months parts warranty from date of purchase, providing it has
been installed correctly and used as instructed in this manual. Whilst most of the
components in your bath lift are made from anti-corrodable materials, using your
bathlift with a salt-based water softener could shorten it’s lifespan and should be
avoided. Regular drying of the bath lift and grab rail surfaces after use will help
enhance the life of your bathlift.
NOTE: The battery and slip-cushion are not covered under the 12 months warranty,
other than for defective materials or bad workmanship.
Understanding your Bathlift
NOTE: The rating of your bathlift is 140kg
(22stones), which must not be exceeded.
Your bathlift is installed next to a wall beside
your existing bath.
Service record
12 months service
24 months service
36 months service
48 months service
Product specification
Item
Specification
Maximum user weight
Seat height
Seat size
Belt width
Lift range
Bath width suitability
Bath height suitability
Battery
Battery range
Battery charge duration
Battery weight
Bathlift weight (exc. battery)
140kg / 308lb / 22st
Min: 50cm / 20” - Max: 62cm / 24½”
Width: 46cm / 18” x Depth: 22cm / 8½”
28cm / 11”
43cm / 17”
Min: 65cm / 25” - Max: 85cm / 33”
Min: 46cm / 18” - Max: 58cm / 23”
12vDC x 2.3aH SLA
20 lifts average between charge
8 to 10 hours (overnight)
1.5kg / 3.3lb
12.5kg / 27.5lb
Spare parts
Item
Specification
BAT
CHARGE-UK
CHARGE-USA
CHARGE-EU
CHARGE-AUS
SC140W
SC140B
SEAT-W
BELT
BELT-XL
Replacement battery
Replacement battery charger - UK
Replacement battery charger - USA
Replacement battery charger - Europe
Replacement battery charger - Australia / NZ
Replacement slip-cushion WHITE
Replacement NAVY BLUE
Replacement padded stool seat - WHITE
Replacement standard belt (65 to 85cm bath width)
Replacement extra-long belt (85 to 105cm bath width)
Page 10
The grab rail has been securely fixed to the
wall directly opposite the floor-mounted seat.
The grab rail additionally acts as a wall
support for the fixed end of the bathing belt.
The belt can be removed from the grab rail
allowing others to use the bath normally.
The handset
controls are
waterproof
and can be
used in and
out of the
bath.
Pressing the
red (right)
button raises
the bathing
belt, while pressing the grey (left)
button lowers the bathing belt.
Above the handset buttons is a lamp
which illuminates when the battery
needs charging.
A padded
seat is fitted
above the
main unit.
The seat
edges
protrude out
to form a
hand hold to
aid transfer.
The padded
seat is
hinged
upwards to
access the
rechargeable
battery. The battery must be charged
outside the bathroom using the charger
supplied.
Charge the battery fornightly or when
the red light illuminates on the handset.
Leave overnight for a full charge.
Page 3
Using
your Bathlift
How to transfer into and out of the bath
It is vital you understand how to transfer safely into and
out of the bath when using your bathlift.
Product
care-Troubleshooting
Troubleshooting tips
11
22
33
IMPORTANT
To prevent falling backwards, ensure you hold on to the
grab rail and do not lean backwards whilst moving.
You may be supple enough merely to step in and out of
your bath, using the bathlift only to lower you to a
comfortable height for bathing, then raising you to step
out. However the bathlift has also been designed to allow
safe and comfortable transfer for those who need more
help.
The recommended transfer procedure for those needing
more help is as follows:
NOTE
• Place the handset away from the edge of the bath, leaving
the top edge clear for you to swing your legs over. Ideally
storing on the limpet hook supplied close to hand.
Always check the belt is taut and the belt bar is properly
fitted into the grab rail cradles before you use your Molly
Bather.
•
4
4
Page 4
Lowering to the bottom of the bath
1. Sit on the padded seat facing away from the bath. (This
is ideal for undressing).
2. Holding on to the edge of the padded seat, rotate
yourself so your legs are against the side of the bath.
Reach for the grab rail with your other hand.
3. Holding on to the edge of the padded seat and the grab
rail, lift your legs over the bath side and into the bath.
4. Again, holding on to the edge of the padded seat and
the far edge of the slip cushion, position yourself centrally
on the slip cushion.
In the unlikely event that your bathlift develops a technical fault or is performing below its
original specification, please refer to the table on the right, prior to contacting your supplier
for assistance.
SYMPTOM
Important tips for reliability
Red lamp on
1. Ensure the battery is
handset lit
charged every 2 weeks for
optimum performance.
Red lamp on
handset flashing
2. Ensure the belt and slip
cushion are regularly cleaned
Belt is very slack
and allowed to dry naturally.
when fully raised
3. We recommend your bathlift
Belt is too taut when
is serviced every 12 months.
fully raised
4. If your bathlift is not going
to be used for more than a week, Belt has an odour
or is grimy
it is essential to remove the
battery from the unit to prevent
Motor struggling
it being discharged.
during lift
Failure to do so could invalidate
your warranty.
Unusual noises from
This will help to ensure your
bathlift and building
attachments are safe and
reliable.
CAUSE
Battery low
Recharge battery
Battery very low
DO NOT USE until
battery is charged
Incorrect width
setting
Readjust as page 8
Incorrect width
setting
Readjust as page 8
Not regularly
cleaned / dried
See page 8 for
instructions
Battery low
Recharge battery
Service required
Contact your dealer
Service required
Contact your
supplier
Belt showing signs
of fraying or
serious damage
Service required
Contact your
supplier
Belt creased
Belt being wound
incorrectly
Sit upright when
raising or lowering
motor
NOTE
Belt raises when
Belt wound up in
Please contact your supplier if
reverse
you are unsure how to use your Grey button pressed
bathlift correctly or the
Electronics fault or
Belt wound up in
suggested tips have not
Belt will not raise or
reverse
rectified the fault.
lower
(Refer to the ‘Contact’ section
on the back of this booklet for
their details).
SOLUTION
Seat height altered
Contact your
supplier
Contact your
supplier
Battery very low
Recharge battery
Leg adjustment
loose
Contact your
supplier
Page 9
Product
care-Belt
Belt care
2. Using a damp cloth and anti-bacterial cleaner,
wipe down the upper and lower surfaces of the
belt.
your bath
width. This will
have been set
for you initially,
but you will
need to
remember
which is best
for you.
The belt can be removed from the grab rail
for cleaning or for others to use the bath, but
when refitting, ensure the belt is fully ‘raised’,
and that the belt is fitted back into the grab
rail cradles correctly, wound to the same
width setting as before.
Belt cleaning
To clean the belt, please follow this procedure:
1. Lower the bathing belt into the bath,
putting hand pressure on the empty belt to
maintain tension at all times.
Page 8
your Bathlift
How to transfer into and out of the bath
5. Reach for the handset and press the grey ‘down’ button to
lower yourself into the bath. By leaning slightly towards the
grab rail, the slip cushion should keep you central on the
lowering belt.
NOTE
It is advisable to hold the grab rail when in motion.
6. Continue lowering by pressing the grey ‘down’ button
until you reach the bath bottom. Stop lowering and ensure
you are sitting in a comfortable position.
If necessary, you can press the grey ‘down’ button briefly to
6
release the belt tension from your body.
7. Store the handset over the bath edge, or using the limpet
provided.
Gently lie back in the bath and enjoy a normal soak.
5
Belt attachment and removal
A stainless steel bar is attached to the fixed
end of the bathing belt, the excess belt is
wound around the bar until the belt is
relatively taut. (The white label will normally
be level with the grab rail).
Note the
marking of the
belt label, it will
indicate either
‘MIN’, ‘MID’ or
‘MAX’
depending on
Using
3. Allow to dry naturally while lowered.
4. Raise the bathing belt fully, again putting
hand pressure on the belt to maintain tension
at all times. Check your belt is set to the correct
width setting as mentioned earlier.
Slip-Cushion cleaning
The slip cushion can be removed by
unsecuring the velcro straps. Hand or mashinewash at 40°C, (ensuring straps are closed
during washing). When clean and dry simply
re-attach the velcro straps under the belt.
Straps should not be too taut to allow it to
slide sideways easily.
Seat and metalwork cleaning
The padded seat, handset and all the external
metalwork can be cleaned using a damp cloth
and anti-bacterial cleaner, drying thoroughly
afterwards.
Care should be taken to keep moisture away
from the battery and the battery chamber.
7
Raising to the top of the bath
8. Ensure you are sitting centrally on the slip cushion, hold
the grab rail and bring yourself to an upright sitting position.
Reach for the handset and press the red ‘up’ button to start
raising yourself up. By leaning towards the padded seat, the
slip cushion should keep you central on the belt.
NOTE
It is advisable to keep a hand on the grab rail when in motion.
8
IMPORTANT
• ALWAYS check you are pressing the RED ‘Up’ button to
raise yourself.
(If the grey ‘down’ button is continuously pressed by mistake,
it could completely wind out the belt and start winding the
belt in reverse. This will render the magnetic belt-stop
inoperable).
Page 5
Using
your Bathlift
Product care-Battery
How to transfer into and out of the bath
Raising to the top of the bath - continued
9
9. Continue raising by pressing the red ‘up’ button until
you are level with the seat or the motor stops automatically.
10. Put the handset out of the way, then hold firmly on to
the grab rail and padded seat hand hold.
Slide yourself from the belt up on to the padded seat
ensuring a firm hold.
11. Holding on to the edge of the padded seat, lift your
legs over the side of the bath and on to the floor.
12. Rotate yourself to a comfortable seated position,
10
where you can dry yourself and dress.
11
Bathlift handset
The handset shown is marked with ‘Up’ and ‘Down’ arrows
on the soft rubber buttons, (marked in the photograph
below). The right ‘UP’ button is RED, the left ‘DOWN’
button is GREY. The cable should always be pointing
towards you.
Directly above the buttons there is a red lamp which
illuminates when the battery needs charging.
The handset is waterproof and can be safely used in or
out of the bath.
Battery indicator
Red ‘UP’ button
12
Your bathlift has a rechargeable battery, which is fitted below the
padded seat and is accessed by holding the edge of the seat nearest
the bath and hinging upwards.
(As shown left).
Always hold the battery by the strap to remove and replace back
into the battery-well. NEVER HOLD BY THE BATTERY CASE.
NOTE: The battery must be taken outside the bathroom and charged
overnight, using the supplied battery charger. (Usually once every
two weeks will be adequate).
Battery charge indication
The handset battery indicator light will illuminate when the battery needs charging.
If the battery is low, the red light will be on when the grey ‘down’ button is pressed and will
remain lit. NOTE: It is safe to use your bathlift once more, but charge the battery immediately
afterwards, leaving overnight for a complete charge.
If the battery is very low, the red light will flash when the grey ‘down’ button is pressed and
will remain flashing. Charge the battery IMMEDIATELY before use.
Charging the battery
The battery charger lead is fitted with a jack-plug which must be fitted into the chrome socket
nearest the curved end of the battery pack. Plug the charger into a mains power socket. The
green light will come on inititally, then change to red while the charging commences. Leave
charging overnight, or at least for 8 to 10 hours.
When fully charged the red light will be off and the green light will be lit.
Unplug the battery from the charger, and remove the charger from the mains power socket.
WARNING
Always pull out by the moulded jack-plug - NEVER PULL OUT BY THE CABLE.
Refitting the battery
Holding the strap, lower the charged battery into the battery-well below the seat.The red light
on the handset will extinguish when the grey ‘down’ button is pressed again. If it lights again,
lift the battery half-way out, press the red and grey buttons alternately 3 times then lower into
the battery-well. (This cancels the last checked voltage and re-checks the battery voltage).
Grey ‘DOWN’
‘DOWN’ button
button
Grey
Page 6
Important:
• Charging your battery every two weeks will prolong its life.
• Always remove the battery from the bathlift if it not used for more than a week.
Page 7