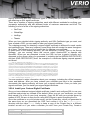
1
Managed VPS Linux –
User’s Guide
Version:
April 10 – Subject to modification
Distribution:
For external use
Sales office/Region:
VERIO Europe GmbH, Neugablonzer Str. 1, D-93073 Neutraubling
Copyright © 2006 VERIO Europe
page 1
1
INTRODUCTION
5
1.1
How to Use this Document
5
1.2
Shell Prompts in Command Examples
5
1.3
Audience
6
1.4
Overview of VPS Linux
1.4.1 Operating-system Level Server Virtualization
1.4.2 Skel Package
1.4.3 Copy-on-Write
1.4.4 RPM
6
7
7
8
8
2
9
CONFIGURE VPS LINUX
2.1
Custom Installation Archive Tool
2.2
Connect to Your Private Server the First Time
10
2.3
Access Your Private Server
11
2.4
Create a Virtual Host
11
2.5
CGI Binary Access
12
2.6
Creating and Editing User Accounts
12
2.7
Configure Virtual Sub Hosts
13
2.8
CGI Scripts and Security Issues
14
2.9
Verify Core Services
15
2.10
Verify Resources
15
3
INSTALL ADDITIONAL SUPPORTED FEATURES
9
16
3.1
Accrisoft Freedom
16
3.2
Apache HTTP Server
16
3.3
Apache Dynamic Modules
16
3.4
ClamAV
17
3.5
CPX: Control Panel
18
3.6
Dovecot
19
Version:
April 10 – Subject to modification
Distribution:
For external use
Sales office/Region:
VERIO Europe GmbH, Neugablonzer Str. 1, D-93073 Neutraubling
Copyright © 2006 VERIO Europe
page 2
3.7
Email List Package
3.7.1 Majordomo
3.7.2 FML
3.7.3 Mailman
19
19
20
20
3.8
Email Service
20
3.9
Firewall
20
3.10
FormMail
3.10.1
Installing FormMail
3.10.2
Using FormMail
21
21
21
3.11
FTP
22
3.12
GCC
23
3.13
Java
23
3.14
MySQL
23
3.15
phpMyAdmin
24
3.16
Namazu
24
3.17
osCommerce
3.17.1
Before You Install the Application
3.17.2
Web Server Document Path
3.17.3
Username/Password and Database
3.17.4
Change File Permissions
3.17.5
Install the Application
3.17.6
Start the Web-based Configuration Procedure
3.17.7
Configure Web Server
3.17.8
After You Install the Application
24
25
25
25
26
26
26
27
28
3.18
Perl
29
3.19
PGP/GnuGP
29
3.20
PHP
30
3.21
PostgreSQL
3.21.1
Multi-Language Abilities in PostgreSQL
30
31
3.22
Procmail and SpamAssassin
3.22.1
Procmail
3.22.2
SpamAssassin
31
31
32
3.23
Python
33
3.24
Rsync
33
Version:
April 10 – Subject to modification
Distribution:
For external use
Sales office/Region:
VERIO Europe GmbH, Neugablonzer Str. 1, D-93073 Neutraubling
Copyright © 2006 VERIO Europe
page 3
3.25
Ruby
33
3.26
Savelogs
33
3.27
ShopSite
33
3.28
SquirrelMail
34
3.29
SSL
3.29.1
3.29.2
3.29.3
3.29.4
3.29.5
3.29.6
3.29.7
3.29.8
Create a Signing Request and Private Key
Custom Digital Certificate
Obtain a Signed Digital Certificate
Install your Custom Digital Certificate
Move your Custom SSL Certificate
Change Operating Systems
Move a Certificate to a New Server
Renew Custom digital certificates
34
34
35
35
36
37
38
38
39
3.30
Swish-e
39
3.31
Tomcat
39
3.32
Vinstall Utilities Library
3.32.1
Removing packages
3.32.2
Software Packages Included in the Vinstall Utilities Library
39
40
40
3.33
41
The Webalizer
3.34
WordPress
3.34.1
Available Features
3.34.2
Before you Install WordPress
3.34.3
Get Started
3.34.4
More Information About WordPress
41
41
42
42
42
3.35
43
4
Zend Optimizer
TROUBLESHOOT YOUR PRIVATE SERVER
44
4.1
General Issues
44
4.2
Failure to Create a Virtual Host
44
4.3
Check Quotas
44
4.4
Check Log Files
44
4.5
Check for Idle Processes
45
4.6
Custom Digital Certificate Problems
45
Version:
April 10 – Subject to modification
Distribution:
For external use
Sales office/Region:
VERIO Europe GmbH, Neugablonzer Str. 1, D-93073 Neutraubling
Copyright © 2006 VERIO Europe
page 4
1
Introduction
Use the instructions included in this document and apply your previous system
administration experience to conduct an installation of a Managed Virtual Private Server
Linux (VPS Linux in the following) account, administer all features of your private server,
and troubleshoot common concerns. By using this document, conduct these tasks at your
own pace, on your own, and without extensive technical support. This introduction
provides you with descriptions of how to use this document, the audience it is intended to
reach, and the product’s features.
In addition to this introduction, this document includes the following sections:
• “Configure VPS Linux”
• “Install Additional Supported Features”
• “Troubleshoot Your Private Server”
1.1
How to Use this Document
Note: Some additional, late-breaking information regarding installation, administration, and
troubleshooting tasks are included in release notes and VPS Linux-related Web content
such as frequently asked questions (FAQ). Always verify you have acquired the latest
information available prior to installing, administering, or troubleshooting your private
server.
This document provides you with an overview of Red Hat Enterprise Linux (RHEL) and
VPS Linux. This document describes the details of how to install, maintain, and
troubleshoot your private server. When applicable, the document describes these tasks by
instructing you to use product-specific commands and operations. However, not all
features of your private server use product-specific commands and operations. In those
cases, this document describes the details of how the features function and refers you to
the correct resources provided by Linux and the RHEL operating system.
1.2
Shell Prompts in Command Examples
Command line examples included in this document assume you use the Bourne-again
shell (bash). Wherever a command is able to be issued by a user, this document provides
a dollar sign ($) prompt. When a command is meant to be issued as root, this document
provides a hash mark (#).
When you follow the instructions in this document, type the double-quotes or single quotes
as displayed. The root path typically includes /bin, /abin, /usr/bin, or usr/sbin directories.
The instructions using commands from these directories show the commands in these
directories without absolute path names. Instructions which use commands in other
directories show the absolute paths in examples.
Version:
April 10 – Subject to modification
Distribution:
For external use
Sales office/Region:
VERIO Europe GmbH, Neugablonzer Str. 1, D-93073 Neutraubling
Copyright © 2006 VERIO Europe
page 5
1.3
Audience
This document provides information useful to VPS Linux account administrators located at
any of the following types of organizations:
• Hosting service provider (HSP)
• Application service provider (ASP)
• Independent software vendor (ISV)
• Value-added reseller (VAR)
• Small-sized business
• Medium-sized businesses
The instructions describe tasks assuming you have moderate knowledge and familiarity
with Linux, the RHEL, as well as some broad knowledge of Internet and Web hosting
technologies.
1.4
Overview of VPS Linux
Linux (sometimes referred to as GNU/Linux or a Linux-based GNU system) is a UNIX-like
operating system. Linux is distributed under the terms of the GNU General Public License
as published by the Free Software Foundation. Your private server utilizes RHEL, a widely
implemented corporate Linux standard. RHEL is based on open standards and is derived
from the Red Hat-sponsored and the community-supported, open source Fedora project
named. To locate more information about RHEL and the Fedora project, refer to the
following Web sites:
• http://www.redhat.com
• http://fedora.redhat.com/
The RHEL operating system provides support for GNU Compiler Collection (GCC) and the
Red Hat Package Manager (RPM). The package manager is described in the section
labeled “RPM” located on page 8 and the compiler is described in the section named
“GCC” located on page 23. As you perform configuration, administration and troubleshooting tasks, apply your previous knowledge of open-source software applications. Your
private server provides services in a way that assures the account functions as a standalone server, independent from any other account. The account supports specific
processes, applications, users, and files. Utilize root access and grant access to any ports.
The account supports multiple users and provides you with access to all logs. Data
backups, server security and software updates are updated by means of server software
updates which often do not require your intervention. Your private server is a hosting
environment which provides you with an approximation of your own virtual machine. Keep
in mind that although your private server shares remote hardware with other accounts,
your private server does not share software. Each account has its own complete directory
structure and set of dedicated applications such as Web server and mail server. Your
private server can be remotely rebooted without affecting any other accounts served by
the physical hardware. Your private server is compliant with server monitoring software
applications. Configure your private server to support multiple users with shell, Web, FTP
and/or email privileges. The RHEL operating system provides a compatible base for
operating- system level server virtualization, skel package, and copy-on-write optimization.
Version:
April 10 – Subject to modification
Distribution:
For external use
Sales office/Region:
VERIO Europe GmbH, Neugablonzer Str. 1, D-93073 Neutraubling
Copyright © 2006 VERIO Europe
page 6
Your private server also supports your access to the Linux Command Library (or manual
pages) which provides information about the full command set supported by your private
server. Manual pages also provide information about system calls, library calls, special
files, as well as file formats and conventions.
Following are examples of how to utilize the features of your private server:
•
Host an e-commerce Web site
•
Support a corporate intranet
•
Build a custom development environment
•
Provide Web-based calendaring
•
Provide multimedia applications
•
Manage an email system
•
Create a customer support tracking system
•
Backup important data
•
Host multiple Web sites
1.4.1
Operating-system Level Server Virtualization
Operating system-level server virtualization creates isolated, secure virtual environments
on a single physical server. Server virtualization enables better server utilization and
ensures applications do not conflict. Each account performs and executes as a standalone server can. Reboot your private server independently and have and assign account
root access, users, IP addresses, memory, processes, files, applications, system libraries
and configuration files.
Your private server behaves as a stand-alone Linux server. It has standard startup scripts
and software from multiple vendors can operate in the account without modification.
Change any configuration file and install additional software. The file system, the
processes, Interprocess Communication (IPC) mechanisms, and sysct1 variables are
always fully isolated from any other account. Processes which belong to your private
server are scheduled for execution on all available processing power.
Your private server includes its own IP address. The network traffic of your private server
is isolated from all other accounts. Traffic snooping is not possible. Manipulate your private
servers routing table using advanced routing features.
Resource management controls the amount of resources available to your private server.
This enables the quality of service to meet the service level agreements associated with
your private server. The operating system-level server virtualization also provides
performance and resource isolation which protects your private server from denial of
service attacks.
1.4.2
Skel Package
VERIO pre-configures each VPS Linux account with the following core services residing
on the virtual private server account:
• Web - Hypertext Transfer Protocol (HTTP) and HTTPS.
Version:
April 10 – Subject to modification
Distribution:
For external use
Sales office/Region:
VERIO Europe GmbH, Neugablonzer Str. 1, D-93073 Neutraubling
Copyright © 2006 VERIO Europe
page 7
• Email - Simple Mail Transfer Protocol (SMTP), Post Office Protocol (POP), and Internet
Message Access Protocol (IMAP).
• File Transfer Protocol (FTP)
• Shell access tools - Telnet, Secure Shell (SSH), cron
These core services are managed by the VERIO Support Staff, but can be configured by
the customer to run according to their specific needs. VERIO will provide basic
instructional support for configuring and using the core services, as well as maintaining the
system functionality of these services free of charge. VERIO reserves the right to adjust
VPS resources as required to preserve an optimal operating environment for all VPS
customers.
By default your new VPS Linux account is pre-configured as a Web and email server. Your
account begins as a copy-on-write (COW) image of a VERIO-tested, basic RHEL
installation. However, you can configure your VPS Linux account to provide additional
services
1.4.3
Copy-on-Write
VPS Linux technology utilizes a COW file system. The system is based on a COW image
of a VERIO-tested, basic RHEL installation. Even as you and system administrators
update and customize the account, your account continues to use central files maintained
by VERIO. This ensures that your account has relatively unfettered access to as many
system resources such as Random Access Memory (RAM). Over time, files which are
unique to your own account and configuration might grow in size to suit your needs.
However, nearly all of the files which ensure clean, speedy operations for your account will
not do so. Further, VERIO system administrators will continue to easily and quickly
manage updates to core services.
1.4.4
RPM
Your private server supports RPM, an open packaging system for Linux and UNIX
systems distributed under the terms of the GPL. The package maintains a database of
installed packages and their files. This enables you to maintain and upgrade your private
server configurations and customizations with minimal risk of losing them as you do so.
Version:
April 10 – Subject to modification
Distribution:
For external use
Sales office/Region:
VERIO Europe GmbH, Neugablonzer Str. 1, D-93073 Neutraubling
Copyright © 2006 VERIO Europe
page 8
2
Configure VPS Linux
Begin by verifying you have stored your own, local copy of the files which are essential to
your Web site. For example, if you have essential content and graphics. Save them in so
that they are accessible even when you are unable access to your private server. Do this
prior to following any of the subsequent instructions.
As you begin to configure your private server, consider the processing power, memory and
disk space available on your local system. Since your private server has sufficient
resources and has exclusive access to those resources, the account itself meets the
requirements of operating a virtual host.
The following are basic, network requirements for operating your private server:
• Local Area Network (LAN).
• Internet connection.
• Valid IP addresses.
• IP addresses are open for access from the outside if firewall applications and hardware
apply.
In addition, verify your system has a local copy of an applicable RPM.
The instructions included in the following sections describe the tasks which enable you to
complete the initial configuration of your private server:
• “Custom Installation Archive Tool” on page 9.
• “Connect to Your Private Server the First Time” on page 10.
• “Access Your Private Server” on page 11.
• “Create a Virtual Host” on page 11.
• “CGI Binary Access” on page 12.
• “Creating and Editing User Accounts” on page 12.
• “Configure Virtual Sub Hosts” on page 13.
• “CGI Scripts and Security Issues” on page 14.
• “Verify Core Services” on page 15.
• “Verify Resources” on page 15.
2.1
Custom Installation Archive Tool
Note: You are not required to provide a custom installation archive when you order a new
account. Accounts you provision without specifying a path to an archive file receive the
default product configuration. Use the Custom Installation Archive Tool to customize new
accounts only. You must customize any existing account by running your scripts manually.
If you market VPS Linux accounts to others, the Custom Installation Archive tool enables
you to automatically customize new accounts with a specific, customized configuration.
Access the updated Custom Installation Archive Tool by means of a field located account
order pages.
Follow these steps to use the custom archive functionality:
Version:
April 10 – Subject to modification
Distribution:
For external use
Sales office/Region:
VERIO Europe GmbH, Neugablonzer Str. 1, D-93073 Neutraubling
Copyright © 2006 VERIO Europe
page 9
1. Create script(s) to perform your desired customizations. For example, to specify a
time zone or to install an application.
2. Create an archive file, which contains your customization script(s). Verify that your
archive file matches the directory structure of the platform to which is copied. The
supported archive formats include .zip, .gzip, and .tar.
3. Upload the archive file(s) to any server which is publicly accessible by means of
HTTP or FTP.
4. Go to the Add Product portion of the order pages. When you reach the Product
Details page in, enter the exact URL of the custom archive that you wish to use into
the URL of Custom Installation Archive field. (For example:
http://www.example.net/vir_setup.tar)
5. When provisioning a new account is complete, the Custom Installation Archive Tool
automatically unpacks and runs your customization script(s). You receive an email
notification when your private server customization is complete.
2.2
Connect to Your Private Server the First Time
When you ordered your private server, you provided a username and password for your
administrative user account. This account is the one you will use to connect to your private
server to perform administrative tasks.
Your administrative user is the primary user for managing your Account, and has email
and FTP permissions, as well as the ability to manage virtual user accounts, as well as
managing FTP, Web, and email configuration. In addition, the administrative user is a
member of the wheel group, which means that the administrative user can use the su
command to become the root user.
When you connect to your private server to perform administrative tasks, always connect
using a secure protocol (such as SSH, SFTP, or SCP). Avoid connecting to your private
server directly as the root user, and never use an insecure protocol when doing so. A
successful login places you in the User Home Directory. Only the User's files and
directories are accessible here. To access the main server directories you will need to
change your current directory to the Server Directory.
Keep in mind that the user root is the primary administrative user on your private server.
To modify many system files, including adding or modifying users, you must be root.
Because root is such an important user with so much power, you should be especially
careful about selecting a root password and maintaining its security. Only after you
configure SSH keys are you able to connect directly to your private server as the user root.
Until then, any user who belongs to the wheel group, such as the Administrative User that
was created when your private server was provisioned, can SSH to the server and then
use the su command to become root. Never use an insecure protocol such as Telnet for
administrative tasks. If you do, any non-encrypted data could be sniffed by malicious
hackers. Because the root user should only be used for administrative purposes, root does
not have email or Web permissions.
Version:
April 10 – Subject to modification
Distribution:
For external use
Sales office/Region:
VERIO Europe GmbH, Neugablonzer Str. 1, D-93073 Neutraubling
Copyright © 2006 VERIO Europe
page 10
All users with shell access are able to login in as a substitute user (or su). This enables
authorized users to become the root user, or it enables the root user to become another
user. Once you become root, however, use the su command to become another user on
the server without requiring a password.
2.3
Access Your Private Server
Shell provides a powerful tool for your private server administration tasks. Using an SSH
(Secure Shell) client, connect and log in to your private server from anywhere in the world.
You have SSH access to your private server. Your private server benefits from a security
hardened environment which ensures that your data is not compromised. Using SSH, log
into a remote machine such as your private server and provide secure, encrypted
communications between your private server and your local computer. Because SSH
provides complete shell capability over a secure channel, it is the useful tool for managing
your private server. While SSH is preferable to Telnet, most operating systems include a
Telnet client. Shell also includes a built-in Telnet client program. Once you have
determined a SSH client, connecting to your private server requires you to specify a
remote host. Your remote host is your private server, so you would specify your domain
name (or your temporary domain, if applicable) or IP addresses. At some point, you are
prompted for your login name and login password. You specified both your login name and
login password when you ordered your private server. After the login process is
successful, you will have gained access to your private server and can now issue
commands at the command prompt.
Follow these steps to access your private server by means of SSH:
1. Log into your private server by means of Secure Shell (SSH). For example, SSH to
a server named example.example.net by issuing the address, as follows: ssh
[email protected]
2. Once you have accessed the server, show existing accounts by issuing the
following command: vlist -a
3. Use an Internet browser to access Web sites provisioned on the account, as
follows: http://example.example.net
2.4
Create a Virtual Host
The vaddhost utility is an interactive, command-line program that automates the process of
configuring virtual sub hosts. After launching vaddhost, it will ask you several questions
about the configuration of your virtual sub host and provide you with default responses. As
you answer each question, vaddhost will display the Virtual Host definition with each new
piece of information.
Once you have responded to all questions, vaddhost will create necessary directories, add
the virtual host entry to your main Web server configuration file (/www/conf/httpd.conf), and
create a backup of your old /www/conf/httpd.conf file in your /www/conf directory. Remove
these backup files at your discretion.
Note: If your Web server configuration file (/www/conf/httpd.conf) does not already have
the NameVirtualHost directive, you will need to add it before adding any virtual sub hosts.
Version:
April 10 – Subject to modification
Distribution:
For external use
Sales office/Region:
VERIO Europe GmbH, Neugablonzer Str. 1, D-93073 Neutraubling
Copyright © 2006 VERIO Europe
page 11
To issue the vaddhost command, connect to your private server by means of SSH () and
do the following.
1. Issue the vaddhost command.
2. Specify one or more domain names for each virtual sub host definition. Typically,
Virtual Host Names will at the very least include www.SUBHOST-DOMAIN.NAME
and SUBHOST-DOMAIN.NAME.
3. Enter the administrative email address for the virtual sub host. This identifies the
person responsible for the virtual sub host Web site. If the email address you
specify is an email user account, issue the vadduser command to add the email
account separately.
2.5
CGI Binary Access
It is important to understand the virtual sub hosting security issues involved when giving
CGI binary access to your virtual sub host customers. Giving your virtual sub host
customers CGIbinary access is a potential security risk. The CGI binaries your customers
upload and execute have all of the rights and privileges of the CGI binaries you execute.
Therefore, it is possible for a virtual sub host customer who has been granted CGI
privileges to read or remove any file in your directory hierarchy. Moreover, it is possible for
a malicious virtual sub host customer to crack weak passwords and gain shell access to
your private server. Enter the document root, where the virtual sub host’s Web content will
reside. The value of the document root is defined with respect to the Account home
directory, so you need not preface your definition with /usr/home/USERNAME. For example, a
valid path for a document root might be /home/USER/www/SUBHOST-DOMAIN.NAME. The default
value for the document root directory is located in your /usr/local/etc/httpd/vhosts
directory. Specify separate transfer and error log files for each virtual sub host. This is an
optional feature. If you do not wish to store separate log files for the virtual sub host, the
transfer and error log information is stored in the Web server's master log files. If you do
wish to store separate transfer and error log files, vaddhost will provide you with several
options based on the input you provided for the virtual sub host document root.
Configure a CGI-binary directory for your virtual sub host. This is an optional feature. The
ScriptAlias directive defines where CGI scripts are stored for the virtual sub host.
2.6
Creating and Editing User Accounts
Your private server enables you to create new users by manually editing the files that
contain user information. To make the task easier, your private server supports commands
which guide you through the process.
The vadduser command is a standard command with which to add user accounts. If you
are not familiar with the command, however, it can be confusing. For more information on
the command, refer to the manual pages.
To issue the vadduser command, connect to your private server by means of SSH and then
type vadduser at the command prompt. The on screen instructions prompt you for the
required information.
Version:
April 10 – Subject to modification
Distribution:
For external use
Sales office/Region:
VERIO Europe GmbH, Neugablonzer Str. 1, D-93073 Neutraubling
Copyright © 2006 VERIO Europe
page 12
The vedituser command is a custom script that modifies an existing user account. You are
prompted to modify the user information, including permissions and quota. There are also
several other tools that exist which you want to become familiar with. For more information
about other tools, refer to the relevant manual pages.
•
pw - The pw command has numerous features that allow you to modify user
information.
•
quota
•
edquota
•
passwd
- View user quotas
- Modify disk space and file number quotas for users.
- Change a user password.
Because user account information is stored in several locations, including in compressed
databases, it is important to use the tools listed above, rather than attempting to modify
account information by editing the files directly. When a user account is no longer needed,
remove the account using the rmuser command. This gives you the option to keep or
remove the home directory as well. Do not use this command to disable a user who you
intend to re-establish at a later time. In those cases, it is better to change the password or
to disable a user’s privileges.
User information is stored in several different files on your private server. First, the
/etc/passwd file contains a list of user names, along with some account information. The
following is a sample entry for the user test:
test:*:1001:1001:Test User Account:/home/test:/usr/local/bin/tcsh
The entry contains seven fields in a colon (:) delimited list. The first field is the username,
followed by an asterisk (*), which represents the password. As a security measure,
passwords are not actually stored in the /etc/passwd file, so you see an asterisk instead.
Next are two numbers, the User ID number and the Group ID number. These are used by
the account to track file access and ownership rights. After the numbers, the real name or
a description of the user account, followed by the user's home directory, and finally the
shell they are allowed to use.
User passwords are stored in an encrypted format in the /etc/shadow file. This file is similar
to the passwd file, although there are a few extra fields that the system uses. Additional
user information is stored in files such as /etc/group and /aquota.user. Administrators can
view users and user quota information. The vlistuser command displays a list of all the
user accounts (excluding the system users). The following is an example of the output of
the vlistuser command.
UserName FullNameHome DirectoryQuotas
-------- ------------------------------- ------------------------- -----admin Administrative User /home/admin 47/0k
nobodyUnprivileged User /nonexistent 2036/0k
test Toast /home/testexampley 0/10240k
-------------------------------------------------------------------------Totals: 2083/10240k
2.7
Configure Virtual Sub Hosts
Virtual sub hosting is one of the most powerful features of your private server and the
Apache HTTP Server. This feature enables you to support multiple domain names that
Version:
April 10 – Subject to modification
Distribution:
For external use
Sales office/Region:
VERIO Europe GmbH, Neugablonzer Str. 1, D-93073 Neutraubling
Copyright © 2006 VERIO Europe
page 13
each resolve to their own unique subdirectories on a single Account. You can host
example1.com and example2.com on the same account, each with its own domain name
and unique site content.
Provide each virtual sub host customer their own unique FTP login with access to their
own subdirectory and email addresses using their own domain name. For performance
reasons, you must adhere to guidelines with regard to the number of virtual sub hosts you
should place on a single account. Keep in mind that these guidelines are suggested so
that the performance of your own account and virtual sub host domains are not
compromised. Here are guidelines to follow:
•
VPS Linux Basic -- Approximately 5 low volume sub hosts
•
VPS Linux Pro -- Approximately 25 low volume sub hosts
•
VPS Linux Pro Plus -- Approximately 50 low volume sub hosts
2.8
CGI Scripts and Security Issues
It is important to consider some of the security issues that relate to virtual sub hosting. In
most cases it is likely that not only are you providing your clients with hosting service, but
you are also designing their Web content and writing their CGI scripts as well.
Because the virtual sub hosts operate in the same account environment, CGI scripts that
are executed by any virtual sub host will inherit privileges to access any directory or file in
your private server directory hierarchy. For example, a malicious virtual subhosted client
could write a simple script to remove all of the files on your private server. Another script
could send the contents of your /etc/passwd file to a remote email address where weak
passwords could be decrypted. If your login password is susceptible to a dictionary crack,
a subhosted client could effectively steal shell access away from you.
Do not offer full CGI-binary access to your virtual subhosted users unless you have
complete trust in them (even then, they can accidentally cause damage to your private
server). Most Web sites do not demand a great deal of custom CGI programming. It is
likely that you could provide a library of pre-made CGI scripts which your subhosted clients
could then use. A sample composition of such a library can include: a counter, a
guestbook, and a generic form processor. You would store these scripts in a subdirectory
of your CGI-binary directory. You would then configure each of your virtual sub hosts to
use this cgi-bin directory by adding the following lines to their virtual host definition:
ScriptAlias /cgi-bin/ /usr/local/etc/httpd/cgi-bin/sub-lib/
Another alternative is to provide your subhosted clients with a CGI-binary that is not a
subdirectory in their home directory. This would prohibit them from uploading and
executing any arbitrary script. Instead, the subhosted client would email you the script, you
would review it, and then install it into their CGI-binary directory (which can be configured
to be a subdirectory of your main CGI-binary directory). An example is shown below:
ScriptAlias /cgi-bin/ /usr/local/etc/httpd/cgi-bin/SUBDIRECTORY/
In this case, SUBDIRECTORY becomes the CGI-binary directory for a specific subhosted
client (use the same subdirectory name for both the /www/vhosts and /www/cgi-bin to keep
them organized).
Version:
April 10 – Subject to modification
Distribution:
For external use
Sales office/Region:
VERIO Europe GmbH, Neugablonzer Str. 1, D-93073 Neutraubling
Copyright © 2006 VERIO Europe
page 14
2.9
Verify Core Services
Verify SMTP, POP3, IMAP, FTP, and Web operations, as follows:
•
SMTP -- Send multiple emails to [email protected].
•
POP3 -- Configure your mail client and POP some mail from user1.
•
IMAP -- Reconfigure your mail client and use IMAP to read mail from user2.
•
FTP – Use your preferred FTP client to connect to your private server. Verify the
following files:
•
ftp example.example.net
put index.html
put example.img
put whatever.rpm
•
2.10
Web -- Browse to http://example.example.net.
Verify Resources
Access information about the following aspects of the resources available on your private
server:
•
Disk -- Open file descriptors limit (numfile), maximum number of file locks (numflock),
disk space quota (quota)
•
CPU -- Maximum number of processes (numproc)
•
Memory -- Maximum usable virtual memory (privvmpages), maximum number of
locked pages (lockedpages)
Version:
April 10 – Subject to modification
Distribution:
For external use
Sales office/Region:
VERIO Europe GmbH, Neugablonzer Str. 1, D-93073 Neutraubling
Copyright © 2006 VERIO Europe
page 15
3
Install Additional Supported Features
Important: New services may require activation. When you install a service, your private
server does not automatically activate or start it. To configure a new service to issue on
first start, use the chkconfig and service command-line utilities.
3.1
Accrisoft Freedom
Accrisoft Freedom (also referred to as Accrisoft RBT) provides you with a suite of tools to
build and manage your Web sites. The Accrisoft suite is available as a fee-based,
additional feature for your account. Once you purchase the suite and verify the installation,
refer to Web based information, documentation, and instructions provided with the
purchase of the suite for more information.
3.2
Apache HTTP Server
As a core service, your private server supports the Apache Hypertext Transfer Protocol
(HTTP) Server open-source software distributed by the Apache Software Foundation
(http://www.apache.org/), under the terms of the Apache License. Apache HTTP Server
maintains ongoing compliance with the HTTP standard which provides an application-level
protocol for distributed, collaborative, hypermedia information systems.
Note: Apache HTTP server provides one part of the Linux, Apache, MySQL, and
PHP/Perl/Python (LAMP) open source enterprise software stack.
3.3
Apache Dynamic Modules
Apache Modules are code segments that are written to comply with the Apache API
specification and can be loaded into the Apache Web Server. Apache modules can be
loaded in the following ways:
• Statically loaded in the compiled httpd daemon
• Dynamically loaded in the Web server configuration file
This modular design for adding Web server features gives Web administrators and
developers tremendous power and flexibility. A wide variety of Apache modules have been
created supporting all kinds of exciting Web server features. Web server speed and
efficiency is improved when using Apache modules since your Web server can internally
process instruction sets rather than relying on external applications.
Dynamic module support is one of the key features of the Apache Web Server. The ability
to dynamically load modules is known as DSO support. DSO allows you to extend the
features and capabilities of Apache by adding the specific module you need, when you
need it, without recompiling the Web server binary.
Version:
April 10 – Subject to modification
Distribution:
For external use
Sales office/Region:
VERIO Europe GmbH, Neugablonzer Str. 1, D-93073 Neutraubling
Copyright © 2006 VERIO Europe
page 16
Note: If you try to load all the modules at the same time you will probably get a resource
error. Simply load the modules you need one at a time. A few notable apache modules you
may want to use include the following.
• mod_perl
• mod_php
• mod_dav
• mod_gzip
• mod_negotiation
• mod_ruby
• mod_python
• mod_gzip
• mod_fastcgi
• mod_auth_mysql
• mod_auth_postgresql
There are a number of pre-compiled Apache modules for your use. You can load any of
these modules in your Apache configuration file by removing the comment for the
appropriate line in your httpd.conf file and running restart_apache.
#LoadModule
#LoadModule
#LoadModule
#LoadModule
#LoadModule
#LoadModule
#LoadModule
#LoadModule
#LoadModule
#LoadModule
#LoadModule
#LoadModule
#LoadModule
#LoadModule
#LoadModule
#LoadModule
#LoadModule
#LoadModule
#LoadModule
#LoadModule
#LoadModule
#LoadModule
#LoadModule
#LoadModule
3.4
mmap_static_module libexec/mod_mmap_static.so
vhost_alias_module libexec/mod_vhost_alias.so
mime_magic_module libexec/mod_mime_magic.so
negotiation_module libexec/mod_negotiation.so
status_module libexec/mod_status.so
info_modulelibexec/mod_info.so
asis_modulelibexec/mod_asis.so
speling_module libexec/mod_speling.so
rewrite_module libexec/mod_rewrite.so
anon_auth_module libexec/mod_auth_anon.so
db_auth_module libexec/mod_auth_db.so
digest_module libexec/mod_digest.so
proxy_module libexec/libproxy.so
cern_meta_module libexec/mod_cern_meta.so
expires_module libexec/mod_expires.so
headers_module libexec/mod_headers.so
usertrack_module libexec/mod_usertrack.so
perl_modulelibexec/mod_perl.so
gzip_modulelibexec/mod_gzip.so
dav_module libexec/mod_dav.so
fastcgi_module libexec/mod_fastcgi.so
auth_mysql_module libexec/mod_auth_mysql.so
auth_pgsql_module libexec/mod_auth_pgsql.so
php4_modulelibexec/mod_php4.so
ClamAV
Your private server supports Clam Antivirus (or ClamAV), a free, open-source virus
scanner distributed by the ClamAV Team (http://www.clamav.net/), under the terms of the
GPL.
Note: Do not use ClamAV to replace antivirus software on your local computer system.
ClamAV is designed to supplement such programs and provide additional safeguards. It
does not provide the antivirus capabilities such as protection from Web based or TCP/IPbased attacks. Only a local antivirus program installed to your computer system provides
sufficient protection.
Version:
April 10 – Subject to modification
Distribution:
For external use
Sales office/Region:
VERIO Europe GmbH, Neugablonzer Str. 1, D-93073 Neutraubling
Copyright © 2006 VERIO Europe
page 17
If you do not have Procmail installed on your private server, the ClamAV installation script
will install it and configure it as your local delivery agent (LDA). If you already have
Procmail installed and have your own recipes in use, check your /etc/procmailrc directory
to see that the ClamAV configurations are in the proper order. When ClamAV is installed,
a table of utilities configured to operate in the background at regular intervals (or crontab)
is added to the system to update your virus database twice daily using ClamAV’s
Freshclam program.
For more documentation of ClamAV, consult the clamscan, clamd, freshclam, and clamav.conf
manual pages. Find documentation on the ClamAV Web site (http://www.clamav.net/).
3.5
CPX: Control Panel
The CPX: Control Panel provides an intuitive Web interface to administer your private
server. The interface enables you to perform user and domain management tasks. It also
provides a Web-based email interface and mail management modules and empowers
virtual sub hosting on your private server. CPX enables you to create domain
administrators with user management control. This enables each sub host and its
respective end users the ability to configure and control their own accounts. CPX includes
the following modules:
•
File Management
•
Webmail
•
User Management
•
Domain Management
•
•
-- This module enables you to navigate through directories, view and
edit text files, download and upload files, create or delete files and directories,
rename or move files and directories, and view and edit permissions.
– An email management interface to read, store and compose email,
manage folders, apply spam filters, store contact information, and manage
automated replies (Autoreply).
-- The user management module enables you to add or delete
users, manage domain admin accounts, and view the status of user accounts.
-- Manage your domains easily with the ability to add or delete
sub hosts, specify limits on the number of users and email accounts, manage logs,
and specify catchall email rules.
Mail Management -- This module provides the management of email to add or delete
email aliases, edit account settings, or even configure broadcast lists.
Profile and Preferences
-- Customize your settings to your personal preferences.
Change your password, shell, and the date/time display for your private server.
Note: Due to the high number of possible account configurations or modifications, there is
no guarantee that CPX will perform reliably on previously configured accounts. CPX is
designed and tested for new server configurations and a small number of existing
configurations.
The CPX installation utility (vinstall) makes the following changes to your private server:
•
Upgrade of Perl.
•
Installation of mod_perl and mod_rewrite.
Version:
April 10 – Subject to modification
Distribution:
For external use
Sales office/Region:
VERIO Europe GmbH, Neugablonzer Str. 1, D-93073 Neutraubling
Copyright © 2006 VERIO Europe
page 18
•
Installation the Control Panel handler for mod_perl.
•
Installation of ClamAV, SpamAssassin, and Procmail (configured as the sendmail
local delivery agent).
•
Modification existing ClamAV and SpamAssassin installations.
•
Install Savelogs (or upgrade if previously installed).
•
Initiation of the Control Panel daemon vsapd.
•
Creation of virtusertable entries for existing mail users, as well as addition of
default catchalls for all domains (as found in /etc/mail/local-host-names).
Follow these steps to install CPX on your private server.
1. Connect to your private server by means of SSH and issue this command:
# vinstall cpx
1. Access
CPX
by
going
DOMAIN.NAME/ControlPanel/
to
the
following
URL:
https://YOUR-
You control whether virtual users are enabled to use the Webmail and Profile/Preferences
features of CPX. Add new users by using the CPX: Control Panel or by command line
issuing the following command:
# vadduser --cpx
3.6
Dovecot
Your private server supports Dovecot, an open-source IMAP server. The server is
distributed by the Dovecot organization (http://www.dovecot.org/) under the terms of a
Massachusetts Institute of Technology (MIT) license as well as the GPL. The MIT license
(also referred to as an X License or an X11 License) enables developers to reuse the
IMAP server for proprietary as well as open source software environments. (For more
information, refer to the Dovecot Organization Web site.)
3.7
Email List Package
Automate the management of Internet email lists on your private server by installing and
utilizing Majordomo, FML, or Mailman.
3.7.1
Majordomo
Note: Majordomo is best configured by administrators with advanced skills who carefully
research the software capabilities before installing the feature.
Majordomo is community-supported software you use to automate the management of
Internet email lists. The software is written in Perl and is compatible with the current, stable
version of the language. Correct operations of the software on your private server are
dependent upon the versions of Majordomo, Perl, operating system software, as well as
the email software (such as Sendmail) and the versions you are operating. Great Circle
Version:
April 10 – Subject to modification
Distribution:
For external use
Sales office/Region:
VERIO Europe GmbH, Neugablonzer Str. 1, D-93073 Neutraubling
Copyright © 2006 VERIO Europe
page 19
Associates (http://www.greatcircle.com/majordomo/) distributes the free software but offers
no technical support.
3.7.2
FML
Your private server supports FML, an open-source mailing list driver maintained by
Ken’ichi Fukamachi (http://www.fml.org/index.html.en). The driver is available for free
under the terms of the GPL. FML requires one mail server software program such as
sendmail, postfix, qmail, exim, or zmailer, as well as Perl to operate.
The Simple Mail Transfer Protocol authentication extension (SMTP AUTH), is the
preferred and standard method for managing email relay since it overcomes many of the
short-comings of POP before SMTP. With SMTP AUTH, email client software like Outlook,
Eudora, Pine, etc. can be configured to send a user ID and password to the account
during the course of mail delivery.
3.7.3
Mailman
Your private server supports Mailman, free software, distributed under the GNU General
Public License. Mailman is written in the Python programming language the versions of the
software and the programming language must both be stable, current versions installed on
your private server.
3.8
Email Service
As a core service, your private server supports mail services by means of the Simple Mail
Transfer Protocol (SMTP), Post Office Protocol (POP or POP3), and Internet Message
Access Protocol (IMAP or, more precisely, IMAP4).
•
SMTP provides a standard method to send email messages between servers.
•
POP provides a standard method to retrieve email from a mail server.
•
IMAP provides a standard method of accessing electronic mail or bulletin board
messages kept on a shared mail server.
These standards are maintained and updated as Internet industry standards by the
Internet Engineering Task Force (http://www.ietf.org/).
3.9
Firewall
Your server includes the default, basic software firewall supported by RHEL. The firewall is
enabled by default and firewall rule set is empty. You can configure the firewall by editing
the IP table and configuration file through the command line of your account. The default
implementation of RHEL software firewall is enabled unless you disable the feature. The
firewall enables you to specify the following services to pass through the firewall:
•
FTP
•
HTTPS
•
IMAP
Version:
April 10 – Subject to modification
Distribution:
For external use
Sales office/Region:
VERIO Europe GmbH, Neugablonzer Str. 1, D-93073 Neutraubling
Copyright © 2006 VERIO Europe
page 20
•
SSH
•
Telnet
•
WWW (HTTP)
There is no additional charge for the default, basic software firewall. If you experience
server performance issues and you determine that the firewall is the cause, you can
contact customer support to request a firewall reset.
Note: If you are a reseller for the VPS Linux platform or an administrator with full root
access to a server, firewall features include the following, additional functions:
•
3.10
Distribute of a standard firewall configuration for new accounts by using the CArchive tools available.
FormMail
FormMail is a CGI program designed to generate email based on the input from an HTML
form.
3.10.1 Installing FormMail
To install the FormMail CGI on your server, connect to your server via SSH, su to root, and
run the following command:
# vinstall formmail
This command installs three files, FormMail.pl, FormMail.examples and FormMail.readme,
into your /www/cgi-bin directory. The examples and readme files contain various
information and examples on using FormMail. Set up the script to use your account
information. Open the file FormMail.pl file and modify the following lines in the user
configuration section.
•
Find the @referers line and replace the information inside the parentheses with your
own server's domain name(s) and IP address. You can leave the localhost value.
•
In the @allow_mail_to line, remove the original email addresses and put either the
domain, or a full email address for every account that should be allowed to receive
email messages from this form. For security reasons, unless you have a large
number of email accounts at a single domain, it is better to list the full address for
each recipient.
Once you have modified these two fields, save the file.
3.10.2 Using FormMail
Create a form that you would like the contents mailed to some address. The form should
include the following field (at the very least):
•
recipient -- specifies who mail is sent to
Other optional fields can also be used to enhance the operation of FormMail for you site,
for example:
Version:
April 10 – Subject to modification
Distribution:
For external use
Sales office/Region:
VERIO Europe GmbH, Neugablonzer Str. 1, D-93073 Neutraubling
Copyright © 2006 VERIO Europe
page 21
•
subject -- specify the subject included in email sent back to you.
•
email -- allow the user to specify a return email address.
•
realname -- allow the user to input their real name.
•
redirect -- URL of page to redirect to instead of echoing form input.
•
required -- list of field names that are required input (comma delimited).
Several other fields are supported. See the FormMail.readme file for a complete
presentation of the supported fields. The following is an example of HTML source markup:
<form method="POST" action="/cgi-bin/formmail.pl">
<input type="hidden" name="recipient"
value="[email protected]">
<input type="hidden" name="subject"
value="Order Request">
<input type="hidden" name="required"
value="realname,email,phone">
Please Enter Your Name:<br>
<input name="realname" size="40">
<p>
Please Enter Your Email Address:<br>
<input name="email" size="40">
<p>
Please Enter Your Phone Number:<br>
<input name="phone" size="40">
<p>
.
.
.
<input type="submit" value="Submit">
<input type="reset" value="Reset">
</form>
Once your form is complete, you should be able to send email messages using it
3.11
FTP
File Transfer Protocol (FTP) enables you to copy files from one computer to another. As a
core service, your private server supports ProFTPD with the Transport Layer Security
(TLS) protocol as well as anonymous configuration for unlimited users. The software
provides secure and configurable FTP and is distributed by the ProFTPD Project
(http://www.proftpd.org) and is available for free under the terms of the GNU General
Public License (GPL). As you configure ProFTPD, you must implement only the
application features supported by the current release.
To use FTP to transfer files between your private server and your own local computer
system, you must have an FTP client (or program) installed on your local computer
system. For your private server, configure ProFTPD to suit your use of the software. The
ProFTPD configuration file is located at the following location:
/etc/proftpd.conf
Use an online file editor or transfer the file to your local computer system to make any
configuration changes. ProFTPD runs as a daemon on your private server. The software
reads its configuration file each time a process is spawned. Be certain you download and
upload the /etc/proftpd.conf file in ASCII mode if you use FTP. To use anonymous FTP,
Version:
April 10 – Subject to modification
Distribution:
For external use
Sales office/Region:
VERIO Europe GmbH, Neugablonzer Str. 1, D-93073 Neutraubling
Copyright © 2006 VERIO Europe
page 22
the user ftp must exist with FTP privileges on your private server. This user is configured
by default in your /etc/passwd file, but removing or modifying this user could prevent
anonymous FTP from functioning on your private server.
3.12
GCC
Your private server supports the current, stable, and compatible GNU Compiler Collection
(GCC). The collection is distributed by the GCC Team (http://gcc.gnu.org/) and is available
for free under the terms of the GPL. As you configure GCC, you must implement only the
application features supported by the current release. For example, the future upgrades to
the collection must support the RPM your private server utilizes.
3.13
Java
Java technology, created and distributed by Sun Microsystems, offers many benefits to
Internet and application programmers. The vinstall utilities library includes the following
Java applications:
•
Java SE Development Kit (JDK)
•
Java Runtime Environment (JRE)
•
Java Sun Developer Kit (SDK)
Note: Many Java applications consume significant CPU and memory resources and may
not be appropriate for use on a VPS. Java applications on a VPS should be restricted for
use only on Web sites with a low expected workload. In addition, some larger Java
applications may not be suitable for use on a VPS even with low workloads. You must
conduct sufficient performance testing of your Java application on a VPS Linux account
before you rely on the IT for critical business needs. You must build contingency plans in
case your Java application does not perform as expected; alternative solutions may
include:
•
Extensive optimization of the Java application
•
Moving the Java application to a dedicated server
•
Implementing an alternative solution to using Java. For example, if you move away
from Java to an optimized C program.
For further details of VPS Linux plan resource allocations and recommended usage,
please refer to the VPS Linux Technical Overview.
3.14
MySQL
Your private server supports the current, stable release of MySQL, an open source
database server and tool distributed under the terms of the GPL.
Note: MySQL provides one part of the Linux, Apache, MySQL, and PHP/Perl/Python
(LAMP) open source enterprise software stack.
Version:
April 10 – Subject to modification
Distribution:
For external use
Sales office/Region:
VERIO Europe GmbH, Neugablonzer Str. 1, D-93073 Neutraubling
Copyright © 2006 VERIO Europe
page 23
To use the MySQL client, connect to your private server by means of SSH and issue the
following command:
% /usr/local/mysql/bin/mysql -u root
This command will start the MySQL client as the root user. Add more users by following
the directions in the MySQL Reference Manual or another, reliable MySQL resource. To
make starting MySQL easier, create a file with all your start-up options instead of having to
type in all the different flags at the command prompt. To do this, create a file in your /etc/
directory named my.cnf. The contents of the file would appear as follows if you wanted
MySQL to report error messages in Japanese:
[mysqld]
language = japanese
default-character-set = ujis
Access manual pages by typing the following during an SSH session with your private
server:
% man mysql
For more information, refer
(http://dev.mysql.com/doc/).
3.15
to
the
MySQL
Developer
Zone
Web
site
phpMyAdmin
Your server supports phpMyAdmin, a PHP software package which enables you to
administer of MySQL over the Web. PhpMyAdmin is distributed by the PhpMyAdmin
Project (http://www.phpmyadmin.net/home_page/index.php) under the terms of the GNU
General Public License (GPL). You can install and uninstall the software package using
custom installation scripts. Once the package is installed, your server receives automatic
updates which do not require your intervention.
3.16
Namazu
Your private server supports Namazu, an open-source, full-text search engine maintained
by the Namazu Project (http://www.namazu.org/). The software is available for free under
the terms of the GPL.
3.17
osCommerce
osCommerce provides online shopping cart functionality. The software is available for free
under GPL and utilizes the PHP Web scripting language, Apache HTTP server, and the
MySQL database server. There are no special requirements to operate on any PHP 4.1.x
enabled Web server running on the RHEL operating system, as well as other operating
systems.
Install osCommerce on any server where a Web server with PHP is installed on and has
access to a MySQL database server. The software runs on most server-specific
configurations ranging from dedicated servers to shared servers that utilize different PHP
configurations such as register_globals and safe_mode restrictions.
Version:
April 10 – Subject to modification
Distribution:
For external use
Sales office/Region:
VERIO Europe GmbH, Neugablonzer Str. 1, D-93073 Neutraubling
Copyright © 2006 VERIO Europe
page 24
3.17.1 Before You Install the Application
You do not start osCommerce by clicking on an executable file as you might with other
applications. It is a Web-based application for which you must copy relevant files to your
Web server. Extract the osCommerce download package locally and copying the files and
directories to the server by means of SCP, or by copying the download package to the
server and extracting the package there. osCommerce provides one set of files, regardless
of which operating system your private server is using. Perform one of the following types
of installations:
•
FTP/SCP
•
Direct Server Access
Whether you acquire the application by SCP or by direct server access, a directory named
catalog exists inside the oscommerce-x directory created by extracting the application
download package (where x is the application version number).
Follow these to steps to acquire the application by means of SCP:
1. Download the osCommerce release package.
2. Extract the package to a temporary directory.
3. Connect to the Web server with an SCP client.
4. Copy the catalog directory to the Web server document path.
Follow these steps to acquire the application by means of direct server access:
1. Save the osCommerce release package on the server.
2. Extract the package to a temporary directory.
3. Copy the catalog directory to the Web server document path.
3.17.2 Web Server Document Path
The Web server document path is the directory where the Web server is configured to look
for the HTML/PHP files to serve to the public. Example Web server document paths are:
/home/hpdl/public_html/
/srv/www/htdocs/
/usr/local/htdocs/
If the catalog directory is kept and copied to, for example, /home/hpdl/public_html/catalog/,
the Web server public address would be http://www.my-server.com/catalog/. If the
osCommerce installation is to reside on the root path, for example
http://www.myserver.com/, then the files within the catalog directory is copied over and not
the actual catalog directory itself.
3.17.3 Username/Password and Database
Using phpMyAdmin or another tool, create your database and user, and assign that user
to the database. Avoid writing down the name of the database, login, and password for this
Version:
April 10 – Subject to modification
Distribution:
For external use
Sales office/Region:
VERIO Europe GmbH, Neugablonzer Str. 1, D-93073 Neutraubling
Copyright © 2006 VERIO Europe
page 25
database for later. Also note the hostname of the server (such as myserver.com) for later
use.
3.17.4 Change File Permissions
The permission on the catalog/includes/configure.php file needs specify the value 777 by
logging into your root server and running chmod 777 configure.php. If you do not have
access to the root of your private server, use an FTP program such as www.smartftp.com.
When using an FTP program to change the permissions navigate to that specific file, rightclick on the file, and a chmod (or change attributes) listing which is where the permissions
would be changed to 777 for the catalog/includes/configure.php files ... 777 =
read/write/execute. If these permissions are not specified correctly you receive an error
indicating the permission setting on catalog/includes/configure.php is incorrect.
3.17.5 Install the Application
The Web-based configuration procedure enables you to configure osCommerce by
providing default configuration parameter values for beginning users, and enables each
configuration parameter to be modified by the advanced users.
The configuration parameter values that are provided by default are gathered from
environment variables specified on the server, and differs for each server osCommerce is
installed on.
3.17.6 Start the Web-based Configuration Procedure
The Web-based configuration procedure is started in a Web browser, by going to:
http://www.my-server.com/osCommerce/
osCommerce automatically detects if the installation is finished, and redirects to the
installation procedure if the installation has not yet been finished. The osCommerce
installation can be customized for new installations and to configure (or to reconfigure)
osCommerce installations.
New osCommerce installations need to import the catalog database and also need to be
configured to the server. osCommerce installations which need to be reconfigured only (for
example, when moving to another server) do not need to have the database import
selected, otherwise a new database is used instead of an existing database. Verify you
have the information needed for this step, specified during the Pre-Installation Procedure.
•
Database server address
•
Database server username
•
Database server password
•
Database name
Note: The database is automatically created on the server if the database does not exist
and if the user account provided has the access privileges to do so. As such super access
privileges are not required for the normal operation of osCommerce; the user account can
be safely changed later in the Web-based configuration procedure during the database
server configuration step.
Version:
April 10 – Subject to modification
Distribution:
For external use
Sales office/Region:
VERIO Europe GmbH, Neugablonzer Str. 1, D-93073 Neutraubling
Copyright © 2006 VERIO Europe
page 26
•
Use a database table prefix if the osCommerce database is to be shared with other
Web based applications. This avoids any possible conflicts with the use of table
names that previously exist on the server.
•
Persistent connections improve the performance of dedicated servers that
experience high loads. Do not enable persistent connections for installations on
shared hosting accounts as it degrades the performance instead of improving it.
•
The session data osCommerce uses on a per customer basis can either be stored
in the database or on the Web server as files. Shared hosting servers to use
database session storage due to security related issues. File based session storage
improves performance but is only recommended for dedicated servers. Most Web
hosting sites are not dedicated servers.
Note: Using file based session storage on shared hosting servers enables other users on
the same server to access the session data stored in the files which opens the possibility
for user sessions to be hijacked.
The Web-based configuration procedure verifies the information provided before
proceeding to the next step to verify the osCommerce installation operates without any
problems when the configuration procedure is complete.
If you encounter problems during the database import configuration step, the error
message and instructions on how to fix the problem are displayed. When a successful
connection to the database server is made by means of the database configuration
parameters provided, a success page is shown to inform that the next step can be
performed safely. When the required osCommerce data and optional sample data are
imported into the database, a success page displays to inform that the next step can be
performed safely.
3.17.7 Configure Web Server
osCommerce Web server configuration requires you to complete HTTP configuration, to
be aware of possible error messages, and then to recognize your successful Web server
configuration.
3.17.7.1 Completing HTTP Configuration
Configuration of HTTP is required to correctly configure the navigation links used within
osCommerce and to correctly specify cookie related information specific to the server on
which osCommerce is installed. Verify you have gathered the following information:
•
Web server address.
•
Location of the osCommerce installation.
•
Secure Web server address.
Note: A secure Web server protects and secures the transmission of customer data.
osCommerce operates with dedicated secure Web servers and with Web servers that
share an SSL certificate. If the secure Web server is on a different server than the normal
Version:
April 10 – Subject to modification
Distribution:
For external use
Sales office/Region:
VERIO Europe GmbH, Neugablonzer Str. 1, D-93073 Neutraubling
Copyright © 2006 VERIO Europe
page 27
Web server, the session data needs to be stored in the database in order for both Web
servers to successfully share the session data.
The WWW address is the full address to the osCommerce installation, such as
http://www.myserver. com/osCommerce/. The Web server root directory is the physical
directory
where
osCommerce
is
installed
on
the
server,
such
as
/usr/home/hpdl/public_html/osCommerce/. The HTTP cookie domain is used when storing
cookie related information on the customer’s browser. A valid cookie domain consists of a
minimum of two dots in the address, such as .my-server.com. The HTTP cookie path is
used to secure access to the cookie information stored on the user’s browser. This is
useful for shared servers to verify only one osCommerce installation has access to the
cookies it has specified, such as /~hpdl/osCommerce/. Dedicated servers lessen the
access control so that all Web-based applications on the server can share cookie related
information. The work directory is required by osCommerce to store cached files and
session data if file based session storage is used.
Note: The work directory does not exist by default on new osCommerce installations as
the directory is not intended for public accessibility by means of a WWW address. It is
important that this directory exists outside the Web server path and is used only for one
osCommerce installation.
3.17.7.2 Possible Error Messages
The Web-based configuration procedure verifies the information provided before
proceeding to the next step to verify the osCommerce installation operates without any
problems when the configuration procedure is complete. If you encounter problems during
the Web server configuration step to configure a directory, the error message and
instructions on how to fix the problem are displayed. If you encounter problems during the
Web server configuration step to change the permissions (chmod) on a file, the error
message and instructions on how to fix the problem are displayed.
3.17.7.3 Successful Web Configuration
When you configure the Web server correctly, a success page is displayed. The secure
Web server configuration step is only activated when secure SSL connections are enabled
in your Web server configuration. The Web-based configuration procedure verifies the
information provided before proceeding to the next step to verify the osCommerce
installation operates without any problems when the configuration procedure is complete.
If you encounter problems during the Web server configuration step, the error message
and instructions on how to fix the problem. When the provided configurations parameters
are successfully written to the configuration files, a success page displays. The message
informs you that you have concluded the Web-based configuration and that you configured
the Catalog and Administration Tool and prepared them for use.
3.17.8 After You Install the Application
After installing osCommerce perform some follow-up tasks to complete the installation and
configuration as well as to secure your private server. To do this, use an FTP program that
enables you to easily change permissions by means of chmod. (See “FTP” on page 22 for
Version:
April 10 – Subject to modification
Distribution:
For external use
Sales office/Region:
VERIO Europe GmbH, Neugablonzer Str. 1, D-93073 Neutraubling
Copyright © 2006 VERIO Europe
page 28
information regarding the ProFTPD software.) After installing the application, follow these
steps:
1. Rename the catalog/install folder or delete it.
2. Reset the permissions on catalog/includes/configure.php to 644.
Note: If you receive a warning message after setting permission to 644,
configure.php files to 644 and then specify the catalog/includes/configure.php
file to 444).
3.
Specify the permissions on the
to 777.
catalog/images
and
admin/images/graphs
directories
4. Create the directory admin/backups and specify permissions to 777 (this is the folder
to store the database backup of your store in the Tools section of the store admin
directory).
5. Password protect the store
3.18
admin
directory on your private server using htaccess.
Perl
Note: Perl provides one part of the Linux, Apache, MySQL, and PHP/Perl/Python (LAMP)
open source enterprise software stack.
Perl is pre-installed on your private server. Your private server supports Perl
(http://www.perl.org/), the widely-used, open-source cross platform programming language
distributed with most Linux binaries. As you configure Perl, you must implement only the
application features supported by the current, stable production release. The performance
of the CPX: Control Panel is dependent upon support for Perl Modules. For more
information, see “CPX: Control Panel” on page 18.
3.19
PGP/GnuGP
For the purposes of signing and encrypting your data communications, Pretty Good
Privacy (PGP) and Gnu Privacy Guard (GnuPG) are both pre-installed on your private
server. PGP, originally developed by Phil Zimmerman, is a high security cryptographic
software application for MSDOS, UNIX, VAX/VMS, and other computers. PGP enables
you to exchange files or messages with privacy, authentication, and convenience.
Note: You must agree to the PGP 5.0 License before installing this version of PGP on
your server. This version of PGP is for non-commercial use only. If you are going to use
PGP for commercial use, you must purchase a license from Network Associates. This
version of PGP has also been modified so that it will work in both the virtual and nonvirtual environments. Modifications have also been made to the PGP executable provided
such that it will only run on VPS Linux. Please do not attempt to export this version off of
your server. It will not operate.
An alternative to PGP, GnuPG is distributed under the terms of the GNU General Public
License. For more information, refer to the PGP GnuPG Web site (http://www.gnupg.org/).
GnuPG (The GNU Privacy Guard) is a tool for secure communication and data storage. It
can be used to encrypt data and to create digital signatures. It includes an advanced key
Version:
April 10 – Subject to modification
Distribution:
For external use
Sales office/Region:
VERIO Europe GmbH, Neugablonzer Str. 1, D-93073 Neutraubling
Copyright © 2006 VERIO Europe
page 29
management facility and is compliant with the proposed OpenPGP Internet standard as
described in RFC2440. GnuPG is a complete and free alternative to PGP. Because it does
not use the patented IDEA algorithm, it can be used without any restrictions.
3.20
PHP
Your private server supports PHP: Hypertext Preprocessor (http://www.php.net/), the
widely used, general-purpose, and open-source scripting language distributed with most
Linux binaries. As you configure PHP, you must implement only the application features
supported by the current, stable production release. The custom installation script for PHP
includes prompts for you to include the Zend Optimizer and the Apache Perl Module
(mod_php).
3.21
PostgreSQL
Your private server supports the current, stable release of PostgreSQL, an open source
relational database system distributed by PostgreSQL Global Development Group under
the Berkley Software Distribution (BSD) license. The database system was formerly known
as Postgres and Postgres95.
If you choose to configure PostgreSQL, add the following lines to your shell startup file,
according to which shell your private server is running.
Note: To find out which shell your private server is running, issue the following command:
% echo $SHELL
•
/bin/csh - If you are using /bin/csh or one of its variants, then add the following lines
to the /.cshrc file on your private server.
setenv PGDATA /usr/local/pgsql/data
setenv PGLIB /usr/local/pgsql/lib
set path = (/usr/local/pgsql/bin $path)
•
- If you are using the Bourne shell (/bin/sh or
add the following lines to the /.profile file on your private server:
/bin/sh & /bin/bash
/bin/bash)
then
PATH=$PATH:/usr/local/pgsql/bin
PGDATA=/usr/local/pgsql/data
PGLIB=/usr/local/pgsql/lib
export PGDATA PGLIB
The tool for managing PostgreSQL is the psql client. To start psql issue the following
command:
% psql
The psql client starts, and then you can to issue SQL-related commands and for help.
Note: Look for the following error:
Connection to database '(null)' failed.
FATAL: PQsetdb: Unable to determine a Postgres username!
To resolve this, issue the following command:
% vpwd_mkdb /etc/passwd
This program will read your password file at /etc/passwd and create a Berkeley DB format
file. PostgreSQL uses this new file to look up user names and account information.
Version:
April 10 – Subject to modification
Distribution:
For external use
Sales office/Region:
VERIO Europe GmbH, Neugablonzer Str. 1, D-93073 Neutraubling
Copyright © 2006 VERIO Europe
page 30
3.21.1 Multi-Language Abilities in PostgreSQL
PostgreSQL enables for a number of languages by enabling specific character-sets in the
databases. When you create a database in PostgreSQL, you can use the -E flag to enable
support for a specific character set.
% initdb -E SET
The following list provides the available character sets and the character set name to use
to enable support for it.
•
ALT (Windows CP866).
•
EUC (JP Japan EUC).
•
EUC (CN China EUC).
•
EUC KR (Korea EUC).
•
EUC TW (Taiwan EUC).
•
MULE_INTERVAL (Mule internal code).
•
LATIN1 ISO 8859-1, LATIN2 ISO 8859-2, LATIN3 ISO 8859-3, LATIN4 ISO 8859-4,
LATIN5 ISO 8859-5 (Latin alphabets one through five for Western Europe, Eastern
Europe, Turkey, Northern and Western Europe, Cyrillic character sets).
•
SQL_ASCII (ASCII).
•
UNICODE (Unicode or UTF-8).
•
WIN (Windows CP1251).
To remove PostgreSQL, connect to your private server by means of SSH and issue the
following command:
% vuninstall pgsql
Edit your /etc/rc file, removing the line that contains postmaster. Issue the
as follows:
ps
command,
% ps -x
Determine the process ID of the PostgreSQL daemon and use kill to stop the PostgreSQL
daemon:
% kill PROCESS-ID
3.22
Procmail and SpamAssassin
Your private server supports the Procmail email delivery agent and the SpamAssassin
email filter.
3.22.1 Procmail
Your private server supports Procmail, a free, open-source mail delivery agent (MDA)
distributed under the terms of the GPL. You can configure Procmail to call mail programs,
such as SpamAssassin.
Version:
April 10 – Subject to modification
Distribution:
For external use
Sales office/Region:
VERIO Europe GmbH, Neugablonzer Str. 1, D-93073 Neutraubling
Copyright © 2006 VERIO Europe
page 31
You can customize the behavior of Procmail by creating a procmailrc file. The file must be
located in your /usr/local/etc/ directory, or a user can have a .procmailrc file in the user’s
home directory.
3.22.2 SpamAssassin
Your private server supports SpamAssasin, a free, open-source email filter distributed
under the terms of the Apache Software license.
SpamAssassin applies a number of tests to an incoming message, and each test returns a
score. If enough tests return a combined score that is high enough. The default setting is
five (5). Once a message has been tagged, there are a number of possible actions that
can be taken with the message. Both tagging and actions can be handled either as a
system-wide or as a user specific filter.
•
System-wide Filters
•
User Specific Filters
apply SpamAssassin tests to every email message that arrives on
your private server, regardless of the intended recipient. This avoids accidentally
losing the occasional legitimate message that has spam-like characteristics.
enables individual users to use different methods of dealing with
spam. The user-specific settings enable you to configure specific users with
different ways of dealing with messages tagged as spam. Once you tag a message,
SpamAssassin will do one of the following with the message, depending on your
system and user settings.
•
Deliver Tagged messages along with Untagged messages enables the user to see if a
message is tagged as spam and enables them to make the final decision to read
the message or not. If you have system-wide filtering on, it is a good idea to use this
option for the system-level filtering.
•
delivers untagged messages and delivers tagged
messages to a special mailbox (or IMAP folder). This is a good user-level setting for
all users who don't want potential spam cluttering the user’s inbox but want to have
the option to check through to see if there is anything important among the tagged
messages.
•
Deliver spam to a special mailbox and forward non-spam to another address specifies that if a
user has another account that they forward the user’s messages to, this enables
you to filter out spam before forwarding the messages to the user’s account
Deliver Spam to a special mailbox
•
Forward Spam to another address
•
Delete Spam
•
specifies non-spam is delivered normally, but spam
can be forwarded to an account on a different server.
specifies that all messages tagged as spam are deleted, either on a
system level, or just for specific users. This is not suggested, as messages (and
possible false positives) would be permanently thrown away
Delete Spam and forward non-spam to another address specifies that the tagged messages
are deleted before forwarding untagged messages to a remote email account.
You can configure SpamAssassin to keep a log of activity. Logs can be useful in tracking
down problems and errors but, like any other log file, your SpamAssassin logs must be
Version:
April 10 – Subject to modification
Distribution:
For external use
Sales office/Region:
VERIO Europe GmbH, Neugablonzer Str. 1, D-93073 Neutraubling
Copyright © 2006 VERIO Europe
page 32
cleared out occasionally to prevent them from using up all your disk space. You can issue
the cron command to archive or empty your spam log files.
There are a number of sources of documentation for SpamAssassin. You can access the
manual pages issuing the following commands.
% man spamassassin
% man Mail::SpamAssassin::Conf
Locate further information about the SpamAssassin filtering engine at the SpamAssassin
Project Web site (http://spamassassin.apache.org/).
3.23
Python
The RHEL operating system supports the current production (or stable) version of Python.
The software is distributed for free by Python Software Foundation
(http://www.python.org/psf/) under the terms of the Python license. Although the software
is pre-installed on your server, as you configure Python, you must implement only the
application features supported by the current production release.
Note: Python provides one part of the Linux, Apache, MySQL, and PHP/Perl/Python
(LAMP) open source enterprise software stack.
3.24
Rsync
Rsync (http://rsync.samba.org/) is an open-source utility which provides fast incremental
file transfer. The utility is available for free under the terms of the GPL. Your private server
supports the current, stable release. As you configure rsync, you must implement only the
application features supported by the compatible production release.
3.25
Ruby
Ruby (http://www.ruby-lang.org/en/) is an open-source interpreted scripting language
primarily developed on the Linux operating system. It is available for free under the terms
of the GPL. Your private server supports the current, stable release. As you configure
Ruby, you must implement only the application features supported by the current, stable
production release.
3.26
Savelogs
Savelogs provide a complete Web server log rotation program. Savelogs can rename,
archive, compress, delete, and provide a newsyslog-type of log rotation. You can specify
options on the command-line or in a configuration file. Besides archiving single logs,
savelogs can search your Web server configuration file to automatically rotate logs defined
there.
3.27
ShopSite
Your private server supports the optional ShopSite shopping cart suite. If you have
ordered the installation, you can configure and utilize ShopSite features such as secure
shopping cart and e-commerce Web page templates. You can use an installation script
Version:
April 10 – Subject to modification
Distribution:
For external use
Sales office/Region:
VERIO Europe GmbH, Neugablonzer Str. 1, D-93073 Neutraubling
Copyright © 2006 VERIO Europe
page 33
(vinstall) and/or an uninstall script (vuninstall). Once you purchase the suite and verify
the installation, refer to Web-based information, documentation, and instructions provided
with the purchase of the suite.
3.28
SquirrelMail
Your server supports SquirrelMail for Web mail processes. The open-source software is
distributed by the SquirrelMail Project Team (http://www.squirrelmail.org/) under the terms
of the GNU General Public License (GPL).
3.29
SSL
Your private server supports the privacy and encryption provided by the Secure Sockets
Layer (SSL) protocol. You can also change operating system and maintain SSL support,
move a certificate to a new server, and renew a custom digital certificate.
3.29.1 Create a Signing Request and Private Key
To obtain a signed Digital Certificate you must create a Certificate Signing Request (CSR).
At the same time your CSR is created, you will also generate a Private Key. The CSR is
used by the signing authority to create a signed digital certificate which works with your
Private Key to provide secure access to your Web site. There is some necessary
information that you gather before generating the CSR and Private Key. The following
information is required as part of the CSR and must be entered exactly as you want them
to appear in your certificate:
•
PEM Passphrase
•
Company Location
•
Company Contact Information
-- This is a security phrase which, like a password, ensures that only
you can use your digital certificate. Be sure to use a phrase which you can easily
remember but which is not easily guessed. Enter the pass phrase in the future to
install your signed certificate.
-- Know the country, province or state, and city where you want the
certificate to display as your company location.
-- This includes the complete company or organization
name and the organizational unit or department (if applicable).
•
Your Domain Name -- Determine the exact domain name you want to use to access
your Web site securely.
•
Contact Email Address -- The contact email address that you want to have the signing
authority use when corresponding with you.
•
– This information can include a challenge password which some
signing authorities use to allow you access to your certificate and which they require
when interacting with them. You can also enter additional company information.
Extra Information
Connect to your private server by means of SSH and issue the following command:
# mkdir /usr/local/certs
# cd /usr/local/certs
# openssl req -new
Version:
April 10 – Subject to modification
Distribution:
For external use
Sales office/Region:
VERIO Europe GmbH, Neugablonzer Str. 1, D-93073 Neutraubling
Copyright © 2006 VERIO Europe
page 34
You are prompted to provide the information you gathered earlier. Common name refers to
the domain name that you want to use when you access your site using SSL. For
example, domain.com, www.domain.com, cname.domain.com, or *.domain.com. The domain must
be used exactly as it appears in the certificate.
When you have entered all the data, your CSR is shown. It is a good idea to save the CSR
by copying and pasting it exactly as it appears on the screen, with line breaks and no extra
lines before or after into a file on your local computer. You will need it when you are
ordering your SSL certificate from a signing authority’s Web site. The following is an
example of a CSR.
-----BEGIN CERTIFICATE REQUEST----MIIB2jCCAUMCAQAwgYExCzAJBgNVBAYTAlVTMQ0wCwYDVQQIEwRVdGFoMQ4wDAYD
VQQHEwVQcm92bzETMBEGA1UEChMKU3R1bmt3b3JrczEVMBMGA1UEAxMMTWFyayBT
cGVuY2VyMScwJQYJKoZIhvcNAQkBFhh3ZWJtYXN0ZXJAc3R1bmt3b3Jrcy5jb20w
gZ8wDQYJKoZIhvcNAQEBBQADgY0AMIGJAoGBAKIkMHnII4uNDwgTYsBYdiiOBLTY
NOsTfXp/5sG1VXjlYhDMoLzWxBbaulx2hEufj1Sfkm65Mrd8j4nMFVIGf1sGnFCj
ClgxQ/5DJtV22jgnqQfKq7se32r9INoPWjFfjD1JC+4zry5LRiSPNImCYq2E1578
h6S6i6auD1nTDD0LAgMBAAGgGDAWBgkqhkiG9w0BCQcxCRMHZ3JvYmxpbjANBgkq
hkiG9w0BAQQFAAOBgQANwQ7wudkfkxrrZA4lXbOYeXWLngHtNdzPJ8WyzOjGof4h
jkpDPV6SJqHEszpmZljEqb6fxgeiM4cpWSFGJA1QNFz+Ra8/msrLLBMM+zPuHpER
OPFCsrIErmaBgnmymGOk/DiHvhV+LqCkAgjcS2Kpn0cOy8KRyXzUc4k+TTw0Uw==
-----end CERTIFICATE REQUEST-----
In the directory where you ran the openssl command you will also find a new file called
privkey.pm. This is your private key which you will need at a later time. The following is an
example of a private key.
-----BEGIN RSA PRIVATE KEY----Proc-Type: 4,ENCRYPTED
DEK-Info: DES-EDE3-CBC,BCC23A5E16582F3D
hfWyPkea3gnVCHCZJ/zgQpCH9RZF7WjYXGYohdbfkJY0ETLwXaqjvnNHQlLomwIt
CvAzXhq8wnHur6SK21SO0ry3aSCvrBezH99miSJvtnT0HVlRJDNvaYQDbe01Z26D
hY2Yqha56Z8pvrTTolJfNL0sW4ewdws1wR4kxYDYkpusoe/Wed9Wg+i6xr9YmIjT
le9bbQlPK2D/3gJDhWW/aZHiMmLcYJtmWmf0wUMdmlibWYuq0UH1EefiLq3SLKK2
izvYpWDGHxVgtmzupvoc2E6CS3rQeRN3QQ9RqhzqdGqP8Xy/xl1LMuDRUbPY54Kp
3a4gqZCXdlxctK70XX5TdhiMsFEb5L1wA8CsnKE69nzs8MOLiz6mjtAhGB6KVKB4
dod3Wn6z20cus21SY5LxFkfq6JZrAsqSZFzETN9n2Fbel2pTp3IRWx7Q+WBTlrME
uIMgUSKszpvgzg0Tf2Kxfw6YWl5EpEGA8PeiGrM1NeT2TFtgiQBRQdAy7TQxgBlF
LOW2r5/1347ZgafacXLzpDBHnQrn/OtZijzleeoIwcgVwCOKz1oufEAN1ZTJbG6F
WYJuFtfopM5swyoUYK3JgT582ziAeu4jcPdrNHCxqcInkNG+ib3dHdy8yccWRehD
VnSX2hr1MDd2cpFFTl77Bc2/neNyUieqiHkrTOZIcD9oBSxFd0fP9QxLWEMCDWHt
N5UK1n29+TFgm/aXjZNjSIE5DSjTTBGTy2fPWtnefQaFk23ppV5VQypmZjxcWt2f
Eekjh1vEiQChKULQCXFAaxL61HvBRqe3iJwJ+niOBuGpYnjdC80oIA==
-----END RSA PRIVATE KEY-----
3.29.2 Custom Digital Certificate
The Default Certificate is a generic way to provide secure access to your private server.
However, if you want to use your own domain name to provide secure access to your
private server get a custom digital certificate. This not only provides secure access to your
Virtual Server, but provides an additional level of customer confidence by using your own
domain name in the secure area of your site.
3.29.3 Obtain a Signed Digital Certificate
Once you have created a CSR, decide what signing authority and digital certificate to use.
There are a large number of different signing authorities. Each one offers several different
types of digital certificated that have different capabilities and options associated with it. It
is very important you select the certificate that best suits your needs. Because most
Version:
April 10 – Subject to modification
Distribution:
For external use
Sales office/Region:
VERIO Europe GmbH, Neugablonzer Str. 1, D-93073 Neutraubling
Copyright © 2006 VERIO Europe
page 35
signing authorities also sign additional types of certificates and products, verify that you
are obtaining an SSL digital certificate.
There are a number of signing authorities, each with different methods for verifying your
company's authenticity and with different levels of customer awareness and trust. The
following is a list of a few of the signing authorities.
•
GeoTrust
•
GlobalSign
•
VeriSign
•
Thawte
When you have decided which signing authority and SSL Certificate type you want, and
have created a CSR, you are ready to order your signed certificate.
The ordering process for obtaining a signed digital certificate is different for each vendor
and certificate type. There are, however, some things that will remain the same throughout
all of them. The following is a list of useful tips for ordering your certificate.
At some point in the ordering process, you are asked for a Server Type or the Server
Software you are running; when this occurs, select Apache-SSL or Apache with
OpenSSL. When you are prompted to enter the CSR, be sure to paste it exactly as it
appeared on the screen when you generated it, including the first (BEGIN CERTIFICATE)
and last (END CERTIFICATE) lines. An example of a certificate signing request appears
as follows:
-----BEGIN CERTIFICATE REQUEST----MIIB2jCCAUMCAQAwgYExCzAJBgNVBAYTAlVTMQ0wCwYDVQQIEwRVdGFoMQ4wDAYD
VQQHEwVQcm92bzETMBEGA1UEChMKU3R1bmt3b3JrczEVMBMGA1UEAxMMTWFyayBT
cGVuY2VyMScwJQYJKoZIhvcNAQkBFhh3ZWJtYXN0ZXJAc3R1bmt3b3Jrcy5jb20w
gZ8wDQYJKoZIhvcNAQEBBQADgY0AMIGJAoGBAKIkMHnII4uNDwgTYsBYdiiOBLTY
NOsTfXp/5sG1VXjlYhDMoLzWxBbaulx2hEufj1Sfkm65Mrd8j4nMFVIGf1sGnFCj
ClgxQ/5DJtV22jgnqQfKq7se32r9INoPWjFfjD1JC+4zry5LRiSPNImCYq2E1578
h6S6i6auD1nTDD0LAgMBAAGgGDAWBgkqhkiG9w0BCQcxCRMHZ3JvYmxpbjANBgkq
hkiG9w0BAQQFAAOBgQANwQ7wudkfkxrrZA4lXbOYeXWLngHtNdzPJ8WyzOjGof4h
jkpDPV6SJqHEszpmZljEqb6fxgeiM4cpWSFGJA1QNFz+Ra8/msrLLBMM+zPuHpER
OPFCsrIErmaBgnmymGOk/DiHvhV+LqCkAgjcS2Kpn0cOy8KRyXzUc4k+TTw0Uw==
-----END CERTIFICATE REQUEST-----
You are required to enter information about your company, including the official company
name and address. After you have ordered your certificate and sent in the requested
documents, the signing authority will issue you a signed certificate. Once you have your
signed certificate, you can install your signed digital certificate.
3.29.4 Install your Custom Digital Certificate
Once you have obtained a signed digital certificate, install it and configure SSL to use your
certificate and private key instead of the default. When you got your certificate, you most
likely saved it to a file on your local computer. Copy the file onto your private server by
means of SCP. Be sure to copy the file using ASCII format to avoid corrupting the file.
Once the certificate is on your private server, get the Private Key, which you generated at
the same time as you generated the CSR, and confirm it is in the /usr/local/certs/
directory with the name ssl.pk. Verify to keep a copy of the Private Key in a different
location as well so if you make a mistake you don't lose your Private Key. Create a
Version:
April 10 – Subject to modification
Distribution:
For external use
Sales office/Region:
VERIO Europe GmbH, Neugablonzer Str. 1, D-93073 Neutraubling
Copyright © 2006 VERIO Europe
page 36
directory on your private server and store a copy of both your Private Key and the
Certificate until you are certain that the new certificate is working properly.
Connect to your private server by means of SSH and issue the following:
# cd /usr/local/certs
# openssl rsa -in ssl.pk -out ssl.pk
The openssl rsa command removes the default encryption on your key, and makes it
useable by the Apache HTTP server. Verify your Private Key has been decrypted or not by
looking at the file. When your key is generated, the first few lines are similar to the
following example:
-----BEGIN RSA PRIVATE KEY----Proc-Type: 4,ENCRYPTED
DEK-Info: DES-EDE3-CBC,BCC23A5E16582F3D
hfWyPkea3gnVCHCZJ/zgQpCH9RZF7WjYXGYohdbfkJY0ETLwXaqjvnNHQlLomwIt
After decrypting your key, the key changed as in the following example:
-----BEGIN RSA PRIVATE KEY----MIICXQIBAAKBgQCot9aa9R38QevFSWqU718VFxqEDcY4gJfdZ6sBy282jdgCVcwU
q92tQ5V3amQanoSIWxI/O9GYm5kJSo3b2qGib2sqLiHZFav/bRjL5IDFOMwcSTyp
O0I9otCK72/rrxMl+Gt8b5saEiIdmGO4ar9AM2DYYQCFKYR62mDZ7mRa6wIDAQAB
AoGBAJWy0CqblGhvgSeCdZwCK+ZFopRKuHcHujeLtRKZk2rfPisMP1CUEdObJLJY
5ssrnUJzM+SBSf5TCN1Slj3dZg2NRBq+68L1dR+3voEWv2ebPhzicjw81l0xuVoX
HbXhM052Bmhp8XWZd3VdKXyQuTQeh17F4R2o39r9vP88pGnRAkEA4OxTu4p6gAxF
l4JwiqFeswdoq/jEj9KkKGy/wM4psGQqUrzWzgKmN+R1NpSRWcyohpSOsU8yFcHb
bydNYvYj0wJBAMAHgQENrGx+3XEzcCx3uY8vv1gvcNFou0RKKcoaHyf8n028AJAf
ZAM/7h+cFcJVYEeb8n54ED4979c+gr3ttYkCQD444okVLAJUYsQhL6UKMzpvqEM6
1JW8/fC49OsPnXTQoOy2lO30yarYppxsyTEAbvacDkV61S4zrNK5Gq1vzkUCQF45
0GVR7k92mPZZBSvsu5K1HTEKZlN7Dpjdw0+2LZ+TaB/epnAR1yN5FUFRd6PZ/Npm
fUDtbRr9jViTBdhocfECQQDfxT3bUNjvJUeWQieQg2ooj7yzbjMD5MjA+9z+qh1V
Cb+4kQSEWrP7EdJk4cOHOH+ZYjinf77x8v2PbnaKE5Dc
-----END RSA PRIVATE KEY-----
Edit your /www/conf/httpd.conf file to look for your certificate file by adding the following
command:
SSLCertificateFile /usr/local/certs/example.com.pem
Once you have added the certificate directive to your /www/conf/httpd.conf file, issue
restart_apache to make Apache start and utilize the new certificate. Check to verify the
new certificate is working by connecting to the domain your certificate is configured to use
by means of HTTPS. For example, if the domain name were www.example.com, you
would type https://www.example.com into your browser's location bar. If the page loads
without any errors, find the lock icon on your browser and click (or possibly double-click)
on it. This brings up the certificate information or a window that lets you view certificate
information. Check that the certificate is using the correct domain name and has the
correct information.
If you intend to use your SSL certificate with email as well, make links so that the POP and
IMAP is able to find the file as well:
# ln /usr/local/certs/example.com.pem /usr/local/certs/imapd.pem
# ln /usr/local/certs/example.com.pem /usr/local/certs/ipop3d.pem
3.29.5 Move your Custom SSL Certificate
If you are moving your secure Web site from one server to another, there are a few
specific concerns to be aware of in order for the certificate to work on the new server.
Version:
April 10 – Subject to modification
Distribution:
For external use
Sales office/Region:
VERIO Europe GmbH, Neugablonzer Str. 1, D-93073 Neutraubling
Copyright © 2006 VERIO Europe
page 37
3.29.6 Change Operating Systems
Digital certificates work differently with different operating systems and Web Server
software. Because of this, a certificate generated for a Windows2000 server running the
IIS Web server does not work on a RHEL server running Apache. Likewise, a RHEL server
running Netscape Web Server can not use a certificate designed to operate on a RHEL
server running Apache.
If your current certificate is not compatible with your new server, obtain a certificate for the
new operating system and Web server. Most certificate authorities will issue a transfer
certificate at a lesser cost than obtaining a new certificate. The signing authority provides
you with instructions on how to install a transfer certificate.
3.29.7 Move a Certificate to a New Server
If your current certificate is compatible with the server you are moving your secure Web
site to, you do not need a new certificate. Simply move your certificate to the new server
and ensure that it works.
1. Connect to your private server by means of SSH and issue the following command:
# mkdir /usr/local/certs
# cd /usr/local/certs
2. Using FTP or another method, copy the certificate and Private Key files to the new
server. Copy the files to the /usr/local/certs/ directory. The certificate is in a file
named ssl.cert, and the key is in a file named ssl.pk. If you use FTP, be sure to
copy the file using ASCII format to avoid corrupting the file.
3. Verify the Private Key has been decrypted by looking at the file. If the key has not
been decrypted the first few lines appear as in the following example:
Proc-Type: 4,ENCRYPTED
DEK-Info: DES-EDE3-CBC,BCC23A5E16582F3D
4. To decrypt the key connect to your private server by means of SSH and issue the
following commands:
# cd /usr/local/certs
# openssl rsa -in ssl.pk -out ssl.pk
5. Create a PEM file that contains both the certificate and key. To do this, issue the
following commands:
# cd /usr/local/certs
# cp ssl.pk YOUR-DOMAIN.NAME.pem
# cat ssl.cert >> YOUR-DOMAIN.NAME.pem
6. Edit your /www/conf/httpd.conf file to look for your certificate file by adding the
following command: SSLCertificateFile /usr/local/certs/MY-DOMAIN.NAME.pem
7. Once you have added the certificate directive to your /www/conf/httpd.conf file,
issue restart_apache to make Apache start using the new certificate.
Version:
April 10 – Subject to modification
Distribution:
For external use
Sales office/Region:
VERIO Europe GmbH, Neugablonzer Str. 1, D-93073 Neutraubling
Copyright © 2006 VERIO Europe
page 38
3.29.8 Renew Custom digital certificates
Order signed digital certificates for periods of one to three years depending on the signing
authority. It is important to renew digital certificates no less than 30 days prior to the
expiration date to avoid any interruptions with your SSL Service. The renewal process is
different for each vendor and certificate type.
After you have completed the renewal process, the signing authority will issue a new
signed certificate. Once you have received the renewed certificate, replace the original
certificate of your private server, and restart Apache. Follow the instructions to install your
signed digital certificate to complete this process.
3.30
Swish-e
Your server supports Simple Web Indexing System for Humans - Enhanced (Swish-e), an
open source system which enables you to index Web page and other types of files. A
Swish-e development community (http://swish-e.org/) distributes the system under the
terms of the GNU General Public License (GPL).
3.31
Tomcat
Java Servlets and JSPs are made available on your server by means Tomcat, a software
package distributed by the Apache Jakarta Project (http://jakarta.apache.org/). Tomcat is
an implementation of the Java Servlet and Java server pages specifications.
Note: Java applications consume significant CPU and memory resources and may not be
appropriate for use on a VPS. See “Java” on page 18 for more information or refer to the
VPS Linux Technical Overview for details regarding resource allocations and
recommended usages for each plan.
3.32
Vinstall Utilities Library
The vinstall utilities library enables you to add supported software packages (utilities,
database programs, and other software) to your VPS Linux. The library provides a custom
VPS Linux command-line tool. A root user can use the vinstall utility library from the shell
on your server. To begin using library, connect to your VPS Linux server via SSH, su to
root, and run the following command:
# vinstall
If you know the name of the package you want to install, you can install it directly by
indicating the name of the package.
# vinstall package_name
If you do not indicate a package name, vinstall will enter an interactive mode which
prompts you for more information, as in the following example:
Select an option:
? view list of programs
install enter install mode
module_name view information about program_name
quitexit vinstall program
-->
Version:
April 10 – Subject to modification
Distribution:
For external use
Sales office/Region:
VERIO Europe GmbH, Neugablonzer Str. 1, D-93073 Neutraubling
Copyright © 2006 VERIO Europe
page 39
You can view the available programs available to install using the library, enter a question
mark (?) at the prompt.
You can install a program by entering install mode. Type install at the prompt, and you
will enter install mode. You can then enter the package name at the next prompt, and
vinstall will begin installing the package. Typing the name of a program in the list will bring
up a short dialog about what the program is. You can leave install mode without installing
anything. To do this type quit at the prompt and you will return to the standard shell
prompt.
3.32.1 Removing packages
Most packages that can be installed using vinstall can be removed using vuninstall. The
vuninstall command follows the same format as vinstall.
3.32.2 Software Packages Included in the Vinstall Utilities Library
The following table provides you with information regarding the software packages which
are included with the vinstall utilities library.
Note: Refer to updates provided on the Web, and other electronic communications from
VERIO regarding additions and modifications to the library.
Software Package
Install (vinstall)
Uninstall (vuninstall)
Accrisoft
No
No
ClamAV
Yes
Yes
CPX: Control Panel
Yes
Yes
FormMail
Yes
Yes
Java SE Development Kit
(JDK)
Yes
Yes
Java Runtim Environment
(JRE)
Yes
Yes
Java Sun Developer Kit
(SDK)
Yes
Yes
Mailman
Yes
No
MySQL
Yes
Yes
PHP
Yes
Yes
phpMyAdmin
Yes
Yes
PostgreSQL
Yes
Yes
ProcMail
Yes
Yes
SpamAssassin
Yes
Yes
Tomcat
Yes
Yes
Version:
April 10 – Subject to modification
Distribution:
For external use
Sales office/Region:
VERIO Europe GmbH, Neugablonzer Str. 1, D-93073 Neutraubling
Copyright © 2006 VERIO Europe
page 40
WordPress
Yes
Yes
Zend Optimizer
Yes
Yes
Note: Java applications consume significant CPU and memory resources and may not be
appropriate for use on a VPS. See “Java” on page 23 for more information or refer to the
VPS Linux Technical Overview for details regarding resource allocations and
recommended usages for each plan.
3.33
The Webalizer
Your private server supports The Webalizer (http://Webalizer.domainunion.de/). The Web
server log file analysis program distributed under the terms of the GNU General Public
License as published by the Free Software Foundation.
Manual pages are installed on your private server when you install The Webalizer. Use the
following man command to access them:
% man Webalizer
3.34
WordPress
WordPress is an open-source software distributed under the terms of the GNU General
Public License (GPL). WordPress utilizes PHP and MySQL. The software is highly
customizable and provides you with the cah1pability to deliver information by means of
audio, video, and other media, including blogs and podcasts.
A blog is a collection of short articles, essays, or loosely-formatted thoughts, usually
written by one individual. A podcast is a multimedia file (audio, video, or multimedia)
distributed in a series of episodes. A customer can subscribe to your podcast, download it
as soon as it is available, and then play it on their compatible devices (such as MP3
players).
3.34.1 Available Features
The following list provides an overview of some of the available features included with
WordPress:
•
Integrated theme system.
•
Trackback support.
•
Pingback support.
•
Spam protection.
•
Full user registration.
•
Password protected blog postings.
•
Support for importing
MoveableType).
•
Common blog XML-RPC support.
content
from
previously-designed
Version:
April 10 – Subject to modification
Distribution:
For external use
Sales office/Region:
VERIO Europe GmbH, Neugablonzer Str. 1, D-93073 Neutraubling
Copyright © 2006 VERIO Europe
page 41
blogs
(such
as
•
Workflow, post, and draft tools.
•
Intelligent text formatting.
•
Support for services (such as Ping-O-Matic) designed to update Web search
engines.
As an open-source application, WordPress is not limited to this set of features. There are
numerous extensions, or plug-ins developed by the community of WordPress users. Refer
to the WordPress Web site for more information about standard WordPress features,
extensions, or plug-ins.
3.34.2 Before you Install WordPress
You must uninstall any previously installed version of WordPress present on your account
prior to installation using the vinstall. Also, make a backup of your previous configuration of
blog or podcast software, as well as of the databases to which they refer. The vinstall
provides for installing WordPress to any sub host configured in the Apache configuration
file (httpd.conf).
3.34.3 Get Started
The vinstall for WordPress runs a script which places the WordPress version 2.0.2 on your
account. To install the software, run the following command from a Secure Shell (SSH)
prompt:
# vinstall wordpress
Note: If you are upgrading WordPress from a previous installation, ignore any warnings
you receive regarding your existing MySQL database. After the installation completes, use
your preferred browser to access the following location:
https://YOURDOMAIN/WORDPRESS/upgrade.php
Replace YOURDOMAIN and WORDPRESS with the domain and directory, respectively, in
which you installed WordPress. After visiting the upgrade page, replace your
customizations by utilizing the backup file you made before you began this process. Refer
to the WordPress Web site and documentation for further information regarding
maintenance, administration, and troubleshooting.
3.34.4 More Information About WordPress
Following are links to Web sites you can use to learn more about WordPress software,
blogging, and other related services. These Web sites inform you about concerns in the
Internet development community regarding how these applications interact with each
other. In addition, many of the Web sites provide opportunities for you to subscribe to
topical email lists and RSS Web feeds.
•
MySQL Developer Zone -- http://dev.mysql.com/
•
PHP Group -- http://www.php.net/
•
WordPress Open-Source Software Wiki -- http://codex.wordpress.org/Main_Page
•
WordPress Open-Source Software homepage -- http://wordpress.org/
Version:
April 10 – Subject to modification
Distribution:
For external use
Sales office/Region:
VERIO Europe GmbH, Neugablonzer Str. 1, D-93073 Neutraubling
Copyright © 2006 VERIO Europe
page 42
3.35
Zend Optimizer
Zend Optimizer enables you to run encoded files and enhance the performance of your
PHP scripts. The package is a passive module which runs within the framework of PHP
and uses multi-pass code optimizations to potentially double the running speed of current
PHP applications. This add-on is appropriate for all PHP users, who can benefit from the
better response time featured by the package. The increase in speed for running PHP
code reduces the CPU load for the server, and cuts latency time in half. Once you install
the package, the version is updated automatically by means of server software updates.
For VPS Linux, the option to install Zend Optimizer is integrated into the custom
installation script for PHP.
Version:
April 10 – Subject to modification
Distribution:
For external use
Sales office/Region:
VERIO Europe GmbH, Neugablonzer Str. 1, D-93073 Neutraubling
Copyright © 2006 VERIO Europe
page 43
4
Troubleshoot Your Private Server
This section describes how to troubleshoot general issues as well specific problems you
encounter as you operate your private server. This section provides information about
troubleshooting the following problems on you account:
•
“General Issues” on page 44.
•
“Failure to Create a Virtual Host” on page 44.
•
“Check Quotas” on page 44.
•
“Check Log Files” on page 44.
•
“Check for Idle Processes” on page 45.
•
“Custom Digital Certificate Problems” on page 45.
4.1
General Issues
Always remember where you are located now in your command interface. Check it
periodically using the pwd, hostname, ifconfig commands. The same command executed
inside your private server, under a different level of access, can lead to different results.
Subscribe to bug tracking lists for RHEL and the additional, supported features you install
on your private server. Keep track of new public denial-of-service attack tools or remote
exploits for the software and install them into your private server or at the server level.
4.2
Failure to Create a Virtual Host
If your attempt to create a new virtual host fails and you see a message indicating that the
operating system template is absent or inaccessible, verify the location of the template on
your system and, if necessary, re-install the template.
4.3
Check Quotas
When your private server meets quota limits, the disk cannot be written to. Your private
server cannot accept email, log files, or complete installations. Your quota has a soft limit
(which you temporarily exceed) and a hard limit (which you do not exceed).
4.4
Check Log Files
Your private server records all errors and system messages in log files. If you or your
users are having problems on the account, first check the quota; then check the log files. If
Version:
April 10 – Subject to modification
Distribution:
For external use
Sales office/Region:
VERIO Europe GmbH, Neugablonzer Str. 1, D-93073 Neutraubling
Copyright © 2006 VERIO Europe
page 44
the problems concern email, check the /var/log/maillog file. Problems with the Web site
are recorded in the /www/logs/error_log file.
Use the tail command to watch error messages as they are added to log files. Note what
is being added to the log files as the user duplicates the error. Follow these steps to use
the tail command:
1. Connect to your private server using SSH.
2. At the command prompt type tail –f /var/log/maillog. (If necessary, substitute the
messages directory with /www/logs/error_log, /access_log, or the /ssl_error_log
files.)
3. Have the user duplicate the error while you are running the tail command.
4.5
Check for Idle Processes
If you are receiving errors, use the top command to check the length of time a current
process has been running. If the process is idle or has been running an unusually lengthy
period of time, the process could be suspended and causing problems. For example, an
FTP process can hang if you improperly disconnect from your private server. Use the kill
command to shut down a suspended process.
4.6
Custom Digital Certificate Problems
There are a number of warnings or errors that can come up when accessing Web pages
by means of SSL. Your SSL digital certificate is configured to use a very specific domain
name, which must match exactly to avoid an error. For example, if your certificate is for the
domain www.my-domain.name, and you type https://my-domain.name into the browser,
you will get this warning. Likewise, if your certificate is for my-domain.name and you enter
https://www.my-domain.name into your browser, you will get the same warning. To avoid
this warning, verify the exact domain name on the certificate when making links to secure
pages.
Following are suggestions to use as you troubleshoot for digital .certificate problems:
•
When you make links or include images in pages, the URL is an absolute link and
includes the protocol, domain, and path to a file. If you include an image in a page
using an absolute URL, see an error when the page is viewed using a different
protocol than the one indicated in the image URL. For example, include an image
as follows:
http://www.my-domain.name/images/myimage.gif
When you access this page through secure protocol such as HTTP over SSL
(HTTPS), you will see a warning that the page has encrypted as well as
unencrypted content. The easiest way to avoid this error is to use relative paths, as
in the following example:
/images/myimage.gif
•
Many older Web browsers only support 40 or 52 bit encryption. Because modern
SSL certificates use 128 bit encryption, older browsers may not be able to view
Version:
April 10 – Subject to modification
Distribution:
For external use
Sales office/Region:
VERIO Europe GmbH, Neugablonzer Str. 1, D-93073 Neutraubling
Copyright © 2006 VERIO Europe
page 45
pages securely. If many of your customers are likely to be using older browsers,
you must acquire a special low-encryption certificate. Several current browsers are
available free of charge. Encourage any users having problems with your SSL
certificate to upgrade to a current browser.
•
When you install a custom signed digital certificate, there are a number of possible
mistakes or errors that can cause problems. In most cases, the Apache HTTP
server will not start up when one of these errors occurs. If your site will not load in a
browser, check if there are any HTTPS processes running on your private server.
Connect to your private server by means of SSH and issue the following command:
# top
Restart Apache and try loading the page again even if there are HTTPS processes
running. If restarting the Apache does not cause HTTPS processes to start on your
private server, it is possible your custom certificate is not installed properly.
•
Verify the account’s private key is not decrypted. View the file; if the key file
includes the following lines, the key is still encrypted:
Proc-Type: 4,ENCRYPTED
DEK-Info: DES-EDE3-CBC,BCC23A5E16582F3D
To decrypt your private server’s private key, issue the following command from the
SSH command prompt:
% openssl rsa -in /etc/ssl.pk -out /etc/ssl.pk
When prompted, type the PEM Passphrase, after which the key is decrypted.
•
Verify you uploaded the certificate using an ASCII format. Check if your certificate
was uploaded properly by reviewing it in a text editor. If each line includes character
which indicate it was uploaded the file in a binary format (^M), you must upload the
file again using ASCII format.
•
Verify that the certificate and private key match. For example, if you have multiple
accounts which utilize SSL, verify you are using the private key which was
generated at the same time as the CSR for the domain of the account you are
configuring.
•
Verify if you ordered a certificate that is correct for your private server. For example,
if you are transferring your certificate from a previous account, verify that the
previous account uses Apache with SSL as the Web server software.
•
Verify your certificate or key are complete. Check that the certificate or key is
complete, that the beginning and ending lines of the key or certificate are present.
Both the certificate and private key begin and end with specific as in the following
example:
-----BEGIN RSA PRIVATE KEY.
Version:
April 10 – Subject to modification
Distribution:
For external use
Sales office/Region:
VERIO Europe GmbH, Neugablonzer Str. 1, D-93073 Neutraubling
Copyright © 2006 VERIO Europe
page 46