1
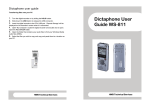
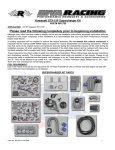
Dictaphone user guide
Transferring files onto your PC
1.
2.
3.
Turn the digital recorder on by sliding the HOLD button.
Connect the USB cable to the USB port on your PC.
Connect the USB cable to the connection port on the bottom of the
recorder. (Please ensure the ∆ on the USB cable matches the ∆ on the
recorder).
4. 'Storage Remote' will be displayed on the recorder’s screen when it is
connected.
5. Open 'My Computer', locate the digital recorder and double click to open.
There are five folders DSS_FLDA, DSS_FLDB etc.
6. Open the folder that contains your audio files to find your Windows Media
Audio files (WMA).
7. Select the files you wish to copy and copy and paste them to a location on
your PC.
HWB Technical Services
Dictaphone User
Guide DS-2
HWB Technical Services
Digital Recorder user guide
Digital Recorder user guide
Turning on/off the power
Playing
1.
To turn the recorder ON slide the hold button down. You will see a display
appear on the screen.
2. To turn the recorder OFF slide the hold button up in the direction of the
arrow. The on screen display will be turned off.
1.
If the recorder is switched on and not used within 5 minutes it goes into standby
mode and the display will turn off. Press any button to exit standby mode.
4. While playing your recording, press the + or - VOL button on the side to
increase/decrease the volume.
5. To forward press and hold the button while the FF recorder is playing. Release the button to stop.
6. To rewind press and hold the REW button while the recorder is playing.
Release the button to stop.
Getting Started
The recorder provides 5 folders. The current folder will be displayed in the top
left corner.
To move between folders press the FOLDER/REPEAT button located on the
side of the recorder.
Recording
1.
2.
3.
4.
Press the REC button to start recording. The record light will glow red.
Press the REC button to pause a recording.
To resume recording press the REC button again.
To stop recording press STOP. When you start recording again a new file
will be created. Each new recording is automatically assigned a filename and
number.
HWB Technical Services
Press the REW or FF button to choose a file/recording you want to playback
2. Press the PLAY or OK button to start playback. The record/play indicator
light glows green.
3. Press the STOP button when you want to stop the playback.
Deleting files
1.
2.
3.
4.
Select the file you want to delete.
Press the ERASE button. You will have the option to cancel or start.
Press the FOLDER/REPEAT button to choose start.
Press the DISPLAY button. The display changes to "File Erase!" and erasing will start. "Erase Done" is displayed when the file is deleted.
5. To delete all files in a particular folder. Press FOLDER/REPEAT button to
locate the folder containing the files you want to delete.
6. Press and hold down the ERASE for 4 seconds. You will have the option to
cancel or start .
7. Press the FOLDER/REPEAT button to choose erase choose start.
8.
Press the DISPLAY button. The display changes to "All Erase!" and erasing will start. "Erase Done" is displayed when all the files are deleted.
HWB Technical Services