1
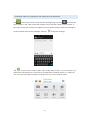
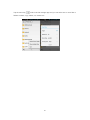
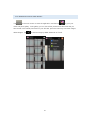
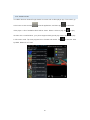
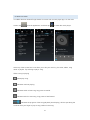
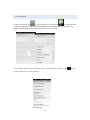
SMART&TOUGH STEALTH V2 USER GUIDE CO NTENTS The Legal Stuff............................................................................................................................4 The Basics 6 1.1 BRIEF Introduction TO THE MANUAL...........................................................................................6 1.2 General Considerations................................................................................................................6 1.3 ABOUT YOUR PHONE BATTERY ...................................................................................................7 1.4 FIRST USE, AND HOW TO Charge YOUR Mobile Phone ..............................................................8 1.5 Charger Precautions....................................................................................................................9 1.6 Cleaning and Maintenance .........................................................................................................9 Introduction TO ANDROID .......................................................................................................10 2.1 Icons ..........................................................................................................................................10 2.2 Phone Layout............................................................................................................................12 2.3 HOW TO Insert SIM CardS AND MEMORY CARDS ....................................................................14 2.4 Power On/Off, REEBOOT AND AIRPLANE MODE ......................................................................15 2.3.3 SIM CARD PIN LOCK ...............................................................................................................16 PREVENTING unauthorised access to your phone...........................................................................16 ABOUT ANDROID– AND HOW TO USE THE Basic Functions OF YOUR PHONE .......................17 3.1 HOW TO MAKE A PHONE CALL ..................................................................................................18 3.2 Contacts. ....................................................................................................................................21 SENDING SMS TEXT MESSAGES AND MMS PICTURE MESSAGES ....................................................23 MANAGING THE FILES ON YOUR DEVICE.........................................................................................24 TRANSFERING FILES BETWEEN YOUR PHONE AND PC ....................................................................26 TAKING PICTURES AND VIDEO WITH THE CAMERA.........................................................................27 MANAGING VIDEOS AND IMAGES ...................................................................................................29 Video Player .....................................................................................................................................30 3.8 Music Player ...............................................................................................................................31 3.9 FM Radio ....................................................................................................................................33 3.10 Recorder...................................................................................... Error! Bookmark not defined. 3.11 Clock .........................................................................................................................................35 3.12 Calendar ...................................................................................................................................36 3.13 Calculator .................................................................................................................................37 3.14 Notepad ...................................................................................................................................38 3.15 Flashlight ..................................................................................................................................39 3.16 E-mail .......................................................................................................................................40 3.17 Browser ....................................................................................................................................40 3.18 Searching..................................................................................................................................43 3.19 Download .................................................................................................................................44 3.20 Map ..........................................................................................................................................45 3.21 Barometric Altimeter ................................................................................................................46 3.22 Backlog ........................................................................................ Error! Bookmark not defined. 3.23 Compass ...................................................................................................................................46 3.24 Play Service ................................................................................. Error! Bookmark not defined. 四 Settings.................................................. 47 4.1 SIM Management ....................................................................................................................48 4.2 WIFI ............................................................................................................................................48 4.3 Bluetooth ...................................................................................................................................50 4.4 Mobile Network .........................................................................................................................50 4.5 Flight Mode ................................................................................................................................51 2 4.6 Scenes Mode ..............................................................................................................................51 4.7 Display ........................................................................................................................................52 4.8 Storage .......................................................................................................................................52 4.9 Application .................................................................................................................................53 4.10 Security.....................................................................................................................................53 4.11 Language and Input Method....................................................................................................54 4.12 Backup and Reset .....................................................................................................................55 4.13 Date and Time ..........................................................................................................................55 4.14 Schedule Power On/Off ...........................................................................................................55 4.15 Auxiliary Function ....................................................................................................................56 4.16 Developer Options ...................................................................................................................56 4.17 About Phone ............................................................................................................................56 五 Common Problems & Solutions ................................ 56 四 Common Problems & Solutions...................................... Error! Bookmark not defined. 3 T HE LEGA L STU FF No part of this document may be reproduced or transmitted in any form or by any means without prior written consent of BWC Devices. The product described in this manual includes copyrighted software. Customers shall not in any manner reproduce, distribute, modify, decompile, disassemble, decrypt, extract, reverse engineer, lease, assign, or sublicense the said software or hardware, unless such restrictions are prohibited by Applicable laws or such actions are approved by respective copyright holders under licenses. Some features of the product and its accessories described in this manual rely on the software installed, capacities and settings of the local network, and may not be activated or may be limited by local network operators or network service providers. Thus, the descriptions herein may not exactly match the product or its accessories you purchase. BWC Devices reserve the right to change or modify any information or specifications contained in the manual or the product. BWC Devices is not responsible for the legitimacy and quality of any products that you upload or download through this mobile phone, including but not limited to the text, pictures, music, movies, and non-built-in software with copyright protection. Any consequences arising from the installation or usage of the preceding products on this mobile phone shall be your responsibility. NO WARRANTY The contents of this manual are provided “as is.” Except as required by applicable laws, no warranties of any kind, either express or implied, including but not limited to the accuracy and reliability of the information in this manual. To the maximum extent permitted by applicable law, in no case shall the manufacturer shall not be liable for any loss or damage of any kind caused by or in relation to any use of this manual or any failing, error or mistake in this manual. Customers shall comply with all applicable export or import laws and regulations and will obtain all necessary governmental permits and licenses in order to export, re-export or import the product mentioned in this manual including the software. Some of the services and functions described in this manual depend on the network on Google services or on other third party software which are not provided by BWC, these services may be different from those described or may not be available from time to time or in some locations. BWC Devices reserves the right to modify the contents of this manual without prior notice. 4 5 T HE BA SIC S 1.1 B RIE F INT RODUCTION T O T HE MAN UA L Thank you for purchasing a BWC Devices Smart&Tough Stealth V2 phone. This instruction manual is intended to guide you in the use of the phone and to help understand the functions and features of the Smart&Tough Stealth V2. In addition to basic call functions this phone uses the Google Android operating system which in turn runs applications (also known as ‘Apps’) from Google and others to provide you a variety of useful features and services. There are a huge number of functions available in Android and at the time of writing (May 2014) there are over a million apps available for Android so it is impossible for this manual to cover everything that you can do with your phone, it tries instead to cover the basics of how your phone works, how manage basic tasks and how to use the phone safely. We encourage you to explore the menus and functions in your phone and to learn more about it through trial and error, it is very hard to damage the phone through experimentation of this kind and you can always set it back to the way it came out of the box by conducting a factory reset as detailed in section 3.12 Backup and Reset. 1.2 GE NERA L C ONSIDERA TION S Your phone should only be used with BWC Standard (2800mAH) and Extended (4800mAh) Batteries. Using other products may cause battery leakage, overheating, explosion and fire. Spare batteries are available from the BWC Devices online shop or from the retailer who sold you your phone. Your phone should only be charged using our approved chargers, other chargers may work, or they may not – and use of a non-approved charger that damaged the phone will void your warranty. The correct charger supplies 1.5A, 5V through the USB port to charge the phone, check the voltage on any third party charger before using. Do not put the battery, mobile phone or charger in a microwave oven, a regular oven or expose it to high temperatures in any other manner as this may cause circuit damage which can result in a fire or other problem. Car dash boards get surprisingly hot in direct sunlight. Keep the phone away from children under 3 as some parts pose a choking hazard, and only allow older children to use it under supervision. Some Airplanes, hospitals and other places prohibit the use of mobile phones, please turn off the phone when asked to do so for the safety of yourself and others. 6 Your Smart&Tough Stealth V2 is a powerful radio transmitter, it is capable of interfering with other electronic devices, be careful when using it around sensitive electronics. Do not disassemble or modify the phone, if you do then you must accept that the consequences are your problem, not ours! Avoid placing your Smart&Tough Stealth V2 too close to magnetic objects such as magnetic cards, mobile phone radiation can damage data on floppy disk, bank cards, credit cards and hotel room keys. 1.3 AB OU T Y OUR PHON E BAT TERY Your mobile phone battery is warrantied for 12 months along with the phone, However please remember that the battery life is limited and that it is a consumable item. The battery is capable of around 500 charge and discharge cycles, over this life the battery capacity will gradually reduce, once the battery life is too short you should replace it with a new battery. Standard and extended life batteries are available from the BWC Devices online shop. When installing batteries check the location of the connectors on the battery and on the phone, make sure that you insert the battery so that they connect correctly. On the Smart&Tough Stealth V2 the end with the connectors is inserted first, then the other end should drop into place. Do not apply pressure to force the battery into place if it will not go smoothly. This could damage the battery and cause the battery to leak. Do not leave your phone on charge when it is fully charged. If you charge the battery for more than 24 hours continuously as this will degrade the performance of your battery. Do not throw old batteries in the general household waste. There will be local regulations in your area for battery disposal, please follow them. Do not throw the battery into a fire, this will cause the battery to ignite and explode which is dangerous (doagh). Damaged batteries are dangerous! If the battery fluid comes into contact with your eye it may cause blindness, do not rub your eyes, rinse with fresh water, and then immediately seek medical attention. Do not disassemble or modify the battery. Do not use or leave the battery beside a fire or heater or in a hot place. Do not use or leave the battery in direct sunlight or in a hot car, this can result in fluid leakage and overheating which will degrade performance and shorten the service life of your battery. Do not allow the battery to get wet this can cause the battery to corrode. 7 1.4 FIR ST USE, A ND HOW T O C HARGE YOUR MOBILE PHONE To start using the phone follow the instructions below. 1. Insert the battery into the phone To do this, fist take the battery out of the protective bag, then take the battery cover off the phone by unfastening the two large silver screws that hold the back cover in place. A small screwdriver is provided in the box to do this, but a small coin or a full size screwdriver should work as well. Once the screws are unfastened the top of the battery cover will lift up and the cover can be removed. Before inserting the Battery it is a good idea to insert your SIM card or cards and to insert a micro SD Memory Card if you intend to use one in your phone. Read section 2.3 HOW TO Insert SIM Cards and Memory Cards to learn how to do this. To Insert the Battery, first check the location of the gold colored connectors on the battery and on the phone, make sure that you insert the battery so that they connect correctly. On the Smart&Tough Stealth V2 the end of the battery with the connectors is inserted first, then the other end should drop into place. Do not apply pressure to force the battery into place if it will not go smoothly. This could damage the battery and cause the battery to leak. Then replace the back cover, before doing this check that the rubber seal around the battery compartment is in place and in good condition. If it is not then the phone will not be waterproof. There are two plastic lugs at the bottom of the back cover, insert these into the corresponding slots in the phone, then push the top against the phone and tighten the two locking screws. 2. Assemble the AC adaptor The AC Adaptor has US style prongs built in, in the USA these can simply be inserted into the mains outlet, for other countries a converter is supplied, to use the converter fold the US pins flat against the body of the AC adaptor, then slide on the correct converter for your country and insert it into the mains socket. 3. Use the USB cable to connect the AC adaptor to the phone Connect the USB A part of the cable to the socket in the AC adaptor, then remove the waterproof plug from the tip edge of the phone and insert the micro USB end of the cable CAREFULLY into the micro USB socket underneath the plug. The waterproof plug is held to the phone by a plastic retaining cord. Once the cable is connected properly thee phone battery charging indicator will be shown on the top right of the screen and will flash. When the on-screen battery indicator shows full, and it is no longer flashing this indicates that charging has been completed. After charging is complete, disconnect the cable from the phone and replace the waterproof plug. 8 If you do not disconnect the charger and leave the phone on, then after a period of time (about 5 to 8 hours), the battery will reduce enough that the phone starts charging again. We recommend that you do not allow this to happen, because it will reduce battery performance and lifespan. 1.5 C HAR GER PR ECAUT ION S Please use the charger supplied with the phone where possible. Other USB chargers with an output of between 500mA and 2A, 5V should work, but we can not be held responsible for warranty claims caused if they do not. NEVER short-circuit the charger NEVER use the charger if the power cord is damaged ALWAYS make sure that the power socket is clean. NEVER allow the AC adaptor to get wet, do not put a water container near the charger. If the charger comes into contact with water or other liquids, immediately turn off the power to the socket and then unplug the AC adaptor. Discard an AC Adaptor that has ever been wet. NEVER use the charger in the bathroom or other rooms with high humidity. NEVER disassemble or modify the charger 1.6 C LEA NING AN D MAINTE NANC E The BWC Devices Smart&Tough Stealth V2 Mobile phone is waterproof only if the battery cover seal is in place and intact and the waterproof plug in the top of the unit is in place. The battery and charger are not waterproof under and circumstances. Check the seal around the battery compartment to ensure that it is in place and undamaged before replacing the cover every time that you do it. To clean the phone use a soft, dry cloth to clean the phone, battery and charger. Do not use alcohol, thinner or benzene solution to wipe the phone. No parts of the phone are user serviceable or replaceable except the battery. 9 2.0 INTR ODUC TION TO A N DR OID 2.1 ICONS The bar across the top of the screen is used to provide information to you, about the phone Icon Meaning Time Display Alarm clock has been set and activated The blue part of the icon shows approximate battery level. The white flash is present if the battery is charging Vertical bars indicate the signal strength of the phone network signal. There are two icons, one for each SIM slot. Next to the Icon the type of data connection available can be shown, G for GPRS E for Edge H for HSDPA (3G) H+ for HSDPA+(3.5G) Phone is playing music Message Recieved 10 Missed Call Meeting Mode Audio Profile is engaged Flight Mode Profile is engaged Mute Mode Audio Profile is engaged USB mode is active (phone connected to a computer) Access Restricted 11 2.2 PHONE LAY OU T Keys Instructions Press this key to enter the mobile phone, voice call interface. ①Call Key Press this key to answer an incoming call ②End Key Press this key to end an active call. In other screens, press this key to turn the screen off, of if it is off to turn it on again. ③Menu Key In any mode, press this key to display the current menu options. ④Return Key In any mode, press this key to return to the previous menu. ⑤Home Key Press this key to go directly back to the home screen. Long press this key to open the list of active tasks. 12 ⑥Power Key Long press this key to turn the phone off/on, turning off requires confirmation from the on screen menu Short press this key to lock the phone. ⑦USB Jack Headset and USB Jack under waterproof rubber plug ⑧Camera Key Press this button to enter the camera application to take photos. ⑨SOS Key Long press to dial emergency number and send a message for help. Go to Settings > SOS Setting to enter the number to be called and up to four numbers to be messaged when the SOS key is pressed ⑩Volume Keys Ongoing call and audio play level, press the two side keys to adjust the volume up and down. ⑾Camera 8M Pixel Camera behind glass lens ⑿Flashlight LED Camera flash, can also be used as an emergency flashlight. ⒀Loudspeaker Loudspeaker 14 Battery Cover Screws Holds battery cover in place and watertight 13 2.3 HOW T O IN SERT SIM C AR DS A N D MEMOR Y CAR DS DUAL SIM PHONE Your BWC Devices Smart&Tough Stealth V2 phone is a Dual SIM phone, it has two SIM card slots and they are both active at the same time. SIM SIZE Both Slots use full size SIM cards, if you have a micro SIM or a nano SIM then you can use them in this phone with an adaptor, but when doing so please be very careful as the groove between the SIM and the adaptor can snag the contacts, damaging them. Repairing this damage can be expensive. INSERTING SIM CARDS To insert the SIM cards into your phone you must first remove the battery cover and then take out the battery. Take the battery cover off the phone by unfastening the two large silver screws that hold the back cover in place. A small screwdriver is provided in the box to do this, but a small coin or a full size screwdriver should work as well. Once the screws are unfastened the top of the battery cover will lift up and the cover can be removed. Remove the battery by gently prying it up from the bottom edge. The two SIM card slots are stacked on top of each other, the bottom slot is SIM1, the top slot is SIM 2. SIM 1 is enabled for 2G and 3G services including WCDMA and HSDPA+ Data, SIM 2 is enabled for 2G services such as voice calling only. When traveling outside of your home network area you can ensure that you do not suffer from roaming data costs by moving you home SIM to slot 2 and using a local pay as you go SIM in slot 1 for voice and data, you will still receive and be able to make roaming voice calls in this configuration. If you plan to use the phone with just one SIM card it is normal to use the SIM in Slot 1 so that you have access to both 2G and 3G services. There is a graphic next to the SIM card slots to show the correct orientation of the cards, orient your card in this way and simply slide the card into the slot, insert SIM 1 first, then SIM 2 if you have one. OPERATING WITHOUT A SIM CARD The phone will work without a SIM card, you can still connect to WiFi for data transmission and to use VOIP services such as SKYPE, but it will not be able to access the mobile phone network for voice calls or data transmission. 14 2.4 POWER ON/OFF, REE BOOT A N D AIR PLANE MODE To turn on the phone, please long press the power key on the top of the phone. When the phone is on, you can turn it off by long pressing the power key. The following message box pops up, select "Power off” to turn the phone off completely. You can also use this process to reboot the phone, to switch it into or out of Airplane mode (which disables all wireless transmissions for safety) or to switch between normal ringing mode, vibrate mode or silent mode using the icons at the bottom of the pop up window. 15 2.5 SIM CAR D PIN LOC K Your BWC Devices Smart&Tough Stealth V2 phone supports SIM card PIN lock, if you have enabled this feature on your SIM card you will need to enter the 4 digit PIN code for your SIM card every time you turn on the phone. Press the ON / OFF key to boot the phone; enter PIN1 code, press input, press to clear the error to confirm If you enter the wrong PIN1 code in several times, SIM card will be locked, then please contact your SIM card network operator. Go to Settings > Security > Set Up SIM card lock to set up a SIM card lock. 2.6 PRE VE NT ING U NAU T HORI SE D ACC ESS T O Y OU R P HONE In order to prevent unauthorized use of your phone, you can set your phone to lock its self after a period of inactivity and then require the user to identify themselves before the phone can be used. Your BWC Devices Smart&Tough Stealth V2 phone supports face recognition, voice recognition, pattern input, PIN input and password input to unlock the phone. Go to Settings > Security > Screen Lock. To choose what type of access control you would like to use on your device, select ‘Slide’ if you would like to have a simple but unsecure access to your device. If you forget your PIN, password or unlock pattern BWC are able to reset your device for you, but this is a chargeable service and all of your data and aps will be lost. 16 AB OUT AN DR OID– AN D HOW TO USE T HE BASIC FUN CTIONS OF Y OUR PHON E Your BWC Devices Smart&Tough Stealth V2 phone runs Android 4.2.1 which is also known as ‘Android Jelly Bean’. If you have used Android before then this section will be a bit basic for you – if this is your first smartphone then read on.. This is not intended to be a full manual on Android, you can find lots of free help using Android online and you can buy some great books that are very comprehensive, but it should help you understand the basic concepts of how to use Android and get you ready to learn more by exploring the functions of your phone. WHAT IS ANDROID? Android is a powerful operating system developed by Google specifically to run on touchscreen phones and tablet PCs. Android runs the phone and allows you to customize the way that the phone screens are laid out, it also allows you to run ‘Apps’ on the phone. Apps are programs, like applications for a PC, there are over a million apps available for Android devices ranging from trivial toys and games to versions of Microsoft Office and other complex business tools. The wide variety of Apps available for Android are what makes the platform so flexible and so powerful. Some Apps are installed on the phone when you get it, others need to be downloaded and installed on your phone. INTERACTING WITH THE ANDROID USER INTERFACE Android is designed to be simple to use and most functions are obvious, try using the phone, its hard to do any harm by just trying things so go ahead and explore. Two things that will help a lot if you get ‘lost’ in the operating system are the Home key and the Back key (see 2.2 Phone Layout if you need help finding them). The Home key takes you back to the home screen regardless of where you are and the back key moves you back one step from where you are. There are four basic things that you need to practice to use Android effectively, all use the touchscreen on your phone, the simplest is the ‘tap’ to open an app you simply tap it’s icon on the screen, a tap is simply touching the icon with your finger tip. The second most common way to control android is with a ‘swipe’ to swipe you slide your finger briskly across the screen. The direction of the swipe and where you start it are both used by android to decide what you want it to do. For example swiping the middle of the screen from side to side moves between the 5 pages of the home screen, swiping down from the top of the screen opens up the notifications page. In some applications like maps you can zoom your view in or out. To zoom in you ‘pinch‘ the screen place your index finger and thumb on the screen about an inch apart then drag them together to zoom in. The opposite action zooms out. 17 Some apps have lists or long pages of text that you need to scroll through to read properly, you can scroll these by just touching the screen, then sliding your finger in the direction that you want the text to move. A GOOGLE ACCOUNT To use Android properly you need to interact with the various services that google have set up to support Android through the internet. To access these services you need to have a google account so that Google know who you are and which services you are signed up for (and so that they can target you with adverts – but that’s the trade off with google!) If you use G-mail then you already have a google account and your username and password are your gmail address and password. If you don’t have a google account then to use your Android device effectively you need one, sign up for one now. To connect your Smart&Tough Stealth V2 to your Google account go to Settings > Add Account > Google and hit ‘Existing’, if you want to set up a new account do the same thing but tap ‘New’ and google will set an account up for you for free. PRE-INSTALLED APPS The most important Apps that are installed on your phone are as follows Settings, Browser, Gmail, File Manager, Play Store, Maps, Messaging, People 2.7 HOW T O MAKE A PHONE CA LL In the home screen to tapthe phone icon to go into the phone app, tap the numbers on the screen to dial the number just as you would on a phone keypad. If you need to erase a the phone number, tap back to delete characters, then press the green key on the front of the phone or the phone icon at the bottom of the screen to dial the number. You can also press the Menu key to pop-up menu options as shown below to send SMS, add the number to the "Contacts" etc. 18 You can also touch at the top of screen, enter to the call records interface to dial numbers that have called you or that you have previously dialed. Or tap the screen, enter the contact interface to dial one of your stored contacts. Tap directly in the home screen, to go directly to the contacts app After the call is connected you will see a screen like the one below: 19 at the top of Tap to open the dial pad and send DTMF tones to the connection if you need to interact with an automated switchboard system. Tap to turn on the speakerphone. Tap to mute the microphone. Tap to hold the current call. Tap to use the keyboard or contacts to add another party to the call. Tap or press the red external key on the phone front to end the current call When you receive a call you should see the interface as below, tap to answer the phone, or drag it to to reject a call, drag it to the caller. 20 and drag it to to send an SMS to 2.8 C ONTA CT S. You can directly open the "Contacts" on the main screen, or open it from the "Dial" app. Enter the contact interface as shown, tap on a contact to view the contact information. Tap call the contact, tap on to to send SMS to the contact. Press the Menu key to modify, share or delete the contact. In the contact interface, tap on to search contacts, tap on to add a new contact. You can choose to save the newly added contacts to the phone or the SIM card and save the contact name, phone, email, address and other information, as shown: 21 In the contact interface tap menu button to pop up the following menu options, you can delete, import, export and share contacts etc. 22 2.9 SEN DING SMS T EXT MES SAGE S A ND MMS PICT URE ME SSA GE S Tap on the home screen to open the text messaging app, then tap to write a new text message. In the "input names and numbers" area, input the number of the recipient, or tap on the contact icon to select a recipient from your stored contacts. Enter your message in the box marked "input the text message" then tap to send the message. Tap on the screen to insert images, video, audio and other files, if you do this then your SMS will be automatically be converted into an MMS before sending (watch out – MMS can cost a lot more than SMS messages, sending the file by e-mail is often cheaper) 23 2.10 MA NAGING T HE FILES O N Y OUR DE VICE You can view and manage the files which are stored locally on the phone and on the micro SD card in your phone if you have inserted one through the file manager application. Files include music and video that you have downloaded, photos and video that you have taken using the camera on the phone. To access file manager, tap on the main screen to list all applications, then tap ‘file manager’ to go into the application. The file manager on the phone is similar to the one on your PC. Files are stored in folders and you can copy the files, paste, rename, delete, share and perform other operations. 24 Tap the menu key while in the file manager app and you can select one or more files or folders to share, copy, delete, cut, rename etc. 25 2.11 TRA NSFE RING FILE S BE TWEE N Y OU R PHONE AN D PC It is possible to transfer files on and off your phone in several ways, the simplest way to move a small number of small files like photos is to e-mail them to yourself as attachments, doing this while your phone is connected to wifi should be free and fast. If you need to move larger files or more files then you can either connect the phone to your PC via USB or move files over using a micro SD card. USB Connection to PCs running Windows 7 and some PCs running Windows 8 is supported, other versions may work, but we recommend that you use a micro SD for file transfer to other PCs or to Macs USB FILE TRANSFER To connect your BWC Devices Smart&Tough Stealth V2 to your PC use the USB cable supplied, it works for both power and data. Connect the micro USB end to the phone and the other end to a free USB port on your PC. The PC should install device drivers automatically. Your phone will pop up a menu telling you that it is USB connected and asking if you want to turn of USB mass storage. Tap ‘Turn on USB mass storage’ to do so and your phone will then behave like a USB storage device, you will see it listed as an external drive in your PC file manager and if you have an SD card in your phone that will also be listed as a separate USB drive. Once the unit is connected as a USB mass storage device you can move files on and off the phone and SD card using your PCs file manager in the normal way. MICRO SD FILE TRANSFER You can use the micro SD card to transfer files on and off your phone by transferring files onto the micro SD and then removing the micro SD and connecting it to your PC as an external USB drive using a USB memory card reader. 26 2.12 TA KING PIC TUR ES A N D VIDE O W IT H T HE C AME RA Like all the other functions of your BWC Devices Smart&Tough Stealth V2 the camera function is an app. The Camera app installed on your phone is a powerful application for taking stills and video, but you can get more powerful and feature rich camera applications through the play store or the BWC Devices app store if you want other functionality. You can access the built in camera app by pressing the dedicated camera button on the top left of the phone (see 2.2 Phone Layout if you can’t find it) , this works when the phone is on and unlocked. Alternatively go to the home screen, and tap into the camera application by tapping to list all apps and then go . This brings up the camera app as shown above. Tap to enter the camera setting mode, here you can change the settings for camera exposure, effects, shooting timer etc. As shown: 27 Tap to take a picture, tap to convert video interface, as shown below and shoot video 28 2.13 MA NAGING VIDE OS AN D IMAG ES Tap on the main screen to enter the application, and then tap , to go to your video and photo gallery. In the gallery you can view all the pictures and video files that you have saved in the mobile phone and on your SD card, press the menu key to browse images, delete images. Tap to send an image by MMS, Bluetooth or E-mail. 29 2.14 VIDE O PLAYER Your BWC Devices Smart&Tough Stealth V2 comes with a video player app. To access it go to the home screen and tap to list all applications, and then tap to enter the video player. A list of available videos will be shown. Select a video to play, tap the video into a small window, your phone supports background play mode. Tap in full-screen mode. Tap time progress bar to forward and rewind. Tap by MMS, Bluetooth or E-mail. 30 to play to play to send the video 2.15 MU SIC PLAYE R Your BWC Devices Smart&Tough Stealth V2 comes with a music player app. On the main screen, tap to list all applications, and then tap to enter the music player. At the top of the screen four icons allow you to list your music by, the artist, album, song name or playlist. Tap a listing to play a song: When a song is playing pause/play song. indicates continue playing. indicates switch to last song, long press to rewind. indicates switch to next song, long press to fast forward. indicates the progress of the song playback (time display), slid the spot along the scroll bar with your finger to jump to any position in the song. 31 Tap to turn shuffle function on/off. Tap to turn repeat all songs on/off Tap to turn repeat current songs on/off. Tap to go back to song list. 32 2.16 BU ILT IN FM RADIO On the main screen, tap to list all applications, and then tap to enter the radio application. In order to use the radio you need to plug in the headset cable, it works as an antenna for the radio. If you do not see the channel search feature the headset is not inserted. Tap the channel list; tap Stop / Play Radio. As in other applications tap , to bring up the app menu as seen below. 33 to enter 2.17 VOICE R EC OR DER FU NCT ION On the main screen, tap to list all applications, and then tap to enter the voice record. You can use this app to record and manage audio files. Start recording: Tap Play recording: Tap End recoding: Tap Pause recording: Tap List of recording: Tap Recorded audio files successfully saved automatically generated file list, tap recording or playback recording, and automatically save to your phone. 34 to view the 2.18 C LOC K SE TTING A LAR MS AN D U SING T HE ST OPWA TC H F UNC TION On the main screen, tap to list all applications, and then tap to enter the clock app, Tap to view and set alarmS. tap to open the stopwatch function Tap to pop up the in app menu and select night mode, set menu and set the alarm, etc. 35 2.19 CA LEN DA R On the main screen, tap to list all applications, and then tap to access the built in calendar application. Other Calendar applications are available from the Play store, the Google Calendar application is particularly good if you use g-mail. In the calendar interface you can perform all the normal calendar functions. Tap up the in app menu for most functions: 36 to pop 2.20 CA LCU LAT OR On the main screen, tap to list all applications, and then tap to access the calculator. Your phone provides you a calculator with the four basic functions, allowing you to perform simple arithmetic. Press the "Clear" to clear the recent input or the result. 37 2.21 N OTE PA D On the main screen, tap Notepad app. Tap on to list all applications, and then tap to access the to add a new Note. Tap the "Unclassified" area to classify the new Note, mainly divided into work items, personal matters, family matters and learning issues. 38 2.22 FLA SHLIG HT On the main screen, tap to list all applications, and then tap on to enter the flashlight app, this is very easy to use. The LED light is next to the camera on the back of the phone. If you leave the light on for a long time it will affect battery life. 39 2.23 E-MA IL There are a number of different ways to get e-Mail on your BWC Smart&Tough Stealth V2. The unit comes with an e-mail client application pre-installed and you can add other apps designed for use with different e-mail service providers including a dedicated G-mail app through the app store. The pre-installed e-mail app is set up to allow you to access G-mail, Hotmail and many different kinds of corporate mail accounts, it is quite easy to use, but itr does not allow access to all of the features of complex e-mail systems such as G-Mail. BWC recommend that you install a dedicated client app for your main e-mail service through the app store, and use the built in app for secondary accounts or systems that do not have a dedicated app available. To access the built in e-mail app on the main screen, tap then tap on to list all applications, and to enter the pre-installed e-mail app. Enter the program and follow the on screen instructions set up your account, then you can tap on your email account. Obviously to opperate correctly the e-mail app requires that your phone is connected to a cellular data network or wifi network. 2.24 BR OW SE R There are a wide range of browser applications available for android through the app store, if you have a favorite desktop browser BWC recommend that you install the Android version on 40 your phone, if you use Chrome for example this will allow you to see saved favorites from your desktop browser on your phone once you sign in. However if you do not have a browser preference the built in web browser is fast, capable and works well on the screen size of the Stealth. To access the built in web browser app on the main screen, tap and then tap to list all applications, to enter the browser. Obviously web browsing required a network connection, either mobile data or wifi. The built in browser allows you to surf the Web on your phone, view Web pages, create a bookmarks etc. You can use search engines and most web sites just as you can on a desktop PC.: Touch the screen, the screen display URL above, display the menu below: 41 Tap to go back to the previous page; Tap to enter the next page; The web browser can keep multiple tabs open at the same time, tap to view the tabs that you have open at the moment, the number superimposed on the icon shows how many are open you can slide up and down the list of open tabs, and select a tab to open. Taping , will bring up a list of your bookmarks, history, and saved web pages. Tap on the menu button on the main page, to bring up the web browser menu shown below where you can refresh, close, save to bookmark, share web pages, change settings, etc. 42 2.25 SE ARC HING Your BWC Stealth V2 has a powerful search tool built into the operating system. To access search tool on the main screen, tap to list all applications, and then tap on to enter the search interface, search will look at all of the content in your phone and it can be used to search the web: Enter the phrase tha you want to search for, tap the ‘go’ key, then select the type of search you want to conduct, you can search web pages, contacts, etc.: Tap , open the search results: 43 Tap on the menu key on the main page, you can refresh, close, save to bookmark, share web pages, settings, etc. 2.26 DOW N LOA D TOOL 44 The download tool can be used to see details of any files that you download through the web browser or other apps. On the main screen, tap into the application list, and then tap to enter the download interface. This will bring up a list of recent downloads and currently active downloads. Click the menu icon to change the sort order etc. 2.27 GOOG LE MA PS Google maps is pre-loaded on your BWC Stealth V2. You can use google maps to check locations, plan trips and to get turn by turn navigation. To access Google Maps on the main screen, tap to list all applications, and then tap enter the map interface. Google maps is a complex app which is regularly updated, detailed use instructions for Google Maps is outside the scope of this user guide for the Stealth V2, check online for detailed instructions or explore the interface to see what it can do ! Google maps requires an active data network or wifi connection to opperate. 45 to 2.28 BAR OMET RIC A LT IMETE R AN D T HERMO MET ER On the main screen, tap into the application list, and then tap to enter the barometric altimeter. You can view the pressure, temperature (temperature inside the phone) and altitude of your location. Press the menu key to pop up the app menu "Calibration" and "About". In the menu you can calibrate your altitude to the local barometric pressure, and view the software features. 2.29 COMPA SS On the main screen, tap into the application, and then tap to enter the compass interface. The compass icon on middle of the screen will change according to the orientation of the phone, an icon appears above the corresponding angle, as shown: . 46 2.30 DOW N LOA DING A PPS, MU SIC AN D VIDE OS T O Y OU R PHONE Your BWC Stealth V2 is a powerful computer that can be used to run a wide range of apps, there are two easy ways to load new apps onto your device, use the Google Play store or the BWC App Store of On the main screen, tap into the application, and then tap to enter the Play Store or the separate BWC Store icon to enter our own store. To use either store when you first enter, you need to create a new account, you can follow the prompts to complete the creation process. Once that is done both stores are quite selfexplanatory and work in similar ways. Be aware that if you enter your credit card details you are liable for the cost of purchases made in the store or through ‘in app’ purchases – if you give your phone to your kids to play games like candy crush with in app purchases it can be very expensive ! 3 SETTI NGS All of the operational settings for your phone and how it connects to networks and devices are controlled through the settings application. 47 To enter the settings app, on the main screen, tap then tap to go into the application list, and to enter the settings. This will bring up a list of items that can be adjusted down the left side of the screen and when one of these items is selected the details related to that selection appear on the right hand side of the screen 3.1 SIM M ANAG EM ENT The Smart&Tough Stealth V2 has two SIM slots, you can use the SIM management settings to decide which SIM is used by default for voice calls, video calls, messages, data connections etc. Remember that SIM 1 is a 2G and 3G slot enabled for 3.5G HSDPA+ connections, and SIM 2 is a 2G slot only, so SIM 1 is the slot to use with you main SIM for data connections etc and SIM 2 is best used for voice calls only. If you travel abroad you can use SIM 2 for your home SIM to be sure that it can not incur data roaming charges but it can still be used for voice calls and buy a local pay as you go SIM for SIM slot 1. 3.2 W IFI Next to the listing for WiFi you will find a switch to turn WiFi on and off, tap it to toggle the state of the connection. Tap WIFI to enter the WIFI interface and see available networks, make sure that the toggle switch is ‘ON’ then your phone will automatically search for wireless networks within range. 48 Tap to refresh the network list. You can connect to a specific network by tapping on the name of the network, if the network requires a password enter the password in the input area, and then tap "Connect" Note that most public wifi networks will then require you to open a web browser and enter payment or membership details or accept terms and conditions of use. You can also tap on the screen in the lower right corner, add a hidden network: 49 3.3 B LU ET OOT H Next to the listing for Bluetooth you will find a switch to turn Bluetooth on and off, tap it to toggle the state of the connection. Tap on ‘Bluetooth’ to enter the Bluetooth management interface, if the toggle switch is ‘ON’ the phone automatically searches for Bluetooth devices within range you can tap on any device with which to pair your Stealth V2. 3.4 MOBILE NET WOR K 50 In this menu you can control the way that your phone connects to and interacts with your mobile phone networks, you can turn the data connection on or off, enable 3G services, manage default network operators when roaming and other options: 3.5 FLIG HT MODE There are often occasions when you need to turn off all of the radio functions of your phone, for example when traveling by aircraft or when in a hospital. Flight mode gives you a quick and easy way to do this, when Fight Mode is ‘ON’ all radio functions are switched off. So all wireless connections, calls and messages are not available. Flight Mode can be switched on by ticking the box found under More.. in the settings menu. 3.6 AU DIO PROFILE Your Smart&Tough Stealth V2 can be set up to a number of different audio profiles. Each Audio profile has a specific combination of ring tones and alerts for different kinds of incoming message, ringer volume and either vibrates or not when a call comes in. 51 The following profiles are installed by default: Standard, Mute, Meeting, Outdoor; You can also tap on the left corner to add a new mode using your own custom settings, tap on the lower right corner to return to the default settings. 3.7 DISPLAY Open this item to personalize set the phone screen brightness (remember a brighter screen uses more battery power), theme, wallpaper, themes and decide if the phone should automatically rotate the screen when held sideways or not. 3.8 ST ORAGE You can tap storage under settings to view the phone and SD card total capacity, free space, and used space. You can choose the preferred installation location for apps and format the phone and micro SD card memory. 52 3.9 A PPS Tap Apps to view the installed app, phone storage applications, running applications and all applications. You can tap on the menu key to reorder these programs by size. Tap on any App in the list to disable it, uninstall it or update it. 3.10 SE CUR ITY Tap on Security to set the power on screen security pass code or password, SIM card lock, device encription, credential storage and other security settings: 53 3.11 LA NGUA GE AN D IN PUT ME T HOD Tap ‘Language and Input’ (the menu choice next to the icon that looks like a letter ‘A” key from a keyboard to change the menu language and text input method used by the phone, tap to change the settings for spelling management and data input for your keyboard: BWC recommend that you download the ‘Swiftkey’ app from the play store as we think it is the best keyboard ever made! 54 3.12 BAC KU P A ND RE SET The backup and reset function is a very important function on your phone, you can use it to backup data, automatically restore it and you can also use it to restore your phone to the factory settings, this is a good way to clear the phone of unwanted data and apps that could be causing malfunctions. It will remove all installed apps and data, alowing you to restore a ‘clean sheet’ when troubleshooting a malfunctioning phone. 3.13 DA TE AN D T IME You can use this function to set the data and time or to choose to you’re your phone automatically determine the date and time. You can set your phone to use the 24hour format or 12 hour time format and set the way that the date is displayed. You can also set the geographic time zone where you are located, if the time on your phone looks wrong, make sure that both the Time and Time Zone are set correctly: Most Apps use the time set here, for example e-mails will show as received at the time set in this setting. 3.14 SC HEDU LE POWER ON/ OF F 55 Use this feature to set the time to automatically turn the phone on or off. 3.15 ACCE SSIB ILITY To set fast boot, auto-rotate screen, large font, press the "Power" key to end the call and other functions: 3.16 DEVE LOPE R OPTION S You can set desktop backup password, unlock the screen, SD card read and write protection, USB debugging and other different applications in developer functions. 3.17 AB OUT PHONE View phone's current signal, power, service status, the phone's software and hardware information and other details in ‘About Phone’. 4 COMMO N PROBLE MS & SO LUTIO NS If an exception occurs while using your phone, please refer to the following table to troubleshoot 56 Common The causes The solutions problems Using the mobile phone in poor reception area, such as in stone, Try to avoid brick or metal buildings or basements, the radio waves cannot effectively penetrate; Using the mobile phone in the Poor signal congested area, such as a soprts Try to avoid stadium, congestion caused by the volume of calls. Are you within range of a base station for your network Can ask Internet service providers provides service area map provider? Due to poor network trunk, Echo or noise is a regional problem Hang up and redial, new trunk lines may be better Some regional bad line Turn off the mobile Standby time is related to the phone in poor reception network system setting area. Standby time shorter The battery need to replaced, Please replace new please replace new battery. battery. The phone will continue to search Please move to strong signal 57 base station, it will use a lot place or turn off the phone. of battery power, causing the standby time become shorter. Check the battery power Unable to The battery power is exhausted. or charge it. boot Contact your network SIM card is damaged service supplier. Make sure SIM Card has SIM card SIM card not installed been installed. error Use clean cloth to brush the SIM card metal surface have dirt SIM card metal contact point Contact your network SIM card is invalid service supplier. Ask your network service unable to Beyond the GSM or 3G network supplier the service connect the service area. area. network Please move to the strong The signal is weak signal place to retry cancel the call barring set up the call barring function function Calls unable to call cancel the fixed dial set up the fixed dial function function. 58 PIN error input incorrect PIN Code in three times contact your network service supplier. need to replace new battery Battery or charger damaged or charger Unable to charge Charge in lower than -10℃ or change the charging higher than 55℃ environment environment check whether the plug Bad contact connection well Unable to Phonebook memory is full add phonebook phonebook record. record unable to set up some delete some part of Network provider does not support this feature, or you did not apply for this function function 59 contact your network provider.