1
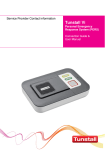
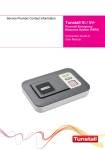
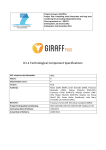
Programming
and user guide
CareAssist
68100/01
D6707281B
Programming and user guide
Introduction
CareAssist is designed to support local carers to deliver high
quality, non-intrusive care. It is extremely easy to use,
portable device that provides carers working or living onsite
with a means to receive instant alerts from Tunstall’s range of
telecare sensors.
As a result, onsite carers can be quickly made aware of any
incidents allowing them to provide a high level of care whilst
maximising their efficiency. It provides a very cost effective
telecare solution whilst avoiding the need for a telephone line
or monitoring centre service which is often not required when
full time (24 hour) care is being provided.
The CareAssist has a radio range in free space of up to 200m
and has a battery life of up to 12 hours (depending on usage).
Page 2 of 24
Programming and user guide
Contents
What’s in the box .................................................................... 4
Key features............................................................................. 5
Display symbols...................................................................... 6
How to set up for the first time ............................................. 7
How to program ...................................................................... 8
Entering programming mode ........................................................... 8
Exiting programming mode.............................................................. 8
Adding a trigger................................................................................ 9
Removing a trigger......................................................................... 10
Editing a trigger.............................................................................. 11
Viewing Triggers ............................................................................ 12
Locations........................................................................................ 12
Adding a Location................................................................................... 13
Removing a Location.............................................................................. 13
Editing a Location................................................................................... 14
Setting Time and Date ................................................................... 14
Changing Settings.......................................................................... 15
Alerts ...................................................................................................... 15
Radio Walk Test ..................................................................................... 16
Service Menu.......................................................................................... 16
Alarm History ................................................................................. 17
View Locally............................................................................................ 17
Send to PC ............................................................................................. 18
Switch Off....................................................................................... 20
How to manage alarms ........................................................ 21
Acknowledging an alarm call .................................................................. 21
Managing multiple alarm calls ................................................................ 21
Battery Information............................................................... 22
Accessories ........................................................................... 22
Notices ................................................................................... 23
Declaration of conformity .................................................... 23
Technical Details................................................................... 23
Page 3 of 24
Programming and user guide
What’s in the box
CareAssist
Antenna
Port
Pager
Output
Port
Charging
Socket
(USB)
Keypad
Antenna
Belt clip and screw
Charger
User Guide
Page 4 of 24
Programming and user guide
Key features
The CareAssist is designed to be extremely easy to use and
understand. It includes the following features:
Multiple alert modes – the unit can alert the carer using
audible alerts, on screen message and a vibration mode. The
audible alerts and vibration mode can be turned off if
necessary.
Date and time – providing that the time has been set, the
current time will be shown on the screen. The set date and
time will also be used to log the alarm history in the
CareAssist’s memory.
Keypad lock – if the keypad is
not pressed for 30 seconds, the
keypad will be locked and a key
symbol will be displayed on the screen.
View and download alarm history – the alarm history
including the time the alarm was received and the time it was
acknowledged (cleared) is held on the unit’s memory and can
be viewed on the screen or downloaded to a PC.
Flexible monitoring period – when using a Universal Sensor
(only when set to send ‘Door’, ‘PES Wander’, ‘Bed Absence’
and ‘PIR Standard’ radio messages) or PIR movement
sensor, the CareAssist provides the ability to only alert the
carer to trigger activations during a specified period of time
each day. For example, to only receive activation alerts from
a bedroom door during the night. The date and time must be
set in the unit for this feature to operate.
Pager compatible – the CareAssist has a pager output port
that enables alarm messages to be sent to pagers worn by
carers (this requires additional products see accessories on
page 22 for more details).
Page 5 of 24
Programming and user guide
Display symbols
Symbol
flashing
Meaning
Description
Battery indicator
1 bar = 25% charged
2 bars = 50% charged
3 bars = 75% charged
4 bars = 100%charged
Low battery
Battery should be
charged
Keypad locked
Press and hold select
key to unlock keypad
Time
Silent mode
Audible alerts disabled
Down arrow
Press down key to
scroll to next menu item
Up arrow
Press up key to scroll to
next menu item
Right arrow
Press right key to scroll
to next menu item
Left Arrow
Press left key to scroll
to next menu item
Page 6 of 24
Programming and user guide
How to set up for the first time
To set up the CareAssist follow the below steps:
1.
2.
3.
4.
If the CareAssist is to be used as a portable device,
attach the belt clip to the back of the CareAssist
and then fit the screw to permanently fix it in place.
A – Back of the CareAssist with
the belt clip fixing points
B – Squeeze the top of the
belt clip and fit in to the fixing
points
C – Fit the screw to permanently
fix the belt clip
D – Belt clip is now fixed
Connect the CareAssist to the USB charger
provided then plug it into a mains power socket and
charge for an initial period of 24 hours.
It is now advisable to perform a range test around
the building in which the CareAssist will be
deployed to ensure it provides sufficient coverage
(see Radio Walk Test on page 16 for details).
The antenna can be
screwed into the antenna
port to improve the radio
range of the unit. The
Antenna does not have to
be used where the radio
coverage is sufficient.
You are now ready to program the CareAssist.
Page 7 of 24
Programming and user guide
How to program
In order to program the CareAssist you first of all need to
enter programming mode.
Entering programming mode
To enter programming mode, ensure the keypad is unlocked
then press and hold the select key until the unit beeps.
displayed), press and hold the
If the keypad is locked (
select key to unlock it, then press and hold the select key
again to enter programming mode.
The CareAssist will then display the first item (Add Trigger) in
the programming menu.
NOTE: The word ‘Trigger’ refers to any 869MHz radio trigger or telecare sensor.
Programming mode will automatically time out if the keypad is not pressed for a 60
second period.
Exiting programming mode
To exit programming mode, press the up/down keys to ‘Exit’
then press select. The CareAssist will return to its normal
mode.
NOTE: Unless the unit is in ‘Walk Test’ mode, programming mode will
automatically be exited if an alarm is received.
Page 8 of 24
Programming and user guide
Adding a trigger
Step 1 - In programming mode, use the up/down keys to
display ‘Add Trigger’ then press the select key.
Step 2 - The CareAssist will then
display ‘Please Press Trigger’.
Then activate the trigger/sensor that is required to be added.
Step 3 – The radio trigger’s ID number will
then be displayed. Check the radio trigger
ID displayed matches the ID on the small
label on the trigger/sensor (see below).
The Trigger ID is a 6
digit number normally
Step 4 – If the Trigger ID matches, press
displayed in the top right
of product labels.
select. If the ID doesn’t match then more
than one trigger may have been received. In this case, use
the down key to display the correct ID, then press select.
Step 5 – You must then assign a location to the trigger. Use
the up/down key to scroll to the required location then press
select. If Custom Locations have been programmed, they will
be displayed before the default locations.
Step 5a – When adding a Universal Sensor (only when set to send
‘Door’, ‘PES Wander’, ‘Bed Absence’ and ‘PIR Standard’ radio
messages) or PIR movement sensor, the CareAssist provides the
ability to only alert the carer to trigger activations during a specified
period of time each day e.g. at night. In this case, the unit will ask you
to set the ‘Monitoring period’. You can then select either:
24 Hour - the unit will monitor trigger activations 24 hours a day.
Configure – the unit will ask you to input a start/end time and will only
generate alerts for trigger activations received during this period.
The date and time must be set correctly in the unit for this feature.
Step 6 – A confirmation tone will be emitted after successfully
adding the trigger.
NOTE: If a location is not assigned the trigger will not be added to the CareAssist.
Page 9 of 24
Programming and user guide
Removing a trigger
IMPORTANT: Removing triggers may affect the events held in the memory of the
CareAssist. Therefore before removing triggers it is advisable to download any
history you wish to keep (see Alarm History section).
Step 1 - In programming mode, use the up/down keys to
display ‘Remove Trigger’ then press the select key.
Step 2 – Scroll to or activate the
trigger you wish to delete. When
the correct trigger ID is displayed,
press select.
Step 3 – Confirm that you wish to remove the trigger and a
confirmation beep will be emitted.
Step 4 – To exit, press the down arrow key until the word
‘Exit’ is displayed then press select.
Page 10 of 24
Programming and user guide
Editing a trigger
IMPORTANT: Editing triggers may affect the events held in the memory of the
CareAssist. Therefore before editing triggers it is advisable to download any
history you wish to keep (see Alarm History section).
Editing a trigger enables you to change the location assigned
to a trigger.
Step 1 - In programming mode, use the up/down keys to
display ‘Edit Trigger’ then press the select key.
Step 2 – Scroll to or activate the trigger you wish to edit.
When the correct trigger ID is displayed, press select.
Step 3 – Then scroll to a new location and press select to
confirm the change. A confirmation beep will be emitted.
Step 3a – When editing a Universal Sensor (only when set to send
‘Door’, ‘PES Wander’, ‘Bed Absence’ and ‘PIR Standard’ radio
messages) or a PIR movement sensor, the CareAssist provides the
ability to only alert the carer to trigger activations during a specified
period of time each day e.g. at night. In this case, the unit will ask you
to set the ‘Monitoring period’. You can then select either:
24 Hour - the unit will monitor trigger activations 24 hours a day.
Configure – the unit will ask you to input a start/end time and will only
generate alerts for trigger activations received during this period.
The date and time must be set correctly in the unit for this feature.
Step 4 – To exit, press the down arrow key until the word
‘Exit’ is displayed then press select.
Page 11 of 24
Programming and user guide
Viewing Triggers
By selecting ‘View triggers’ you can easily view all the triggers
that are currently programmed to the CareAssist. This
includes the Trigger ID and type. By pressing and holding the
right key you can also temporarily view the location assigned
to the highlighted trigger.
To exit, press the down arrow key until the word ‘Exit’ is
displayed then press select.
Locations
Whilst all triggers and telecare sensors have a list of preprogrammed locations available to choose from you can
personalise the CareAssist by adding custom locations. The
custom location replaces the location information that is
presented during an alarm call. Custom locations can be used
to display a resident’s name or, where it is important to have a
location; both the resident’s name and a location could be
added. Where both a resident’s name and location is
required, a custom location for each of the resident’s rooms
will need to be added.
For example.
Custom location 1 – Deborah’s living room
Custom location 2 – Deborah’s bedroom
In multiple person complexes it may be more appropriate to
just display the person to whom the trigger is associated.
For example;
Custom location 1 – Deborah
Custom location 2 – Helen
Page 12 of 24
Programming and user guide
Adding a Location
Step 1 - In programming mode, use the up/down keys to
display ‘Add Location’ then press the select key.
Step 2 – To edit the location text, press the up/down keys to
scroll to the letter/symbol you wish to use then press the
left/right keys to move to the next space.
Step 3 – Press select when you have completed the custom
location text and a confirmation beep will be emitted.
Removing a Location
IMPORTANT: Removing locations may affect the events held in the memory of the
CareAssist. Therefore before removing locations it is advisable to download any
history you wish to keep.
Step 1 - In programming mode, use the up/down keys to
display ‘Remove Location’ then press the select key.
Step 2 – Scroll to the location you wish to delete. When the
correct location is displayed, press select.
Step 3 – Confirm that you wish to remove the location by
highlighting ‘yes’ and pressing select, a confirmation beep will
be emitted.
Page 13 of 24
Programming and user guide
Editing a Location
IMPORTANT: Editing locations may affect the events held in the memory of the
CareAssist. Therefore before editing locations it is advisable to download any
history you wish to keep.
Step 1 - In programming mode, use the up/down keys to
display ‘Edit Location’ then press the select key.
Step 2 – Scroll to the location you wish to edit. When the
correct location is displayed, press select.
Step 3 – To edit the location text, press the up/down keys to
scroll to the letter/symbol you wish to use then press the
left/right keys to move to the next space.
Step 4 – Confirm that you wish to save the changes by
highlighting ‘yes’ and pressing select, a confirmation beep will
be emitted.
Setting Time and Date
IMPORTANT: The date and time must be set correctly on the CareAssist as the
time and date is logged in the unit’s history. If the CareAssist battery runs out and
is not recharged the Time and Date should be checked to ensure it hasn’t reset.
Step 1 - In programming mode, use the up/down keys to
display ‘Set Time/Date’ then press the select key.
Step 2 – Press up/down keys to display either ‘Time’ or ‘Date’
then press select.
Step 3 – To edit the time/date, press the up/down keys to
change the number and the left/right keys to move to the
hours/minutes/day/month/year.
Step 4 – Press select when the correct time/date is displayed,
a confirmation beep will be emitted.
To exit the Time/Date menu, use the up/down keys to display
‘Back’ then press select.
Page 14 of 24
Programming and user guide
Changing Settings
In programming mode, use the up/down keys to display
‘Settings’ then press the select key. You will now be
presented with the settings menu.
To exit the settings menu, use the up/down keys to display
‘Back’ then press select.
Alerts
The alerts menu item enables you to configure how the unit
should alert you when an alarm is received.
Use the up/down keys to display ‘Alerts’ then press select.
Then follow the on screen instructions to:
•
•
•
Enable/Disable Audible Alerts
Set Alert Volume Level – High or Low
Enable/Disable the Vibration mode
Highlight ‘Yes/No’ then press select to confirm each alert
setting.
Page 15 of 24
Programming and user guide
Radio Walk Test
IMPORTANT: Genuine alarm calls will only display as a range test when the
CareAssist is in Walk Test mode and will not be registered in the unit’s history.
This feature allows you to test the radio range around the
building by continually activating triggers and receiving
audible alerts to verify the radio transmission has been
received.
To enter walk test mode, enter programming mode by holding
down select then press select when ‘Radio Walk Test’ is
displayed. Then activate the trigger/sensor at different points
in the building to assess the radio performance/range within
the building.
Walk test mode can be exited by pressing the select key at
any time alternatively, Walk Test mode will time out after a
period of inactivity.
In Walk Test mode, Audible alerts will only be emitted if the
trigger is already programmed into the CareAssist. Triggers
not programmed into the unit will just display their trigger type
and ID number on the screen.
NOTE: The range of the unit is up to 200m (line of sight) however the overall radio
performance in buildings is dependant upon a number of conditions including the
building type, wall thicknesses, insulation type etc.
Service Menu
This menu provides access to Pager settings, Radio
Diagnostics, Battery Status, Software Version Info, Restore
Defaults and a complete unit Shutdown. It is only accessible
by authorised individuals.
Page 16 of 24
Programming and user guide
Alarm History
IMPORTANT: The history is altered when triggers/locations are edited and deleted
therefore it is advisable to download the unit’s history before performing these
tasks. The Time/Date must be set correctly to use this feature.
The history of alarms received and acknowledged (cleared) is
held in the unit’s memory. The memory has a capacity to hold
the last 256 events. The history can be viewed locally (on the
CareAssist screen) or can be downloaded to a PC.
View Locally
After entering Alarm History, press select when the screen
displays ‘View Locally’, the CareAssist will then display the
history held on its memory in the following format.
Memory event
number
Total events in memory
Action (Raised or Cleared)
View next
event
Alarm information (display will scroll between
(alarm type, location, date and time, trigger ID)
Page 17 of 24
Programming and user guide
Send to PC
The unit’s history can be downloaded to a PC using
HyperTerminal which is a program available on standard
Windows based PCs. The program is also available from
www.hilgraeve.com and free versions are also available
from many other websites.
Step 1 – Connect the CareAssist to your PC using the PC
download lead (see
accessories) and a USB to
RS232 adaptor (if
required).
Step 2 – Go to the ‘Start’
menu on your PC, and
select the following go to
the following folder ‘All
Programs / Accessories /
Communications’, then
click on HyperTerminal.
Step 3 – Create a new connection by
typing in the name ‘CareAssist’ and
clicking OK.
Step 4 – on the Connect to screen,
change the ‘Connect using’ drop
down box to the correct COM port
then click OK. To establish which
COM port your PC is using.
a.
Open your PC’s System
Properties and select the
Hardware tab, then click
Device Manager
Page 18 of 24
Programming and user guide
b.
Scroll down to Ports (COM & LPT) and click on the
+ symbol, then see which COM port is being used
(example COM5 is the port
being used for the USB
adapter cable). You can then
close the device manager.
Step 5 – Ensure the COM port
properties are set correctly (see
below) then click OK
Bits per second Data bits Parity Stop bits Flow control -
9600
8
None
1
None
Step 6 – In the HyperTerminal
menu select Transfer, then either ‘Capture Text’ (saves as a
text file) or ‘Capture to Printer’ (prints the history) and select
the appropriate file/printer.
Step 7 – Go to CareAssist programming menu by holding
down the select key. Scroll down to ‘Alarm History’ then press
select. Scroll to ‘Send To PC’ then press select and the
history will be transferred into HyperTerminal.
Step 8 – Exit HyperTerminal and when asked ‘Do you want to
save the connection named “CareAssist”?’, click yes.
Page 19 of 24
Programming and user guide
Step 9 – the next time you open HyperTerminal, you can
directly open the previously saved CareAssist setup to avoid
needing to carry outs steps 2-5. The CareAssist setting can
be opened by going to ‘Start / All Programs / Accessories /
Communications / HyperTerminal’ then click on CareAssist.
Switch Off
Pressing select when ‘Switch Off’ is displayed will turn off the
CareAssist unit. No alarm calls will be received when the unit
is switched off.
The unit can be turned on again by pressing and holding the
select key.
Page 20 of 24
Programming and user guide
How to manage alarms
To generate an alarm, activate a trigger that has been
programmed to the CareAssist. The unit will enter alarm
mode and the display will alternate between the activation
type and the location of the trigger. The CareAssist will also
beep and vibrate according to the alert settings (see alert
settings).
Activation type
Location
Additional information including the time the alarm was
received and the trigger ID can also be accessed by pressing
the down key.
Acknowledging an alarm call
When an alarm call is received, it can be acknowledged
(cleared) by pressing select. Then press the right arrow key to
highlight yes and press select again.
The call will then be cleared and the call information stored in
the CareAssist’s memory (see alarm memory).
Managing multiple alarm calls
If multiple alarms are received, then it is possible to scroll to
other alarms in the queue by using the left/rights keys.
NOTE: The CareAssist supports up to 20 concurrent alarm calls.
Page 21 of 24
Programming and user guide
Battery Information
The unit contains a Lithium ION rechargeable battery. Before
using for the first time, the unit should be charged for a full 24
hour period in order to fully charge the battery.
During normal usage the battery will last up to 12 hours.
Whenever the unit is discharged it is advisable to charge the
unit for 2 hours in order to return the battery to full charge.
To preserve battery power, the CareAssist screen will go
blank after 50 seconds if the keypad is unlocked and after 15
seconds if the keypad is locked.
The CareAssist should be disposed of according to current
local regulations.
The battery can be changed by removing the battery cover
Accessories
The following accessories are available from Tunstall:
Accessory
PC download lead (RS232)
RS232 to USB converter
Replacement battery
Belt clip
Antenna
Micro USB charger
For connecting to a pager
system
Pager
Pager Transmitter
Pager Transmitter Connection
lead (Connects CareAssist to the
Part Number
D6705015A
S8502004
S1004037
D6702098A
S2005018
XD6706011A
9000/69A
9000/61A
D6705015A
Transmitter)
Page 22 of 24
Programming and user guide
Notices
Please refer to www.tunstallhealth.com for information
regarding the statutory approvals and notices for this product.
Declaration of conformity
We, Tunstall declare that this telecare equipment is in
compliance with the essential requirements and other relevant
provisions of the R&TTE Directive 1999/5/EC.
Technical Details
Size:
Weight:
Radio Frequency:
Radio Range:
Battery backup time:
Battery charge time:
Programmable sensors:
Number of locations/users:
Memory capacity:
Warranty:
128 x 73 x 22mm (L x W x D)
148g
869.2125MHz
Up to 200 metres (line of sight)
Up to 12 hours
Up to 2 hours
Up to 128
139 locations
(inc 64 custom locations)
Last 256 events
2 years return to base
Page 23 of 24
www.tunstallhealth.com
Our policy of continual development means that product specification
and appearance may change without notice.
© 2010 Tunstall Healthcare Group Ltd.
® TUNSTALL is a registered trademark
Tunstall Healthcare Group Limited, Whitley Lodge, Whitley Bridge,
Yorkshire DN14 0HR