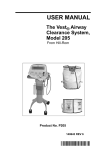
1
USER MANUAL
CareAssist™
Bed
From Hill-Rom
Product No. P1170
USR116 REV 4
© 2005 by Hill-Rom Services, Inc. ALL RIGHTS RESERVED.
Manufactured by:
HILL-ROM COMPANY, INC.
1069 STATE ROUTE 46 E
BATESVILLE, IN 47006-9167
Authorized European Union Representative:
HILL-ROM SAS
B.P. 14 - Z.I. DU TALHOUET
56330 PLUVIGNER
FRANCE
TEL: +33 (0)2 97 50 92 12
No part of this text shall be reproduced or transmitted in any form or by any
means, electronic or mechanical, including photocopying, recording, or by any
information or retrieval system without written permission from Hill-Rom
Services, Inc. (Hill-Rom).
The information in this manual is confidential and may not be disclosed to third
parties without the prior written consent of Hill-Rom.
Fourth Edition
First Printing 2003
Printed in the USA
CareAssist™ is a trademark of Hill-Rom Services, Inc.
CSA® is a registered trademark of Canadian Standards Association, Inc.
Dining Chair™ is a trademark of Hill-Rom Services, Inc.
FullChair® is a registered trademark of Hill-Rom Services, Inc.
Hill-Rom® is a registered trademark of Hill-Rom Services, Inc.
Line-of-Site® is a registered trademark of Hill-Rom Services, Inc.
PLEUR-EVAC® is a registered trademark of Deknatel, Inc.
Shearless Pivot® is a registered trademark of Hill-Rom Services, Inc.
SideCom® is a registered trademark of Hill-Rom Services, Inc.
Slo-Blo® is a registered trademark of Littlefuse, Inc.
The UL logo is a registered trademark of Underwriter’s Laboratories, Inc.
The information contained in this manual is subject to change without notice.
Hill-Rom makes no commitment to update or keep current, the information
contained in this manual.
Hill-Rom reserves the right to make changes without notice in design,
specifications, and models. The only warranty Hill-Rom makes is the express
written warranty extended on the sale or rental of its products.
To order additional copies of this manual (USR116), refer to the back cover for
contact information. For countries not listed on the back cover, contact your
distributor.
NOTE:
The back cover is a comprehensive list of Technical Support contact information for
Hill-Rom. The product discussed in this manual may not be available in all of the
countries listed.
Revision
Original Issue
A
B
4
Pages Affected
All
All
All
Date
October 2003
January 2004
January 2005
July 2005
Table of Contents
Document Symbols . . . . . . . . . . . . . . . . . . . . . . . . . . . . . . . . . . . . . . . . . . . . . . . . . . . . . . . . . . . . . . . .5
Intended Use . . . . . . . . . . . . . . . . . . . . . . . . . . . . . . . . . . . . . . . . . . . . . . . . . . . . . . . . . . . . . . . . . . . . .6
Introduction . . . . . . . . . . . . . . . . . . . . . . . . . . . . . . . . . . . . . . . . . . . . . . . . . . . . . . . . . . . . . . . . . . . . . .6
Features . . . . . . . . . . . . . . . . . . . . . . . . . . . . . . . . . . . . . . . . . . . . . . . . . . . . . . . . . . . . . . . . . . . . . . . . .7
Standard Features . . . . . . . . . . . . . . . . . . . . . . . . . . . . . . . . . . . . . . . . . . . . . . . . . . . . . . . . . . . . . . . . .8
Emergency CPR Control . . . . . . . . . . . . . . . . . . . . . . . . . . . . . . . . . . . . . . . . . . . . . . . . . . . . . . . .8
Caregiver Siderail Controls . . . . . . . . . . . . . . . . . . . . . . . . . . . . . . . . . . . . . . . . . . . . . . . . . . . . . .8
Enable Control . . . . . . . . . . . . . . . . . . . . . . . . . . . . . . . . . . . . . . . . . . . . . . . . . . . . . . . . . . . . . . . .8
Lockout Control . . . . . . . . . . . . . . . . . . . . . . . . . . . . . . . . . . . . . . . . . . . . . . . . . . . . . . . . . . . . . . .9
Bed Up/Down Control . . . . . . . . . . . . . . . . . . . . . . . . . . . . . . . . . . . . . . . . . . . . . . . . . . . . . . . . . .9
Head Up/Down Control . . . . . . . . . . . . . . . . . . . . . . . . . . . . . . . . . . . . . . . . . . . . . . . . . . . . . . . .10
Automatic Contour Feature . . . . . . . . . . . . . . . . . . . . . . . . . . . . . . . . . . . . . . . . . . . . . . . . . . . . .10
Knee Up/Down Control . . . . . . . . . . . . . . . . . . . . . . . . . . . . . . . . . . . . . . . . . . . . . . . . . . . . . . . .11
Trendelenburg and Reverse Trendelenburg Controls . . . . . . . . . . . . . . . . . . . . . . . . . . . . . . . . . .11
Bed Flat Control . . . . . . . . . . . . . . . . . . . . . . . . . . . . . . . . . . . . . . . . . . . . . . . . . . . . . . . . . . . . . .11
Dining Chair™ Position . . . . . . . . . . . . . . . . . . . . . . . . . . . . . . . . . . . . . . . . . . . . . . . . . . . . . . . .12
FullChair® Patient Positioning Mechanism . . . . . . . . . . . . . . . . . . . . . . . . . . . . . . . . . . . . . . . . .12
Vascular Position . . . . . . . . . . . . . . . . . . . . . . . . . . . . . . . . . . . . . . . . . . . . . . . . . . . . . . . . . . . . .13
Battery Control . . . . . . . . . . . . . . . . . . . . . . . . . . . . . . . . . . . . . . . . . . . . . . . . . . . . . . . . . . . . . . .13
Standard Casters . . . . . . . . . . . . . . . . . . . . . . . . . . . . . . . . . . . . . . . . . . . . . . . . . . . . . . . . . . . . . .13
Brake and Steer Control . . . . . . . . . . . . . . . . . . . . . . . . . . . . . . . . . . . . . . . . . . . . . . . . . . . . . . . .14
Head and Foot Siderails . . . . . . . . . . . . . . . . . . . . . . . . . . . . . . . . . . . . . . . . . . . . . . . . . . . . . . . .14
Headboard . . . . . . . . . . . . . . . . . . . . . . . . . . . . . . . . . . . . . . . . . . . . . . . . . . . . . . . . . . . . . . . . . . .15
Footboard . . . . . . . . . . . . . . . . . . . . . . . . . . . . . . . . . . . . . . . . . . . . . . . . . . . . . . . . . . . . . . . . . . .16
Patient Position Indicator . . . . . . . . . . . . . . . . . . . . . . . . . . . . . . . . . . . . . . . . . . . . . . . . . . . . . . .16
Equipment Sockets . . . . . . . . . . . . . . . . . . . . . . . . . . . . . . . . . . . . . . . . . . . . . . . . . . . . . . . . . . . .16
Foot Extension . . . . . . . . . . . . . . . . . . . . . . . . . . . . . . . . . . . . . . . . . . . . . . . . . . . . . . . . . . . . . . .17
Drainage Bag Holders . . . . . . . . . . . . . . . . . . . . . . . . . . . . . . . . . . . . . . . . . . . . . . . . . . . . . . . . . .17
Patient Restraint . . . . . . . . . . . . . . . . . . . . . . . . . . . . . . . . . . . . . . . . . . . . . . . . . . . . . . . . . . . . . .18
Standard Patient Controls . . . . . . . . . . . . . . . . . . . . . . . . . . . . . . . . . . . . . . . . . . . . . . . . . . . . . . .18
Optional Features . . . . . . . . . . . . . . . . . . . . . . . . . . . . . . . . . . . . . . . . . . . . . . . . . . . . . . . . . . . . . . . .19
SideCom® Communication System . . . . . . . . . . . . . . . . . . . . . . . . . . . . . . . . . . . . . . . . . . . . . . .19
Nurse Call Control . . . . . . . . . . . . . . . . . . . . . . . . . . . . . . . . . . . . . . . . . . . . . . . . . . . . . . . . . . . .19
Bed Exit System (Beds without Scale) . . . . . . . . . . . . . . . . . . . . . . . . . . . . . . . . . . . . . . . . . . . . .20
Bed Exit System (B Model Beds with Scale) . . . . . . . . . . . . . . . . . . . . . . . . . . . . . . . . . . . . . . . .20
Bed Exit Alarm System (C Model and Newer Beds) . . . . . . . . . . . . . . . . . . . . . . . . . . . . . . . . . .21
Scale (B Model and Newer Beds) . . . . . . . . . . . . . . . . . . . . . . . . . . . . . . . . . . . . . . . . . . . . . . . . .24
Bed Setup . . . . . . . . . . . . . . . . . . . . . . . . . . . . . . . . . . . . . . . . . . . . . . . . . . . . . . . . . . . . . . . .24
1
Scale Display On/Off . . . . . . . . . . . . . . . . . . . . . . . . . . . . . . . . . . . . . . . . . . . . . . . . . . . . . . .24
Zero the Scale . . . . . . . . . . . . . . . . . . . . . . . . . . . . . . . . . . . . . . . . . . . . . . . . . . . . . . . . . . . . .24
Weigh the Patient . . . . . . . . . . . . . . . . . . . . . . . . . . . . . . . . . . . . . . . . . . . . . . . . . . . . . . . . . .24
Changing Items on the Bed . . . . . . . . . . . . . . . . . . . . . . . . . . . . . . . . . . . . . . . . . . . . . . . . . . .25
Manual Weight Adjustment . . . . . . . . . . . . . . . . . . . . . . . . . . . . . . . . . . . . . . . . . . . . . . . . . .25
Pounds/Kilograms . . . . . . . . . . . . . . . . . . . . . . . . . . . . . . . . . . . . . . . . . . . . . . . . . . . . . . . . . .25
Optional Patient Controls . . . . . . . . . . . . . . . . . . . . . . . . . . . . . . . . . . . . . . . . . . . . . . . . . . . . . . .25
Nurse Call Control . . . . . . . . . . . . . . . . . . . . . . . . . . . . . . . . . . . . . . . . . . . . . . . . . . . . . . . . .25
Room Light Control . . . . . . . . . . . . . . . . . . . . . . . . . . . . . . . . . . . . . . . . . . . . . . . . . . . . . . . .25
Reading Light Control . . . . . . . . . . . . . . . . . . . . . . . . . . . . . . . . . . . . . . . . . . . . . . . . . . . . . .25
Volume Control . . . . . . . . . . . . . . . . . . . . . . . . . . . . . . . . . . . . . . . . . . . . . . . . . . . . . . . . . . .26
Channel Control . . . . . . . . . . . . . . . . . . . . . . . . . . . . . . . . . . . . . . . . . . . . . . . . . . . . . . . . . . .26
Music Control . . . . . . . . . . . . . . . . . . . . . . . . . . . . . . . . . . . . . . . . . . . . . . . . . . . . . . . . . . . . .26
Television Control . . . . . . . . . . . . . . . . . . . . . . . . . . . . . . . . . . . . . . . . . . . . . . . . . . . . . . . . .26
Accessories . . . . . . . . . . . . . . . . . . . . . . . . . . . . . . . . . . . . . . . . . . . . . . . . . . . . . . . . . . . . . . . . . . . . .27
IV Pole (P2217) . . . . . . . . . . . . . . . . . . . . . . . . . . . . . . . . . . . . . . . . . . . . . . . . . . . . . . . . . . . . . .27
Mattress Foot Pad Extender (P734EA1) . . . . . . . . . . . . . . . . . . . . . . . . . . . . . . . . . . . . . . . . . . . .28
Infusion Support System Transfer Pole (P158) . . . . . . . . . . . . . . . . . . . . . . . . . . . . . . . . . . . . . .28
Mattress (P731EA3) . . . . . . . . . . . . . . . . . . . . . . . . . . . . . . . . . . . . . . . . . . . . . . . . . . . . . . . . . . .28
Oxygen Tank Holder, E-Size (P27601) . . . . . . . . . . . . . . . . . . . . . . . . . . . . . . . . . . . . . . . . . . . .29
Traction Frame Support (P1181) . . . . . . . . . . . . . . . . . . . . . . . . . . . . . . . . . . . . . . . . . . . . . . . . .29
Patient Helper Support (P1180) . . . . . . . . . . . . . . . . . . . . . . . . . . . . . . . . . . . . . . . . . . . . . . . . . .29
Safety Tips . . . . . . . . . . . . . . . . . . . . . . . . . . . . . . . . . . . . . . . . . . . . . . . . . . . . . . . . . . . . . . . . . . . . .30
Bed Positions . . . . . . . . . . . . . . . . . . . . . . . . . . . . . . . . . . . . . . . . . . . . . . . . . . . . . . . . . . . . . . . .30
Brakes . . . . . . . . . . . . . . . . . . . . . . . . . . . . . . . . . . . . . . . . . . . . . . . . . . . . . . . . . . . . . . . . . . . . . .30
Siderails/Restraints/Patient Monitoring . . . . . . . . . . . . . . . . . . . . . . . . . . . . . . . . . . . . . . . . . . . .30
Electricity . . . . . . . . . . . . . . . . . . . . . . . . . . . . . . . . . . . . . . . . . . . . . . . . . . . . . . . . . . . . . . . . . . .31
Parts and Accessories . . . . . . . . . . . . . . . . . . . . . . . . . . . . . . . . . . . . . . . . . . . . . . . . . . . . . . . . . .32
Operating Bed/Surface Precautions . . . . . . . . . . . . . . . . . . . . . . . . . . . . . . . . . . . . . . . . . . . . . . .32
Transport . . . . . . . . . . . . . . . . . . . . . . . . . . . . . . . . . . . . . . . . . . . . . . . . . . . . . . . . . . . . . . . . . . . .32
Sleep Surface/Mattress . . . . . . . . . . . . . . . . . . . . . . . . . . . . . . . . . . . . . . . . . . . . . . . . . . . . . . . . .33
Flammability . . . . . . . . . . . . . . . . . . . . . . . . . . . . . . . . . . . . . . . . . . . . . . . . . . . . . . . . . . . . . . . . .33
Bed Articulations . . . . . . . . . . . . . . . . . . . . . . . . . . . . . . . . . . . . . . . . . . . . . . . . . . . . . . . . . . . . .34
Chair Positioning . . . . . . . . . . . . . . . . . . . . . . . . . . . . . . . . . . . . . . . . . . . . . . . . . . . . . . . . . . . . .34
Visitor Notification . . . . . . . . . . . . . . . . . . . . . . . . . . . . . . . . . . . . . . . . . . . . . . . . . . . . . . . . . . . .34
Cleaning . . . . . . . . . . . . . . . . . . . . . . . . . . . . . . . . . . . . . . . . . . . . . . . . . . . . . . . . . . . . . . . . . . . . . . .35
General Cleaning . . . . . . . . . . . . . . . . . . . . . . . . . . . . . . . . . . . . . . . . . . . . . . . . . . . . . . . . . . . . .35
Steam Cleaning . . . . . . . . . . . . . . . . . . . . . . . . . . . . . . . . . . . . . . . . . . . . . . . . . . . . . . . . . . . . . . .35
Cleaning Hard to Clean Spots . . . . . . . . . . . . . . . . . . . . . . . . . . . . . . . . . . . . . . . . . . . . . . . . . . . .35
2
Disinfecting . . . . . . . . . . . . . . . . . . . . . . . . . . . . . . . . . . . . . . . . . . . . . . . . . . . . . . . . . . . . . . . . . .35
Preventive Maintenance . . . . . . . . . . . . . . . . . . . . . . . . . . . . . . . . . . . . . . . . . . . . . . . . . . . . . . . . . . .36
The CareAssist™ Bed Main Battery . . . . . . . . . . . . . . . . . . . . . . . . . . . . . . . . . . . . . . . . . . . . . .36
Troubleshooting . . . . . . . . . . . . . . . . . . . . . . . . . . . . . . . . . . . . . . . . . . . . . . . . . . . . . . . . . . . . . .36
Product Symbols . . . . . . . . . . . . . . . . . . . . . . . . . . . . . . . . . . . . . . . . . . . . . . . . . . . . . . . . . . . . . . . . .37
Specifications . . . . . . . . . . . . . . . . . . . . . . . . . . . . . . . . . . . . . . . . . . . . . . . . . . . . . . . . . . . . . . . . . . .45
3
4
Document Symbols
This manual contains different typefaces and icons designed to improve readability and increase
understanding of its content. For a list of symbols used on the product, see “Product Symbols” on page
37.
Note the following examples:
•
Standard text—used for regular information.
•
Boldface text—emphasizes a word or phrase.
•
NOTE:—sets apart special information or important instruction clarification.
•
The symbol below highlights a WARNING or CAUTION:
Warning and Caution
•
–
A WARNING identifies situations or actions that may affect patient or user safety. Disregarding a
warning could result in patient or user injury.
–
A CAUTION points out special procedures or precautions that personnel must follow to avoid
equipment damage.
The symbol below highlights a CAUGHT HAZARD WARNING:
Caught Hazard Warning
•
The symbol below highlights a CHEMICAL HAZARD WARNING:
Chemical Hazard Warning
•
The symbol below highlights an ELECTRICAL SHOCK HAZARD WARNING:
Electrical Shock Hazard Warning
5
Intended Use
The CareAssist™ Bed is intended for low to moderate acuity patients in the medical/surgical area of the
hospital.
Introduction
This manual provides the information required for normal operation of the CareAssist™ Bed from
Hill-Rom. Before operating the CareAssist™ Bed, be sure that you have read and understood in detail the
contents of this manual. It is important that you read and strictly adhere to the aspects of safety contained
in this manual. Any reference to a side of the bed is from the view of the patient lying in the supine
position.
6
Features
A
B
N
M
C
L
D
E
F
E
K
J
F
O
G
I
H
Item
Description
A
Speaker
B
Head siderail
C
D
E
F
G
Foot siderail
Footboard
Equipment socket
Wall guard
Brake/steer bar
Item
Description
H
6" (152 mm) caster
I
Trendelenburg/Reverse Trendelenburg
Line-of-Site® Angle Indicator
J
Caregiver siderail controls
K
Siderail release mechanism
L
Headboard
M
Patient control pendant
N
Line-of-Site® Head Angle Indicator
O
Scale control pod (B model and newer
beds)
7
Standard Features
Emergency CPR Control
The Emergency CPR control handles are located at the
head end of the bed, under each corner of the sleep
deck.
When activated, the CPR release allows the head
section to lower. The CPR release function is gasassisted to cushion the movement and can be used when
power is not available.
To Activate
•
Pull, and hold, the CPR control handle with one
hand.
•
Let the head section come to a stop in the flat position.
•
Release the CPR control handle when the head section is flat.
The head section actuator is automatically re-enabled after the CPR control handle is released.
Caregiver Siderail Controls
The caregiver siderail controls are located on the outside of the head siderails.
Enable Control
The Enable control deters unauthorized operation of certain siderail controls. The Enable
control must be pressed before the Trendelenburg and Reverse Trendelenburg controls
will operate. The Enable control stays active for approximately 60 seconds.
To Activate
8
•
Press the Enable control. The Enable control is active for approximately 60 seconds.
•
During the 60-second period, you may activate the Trendelenburg and Reverse Trendelenburg
controls without pressing the Enable control again.
The following caregiver controls can be activated without activating the Enable control: Bed Up/Down,
Head Up/Down, Knee Up/Down, Nurse Call, Chair Positioning, Foot Up/Down, and Bed Flat.
Bed
Up/Down
Head
Up/Down
Knee
Up/Down
Nurse Call
Chair Positioning,
Foot Up/Down and
Bed Flat
Lockout Control
The Lockout control, located on the caregiver siderail control panel, disables the bed
articulation functions. The Lockout control affects only the functions inside the blue area
of the caregiver siderail control panel.
To verify a previously locked out control is properly disabled
Check both siderails to ensure the LED for the locked control is illuminated. If one lockout is
illuminated, and one is not illuminated, activate the control to verify the control is locked out, then
contact your facility maintenance personnel.
To Activate
•
Press and hold the Lockout control, and then press the desired control. Both patient and care-giver
controls are locked out. An LED on the control panel illuminates continuously when a lockout is
activated.
•
After the desired control is locked out, activate the locked out control to verify the lockout is
activated. If the desired control is not locked out, contact your facility maintenance personnel.
To Deactivate
Press and hold the Lockout control, and then press the locked out control.
The Lockout control disables only articulation controls, not Nurse Call. No movement of the unit is
allowed, except for emergency CPR, Trendelenburg, and Reverse Trendelenburg.
Bed Up/Down Control
The CareAssist™ Bed adjusts in height from a low position for patient egress to a high position
for examination. The Bed Up/Down controls are located on the head siderails.
To Activate
• Press and hold the Bed Up control to raise the bed. Release the control when the desired
height is reached.
• Press and hold the Bed Down control to lower the bed. Release the control when the desired
height is reached.
9
• To disable the Bed Up/Down control activate its Lockout control.
NOTE:
When the bed is not in the low-low position, an indicator next to the Up/Down control illuminates.
WARNING:
When raising the bed, ensure there is sufficient room above the IV pole/ISS pole if installed.
Failure to do can result in patient injury.
Head Up/Down Control
Using the Head Up/Down controls, the caregiver can adjust the head section to specific
angles. The Line-of-Site® Angle Indicators are located on the head siderails.
The head section maximum travel is 65°.
To Activate
•
Press and hold the Head Up control to raise the head section.
• Press and hold the Head Down control to lower the head section.
NOTE:
The CareAssist™ Bed is equipped with an automatic contour feature. When the Head Up
control is pressed, the automatic contour feature is enabled, and the knee section rises to an intermediate
position (20°).
•
Automatic Contour Feature—Press and hold the Head Up control. The head and knee sections rise
together to reduce patient migration toward the foot end of the bed.
•
Disable Automatic Contour—Press and hold the Knee Down control while raising the head section,
or activate the Knee Lockout control.
Automatic Contour Feature
The automatic contour feature (automatic comfort level
positioning) can be activated by using the Head Up control.
The automatic contour feature raises the head section and the
knee section simultaneously and helps to prevent the patient
from sliding down in the bed.
To avoid patient sliding while lowering the head section, the
knee section will stay elevated until the head section reaches the
flat position.
The automatic contour feature is active only when both the head section and knee section are not locked
out.
NOTE:
When the head section is locked out, the knee section can be raised or lowered by using the Knee
Up/Down control.
10
Knee Up/Down Control
The caregiver can raise or lower the knee section by using the Knee Up/Down controls.
The knee section has a maximum travel of 35°.
To Activate
•
Press and hold the Knee Up control to raise the knee section.
•
Press and hold the Knee Down control to lower the knee section.
The automatic contour feature does not work when using only the Knee Up/Down controls.
Trendelenburg and Reverse Trendelenburg
Controls
The CareAssist™ Bed is capable of a 16° Trendelenburg
and 16° Reverse Trendelenburg. The powered
Trendelenburg and Reverse Trendelenburg controls can be
activated at any bed height.
The Trendelenburg and Reverse Trendelenburg Line-ofSite® Angle Indicators are located in the foot end siderails.
To Activate
Trendelenburg
•
Press the Enable control.
•
Press and hold the Trendelenburg control to go into the Trendelenburg position. The foot end of the
bed system articulating frame raises relative to the head end.
•
Press and hold the Reverse Trendelenburg control to
go into the Reverse Trendelenburg position. The head
end of the bed system articulating frame raises relative
to the foot end.
•
Press the opposite control to return to the flat position.
(If in the Trendelenburg position, press Reverse
Trendelenburg. If in the Reverse Trendelenburg
position, press Trendelenburg.)
Reverse
Trendelenburg
Bed Flat Control
The Bed Flat control is provided so that a caregiver can easily return the sleep deck to a flat
position (head and knee section down and foot section up) from any articulated position. The
Bed Flat control only returns the sleep deck to a flat position, it does not change the angle of
the bed. The Bed Flat control does not lower the foot section if it is raised (vascular position).
To Activate
Press and hold the Bed Flat control. When all sections are flat, the system stops.
11
Dining Chair™ Position
The Dining Chair™ Position control allows the caregiver to put the bed in an upright position.
The Dining Chair™ Position controls are located on the outside of the head siderails. When activated, the
bed will articulate to a maximum of 65° for the head section, 20° for the knee section, and -23° for the
foot section.
WARNING:
Check periodically to make sure the patient remains properly positioned. The use of pillows can
help maintain side-to-side positioning. Injury to the patient may result from improper positioning.
To Activate
•
Set the brake.
•
Press the Dining Chair™ Position control. The patient
deck moves to the chair position.
To Return to Flat Position
Press the Bed Flat control to return the sleep deck to the
flat position.
FullChair® Patient Positioning Mechanism
The FullChair® Patient Positioning Mechanism allows the
caregiver to place the patient in a fully seated position without
having to remove the patient from the bed.
WARNING:
Check periodically to make sure the patient remains
properly positioned. The use of pillows can help maintain
side-to-side positioning. Injury to the patient may result
from improper positioning.
To Activate
•
Set the brake.
•
Press the Dining Chair™ Position control. The patient deck transitions to the chair position.
•
Once the bed has finished traveling, press the Enable control.
•
Press the Reverse Trendelenburg control until the desired position is obtained.
To Return to Flat Position
12
•
Press the Bed Flat control to return the sleep deck to the flat position.
•
Press the Trendelenburg control to return the bed frame to the level position.
Vascular Position
The Vascular Position allows the caregiver to place the
patient’s legs above the level of the patient’s sternum
without placing the bed in the Trendelenburg position.
To Activate
•
Raise the knee section to 20° or more.
•
Press the Foot Up control.
•
Adjust the knee section as needed to maintain
alignment with the foot section.
To Return to Flat Position
Press the Foot Down control.
Battery Control
The battery function is available only when the bed is not connected to AC power.
Press the Battery control to activate the battery. All patient comfort electrical functions
are then available.
When the battery charge level is low and an electrical function is activated, an alarm will sound
indicating that the battery needs recharging. The ongoing bed movement will be completed.
Plug the bed into an appropriate power source to automatically charge the battery.
WARNING:
The bed must remain connected to the mains power supply until the charge LED turns off
(recharge time is approximately 10 hours, for a completely discharged battery). Failure to do so
could result in the inability to operate the bed when power is unavailable.
If the indicator is flashing, it indicates a low battery, and is charging. If the indicator is not illuminated
and AC power is connected, the battery is fully charged. When disconnected from AC power, the
indicator will not be illuminated.
Standard Casters
The CareAssist™ Bed is equipped with 6" (152 mm) single wheel casters.
13
Brake and Steer Control
WARNING:
Unless transporting the patient, always set the brakes when the unit is occupied. Reconfirm that
the brakes are set before any patient transfer. Failure to do so may result in personal injury or
equipment damage.
The brake and steer control is located under the foot section. There are three positions: Brake, Neutral,
and Steer. The brake position keeps the bed from moving. The neutral position allows the bed to be
moved sideways. The steer position allows the bed to be moved in a straight line.
When the bed is plugged into AC power and the brakes are not set, an alarm sounds until the brakes are
set or AC power is removed.
To Activate
Brake
Using your foot,
step down on the
brake/steer bar
until it stops.
Neutral
Using your foot, lift the
brake/steer bar until it
travels to the middle detent.
Steer
Using your foot, lift the
brake/steer bar to the full
up position.
Brake Position Label
Located on the base
frame near the casters.
Head and Foot Siderails
WARNING:
Evaluate patients for entrapment risk according to facility protocol, and monitor patients
appropriately.
WARNING:
Evaluate patients for entrapment risk according to facility protocol, and monitor patients
appropriately. Ensure that all siderails are fully latched when in the raised position. Failure to do
either of these could result in serious injury or death.
NOTE:
Siderails are intended to be a reminder to the patient of the unit's edges, not a patient-restraining device.
When appropriate, Hill-Rom recommends that medical personnel determine the proper methods
necessary to ensure a patient remains safely in bed.
The CareAssist™ Bed siderails have been designed for one-step operation.
Siderails in the raised position are intended to make the patient aware of the proximity of the edge of the
sleep surface and to assist in patient entry and exit.
14
Siderails in the lowered position, below the patient surface, facilitate a patient’s entry or exit from the
bed. This design feature also facilitates unobstructed access to the patient.
The head siderails contain the Line-of-Site® Head Angle Indicators and the foot
siderails contain the Line-of-Site® Trendelenburg Angle Indicators.
To Raise a Siderail
•
Pull the siderail up until it latches into the locked
position. A click will be heard when it latches into the
locked position.
•
Once the click is heard, gently pull on the siderail to
ensure it is latched properly.
To Lower a Siderail
Grasp the release handle and pull up. The siderail
lowers automatically.
Headboard
The headboard is located at the head end of the bed. It attaches to the head end of
the frame. It does not articulate with the sleep deck.
The headboard can be removed for increased access to the patient’s head without
the use of tools.
To Remove
Grasp the headboard, and lift it straight up.
To Install
•
Position the headboard pins over the sockets in the frame.
•
Lower the headboard into the sockets.
•
Push the headboard down until the bottom rests on the frame.
15
Footboard
The footboard is located at the foot end of the bed. It attaches to the articulating
foot section and remains perpendicular to the surface of the foot section at all
times. The footboard protects the patient during transport and room docking.
A caregiver can quickly remove or attach the footboard in a single step without
the use of tools.
To Remove
Grasp the handles on the footboard, and lift it straight up.
To Install
•
Insert the pins of the footboard into the sockets in the articulating frame.
•
Push the footboard down until it rests on the deck.
Patient Position Indicator
The patient position indicator is located on the inside of the head siderails. The
indicator is used to help provide optimal, ergonomic patient positioning.
Equipment Sockets
There are four equipment sockets, one at each corner, for the attachment of
accessories.
The equipment sockets can be used to mount IV poles, ISS poles, traction
equipment, and oxygen tank holders.
NOTE:
The ISS poles require an adapter to be installed prior to use. See “Accessories”
on page 27.
16
Foot Extension
The foot extension allows the foot section to extend 4" (10 cm).
To Extend the Foot Section
•
Grasp the control bar located under the bed frame, below
the footboard.
•
Push up on the control bar.
•
Pull the foot section out, then release the control bar.
•
Continue to pull on the foot section until it locks into
position.
•
When the foot section is extended, insert the mattress foot
extender pad between the mattress and the footboard.
To Retract the Foot Section
•
Remove the mattress foot extender pad.
•
Grasp the control bar located under the bed frame, below the footboard.
•
Push up on the control bar.
•
Push the foot section toward the head end of the bed, then release the control bar.
•
Push the foot section in until it locks into position.
Drainage Bag Holders
WARNING:
Do not tie restraints to the primary drainage bag holders.
There are two drainage bag holders mounted on the bed, just
under the sleep deck surface.
WARNING:
Caregivers should select drainage system components
that can be safely used within infection control and other
therapeutic guidelines. Failure to do so could cause
patient injury.
The holders accommodate any combination of the following
drainage devices:
•
Fecal incontinence bag
•
250/2000 ml Foley collection bag
•
PLEUR-EVAC® (on foot end holders during transport only)
1
When the bed system is docked, place the PLEUR-EVAC® or other chest drainage devices on the floor,
clear of the bed system to allow space for articulation.
1. Pleur-Evac® is a registered trademark of Deknatel, Inc.
17
Patient Restraint
The CareAssist™ Bed facilitates the use of vest, wrist,
waist, and ankle restraints. Hill-Rom makes no
recommendation regarding the use of physical restraints.
Caregivers should refer to legal restrictions and
appropriate facility protocols before physical restraints
are used.
WARNING:
Patient restraints are not intended as substitutes
for good nursing practices. Physical restraints,
even properly installed, can result in entanglement, physical injury, and death, particularly with
agitated and disoriented patients. Monitor patients when using physical restraints in accordance
with legal requirements and facility protocol.
WARNING:
Restraints must be attached to the articulating sections of the system at the proper attachment
points to prevent injury to the patient.
WARNING:
Do not use ankle restraints in a chair position or when the foot section is retracted. Doing so
may result in patient injury or equipment damage.
Standard Patient Controls
The patient controls are located on the patient pendant, which can be housed in any
siderail.
The standard patient controls include: Head Up/Down and Knee Up/Down. They
operate in the same manner as the caregiver siderail controls.
If the caregiver has locked out a bed function, that same function is locked out on
the patient control pendant.
To Install the Pendant into the Siderail
•
Position the pendant next to the opening in the siderail.
•
Insert the top edge of the pendant into the siderail so it engages the upper
section of the siderail.
•
Rotate the lower edge of the pendant in until it clicks into place inside the
siderail.
To Remove the Pendant from the Siderail
Gently pull on the lower edge of the pendant until it pops out of the siderail.
To move the pendant from one siderail to the other, the control cable mount must
be moved from one side of the bed to the other. It is recommended to have facility
maintenance personnel perform this procedure.
18
Optional Features
SideCom® Communication System
The SideCom® Communication System provides the
following controls: Nurse Call, Entertainment, and
Lighting.
A Model Bed
The SideCom® Communication System connector is
located at the head end of the bed. When not connected
to the facility, install the dummy plug onto the bed
SideCom® Communication System cable.
B Model and
Newer Beds
Nurse Call Control
The Nurse Call control is located on the outside and inside of the head siderails.
When the Nurse Call control is activated, and connected to the facility, a signal is sent
to the nurses station, and an LED illuminates on the control. Voice communication is
provided through a speaker/microphone mounted on the inside of both head siderails.
To Activate
•
Press a Nurse Call control.
•
When the nurses station acknowledges the nurse call, the LED on the Nurse Call
control will flash.
•
When the nurses station’s communication line is open, the LED stops flashing and illuminates
continuously.
• Speak into the speaker/microphone located on the inside of the head siderails.
NOTE:
The Enable control does not need to be activated prior to pressing a Nurse Call control. The Nurse Call
controls are always active. The Nurse Call controls cannot be locked out.
19
Bed Exit System (Beds without Scale)
WARNING:
The Bed Exit System is not intended as a substitute for good
nursing practices. The Bed Exit System must be used in
conjunction with a sound risk assessment and protocol.
The Bed Exit system is designed to be a reminder to the patient to
stay in bed. The Bed Exit control is located on the outside of both
head siderails.
To Activate
•
Ensure the patient is on the bed.
•
Simultaneously press both buttons on the Bed Exit control on either head siderail. The LED will
illuminate when armed.
When activated, the Bed Exit sounds a local alarm when the patient exits the bed. If the bed is equipped
with the SideCom® Communication System, and it is connected to the facility, a signal is sent to the
nurses station when the Bed Exit alarm sounds.
If the patient moves to exit the bed, the Bed Exit alarm sounds. If the Nurse Call system is operational, a
signal is sent to the nurse station. The Bed Exit system must be turned off at the bedside to cancel the
nurse call signal.
To Reset After the Alarm Sounds
•
Ensure the patient is on the bed.
•
Simultaneously press both buttons on the Bed Exit control on either head siderail to turn the system
off.
•
Simultaneously press both buttons on the Bed Exit control on either head siderail to turn the system
on. The LED will illuminate when armed.
To Deactivate
Simultaneously press both buttons on the Bed Exit control on either head siderail.
Bed Exit System (B Model Beds with Scale)
WARNING:
The Bed Exit System is not intended as a substitute for good nursing practices. The Bed Exit
System must be used in conjunction with a sound risk assessment and protocol.
The patient must weigh between 50 and 400 lb (23 to 181 kg) for Bed Exit to work.
To Activate
•
•
Press the Enable control on the scale control pod.
Press the Bed Exit control. When the Bed Exit control indicator comes
on, the Bed Exit is armed.
NOTE:
The Enable control on the scale control pod does not activate the Trendelenburg or Reverse
Trendelenburg controls.
20
When 30 lb (14 kg) are added to the bed, a warning tone sounds. When 30 lb (14 kg) are removed from
the bed, a local alarm sounds. If the Nurse Call system is operational, a signal is sent to the nurse station.
The Bed Exit system must be turned off at the bedside to cancel the nurse call signal.
To Silence an Alarm
•
Press the Enable control on the scale control pod.
•
Press the Bed Exit control. This turns off the Bed Exit system and silences the alarm.
•
Make sure the patient is on the bed.
•
Activate the Bed Exit system.
Changing the Alarm Tone
•
Press the Enable control on the scale control pod.
•
Press the Tone control until you reach the desired tone.
Changing the Alarm Volume
•
Press the Enable control on the scale control pod.
•
Press the Volume control until you reach the desired volume. The
volume setting is shown next to the Volume control.
Bed Exit Alarm System (C Model and Newer Beds)
WARNING:
The Bed Exit Alarm System is not intended as a substitute
for good nursing practices. The Bed Exit Alarm System must
be used in conjunction with a sound risk assessment and
protocol.
The Bed Exit Alarm System control is on the flip-up control pod
on the outside of the head end siderails.
The Bed Exit Alarm System has three modes: Patient Position Mode/Patient Movement Mode, Bed
Exiting, and Out-of-Bed.
Patient Position Mode/Patient Movement Mode
The Patient Position Mode/Patient Movement Mode alarms when the patient moves
towards either siderail or moves away from the head section, such as sits up in bed. This
mode should be used when a caregiver wants to be alerted when the patient begins to
move. (Sometimes this is referred to as Patient Movement Mode).
When the system is armed and it detects patient movement towards either siderail or
away from the head section, these occur:
• An audible alarm comes on.
• The Patient Position Mode/Patient Movement Mode indicator flashes.
• A priority nurse call is sent. The light and alarm continue until the system is turned off, even if the
patient lies down on the bed.
21
Bed Exiting Mode
The Bed Exiting Mode alarm comes on when a patient moves away from the center of
the bed towards an egress point. This mode should be used when a caregiver wants to
be alerted when a potential egress is attempted.
When the system is armed and it detects patient movement towards an exit point, these
occur:
• An audible alarm comes on.
• The Bed Exiting Mode indicator flashes.
• A priority nurse call is sent. The light and alarm continue until the system is turned off, even if the
patient lies down on the bed.
Out-of-Bed Mode
The Out-of-Bed Mode alarm comes on when the patient's weight shifts significantly off
the frame of the bed. This mode should be used when a caregiver wants the patient to
move freely within the bed, but to be alerted when the patient leaves the bed.
When the system is armed and it detects movement off the bed, these occur:
• An audible alarm comes on.
• The Out-of-Bed Mode indicator flashes.
• A priority nurse call is sent. The light and alarm continue until the system is turned off, even if the
patient lies down on the bed.
To Activate
1. Make sure the patient is centered in the bed and aligned with the hip locator.
2. Press the Enable control until the indicator comes on.
3. Press the applicable mode control. When the system beeps one time and the indicator stays on solid,
the system is armed.
NOTE:
The indicator flashes until the system is armed.
Enable
Control
Patient Position
Mode/Patient
Movement Mode
Bed Exiting Mode
Out-of-Bed
Mode
If the system does not arm, the system will beep rapidly for a few seconds and the selected mode
indicator will flash. This means the patient weighs less than 50 lb (23 kg) or more than 400 lb (181 kg),
the patient is not in the correct position, or the system has malfunctioned.
To Reset or Deactivate
1. Press the Enable control until the indicator illuminates.
2. Press any mode control, or the alarm silence control, until the indicator goes off.
22
To Adjust the Alarm Volume
1. make sure the patient must be on the bed and the system is armed.
2. Press the Enable control until the indicator illuminates.
3. Press and release the Volume control until the applicable indicator
illuminates next to the volume setting.
To Change the Alarm Tone
1. Activate one of the Bed Exit Alarm System Modes. It is recommended
to use another caregiver instead of a patient to activate the Bed Exit
Alarm System mode.
2. Have the caregiver exit the bed to activate the alarm.
3. Press and hold the Volume control.
4. While you press the Volume control, press the Out-of-Bed control.
5. Press and release the Out-of-Bed control until the desired tone is
reached.
6. Clear the alarm condition.
Zero the Bed Exit Alarm System
The Bed Exit Alarm System must be zeroed before the patient is put on the bed. Be sure to put all linens,
pillows, and equipment on the bed before you zero it.
To Zero
1. Make sure the patient is not on the bed.
2. Press the Enable control.
3. Press and hold the Zero (0) control for 1 second. Release the control pod.
When the system beeps, it is zeroed.
If all three Bed Exit Alarm System control indicators are flashing, zero the bed
exit alarm system.
Scale Beds
Non-Scale
Beds
Maintenance Required Indicator
The maintenance required indicator notifies the caregiver when there is a problem with
the Bed Exit System only. Contact the facility maintenance persons to fix the problem.
23
Scale (B Model and Newer Beds)
The scale system for the CareAssist™ Bed has an accuracy of 1% or
2.2 lb (1 kg), whichever is greater and an operating range of 0 lb to
400 lb (0 kg to 181 kg). The scale display and controls are located on
head end siderails.
The scale is very sensitive. The weight reading will be most accurate if
the bed is not touching anything. This includes the headwall, lines such
as pendant controls, ventilators, or drainage bags.
B-model beds
Bed Setup
For best results, do as follows before you put the patient on the bed:
1. Make sure the bed is plugged into electrical power.
2. Put all linens, blankets, pillows, equipment, and other items on
the bed. A list of these items posted near the bed may be helpful
for future reference.
C-model and newer beds
3. Make sure none of the items on the bed are touching the
headboard.
4. Make sure the bed is not touching anything that could affect the patient weight (headwall, lines such
as pendant controls, ventilators, or drainage bags).
5. Zero the scale, see “Zero the Scale” on page 24.
The scale system is now ready to weigh.
Scale Display On/Off
Press the Weigh control. The scale display becomes active and shows 4 dashes "----," and the
scale controls can be used. The scale display will automatically turn off after 3 minutes of no
activity.
Zero the Scale
The bed must be zeroed before the patient is put on the bed.
1. Make sure all linens, pillows, and equipment are on the bed.
2. Press the Weigh control. Wait for two beeps to sound.
3. Press and hold the Zero control until the Hands Off indicator flashes.
The display will show 00.0.
Weigh the Patient
1. Make sure of these:
• All items defined in the “Bed Setup” section are accounted for.
• No drainage bags or equipment has been added.
• The patient is lying still and is centered on the mattress.
2. Press the Weigh control until the Hands Off indicator flashes. The weight will show in either pounds
(lb) or kilograms (kg).
24
Changing Items on the Bed
The Change Items control lets you add or remove items from the bed. The
control is active for 5 minutes once pressed.
1. Press the Change Items control until the Hands Off indicator flashes. The
bed takes a reference weight reading.
2. When the Change Items indicator flashes, add or remove items as necessary.
3. Press the Change Items control after adding or removing the desired items. Release the display pod.
The bed takes a weight reading and adjusts for the items added or removed.
Manual Weight Adjustment
The plus and minus arrows let the caregiver manually put in a weight for the scale system.
Press and hold the Plus or Minus control to adjust the displayed weight.
Pounds/Kilograms
Press the lb/kg control to change the display to show the weight in pounds (lb) or kilograms (kg).
Optional Patient Controls
The optional patient controls are located on the patient pendant.
Nurse Call Control
The Nurse Call control is located on the inside of the head siderails and on the patient
pendant. The patient Nurse Call control functions in the same manner as the caregiver
Nurse Call control (see “Nurse Call Control” on page 19).
Room Light Control
The room light control allows the patient to turn the room light off and on.
Reading Light Control
The reading light control allows the patient to turn the reading light off and on.
25
Volume Control
The volume control allows the patient to adjust the volume of the television or radio in
the room.
Channel Control
The channel control allows the patient to change channels on the television or stations on
the radio in the room.
Music Control
The music control allows the patient to turn on and off the radio in the room.
Television Control
The television control allows the patient to turn on and off the television in the room.
26
Accessories
Part Number
P2217
P734EA1
P158
P731EA3
P27601
P163
P1181
P1180
Description
IV Pole
Mattress foot pad extender
Infusion Support System (ISS) transfer
pole
Mattress
Oxygen tank holder, E-size
ISS socket adapter
Traction frame support
Patient helper support
IV Pole (P2217)
CAUTION:
Do not exceed the 25 lb (11 kg) load capacity of the IV pole. If the IV
pole is overloaded, personal injury or equipment damage may occur.
WARNING:
If the IV pole is placed at the foot end of the bed, ensure the Knee
Up/Down controls are locked out. Failure to do so can result in
caregiver, patient, or visitor injury if the foot section fully lowers and the
IV pole becomes dislodged from the bed.
WARNING:
The head end equipment sockets do not move up and down with the
sleep deck. Use appropriate precautions with gravity-sensitive devices such as ventricular
drains or lumbar drains before, during, and after operating bed functions. Make sure flow rates
on all gravity-fed IVs are correct after bed height adjustment. Failure to correctly manage
patient equipment could result in patient injury.
CAUTION:
When lowering the upper section of the IV pole, always grasp and hold the upper section of the
pole before pulling the release knob.
The IV pole is a removable, telescopic pole that installs in any of the four equipment sockets on the bed.
The IV pole can hold 25 lb (11 kg).
To install the standard IV pole, insert the IV pole into any of the four equipment sockets on the bed.
Removal is reverse of installation.
NOTE:
Added height is recommended for gravity drain applications.
27
Mattress Foot Pad Extender (P734EA1)
The mattress pad extender is used to fill in the gap between the mattress and the
footboard when the foot section is extended to its full length.
To Install
Insert the extender between the footboard and mattress after the foot section is
extended.
Infusion Support System Transfer Pole (P158)
WARNING:
If the ISS pole is placed at the foot end of the bed, ensure the Knee
Up/Down controls are locked out. Failure to do so can result in caregiver,
patient, or visitor injury if the foot section fully lowers and the ISS pole
becomes dislodged from the bed.
CAUTION:
Do not exceed the 20 lb (9 kg) load capacity of the ISS pole. If the ISS pole
is overloaded, personal injury or equipment damage may occur.
CAUTION:
Do not mount infusion pumps on the lower section of an IV pole. Doing so may cause
interference with head section articulation.
CAUTION:
When lowering the upper section of an IV pole, always grasp and hold the upper section of the
pole before pulling the release knob.
The Infusion Support System (ISS) consists of a movable and adjustable IV pole. The pole supports IV
pumps or bags in a vertical orientation and raises or lowers the pumps or bags with respect to the system
frame. The ISS pole can hold 20 lb (9 kg).
The head end of the system has attaching points for two mobile ISS. Each ISS can support one infusion
pump plus two liters of intravenous solution.
When using the ISS, it is necessary to use the P163 socket adapter before installing the ISS pole.
Mattress (P731EA3)
WARNING:
Only use mattresses of the specified dimension. Failure to do so could result in personal injury.
The mattress contains an all-foam, zoned, three-layered core with foam side bolsters and is designed to
reduce patient interface pressures. The CareAssist™ Bed surface is designed especially for the
CareAssist™ Bed frame. Loose fitting sheets (preferably knitted) must be used for correct operation of
the sleep surface.
The CareAssist™ Bed surface is designed especially to work with the following system features:
• Shearless Pivot® Patient Position Mechanism
• FullChair® Patient Position Mechanism
Loose fitting sheets (preferably knitted) must be used for correct operation of the sleep surface.
28
Oxygen Tank Holder, E-Size (P27601)
WARNING:
If the oxygen tank holder is placed at the foot end of the bed, ensure
the Knee Up/Down controls are locked out. Failure to do so can result
in caregiver, patient, or visitor injury if the foot section fully lowers and
the holder becomes dislodged from the bed.
CAUTION:
Do not exceed the load capacity of the oxygen tank holder. If the
oxygen tank is overloaded, personal injury or equipment damage may
occur.
The oxygen tank holder attaches to the head end of the articulating frame in a
vertical position. The oxygen tank holder accommodates one E size oxygen
tank with a regulator. The mounting points are located to allow the affixed oxygen tank holder to pivot.
To Install
•
Install the mounting bar vertically into a mounting socket at either the head end or foot end of the
articulating frame. Make sure the Knee Up/Down control is locked out if installing at the foot end.
•
Place the tank in the holder, and tighten the holder thumbscrew. The thumbscrew keeps the oxygen
tank from rotating in the holder.
To Remove
•
Loosen the thumbscrew that holds the tank secure in the holder.
•
Lift the tank out of the holder.
•
Lift up on the tank holder, and remove it from the mounting sockets.
Traction Frame Support (P1181)
The traction frame adapter bracket (P1181) is to attach fracture frame
equipment to the bed.
Refer to the equipment manufacturer’s instructions for installation procedures.
Patient Helper Support (P1180)
The Patient Helper Support (P1180) is used to attach the patient helper to the
bed.
Refer to the equipment manufacturer’s instructions for installation procedures
29
Safety Tips
Bed Positions
WARNING:
It is recommended that the unit be in the low position when the patient is unattended. This may
reduce the severity of any resultant injuries from patient falls.
WARNING:
When a patient’s condition (such as disorientation due to medication or clinical condition) could
lead to patient entrapment, the sleep deck should be left in the flat and lowest position while
unattended (except when required otherwise by medical staff for special or particular
circumstances). Failure to do so could result in patient injury.
WARNING:
The head end equipment sockets do not move up and down with the sleep deck. Use
appropriate precautions with gravity-sensitive devices such as ventricular drains or lumbar
drains before, during, and after operating bed functions. Make sure flow rates on all gravity-fed
IVs are correct after bed height adjustment. Failure to correctly manage patient equipment
could result in patient injury.
Brakes
WARNING:
Unless transporting the patient, always set the brakes when the unit is occupied. Reconfirm that
the brakes are set before any patient transfer. Failure to do so may result in personal injury or
equipment damage.
Brakes should always be set when the bed is occupied and especially when transferring a patient from
one surface to another. Patients often use the bed for support when getting in and out of the bed and could
be injured if the bed moves unexpectedly. After you set the brakes, push and pull the bed to make sure it
is stable.
Siderails/Restraints/Patient Monitoring
WARNING:
Evaluate patients for entrapment risk according to facility protocol, and monitor patients
appropriately.
WARNING:
Evaluate patients for entrapment risk according to facility protocol, and monitor patients
appropriately. Ensure that all siderails are fully latched when in the raised position. Failure to do
either of these could result in serious injury or death.
NOTE:
Siderails are intended to be a reminder to the patient of the unit's edges, not a patient-restraining device.
When appropriate, Hill-Rom recommends that medical personnel determine the proper methods
necessary to ensure a patient remains safely in bed.
Siderails may serve several beneficial uses including providing an edge reminder, bed egress assist, and
access to caregiver interface and patient controls. The use of siderails also may provide a sense of
security. Siderails should always be in the upright and latched position when the CareAssist™ Bed is in
30
the chair position. The use of siderails in the bed position should be determined according to patient need
after assessing any risk factors according to the facility protocols for safe positioning.
When raising the siderails, a click indicates that the siderails are completely raised and locked in place.
Gently pull on the siderail once the click is heard to make sure the siderail is latched in position.
Siderails are intended to be a reminder, not a patient restraining device. Hill-Rom recommends that the
appropriate medical personnel determine the level of restraint necessary to ensure a patient will remain
safely in bed.
For restraining devices, consult the restraint manufacturer’s instructions for use to verify the correct
application of each restraining device.
WARNING:
Patient restraints are not intended as substitutes for good nursing practices. Physical restraints,
even properly installed, can result in entanglement, physical injury, and death, particularly with
agitated and disoriented patients. Monitor patients when using physical restraints in accordance
with legal requirements and facility protocol.
1. Develop guidelines for all patients that indicate:
•
Which patients may need to be restrained and the appropriate restraint to utilize.
•
The proper method to monitor a patient, whether restrained or not, including time interval, visual
check of restraint, etc.
2. Develop training programs for all caregivers concerning the proper use and application of restraints.
3. Maintain the bed at its lowest position whenever a caregiver is not in the room.
4. Clarify the need for restraint devices to families or guardians.
Electricity
SHOCK HAZARD:
The potential for electrical shock exists with electrical equipment. Failure to follow facility
protocols may result in death or serious personal injury.
WARNING:
Do not expose the unit to excessive moisture. Personal injury or equipment damage could
occur.
WARNING:
Improper use or handling of the power cord may result in damage to the power cord. If damage
has occurred to the power cord or any of its components, immediately remove the unit from
service, and contact the appropriate maintenance personnel. Failure to do so could result in
personal injury or equipment damage.
WARNING:
If the integrity of the external protective earth conductor is in doubt, operate the bed from its
internal electrical power source. Failure to do so could result in personal injury.
31
CAUTION:
This device meets all applicable requirements for electromagnetic compatibility per IEC 606011-2. It is unlikely that the user will encounter problems with this device because of inadequate
electromagnetic immunity. However, electromagnetic immunity is relative, and standards are
based on anticipated environments of usage. If the user notes unusual device behavior,
particularly if such behavior is intermittent and associated with nearby usage of radio or TV
transmitters, cell phones, or electro-surgical equipment, this could be an indication of
electromagnetic-interference. If such behavior occurs, the user should try moving the interfering
equipment further from this device.
CAUTION:
Before transporting the unit, ensure that the power cord is properly stored. Failure to do so
could result in equipment damage.
Policies and procedures must be established to train and educate your staff on the risks associated with
electric equipment. It is never prudent or necessary for personnel to place any part of their body under or
between moving parts of the bed. Whenever a bed is being cleaned or serviced, it should be unplugged
from its power source, and the lockouts should be activated to keep the bed from accidentally operating
due to the battery backup.
Parts and Accessories
Only use parts and accessories from Hill-Rom. Do not modify the bed system without authorization from
Hill-Rom.
Operating Bed/Surface Precautions
WARNING:
Do not operate the bed in the presence of flammable gas or vapors. Doing so could result in
personal injury or equipment damage.
WARNING:
Use oxygen administering equipment of the nasal, mask, or ventilator type only. Do not use with
oxygen tents. Doing so could result in personal injury or equipment damage.
WARNING:
Deactivate the bed functions by using the lockout control. Movement of a patient or inadvertent
activation of the bed functions by untrained individuals could result in personal injury.
Transport
WARNING:
Do not store the power cord in the holes in the headboard. Doing
so may result in entanglement problems with the headboard
while removing the headboard during emergency CPR.
The CareAssist™ Bed is intended to be used to transport patients with
the foot end of the system forward. Prior to transport, properly stow the
power cord to prevent tripping. Take care to prevent damage to the AC
power cord. An electrical shock hazard exists. Use only the headboard
or the footboard to move the bed.
32
Make sure that the patient, equipment, and all lines are securely placed within the perimeter of the bed for
intra-hospital transport. The CareAssist™ Bed is not intended to be used to transport a patient in the
Dining Chair™ Position or FullChair® Patient position.
Fully extended IV poles could impact doorways or ceiling fixtures. Lower poles prior to patient transport.
Make sure the Nurse Call system cables are properly connected after transport.
Sleep Surface/Mattress
WARNING:
Some safety features of the CareAssist™ Bed may not function or may not operate as intended
with surfaces manufactured by other companies. Check with the surface manufacturer to
determine those safety features of the bed that have been tested and verified to work properly
with the replacement surface. Failure to do so could result in serious personal injury or damage
to equipment.
NOTE:
Hill-Rom recommends the use of Hill-Rom surfaces that have been designed and tested specifically for
the CareAssist™ Bed. Customers electing to purchase replacement surfaces from other manufacturers
should confirm that the replacement surface, when used in conjunction with the CareAssist™ Bed, meets
applicable regulations, regulatory guidance and technical standards and does not create unacceptable
risks of injury to patients or caregivers. Specifically, Hill-Rom suggests that surfaces utilize dimensions
and construction to minimize gaps where entrapment could occur, provide for sufficient height between
the surface and the top of the siderail to prevent accidental roll-over events, provide appropriate firmness
at the edges of the surface to facilitate safe transfers into and out of the bed, and do not interfere with the
proper operation of siderails.
WARNING:
Sleep surface impermeability could be affected by needle sticks or punctures caused by
improper use of x-ray cassette holders and/or needle sticks. Personal injury or infection could
result.
The sleep surface should be regularly inspected for such damage.
Flammability
WARNING:
Patients should not be allowed to smoke in bed. Sheets and pillows generally do not have flame
resistant properties. Personal injury or equipment damage could occur.
Reduce the possibility of fires by observing fire prevention rules and regulations.
The sleep surface mattress meets the following specifications:
•
CAL TB-117, Requirements, Test Procedure and Apparatus for Testing the Flame Retardance of
Resilient Filling Materials Used in Upholstered Furniture (foam)
•
16 CFR 1632, Standard for the Flammability of Mattresses and Mattress Pads
•
CAL TB-129, Flammability Test Procedures for Mattresses for Use in Public Buildings (models
with fire barrier only)
•
BFD IX-II, Boston Fire Department Mattress Fire Test (models with fire barrier only)
33
Bed Articulations
Do not operate system controls until all persons and equipment are clear of mechanisms. To stop a
function do any or all of the following:
•
Release the control.
•
Activate the opposite function.
•
Immediately unplug the power cord.
Observe lines closely during articulations. Always use good line management techniques, particularly as
the head section rises.
Chair Positioning
Always set the brakes before placing the system in a chair position. Observe lines closely during head
up/down and chair articulation.
Visitor Notification
Instruct visitors not to attempt operation of the caregiver siderail controls. Visitors may assist the patient
with patient controls.
34
Cleaning
WARNING:
Follow the product manufacturer’s instructions. Failure to do so could result in personal injury or
equipment damage.
SHOCK HAZARD:
Unplug the unit from its power source. Failure to do so could result in personal injury or
equipment damage.
SHOCK HAZARD:
Do not expose the unit to excessive moisture. Personal injury or equipment damage could
occur.
SHOCK HAZARD:
The potential for electrical shock exists with electrical equipment. Failure to follow facility
protocols may result in death or serious personal injury.
CAUTION:
Do not use harsh cleansers, solvents, or detergents. Equipment damage could occur.
General Cleaning
We recommend that you clean the unit with detergent and warm water. Do not use excessive liquid or
harsh cleansers.
Steam Cleaning
Do not use any steam cleaning device on the unit or immerse in water. Excessive moisture can damage
mechanisms in this unit.
Cleaning Hard to Clean Spots
To remove difficult spots or stains, we recommend that you use standard household cleansers and a soft
bristle brush. To loosen heavy, dried-on soil, you may first need to saturate the spot.
Disinfecting
When there is visible soilage and also between patient use, we recommend that you disinfect the unit
using an EPA registered (US only), tuberculocidal, disinfectant.
Dilute and use the disinfectant as specified on the manufacturer's label.
35
Preventive Maintenance
WARNING:
Only facility-authorized personnel should service the CareAssist™ Bed. Servicing by
unauthorized personnel could result in personal injury or equipment damage.
The CareAssist™ Bed requires an effective maintenance program. We recommend that you perform
annual preventive maintenance (PM) and testing for Joint Commission on Accreditation of Healthcare
Organizations (JCAHO). PM and testing not only meet JCAHO requirements but will help ensure a long,
operative life for the CareAssist™ Bed. PM will minimize downtime due to excessive wear. For
preventive maintenance schedule, refer to the CareAssist™ Bed Service Manual (MAN330).
Perform annual preventive maintenance procedures to ensure all CareAssist™ Bed components are
functioning as originally designed. Pay particular attention to safety features, including but not limited to
the following:
•
Siderail latching mechanisms
•
Caster braking systems
•
Electrical system components
•
Electrical power cords for fraying, damage, and proper grounding
•
Leakage current at the Nurse Call system communication connections
•
Controls return to off or neutral position when released
•
Cables are not tangled in system mechanisms or siderails
•
Proper operation of the lockout controls
•
Integrity of sleep surface ticking
•
Proper operation of the scale and Bed Exit System
The CareAssist™ Bed Main Battery
Replace the battery if any of the following conditions exist (refer to the CareAssist™ Bed Service Manual
(MAN330):
•
The battery indicator does not stop flashing (low condition) within 12 hours of bed connection to
the AC power
•
The battery completely discharges when less than three (3) complete hilow cycles with no load on
the bed (no patient on the surface) are completed .
Troubleshooting
WARNING:
Only facility-authorized personnel should troubleshoot the CareAssist™ Bed. Troubleshooting
by unauthorized personnel could result in personal injury or equipment damage.
Always check the battery charge status on the siderail. The bed may not be functioning due to the battery
being drained and the bed needing to be plugged into an appropriate power source.
36
Product Symbols
The following symbols are used on the CareAssist™ Bed:
Symbol
Description
Type B applied part according to IEC 60601-1 (UL 60601-1).
IPX4
According to IEC 60529, Rating for protection against fluid ingress
and identified as equipment that is protected against spraying and
splashing water.
CAUTION: Consult accompanying documents.
a
Medical Electrical Equipment Classified By Underwriters Laboratories Inc. with respect to Electric Shock, Fire, and Mechanical Hazards
only in accordance with UL60601-1, IEC60601-1, CAN/CSA C22.2
No 601.1, and IEC60601-2-38.
Demko Certified Unit.
Lockout control—Used to lockout or unlock bed functions.
Bed Up/Down control—Raises and lowers the bed.
37
Symbol
Description
Head Up/Down control—Raises and lowers the head section of the
bed.
Knee Up/Down control—Raises and lowers the knee section of the
bed.
Battery control—Activates the battery. Indicates battery charge.
Enable control—Enables the Trendelenburg and Reverse Trendelenburg functions on the bed. (Located on the caregiver control panel)
Enable control—Only enables the Bed Exit System control pod functions. (Located on the scale control pod)
Trendelenburg control—Enables the Trendelenburg function on the
bed.
Reverse Trendelenburg control—Enables the Reverse Trendelenburg function on the bed.
38
Symbol
Description
Bed Exit control—Arms and disarms the Bed Exit function on the
bed. (Beds without scale)
Nurse Call control—Sends a Nurse Call to the nurse’s station when
activated.
Hip Location—Indicates optimal patient placement on the bed.
Dining Chair™ Position control—Enables the Dining Chair™ Position
function on the bed.
Bed Flat control—Places the bed in a flat position.
Foot Up control—Raises the foot section on the bed.
Foot Down control—Lowers the foot section on the bed.
Room Light control—Turns the room light on and off. (Patient control
pendant only)
39
Symbol
Description
Reading Light control—Turns the reading light on and off. (Patient
control pendant only)
Music control—Turns the radio on and off. (Patient control pendant
only)
Television control—Turns the television on and off. (Patient control
pendant only)
Volume control—Raises or lowers the volume of the television or
radio. (Patient control pendant only)
Channel/Station Up/Down control—Changes the television channel
or radio station up or down. (Patient control pendant only)
Steer Indicator—Indicates the position needed for the brake/steer bar
to be located in for the bed to have steer function.
Neutral Indicator—Indicates the position needed for the brake/steer
bar to be located in for the bed to have neutral function.
40
Symbol
Description
Brake Indicator—Indicates the position needed for the brake/steer
bar to be located in for the brakes to be set.
Do not store items in this area.
Recycle—Indicates an item that is a recyclable item.
Do Not Throw Away—Indicates the need to recycle the item.
Do Not Use with Oxygen Tents—Indicates that oxygen tents are not
to be used. Use oxygen administering equipment of the nasal, mask,
or ventilator type only.
Bed Not Down Indicator—Illuminates when the bed is not in the
low-low position.
Safe Working Load—Indicates the safe working load of the bed.
41
Symbol
Description
Battery present—Indicates the presence of a battery in the bed.
Shows the head end IV poles do not change height when the sleep
surface is raised or lowered.
Bed Exit control—Arms and disarms the Bed Exit function on the
bed. (B model beds with scale only)
Change Items indicator—Beds with scale
Change Items control—Beds with scale
Weigh control—Beds with scale
Plus and Minus arrows—For manually adjusting the patient weight.
Local Alarm Volume control—B model beds with scale only.
42
Symbol
Description
Local Alarm Tone control—B model beds with scale only.
Zero control—Beds with scale
Hands Off indicator—Beds with scale
Patient Position Mode/Patient Movement Mode alarm—Comes on
when a patient moves towards either siderail or moves away from the
head section such as by sitting up in bed (C model and newer beds).
Bed Exiting Mode alarm—Comes on when a patient moves away
from the center of the bed towards an exit point (C model and newer
beds).
Out-of-Bed Mode alarm—Comes on when the patient's weight shifts
significantly off the frame of the bed (C model and newer beds).
Alarm Silence control—Silences the Bed Exit Alarm (C model and
newer beds).
Alarm Volume indicator—Shows the local alarm volume level setting
of the Bed Exit Alarm System (C model and newer beds).
43
Symbol
Description
Empty bed—Reminder to make sure the patient is not on the bed
when you zero the scale.
Bed Exit Alarm System Zero control—Zeroes the Bed Exit Alarm
System on beds without a scale. (C model and newer beds only)
Bed Exit Alarm System Deactivation Instruction—Shows the
sequence to deactivate the Bed Exit Alarm System.
Service Required indicator—Flashes to show a Bed Exit System malfunction (beds without scale ) (C model and newer beds only)
a. The UL logo is a registered trademark of Underwriter’s Laboratories, Inc.
44
Specifications
Product Identification
Product Number
Description
P1170
The CareAssist™ Bed
Dimensions
Feature
Dimension
Total length
100" (254 cm)
Maximum width (siderails stored)
40" (102 cm)
Maximum width (siderails up)
40" (102 cm)
Recommended Mattress dimensions:
Mattress width
36.25" (92.1 cm)
Mattress length
80.0" (203.2 cm)
Mattress thickness
6.0" (15.2 cm)
Alternate mattresses: Recommended height above
the mattress at the deck perimeter to the top of the
siderail, per IEC 60601-2-38
8.7" (220 mm)
Caster size
6.0" (15.2 cm)
Total weight
420.0 lb (190.5 kg) without surface, options, or accessories
Specifications
Feature
Dimension
Head section inclination (maximum)
65°
Knee section inclination (maximum)
20°
Foot section inclination (maximum)
-23°
Maximum height (to top of sleep deck)
32.5" (82.5 cm)
Minimum height (to top of sleep deck)
16.75" (42.54 cm)
Trendelenburg position (maximum)
16°
Safe working load
(safe working load includes: patient, accessories,
mattress, and etc.)
400 lb (181 kg)
Siderail opening size
4.34" (11.02 cm)
Distance between siderails
< 2.3" (58.4 mm)
Environmental Conditions for Transport and Storage
Condition
Range
Temperature
-40°F to 122°F (-40°C to 50°C)
Relative humidity
Up to 95%, non-condensing
Pressure
50 kPa to 106 kPa
45
Nurse Call Connection Requirements
For information about the Nurse Call connection requirements, refer to the SideCom® Communication System Design and Application Manual (DS059).
Environmental Conditions for Use
Condition
Range
Temperature
32°F to 104°F (0°C to 40°C) ambient temperature
Relative humidity range
30% to 85% non-condensing
Atmospheric Pressure
70 kPa to 106 kPa
AC Power Requirements
Nominal Power Distribution
Voltage (Volts)
Nominal Power Distribution
Frequency (Hertz)
Maximum Equipment Current
(Amps)
120
60
6.0
100
50/60
7.5
110-120
50/60
7.5
127
50/60
6.0
220
50/60
3.5
230
50/60
3.5
240
50/60
3.5
a
a. North American power supply configuration.
Fuse Specifications
There are no user accessible fuses. Refer to the CareAssist™ Bed Service Manual (MAN330) for
fuse ratings and replacement procedures.
46
Classification and Standards
The CareAssist™ Bed is designed and manufactured according to the following equipment classifications and
standards:
Technical and Quality Assurance Standards
UL 60601-1
CSA® C22.2 No. 601.1
IEC 60601-2-38
IEC 60601-1
IEC 60601-1-2
EN ISO 9001 and EN 13485
a
Equipment Classification per IEC 60601-1
Class
Degree of Protection Against Electric Shock
Type B
Degree of Protection Against Ingress of Water
Protection against spraying or splashing water- IPX4
Degree of Protection Against the Presence of
Flammable Anaesthetic Mixtures
Not for use with flammable anaesthetics.
Mode of Operation
Continuous operation with intermittent loading,
3 minutes ON/27 minutes OFF
Sound level (except alarms) (measured 1 meter from
patient’s ear)
< 60 dBA
I equipment, internally powered equipment
a. CSA® is a registered trademark of Canadian Standards Association, Inc.
Electromagnetic Emissions Guidance
Guidance and Manufacturer's Declaration—Electromagnetic Emissions
The CareAssist™ Bed model P1170 is intended for use in the electromagnetic environment specified below. The customer or the user of
the model P1170 should make sure it is used in such an environment.
Emissions Test
Compliance
Electromagnetic Environment—Guidance
RF Emissions
CISPR 11
Group 1
The model P1170 uses RF energy only for its internal functions. Therefore,
its RF emissions are low and are not likely to cause any interference in
nearby electronic equipment.
RF Emissions
CISPR 11
Class A
Harmonic Emissions
IEC 61000-3-2
Not
Applicable
The model P1170 is suitable for use in all establishments other than domestic
and those directly connected to the public low-voltage power supply network
that supplies buildings used for domestic purposes.
Voltage Fluctuations/
Flicker Emissions
IEC 61000-3-3
Not
Applicable
47
Electromagnetic Immunity Guidance
Guidance and Manufacturer's Declaration - Electromagnetic Emissions
The CareAssist™ Bed model P1170 is intended for use in the electromagnetic environment specified below. The customer or the user of
the model P1170 should make sure it is used in such an environment.
IEC 60601
Test Level
Immunity Test
Compliance Level
Electromagnetic Environment—
Guidance
Electrostatic
Discharge (ESD)
IEC 61000-4-2
± 6kV Contact
± 8kV Air
± 6kV Contact
± 8kV Air
Floors should be wood, concrete, or
ceramic tile. If floors are covered with
synthetic material, the relative humidity
should be at least 30%.
Radiated RF
IEC 61000-4-3
3 Vrms
80 MHz to 2.5 GHz
3 Vrms
80 MHz to 2.5 GHz
Portable and mobile RF communications
equipment should not be used at close distances to the P1170 bed. (See Note 2)
Electrical Fast
Transient/Burst
IEC 61000-4-4
± 2kV on Power Supply Lines
± 1kV on Input/ Output Lines
± 2kV on Power Supply Lines
± 1kV on Input/ Output Lines
Mains power quality should be that of a
typical commercial or hospital environment
Surge
IEC 61000-4-5
± 1kV Differential Mode
(line-line)
± 2kV Common Mode
(Line-Ground)
± 1kV Differential Mode
(line-line)
± 2kV Common Mode
(Line-Ground)
Mains power quality should be that of a
typical commercial or hospital environment
Conducted RF
IEC 61000-4-6
3 Vrms
150 kHz to 80 MHz
3 Vrms
150 kHz to 80 MHz
Portable and mobile RF communications
equipment (cell phones) should not be
used at close distances to the P1170 bed.
(See Note 2)
Power Frequency
Magnetic Fields
IEC 61000-4-8
3 A/m
3 A/m
The power frequency magnetic field
should be measured in the intended installation location to assure it is sufficiently
low.
Voltage Dips, Short
Interrupts, & Variations On Power Supply Lines
IEC 61000-4-11
< 5% UT
(95% dip in UT for 0.5 cycles )
< 40% UT
(60% dip in UT for 5 cycles )
< 70% UT
(30% dip in UT for 25 cycles )
< 5% UT
(95% dip in UT for 5 seconds )
(See Note 1)
< 5% UT
(95% dip in UT for 0.5 cycles )
< 40% U T
(60% dip in UT for 5 cycles )
< 70% U T
(30% dip in UT for 25 cycles )
< 5% UT
(95% dip in UT for 5 seconds )
Mains power quality should be that of a
typical commercial or hospital environment. If operation is required during an
extended power outage or interruption, the
model P1170 should be switched to operate from the backup battery.
Note 1: UT is the AC mains voltage prior to application of the test level.
Note 2: The compliance levels in the ISM frequency range 150 kHz to 2.5 GHz are intended to decrease the likelihood that mobile/portable communications equipment could cause interference if it is inadvertently brought into the patient area. However, emission limits,
IEC 60601 test levels, and tests specified in IEC 60601-1-2:2001 do not address electromagnetic compatibility of electrical equipment at
very close distances. Care should always be exercised when using any electrical or RF equipment in the immediate patient area.
48
Global Headquarters
Hill-Rom Company, Inc.
1069 State Route 46 E
Batesville, IN 47006-9167
Tel: 800-445-3720
www.hill-rom.com
USA Rental Therapy
Hill-Rom Company, Inc.
4349 Corporate Road
Charleston, SC 29405
Tel: 800-638-2546
St. Paul, MN USA
Hill-Rom Company, Inc.
1020 W. County Road F
St. Paul, MN 55126
Tel: 651-490-1468 or 800-426-4224
www.thevest.com
Belgique / België
Distribal
Admiral De Boisot Straat 19-21
2000 Antwerpen
Tel: +32 (0)32 38 43 15
Fax: +32 (0)32 16 06 86
Canada
Hill-Rom Canada
5444 Timberlea Blvd.
Mississauga, Ontario
Canada L4W 2T7
Tel: 800-267-2337
Deutschland
Hill-Rom GmbH
Franz-Rennefeld-Weg 4
40472 Dusseldorf
Tel: +49 (0)211 16450 0
Fax: +49 (0)211 16450 182
Ellás
Meditime
Nikolaos Chatziioannidis
Egnatia 142 Str
54622 Thessaloniki
Tel: +30 2310 263300
Fax: +30 2311 263329
España
Hill-Rom Iberia S.L.
C/ Comerc, n° 2-22, Nave n° 14
Poligno Industrial EL PLA
08980 Sant Feliu de Llobregat
(Barcelona) - SPAIN
Tel: +34 (0)93 685 6009
Fax: +34 (0)93 666 5570
France
Hill-Rom SAS
Z.I. du Talhouët, BP 14
56330 Pluvigner
Tel: +33 (0)2 97 50 92 12
Service France: +33 (0)820 01 23 45
Fax: +33 (0)2 97 50 92 00
Ireland
Hill-Rom Ltd.
Unit 1 - Kilcarberry Business Park
Nangor Road
Dublin 22
Tel: +353 (0)1 413 6005
Fax: +353 (0)1 413 6030
[email protected]
Italia
Hill-Rom S.p.A.
Via Ambrosoli 6
20090 Rodano
Tel: +39 (0)02 / 950541
Fax: +39 (0)02 / 95328578
Nederland
Hill-Rom Medical Services BV
Hagenweg 1c
Postbus 173
4130 ED Vianen
Tel: +31 (0)347 / 32 35 32
Fax: +31 (0)347 / 32 35 00
Nordic Region
Hill-Rom AB
Ekbacksvägen 20
168 69, Bromma
Sweden
Tel: +46 (0)8 564 353 60
Fax: +46 (0)8 564 353 61
[email protected]
Österreich
Hill-Rom Austria GmbH
Bueropark Donau / Haus 8
3400 Klosterneuburg
Tel: +43 (0)2243 / 28550
Fax: +43 (0)2243 / 28550-19
[email protected]
Portugal
Hill-Rom Iberia S.L.
C/ Comerc, n° 2-22, Nave n° 14
Poligno Industrial EL PLA
08980 Sant Feliu de Llobregat
(Barcelona) - SPAIN
Tel: +34 (0)93 685 6009
Fax: +34 (0)93 666 5570
Suisse / Schweiz
Hill-Rom SA
Chemin du Vallon 26
1030 Bussigny
Tel: +41 (0)21 / 706 21 30
Fax: +41 (0)21 / 706 21 33
hrch.info@hill-rom
United Kingdom
Hill-Rom Ltd.
Clinitron House
Ashby Park
Ashby de la Zouch
Leicestershire LE65 1JG
Tel: +44 (0)1530 411000
Fax: +44 (0)1530 411555
International
Hill-Rom Company, Inc.
International Department
1069 State Route 46 East, J55
Batesville, Indiana 47006 USA
Tel: +1 (0)812 934 8173
Fax: +1 (0)812 934 7191
www.hill-rom.com
[email protected]