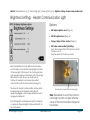
1
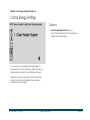
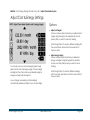
Clear Heater System Control Panel User Guide Logicor (CH) Ltd. Version / Issue Date: 10 Jun 2015 TABLE OF CONTENTS SAFETY ............................................................................................................ v - vi INTRODUCTION ..................................................................................................... 1 Control Panel .................................................................................. 2 Clear Heater Units .......................................................................... 3 SECTION 1: HELP MODE ........................................................................................ 4 Help Mode ...................................................................................... 5 SECTION 2: CONTROL PANEL & TEMPERATURE SETTINGS .................................... 6 Control Panel & Temperature Settings........................................ 7 Main Settings .................................................................................. 8 o Wifi Settings............................................................................ 9 o Time & Date ........................................................................ 10 o Tariff Settings........................................................................ 11 o Units of Measurement ........................................................ 12 Screen Options ..................................................... 13 Status Screen Options: Choose a System ......... 14 Status Screen Options: Choose Readings ........ 15 Brightness Settings ................................................ 16 Heater Communication Light ............................ 17 i TABLE OF CONTENTS Recalibration ........................................................ 18 Fireguard Settings ................................................ 19 Load Original Settings ................................................................. 20 Clear Heater System Settings ..................................................... 21 o Adjust Complete System ................................................... 22 o Adjust Zones ........................................................................ 23 Adjust Independent Zone ................................... 24 Independent Zone Switched ON ...................... 25 Edit Zone Name & Temperature ........................ 26 Add New Zone ..................................................... 27 Assign Heater Units to Zone ................................ 28 Delete Zone .......................................................... 29 o Adjust Heaters ..................................................................... 30 Add New Heater .................................................. 31 Add New Heater: Waiting .................................. 32 Add New Heater: Confirmation......................... 33 Edit Heater Name & Temperature..................... 34 Delete Heater Unit ............................................... 35 ii TABLE OF CONTENTS o Link Heaters ......................................................................... 36 Edit Name & Temperature of Link...................... 37 Add New Link ....................................................... 38 Modify Link ............................................................ 39 Delete Link............................................................. 40 Heat-up Mode - Surface Temperature ..................................... 41 o Heat-up Mode - Activation Threshold ............................. 42 Heater Surface Temperature ..................................................... 43 Clear Heater Clothes Dryer ........................................................ 44 o Select Clear Heater ........................................................... 45 o Adjust Drying Time .............................................................. 46 o Start Drying .......................................................................... 47 Heat Up Mode Override ............................................................. 48 SECTION 3: STATUS SCREEN ................................................................................ 49 Status Screen ................................................................................ 50 iii TABLE OF CONTENTS SECTION 4: COST & ENERGY SETTINGS .............................................................. 51 Cost & Energy Settings ................................................................ 52 Adjust Cost & Energy Settings .................................................... 53 SECTION 5: TIMER SETTINGS................................................................................ 54 Timer Settings ................................................................................ 55 Weekly Settings ............................................................................ 56 Add Event ..................................................................................... 57 Adjust Event .................................................................................. 58 Graphical View ............................................................................ 59 Enable / Disable Scheduling ...................................................... 60 SPECIFICATION: CONTROL PANEL ..................................................................... 61 SPECIFICATION: CLEAR HEATER UNITS ............................................................... 62 iv Safety (part 1 of 2) Installation Safety & Maintenance The Clear Heater System must be installed by a certified installer authorized by Logicor. Our installers have to pass strict qualification standards before they become approved to install our systems. Our installers will advise and install your Clear Heater System in the most effective position to heat your property safely and efficiently. WARNING - Clear Heater units must not be located immediately below a wall socket outlet. WARNING - Bathroom Installations. Clear Heaters are robust and durable but please avoid impacts from sharp or heavy objects: a hammer for example. In the unlikely event that a glass panel of your clear heater unit becomes damaged, unplug the heater unit from the wall socket if it is safe to do so and contact Logicor (CH) Ltd. CAUTION - Some parts of this product can become hot and cause burns. Particular attention has to be given where children or vulnerable people are present. Clear Heaters operate at a normal 70°C (158 °F). The use of this heater by young children under 8 years old or infirm persons without supervision is not recommended. Do not allow young children to play with the appliance. Clear Heaters units and control panels located in a bathroom must be positioned so that switches and other controls cannot be touched by a person in the bath or shower. Heater units must not be installed at a height greater than 1.8m in a bathroom. WARNING - A heater units must not be used if the glass panels are damaged. WARNING - Do not install the Clear Heater System in a wardrobe or to a ceiling. WARNING - Do not dismantle; this appliance contains no user serviceable parts. In the unlikely event of you requiring service please contact your authorised distributor or Logicor by visiting www.logicor.co.uk. Our installers will advise and install your Clear Heater System in the most effective position to heat your property safely and efficiently. v Safety (part 2 of 2) Safety & Maintenance (continued) Cleaning WARNING - If the power cord is damaged do not use the appliance. If the power cord is damaged it must be replaced by the manufacturer, its service agent or similar qualified persons to avoid a hazard. WARNING - In order to avoid overheating, do not cover the heater. If you wish to dry clothes with the Clear Heater System please purchase a clothes dryer system from Logicor. The Logicor clothes dryer system provides a convenient, safe and quick method to dry clothes positioned a safe distance from the heater unit. At no point must clothing be hung directly over a Clear Heater unit. WARNING: Do not cover. vi IMPORTANT - The temperature sensor located in the Heater unit base is designed to cope with normal household dust. Please avoid spraying polish, hair sprays or other chemical sprays near the sensor as it may reduce or damage the performance. Use a clean dry cloth to clean the heaters and control panel but avoid polish, sprays or harsh abrasives. MENU ► Tip! Use the menu path headings at the top of each page to help you navigate through the screens Introduction Energy efficiency has never been more important, especially where cost is concerned. With our smart touch-screen control panel you will benefit from better, more accessible information and control over your heating costs. The control panel is pre-programmed and ready to go but you can follow the on-screen prompts and this user guide to customise your settings. Section 1: Help Mode……………………….............. (Page 4) Section 2: Control Panel & Temperature Settings (Page 6) Section 3: Status Screen……………........................ (Page 49) Section 4: Cost & Energy Settings…....................... (Page 51) Section 5: Timer Settings……………....................... (Page 54) How to use this guide This user guide is designed to help you get the most from your Clear Heater System and understand the different functions available on the control panel. Your control panel also has help messages associated with each function; simply press the help icon at any time. Use the table of contents at the beginning of this guide to find the page number of the function you need help with and go to that page. The nature of the control panel options means that you may need to back-track through the screen menus in order to fully understand how to reach your chosen function. Use the MENU ►headings at the top of each page to find the page number of each previous screen leading up to your chosen function. If you are using an electronic (pdf) copy of this guide you can click any page number reference or MENU ► heading at the top of the page to go direct to that page. Check out our website www.clear-heater.co.uk for product updates. © 2015 Logicor (CH) Ltd clear-heater.co.uk Page 1 MENU ► Tip! Use the menu path headings at the top of each page to help you navigate through the screens Control Panel The control panel is the ‘brain’ of the Clear Heater System and is recommended by the Energy Saving Trust for its energy saving abilities. The control panel is pre-programmed to work out of the box but you can change the settings at any time with your own preferences. Once the control panel and Clear Heater units are plugged into the wall socket they are ready to communicate with each other using the electrical mains wiring in your home. For example, you can change the name and temperature of each heater unit, link heater units to work as one unit together, or assign heater units to work in named zones (e.g. all bedrooms). Use the touch screen LCD to select options or type in your data. The menu icons on the left of the display are your starting point for each of the following sections. Section 1: Help Mode……………………….............. (Page 4) Section 2: Control Panel & Temperature Settings (Page 6) Section 3: Status Screen……………........................ (Page 49) Section 4: Cost & Energy Settings…....................... (Page 51) The control panel is also equipped with Wifi capability to receive software updates via the internet. A new feature to be launched in 2015 will be the ability to connect via your Smartphone or iPad. © 2015 Logicor (CH) Ltd clear-heater.co.uk Section 5: Timer Settings……………....................... (Page 54) Page 2 MENU ► Tip! Use the menu path headings at the top of each page to help you navigate through the screens Clear Heater Units Our unique patented infrared heaters require no complex plumbing or wiring. A qualified installer will advise on the best position and fit them to the wall. Once the control panel and Clear Heater units are plugged into the wall sockets they are ready to communicate with each other using the electrical mains wiring in your home. Important: The Clear Heating System is an all-electric phased radiant heating system. The heaters have a very thin carbon ceramic heating element sandwiched between two sheets of toughened glass with a mica insert to minimise rear facing heat loss. A Clear Heater System requires a control panel to operate normally. Each Clear Heater unit has a manual temperature control on the base panel. This is only active if the heater is not connected to its control panel and then only for a limited period of up to eleven days before it stops working. The heater unit will operate again once a control panel is connected. We pride ourselves in making robust products that are both elegant in design and provide solutions that work. We are so confident in our heater system that we give you 20 years guarantee on all heater units with a life expectancy of over 33 years. © 2015 Logicor (CH) Ltd clear-heater.co.uk Page 3 MENU ► Help Icon Section 1: Help Mode Select the Help Icon on your control panel display then turn to page 5. Section 1: Help Mode……………………….............. (Page 4) Section 2: Control Panel & Temperature Settings (Page 6) Section 3: Status Screen……………........................ (Page 49) Section 4: Cost & Energy Settings…....................... (Page 51) Section 5: Timer Settings……………....................... (Page 54) © 2015 Logicor (CH) Ltd clear-heater.co.uk Page 4 MENU ► Help Icon Help Mode Options: Press ‘Help’ Icon Touch the help icon at any time to enter help mode. The associated help message appears in the pop-up box. ‘Exit’ Help Press anywhere on the screen to take you back to your previous display. The help icon is always there at the top left of your screen to give you additional information about the current control panel display. Pressing the screen again takes you back to your previous screen. © 2015 Logicor (CH) Ltd clear-heater.co.uk Page 5 MENU ► Temperature Icon Section 2: Control Panel & Temperature Settings Select the Temperature Icon on your control panel display then turn to page 7. Section 1: Help Mode……………………….............. (Page 4) Section 2: Control Panel & Temperature Settings (Page 6) Section 3: Status Screen……………........................ (Page 49) Section 4: Cost & Energy Settings…....................... (Page 51) Section 5: Timer Settings……………....................... (Page 54) © 2015 Logicor (CH) Ltd clear-heater.co.uk Page 6 MENU ► Temperature Icon Control Panel & Temperature Settings Options: Main settings (Page 8) Adjust the main settings of the control panel, including Wifi, time and date, tariff settings, units of measurement, screen display options and the fireguard function settings. Load original settings (Page 20) Load the original factory settings if you want to reset the system back to its factory settings. You will be asked to confirm your choice on the next screen or cancel. Clear Heater System (Page 21) Adjust your heating preferences for individual heater units, create heating zones, or link heater units together to operate as one. Selecting the Temperature Icon brings you to the main control panel and temperature settings menu. From here you can change the main settings of your control panel or load the original factory settings to reset the control panel completely and delete your saved preferences. The Clear Heater System option is where you can change all your temperature settings of your Clear Heater System and the Clear Heater Clothes Dryer option takes you to the clothes dryer function settings. Warning: Only dry clothes using the special clothes drying unit standing in front of a heater unit. Never hang clothes directly over a Clear Heater Unit. Use the Heat-up mode override in some situations to save more energy. © 2015 Logicor (CH) Ltd Clear Heater Clothes Dryer (Page 44) Set up and adjust the clothes dryer function of your Clear Heater System. clear-heater.co.uk Heat up mode override (Page 48) Override Heat-up mode for the next 11 days. Page 7 MENU ► Temperature Icon (p. 7) / Main settings Main Settings Options: Set up your control panel preferences by choosing one of the displayed options, or click the back arrow button to go back to the previous menu. © 2015 Logicor (CH) Ltd Wifi settings (Page 9) Amend your Wifi settings to enable the control panel to connect to the internet for software updates or access your control panel via your Smartphone. Time & date (Page 10) The time and date is needed for the control panel to accurately regulate your heater system and provide you with up to date performance and cost data. Tariff settings (Page 11) Enter your tariff rate to get accurate cost and performance data for your system. Units of measurement (Page 12) Select your preferred choice of currency for your cost performance targets Screen options (Page 13) Edit which status messages appear on the main status screen or change the control panel screen brightness levels and touch-screen settings. Fireguard (Page 19) Fireguard warns you if a heater unit detects a higher than expected temperature in the room. clear-heater.co.uk Page 8 MENU ► Temperature Icon (p. 7) / Main settings (p.8) / Wifi settings Wifi Settings Options: Manual setup Enter your network name or SSID (service set identifier) and password to add your Wifi network to the control panel. Use the keypads to type in your settings and press the save button to store your settings. Connect to an available network Choose from the list of available networks and touch once to connect or unselect by touching the screen option again. Amend your Wifi settings to enable your control panel to connect to the internet for software updates. A Smartphone can also function as a Wifi Hotspot. Connecting to the internet also allows you to access your control panel via your Smartphone. Use the keypads to type in your settings and press the save button to store your settings. The INFO message at the top displays the current Wifi status. © 2015 Logicor (CH) Ltd clear-heater.co.uk Page 9 MENU ► Temperature Icon (p. 7) / Main settings (p.8) / Time & Date Time & Date Options: Enter time Enter the current time by first selecting that area on the screen. The time format is Hours: Minutes: Seconds Use the keypads to type in your settings and press the save button to store your settings. Enter date Enter the current date by selecting that area on the screen. The date format is Day / Month / Year. Use the keypads to type in your settings and press the save button to store your settings. The time and date is needed for the control panel to accurately regulate your heater system and provide you with up to date performance and cost data. Once set, you should not need to adjust the time and date again if your control panel is connected to the internet. Time and date updates will then be automatic. © 2015 Logicor (CH) Ltd clear-heater.co.uk Page 10 MENU ► Temperature Icon (p. 7) / Main settings (p.8) / Tariff settings Tariff Settings Options: Enter your electricity tariff Enter your electricity tariff by first selecting that area on the screen. Use the keypads to type in your settings and press the save button to store your settings. Tip: 15p is entered as 0.1500 GBP 20p is entered as 0.2000 GBP Entering your electricity tariff allows accurate cost and performance data feedback for your system. Your tariff settings can be found on your utilities bill, or by contacting your service provider. Please remember to amend your tariff rate on the control panel if and when your tariff changes. © 2015 Logicor (CH) Ltd clear-heater.co.uk Page 11 MENU ► Temperature Icon (p. 7) / Main settings (p.8) / Units of measurement Units of Measurement Options: Enter preferred currency Choose from the list of available currencies. Touch once to select or again to unselect. Selected units will display a tick next to the item. Press the save button to store your entry. Enter preferred temperature units Choose to display temperature in degrees Fahrenheit or degrees Celsius. Touch once to select or again to unselect. Selected units will display a tick next to the item. Press the save button to store your entry. The currency and temperature units are required to display your cost performance targets and the system temperature. You can change your preferred units from the available options. © 2015 Logicor (CH) Ltd clear-heater.co.uk Page 12 MENU ► Temperature Icon (p. 7) / Main settings (p.8) / Screen options Screen Options Options: Status Screen Options (Page 14) Choose which performance data appears on the main status screen. Brightness Settings (Page 16) Change the screen and LED brightness levels, or adjust the how long the screen stays on before switching into energy saving mode. Touch Recalibration (Page 18) 'Touch recalibration' adjusts the control panel sensitivity settings. Choose this option to start the recalibration process where you’ll be asked to touch a white dot at the topleft, bottom-right and middle of the screen to automatically calibrate the screen. Screen options allow you to change how your control panel looks and adjust your touch-screen settings. Choose which performance data appears on the main status screen by selecting ‘Status screen options’. Change the screen brightness and energy saving settings by selecting ‘Brightness settings’. 'Touch recalibration' allows you to fine tune the touchscreen sensitivity settings. © 2015 Logicor (CH) Ltd clear-heater.co.uk Page 13 MENU ► Temperature Icon (p. 7) / Main settings (p.8) / Screen options (p.13) / Status screen options Status Screen Options: Choose a System Options: Choose Clear Heater System (Page 15) Choose this option to adjust the performance data readings for your Clear Heater System. You can choose which performance data appears on the main status screen. First choose your heater system from the list. If you only have one heater system available only one option will be listed. Additional systems are proposed for the future that will be listed on this screen if available. Please check our website for product updates. © 2015 Logicor (CH) Ltd clear-heater.co.uk Page 14 MENU ► Temperature Icon (p. 7) / Main settings (p.8) / Screen options (p.13) / Status screen options (p.14) / CHS Status Screen Options: Choose Readings Options: Choose your readings Choose from the list which performance data readings appear on the main status screen. Touch once to select or again to unselect. Selected items will display a tick next to the item. Scroll up and down the list with the arrows. Press the save button to store your entry. You can choose which performance data readings appear on the main status screen by selecting from the list of options. Once your choice is selected it will display a tick next to the item and will be displayed on the main status screen. The status screen is reached by pressing the ‘Home’ Icon. © 2015 Logicor (CH) Ltd clear-heater.co.uk Page 15 MENU ► Temperature Icon (p. 7) / Main settings (p.8) / Screen options (p.13) / Brightness settings Brightness Settings Options: Edit display brightness level Touch the plus and minus symbols to increase or decrease the brightness setting between 1 and 10. Press the save button to store your entry. Edit LED brightness level Touch the plus and minus symbols to increase or decrease the LED brightness setting between 1 and 10. Press the save button to store your entry. Change ‘display off time’ duration The ‘display off time’ function switches the screen display into energy saving mode after a predetermined time. The display brightness option is the backlight brightness level of the main LCD display screen. The control panel has three blue LEDs that switch on when the control panel goes into sleep mode. Sleep mode is the energy saving function of the control panel. In sleep mode the main display screen dims to black. You can change how long (in seconds) the display is active before switching off into sleep mode. © 2015 Logicor (CH) Ltd Touch the plus and minus symbols to increase or decrease the display off time setting between 1 and 300 seconds (5 minutes). Press the save button to store your entry. clear-heater.co.uk Edit heater communication light settings (Page 17 ) Page 16 MENU ► Temperature Icon (p. 7) / Main settings (p.8) / Screen options (p.13) / Brightness settings - Heater communication light Brightness Settings - Heater Communication Light Options: Edit display brightness level (Page 16) Edit LED brightness level (Page 16) Change ‘display off time’ duration (Page 16) Edit heater communication light settings Touch the on-screen ON or OFF options to turn this function on or off. Press the save button to store your entry. Each Clear Heater unit has an LED screen in the base unit. The heater communication warning light is located at the lower right of this screen. If the control panel loses communication with one of the heater units, this warning light will flash to alert the user. The heater unit will continue to operate for up to eleven days without communication with the control panel (see page 3 ). The cause for a break in communication can be varied, including using non CE standard or faulty electric appliances plugged in and causing interference near to a plugged-in heater unit. If the flashing light is a disturbance at night, for example in a bedroom, the warning light can be switched off via the control panel. © 2015 Logicor (CH) Ltd Clear Heater Communication Warning Light Note: Remember to switch the communication light function on again after the cause of the communication interruption has ended. clear-heater.co.uk Page 17 MENU ► Temperature Icon (p. 7) / Main settings (p.8) / Screen options (p.13) / Touch recalibration Recalibration Options: Press top left corner of display Press the dot at the top left corner of the display. The next screen will then be automatically displayed. Press bottom right corner of display Press the dot at the bottom right corner of the display. The next screen will then be automatically displayed. Press dot on the display Press the dot on the display. The next screen will then be automatically displayed. Results The confirmation screen will display the results. Touch-screen recalibration adjusts the control panel display sensitivity to your own touch pressure. Choose this option from the Screen Options Menu (Page 13) to start the recalibration process where you’ll be asked to touch a dot at the top-left, bottom-right and middle of the screen to automatically adjust to your settings. When completed, the confirmation screen will display the results. © 2015 Logicor (CH) Ltd clear-heater.co.uk Page 18 MENU ► Temperature Icon (p. 7) / Main settings (p.8) / Fireguard settings Fireguard Settings Options: Fireguard is a safety feature of the Clear Heater system and is intended to work in addition to standard smoke and fire alarms and not as the only fire warning device. Set Fireguard warning temperature Select this option by touching the screen and enter the temperature figure using the keypad. Press the save button to store your entry. Set contact numbers You may enter up to four contact numbers in the list. In the situation of a Fireguard warning, these numbers will be automatically called and relayed a standard voice message warning you of the potential fire risk. Touch each list item on the screen and type the number using the keypad. Press the save button to store your entry. If a Clear Heater unit detects a temperature in your room higher than expected the control panel will signal a warning. When your control panel is connected to the internet it will also call up to four telephone numbers to warn you of a possible fire. Turn Fireguard function on or off Touch ON or OFF to turn this function on or off. Press the save button to store your entry. You can set the preferred warning temperature to any value above 50°C (122 °F). We recommend 51°C (124 °F). The Fireguard function can be turned on or off. © 2015 Logicor (CH) Ltd clear-heater.co.uk Page 19 MENU ► Temperature Icon (p. 7) / Load original settings Load Original Settings Options: Select YES Choose YES to load the original factory settings. Warning: all stored settings and preferences will be deleted. Select NO Choose NO to cancel this action and return to the previous screen. Load the original settings if you want to reset the system back to the original factory settings. Once reset, you will have to re-enter all your settings and preferences again. © 2015 Logicor (CH) Ltd clear-heater.co.uk Page 20 MENU ► Temperature Icon (p. 7) / Clear Heater System Clear Heater System Settings Options: Complete system (Page 22) Adjust the temperature of the whole system or turn the system on or off. Adjust zones (Page 23) A zone is a group of heater units with the same settings. This makes it easy to adjust the temperature of multiple rooms together. Adjust heaters (Page 30) Heater units can be set to operate individually. Link heaters (Page 36) Heater units can be linked to operate together as one unit. This is useful when you have a large room for example that has a higher heating requirement. Adjust heat-up mode (Page 41) The normal surface temperature of a heater unit during heat-up mode is 90°C (194 °F). Increase this to complete the heat-up mode faster, or reduce it when a lower temperature is preferred. Adjust heater surface temperature (Page 43) The normal surface temperature of a heater unit during operation is 90°C (194 °F). You can change this for your own heating environment; a lower temperature in a child's bedroom for example. Access all your Clear Heater System settings from this menu. Use the arrows to scroll through the list and select an option to adjust. © 2015 Logicor (CH) Ltd clear-heater.co.uk Page 21 MENU ► Temperature Icon (p. 7) / Clear Heater System (p.21) / Complete system Adjust Complete System Options: Adjust complete system temperature Select this option by touching the screen and type the details using the keypad. Press the save button to store your entry. Turn Clear Heater System On or Off Select ON or OFF to turn the complete heater system on or off. Press the save button to store your entry. The complete heater system can be given one temperature setting to save you time. Adjust the temperature of the whole system by entering numbers in the keypad. You can also turn the system on and off. Leave the system on if you want the control panel to optimise your heating for you. © 2015 Logicor (CH) Ltd clear-heater.co.uk Page 22 MENU ► Temperature Icon (p. 7) / Clear Heater System (p.21) / Adjust zones Adjust Zones Options: Adjust the independent zone (Page 24) Choose this pre-programmed Independent Zone to be able to: - assign heater units to this zone (Page 24) - adjust the temperature (Page 24) - switch zone heaters ON (Page 24) and OFF (Page 25) Adjust an existing zone (Page 26) Choose a zone name from the list of existing zones to be able to: A zone is a group of heater units working with the same settings. This makes it easy to adjust the temperature of multiple rooms together. - edit the zone name and temperature (Page 26) For example, you could choose to heat all bedrooms with the same settings, saving you time when making adjustments. - delete the zone from the system (Page 29) Use the Independent Zone for spaces that you don't heat very often; a spare bedroom or a conservatory in winter for example. This zone can be switched on manually via the Control Panel only when you need it. Scroll through the list to select an existing zone to adjust or press 'Add new zone' to add a new zone to the system. © 2015 Logicor (CH) Ltd - assign heater units to the zone (Page 28) Use the scroll arrows to move up and down the list or select the back arrow to go back one screen. clear-heater.co.uk Add new zone (Page 27) Select this option to manually add a new zone to the system. Page 23 MENU ► Temperature Icon (p. 7) / Clear Heater System (p.21) / Adjust zones (p. 23) / Adjust Independent Zone Adjust Independent Zone Options: The Independent Zone is pre-programmed into your zone list and is intended for spaces that you don't heat very often; an infrequently used spare bedroom or a conservatory in winter for example. Adjust zone temperature Touch the screen and type the required temperature using the keypad. Press the save button to store your entry. Assign heater units to zone (Page 28) Select this option to assign heater units to this zone. Adjust ON time duration Touch the screen and type the required ON time duration using the keypad. You can choose between 1 and 999 minutes. Press the save button to store your entry. Switch Independent Zone ON Touch this screen option to switch the Independent Zone on. The display screen will then change to show the remaining ON time and give you the option to switch the Independent Zone off (Page 25). You can assign heater units to this zone just like any other zone, but those heaters will only switch on when and for how long you choose. Edit the ON time duration in minutes and turn the Independent Zone on by using the control panel touch screen options on this display. © 2015 Logicor (CH) Ltd clear-heater.co.uk Page 24 MENU ► Temperature Icon (p. 7) / Clear Heater System (p.21) / Adjust zones (p. 23) / Independent Zone (p.24 ) / Switch ON Independent Zone Switched ON Options: Adjust zone temperature Touch the screen and type the required temperature using the keypad. Press the save button to store your entry. Assign heater units to zone (Page 28) Select this option to assign heater units to this zone. Switch Independent Zone OFF Switching the Independent Zone off will change the display screen on your Control Panel back to show the Adjust Independent Zone settings with the option to switch the Independent Zone back on (Page 24). When the Independent Zone is switched on, all assigned heater units will heat this zone to the required temperature. The remaining time is displayed as a countdown in minutes so you know how long the zone will continue to heat. The Independent Zone can be switched ON or OFF at any time using the touch screen options. The current monthly cost of running the Independent zone is included in the total costs, but can also be displayed separately on the Status Screen (Page 50)by adding the 'I-Zone cost' option from the Status Screen Options menu (Page 15). © 2015 Logicor (CH) Ltd clear-heater.co.uk Page 25 MENU ► Temperature Icon (p. 7) / Clear Heater System (p.21) / Adjust zones (p.23) / Edit zone name & temperature Edit Zone Name & Temperature Options: Edit zone name and temperature Touch the screen and type the name and temperature details using the keypad. Press the save button to store your entry. Assign heater units to zone (Page 28) Heater units can be assigned to a zone by selecting this option. Delete this zone (Page 29) Zones can be deleted from the system by selecting this option. Only the zone will be deleted and not the individual heater units. You will be asked to confirm your selection on the next screen. Give each zone a unique name and temperature by entering the details with the keypad. Heater units can also be assigned to a zone or the zone can be deleted from the system. © 2015 Logicor (CH) Ltd clear-heater.co.uk Page 26 MENU ► Temperature Icon (p. 7) / Clear Heater System (p.21) / Adjust zones (p.23) / Add new zone Add New Zone Options: Edit zone name and temperature Touch the screen and type the name and temperature details using the keypad. Press the save button to store your entry. Assign heater units to zone (Page 28) Heater unit scan be assigned to a zone by selecting this option. Delete this zone (Page 29) Zones can be deleted from the system by selecting this option. Only the zone will be deleted and not the individual heater units. You will be asked to confirm your selection on the next screen. Give each zone a unique name and temperature by entering the details with the keypad. Heater units can also be assigned to a zone or the zone can be deleted from the system. © 2015 Logicor (CH) Ltd clear-heater.co.uk Page 27 MENU ► Temperature Icon (p. 7) / Clear Heater System (p.21) / Adjust zones (p.23) / Edit zone (p.26) / Assign heater units Assign Heater Units to Zone Options: Assign heater units to zone Select heater units from the list of available heaters to add them to the zone. You can choose multiple heater units for each zone. Scroll up and down the list with the arrows. Touch a heater name once to select or again to unselect. Selected heater units will display a tick next to the name. Choose which heater units should operate within this zone by selecting the heater names from the list. All heater units assigned to a zone then use the zone settings. Assigned heater units will display a tick next to the name. © 2015 Logicor (CH) Ltd clear-heater.co.uk Page 28 MENU ► Temperature Icon (p. 7) / Clear Heater System (p.21) / Adjust zones (p.23) / Edit zone (p.26) / Delete zone Delete Zone Options: Select YES Choose YES to delete this zone from the system. Warning: This action cannot be reversed. Only the zone will be deleted and not the individual heater units. Select NO Choose NO to cancel this action and return to the previous screen. Zones can be deleted from the system. Only the zone will be deleted and not the individual heater units. Confirm your choice with yes or no. © 2015 Logicor (CH) Ltd clear-heater.co.uk Page 29 MENU ► Temperature Icon (p. 7) / Clear Heater System (p.21) / Adjust heaters Adjust Heaters Options: Adjust an existing heater (Page 34) Choose a heater name from the list of existing heater units to be able to: - edit the name and temperature (Page 34) - assign the heater unit to a zone (Page 28) - delete the heater unit from the system (Page 35) Use the scroll arrows to move up and down the list or select the back arrow to go back one screen. Heater units can be set to operate individually, in a zone or linked together with other heaters to work as one unit. Add new heater (Page 31) Select this option to manually add a new heater to the system. Adjust the individual settings here to give each heater unit a unique setting. © 2015 Logicor (CH) Ltd clear-heater.co.uk Page 30 MENU ► Temperature Icon (p. 7) / Clear Heater System (p.21) / Adjust heaters (p.30) / Add new heater Add New Heater Options: Enter heater ID Touch the screen and enter the heater identification number using the keypad. The ID number can be found on the underside of the heater base. Press the save button to store your entry. Wait for the control panel to find and connect to the new heater unit on the next screen: Connecting to new heater unit (Page 32) Each heater unit has a unique identification number on the underside of the base. Plug in your new heater unit and enter the heater ID number here to automatically add it to the system. © 2015 Logicor (CH) Ltd clear-heater.co.uk Page 31 MENU ► Temperature Icon (p. 7) / Clear Heater System (p.21) / Adjust heaters (p.30) / Add new heater: Waiting Add New Heater: Waiting Options: Wait while connecting to new heater unit After the unique ID number is entered on the previous screen (Page 31) wait for the control panel to connect to the new heater unit. Abort Cancel the operation by pressing the abort button. Each heater unit has a unique identification number on the underside of the base. Once you enter this number on the previous screen (Page 31), the control panel attempts to connect the new heater unit automatically. © 2015 Logicor (CH) Ltd clear-heater.co.uk Page 32 MENU ► Temperature Icon (p. 7) / Clear Heater System (p.21) / Adjust heaters (p.30) / Add new heater: Confirmation Add New Heater: Confirmation Options: Adjust Heater (Page 30) When a heater unit is successfully added to the control panel you can adjust its individual settings to be able to change its name and temperature, assign the heater unit to a zone, or delete the heater unit from the system. Add New (Page 31) Choose this option to repeat the process and add an additional new heater unit. Each heater unit has a unique identification number on the underside of the base. Once you enter this number on the previous screen, the control panel attempts to connect the new heater unit automatically. The results are shown on this screen. If successful you can adjust its individual settings or repeat the process to add an additional new heater unit. © 2015 Logicor (CH) Ltd clear-heater.co.uk Page 33 MENU ► Temperature Icon (p. 7) / Clear Heater System (p.21) / Adjust heaters (p.30) / Edit heater name & temperature Edit Heater Name & Temperature Options: Edit heater name and temperature Touch the screen and type the name and temperature details using the keypad. Press the save button to store your entry. Assign heater to a zone (Page 28) The heater unit can be assigned to a zone by selecting this option. Delete heater unit (Page 35) Heater units can be deleted from the system by selecting this option. You will be asked to confirm your selection on the next screen. Heater units can always be added again after you delete it. Give each heater unit a unique name and temperature by entering the details with the keypad. Heater units can also be assigned to a zone or deleted from the system. © 2015 Logicor (CH) Ltd clear-heater.co.uk Page 34 MENU ► Temperature Icon (p. 7) / Clear Heater System (p.21) / Adjust heaters (p.30) / Edit heater (p.34) / Delete heater Delete Heater Unit Options: Select YES Choose YES to delete this heater unit from the system. Warning: This action cannot be reversed. Only this heater unit will be deleted, but it can be added again if you make a mistake. Select NO Choose NO to cancel this action and return to the previous screen. Heater units can be deleted from the system. Confirm your choice on this screen by selecting YES or NO. If you make a mistake, a heater unit can always be added again by selecting the 'add new heater' option on page 30. © 2015 Logicor (CH) Ltd clear-heater.co.uk Page 35 MENU ► Temperature Icon (p. 7) / Clear Heater System (p.21) / Link heaters Link Heaters Options: Adjust link (Page 37) Choose a link name from the list of existing links to be able to: - edit the link name and temperature (Page 37) - modify the link between heater units by adding or removing heater units to/ from a link (Page 28) - delete a link between heater units (Page 40) Use the scroll arrows to move up and down the list or select the back arrow to go back one screen. Heater units can be linked to operate together as one unit. This can be useful when you have a large room that has a higher heating requirement. © 2015 Logicor (CH) Ltd clear-heater.co.uk Add new link (Page 38) Select this option to manually add a new link to the system and connect several heater units together to operate as one unit. Page 36 MENU ► Temperature Icon (p. 7) / Clear Heater System (p.21) / Link heaters (p.36) / Edit link Edit Name & Temperature of Link Options: Edit name and temperature of link Touch the screen and type the name and temperature details using the keypad. Press the save button to store your entry. Modify link (Page 39) Add or remove heater units to or from the named link. Delete this link (Page 40) Links between heater units can be deleted from the system. You will be asked to confirm your selection on the next screen. Only the link between heater units will be deleted and not the individual heater units. Give linked heaters a unique name and temperature by entering the details with the keypad. Linked heaters can also be modified by adding or removing heater units or a link can be deleted from the system completely. © 2015 Logicor (CH) Ltd clear-heater.co.uk Page 37 MENU ► Temperature Icon (p. 7) / Clear Heater System (p.21) / Link heaters (p.36) / Add new link Add New Link Options: Edit name and temperature of new link Touch the screen and type the name and temperature details using the keypad. Press the save button to store your entry. Modify link (Page 39) Add or remove heater units to or from the named link. Delete this link (Page 40) Links between heater units can be deleted from the system. You will be asked to confirm your selection on the next screen. Only the link between heater units will be deleted and not the individual heater units. Give your new link a unique name and temperature by entering the details with the keypad. Linked heaters can also be modified by adding or removing heater units or a link can be deleted from the system. © 2015 Logicor (CH) Ltd clear-heater.co.uk Page 38 MENU ► Temperature Icon (p. 7) / Clear Heater System (p.21) / Link heaters (p.36) / Edit link (p.37) / Modify link Modify Link Options: Select heater units to link together Select individual heater units from the list of available heaters to add them to the named link. You can choose multiple heater units to operate with each named link. Scroll up and down the list with the arrows. Touch a heater name once to select or again to unselect. Selected heater units will display a tick next to the name. Choose which heater units should be linked to operate together as one unit by selecting the heater names from the list. All linked heater units then operate as if they were one unit. Selected heater units will display a tick next to the name. © 2015 Logicor (CH) Ltd clear-heater.co.uk Page 39 MENU ► Temperature Icon (p. 7) / Clear Heater System (p.21) / Link heaters (p.36) / Delete link Delete Link Options: Select YES Choose YES to delete this named link from the system. Warning: This action cannot be reversed. Only the named link will be deleted and not the individual heater units. Select NO Choose NO to cancel this action and return to the previous screen. Named links can be deleted from the system. Only the link between heater units will be deleted and not the individual heater units. Confirm your choice with yes or no. © 2015 Logicor (CH) Ltd clear-heater.co.uk Page 40 MENU ► Temperature Icon (p. 7) / Clear Heater System (p.21) / Adjust heat-up mode Heat-up Mode - Surface Temperature Options: Increase the heat-up mode surface temperature Touch the screen reading and enter the preferred surface temperature using the keypad. The maximum temperature is 130°C (266 °F). Press the save button to store your entry. Decrease the heat-up mode surface temperature Touch the screen reading and enter the preferred surface temperature using the keypad. The minimum temperature is 70°C (158 °F). Press the save button to store your entry. Adjust activation threshold (Page 42) Heat-up mode occurs when the heater units are first switched on or if any part of the system shows a temperature lower than the target temperature. The default threshold is if 20% of the system is below 0.9°C of target temperature. All heaters then heat up to compensate for and quickly achieve optimal temperature but this uses more energy. The normal surface temperature of a heater unit during heat-up mode is 90°C (194 °F). Increase the normal surface temperature to complete the heat-up mode faster. Decrease the normal surface temperature during heat-up where it may be considered safer to have lower surface temperatures; in a child’s bedroom or with elderly or vulnerable people for example. © 2015 Logicor (CH) Ltd clear-heater.co.uk Page 41 MENU ► Temperature Icon (p. 7) / Clear Heater System (p.21) / Adjust heat-up mode Heat-up Mode - Activation Threshold Options: Increase the activation threshold Touch the screen reading and enter the preferred threshold value using the keypad. A higher value (e.g. 90%) will reduce the frequency of heat-up mode activation and the affected heater units will heat up gradually using less energy. Press the save button to store your entry. Heat-up mode occurs when the heater units are first switched on or if any part of the system shows a temperature lower than the target temperature. The default threshold is if 20% of the system is below 0.9°C of target temperature. All heaters then heat up to compensate for and quickly achieve optimal temperature but this uses more energy. If for example you have a heater unit located in a porch where the outside door is opened frequently, cold outside air could activate the heat-up mode more often for the whole system. The threshold setting may be adjusted here or alternatively you may override Heat-up mode for the next eleven days (page 48). © 2015 Logicor (CH) Ltd clear-heater.co.uk Decrease the activation threshold Touch the screen reading and enter the preferred threshold value using the keypad. A lower value (e.g.20%) will increase the frequency of heat-up mode activation and all heater units on the system will heat up quickly using more energy but achieve optimal temperature in less time. Press the save button to store your entry. Tip: You may also override Heat-up mode to switch off the function for the next eleven days (page 48). Page 42 MENU ► Temperature Icon (p. 7) / Clear Heater System (p.21) / Heater surface temperature Heater Surface Temperature Options: Increase the normal surface temperature Touch the screen reading and type the preferred surface temperature using the keypad. The maximum temperature is 130°C (266 °F). Press the save button to store your entry. Decrease the normal surface temperature Touch the screen reading and type the preferred surface temperature using the keypad. The minimum temperature is 70°C (158 °F). Press the save button to store your entry. The normal surface temperature of a heater unit during operation is 90°C (194 °F). Increase the normal surface temperature in a particularly cold environment. Decrease the normal surface temperature where it may be considered safer to have lower surface temperatures; in a child’s bedroom or with elderly or vulnerable people for example. © 2015 Logicor (CH) Ltd clear-heater.co.uk Page 43 MENU ► Temperature Icon (p. 7) / Clear Heater Clothes Dryer Clear Heater Clothes Dryer Options: The Clear Heater System has an available clothes dryer unit specially designed to take advantage of the superfast drying ability of the heater units. Use the control panel settings to select which Clear Heater unit to use and adjust the drying time in 15 minute intervals. Select Clear Heater (Page 45) Choose this option to select which Clear Heater unit you want to use with the clothes dryer unit. Adjust drying time (Page 46) Choose this option to adjust the drying time in 15 minute intervals. Start drying (Page 47) Choose this option to start the drying process. The drying status and time remaining are displayed at the bottom of the screen. Warning: Only dry clothes using the special clothes drying unit standing in front of a heater unit. Never hang clothes directly over a Clear Heater Unit. The status of the dryer function is displayed at the bottom of the screen. WARNING: Do not cover. © 2015 Logicor (CH) Ltd clear-heater.co.uk Page 44 MENU ► Temperature Icon (p. 7) / Clear Heater Clothes Dryer (p.44) / Select Clear Heater Select Clear Heater Options: Select a heater for clothes dryer function Touch the screen to select your preferred heater unit to be used for drying clothes. A tick confirms your selection. Press the back arrow to return to the Clothes Dryer menu screen (Page 44). Choose from the list of available heater units which one you want to use with the special clothes dryer unit. The chosen heater unit is highlighted with a tick. Warning: Only dry clothes using the special clothes drying unit standing in front of a heater unit. Never hang clothes directly over a Clear Heater Unit. WARNING: Do not cover. © 2015 Logicor (CH) Ltd clear-heater.co.uk Page 45 MENU ► Temperature Icon (p. 7) / Clear Heater Clothes Dryer (p.44) / Adjust Drying Time Adjust Drying Time Options: Select a drying time Touch the screen to select how long you want the heater unit to dry your clothes. Once selected, the screen switches back to the main Clothes Dryer menu (Page 44) and the status message at the bottom of the screen displays your chosen dryer duration. From this screen you can choose how long you want to dry your clothes in front of your chosen heater unit. Warning: Only dry clothes using the special clothes drying unit standing in front of a heater unit. Never hang clothes directly over a Clear Heater Unit. WARNING: Do not cover. © 2015 Logicor (CH) Ltd clear-heater.co.uk Page 46 MENU ► Temperature Icon (p. 7) / Clear Heater Clothes Dryer (p.44) / Start Drying Start Drying Options: The Clear Heater System has an available clothes dryer unit specially designed to take advantage of the superfast drying ability of the heater units. Use the control panel settings to select which Clear Heater unit to use and adjust the drying time in 15 minute intervals. The status of the dryer function is displayed at the bottom of the screen. Select Clear Heater (Page 45) Choose this option to select which Clear Heater unit you want to use with the clothes dryer unit. Adjust drying time (Page 46) Choose this option to adjust the drying time in 15 minute intervals. Stop drying (Page 40) Choose this option to stop the drying process at any point. The screen then switches back to the main Clothes Dryer menu screen (Page 44) and the status message at the bottom of the screen displays the drying status. Warning: Only dry clothes using the special clothes drying unit standing in front of a heater unit. Never hang clothes directly over a Clear Heater Unit. WARNING: Do not cover. © 2015 Logicor (CH) Ltd clear-heater.co.uk Page 47 MENU ► Temperature Icon (p. 7) / Clear Heater Clothes Dryer (p.44) / Select Clear Heater Heat Up Mode Override Options: Activate Heat Up override for next 11 days Touch the screen to activate Heat-up mode override for the next 11 days. Once selected and activated the remaining days is displayed, together with the option to deactivate the Heat-up mode function. Heat Up mode occurs when the heater units are first switched on or if any part of the system shows a temperature lower than the target temperature. The default threshold is if 20% of the system is below 0.9°C of target temperature. All heaters then heat up to compensate for and quickly achieve optimal temperature but this uses more energy. If for example you have a heater unit located in a porch where the outside door is opened frequently, cold outside air could activate the Heat Up mode more often for the whole system. Tip: The threshold setting may also be adjusted to change the frequency of Heat Up mode activation (Page 42). You may override Heat Up mode for eleven days here or alternatively adjust the threshold settings to change the frequency of Heat Up mode activation (Page 42). © 2015 Logicor (CH) Ltd clear-heater.co.uk Page 48 MENU ► Status (Home) Icon Section 3: Status Screen Select the Status (Home) Icon on your control panel display then turn to page 50. Section 1: Help Mode……………………….............. (Page 4) Section 2: Control Panel & Temperature Settings (Page 6) Section 3: Status Screen……………........................ (Page 49) Section 4: Cost & Energy Settings…....................... (Page 51) Section 5: Timer Settings……………....................... (Page 54) © 2015 Logicor (CH) Ltd clear-heater.co.uk Page 49 MENU ► Status (Home) Icon Status Screen Options: Choose a menu icon from the left hand panel to access your settings and preferences. The status screen displays a summary of your heater system all in one place. Use the menu buttons on the left to access all your settings and preferences. Pressing the Status (Home) icon at any time brings you back to the status screen. You can choose which status readings are displayed here by pressing the ‘Control Panel & Temperature Settings’ Icon then choosing Main Settings / Screen Options / Status Screen Options (See page 13). © 2015 Logicor (CH) Ltd clear-heater.co.uk Page 50 MENU ► Cost & Energy Settings (Pound) Icon Section 4: Cost & Energy Settings Select the Cost & Energy Settings (Pound) Icon on your control panel display then turn to page 52. Section 1: Help Mode……………………….............. (Page 4) Section 2: Control Panel & Temperature Settings (Page 6) Section 3: Status Screen……………........................ (Page 49) Section 4: Cost & Energy Settings…....................... (Page 51) Section 5: Timer Settings……………....................... (Page 54) © 2015 Logicor (CH) Ltd clear-heater.co.uk Page 51 MENU ► Cost & Energy Settings (Pound) Icon Cost & Energy Settings Options: Select Clear Heater System (Page 53) Select Clear Heater System to start editing your budget and energy targets. You can set your own budget and energy targets to help keep track of costs and energy usage. Choose your heater system from the list to start editing your targets. Additional systems are proposed for the future that will be listed on this screen if available. Please check our website for product updates. © 2015 Logicor (CH) Ltd clear-heater.co.uk Page 52 MENU ► Cost & Energy Settings (Pound) Icon (p.52) / Adjust Clear Heater System Adjust Cost & Energy Settings Options: Adjust cost targets Choose a screen option and enter your preferred cost targets using the keypad. For example, set the cost per day that you want to spend on heating. Scroll through the list to view the different reading with the up and down arrows. Press the save button to store your entry. You can set your own cost and energy targets to help keep track of costs and energy usage. Choose a target reading from the list and enter your preferred budget or energy use target with the keypad. Adjust energy targets Choose a screen option and enter your preferred energy use targets using the keypad. For example, choose how many kWh per day you wish to use on heating. Scroll through the list to view the different readings with the up and down arrows. Press the save button to store your entry. As you change one reading, all other readings automatically update and adjust to your chosen target. © 2015 Logicor (CH) Ltd clear-heater.co.uk Page 53 MENU ► Timer (Clock) Icon Section 5: Timer Settings Select the Timer (Clock) Icon on your control panel display then turn to page 55. Section 1: Help Mode……………………….............. (Page 4) Section 2: Control Panel & Temperature Settings (Page 6) Section 3: Status Screen……………........................ (Page 49) Section 4: Cost & Energy Settings…....................... (Page 51) Section 5: Timer Settings……………....................... (Page 54) © 2015 Logicor (CH) Ltd clear-heater.co.uk Page 54 MENU ► Timer (Clock) Icon Timer Settings Options: Weekly settings (Page 56) Schedule your heater system on a day by day basis to increase or reduce the temperature of the whole heater system at different times of day. This is useful if for example you prefer a cooler temperature at night or a warmer temperature at specific times of day. It is recommended to leave your heater system switched on at all times to achieve optimal heating performance and cost savings. Graphical view (Page 59) View your weekly schedule settings in an easy to view graphical form. Enable / disable scheduling (Page 60) Turn weekly scheduling on or off from the main timer menu screen by pressing the screen option once to enable or again to disable. You may prefer to vary the temperature during the day. To do this, schedule your heater system to heat at different temperatures at set times of the day for each day of the week. Enabling scheduling operates your heater system according to your weekly schedule settings. If you prefer to switch the system to an ‘almost off’ state at a particular time, reduce the temperature by 9°C for example and it will in effect turn your heater system off until your room environment cools down by 9°C. At that point the heater system will resume heating to retain the new lower temperature. The scheduling status (either enabled or disabled) is displayed in the INFO message at the top of the screen. © 2015 Logicor (CH) Ltd clear-heater.co.uk Disabling scheduling operates your heater system according to your current (normal) heater settings. Page 55 MENU ► Timer (Clock) Icon (p.55) / Weekly settings Weekly Settings Options: Scroll through the days Press the left and right scroll arrows to scroll through the days of the week for which you want to add or adjust a scheduled event. Add event (Page 57) Add a new scheduled event for your chosen day. An event is an increase or decrease in temperature for your whole heater system. A maximum of four events are possible for each day. For each day of the week you can add scheduled events which increase or lower the temperature of the whole heater system by a set amount. This is useful if for example you prefer a cooler temperature at night or a warmer temperature at specific times of day. If you prefer to switch the system to an ‘almost off’ state at a particular time, reduce the temperature by 9°C for example and it will in effect turn your heater system off until your room environment cools down by 9°C. At that point the heater system will resume heating to retain the new lower temperature. © 2015 Logicor (CH) Ltd clear-heater.co.uk Page 56 MENU ► Timer (Clock) Icon (p.55) / Add event Add Event Options: Add your scheduled events for each day to increase or decrease the temperature for your whole heater system at a particular time. A maximum of four events are possible for each day. Scroll through days Press the left and right scroll arrows to scroll through the days of the week for which you want to add or adjust a scheduled event. Adjust an event (Page 58) Select an event from the list to adjust the time and temperature change of that scheduled event. Use the keypad to type in your settings and press the save button to store your settings. Delete event Press the bin icon against any event from the list to delete that particular event. Add another event Choose this option to add a new schedule event for your chosen day. An event is an increase or decrease in temperature for your whole heater system. Each event means that the heater system will operate at the new temperature change until the next scheduled event. A maximum of four events are possible for each day. Adding an event with 0° will return the heater system back to its normal state. An event of -9°C for example will in effect switch the heater system off until the room environment cools down by 9°C. At that point heating will resume at the new lower temperature. © 2015 Logicor (CH) Ltd clear-heater.co.uk Page 57 MENU ► Timer (Clock) Icon (p.55) / Adjust event Adjust Event Options: Adjust your scheduled events for each day to increase or decrease the temperature for your whole heater system at a particular time. A maximum of four events are possible for each day. Scroll through days Press the left and right scroll arrows to scroll through the days of the week for which you want to add or adjust a scheduled event. Adjust an event Select an event from the list to adjust the time and temperature change of that scheduled event. Use the keypad to type in your settings and press the save button to store your settings. Delete event Press the bin icon against any event from the list to delete that particular event. Add another event (Page 57) Choose this option to add a new schedule event for your chosen day. An event is an increase or decrease in temperature for your whole heater system. Each event means that the heater system will operate at the new temperature change until the next scheduled event. A maximum of four events are possible for each day. Adding an event with 0° will return the heater system back to its normal state. An event of -9°C for example will in effect switch the heater system off until the room environment cools down by 9°C. At that point heating will resume at the new lower temperature. © 2015 Logicor (CH) Ltd clear-heater.co.uk Page 58 MENU ► Timer (Clock) Icon (p.55) / Graphical view Graphical View Options: Go back (Page 55) Press the back arrow key to go back to the main timer options menu. Choose another main menu icon Select an icon from the main menu list on the left to go direct to another function or to return to the status screen by pressing the home icon. Your weekly scheduled events are displayed in an easy to view graphical display. The blue line indicates the global temperature of your whole heater system. A rise in temperature will be shown above the blue line. A reduction in temperature will be shown below the blue line. Your current day and time is displayed below the graph, together with the status of your weekly scheduling; either enabled or disabled. © 2015 Logicor (CH) Ltd clear-heater.co.uk Page 59 MENU ► Timer (Clock) Icon (p.55) / Disable scheduling Enable / Disable Scheduling Options: Weekly settings (Page 56) Schedule your heater system on a day by day basis to increase or reduce the temperature of the whole heater system at different times of day. This is useful if for example you prefer a cooler temperature at night or a warmer temperature at specific times of day. It is recommended to leave your heater system switched on at all times to achieve optimal heating performance and cost savings. Graphical view (Page 59) View your weekly schedule settings in an easy to view graphical form. Enable / disable scheduling Turn weekly scheduling on or off from the main timer menu screen by pressing the screen option once to enable or again to disable. You may prefer to vary the temperature during the day. To do this, schedule your heater system to heat at different temperatures at set times of the day for each day of the week. Enabling scheduling operates your heater system according to your weekly schedule settings. If you prefer to switch the system to an ‘almost off’ state at a particular time, reduce the temperature by 9°C for example and it will in effect turn your heater system off until your room environment cools down by 9°C. At that point the heater system will resume heating to retain the new lower temperature. The scheduling status (either enabled or disabled) is displayed in the INFO message at the top of the screen. © 2015 Logicor (CH) Ltd clear-heater.co.uk Disabling scheduling operates your heater system according to your current (normal) heater settings. Page 60 Specification: Control Panel Model: Control Panel MATERIALS Body: White plastic casing Logicor Model No. Voltage Voltage Type Frequency Power Rating PSU 1001 230V ( UK, NZ, Australia ) 120V ( U.S. ) AC 50Hz ( UK, NZ, Australia ) 60Hz ( U.S. ) 130mA Width 204mm Height 146mm Depth 58mm Weight <1kg Colour White IP Rating (Ingress Protection) © 2015 Logicor (CH) Ltd Base: Chrome plated Aluminium Electric Supply: Located on the rear of the control panel, connection via CAT5 or CAT6 patch lead to a Logicor bespoke power supply unit. The socket outlet shall be installed near the equipment and shall be easily accessible. TECHNOLOGY Software: Each Control Panel runs on Logicor proprietary software and is updated automatically using in built Wifi connection or via a micro SD card. Connectivity: Each Control Panel communicates using the electrical mains wiring but is also equipped Wifi. IP40 clear-heater.co.uk Page 61 Specification: Clear Heater Units Heater Model: Logicor Model No. Large Small GH-518R GH-518B Performance Rating 1000W 500W (1kW/h) (0.5kW/h) 230V ( UK, NZ, Australia ) Voltage 120V ( U.S. ) Voltage Type Frequency Width AC 50Hz ( UK, NZ, Australia ) 60Hz ( U.S. ) 1100mm 550mm Height 600mm Depth 11mm Weight Colour IP Rating (Ingress Protection) 19kg 10kg White MATERIALS Surround: Seamless Stainless Steel Chrome Base: Chrome plated Aluminium Glass Panels: Toughened Safety Glass Electric Supply: Located at the right end of heater base, connection via flexible lead and Standard AC Power Plug. The socket outlet shall be installed near the equipment and shall be easily accessible. TECHNOLOGY Sensors: Electro Cobalt Heating Element: Carbon Element 1000W or 500W enclosed within toughened Safety Glass Heat Form: Radiant and Convection; Maximum effective range: 8m; 4~9um wavelength range. Internal: Logicor proprietary computer controlled software. TEMPERATURE CONTROL Programmable via Control Panel. In the unlikely event of a control panel failure, the manual temperature control function on the base of each heater unit gives you manual control for a limited period of eleven days. The heater unit will operate again once a control panel is connected. ASSEMBLY & PACKAGING No Assembly required. All Clear Heater units arrive ready to install. Each Clear Heater panel is packed in a single specifically designed carton with shock protection. IP40 Note: For placement of heaters in wet room situations we offer an IP53 rated heater which is a special order item. A qualified installer and surveyor will advise if you need this type of unit. © 2015 Logicor (CH) Ltd clear-heater.co.uk Page 62 MANUFACTURER: Logicor (CH) Ltd Unit 7 Thornes Office Park Monckton Road Wakefield WF2 7AN West Yorkshire UK www.logicor.co.uk www.clear-heater.co.uk