1
Installation and Troubleshooting Guide
All rights reserved. Reproduction or use of content, in any manner, without express written permission by CDI Electronics, Inc., is prohibited.
CDI P/N's: 113-4041
Note: This unit replaces P/N’s: 583489, 584040 and 584041.
WARNINGS:
This product is designed for installation by a professional marine mechanic. CDI cannot be held liable for injury
or damage resulting from improper installation, abuse, neglect or misuse of this product.
Installation
1.
2.
3.
4.
5.
6.
7.
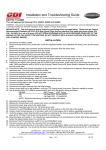
Disconnect the battery cables.
Remove power pack mounting bolts and disconnect all of the wires going to the old power pack.
Check for DC voltage on the kill (stop) wire (usually Black/Yellow) with the key-switch in the on and off position. At no time should
you see over 2 volts DC on this wire as severe damage to the power pack can occur.
Connect the wires to the new power pack. Use a small amount of dielectric silicone grease in the bullet connectors.
Mount the new power pack using the original bolts.
Connect the orange wires to the ignition coils (remember that the blue striped wires go up and the green striped wires go down).
Reconnect the battery cables.
Troubleshooting
Service Note: Please use the Factory recommended spark plug (currently Champion QL77JC4) gapped at 0.030”.
Note: These engines usually have a 35 Amp battery charging capacity. Due to the size and weight of the flywheel magnets, it is highly
recommended that you check to make sure both the triggering and charge magnets are still secure in the flywheel before you service
the engine. A loose or broken magnet can be deadly to you or your pocketbook. It is a recommended you index the flywheel and check
the timing on all cylinders when servicing these engines. Also check for static firing and intermittent spark.
ENGINE WILL NOT START OR MISFIRES:
Verify the wiring in the connectors as follows:
NO SPARK ON ANY CYLINDER:
NOTE: These engines use a gear reduction starter which results in a lower cranking RPM than usual. If you have one or
more cylinders intermittent at cranking: Try starting the engine and checking to see if ALL of the cylinders now fire
correctly. If so, the engine’s ignition should be good. Make sure the battery is sized correctly as the cranking capacity can
affect the cranking speed.
1. Disconnect both of the black/yellow kill wires FROM THE PACK and retest. If the engine's ignition now has fire, the kill
circuit has a fault-possibly the key switch, harness or shift switch.
2. Disconnect the yellow wires from the stator to the rectifier and retest. If the engine fires, replace the rectifier.
3. Check the stator and trigger resistance and DVA output as given below for each bank:
Wire Color
Check to Wire Color
Resistance
DVA Reading
Brown
Brown/Yellow
430-650
150V + Connected, 175V + Disconnected
Orange
Orange/Black
93-103
12-24V Connected, over 45V Disconnected
Blue
White
35-55
0.5
Purple
White
35-55
0.5
Green
White
35-55
0.5
Pink
White
35-55
0.5
Blue/White
White
100-160
1.2
Purple/White White
100-160
1.2
Green/White
White
100-160
1.2
Pink/White
White
100-160
1.2
CDI Electronics • 353 James Record Road SW • Huntsville, AL 35824
Tech support: 1-866-423-4832 • Web support: cdielectronics.com • Sales Support: 1-800-467-3371
All rights reserved. Reproduction or use of content, in any manner, without express written permission by CDI Electronics, Inc., is prohibited.
Rev B • 12/07/12
Page - 1
of 3
QF-319
Installation and Troubleshooting Guide
All rights reserved. Reproduction or use of content, in any manner, without express written permission by CDI Electronics, Inc., is prohibited.
4. Check the center hub triggering magnet in the flywheel. A loose or broken magnet can cause this problem.
5. Check the cranking RPM. A cranking speed of less than 250-RPM will not allow the system to fire properly. This can
be caused by a weak battery, dragging starter, bad battery cables or a mechanical problem inside the engine.
NO SPARK ON ONE CYLINDER:
1. Check the timer base’s resistance and output (see NO SPARK ON ANY CYLINDER above).
2. Check the DVA output on the orange wires from the power pack while connected to the ignition coils. You should
have a reading of at least 130V or more. If the reading is low on one cylinder, disconnect the orange wire from the
ignition coil for that cylinder and reconnect it to a load resistor. Retest. If the reading is now good, the ignition coil is
likely bad.
3. Check the Timer Base resistance given below:
Wire Color
Check to Wire Color
Resistance
DVA Reading
Blue
White
35-55
0.5
Purple
White
35-55
0.5
Green
White
35-55
0.5
Pink
White
35-55
0.5
Blue/White
White
100-160
1.2
Purple/White White
100-160
1.2
Green/White
White
100-160
1.2
Pink/White
White
100-160
1.2
4. Check the spark plug wires for breaks and abrasions.
ENGINE DIES WHEN QUICKSTART DROPS OUT:
Check ignition timing at idle with the White/Black temperature wire disconnected. Remember to allow for the 12-15
Degree drop in ignition timing when Quick Start disengages. Verify ignition timing after engine has warmed up, according
to the service manual.
ENGINE WILL NOT STAY IN QUICKSTART OVER 10 SECONDS:
1. Verify the engine temperature is below the trip point (89 degrees on some engines and 104 degrees on others) of the
temperature switch.
2. Disconnect the White/Black Temperature Switch wire FROM the Port Temperature Switch. If the engine now stays in
QuickStart, the Temperature Switch is likely defective.
ENGINE STAYS IN QUICKSTART ON ALL CYLINDERS:
1. With the engine idling, check the Yellow/Red wire for DC voltage. If there is DC voltage on this wire while the engine
is running, the Quick-Start will not disengage. A voltage over 1.5 volts but less than 7 volts will not engage the starter
solenoid, yet will engage Quick-Start.
2. Short the White/Black Temperature Switch wire FROM the power pack to engine ground. Start the engine, if the Quick
Start drops out after approximately 5 seconds, replace the White/Black Temperature Switch.
3. If the only way to disable QuickStart is to disconnect the 4pin connector with the Blue/White, Purple/White,
Green/White and Pink/White wires between the power pack and the Timer Base, replace the power pack.
ENGINE DROPS OUT AND BACK IN QUICKSTART AT IDLE:
1. Verify the spark plugs are the Champion QL77JC4 or QL78YC. These plugs are INDUCTIVE – NOT Resistive RF
suppression.
2. Check the engine RPM,
3. With the engine idling, check the Yellow/Red wire for DC voltage. Intermittent DC voltage on this wire while the engine
is running will re-engage Quick-Start. A voltage of less than 7 volts will not engage the starter solenoid, yet will
engage Quick-Start.
4. With the engine idling, disconnect the Black/White wire from the power pack and short the White/Black Temperature
Switch wire FROM the power pack to engine ground. If the Quick Start drops out and stays out after approximately 5
seconds, replace the White/Black Temperature Switch. If the problem is still present, replace the power pack.
NO SPARK ON ONE BANK:
1. Swap pin location of the two Brown wires from the stator and retest. If the problem moves, the stator has a fault.
2. Disconnect the yellow wires from the stator to the rectifier and retest. If the engine fires, replace the rectifier.
CDI Electronics • 353 James Record Road SW • Huntsville, AL 35824
Tech support: 1-866-423-4832 • Web support: cdielectronics.com • Sales Support: 1-800-467-3371
All rights reserved. Reproduction or use of content, in any manner, without express written permission by CDI Electronics, Inc., is prohibited.
Rev B • 12/07/12
Page - 2
of 3
QF-319
Installation and Troubleshooting Guide
All rights reserved. Reproduction or use of content, in any manner, without express written permission by CDI Electronics, Inc., is prohibited.
4. Check the Timer Base resistance given below:
Wire Color
Check to Wire Color
Resistance
DVA Reading
Blue
White
35-55
0.5
Purple
White
35-55
0.5
Green
White
35-55
0.5
Pink
White
35-55
0.5
Blue/White
White
100-160
1.2
Purple/White White
100-160
1.2
Green/White
White
100-160
1.2
Pink/White
White
100-160
1.2
5. Check the spark plug wires for breaks and abrasions.
6. Check the cranking RPM. A cranking speed of less than 250-RPM will not allow the system to fire properly. This can
be caused by a weak battery, dragging starter, bad battery cables or a mechanical problem inside the engine.
7. Check the DVA output on the orange wires from the power pack while connected to the ignition coils. You should
have a reading of at least 150V or more. If the reading is low on one bank, disconnect the orange wires from the
ignition coil for that bank and reconnect them to a load resistor. Retest. If the reading is now good, one or all of the
ignition coils are likely bad. A continued low reading indicates a bad power pack.
ENGINE WILL NOT ACCELERATE BEYOND 2500 RPM (Runs smooth below that RPM):
1. Use a temperature probe and verify that the engine is not overheating.
2. Verify the correct spark plugs are installed.
3. Make sure the tan temperature switch wire is not located next to a spark plug wire.
4. Disconnect the tan temperature wire from the pack and retest. If the engine now performs properly, the temperature
switch, VRO switch or engine harness is likely defective.
5. Disconnect the VRO sensor from the engine harness and retest. If the engine performs correctly, replace the VRO or
sensor.
ENGINE ENGAGES S.L.O.W. (Limits at 2500 PM) WHEN THE NO OIL, LOW OIL OR FUEL VACUUM ALARM
SOUNDS:
1. Disconnect engine harness.
2. Disconnect the Tan wires from the temperature sensors in both cylinder heads.
3. Using an VOM Meter, check the diode in the engine harness as follows:
Red Meter Lead
Black Meter Lead
Reading
Tan pin in Engine Harness Connector Tan Lead From Port Cyl Head
0.500 (approximately)
Tan pin in Engine Harness Connector Tan Lead From Stbd Cyl Head
0.500 (approximately)
Tan Lead From Stbd Cyl Head
Tan pin in Engine Harness Connector
OL or over 1.0
Tan Lead From Port Cyl Head
Tan pin in Engine Harness Connector
OL or over 1.0
NOTE: You can replace the diode in the harness with a 1N4007 diode available at most electronics stores.
CDI Electronics • 353 James Record Road SW • Huntsville, AL 35824
Tech support: 1-866-423-4832 • Web support: cdielectronics.com • Sales Support: 1-800-467-3371
All rights reserved. Reproduction or use of content, in any manner, without express written permission by CDI Electronics, Inc., is prohibited.
Rev B • 12/07/12
Page - 3
of 3
QF-319