1
meeknet.co.uk
Troubleshooting in navigation system 2
Page 1 of 7
Troubleshooting in navigation system 2
Pin assignments, functions etc. apply to vehicles of the series E38 and E39 with navigation system 2 (as from
production break PU 97)
Introduction
The navigation system is a dynamic system which is mainly active while driving.
For this purpose, displays have been created on the on-board monitor of the navigation system 2 which make
it possible to check the system while driving.
The test instructions have been set up as follows with the aim of effectively utilizing these functions:
Fault symptoms with reference to the components to be tested
Explanation of on-board monitor functions which are used for troubleshooting
Tests and checks for the individual assemblies in the following sequence: Function test, speed sensor,
GPS aerial and receiver, reverse signal, gyro, sound: NF, display: RGB, selection
Notes on replacing the navigation computer
Important
Observe the installation notes (last chapter in these instructions) when installing or replacing the
navigation computer.
It is advisable to print out this document and keep it with you as a reference during troubleshooting.
Fault symptoms
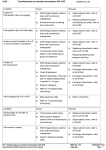
Fault symptom
Test to be carried out
No GPS reception
GPS
Faulty positioning
GPS, gyro
System does not respond to changes in
direction
Gyro
Incorrect distance data in the turnoff
instructions
Wheel speed sensor
Incorrect indication (colours, etc.) of
navigation and selection menu on the onboard monitor
RGB lines
Display geometry not OK: e.g. image too
wide or too flat for the monitor
RGB lines
Incorrect colours, display is white
RGB lines
No sound in navigation mode
AF lines
Navigation not indicated in selection menu
Selection
No selection menu
RGB lines
Functions used
The sensor test indicated on the on-board monitor is assistance during troubleshooting.
The sensor test can be selected as follows:
http://www.bmw-planet.com/diagrams/release/en/zinfo/FOI0997FB-001659001.htm
18/08/2009
Troubleshooting in navigation system 2
Page 2 of 7
Selection, on-board monitor main menu
Selection, ”Settings” in on-board monitor main menu
Press and hold the ”MENU” button (longer than 8 s) in the settings mask
Select ”sensor test”
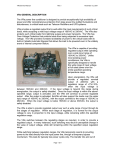
The following display then appears on the on-board monitor:
Significance of displays (for setpoints see table in ”function test” in next chapter)
1
Wheel sensor
Number of pulses of speed sensor per
minute
2
GPS satellites
Number of satellites currently received by
GPS
3
GPS status
See test for displays and remedy: GPS
4
Gyro
Direction arrow; voltage supplied by gyro
in mV
5
Driving direction
Reverse/forward
Function test
Procedure
Select ”sensor test” on on-board monitor
Drive several small diameter circles with the vehicle outdoors
Observe displays/indicators for sensor test
Setpoints while driving in circles outdoors:
If not OK, carry out following
test
Display
Setpoint
1
While driving (as from approx. 5
km/h): > 0
Wheel speed sensor
2
With unobstructed upward field of
vision: > 3
GPS
http://www.bmw-planet.com/diagrams/release/en/zinfo/FOI0997FB-001659001.htm
18/08/2009
Troubleshooting in navigation system 2
Page 3 of 7
3
Position known, searching for
satellite contact/satellite
contact/position known
GPS
4
When stationary/driving straight
ahead: 2500 mV +/- 400 mV;
while turning off: Outside abovespecified range
Gyro
Direction arrow clearly moves out
of zero position when turning off
Gyro
Status of reverse gear is
recognized correctly
Reverse
5
Test: Wheel speed sensor
Fault symptom:
Incorrect distance data in the turnoff instructions
Precondition
No fault code stored for the speed sensors in ABS/ASC/DSC (warning lamp does not come on)
Procedure
1st check
Select sensor test on the on-board monitor, drive vehicle at speed > 5 km/h.
Is a value > 0 indicated for the speed sensor pulses while driving?
If a value > 0 is indicated, then the part test for the speed sensors OK
If value = 0:
2nd check: Oscilloscope measurement of speed sensor signals
Connect test adapter 61 4 470 with 26-pin test box at plug connection X1312
Raise vehicle (observe safety instructions).
Select oscilloscope in <Measuring systems<.
Connect test lead MFK1 between pin 1 (main vehicle wiring harness end) and terminal 31 (vehicle
ground)
Settings: Direct voltage, frequency: 20 Hz, measuring range: +/-20V
Uniformly turn front left wheel by hand
Replace the navigation computer if a square-wave signal is indicated but the navigation computer
does not recognize it (0 indication in sensor test).
If no square-wave signal is indicated check lines leading to ABS/ASC/DSC control unit and if lines
are OK, continue troubleshooting in ABS
Test: GPS aerial and receiver
Precondition
No covers on the GPS aerial.
Procedure
Read GPS status in sensor test on the on-board monitor (display line 3).
Display: GPS fault
Cause: There is no communication between the navigation computer and the GPS receiver.
Troubleshooting procedure:
http://www.bmw-planet.com/diagrams/release/en/zinfo/FOI0997FB-001659001.htm
18/08/2009
Troubleshooting in navigation system 2
Page 4 of 7
Check voltage supply of GPS receiver and repair if necessary: Plug connector X1958, terminal R: Pin
7, terminal 31: Pin 1, terminal 30: Pin 8
If voltage supply is OK: Check wires between navigation computer and GPS receiver and repair if
necessary
If wires are OK: Replace GPS receiver
Display: Reception fault
Cause: Communication between the navigation computer and GPS receiver is OK, however, there is no
satellite information
Troubleshooting procedure:
Make sure that the GPS aerial is not covered.
If the GPS aerial is NOT covered by objects protruding beyond the rear window shelf: Measure aerial
voltage:
Disconnect aerial plug connector X81008 from GPS receiver.
Use test adapter No. 65 5 012
Terminal R ON
Measure voltage at aerial plug connector (GPS receiver end) between pin 1 and pin 2
Setpoint: 5 V +/- 0.3 V
If the measured value is in the set range: Replace GPS aerial
If the measured value is NOT in the set range: Replace GPS receiver
Display: No almanac
Troubleshooting procedure:
If the battery was recently disconnected/the battery supply of the GPS receiver interrupted:
Place vehicle outdoors for 15 minutes with terminal R switched on and unobstructed upward view
If the voltage supply was NOT interrupted:
Check voltage supply of GPS receiver and repair if necessary:
If the voltage supply is OK: Replace GPS receiver.
Display: Searching for satellites
Cause: Satellite contact is interrupted. This always occurs when visual contact to the sky is restricted, e.g. in a
closed room, tunnel or in the cover of high buildings or trees
The system is OK if the display ”searching for satellites” only comes on under the above conditions.
Proceed as described below if ”searching for satellites” is also indicated under the conditions: The vehicle is
outdoors under an open sky with unrestricted upward view, terminal R is on for longer than 3 minutes:
Make sure that the GPS aerial is not covered.
If the GPS aerial is NOT covered by objects protruding beyond the rear window shelf: Measure aerial
voltage:
Disconnect aerial plug connector X81008 from GPS receiver.
Use test adapter No. 65 5 012
Terminal R ON
Measure voltage at aerial plug connector (GPS receiver end) between pin 1 and pin 2
Setpoint: 5 V +/- 0.3 V
If the measured value is in the set range: Replace GPS aerial
If the measured value is NOT in the set range: Replace GPS receiver
Display: Satellite contact
The GPS system is OK.
Display: Position known
The GPS system is OK.
Test: Reverse
Procedure
1st check:
Alternately engage reverse and forward gears. Is the status shown correctly on the on-board monitor (sensor
test)?
If status is shown correctly: Reverse is recognized correctly. Subsystem is OK.
http://www.bmw-planet.com/diagrams/release/en/zinfo/FOI0997FB-001659001.htm
18/08/2009
Troubleshooting in navigation system 2
Page 5 of 7
If the status is NOT shown correctly:
2nd check: Navigation computer input
Connect test adapter 61 4 470 to plug connection X 1312
Measure voltage between pin 1 and terminal 31 (vehicle ground)
Setpoints:
Engage reverse gear: U > approx. 5 V
Reverse NOT engaged: U approx. 0 V
If the measured value is in the set range: Replace navigation computer
If the measured value is NOT in the set range: Check line from light module to navigation computer
plug connector X1312 pin 1; if line is OK: Continue troubleshooting in the light module
Test: Gyro
Procedure
Select sensor test, evaluate display 1 with vehicle stationary: Is the voltage in the range of 2500 mV +/- 400
mV?
If value is not OK: Replace navigation computer. Refer to notes on replacing the navigation computer
If value is OK:
Drive in circles with small diameters in a car park.
Observe indication in line 4 while driving in circles
Setpoint: While driving in circles, the arrow indicator in line 4 must move distinctly out of the zero
position, i.e. the indicated value must deviate distinctly from 2500 mV
If the indication is within the setpoints: System OK
If the indication is NOT within the setpoints: Replace navigation computer, refer to installation
instructions for navigation computer (last chapter of this document).
Test: Sound, AF
On-board monitor system with video module
Work through the corresponding test modules in the diagnostic program for the video module in order to
check the AF lines: ”Sound”
System without video module
1st check: Is the sound radio/cassette mode OK?
Sound in radio/cassette mode not OK: Continue troubleshooting in the radio
Sound in radio/cassette mode OK:
2nd check:
Disconnect plug connection X18805 at navigation computer
Connect V-adapter lead 61 4 470 with 26-pin test box to plug connection X1313
Select oscilloscope in measuring systems.
Test lead MFK1 to pin 9 (+) and pin 18 (-)
Setting:
Alternating voltage, frequency: 200 Hz, measuring range: +/- 5 V
Select <Information>< volume matching> in navigation system
Activate voice output/test tone under volume matching with rotary knob/push button
Check:
Is the signal visible on the oscilloscope for the duration of the test tone/voice output?
Signal visible:
Check lines between navigation computer and radio and repair if necessary. If OK: Continue
troubleshooting in the radio
Signal not visible:
Replace navigation computer.
http://www.bmw-planet.com/diagrams/release/en/zinfo/FOI0997FB-001659001.htm
18/08/2009
Troubleshooting in navigation system 2
Page 6 of 7
Test: Image, RGB
On-board monitor system with video module
Work through the corresponding test modules in the diagnostic program for the video module in order to
check the AF lines: ”RGB lines navigation computer - video module”, ”Image”
On-board monitor system without video module
Symptoms: Faults in menu display AND navigation; no menu display, incorrect colours, image/picture
geometry not OK.
Instructions:
Disconnect plug connection X1313
Measure resistance at disconnected plug connection (vehicle wiring harness end):
Between pin 7 and pin 16, setpoint: approx. 50 Ohm
Between pin 7 and pin 17, setpoint: approx. 50 Ohm
Between pin 7 and pin 18, setpoint: approx. 50 Ohm
If at least one of the measured values is NOT in the specified range: Check lines from navigation
computer to on-board computer and repair if necessary. If wires are OK: Replace on-board monitor
If measured values are in specified range:
Select multimeter in measuring systems.
Settings: Direct voltage, measuring range +/- 1 V
Connect test adapter 61 4 470 with 26-pin test box to plug connector X1313.
Navigation computer AND on-board monitor must be connected!
Switch off radio, switch on on-board monitor, display main menu (if possible)
Measure voltage
Between pin 5 and terminal 31 (vehicle ground)
Between pin 6 and terminal 31 (vehicle ground)
Between pin 7 and terminal 31 (vehicle ground)
Evaluating results
If on at least one of the 3 lines:
U = 0 V:Replace navigation computer.
U >= 1.4 V:Replace on-board monitor
If on all 3 lines:
1.0 V > U >= 0.2 V:carry out the 3rd check as described in the following
3rd check
Test adapter 61 4 470 with 26-pin test box connected, navigation computer and on-board monitor
plugged in.
Select ”menu” on on-board monitor
Light must NOT be switched on
Multimeter selected
Setting: Alternating voltage, measuring range: +/- 1 V
Measure voltage
Between pin 5 and terminal 31 (vehicle ground)
Between pin 6 and terminal 31 (vehicle ground)
Between pin 7 and terminal 31 (vehicle ground)
Evaluating results
All 3 lines U > 100 mV: If one of the above symptoms applies, replace on-board monitor.
On at least 1 line U < 100 mV:Replace navigation computer.
Test: Selection of GPS navigation in menu
On-board monitor system without video module
http://www.bmw-planet.com/diagrams/release/en/zinfo/FOI0997FB-001659001.htm
18/08/2009
Troubleshooting in navigation system 2
Page 7 of 7
GPS navigation is black in selection menu
Switch off ignition, close all doors and flaps, wait approx. 2 minutes. The navigation must then be shown white
and be selectable in the menu.
On-board monitor system with video module
GPS navigation missing in selection menu
If the point ”GPS navigation” is not shown at all in the selection menu in the on-board monitor system with
video module: Try to select navigation via diagnosis. If this is not possible, work through instructions provided
in DIS for reestablishing diagnosis.
GPS navigation is black in selection menu
Switch off ignition, close all doors and flaps, wait approx. 2 minutes. The navigation must then be shown white
and be selectable in the menu.
Notes on replacing the navigation computer
Installation
Proceed as described below to install the navigation computer:
Ignition lock in position 0
Connect navigation computer to vehicle wiring harness
Insert navigation computer in retaining fixture
Ignition lock still set to 0 position
Close all doors and flaps on the vehicle.
Wait approx. 2 minutes (I/K-bus reset)
The vehicle must not be moved or be subject to vibration during this waiting period.
Reason:
The navigation computer recalibrates its gyro every time it is restarted. The gyro reacts to any movement. As
a result, initial calibration which took place while the computer was inserted in the retaining fixture provides
faulty values.
For this reason, the navigation computer must be induced to perform a new gyro calibration before the vehicle
is driven. This is achieved by resetting the I/K-bus as described in the above.
Encoding
After replacement, the navigation computer must be encoded with ”Coding ZCS”.
Test drive
In contrast to the navigation system of the 1st generation, an intricate calibration driving procedure is not
necessary but rather only a test drive of approx. 15 minutes after replacing the navigation computer.
Observe the following points:
The I/K-bus was reset as described under ”installation”.
Drive for approx. 15 minutes in different directions in an area in which GPS reception is not
permanently restricted by tunnels, high buildings or trees.
Reason:
The navigation computer must carry out its automatic wheel calibration procedure. This takes approx. 15
minutes under conditions of uninterrupted GPS reception.
http://www.bmw-planet.com/diagrams/release/en/zinfo/FOI0997FB-001659001.htm
18/08/2009