Download installation - Multicare Electronics Ltd
Transcript
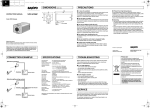
e_l5q_xe_7.fm Page 1 Friday, June 18, 2004 10:22 AM Français Deutsch MAIN FEATURES J INSTRUCTION MANUAL VDC-C1175VP COLOR CCD Camera About this manual Before installing and using the camera, please read this manual carefully. Be sure to keep it handy for later reference. Approvals: IP66/CE PRECAUTIONS Complies with IP66 international rating J Ceiling / Wall mount housing J Built-in vari-focal lens J 1/3-inch solid-state image device CCD J Number of total pixels: 470 K pixels J Internal sync / Line-Lock automatic swichable J Dual power supply: AC 24 V / DC 12 V (lead wire) J High sensitivity, minimum required illumination: 1.0 lx at F2.0 lens This unit has been certified to IP66 standards when properly installed. Use only an IP66 certified enclosure or an electrical box. Ensure all openings in enclosure are sealed as per manufacturer’s instructions. J J J J 35.0 Is the coaxial cable attached securely? Are the power and voltage normal? Is there adequate illumination? J If the image is unclear Is the lens in focus? Is the lens dirty? Dirt or fingerprints on the lens can adversely affect the image. Gently wipe any dirt or fingerprints off the lens with a soft cloth or lens cleaning paper and cleaning fluid (commercially available). Is the monitor adjusted correctly? SERVICE The camera is a precision instrument. Handle it carefully and always follow the safety precautions. If the camera requires service, never try to repair it yourself or open the casing. For servicing, maintenance, or repairs, consult your dealer or an Authorized Sanyo Service Center. Do not put objects inside the unit Be careful when handling the unit Install away from electric or magnetic fields Cleaning Dirt can be removed from the cabinet by wiping it with a soft cloth. To remove stains, wipe with a soft cloth moistened with a soft detergent solution and wrung dry, then dry by wiping with a soft cloth. Do not use benzine, thinner or other chemical products on the cabinet, as this may cause deformation and paint peeling. Before using a chemical cloth, make sure to read all accompanying instructions. Make sure that no plastic or rubber material comes into contact with the cabinet for a long period of time, as this may cause damage or paint peeling. Make sure that no metal objects or flammable substance get inside the unit. If used with a foreign object inside, it could cause a fire, a short-circuit or damage. If installed close to a TV, radio transmitter, magnet, electric motor, transformer, or audio speakers, the magnetic field they generate may cause image distortion. 114.8 Depending on the conditions of use, installation and environment, please be sure to make the appropriate settings and adjustments. If you need help with installation and/or settings, please consult your dealer. If no image appears J To prevent damage, do not drop the unit or subject it to strong shock or vibration. 162.0 J Do not open or modify Protect from high temperatures Do not install close to stoves, or other heat sources, such as spotlights, etc., or where it could be subject to direct sunlight. Be careful when installing close to the ceiling, in a kitchen or boiler room, as the temperature may rise to high levels. Do not open the cabinet except during adjustment, as it may be dangerous and cause damage to the unit. For repairs, consult your dealer or an Authorized Sanyo Service Center. J Dimensions: mm Before sending the camera out for repair, check the items below. If the problem persists after checking these items, consult your dealer or an Authorized Sanyo Service Center. J Do not use the unit if smoke or a strange odor comes from the unit, or if it seems not to function correctly. Turn off the power immediately, and consult your dealer or an Authorized Sanyo Service Center. J TROUBLESHOOTING In case of problem J Mounting Surface The mounting surface material must be strong enough to secure the unit. Plasterboard without a backing plate is not recommended. Protect from humidity and dust To prevent damage, do not install the unit where there is greasy smoke or steam, where the humidity may get too high, or where there is a lot of dust. 100.5 SANYO Electric Co., Ltd. L5QC2/XE3 (0604TR-CP) SPECIFICATIONS Scanning system Interlace Image device Number of pixels in image area Sync system Resolution Video output level Image S/N ratio Pan/Tilt adjustment Lens Operating environment Power supply Power consumption Weight Accessories 1 Use the supplied hexagon wrench (large) to remove the four fixing : PAL standard TV system 625 TV lines, 25 frames/s : PLL 2:1 interlace : 1/3-inch solid-state image device CCD : 752 (H) × 582 (V), 440 K pixels : DC 12 V user : Internal sync AC 24 V user : Line-lock : 460 TV lines horizontally : 1.0 V(p-p)/75 Ω, composite : More than 46 dB at gain control off : Pan : 360 degrees, Tilt : ±80 degrees : Built-in variable focal lens, f=4 – 8 mm, F2.0 – 2.8 : Temperature: -10°C – +50°C (14°F – 122°F) Humidity: less than 90%RH (no condensation) : AC 24 V ±10%, 50 Hz/DC 12 – 15 V ±10% : 2.8 W : Approx. 1.6 kg : Hexagon wrench (large) ........ 1 Hexagon wrench (medium) ... 1 Hexagon wrench (small) ........ 1 Cushioning sheet ................... 1 screws (B) of dome cover (A). 46.0 2 Make screw holes and a cable hole in the supplied cushioning (G) (H) sheet (D) that attaches to the back of the camera unit (C). (D) (C) 3 Attach the cushioning sheet (single-sided tape) to the back of the camera unit. 4 Align the camera unit with the surface of the ceiling or the wall, make marks on the ceiling or the wall in the places where the screw holes are to be drilled, and then drill the four holes. 88.0 5 Cut a hole in the ceiling or the wall for routing the cables. (E) (F) If not routing the cables inside the ceiling or the wall, open the conduit hole cover (F) after removing a screw (E) by supplied hexagon wrench (medium) and pass the cables through the conduit hole. (I) (A) (J) (L) (K) Drop-prevention cord 6 Pass the power cable (G) and video cable (H) from the camera unit through the cable hole in the ceiling or the wall. 7 Align the four screw holes in the camera unit (C) with the screw holes in the ceiling or the wall, and then secure the camera in place by tightening the four or more screws (I) through the washers. (B) Appearance and specifications are subject to change without prior notice. Printed in Korea INSTALLATION 82.5 88.0 English When installing the camera to the ceiling or the wall, make sure to properly perform waterproofing for the holes in the ceiling or the wall. When setting up this camera, make sure that it is installed securely. Check that the installation location is strong enough to bear the camera before proceeding. Install to the ceiling or the wall with no unevenness in its surface. And be sure to embed the screws at least 35 mm and 3.5 – 5 mm into the ceiling or the wall. If the screw holes are too shallow, the camera may fall down. In addition, do not touch the camera unit except when settings and adjustments are necessary. Install where the temperature range will stay between -10°C (14°F) and 50°C (122°F). (no condensation) 8 Secure the dome cover (A) by tightening the screws (B). 9 Carry out the settings and adjustments for the camera. Refer to “CONNECTIONS AND SETTINGS” for camera settings and lens adjustments. 10 If the dome liner (K) is secured in place, loosen the screw (J). Adjust the dome liner (K) so that the dome camera’s lens is visible from the camera window (L), and then use a phillips screwdriver to fix the dome cover. e_l5q_xe_7.fm Page 2 Friday, June 18, 2004 10:22 AM CONNECTIONS AND SETTINGS Q J Supported coaxial cables You can use any of the following coaxial cables: RG-59U (3C-2V) Length: 250 m max. RG-6U (5C-2V) Length: 500 m max. RG-11U (7C-2V) Length: 600 m max. Black – + 2 When using an RG-59U (3C-2V) cable, do not use it on piping or air wiring. Select the cable according to the distance between the devices you wish to connect. If you use a cable other than the types above, the image or sync signal will be attenuated and will not be transmitted correctly. Check for polarity when using a DC 12 V power supply (Polarity does not matter when using an AC 24 V power supply). Q LENS ADJUSTMENTS 2 CAMERA SETTINGS 5 5 ON Q 1 2 3 4 5 6 7 8 Screw (B) Screw (B) 1 2 This switch is not used. 80° 80° Board on the same side as the lens ON FOCUS Board on the opposite side of the lens (Tilt) J CHECKING THE CAMERA IMAGE When monitoring lighting or other extremely bright objects (which exceed the maximum required illumination), smearing may occur in the vertical or horizontal direction (either above and below the high-brightness object or as a perpendicular band). In such a case, adjust the angle of illumination and other factors while observing the monitor. If fluorescent lighting is used where the camera is installed, the object will flicker as a result. This type of phenomenon can be avoided by replacing the fluorescent lighting with incandescent lamps. LENS ADJUSTMENTS Once the camera has been installed, adjust the lens section. Be careful not to touch the lens section when changing the angle of the camera. 1 Adjust the pan position (360°) and the tilt position (±80°). 2 Loosen the zoom lever screw, turn the zoom lever to the right/ left to determine the zoom position while viewing the camera images on the monitor, and then re-tighten the screw. CAMERA SETTINGS J The camera comes pre-adjusted and ready to install at time of factory shipment, but you may want to make settings to adapt to the operating conditions or installation environment. If you have trouble adjusting the camera, consult your dealer or an Authorized Sanyo Service Center. (Off) Flicker compensation 1 3 Loosen the focus lever screw, turn the focus lever to the right/ (Off) This function is off. When the electronic shutter speed setting is set to “ON”, a combination of the following three switches can be used to set up to eight speed levels. (Unit: seconds) Shutter speed Increased sensitivity allows shots to be taken in dark (High:26 dB) environments. • This setting causes noise generation and a grainy image. 1/50 Set this when there is excessive noise in the high setting (Low:20 dB) mode. 1/120 Color compensation (White balance) 4 AUTO WHITE BALANCE 6 7 7 8 8 MANUAL WHITE BALANCE WHITE BALANCE LOCK INDOOR SETTING (LIGHT 1) 6 6 6 7 7 7 8 8 8 Automatically adjusts the white balance when the object is near. Fine-tunes the white balance manually. Adjust the color using 7 buttons (Left:Red, Right:Blue). If an AC 24 V power supply user sets MANUAL WHITE BALANCE, sync adjustment cannot be performed. To perform sync adjustment, do it with 7 buttons before setting MANUAL WHITE BALANCE. Adjusts the white balance when the brightness is constant. After setting the switch at left, keep pressing the white balance lock button until the desired tint is achieved and release it to set. Set for indoors, when the room is lit by fluorescent or incandescent lights (3200° K). INDOOR SETTING (LIGHT 2) 6 7 8 Set for indoors, when the room is lit by fluorescent lights (4200° K). Switches 1/1000 1 2 3 1 2 3 1 2 3 1 2 3 1 2 3 1 2 3 1 2 3 1 2 3 1/2000 1/4000 1/500 Automatically adjusts the white balance. 6 Shutter speed 1/250 Adjusts the balance of colors. When AUTO TRACKING WHITE BALANCE (default setting) does not work properly, select other settings. AUTO TRACKING WHITE BALANCE Switches 1/10000 NOTE: Using the high speed electronic shutter indoors with low lighting will give darker pictures. In such a case, add some lights to make sure the lighting is sufficient. 6 Gamma compensation 5 Q For adjusting the gamma compensation, use this setting to adjust the signal correction/contrast so that the image looks natural. 6 2 (High) Gamma is set to 0.6. Makes the gamma compensation stronger than the default (low) setting. (Low) Gamma is set to 0.45. 6 Q 2 Sync adjustment 7 (Only when using an AC 24 V power supply) Synchronizes the camera with power frequency when two or more cameras are connected via a switcher unit. When the image on the monitor rolls vertically, adjust the phase. (A) If using this unit as the second or subsequent camera; Adjust the roll by pressing each button. left to detemine the focus position while viewing the camera images on the monitor, and then re-tighten the screw. 1 (On) Corrects screen flickering that occurs when positioned under fluorescent lights that use a 60 Hz power supply frequency. INDOOR SETTING (LIGHT 3) 6 7 8 6 7 8 Set for indoors, when the room is lit by fluorescent lights (4700° K). NOTE on image direction: If the monitor image is misaligned, follow the steps below to adjust. c Loosen the screws (B) with the supplied hexagon wrench (small). d Turn the indented dial to adjust the image direction. e Tighten the screws (B) after adjustments are finished. 1 This function is off. (=Factory default setting) Q Changes the switch settings for SW 1 – SW 3 to change the electronic shutter speed. At this time the actual Flickerless and Backlight Compensation are ignored, and the iris function is fixed. 5 NOTE: You can use the monitor checking cable (sold separately) to display an image on a monitor when setting up the camera to check the surveillance angle and range, lens focus, etc. Connect the connector of the monitor checking cable to the monitor checking connector (A) on the circuit board and connect the jack of the monitor checking cable to the monitor. J 1 (On) Gain control 3 360° (Pan) Monitor checking connector (A) When an image is backlit. For adjusting the sensitivity of the camera. Use this setting for shooting in dark environments. J (On) Red ZOOM Electronic shutter speed setting 5 Q 5 CONNECTIONS DC 12 V / AC 24 V connection J Backlight compensation 2 1 (Off) This function is off. NOTE: Even if flickerless is set, the iris function will be fixed. OUTDOOR SETTING Set for outdoor light (6500° K). (B) If using this unit as the first camera; Adjust the roll using the phase adjuster on the second and subsequent cameras. NOTE: When using an AC 24 V power supply to connect the camera to a monitor, internal sync. is set. (The phase adjuster does not function.) When using a DC 12 V power supply, the sync setting is set to internal sync. If MANUAL WHITE BALANCE is set, sync adjustment cannot be performed. Change to a different white balance setting, and adjust the sync. And then set MANUAL WHITE BALANCE again.