1
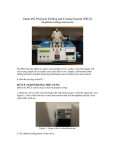
Operating Instructions for the e-Beam Evaporator
Important Notes:
This is not a comprehensive guide for use of e-beam
machine. This is a short reminder notice for references
only.
You can use this equipment without supervision if you are a
Qualified Operator (have the C – status in the table on the
clean room entrance door) only.
Training is required before using the e-beam coater. To
obtain training, make arrangements with someone of
qualified operator to observe and practice operating the
machine under direct supervision. After an initial training
period of several times, and when the qualified operator
decides the individual is prepared, make an arrangement
with the clean room manager for final check out. No one is
allowed to use the equipment without direct supervision
until after final check out.
Schematic layout of the e-beam coater vacuum system
Main valves condition in each Status:
Status
Sealed
1
Open
2
Close
Valve
3
Close
4
Close
Warm up
Open
Close
Close
Close
Cool Down
Open
Close
Close
Close
Roughing
Close
Open
Close
Close
Fine Pump
Open
Close
Open
Close
Standby
Close
Close
Close
Close
Vent
Open
Close
Close
Open
Standby
Roughing
Valve 1 is a Foreline valve.
Penning
gauge
Valve 2 is the roughing valve.
Valve 3 is a high vacuum valve between the chamber
and the diffusion pump.
Pirani
gauge
Valve 4 is a chamber venting valve.
Starting up
Note:
•
Do not switch off the Evaporator at the main switch or at the plug
•
Do not turn off the water until the evaporator is
in ‘Standby’ mode
Main
switch
1. Turn on the water supply (check that the main water tap in a dark
room is on)
2. Press ‘Start’, the system will now warm up the diffusion pump
3. Wait 20 – 30mins till system shows ‘Sealed’
4. You can now press ‘Vent’ to load your samples
Fine
pumping
Loading Samples
1. When the chamber is fully vented the lid will lift slightly, open the lid
and fix it with the key;
2. Remove thermocouple;
3. Lift out tray and load samples;
4. Replace tray and attach thermocouple;
5. Remove key and close the lid;
6. Hold lid shut and press “Process”, once pressure starts to drop, let
-6
go of lid, leave for pressure to drop to at least to 6 x 10 mbar
Tray
Thermocouple
Heating Substrate
1. left grey button turns the heating control unit on
2. press * to change temperature setting
3. right grey button turns heating lamp on
4. NEVER leave the machine unattended when heating is on
Using the Film Thickness Monitor
• Ask for assistance, if a crystal frequency is > 200 kHz
• Find material deposition parameters in the table placed on the
wall next to e-beam
Select the material number you wish to use by:
1. Press ‘RETURN’ until you reach the main menu
2. Select ‘Editors’ and press ‘ENTER’
3. Select ‘Edit Material’ and press ‘CHANGE’
4. Select the material number you require and press ‘ENTER’
To check and edit material parameters:
1. Do the material selection steps above then
2. Select ‘Edit Material’ and press ‘ENTER’
3. Set Density, Acoustic Impedance and Tooling factor
To prepare the monitor for an evaporation:
1. Return to main menu
2. Select Monitor Mode and press “enter”. This shows all info,
pressing ‘run’ will reset the thickness meter.
3. Turn the dial on the front of the unit to select the appropriate
metal
Film Deposition
1. Wait approximately 2 hours till the system maintains pressure
-6
of about 2x10 mbar
2. Select the material you wish to use
3. Switch on high power switch by machine
4. Switch fuse switches on box at the back of machine (LEDs
should light)
5.
Lights should come on on the e-beam panel
6.
Ensure control (bottom button) is set to local
and the current is on ‘min’
7.
Turn on power (top button)
8.
Check the setup of the sweeping unit:
a. Sine Wave
b. Freq = 5
c. Amplitude X and Y – according to material
deposition parameters in the table placed on the
wall next to e-beam
9.
Turn the sweeping unit on
10. Turn on the e-gun (middle button)
11. Turn up the current very slowly. Keep the pressure always below 1x10⁻⁴ mbar by returning the current back
toward the minimum
12. Turn up current till an appropriate evaporation rate is attained (~ 0.1 - 0.5 nm/s). Adjustments to the
sweeping unit can be made to vary beam, look at bright spot on the target
13. Press ‘RUN’ on the Film Thickness Monitor to reset the thickness meter and open the shutter
14. Close the shutter once the appropriate thickness has been deposited and press “Run” on the Film
Thickness Monitor
15. Turn down the current very slowly! (watch the crucible change colour, it should take 3-5mins)
16. Switch off the gun
17. Switch off the sweeping unit
18. Wait 2 mins for the gun to cool down
19. Switch off the power
20. You can now change the target and repeat the process for another metal, if not
21. Turn off fuse switches and mains switch on the wall
Removing Samples
Press ‘Seal’ and ‘Vent’ then follow the opening procedure
described in the ‘loading samples’ section
Shutting Down
1.
After you have finished with the e-Beam make sure the
chamber is sealed and the chamber is pumped down for at
least 5 mins
2.
Press “Seal” before “Stop”
3.
Press ‘Stop’
4.
Wait ~30 mins for diffusion pump to cool until machine says
“Stand By”
5.
Turn off water but not the machine