Transcript
TR8200 Thermostat User Manual
ver 1.3
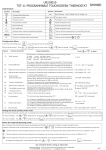
Save money by setting program schedules
This thermostat can be individual 7-day programmable. For each day of the week you are able to have 4 timed set temperature schedules.
Program
Start Time
Setpoint
Explanation
1
WAKE
07:00
22 °C
Set to the time you would like to wake to and the temperature you want during the morning, until you left for the day.
2
LEAVE
09:30
16 °C
Set to the time you leave home and the temperature you wish your home to maintain while you are away at work perhaps.
3
RETURN
16:30
22 °C
Set to the time you return home at end of the day and the temperature you want during evening until bed time.
4
SLEEP
22:30
16 °C
Set to the time you sleep and the temperature you want overnight(usually a comfortable and energy saving temperature).
Above are default program schedules, to make changes, follow easy steps as below.
In 7 day program mode
1.
Press
2.
Use
Set
Schedule
In 5+2 day program mode
, you will see day display flashing.
or
adjust the day to the day you wish to start programming
Set
Schedule
1.
Press
2.
Use
or
to set your weekday Wake time(Mon-Fri), then press
3.
Use
or
to set the temperature for this time period, then press
4.
Set time and temperature for the next time period(Leave). Repeat steps 2 and 3
, you will see the time flashing.
Next
or to the day you wish to edit an existing event or program.
(Press
to select all days of the week, to cancel selecting all days of
All Days
the week, press
3.
Press
4.
Use
All Days
again.)
for each time period of the weekday.
, the LCD will show program 1 with the time display flashing.
Next
or
Next
adjust the time you wish the program 1 event to commence
5.
Press
6.
Press
Next
to move to the weekend(sat-sun) time periods settings.
for the currently selected day or days.
5.
Press
6.
Use
Next
, the LCD will show a temperature value flashing.
or
set the desired heating temperature to be maintained for
Day 1 - 5, refers to the weekday( Monday to Friday)
Day 6 - 7, refers to the weekend( Saturday and Sunday)
the program 1 event.
7.
Press
Next
to save and exit.
DONE
, now the LCD will show program 2 with the time display
flashing, signifying the second daily event is now being programmed.
Note: During setting programs, press
8.
Repeat step 4,5,6 to set remaining programs. Press
DONE
to store and exit.
Note: It is faster to program the same schedule for the entire week and then to
Delete
(if visible) will clear a program entry
and thermostat will maintain the temperature setpoint of the last executed program
until the beginning of the next program.
adjust the exceptional days.
Lock the Keypad
To lock the keypad, press and hold the bottom left corner of display for 5 seconds, you will see a lock symbol
. To unlock, repeat the steps above.
Reset to Factory Settings
With thermostat turned off, press and hold the up left corner of display for 5 seconds until you can see RESET on LCD.
Temporary Temperature Override
Touch the temperature display, and it will start to flash. Use
or
to adjust. Press
DONE
to accept, and you will see “O/RIDE” on LCD. Thermostat will maintain the
new set temperature until the next programmed event(comfort level). To cancel the override setting, press
Run
Schedule
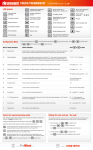
Installation and Wiring
2
1
Carefully separate the front half of the thermostat
from the back plate by placing a small flat head
terminal driver into the slots on the bottom face of
the thermostat
4
Screw the thermostat back
plate on to the back box
3
Carefully unplug the ribbon connector
which is plugged in to the front half of
the thermostat
5
Re-connect the thermostat ribbon cable
and clip the two halves together
Place the thermostat front half somewhere
safe. Terminate the thermostat as shown
in the diagrams below
FEED
(230VAC)
Floor Sensor
LOAD
(16A)
L
N
N
L
This product should be
installedby a qualified
electrician.