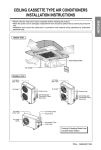
1
Multi V Air Conditioner
INSTALLATION MANUAL
INDOOR UNIT
Model No.: CRNN_Series
The following should be always observed for safety
• Please report to or take consent by the supply authority before connecting to the system.
• Be sure to read "THE FOLLOWING SHOULD BE ALWAYS OBSERVED FOR SAFETY" before installing the air
conditioner.
• Be sure to observe the cautions specified here as they include important items related to safety.
• The indications and meanings are as follows.
WARNING
Could lead to death, serious injury, etc.
CAUTION
Could lead to serious injury in particular environments when operated incorrectly.
• After reading this manual, be sure to keep it together with the instruction manual in a handy place .
WARNING
Do not install it yourself (customer).
Perform the installation securely referring to the installation manual.
• Incomplete installation could cause injury due to fire, electric shock, the unit
falling or a leakage of water. Consult the dealer from whom you purchased the
unit or special installer.
• Incomplete installation could cause a personal injury due to fire, electric
shock, the unit falling or a leakage of water.
Install the unit securely in a place which can bear the
weight of the unit.
Perform electrical work according to the installation
manual and be sure to use an exclusive circuit.
• When installed in an insufficient strong place, the unit could fall causing
injured.
• If the capacity of the power circuit is insufficient or there is incomplete electrical work, it could result in a fire or an electric shock.
Use the specified wires to connect the indoor and the
outdoor units securely and attach the wires firmly to the
terminal board connecting sections so the stress of the
wires is not applied to the sections.
Attach the electrical part cover to the indoor unit and the
service panel to the outdoor unit securely.
• Incomplete connecting and fixing could cause fire.
Check that the refrigerant gas do not leak after installation
is completed.
• If the electrical part cover if the indoor unit and/or the service panel if the outdoor unit are not attached securely, it could result in a fire or electric shock
due to dust, water, etc.
Be sure to use the part provided or specified parts for
the installation work.
• The use of defective parts could cause an injury or leakage of water due to a
fire, electric shock, the unit falling, etc.
CAUTION
Perform grounding
• Do not connect the ground wire to a gas pipe, water pipe arrester
or telephone ground wire. Defective grounding could cause an
electric shock.
Perform the drainage/piping work securely
according to the installation manual.
• If there is a defect in the drainage/piping work, water could drop
from the unit and household goods could be wet and damaged.
Do not install the unit in a place where an inflammable gas leaks.
• If gas leaks and accumulates in the area surrounding the unit,
it could cause an explosion.
❈ The installation parts which are not provided should be purchased.
2
Contents
Installation of Wall Mounted Type Indoor Unit ....................................................................... 4
Installation of wall mounted type indoor unit ....................................................................................... 4
Selection of the best location .............................................................................................................. 6
Connection of pipings.......................................................................................................................... 7
Checking the drainage ...................................................................................................................... 11
Connect the cable to the indoor unit ................................................................................................. 12
Installation of Art Cool Type Indoor Unit................................................................................ 15
Selection of the best location ............................................................................................................ 17
Preparing work for Installation........................................................................................................... 18
Sticking the installation guide map and fixing Indoor unit ................................................................. 19
Preparing work for installation........................................................................................................... 19
Front panel assembly ........................................................................................................................ 22
Connect the cable to the Indoor unit. ................................................................................................ 23
Installation of Ceiling Cassette Type(1 way) Indoor Unit ................................................. 25
Selection of the best location ............................................................................................................ 27
Ceiling opening dimensions and hanging bolt location ..................................................................... 28
The indoor unit installation ................................................................................................................ 29
Wiring connection.............................................................................................................................. 30
Installation of decorative panel.......................................................................................................... 31
Indoor unit drain piping...................................................................................................................... 32
Installation of Ceiling Cassette Type(4 way) Indoor Unit ................................................. 35
Selection of the best location ............................................................................................................ 37
Ceiling opening dimensions and hanging bolt location ..................................................................... 38
Wiring connection.............................................................................................................................. 40
Installation of decorative panel.......................................................................................................... 41
Indoor unit drain piping...................................................................................................................... 42
Installation of Convertible Type Indoor Unit ......................................................................... 45
Selection of the best location ............................................................................................................ 47
Installation ......................................................................................................................................... 48
Piping and drainage ......................................................................................................................... 55
Wiring connection.............................................................................................................................. 58
Installation of Ceiling Concealed Duct Type Indoor Unit.................................................. 61
Selection of the best location ............................................................................................................ 63
Ceiling dimension and hanging ........................................................................................................ 64
The indoor unit installation ................................................................................................................ 65
Connecting cables between indoor unit and outdoor unit ................................................................. 66
Checking the drainage ...................................................................................................................... 68
Common installation process .................................................................................................... 71
Installation of remote controller ......................................................................................................... 71
Preparation of piping ......................................................................................................................... 74
Indoor unit drain pipe work................................................................................................................ 77
Installation of drain pump .................................................................................................................. 79
Optional operation............................................................................................................................. 83
3
Installation of Wall Mounted Type Indoor Unit
Installation of Wall Mounted Type Indoor Unit
4
Installation of Wall Mounted Type Indoor Unit
• Please read this instruction sheet completely before installing the product.
• When the power cord is damaged, replacement work shall be performed by authorized personnel only.
• Installation work must be performed in accordance with the national wiring standards by authorized personnel only.
Installation Parts Provided
1. Type "A" screw
2. Installation Plate
3. Type "B" screw
4. Holder Remote Control
Cooling & Heating Model has
included Drain Elbow.
Required Parts
Required Tools
❏ Installation plate
❏ Four type "A" screws
❏ Connecting cable
❏ Level gauge
❏ Screw driver
❏ Electric drill
❏ Hole core drill(ø70mm)
❏ Pipes: Gas side.....................................Ø12.7, Ø9.53
Liquid side..............................................Ø6.35
(Refer to page 4)
❏ Insulation materials
❏ Additional drain pipe
(Outer Diameter............................................15.5mm)
❏ Flaring tool set
❏ Specified torque wrenches
1.8kg.m, 4.2kg.m, 5.5kg.m, 6.6kg.m
(different depending on model No.)
❏ Spanner......................................................Half union
❏ A glass of water
❏ Screw driver
❏ Two type "B" screws
❏ Owner's manual
❏ Thermometer
❏ Holder Remote Control
Installation of Wall Mounted Type Indoor Unit
5
Installation of Wall Mounted Type Indoor Unit
■ Preparing the indoor unit's piping and drain hose for
installation through the wall.
■ Remove the plastic tubing retainer(see illustration
below) and pull the tubing and drain hose away from
chassis.
■ Replace the plastic tubing holder in the original position.
3. Tape the tubing, drain hose and the connecting
cable. Be sure that the drain hose is located at the
lowest side of the bundle. Locating at the upper
side can cause drain pan to overflow inside the
unit.
Loop
Tubing holder
To remove the holder,
press the bottom of
chassis near the holder
upward and pull the tab
out of its hole.
2 Pull
Connecting
cable
Drain hose
Gas side
piping
Liquid side
piping
1 Press
CAUTION
When install, make sure that the
remaining parts must be removed
clearly so as not to damage the piping
and drain hose, especially power cord
and connecting cable.
For left rear piping
1. Route the indoor tubing and the drain hose in the
direction of rear left.
NOTE: If the drain hose is routed inside the room, insulate
the hose with an insulation material* so that dripping from
"sweating"(condensation) will not damage furniture or
floors.
*Foamed polyethylene or equivalent is recommended.
4. Indoor unit installation
■ Hook the indoor unit onto the upper portion of the
installation plate.(Engage the two hooks of the rear
top of the indoor unit with the upper edge of the
installation plate.) Ensure that the hooks are properly
seated on the installation plate by moving it left and
right.
Connecting
cable
Drain hose
Drain hose
2. Insert the connecting cable into the indoor unit
from the outdoor unit through the piping hole.
■ Do not connect the cable to the indoor unit.
■ Make a small loop with the cable for easy connection
later.
Press the lower left and right sides of the unit against
the installation plate until the hooks engage into their
slots(clicking sound).
5. Connecting the pipings to the indoor unit and drain
hose to drain pipe.
■ Align the center of the pipings and sufficiently tighten
the flare nut by hand.
Indoor unit tubing
Flare nut
Pipings
Installation of Wall Mounted Type Indoor Unit
7
Installation of Wall Mounted Type Indoor Unit
1. Selection of the best location
Front
• There should not be any heat source or steam
The mounting wall should be strong and solid enough
to protect it from the vibration.
1) Mount the installation plate on the wall with
four Type "A" screws.
(If mounting the unit on the concrete wall, consider
using anchor bolts.)
• Always mount the Installation plate horizontally by
aligning the marking-off line by means of the
thread and a level.
2) Drill the piping hole with 70mm dia. holecore drill.
• Line according to the arrows marked on lower the
left and the rght side of the Installation Plate.
The meeting point of the extended line is the center of the hole.
• Drill the piping hole at either the right or the left
and the hole should be slightly slant to the outdoor side.
Left
Rear left
Down right
Right
Rear right
Lower than 2.3m
More than 5 cm
More than
5 cm
More than
5 cm
Higher than eye-level
Installation Plate
marking-off line
Type "A" screw
Thread
Weight
Wall
Indoor
Outdoor
5~7mm
near the unit.
• There should not be any obstacles to prevent
the air circulation.
• A place where air circulation in the room will be
good.
• A place where drainage can be easily obtained.
• A place where noise prevention is taken into
consideration.
• Do not install the unit near the door way.
• Ensure the spaces indicated by arrows from
the wall, ceiling, fence, or other obstacles.
The lower left and the right side of Installation Plate
2.1/7, 2.6/9, 3.5/12 [kW/Btu]
Left rear piping
3.5/18 [kW/Btu]
Right rear piping
Left rear piping
Right rear piping
A
20mm
20mm
80mm
A
A
A
50mm
ø70mm
Installation of Wall Mounted Type Indoor Unit
6
ø70mm
ø70mm
ø70mm
Installation of Wall Mounted Type Indoor Unit
■ Tighten the flare nut with a wrench.
Spanner (fixed)
Flare nut
Connection
pipe
Torque
wrench
■ Wrap the area which accommodates the rear piping housing section with vinyl tape.
Indoor
unit pipe
Wrap with vinyl tape
Connection
pipe
Vinyl tape
(wide)
Connecting cable
Indoor
unit tubing
Pipe
Pipe Size[Torque]
GAS
LIQUID
Ø9.53[4.2kg.m]
Ø12.7[5.5kg.m]
Ø6.35[1.8kg.m]
Ø6.35[1.8kg.m]
■ When extending the drain hose at the indoor unit,
install the drain pipe.
Vinyl tape(narrow)
■ Bundle the piping and drain hose together by
wrapping them with vinyl tape over the range within which they fit into the rear piping housing section.
Wrap with vinyl tape
Pipe
Drain pipe
Vinyl tape(wide)
Drain hose
Indoor unit
drain hose
Vinyl tape(narrow)
Adhesive
6. Wrap the insulation material around the connecting portion.
■ Overlap the connection pipe insulation material
and the indoor unit pipe insulation material. Bind
them together with vinyl tape so that there is no
gap.
Plastic bands
For right rear piping
1. Route the indoor tubing and the drain hose to the
required piping hole position.
Insulation material
2. Insert the piping, drain hose and the connecting
cable into the piping hole.
Connecting cable
Drain pipe
Installation of Wall Mounted Type Indoor Unit
8
Installation of Wall Mounted Type Indoor Unit
3. Insert the connecting cable into the indoor unit.
■ Don't connect the cable to the indoor unit.
■ Make a small loop with the cable for easy connection later.
4. Tape the drain hose and the connecting cable.
• Connecting cable
Pipe Size[Torque]
GAS
LIQUID
Ø9.53[4.2kg.m]
Ø12.7[5.5kg.m]
Ø6.35[1.8kg.m]
Ø6.35[1.8kg.m]
■ When extending the drain hose at the indoor unit,
install the drain pipe.
Drain hose
Indoor unit drain hose
5. Indoor unit installation
■ Hang the indoor unit from the hooks at the top of
the installation plate.
■ Insert the spacer etc. between the indoor unit and
the installation plate and separate the bottom of
the indoor unit from the wall.
Indoor unit
Spacer
Vinyl tape(narrow)
Adhesive
7. Wrap the insulation material around the connecting portion.
■ Overlap the connection pipe heat insulation and
the indoor unit pipe heat insulation material. Bind
them together with vinyl tape so that there is no
gap.
Plastic bands
Insulation material
Installation plate
8cm
6. Connecting the pipings to the indoor unit and
the drain hose to drain pipe.
■ Align the center of the pipings and sufficiently
tighten the flare nut by hand.
■ Wrap the area which accommodates the rear piping housing section with vinyl tape.
Connection
pipe
Vinyl tape
(wide)
Indoor unit tubing
Flare nut
Wrap with vinyl tape
Pipe
Pipings
■ Tighten the flare nut with a wrench.
Indoor
unit piping
Connecting
cable
Vinyl tape
(narrow)
Spanner (fixed)
Torque
wrench
Flare nut
Connection
pipe
Indoor
unit tubing
Installation of Wall Mounted Type Indoor Unit
9
Installation of Wall Mounted Type Indoor Unit
■ Bundle the piping and drain hose together by
wrapping them with cloth tape over the range
within which they fit into the rear piping housing
section.
10. Indoor unit installation
■ Remove the spacer.
■ Ensure that the hooks are properly seated on the
installation plate by moving it left and right.
Pipe
Drain hose
Vinyl tape
(narrow)
Connecting
cable
Wrap with
vinyl tape(wide)
Drain hose
Press the lower left and right sides of the unit
against the installation plate until the hooks engage
into their slots(clicking sound).
8. Reroute the pipings and the drain hose across
the back of the chassis.
Piping for passage through
piping hole
9. Set the pipings and the drain hose to the back of
the chassis with the tubing holder.
■ Hook the edge of tubing holder to tap on chassis
and push the bottom of tubing holder to be
engaged at the bottom of chassis.
Tubing holder
1 Hook
2 Push
Installation of Wall Mounted Type Indoor Unit
10
Installation of Wall Mounted Type Indoor Unit
2. Connection of Pipings
1. To remove the front panel from the indoor unit,
remove the front panel from the indoor unit
cabinet.
■ Set the air direction louvers up-and-down to the
position(horizontally) by hand.
■ Remove the securing screws that retain the front
panel. Pull the lower left and right sides of the
grille toward you and lift it off.
(2.1/7, 2.6/9, 3.5/12 kW/Btu models: 2EA,
3.5/18 kW/Btu models: 3EA)
2. To check the drainage.
■ Pour a glass of water on the evaporator.
■ Ensure the water flows through the drain hose of
the indoor unit without any leakage and goes out
the drain exit.
Pull the right and
the left side.
Screw
Installation of Wall Mounted Type Indoor Unit
11
Installation of Wall Mounted Type Indoor Unit
4. Connect the cable to the indoor unit
1) Connect the wires to the terminals on the
control board individually according to the
outdoor unit connection.
• Ensure that the color of the wires of outdoor
unit and the terminal No. are the same as
those of indoor unit respectively.
Connecting cable
Terminal Block in Indoor
1(L)
2(N)
3(A)
Terminal 2 in Outdoor
4(B)
1(A)
INDOOR POWER INPUT
(CAN BE CONNECTED TO OUTDOOR)
2) Attach the Grille onto the cabinet.
• Grasp lower the left and right side of the
Grille and engage four tabs on the top inside
edge of the chassis.
• Press the Grille toward the chassis until it will
be back into place.
Installation of Wall Mounted Type Indoor Unit
12
2(B)
Terminal 1 in Outdoor
1(R)
2(S)
3(T)
4(N)
OUTDOOR POWER INPUT
Installation of Wall Mounted Type Indoor Unit
CAUTION
After the confirmation of the above conditions, prepare the wiring as follows:
1) Never fail to have an individual power circuit specifically for the air conditioner. As for the
method of wiring, be guided by the circuit diagram posted on the inside of control cover.
2) The screw which fasten the wiring in the casing of electrical fittings are liable to come loose from
vibrations to which the unit is subjected during the course of transportation. Check them and
make sure that they are all tightly fastened. (If they are loose, it could cause burn-out of the
wires.)
3) Specification of power source.
4) Confirm that electrical capacity is sufficient.
5) See to that the starting voltage is maintained at more than 90 percent of the rated voltage marked
on the name plate.
6) Confirm that the cable thickness is as specified in the power source specification.
(Particularly note the relation between cable length and thickness.)
7) Always install an earth leakage circuit breaker in a wet or moist area.
8) The following would be caused by voltage drop.
• Vibration of a magnetic switch, which will damage the contact point, fuse breaking, disturbance of the
normal function of the overload.
9) The means for disconnection from a power supply shall be incorporated in the fixed wiring and
have an air gap contact separation of at least 3mm in each active(phase) conductors.
Installation of Wall Mounted Type Indoor Unit
13
Memo
Installation of Wall Mounted Type Indoor Unit
14
Installation of Art Cool Type Indoor Unit
Installation of Art Cool Type Indoor Unit
15
Installation of Art Cool Type Indoor Unit
• Please read this instruction sheet completely before installing the product.
• When the power cord is damaged, replacement work shall be performed by authorized personnel only.
• Installation work must be performed in accordance with the national wiring standards by authorized personnel only.
Installation Parts Provided
1. Installation guide map
2. Type "A" screw and plastic anchors
3. Type "B" screws
4. Holder Remote Control
Cooling & Heating Model has
included Drain Elbow.
Required Parts
Required Tools
❏ Installation plate
❏ Four type "A" screws
❏ Connecting cable
❏ Level gauge
❏ Screw driver
❏ Electric drill
❏ Hole core drill(ø70mm)
❏ Pipes: Gas side.....................................Ø12.7, Ø9.53
Liquid side..............................................Ø6.35
(Refer to page 4)
❏ Insulation materials
❏ Additional drain pipe
(Outer Diameter............................................15.5mm)
❏ Flaring tool set
❏ Specified torque wrenches
1.8kg.m, 4.2kg.m, 5.5kg.m, 6.6kg.m
(different depending on model No.)
❏ Spanner......................................................Half union
❏ A glass of water
❏ Screw driver
❏ Two type "B" screws
Installation of Art Cool Type Indoor Unit
16
❏ Owner's manual
❏ Thermometer
❏ Holder Remote Control
Installation of Art Cool Type Indoor Unit
1. Selection of the best location
• Do not have any heat or steam near the unit.
• Select a place where there are no obstacles in front of the unit.
• Make sure that condensation drainage can be conveniently routed away.
Do not install near a doorway.
• Ensure that the space around the left and right of the unit is more than 50cm. The unit should be installed as high
on the wall as possible, allowing a minimum of 10cm from ceiling.
• Use a stud finder to locate studs to prevent unnecessary damage to the wall.
More than 10cm
Lower than 2.3m
More than 50cm
More than 50cm
More than 2m
Higher than 2m
Installation of Art Cool Type Indoor Unit
17
Installation of Art Cool Type Indoor Unit
2. Preparing work for Installation
The wall you select should be strong and solid enough
to prevent vibration
1) Open panel front
• First,Pull the grille bottom, then remove screws
(2 pieces), and close grille bottom again.
• The moment of lifting the both lower parts of panel
front, you can hear sound this panel came out, In
this time panel front is separated
• After pull down this panel a bit, and separate connecting wire with product.
2) Cover pipe and cover side remove
• Remove two screws(for fixing cover pipe)
• Pull up the cover side of desired connecting direction, then cover side is separated.
• In case connecting direction is left or right, path
through the hole of cover side.
(When path through the hole, take care of burr.)
Pipe hole
NOTE: When connecting pipe path through rear
wall, don’t remove the hole.
3) Drain hose junction
• Remove the rubber stopple of desired drain direction.
• As the following picture, Insert drain hose in the handle of drain pan, and join drain hose and connecting
hose.
Panel Front
Connector
Adhesive
Only one
desiring direction
Connecting
part
Drain
hose
Installation of Art Cool Type Indoor Unit
18
rubber cap
Installation of Art Cool Type Indoor Unit
3. Sticking the installation guide map and
fixing Indoor unit
1) Put an Installation Guide Map on the desired
surface.
7) Drill the piercing part for connecting pipe as
diameter 50mm. (In case of piercing rear surface)
INSTALLATION GUIDE MAP
Refer to No. 5 on this page when making a hole in the wall.
2) Make a hole with diameter of 6mm and depth of
30-35mm when piercing a screw point.
IN
ST
AII
AT
IO
N
8) First, Drive the two points of the upper parts by
screws. (Leave 10mm for hanging product)
GU
ID
EM
AP
mm
10
IN
ST
AL
LA
TIO
N
3) Drive the fore plastic anchors into drilled points.
IN
ST
AL
LA
TIO
N
GU
ID
EM
AP
GU
9) Drive the lower parts after facing the hole of
product with plastic anchors, and fix completely
the upper screws.
Plastic anchors
Plastic anchors
4) Hang the hole of product at the upper screws.
(In this time, Remove the map)
INS
TAL
LAT
ION
GUID
EM
AP
(Falling attention)
In case of nothing wrong in the matter,
connect the pipe and the wire.
(Installation manual reference)
Hanger hole
(Rear side of
product)
5) Check the fixed product with light power.
4. Preparing work for installation
1) Drill a hole in the wall
• Drill the piping hole with a ø50mm hole core drill.
Drill the piping hole at either the right or the left
with the hole slightly slanted to the outdoor side.
WALL
IN
ST
AL
LA
TIO
N
GU
ID
EM
AP
Outdoor
(0.2~0.3")
Horizontality
Indoor
5-7mm
6) Look at suited horizon by horizontal meter on
the horizontal setting line, and Fix lightly the
map by adhesive tape.
Installation of Art Cool Type Indoor Unit
19
Installation of Art Cool Type Indoor Unit
5. Connection of piping Indoor
• Tighten the flare nut with a wrench.
• Preparing the indoor unit's piping and drain hose for
installation through the wall.
1) Route the indoor tubing and the drain hose in the
direction of rear left or right.
Open-end wrench (fixed)
Flare nut
Connection pipe
Wrench
2) Tape the tubing, drain hose, and the connecting
cable. Be sure that the drain hose is located at
the lowest side of the bundle. Locating at the
upper side can cause drain pan to overflow inside
the unit.
Indoor unit tubing
Pipe Size[Torque]
Capacity
(kW/h)
GAS
LIQUID
2.05, 2.34, 2.64
Ø9.53[4.2kg.m]
Ø6.35[1.8kg.m]
3.22, 3.52, 4.10
Ø12.7[5.5kg.m]
Ø6.35[1.8kg.m]
• When extending the drain hose at the indoor unit,
install the drain pipe.
Loop
Drain pipe
Connecting
cable
Gas side piping
Indoor unit drain hose
Liquid side piping
Drain hose
Adhesive
NOTE: If the drain hose is routed inside the room,
insulate the hose with an insulation material* so that
dripping from "sweating"(condensation) will not damage furniture or floors.
*Foamed polyethylene or equivalent is recommended.
Vinyl tape(narrow)
4) Wrap the insulation material around the connecting portion.
• Overlap the connection pipe insulation material and
the indoor unit pipe insulation material. Bind them
together with vinyl tape so that there is no gap.
Plastic bands Insulation material
3) Connecting the pipings to the indoor unit and
drain hose to drain pipe.
• Align the center of the pipes and sufficiently tighten
the flare nut by hand.
Indoor unit tubing
Flare nut
Installation of Art Cool Type Indoor Unit
20
Pipes
Installation of Art Cool Type Indoor Unit
• Wrap the area which accommodates the rear piping
housing section with vinyl tape.
Indoor
unit pipe
Connection
pipe
Vinyl tape
(wide)
Wrap with vinyl tape
6. Checking the drainage
1) To check the drainage.
• Pour a glass of water on the evaporator.
• Ensure the water flows through the drain hose of
the indoor unit without any leakage and goes out
the drain exit.
Connecting cable
Pipe
Vinyl tape(narrow)
• Bundle the piping and drain hose together by wrapping them with vinyl tape for enough to cover where
they fit into the rear piping housing section.
Wrap with vinyl tape
Pipe
Vinyl tape(wide)
Drain hose
2) Drain piping
• The drain hose should point downward for easy
drain flow.
Downward slope
• Do not make drain piping.
Accumulated
drain water
Air
Do not raise
Water
leakage
Water
leakage
Waving
Tip of drain hose
dipped in water
Water
leakage
Less than
50mm gap
Ditch
Installation of Art Cool Type Indoor Unit
21
Installation of Art Cool Type Indoor Unit
7. Front panel assembly
1) First, Check the side cover assembly exactly,
Fix power cord in the bottom groove of cover
side left.
2) Assemble connecting lead wire with controller
and first fix the upper part of panel front, then
match the lower part of panel front
Panel Front
Connector
3) Drive two screws.
Installation of Art Cool Type Indoor Unit
22
Installation of Art Cool Type Indoor Unit
8. Connect the cable to the Indoor unit.
• Connect the cable to the indoor unit by connecting the wires to the terminals on the control board in
dividually according to the outdoor unit connection. (Ensure that the color of the wires of the outdoor unit
and the terminal No. are the same as those of the indoor unit.)
The earth wire should be longer than the common wires.
Terminal Block Indoor
1(L)
2(N)
3(A)
Terminal 2 in Outdoor
4(B)
1(A)
INDOOR POWER INPUT
(CAN BE CONNECTED TO OUTDOOR)
• When installing, refer to the circuit diagram on the
Control Box of Indoor Unit.
• When installing, refer to the wiring diagram on the
Control Cover Inside Outdoor Unit.
CAUTION
• The above circuit diagram is subject to change without notice.
• Be sure to connect wires according to the wiring diagram.
• Connect the wires firmly, so that not to be pulled out
easily.
• Connect the wires according to color codes by referring the wiring diagram.
CAUTION
If a power plug is not to be used, provide a circuit breaker
between power source and the unit as shown below.
Main power source
Air
Conditioner
Circuit Breaker
Use a circuit
breaker or time
delay fuse.
2(B)
Terminal 1 in Outdoor
1(R)
2(S)
3(T)
4(N)
OUTDOOR POWER INPUT
CAUTION
After the confirmation of the above conditions,
prepare the wiring as follows:
1) Never fail to have an individual power circuit
specifically for the air conditioner. As for the
method of wiring, be guided by the circuit
diagram posted on the inside of control cover.
2) The screw which fasten the wiring in the casing
of electrical fittings are liable to come loose
from vibrations to which the unit is subjected
during the course of transportation. Check
them and make sure that they are all tightly
fastened. (If they are loose, it could cause
burn-out of the wires.)
3) Specification of power source.
4) Confirm that electrical capacity is sufficient.
5) See to that the starting voltage is maintained at
more than 90 percent of the rated voltage
marked on the name plate.
6) Confirm that the cable thickness is as specified
in the power source specification.
(Particularly note the relation between cable
length and thickness. (Refer to page 24)
7) Always install an earth leakage circuit breaker
in a wet or moist area.
8) The following would be caused by voltage drop.
• Vibration of a magnetic switch, which will damage
the contact point, fuse breaking, disturbance of
the normal function of the overload.
9) The means for disconnection from a power
supply shall be incorporated in the fixed wiring
and have an air gap contact separation of at
least 3mm in each active(phase) conductors.
Installation of Art Cool Type Indoor Unit
23
Memo
Installation of Art Cool Type Indoor Unit
24
Installation of Ceiling Cassette Type(1 way) Indoor Unit
Installation of Ceiling Cassette Type(1 way) Indoor Unit
25
Installation of Ceiling Cassette Type(1 way) Indoor Unit
• Please read this instruction sheet completely before installing the product.
• When the power cord is damaged, replacement work shall be performed by authorized personnel only.
• Installation work must be performed in accordance with the national wiring standards by authorized personnel only.
Anti-bacteria filter
Air Outlet
Air Intake
Cooling & Heating Model has
included Drain Elbow.
Required Parts
• Connecting cable
• Pipes: Gas side
Liquid side
• Hanging Bolt
(W 3/8 or M10 length 650mm)
• Insulated drain hose
• Additional Drain hose
(Inner Dia...................................32mm)
Installation of Ceiling Cassette Type(1 way) Indoor Unit
26
Required Tools
• Level
• Screw driver
• Electric drill
• Hole core drill (ø70mm)
• Flaring Tools set
• Torque Wrenches
• Hexagonal Wrench (4mm, 5mm)
• Gas-leak detector
• Owner’s Manual
• Thermometer
Installation of Ceiling Cassette Type(1 way) Indoor Unit
1. Selection of the best location
Above 250
330 or less
50 or
more
100
or more
Ceiling
Ceiling Board
Ceiling Board
50 or
more
30 or less
20 or more
• There should not be any heat source or steam near the unit.
• There should not be any obstacles to the air circulation.
• A place where air circulation in the room will be good.
• A place where drainage can be easily obtained.
• A place where noise prevention is taken into consideration.
• Do not install the unit near the door way.
• Ensure the spaces indicated by arrows from the wall, ceiling, or other obstacles.
• The indoor unit must have the maintenance space.
Unit:cm
Floor
Installation of Ceiling Cassette Type(1 way) Indoor Unit
27
Installation of Ceiling Cassette Type(1 way) Indoor Unit
2. Ceiling opening dimensions and hanging bolt location
• The dimensions of the paper model for installing are
the same as those of the ceiling opening dimensions.
328.4 (Hanging bolt) 30.8
Level gauge
931.6
893.4 (Hanging bolt)
860
430 (Ceiling opening)
390
Ceiling
1,000 (Ceiling opening)
CAUTION
(unit: mm)
• This air-conditioner uses a drain pump.
• Install the unit horizontally using a level gauge.
• During the installation, care should be taken not to
damage electric wires.
• Select and mark the position for fixing bolts and piping hole.
• Decide the position for fixing bolts slightly tilted to
the drain direction after considering the direction of
drain hose.
• Drill the hole for anchor bolt on the wall.
Ceiling board
NOTE:
• Avoid the following installation location.
1. Such places as restaurants and kitchen where considerable amount of oil steam and flour is generated.
These may cause heat exchange efficiency reduction, or water drops, drain pump mal-function.
In these cases, take the following actions;
• Make sure that ventilation fan is enough to cover all noxious gases from this place.
• Ensure enough distance from the cooking room to install the air conditioner in such a place where it may
not suck oily steam.
Air conditioner
Take enough
distance
Use the ventilation fan
for smoke-collecting
hood with sufficient
capacity.
Cooking table
2. Avoid installng air conditioner in such places where cooking oil or iron powder is generated.
3. Avoid places where inflammable gas is generated.
4. Avoid place where noxious gas is generated.
5. Avoid places near high frequency generators.
Installation of Ceiling Cassette Type(1 way) Indoor Unit
28
Installation of Ceiling Cassette Type(1 way) Indoor Unit
3. The Indoor Unit Installation
Ceiling
Nut
(W3/8 or M10)
Spring washer
(M10)
Keep the length of the bolt
from the bracket to 40mm
Flat washer for M10
(accessory) Ceiling board
Flat washer for M10
(accessory)
Nut
(W3/8 or M10)
90mm
Hanging bolt
(W3/8 or M10)
Air Conditioner body
Paper model
for installation
Adjust the same height
• The following parts are local purchasing.
Hanging Bolt - W 3/8 or M10
Nut
- W 3/8 or M10
Spring Washer - M10
Plate Washer - M10
Ceiling board
Set screw of
paper model (4 pieces)
Open the ceiling board
along the outer edge of the
paper model
• Drill the piping hole on the wall slightly tilted to the
outdoor side using a Ø 70 hole-core drill.
Wall
Indoor
Outdoor
• Tighten the nut and bolt to prevent unit from
falling off.
5~7mm
CAUTION
Installation of Ceiling Cassette Type(1 way) Indoor Unit
29
Installation of Ceiling Cassette Type(1 way) Indoor Unit
4. Wiring Connection
• Open the control box cover and connect the Remote controller cord and Indoor power wires.
Power cord
Control box cover
Remote control cord
In-Out connecting wire
Terminal Block in Indoor
1(L)
2(N)
3(A)
Terminal 2 in Outdoor
4(B)
1(A)
2(B)
Terminal 1 in Outdoor
1(R)
INDOOR POWER INPUT
(CAN BE CONNECTED TO OUTDOOR)
2(S)
3(T)
4(N)
OUTDOOR POWER INPUT
CAUTION
The power cord connected to the outdoor unit should be complied
The connecting cable connected to the indoor and outdoor unit should
with the following specifications (Rubber insulation, type H05RN-F
be complied with the following specifications (Rubber insulation,
approved by HAR or SAA).
type H05RN-F approved by HAR or SAA).
NORMAL
CROSS-SECTIONAL
AREA 2.5mm2
GN
/YL
20
mm
NORMAL
CROSS-SECTIONAL
AREA 1.5mm2
20
mm
If the supply cord is damaged, it must be replaced by a special cord or assembly available from the
manufacturer or its service agent.
WARNING
Make sure that the screws of the terminal are free from looseness.
Installation of Ceiling Cassette Type(1 way) Indoor Unit
30
Installation of Ceiling Cassette Type(1 way) Indoor Unit
5. Installation of Decorative Panel
Before installing the decorative panel,
always remove the paper template.
The decorative panel has its installation
direction.
1. Temporarily fix two decorative panel fixing screws (hexagon M6 screw) on the unit body. (Tighten by amount 10mm in
length.)
The fixing screws (hexagon M6 screw) are included the Indoor unit box.
2. Remove the air inlet grille from the decorative panel. (Remove the hook for the air inlet grille cord.)
3. Hook the decorative panel key hole (
) on the screws fixed in step above, and slide the panel so that the screws
reach the key hole edge.
4. Retighten completely two temporarily fixed screws and other two screws. (Total 4 screws)
5. Connect the louver motor connector and display connector and room temp. thermistor connector.
6. After tightening these screws, install the air inlet grille (including the air filter) and push middle point of inlet grille.
7. Assemble the cover display and the cover.
Air conditioner unit
Decorative panel
fixing screws
(hexagon M6 screws)
Temporarily fitting
at 2 poles
(Tightening about 10mm)
Piping side
Control box cover
Key holes
Louver
motor
Inlet Grille
Decorative panel
fixing screws
(Hexagon M6 screw)
Cover
Decorative panel
Cover display
Push
Inlet Grille
Installation of Ceiling Cassette Type(1 way) Indoor Unit
31
Installation of Ceiling Cassette Type(1 way) Indoor Unit
CAUTION
Install certainly the decorative panel.
Cool air leakage causes sweating.
Water drops fall.
Good example
Bad example
Air conditioner
unit
Cool air leakage
(no good)
Ceiling
board
Decorative panel
Air conditioner
unit
Ceiling
board
Decorative panel
Fit the insulator (this part) and
be careful for cool air leakage
6. Indoor Unit Drain Piping
• Drain piping must have down-slope (1/50 to 1/100):
be sure not to provide up-and-down slope to prevent
reversal flow.
• During drain piping connection, be careful not to
exert extra force on the drain port on the indoor unit.
• The outside diameter of the drain connection on the
indoor unit is 32mm.
Piping material: Polyvinyl chloride pipe VP-25
and pipe fittings
Pipe clamp
Upward
routing
not allowed
Indoor unit
Maintenance
drain port
• Be sure to install heat insulation on the drain piping.
1/50~1/100
Heat insulation material: Polyethylene foam with
thickness more than 8 mm.
MAX 700mm
Drain test
The air conditioner uses a drain pump to drain water.
Use the following procedure to test the drain pump operation:
Feed water
Flexible drain hose
(accessory)
Main
drain pipe
Drain Pump
Drain
port
Glue the joint
Drain hose connection
Use the clip (accessory)
Drain pan
Installation of Ceiling Cassette Type(1 way) Indoor Unit
32
• Connect the main drain pipe to the exterior
and leave it provisionally until the test comes
to an end.
• Feed water to the flexible drain hose and
check the piping for leakage.
• Be sure to check the drain pump for normal
operating and noise when electrical wiring is
complete.
• When the test is complete, connect the flexible drain hose to the drain port on the indoor
unit.
Installation of Ceiling Cassette Type(1 way) Indoor Unit
CAUTION
After the confirmation of the above conditions, prepare the wiring as follows:
1) Never fail to have an individual power specialized for the air conditioner. As for the method of
wiring, be guided by the circuit diagram pasted on the inside of control box cover.
2) Provide a circuit breaker switch between power source and the unit.
3) The screw which fasten the wiring in the casing of electrical fittings are liable to come loose
from vibrations to which the unit is subjected during the course of transportation. Check them
and make sure that they are all tightly fastened. (If they are loose, it could give rise to burn-out
of the wires.)
4) Specification of power source
5) Confirm that electrical capacity is sufficient.
6) Be sure that the starting voltage is maintained at more than 90 percent of the rated voltage
marked on the name plate.
7) Confirm that the cable thickness is as specified in the power sources specification.
(Particularly note the relation between cable length and thickness.)
8) Never fail to equip a leakage breaker where it is wet or moist.
9) The following troubles would be caused by voltage drop-down.
• Vibration of a magnetic switch, damage on the contact point there of, fuse breaking, disturbance to
the normal function of a overload protection device.
• Proper starting power is not given to the compressor.
HAND OVER
Teach the customer the operation and maintenance procedures, using the operation manual (air filter cleaning, temperature
control, etc.).
Installation of Ceiling Cassette Type(1 way) Indoor Unit
33
Memo
Installation of Ceiling Cassette Type(1 way) Indoor Unit
34
Installation of Ceiling Cassette Type(4 way) Indoor Unit
Installation of Ceiling Cassette Type(4 way) Indoor Unit
35
Installation of Ceiling Cassette Type(4 way) Indoor Unit
• Please read this instruction sheet completely before installing the product.
• When the power cord is damaged, replacement work shall be performed by authorized personnel only.
• Installation work must be performed in accordance with the national wiring standards by authorized personnel only.
Anti-bacteria filter
Air
Intake
Air Outlet
Cooling & Heating Model has
included Drain Elbow.
Required Parts
Required Tools
• Connecting cable
• Pipes: Gas side
Liquid side
• Hanging Bolt
(W 3/8 or M10 length 650mm)
• Insulated drain hose
• Level
• Screw driver
• Electric drill
• Hole core drill (ø70mm)
• Flaring Tools set
• Torque Wrenches
• Hexagonal Wrench (4mm, 5mm)
• Gas-leak detector
• Owner’s Manual
• Additional Drain hose
(Inner Dia ....................................32mm)
• Thermometer
Installation of Ceiling Cassette Type(4 way) Indoor Unit
36
Installation of Ceiling Cassette Type(4 way) Indoor Unit
1. Selection of the best location
Above 250
400 or less
50 or
more
100
or more
Ceiling
Ceiling Board
Ceiling Board
50 or
more
30 or less
30 or more
• There should not be any heat source or steam near the unit.
• There should not be any obstacles to the air circulation.
• A place where air circulation in the room will be good.
• A place where drainage can be easily obtained.
• A place where noise prevention is taken into consideration.
• Do not install the unit near the door way.
• Ensure the spaces indicated by arrows from the wall, ceiling, or other obstacles.
• The indoor unit must have the maintenance space.
Unit:cm
Floor
Installation of Ceiling Cassette Type(4 way) Indoor Unit
37
Installation of Ceiling Cassette Type(4 way) Indoor Unit
2. Ceiling opening dimensions and hanging bolt location
• The dimensions of the paper model for installing are the same as those of the ceiling opening dimensions.
Ceiling
Ceiling board
Level gauge
CRUN186TE0, CRUN246TE0
CRUN366TD0
75
Unit:mm
CAUTION
• This air-conditioner uses a drain pump.
• Install the unit horizontally using a level gauge.
• During the installation, care should be taken
not to damage electric wires.
840 Unit size
45
875 (Ceiling opening)
785(Hanging bolt)
840 Unit size
570 Unit size
570 Unit size
45
39.5
600 (Ceiling opening)
521(Hanging bolt)
672 (Hanging bolt) 75
39.5
875 (Ceiling opening)
101.5 672 (Hanging bolt) 101.5
600 (Ceiling opening)
Unit:mm
• Select and mark the position for fixing bolts and piping hole.
• Decide the position for fixing bolts slightly tilted to the drain
direction after considering the direction of drain hose.
• Drill the hole for anchor bolt on the wall.
NOTE:
• Avoid the following installation location.
1. Such places as restaurants and kitchen where considerable amount of oil steam and flour is generated.
These may cause heat exchange efficiency reduction, or water drops, drain pump mal-function.
In these cases, take the following actions;
• Make sure that ventilation fan is enough to cover all noxious gases from this place.
• Ensure enough distance from the cooking room to install the air conditioner in such a place where it may
not suck oily steam.
Installation of Ceiling Cassette Type(4 way) Indoor Unit
38
Installation of Ceiling Cassette Type(4 way) Indoor Unit
Air conditioner
Take enough
distance
Use the ventilation fan
for smoke-collecting
hood with sufficient
capacity.
Cooking table
2. Avoid installng air conditioner in such places where cooking oil or iron powder is generated.
3. Avoid places where inflammable gas is generated.
4. Avoid place where noxious gas is generated.
5. Avoid places near high frequency generators.
Ceiling
Nut
(W3/8 or M10)
Spring washer
(M10)
Keep the length of the bolt
from the bracket to 40mm
Flat washer for M10
(accessory)
Ceiling board
Flat washer for M10
(accessory)
Nut
(W3/8 or M10)
Air Conditioner body
Ceiling board
Paper model
for installation
Adjust the same height
• The following parts are local purchasing.
Hanging Bolt - W 3/8 or M10
Nut
- W 3/8 or M10
Spring Washer - M10
Plate Washer - M10
150mm
Hanging bolt
(W3/8 or M10)
Set screw of
paper model (4 pieces)
Open the ceiling board
along the outer edge of the
paper model
• Drill the piping hole on the wall slightly tilted to the
outdoor side using a Ø 70 hole-core drill.
Wall
Indoor
Outdoor
• Tighten the nut and bolt to prevent unit from
falling off.
5~7mm
CAUTION
Installation of Ceiling Cassette Type(4 way) Indoor Unit
39
Installation of Ceiling Cassette Type(4 way) Indoor Unit
3. Wiring Connection
• Open the control box cover and connect the Remote controller cord and Indoor power wires.
Indoor
power cord
Remote
controller
cord
Control box cover
[Air inlet side view]
Control box cover
fitting screw(2 units)
Terminal Block in Indoor
1(L)
2(N)
3(A)
Terminal 2 in Outdoor
4(B)
1(A)
Terminal 1 in Outdoor
2(B)
1(R)
INDOOR POWER INPUT
(CAN BE CONNECTED TO OUTDOOR)
2(S)
3(T)
4(N)
OUTDOOR POWER INPUT
GN
/YL
20
mm
NORMAL
CROSS-SECTIONAL
AREA 4.0mm2 (10.6kW)
6.0mm2 (14.1kW)
8.0mm2 (17.6kW)
7.5mm
8.5mm
CAUTION
The power cord connected to the outdoor unit should be complied
The connecting cable connected to the indoor and outdoor unit should
with the following specifications (Rubber insulation, type H05RN-F
be complied with the following specifications (Rubber insulation,
approved by HAR or SAA).
type H05RN-F approved by HAR or SAA).
NORMAL
CROSS-SECTIONAL
AREA 1.5mm2
GN
/YL
20
mm
If the supply cord is damaged, it must be replaced by a special cord or assembly available from the manufacturer or its service agent.
WARNING
Make sure that the screws of the terminal are free from looseness.
Installation of Ceiling Cassette Type(4 way) Indoor Unit
40
Installation of Ceiling Cassette Type(4 way) Indoor Unit
4. Installation of Decorative Panel
The decorative panel has its installation
direction.
Before installing the decorative panel,
always remove the paper template.
1. Temporarily fix two decorative panel fixing screws (hexagon M5 screw) on the unit body. (Tighten by
amount 10mm in length.)
The fixing screws (hexagon M5 screw) are included the indoor unit box.
2. Remove the air inlet grille from the decorative panel. (Remove the hook for the air inlet grille cord.)
3. Hook the decorative panel key hole (
) on the screws fixed in step above, and slide the panel so
that the screws reach the key hole edge.
4. Retighten completely two temporarily fixed screws and other two screws. (Total 4 screws)
5. Connect the louver motor connector and display connector.
6. After tightening these screws, install the air inlet grille (including the air filter).
Piping side
Air conditioner unit
Decorative panel fixing screws
(hexagon M5 screws)
Temporally fitting at 2 places
(Tightening about 10mm)
Control box cover
Louver
motor
Inlet Grille
Decorative panel
Display
Key holes
Lead wire for
louver motor and
display
Decorative panel fixing screws
(Hexagon M5 screw)
Inlet Grille
Installation of Ceiling Cassette Type(4 way) Indoor Unit
41
Installation of Ceiling Cassette Type(4 way) Indoor Unit
CAUTION
Install certainly the decorative panel.
Cool air leakage causes sweating.
Water drops fall.
Good example
Bad example
Air conditioner
unit
Air
Ceiling
board
• Drain piping must have down-slope (1/50 to 1/100): be
sure not to provide up-and-down slope to prevent
reversal flow.
• During drain piping connection, be careful not to exert
extra force on the drain port on the indoor unit.
• The outside diameter of the drain connection on the
indoor unit is 32mm.
Cool air leakage
(no good)
Ceiling
board
Decorative
panel
Decorative panel
Fit the insulator (this part) and
be careful for cool air leakage
5. Indoor Unit Drain Piping
Air conditioner unit
Pipe clamp
Upward
routing
not allowed
Indoor unit
Maintenance
drain port
Piping material: Polyvinyl chloride pipe VP-25
and pipe fittings
1/50~1/100
• Be sure to install heat insulation on the drain piping.
Heat insulation material: Polyethylene foam with
thickness more than 8 mm.
MAX 700mm
Drain test
The air conditioner uses a drain pump to drain water.
Use the following procedure to test the drain pump operation:
Feed water
Flexible drain hose
(accessory)
Main
drain pipe
Drain Pump
Drain
port
Glue the joint
Drain hose connection
Use the clip (accessory)
D i
Installation of Ceiling Cassette Type(4 way) Indoor Unit
42
• Connect the main drain pipe to the exterior
and leave it provisionally until the test
comes to an end.
• Feed water to the flexible drain hose and
check the piping for leakage.
• Be sure to check the drain pump for normal
operating and noise when electrical wiring
is complete.
• When the test is complete, connect the
flexible drain hose to the drain port on the
indoor unit.
Installation of Ceiling Cassette Type(4 way) Indoor Unit
CAUTION
After the confirmation of the above conditions, prepare the wiring as follows:
1) Never fail to have an individual power specialized for the air conditioner. As for the method of
wiring, be guided by the circuit diagram pasted on the inside of control box cover.
2) Provide a circuit breaker switch between power source and the unit.
3) The screw which fasten the wiring in the casing of electrical fittings are liable to come loose
from vibrations to which the unit is subjected during the course of transportation. Check them
and make sure that they are all tightly fastened. (If they are loose, it could give rise to burn-out
of the wires.)
4) Specification of power source
5) Confirm that electrical capacity is sufficient.
6) Be sure that the starting voltage is maintained at more than 90 percent of the rated voltage
marked on the name plate.
7) Confirm that the cable thickness is as specified in the power sources specification.
(Particularly note the relation between cable length and thickness.)
8) Never fail to equip a leakage breaker where it is wet or moist.
9) The following troubles would be caused by voltage drop-down.
• Vibration of a magnetic switch, damage on the contact point there of, fuse breaking, disturbance to
the normal function of a overload protection device.
• Proper starting power is not given to the compressor.
HAND OVER
Teach the customer the operation and maintenance procedures, using the operation manual (air filter cleaning, temperature
control, etc.).
Installation of Ceiling Cassette Type(4 way) Indoor Unit
43
Memo
Installation of Ceiling Cassette Type(4 way) Indoor Unit
44
Installation of Convertible Type Indoor Unit
Installation of Convertible Type Indoor Unit
45
Installation of Convertible Type Indoor Unit
• Please read this instruction sheet completely before installing the product.
• When the power cord is damaged, replacement work shall be performed by authorized personnel only.
• Installation work must be performed in accordance with the national wiring standards by authorized personnel only.
Installation Parts Provided
1
8
Installation Plate (2pcs)
Washer Bolt (M8
L25, 4pcs, type "A”)
Floor Mount Bracket (1pcs)
2
Drain Hose, Insulated
Remocon Holder
Screw for Remocon Holder(type "B")
Drain Hose Hanger and screw
(Ceiling/Wall Mounting)
7
3
The other Installation Parts Needed
Suspension Bolt
Bolts for Mount Bracket
Connecting Tube
• Gas side : Ø12.7/Ø15.88
• Liquid side : Ø6.35/Ø9.52
9
(Floor Mounting)
4
Connecting Cable
Drain Hose Extended
6
5
Required Parts
Required Tools
• Installation Plate
• Four Type “A” screws
• Connecting cable
• Level
• Screw driver
• Electric drill
• Hole core drill (ø70mm)
• Pipes: Gas side .................Ø12.7, Ø15.87
Liquid side ............................Ø6.35, Ø9.53
• Insulated drain hose
• Insulation materials
• Flaring Tools set
• Specified Torque Wrenches
1.8kg·m...........................Liquid side piping
5.5kg·m .............................Gas side piping
Spanner .....................................Half union
• Specified Torque Wrenches
1.8kg·m...........................Liquid side piping
5.5kg·m..............................Gas side piping
• Hexagonal Wrench (4mm)
• Gas-leak Detector
• Two type “B” screws
Installation of Convertible Type Indoor Unit
46
• Owner’s Manual
• Thermometer
Installation of Convertible Type Indoor Unit
1. Selection of the best location
• There should not be any heat source or steam near the unit.
• There should not be any obstacles to prevent the air circulation.
• A place where air circulation in the room will be good.
• A place where drainage can be easily obtained.
• A place where noise prevention is taken into consideration.
• Do not install the unit near the door way.
• Ensure the spaces indicated by arrows from the wall, ceiling, or other obstacles.
More than
20cm
More than
20cm
R
More than eye-level
(Ceiling installation)
More than
20cm
R
More than
20cm
(Floor/Wall installation)
Installation of Convertible Type Indoor Unit
47
Installation of Convertible Type Indoor Unit
2. installation
■ Before Installing, prepare Installation Plates
• 'Installation Plates' are attached at the bottom of
indoor unit.
Detach them by removing each 3 screws at both sides.
• Detach 'Side Plate (R,L)' by removing each 2 screws
on both sides.
• Pull the upper right and left side of 'Inlet Grille' to the
front, and it will stop at slightly tilted position.
• Unhook the 'Inlet hanger' from the 'Hanger screw' on
the both left and right side.
• Detach the 'Inlet Grille' from the Indoor Unit.
Side Plate
R
Install Plate
1) Installation on the ceiling
Inlet hanger
• Measure and mark the position for the
Suspension bolts and the piping hole.
• Drill the hole for anchor nut on the ceiling.
R
Hanger
screw
Inlet Grille
1)
265
1076
※ Before secure the Installation Plates, select the bent
direction of the Installion Plate to the inside or the
outside according to the installation circumstances.
Suspension
bolt
2)
1236
Center-line for the
piping hole
265
• Drill the piping hole on the wall slightly tilted to the outdoor side using a ø70 hole-core drill.
Indoor
WALL
Outdoor
5~7mm
Installation of Convertible Type Indoor Unit
48
Installation of Convertible Type Indoor Unit
• Insert the nuts and washer onto the suspension bolts
for locking the suspension bolts on the ceiling.
• Mount the suspension bolts to the anchor-nuts firmly.
• Secure the Installation plates onto the Suspension
bolts (adjust level roughly.) using nuts, washers and
spring washers.
Anchor nut
1)
Ceiling
Nut
Washer
Suspension
bolts
Suspension
bolts
Spring
washer
max.
12mm
Nut
Washer
2)
• Engage 2 hooks on the both left and right side
of the unit to the lower slot of Installation Plates.
• Adjust a level with a level gauge on the direction
of left-right, back-forth by adjusting suspension
bolts.
• Move the hooks on the unit to the upper slot of
Installation Plates. Then the unit will be declined
to the bottomside so as to drain well.
Lower slot
Level gauge
R
Suspension
bolt
Adjust a level
Installation plate
R
Upper slot
R
Installation of Convertible Type Indoor Unit
49
Installation of Convertible Type Indoor Unit
CAUTION
1. Install declination of the indoor unit is very important for the drain of the convertible type air
conditioner.
2. Minimum thickness of the insulation for the connecting pipe shall be 7mm.
3. If the Installation Plates are fixed to horizontal line, the indoor unit after installing will be declined
to the bottomside.
Front of view
• The unit must be horizontal or declined to the drain hose connected when finished installation.
Ceiling
Drain hose
Ceiling
Side of view
• The unit must be declined to the bottomside of the unit when finished installation.
Ceiling
Installation of Convertible Type Indoor Unit
50
Installation of Convertible Type Indoor Unit
• Secure the unit to the Installation Plates with four M8
bolts and washers.
R
• Before working, refer to ‘Connecting pipe
and cable to Indoor Unit’.
• Hook up the Inlet Grille Hook to the cabinet.
• Hang the Inlet Hanger to the screw.
Inlet hanger
R
Hook
Cabinet Bottom
• Fit the projection hooks of the side plates to the 'Side
Panel' and the 'Front Panel' by lifting it.
• Fasten the screws.
R
2
1
R
Installation of Convertible Type Indoor Unit
51
Installation of Convertible Type Indoor Unit
2) Installation on the Wall
• Select and mark the position for fixing bolts and piping
hole.
Decide the position for fixing bolts slightly tilted to the
drain direction after considering the direction of drain
hose.
• Drill the hole for anchor nut on the wall.
1076
mor
e th
260 an
265
Unit: mm
• Drill the piping hole on the wall slightly tilted to the outdoor side using a ø70 hole-core drill.
Wall
Outdoor
5~7mm
Indoor
• Secure the 'Install Plate' onto the wall with four anchor
bolts, washers and spring washers.
Spring
washer
Wall
Nut
Washer
Anchor nut
Less than
12mm
※ Before secure the Install Plates, select the bent direction of the 'Install Plate' to the inside or outside
according to the installation circumstances.
123
6
Unit: mm
Installation of Convertible Type Indoor Unit
52
Installation of Convertible Type Indoor Unit
Install the Indoor unit onto Installation Plate.
• Insert 2 hooks on the both left and right side of the unit
to the inner slot (wall side) of the Installation Plate.
Inner slot
• Secure the unit to the Installation Plate with four M8
bolts and washers.
R
• Before working, refer to "Connecting pipe
and cable to Indoor Unit".
• Hook up the Inlet Grille Hook to the cabinet.
• Hang the Inlet Hanger to the screw.
2
1
• Fit the projection hooks of the side plates to the 'Side
Panel' and the 'Front Panel' by lifting it.
• Fasten the screws.
Installation of Convertible Type Indoor Unit
53
Installation of Convertible Type Indoor Unit
3) Installation on the floor
From the left wall
more than 760mm
Installation of Mount Bracket.
• Select and mark the position for Mount Brackets and
the piping hole.
• Drill the hole for the anchor nut on the wall.
• Drill the piping hole using a ø70 hole-core drill.
• Secure the Mount Brackets on the wall with four M4
screws.
Install the indoor unit onto the Mount Brackets.
• Engage the slot at the back of the unit with Mount
Bracket.
From the
right wall
more than 840mm
448mm
Slot
Floor mount
bracket
• Drill the piping hole with 70mm dia, hole core drill.
• Piping hole should be slightly slant to the outdoor side.
Wall
Outdoor
5~7mm
Indoor
After Installing, reassemble detached parts.
• Hang the 'Inlet Grille' and hook the 'Inlet Hanger' to the
Hanger Screw.
• Assemble the 'Side Plates(R,L)' with 2 screws on both
left and right side.
Slot
Wall
Floor mount
bracket
Install plate
Piping hole
Installation of Convertible Type Indoor Unit
54
Installation of Convertible Type Indoor Unit
3. Piping and drainage
3-1. Installation on the ceiling
1) Connecting the pipes to the indoor unit
R
2
1
The pipe can be connected to right side, bottom
or back of the unit.
1. For the Right Side Piping
• After bending an end of the connecting tube, align the
center of the pipings and sufficiently tighten the flare
nut with fingers.
• Finally, tighten the flare nut with torque wrench until
the wrench clicks.
• Connect the Drain Hose insulated to the drain outlet.
Drain hose should be go through under the Hose
Bracket as shown in figure .
• Hang the drain hose on the hose hanger and fix it to
the hole of the hose bracket with a screw.
Hose
Bracket
3
R
4
Piping
5
Drain Hose
Hose Hanger
2. For the Bottom Side Piping
• Remove the knock-out on the bottomside of Inlet Grille
• Align the center of the pipings and sufficiently tighten
the flare nut with fingers.
• Finally, tighten the flare nut with torque wrench until
the wrench clicks.
• Connect the Drain Hose insulated to the drain outlet.
• Hang the drain hose on the hose hanger and fix it to
the hole of cabinet bottom with a screw.
R
Hose
Hanger
2) Connecting the Drain Hose
• The drain hose can be connected to not only the
right side but also left side of the unit.
• If the drain hose is connected to the left side, it
should go through the cabinet bottom.
• Hang the drain hose on the hose hanger and fix it to
the hole of cabinet bottom with a screw.
BOTTOM
Hose Hanger
Drain Hose
Installation of Convertible Type Indoor Unit
55
Installation of Convertible Type Indoor Unit
3-2. Installation on the wall or floor
1) Connecting the pipes to the indoor unit
1. For the Right Rear Piping
• Remove the knock-out at the back side of the cabinet.
• After bending an end of the connecting tube, align the
center of the pipings and sufficiently tighten the flare
nut with fingers.
• Finally, tighten the flare nut with torque wrench until
the wrench clicks.
• Connect the Drain Hose insulated to the drain outlet.
• Tape the Drain Hose to the pipings to avoid coming
off the drain-outlet.
Piping
Taping
Drain Hose
2. For the Right Side Piping
• After bending an end of the connecting tube, align the
center of the pipings and sufficiently tighten the flare
nut with fingers.
• Finally, tighten the flare nut with torque wrench until
the wrench clicks.
• Connect the Drain Hose insulated to the drain outlet.
• Tape the Drain Hose to the pipings to avoid coming
off the drain-outlet.
3. For the Right Bottom Piping
• Align the center of the pipings and sufficiently tighten
the flare nut with fingers.
• Finally, tighten the flare nut with torque wrench until
the wrench clicks.
• Connect the Drain Hose insulated to the drain outlet.
Piping
Taping
Drain Hose
Piping
Taping
Drain Hose
Connecting
Cable
2) Connecting the Drain Hose
• The drain hose can be connected to not only right
side but also left side of the unit.
REAR
Drain Hose
Installation of Convertible Type Indoor Unit
56
BOTTOM
Installation of Convertible Type Indoor Unit
3-3. Checking the Drainage
1. Remove the Air Filter.
• To remove air filter, take hold of tab and pull
slightly upwards.
R
2. Check the drainage.
• Spray one or two glasses of water upon the
evaporator.
• Ensure that water flows drain hose of indoor unit
without any leakage.
R
Installation of Convertible Type Indoor Unit
57
Installation of Convertible Type Indoor Unit
4. Wiring connection
R
1) Connecting cables to the Indoor Unit
1. Remove the Air guide - L by loosening 2 screws
after removing the Inlet grille from the Indoor
unit.
2. Connect the wires to the terminals on the control board individually according to the outdoor
unit connection.
• Ensure that the color of the wires of outdoor
unit and the terminal No. are the same as
those of indoor unit respectively
AIR GUIDE-L
INDOOR UNIT
Clamp
1
2
Control
Panel
Terminal Block in Indoor
1(L)
2(N)
3(A)
Terminal 2 in Outdoor
4(B)
INDOOR POWER INPUT
(CAN BE CONNECTED TO OUTDOOR)
Installation of Convertible Type Indoor Unit
58
1(A)
2(B)
Terminal 1 in Outdoor
1(R)
2(S)
3(T)
4(N)
OUTDOOR POWER INPUT
Installation of Convertible Type Indoor Unit
2) Clamping of cables
1) Arrange 2 power cables on the control panel.
2) First, fasten the steel clamp with a screw to the inner boss of control panel.
3) For the cooling model, fix the other side of the clamp with a screw strongly.
For the heat pump model, put the 0.75mm2 cable(thinner cable) on the clamp and tighten it with a plastic clamp to the
other boss of the control panel.
4) In Australia, the length of power supply cord measured from the entry of the power supply cord to the middle of live pin
on the power plug should be over 1.8m.
NORMAL CROSSSECTIONAL AREA
• 2.5mm2
CAUTION
The power connecting cable
connected between the indoor and
outdoor unit should be complied
with the following specifications
(Type H07RN-F approved by HAR or SAA).
Ø10.0mm
Ø10.0mm
The power cord connected to the
indoor unit should be complied with
the following specifications
(Type H05VV-F(Indoor)
approved by HAR or SAA).
The connecting cable connected
between the indoor and outdoor unit
should be complied with the
following specifications
(Type H07RN-F approved by HAR or SAA).
NORMAL
CROSSSECTIONAL
AREA
1.5mm2
NORMAL CROSSSECTIONAL AREA
• 2.5mm2
CAUTION
After the confirmation of the above conditions, prepare the wiring as follows:
1) Never fail to have an individual power specialized for the air conditioner. As for the method of
wiring, be guided by the circuit diagram pasted on the inside of control box cover.
2) Provide a circuit breaker switch between power source and the unit.
3) The screw which fasten the wiring in the casing of electrical fittings are liable to come loose
from vibrations to which the unit is subjected during the course of transportation. Check them
and make sure that they are all tightly fastened. (If they are loose, it could give rise to burn-out
of the wires.)
4) Specification of power source
5) Confirm that electrical capacity is sufficient.
6) Be sure that the starting voltage is maintained at more than 90 percent of the rated voltage
marked on the name plate.
7) Confirm that the cable thickness is as specified in the power sources specification.
(Particularly note the relation between cable length and thickness.)
8) Never fail to equip a leakage breaker where it is wet or moist.
9) The following troubles would be caused by voltage drop-down.
• Vibration of a magnetic switch, damage on the contact point there of, fuse breaking, disturbance to
the normal function of a overload protection device.
• Proper starting power is not given to the compressor.
10) The means for disconnection from a power supply shall be incorporated in the fixed wiring and
have an air gap contact separation of at least 3mm in each active(phase) conductors.
Installation of Convertible Type Indoor Unit
59
Memo
Installation of Convertible Type Indoor Unit
60
Installation of Ceiling Concealed Duct Type Indoor Unit
Installation of Ceiling Concealed Duct Type Indoor Unit
61
Installation of Ceiling Concealed Duct Type Indoor Unit
• Please read this instruction sheet completely before installing the product.
• When the power cord is damaged, replacement work shall be performed by authorized personnel only.
• Installation work must be performed in accordance with the national wiring standards by authorized personnel only.
Air outlet vents
Air filters
Air intake vents
Remote Controller
Required Parts
Required Tools
• Four Type “A” screws
• Connecting cable
• Level
• Screw driver
• Electric drill
• Hole core drill (ø70mm)
• Pipes: Gas side ......Ø12.7, Ø15.87, Ø19.05
Liquid side ..................Ø6.35, Ø9.53, Ø12.7
• Insulated drain hose
• Insulation materials
• Flaring Tools set
• Additional Drain hose
(Inner Dia..........................................25mm)
• Screw driver
• Hexagonal Wrench (4mm/5mm)
• Gas-leak Detector
Installation of Ceiling Concealed Duct Type Indoor Unit
62
Installation of Ceiling Concealed Duct Type Indoor Unit
1. Selection of the best location
Install the air conditioner in the location that satisfies the following conditions.
• The place shall easily bear a load exceeding four times the indoor unit’s weight.
• The place shall be able to inspect the unit as the figure.
• The place where the unit shall be leveled.
• The place shall allow easy water drainage.(Suitable dimension “H” is necessary to get a slope to drain as
figure.)
• The place shall easily connect with the outdoor unit.
• The place where the unit is not affected by an electrical noise.
• The place where air circulation in the room will be good .
• There should not be any heat source or steam near the unit.
Top view
(unit: mm)
Inspection hole
(600X600)
600
1000
Control box
600
Front
Front view
H
Installation of Ceiling Concealed Duct Type Indoor Unit
63
Installation of Ceiling Concealed Duct Type Indoor Unit
2. Ceiling dimension and hanging
bolt location
A
■ Installation of Unit
Install the unit above the ceiling correctly.
B
C
E
CASE 1
D
POSITION OF SUSPENSION BOLT
• Apply a joint-canvas between the unit and duct to
absorb unnecessary vibration.
• Apply a filter Accessory at air return hole.
(Unit:mm)
F
(G)
Dimension
B
C
D
E
F
(G)
H
I
1-3 mm
A
I
Capacity
(kW/kBtu)
5.3/18
942 880 466 54 575 30
87 750 186
7.0/24
942 880 466 54 575 30
87 750 186
10.6/36 1242 1180 492 54 600 30
87 830 186
H
Drainage hole
M10 Nut
X4
(Local
M10 SP. washer X 4 supply)
M10 washer
X4
• Install the unit leaning to a drainage hole side as a
figure for easy water drainage.
CASE 2
X4
(Local
M10 SP. washer X 4 supply)
M10 Nut
X4
M10 washer
POSITION OF CONSOLE BOLT
• A place where the unit will be leveled and that can
support the weight of the unit.
• A place where the unit can withstand its vibration.
• A place where service can be easily performed.
NOTE:
• Throughly study the following installation locations:
1. In such places as restaurants and kitchens, considerable amount of oil steam and flour adhere to the fan, the fin of the heat
exchanger, resulting in heat exchange reduction, spraying, dispersing of water drops, etc.
In these cases, take the following actions:
• Make sure that the ventilation fan for smoke-collecting hood on a cooking table has sufficient capacity so that it draws oily
steam which should not flow into the suction of the air conditioner.
• Make enough distance from a cooking room to install the air conditioner in such a place where it may not suck in oil steam.
2. Avoid installing air conditioner in such circumstances where cutting oil mist or iron powder is in suspension in factories, etc.
3. Avoid places where inflammable gas is generated, flows in, is stored or vented.
4. Avoid places where sulfurous acid gas or corrosive gas is generated.
5. Avoid places near high frequency generators.
Installation of Ceiling Concealed Duct Type Indoor Unit
64
Installation of Ceiling Concealed Duct Type Indoor Unit
3. The Indoor Unit Installation
• Select and mark the position for fixing bolts.
• Drill the hole for set anchor on the face of ceiling.
Old building
• Insert the set anchor and washer onto the suspension bolts for locking the suspension bolts on the ceiling.
• Mount the suspension bolts to the set anchor firmly.
• Secure the installation plates onto the suspension
bolts (adjust level roughly) using nuts, washers and
spring washers.
New building
1 Set anchor
2 Plate washer
3 Spring washer
4 Nut
CAUTION
5 Suspension
bolts
Tighten the nut and bolt to prevent unit falling.
Installation of Ceiling Concealed Duct Type Indoor Unit
65
Installation of Ceiling Concealed Duct Type Indoor Unit
4. Connecting Cables between Indoor Unit and Outdoor Unit
Connect the wires to the terminals on the control board individually according to the outdoor unit connection.
• Ensure that the color of the wires of outdoor unit and the terminal No. are the same as those of indoor unit
respectively
Terminal Block in Indoor
1(L)
2(N)
3(A)
Terminal 2 in Outdoor
4(B)
1(A)
2(B)
Terminal 1 in Outdoor
1(R)
INDOOR POWER INPUT
(CAN BE CONNECTED TO OUTDOOR)
4(N)
The connecting cable connected to the indoor and outdoor
unit should be complied with the following specifications
(Rubber insulation, type H05RN-F approved by HAR or SAA).
NORMAL CROSS-SECTIONAL AREA
GN
/YL
3(T)
OUTDOOR POWER INPUT
CAUTION
The power cord connected to the outdoor unit should be
complied with the following specifications (Rubber
insulation, type H05RN-F approved by HAR or SAA).
Capacity
5.3
7.0
10.6
2(S)
NORMAL
CROSS-SECTIONAL
AREA 1.5mm2
1 Phase
2.5mm2
2.5mm2
6.0mm2
20
mm
20
mm
If the supply cord is damaged, it must be replaced by a special cord or assembly availible from the manufacturer of its service agent.
WARNING
Make sure that the screws of the terminal are free from looseness.
Clamping of cables
1) Arrange 2 power cables on the control panel.
2) First, fasten the steel clamp with a screw to the inner boss of control panel.
3) For the cooling model, fix the other side of the clamp with a screw strongly. For the heat pump model, put
the 0.75mm2 cable(thinner cable) on the clamp and tighten it with a plastic clamp to the other boss of the
control panel.
4) In Australia, the length of power supply cord measured from the entry of the power supply cord to the middle of live pin on the power plug should be over 1.8m.
Installation of Ceiling Concealed Duct Type Indoor Unit
66
Installation of Ceiling Concealed Duct Type Indoor Unit
• Drill the piping hole with 70mm dia, hole core
drill.
• Piping hole should be slightly slant to the outdoor side.
WALL
Indoor
Outdoor
5~7mm
INSULATION, OTHERS
THERMAL INSULATION
Insulate the joint and tubes completely.
All thermal insulation must comply with local requirement.
INDOOR UNIT
Union for liquid pipe
Thermal insulator for refrigerant pipe
(Local supply) Thermal insulator for
piping(Local supply)
Refrigerant pipe and thermal
insulator(Local supply)
Hose crip for thermal insulator
(Local supply)
Thermal insulator for refrigerant pipe
(Local supply)
Union for gas pipe
REFRIGERANT PIPE
Overlap with thermal
insulator for piping.
Hose crip for thermal insulator(Local supply)
Make sure that there is no clearance here.
Connecting cable
• Insulate and tape both the gas piping and liquid piping.
Liquid pipe
Tape
Gas pipe
Thermal insulator
Installation of Ceiling Concealed Duct Type Indoor Unit
67
Installation of Ceiling Concealed Duct Type Indoor Unit
5. Checking the Drainage
1) Checking the Drainage
1. Remove the Air Filter.
2. Check the drainage.
• Spray one or two glasses of water upon the
evaporator.
• Ensure that water flows drain hose of indoor
unit without any leakage.
Installation of Ceiling Concealed Duct Type Indoor Unit
68
Installation of Ceiling Concealed Duct Type Indoor Unit
CAUTION
1. Install declination of the indoor unit is very important for the drain of the duct type air conditioner.
2. Minimum thickness of the insulation for the connecting pipe shall be 5mm.
Front of view
• The unit must be horizontal or declined to the drain hose connected when finished
installation.
1~3mm
Ceiling
CORRECT
Drainage hole
Drainage hole
INCORRECT
CAUTION FOR GRADIENT OF
UNIT AND DRAIN PIPING
• Alway lay the drain with downward inclination
(1/50 to 1/100).
Prevent any upward flow or reverse flow in any
part.
• 5mm or thicker formed thermal insulator shall
always be provided for the drain pipe.
Lay the drain hose with a downware
inclination so water will drain out.
Thermal insulator
(Local supply)
Drainage pipe
(Local supply)
Unit
Make sure to be closed.
Drainage hole
• Upward routing not
allowed
CORRECT
INCORRECT
Applied U-Trap Dimension
• Install the P-Trap (or U-Trap) to prevent
a water leakage caused by the blocking
of intake air filter.
A ≥ 70mm
B ≥ 2C
C ≥ 2 x SP
SP = External Pressure
(mmAq)
Ex) External Pressure
= 10mmAq
A ≥ 70mm
B ≥ 40mm
C ≥ 20mm
B
C
U-Trap
A
Installation of Ceiling Concealed Duct Type Indoor Unit
69
Memo
Installation of Ceiling Concealed Duct Type Indoor Unit
70
Common Installation Process
Common Installation Process
71
Installation of remote controller
• Although the room themperature sensor is in the indoor unit, the remote controller should be installed in such
places away from direct sunlight and high humidity.
Installation of the remote controller
• Select places that are not splashed with water.
• Select control position after receiving customer approval.
• The room temperature sensor is built in the indoor unit.
• This remote controller equipped with liquid crystal display. If this position is higher or lower, display is difficult
to see.(The standard height is 1.2 ~1.5m high)
Routing of the remote controller cord
• Keep the remote controller cord away from the refrigerant piping and the drain piping.
• To protect the remote controller cord from electrical noise, place the cord at least 5cm away from other power
cables (audio equipment. television set, etc.)
• If the remote controller cord is secured to the wall, provide a trap at the top of the cord to prevent water
droplets from running.
WIRED REMOTE CONTROL INSTALLATION
DISASSEMBLING
Front case
Th
• Separate the under plate from Remote control box.
el
ow
er
pa
rt
Lever carefully
the box open
using a screw
driver, etc.
Remote control
box body
• Fix the under plate on the wall
• Fix the cord clamps on the wall by ø 3 tapping
screws (accessory).
• Fix the remote control cord.
Face of wall
Cord clamp
(accessory)
Under plate
Screw (accessory)
ELECTRICAL WIRING
Remote controller
(Main board)
CN REMO
Wire and make sure that teminal
numbers are matched on unit side and
remote controller side.
The maximum length of the cord is 100m.
If the length of the cord exceeds 50m,
2
use a wire size greater than 0.5mm .
Common Installation Process
72
Installation of remote controller
REMOTE CONTROL PREPARATION(OPTIONAL)
HOW TO MOUNT ONTO A WALL
HOW TO INSERT BATTERIES
Remove the battery cover from the remote controller.
• Slide the cover according to the arrow direction.
Insert the two batteries.
• Be sure that the (+) and (-) directions are correct.
• Be sure that both batteries are new.
Re-attach the cover.
• Slide it back into position.
• Do not use rechargeable batteries,
such batteries differ from standard
dry cells in shape, dimensions, and
performance.
• Romove the batteries from the
remote controller if the air conditioner is not going to be used for
some long time.
Common Installation Process
73
Preparation of Piping
Main cause of gas leakage is defect in flaring work. Carry out correct flaring work in the following procedure.
1) Cut the pipes and the cable.
■ Use the accessory piping kit or the pipes purchased
locally.
■ Measure the distance between the indoor and the outdoor unit.
■ Cut the pipes a little longer than measured distance.
■ Cut the cable 1.5m longer than the pipe length.
Copper
tube
Slanted Uneven Rough
90°
Pipe
2) Burrs removal
Reamer
■ Completely remove all burrs from the cut cross section
of pipe/tube.
■ Put the end of the copper tube/pipe to downward direction as you remove burrs in order to avoid to let burrs
drop in the tubing.
Point down
Flare nut
3) Putting nut on
Copper tube
■ Remove flare nuts attached to indoor and outdoor units,
than put them on pipe/tube having completed burr
removal.
(Not possible to put them on after flaring work)
4) Flaring work
Handle
■ Carry out flaring work using flaring tool as shown below.
Capacity Outside Diameter
(kW/h)
Gas
Liquid
5.3
Ø15.87 Ø6.35
7.0
Ø15.87 Ø6.35
8.2
Ø15.87 Ø9.53
10.6
Ø15.87 Ø9.53
12.3
Ø19.05 Ø9.53
14.1
Ø19.05 Ø9.53
17.6
Ø19.05 Ø12.7
"A"
Gas
0.8~1.0
0.8~1.0
0.8~1.0
0.8~1.0
1.0~1.3
1.0~1.3
1.0~1.3
Liquid
0~0.5
0~0.5
0.5~0.8
0.5~0.8
0.5~0.8
0.5~0.8
0.5~0.8
Bar
Bar
"A"
Cone
Copper pipe
Clamp handle
Inside is shining without scratches.
= Improper flaring =
5) Check
■ Compare the flared work with figure below.
■ If flare is noted to be defective, cut off the flared section
and do flaring work again.
Even length
all round
74
Red arrow mark
Smooth all round
Firmly hold copper tube in a bar(or die) as indicated
dimension in the table above.
Common Installation Process
Yoke
Inclined Surface Cracked Uneven
damaged
thickness
Preparation of Piping
Piping Connection
1. Form the piping according to its routing. Avoid bending and bending back the same piping point more
than three times. (This will result in hardening the
pipe.)
2. After deforming the piping, align centers of the union
fitting of the indoor unit and the piping, and tighten
them firmly with wrenches.
3. Connect pipe to the service valve or ball valve which
is located below the outdoor unit.
4. After completing the piping connection, be sure to
check if there is gas leakage in indoor and outdoor
connection.
Liquid side
Indoor
unit
Outdoor
unit
Flare connection
Gas side
Flare connection
Vacuum drying
After completing the piping connection, execute vacuum
drying for the connecting piping and the indoor unit.
The vacuum drying must be carried out using the service ports of both the liquid and gas side valves.
Model
5.3kW, 7.0kW
8.2kW
10.6kW
12.3kW
14.1kW
17.6kW
Liquid side piping
Ø6.35
Ø9.53
Ø9.53
Ø9.53
Ø9.53
Ø12.7
Gas side piping
Ø15.87
Ø15.87
Ø15.87
Ø19.05
Ø19.05
Ø19.05
CAUTION
Use two wrenches and tighten with regular torque.
Ø6.35mm
Ø9.52mm
Ø12.7mm
Ø15.88mm
Ø19.05mm
Flare nut fastening torque
1.8kg.m
Union
4.0kg.m
5.5kg.m
6.6kg.m
6.6kg.m
Common Installation Process
75
Preparation of Piping
HEAT INSULATION
1. Use the heat insulation material for the refrigerant piping which has an excellent heat-resistance (over
120°C).
Fastening band
(accessory)
2. Precautions in high humidity circumstance:
This air conditioner has been tested according to the
"KS Standard Conditions with Mist" and confirmed that
there is not any default. However, if it is operated for a
Refrigerant piping
long time in high humid atmosphere (dew point temperature: more than 23°C), water drops are liable to
Indoor unit
fall. In this case, add heat insulation material accordThermal insulator
ing to the following procedure:
(accessory)
• Heat insulation material to be prepared... Adiabatic
glass wool with thickness 10 to 20mm.
• Stick glass wool on all air conditioners that are located in ceiling atmosphere.
• In addition to the normal heat insulation (thickness: more than 8mm) for refrigerant piping (gas piping: thick
piping) and drain piping, add further 10mm to 30mm thickness material.
Common Installation Process
76
Indoor Unit Drain Pipe Work
Indoor unit drain pipe work
1) Drain pipe gradient and support
a) - The drain pipe must be fitted at a gradient of at least 1/100.
- The drain pipe should be as short as possible and free from airlocks.
Indoor unit
Gradient of least 1 / 100
(1cm / 1m)
b) - Suspension bolts should be used th support long stretches of drain pipe in order to ensure that a
gradient of 1/100 is maintained (PVC pipe should not be bent)
Spacing of supports for horizontal piping
Class
Norminal diameter
Spacing
Rigid PVC pipe
25~40mm
1.0m or less
c) - The length of pipe laid horizontally should be kept a minimum.
2) Drain trap
Fit any indoor unit whose drain pipe connection is subjected to negative pressure, with a drain trap.
a) Rig the drain trap shown in the drawing below.
Indoor unit
H
H
b) Provide one trap per unit. A single trap for converging units will prove ineffective.
c) Rig the trap to allow for future changing.
Plug
Indoor unit
Indoor unit
Plug
Common Installation Process
77
Indoor Unit Drain Pipe Work
3) Ground drain piping
a) It is standard work practice to make connections to the main pipe from above. The pipe down from the
combination should be as large as possible.
Face the vent pipe mouth downward to keep
foreign matter from penetrating he system
Face piping
downward
Vent pipe
b) The pipe work should be kept as short as possible and he number of indoor units per group kept to a
minimum.
4) Use of an auxiliary drain hose(flexible)
a) It the drain pan made of polystyrene foam is used then an auxiliary drain hose(flexible) is also essential a
flexible drain hose permits the drain socket and drain pipe to be connected without difficulty and prevents
any undue strain being placed on he drain pan.
Metal clamp
Auxiliary drain hose
Drain pan
Thermal insulation (drain pipe area)
Metal clamp
Thermal insulation(bend area)
❈ Important points
- The drain pipe should be at least equal in size to that of the indoor unit.
- The drain pipe is thermally insulated to prevent the formation of condensation inside the pipe.
- The drain up mechanism should be fitted before the indoor unit is installed and when the electricity has
been connected some water should be added to the drain pan and the drain pump check to see that it is
functioning correctly.
- Al connections should be secure. (Special care is needed with PVC pipe)
Common Installation Process
78
Installation of Drain Pump
Installation of drain pump
1) Safety First
• Cut off the power supply before installation and maintenance.
• Drain Pump Assy, Elbow and Hose must be installed at safe area where it is far away from the user.
• Drain Pump Assy must be installed at appointed location.
• All wiring and connections are for installation only.
1
2
2) Quantity
Quantity
1
1
1
2
10
1
1
Package contents
Drain Pump Assy(AC220~240V, 50/60Hz, 400cm3/min)
Elbow(ø32mm)
Hose
Tie Wrap
Screw
Rubber
Installation manual
3) Service Parts List
No.
Location No.
P/No.
Description
1
158590
5858A10001L
Pump Water
2
266012
6601A20001E
Switch Assy, Float
Remark
Common Installation Process
79
Installation of Drain Pump
4) How to install
1. Separate the filter.
2. Open the top cover.
3. Assemble the drain pump assy
- Drive 4 screws to the Channel.
- Drive 2 screws to the Side Panel.
4. Attach the elbow to the side panel.
5. Connect the hose and tie wrap.
6. Connect two lead wires to control box.
(One is float switch, the other is for power supply to
drain pump.)
7. Assemble the top cover.
Common Installation Process
80
Installation of Drain Pump
5) Attention
1. Possible drain-head height is up to 700mm. So, it
must be installed below 700mm.
1/50~1/100
1/50~1/100
2. Keep the drain hose downward up to 1/50~1/100
inclination.
Prevent any upward flow or reverse flow in any
part.
1/50~1/100
Drain Pipe
MAX 700mm
Drain Pump
3. 5mm or thicker formed thermal insulator is provided for the drain pipe.
Thermal insulator
(Local supply)
Drain pipe
(Local supply)
Unit
Elbow
Drain pump
4. Upward routing is not allowed.
5. Be sure to check the drain pump for normal operation and abnormal noise when electrical wiring is
complete.
Wall
Drain hose
Common Installation Process
81
Installation of Drain Pump
6) Wiring Diagram
7) Test operation
• Before test operation, be sure all information is understood completely, and follow the guideline of manual.
• Connect the power and turn on cooling mode.
• After compressor operating, it starts and compressor off, it stops 6 minutes later.
8) Troubleshowting
PROBLEM
CAUSE
REMEDY
No power supply
Check electrical connection and voltage of the power
supply.
Float switch doesn't
operate.
Check float switch.
Pumping air
Check pump connection for water contamination.
Vibrating against
surfaces.
Check the assembly state of drain pump to the unit.
Pump does not work.
Pump noisy
Common Installation Process
82
Optional Operation
Optional operation
1) Two Thermistor System
(1) Open the rear cover of the wired remote-controller to set the mode.
(2) Select one of three selectable modes as follows.
• Position 1:
The room temperature is controlled by the thermistor of the main body.
• Position 2:
The room themperature is controlled by the thermistor of the wired remote-controller, control the
temperature according to the position of wired remote-controller.
• Position 3:
The room temperature is controlled by lower temperature between the temperature of main body and of
remote-controller sensor.
(3) Move the slide switch to set position.
Room Temp. sensor
Slide switch for 2 Thermistor
TH
R14H OP3
SW TH
REMO
MAIN
2TH
OP2
REMO
MAIN
2TH
R12H
CO1H
OP1
R19H
R11H
OP5R16H
OP4
R15H
OP7
R18H
R17H
OP6
LO
STAND
C070
Position 2
Position 1
Position 3
R13H
R03S
HI
R04S
HIGH
R01S
R02S
SW
Slide switch for ceiling height
(4) Close the rear cover and check if it works normally.
CAUTION
• Select the position after counselling with a customer.
• In case of cooling mode, room temperature is controlled by the main body sensor.
• To control the room temperature by a wired remote controller, install controller(room temp. sensor) to
sense the temperature more accurately.
• Maunfactured in the position 3.
Common Installation Process
83
Optional Operation
2) Adjusting air volume to the height of ceiling
You can choose the RPM(or air volume) of indoor motor according to the height of ceiling to supply the
comfortable atmosphere to consumers.
Procedure
1. Choose the selectable position in the table after measuring the height of ceiling.
Ceiling height
more than 4.0m
3.2~4.0m
less than 3.2m
Mode of slide switch
High Ceiling
Standard
Low Ceiling
Change of air volume
Increasing
Decreasing
Remark
Maunfactured in standard mode
2. In the case of changing the height as "high" or "low", open the rear cover of the wired remote-controller.
3. Move the slide switch to the set position.
Slide switch for 2 Thermistor
TH
Low ceiling
Standard
(Default)
High Ceiling
Lo
R14H OP3
SW TH
STAND
R13H
OP2
REMO
MAIN
2TH
Hi
R12H
CO1H
OP1
R19H
R11H
OP7
R18H
R17H
OP6
C070
LO
STAND
R03S
HI
R04S
4. Close the rear cover and check if it works nomally.
Common Installation Process
84
SW
HIGH
R02S
Slide switch for ceiling height
R01S
OP5R16H
OP4
R15H
Optional Operation
3) Group Control(Optional Wiring)
• You can use a group control operation after connecting the brown and yellow wire of each air-conditioner.
• Remove the resistor "OP 7" in remote controller.
• It operates maximum 16 Units by only one Wired Remote Controller,
and each Unit starts sequentially to prevent overcurrent.
Wiring design
Main PCB
RED(12V)
YL(SIGNAL)
BR(GND)
Indoor Unit 1
Indoor Unit 2
Terminal(Local Supply)
Block
Connector
Terminal(Local Supply)
Block
Connector
RED(12V)
YL(SIGNAL)
BR(GND)
Main PCB
#1
YL(SIGNAL)
BR(GND)
YL(SIGNAL)
BR(GND)
Indoor Unit 16
Terminal(Local Supply)
Block
Connector
Main PCB
#2
....
....
AUTO SWING
OPERATION
SET TEMP
Room Temp
Operation unit
03
FAN SPEED
HI
MED
LO
Time
Timer
On Off
Set no. Time 01
ZONE
Slide Switch
SUB FUNCTION
AUTO Heater Preheat
JET Defrost Humidify
Filter Out door
1 2 3 4
Program set
05
07
09
11
13
15
17
19
21
23
Wired Remote Controller
YL(SIGNAL)
BR(GND)
YL(SIGNAL)
BR(GND)
Main PCB
#16
Connecting Cable(Local Supply)
OP7
Remote
Controller
PCB
Features
• Use Only One Wired Remote Controller with several air conditioners(max. 16 Units)
• Random starting to prevent overcurrent.
CAUTION
• Be careful not to exchange the color of wires.
• The maximum length of connecting wire should be below 200m(25Ω) on connecting each units.
• Use a wire more than 0.5mm2
Common Installation Process
85
P/No.: 3828A20280A
October, 2002
Printed in Korea