1
protecting your liquid assets
! IMPORTANT - READ THIS FIRST!
The EW8 Welder has been improved.
Some operating methods have been updated.
Please read this document carefully and
discard all older versions
Version 5 19/12/06
Hand-held Welder
Ha
EW8 - 230V
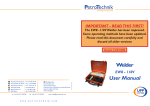
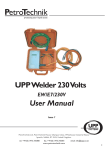
User Manual
+61 3 95 50 18 74
+55 11 3159 0909
+33 1 69 21 41 41
+46 8 767 86 34
+1 201 871 7300
+81 3 3297 7870
tel. +44 (0) 1473 243300
Headquarters
PetroTechnik Ltd
PetroTechnik House
Olympus Close, Whitehouse Industrial Estate,
Ipswich, Suffolk, IP1 5LN,
United Kingdom
fax. +44 (0) 1473 243301
email. [email protected]
w w w . p e t r o t e c h n i k . c o m
EW8-MAN-05-12/06
PetroTechnik Australia
PetroTechnik do Brasil
PetroTechnik France
PetroTeknik AB
PetroTechnik Inc.
P&D Japan
NOTE:
EW8 welding cables use special 7 pin connectors
NOT regular 4 pin connectors
Technical Details
Bridging cables
(x2)
EW8 Electrofusion
Welder
7 pin Secondary
welding cable
7 pin Primary welding
cable
7 Pin Fusion chamber
welding cable
Power cable
7 pin Weld cable
connector
Power on Indicator
UPP Stock Code Number
EW8-230V-TR
Operating Voltage
230v +/-15% (194 to 264v)
Operating Frequency
45 to 65Hz
Power Rating
1150vA
Protection Class
IP65
Operating Temperature
-15°C to +45°C
Shipping Dimensions
410mm wide x 230mm deep x 200mm high
Shipping Weight
3.25kg
Operating Requirements
Fault indicator
WARNING! This machine is for the electrofusion welding of UPP Systems
products only
Power Supply
ON / OFF Switch
(on side of unit)
Weld progress LED’s
This machine must be powered with
• A good quality 230V AC, 50Hz power supply with maximum tolerance of ± 15%
• A good quality generator 1500 VA minimum power rating
START / STOP
button
Extension Leads
The maximum input lead lengths are as follows:
Temperature sensor
1.5mm2 Cable : 25m
2.5mm2 Cable : 50m
4.0mm2 Cable : 75m
Note: All cable must be unwound from the reel to stop inductive heating effects
6
1
EW8-MAN-04-09/06
EW8-MAN-04-09/06
Fault Indicators
Application
When an error has occurred during the weld cycle that will have an effect on the
success of the joint, the red warning LED on the right side of the display will light
up. Also one of the “weld progress” lights will light up at the same time to show
what type of fault has occurred.
The EW8 is designed to automatically weld UPP Primary and Secondary
Containment electrofusion fittings.
Also, using the white 7A welding leads, the EW8 can be used to weld the UPP
Fusion chamber riser to the chamber base.
It can be used in ambient temperatures between -15°C and +45°C.
Only personnel fully trained in the use and installation of the UPP system should
use this equipment.
Error
Led
1
Fault
Indicated
Power supply
failure during
weld
Meaning
The power supply was off at
sometime during the weld
Solution
Check and rectify power supply
Check plug connection
Re-weld fitting only after it is
allowed to cool to ambient
temperature
2
Stop button
pressed during
weld
3
Supply frequency not between
Check and rectify generator
Power supply out 45 and 65 Hz,
output
of limits
or Voltage not between 194
Check mains supply
& 264V
4
Ambient
temperature out
of range
Temperature of the EW8 is
not between -15°c and +45°c
No output
current (open
circuit)
Loose connection to terminal
pin
Loose contact in the welding
circuit
Faulty fitting
Start button not depressed
for long enough
Make sure connectors are pushed
firmly on to terminal pins
Check welding cable connection
and continuity
Replace fitting
See operating sequence, step 5
6
Low output
current
Resistance value of fitting is
too high
Too many fittings connected
in series (Primary mode only)
Input voltage too low
Use only UPP electrofusion
fittings and correct welding cable
Check resistance codes on fittings
- do not exceed a sum total of 10
Check supply voltage
7
High output
current
Regulation error in
electronics
Switch off machine and switch on
again after 10 seconds. If problem
persists, return EW8 to supplier
5
Re-weld fitting only after it is
allowed to cool to ambient
temperature
Allow EW8 and fitting to cool in
the shade
Wait for ambient temperature to
return to range
The EW8 can be reset after a fault has been rectified by pressing and holding the
Start / Stop button for 3 seconds.
5
EW8-MAN-04-09/06
Main Features
UPP electrofusion fittings are welded using a constant current. The EW8
automatically recognises the fitting when connected and applies the correct
amount of energy for a successful weld.
The EW8 takes the ambient temperature into account when calculating the
energy required to weld correctly. It must therefore be allowed to reach ambient
temperature before use and must be at the same temperature as the fitting to be
welded. The temperature sensor is located in the mains cable clamp close to the
unit.
The EW8 works on standard alternating current and either a mains connection
or a generator can be used. Generators must have a rated output of at least 4kW
and power input must be between 195 and 264volts at 45 to 65Hz.
The EW8 has an on/off button, a weld start button and an LED display showing
the weld progress. The LEDs can also show any fault conditions that may affect
the weld.
Safety
The EW8 is designed for usage on construction sites and meets applicable
European and International safety standards.
The machine should be handled with the care usually given to electrical
equipment, especially during transport.
The machine must only be used outside of hazardous areas (zones 0, 1 and 2).
Each time it is used, check the condition of the machine, particularly the mains
power cable. If any damage is discovered, contact the supplier immediately and do
not use the machine.
Check the state of the welding cables before use and replace them if there is any
doubt about their condition.
Always check that the power source is within the parameters shown above
before using the EW8.
Never lift or pull the machine by its power cable or the welding cables. Never
disconnect welding cables by pulling the cable; always pull off the connectors.
EW8-MAN-04-09/06
2
Liability Restrictions
•
•
•
•
•
•
•
All liabilities of the supplier are invalidated in the following cases:
The EW8 is used outside the indicated application area
Non-UPP fittings or pipe are used
The operator has not been trained to use the EW8 or the UPP system
Operating instructions have not been observed
Unauthorised repairs or maintenance have been carried out
The EW8 has been used outside of its technical specification
Safety instructions have not been observed
Multiple Welds
•
•
In Primary mode the EW8 can simultaneously weld up to three UPP fittings,
provided that:
The sum of the resistance values (circled number on UPP fittings) does not
exceed 10
The UPP fittings are connected to the EW8 in series using the bridging leads
provided (see photos below)
Using the EW8
Ensure that the machine is positioned outside hazardous zones 0, 1 and 2
Allow the machine and fittings to reach the ambient temperature of the site.
Keep the machine out of direct sunlight and free of any obstruction.
Make sure fittings and pipe have been prepared in accordance with UPP
Installation instructions.
Step
Action
Information on Display
1
Connect the required welding lead to
the EW8 Welder
PRIMARY fittings=RED lead
SECONDARY fittings=GREEN lead
None
2
Connect welding lead to the UPP
fusion fitting(s), making sure connectors are firmly pushed onto pins
None
3
Connect the EW8 Welder to a 230v
power supply
None
4
Switch ON
All LEDs light in sequence, then
green Power LED remains on
5
Press orange START button until first
weld light illuminates
First weld light comes on then
successive LEDs light up until
green 100% LED is lit, showing
weld is complete
The weld cycle can be stopped at any time by pressing the START/STOP button.
This will generate an error code and you must wait for the fitting to cool before
attempting to continue.
6
Disconnect welding lead from fitting
100% LED and Power LED
remains on
If you have any doubt about a welded joint, UPP fittings can be welded again
provided they are left to cool to ambient temperature.
7
ALWAYS Reset for next weld by
holding START button for 3 seconds
All LEDs light in sequence, then
green power LED remains on
NEVER RE-WELD A FITTING THAT IS STILL WARM
You can ensure that you have connected the fittings correctly and that the welds
are successful by checking that all of the connected fittings get warm and that all
of the indicator pins are exposed at the end of the welding time.
It is not possible to do multiple welds on Secondary fittings. These can
be identified by their smaller terminal pins and require the use of the green
welding cables.
Other Useful Tips
Switch off the machine during breaks and at the end of the job.
3
4
EW8-MAN-04-09/06
EW8-MAN-04-09/06