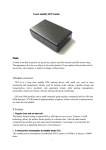
Download Xi-Sign 4400 User Manual
Transcript
XIRING@DOC00131-A
Xi-Sign 4400
User Manual
2
3
Table of contents
1
Opening the box __________________________________ 4
3
Description of the reader ___________________________ 7
2
Installing the batteries _____________________________ 5
3.1
Front of the Card-Reader___________________________7
3.3
Left and Right side of the Card-Reader ______________13
3.2
4
5
6
3.4
Top side of the Card-Reader _______________________13
Back of the Card-Reader __________________________14
Audio messages__________________________________ 15
The soft case ____________________________________ 15
Using the Card-Reader____________________________ 16
6.1
Function selection ________________________________16
6.3
Respond ________________________________________18
6.2
6.4
6.5
6.6
6.7
Identify _________________________________________17
Sign ____________________________________________20
Menu___________________________________________22
Battery level detector _____________________________23
Power __________________________________________24
4
The Xi-Sign 4400 is an authentication solution with
audio output enabling visually impaired or partially
sighted users to hear the information that is
displayed on the reader.
1 Opening the box
The solution comes in a box containing the following
parts:
• The Xi-Sign 4400 reader.
• A soft holder for the reader storage.
• An earphone with a thumbwheel volume
control on the wire.
• A 2.5 mm to 3.5 mm jack adaptor
• 2 x AAA-type standard LR03 batteries for
insertion in the reader.
5
2 Installing the batteries
The Xi-Sign 4400 is powered by 2 standard LR03
batteries. To insert the batteries for the first time or
to change them, proceed as follows.
• Remove the plastic film around the batteries.
• Take the device in your left hand, and use your
right hand to press with thumb and index finger
on the 2 catches on each side of the device to
slide the cover downwards. The battery
compartment then appears on both sides.
• At the bottom of each battery compartment is a
spring which is where the battery’s negative
terminal, the flat end of the battery, will go.
There is a button at the positive end of the
battery. You should insert each battery with its
flat, negative end downwards, pressing on the
spring so that it fits in easily into the
compartment.
6
• Replace the cover by sliding it upwards till it
snaps into place.
Notes
Never use a new battery and a used battery at the
same time.
Alkaline batteries are recommended for optimal
lifetime.
7
3 Description of the reader
To follow this description, you will have to place the
reader flat in front of you, screen upwards.
3.1 Front of the Card-Reader
The Card-Reader is approximately 127 mm by 78
mm by 18 mm. It has a display located at the front
towards the top, which is approximately 60 mm by
30 mm.
Underneath the display is the keypad.
The keypad consists of two smaller round buttons,
located underneath the display on the left and right
hand side, and 17 square buttons in a block.
8
9
3.1.1 The small round buttons
The left button with the white On/Off
symbol on it is the On/Off button.
The On/Off button is used to power on
or off the unit.
The right button with the white “R”
letter on it is the Repeat button.
The Repeat button is used to repeat
the reader answer.
3.1.2 The numeric keypad and function keys
The keys are from left to right.
• First row.
o "Identify" button.
o "Respond" button.
o "Sign" button.
o "Menu" button.
10
• Second row.
o Button number "1".
o Button "2".
o Button "3".
o "Cancel" button.
• Third row.
o Button "4".
o Button "5" with a raised dot to facilitate
identification.
o Button "6".
o "Clear" button.
• Fourth row.
o Button "7".
o Button "8".
o Button "9".
o "OK" button.
• Fifth row.
o Button "0".
11
3.1.2.1 Function keys (right column, from top to bottom)
1) Menu button: Black button with white "M"
letter on it. This button is used to manage
the contrast, to display the A T C
(Application Transaction Counter), and to
display the software version.
2) Cancel button: Red button with black "C"
letter on it. This button is used to clear the
entire entry field or to go back to the
previous menu/function.
3) Clear button: Yellow button with black
“CL” text on it. This button is used to delete
a single character (equivalent to a
backspace).
4) OK button: Green button with black “OK”
text on it. This button is used to validate
data entry.
12
3.1.2.2 Function keys (top row, from left to right)
1) Identify button: Blue button with white “key hole”
icon on it, and “Identify” printed above. This button is
used to launch the Identify function.
2) Respond button: Blue button with white “opposite
arrows” icon on it, and “Respond” printed above.
This button is used to launch the Respond function.
3) Sign button: Blue button with white “tick” icon on
it, and “Sign” printed above. This button is used to
launch the Sign function.
4) Menu button: please refer to description in
3.1.2.1.
13
3.2 Top side of the Card-Reader
On the top edge you will see the slot for the smart
card.
To use the card interface properly, insert the smart
card, with the chip facing you and towards the
bottom. When you insert the card correctly you will
feel it fit into place with around 50 mm protruding.
3.3 Left and Right side of the Card-Reader
On the top section of the left side edge, about 40
mm from the top is a round audio-jack connector to
which the earphone is plugged.
A mono earphone with a thumbwheel volume control
is provided and can be plugged in here.
Connection of another external earphone is possible
through a standard 2.5 mm jack plug, or through the
2.5 mm to 3.5 mm jack adaptor provided with the
reader.
On the right hand side near the top is the strap hole.
14
On the middle section of the side edges you will find
the catches for opening and closing the cover of the
battery compartment. The catches are marked with
3 raised lines which you simply press simultaneously
to open the cover.
Refer to chapter 2 to change the batteries.
3.4 Back of the Card-Reader
The battery cover is located at the back of the CardReader, also covering the sides and bottom.
15
4 Audio messages
Audio messages are the same as the messages on
the display and you will hear them automatically
through the earphone when plugged in.
During PIN entry, the digits are rendered as beeps
(the same beep for all the digits).
Press the "Repeat" button (small round button on
the right hand side) to replay reader answers.
5 The soft case
The soft case opens on the top thanks to a double
zip.
The soft case has been designed for reader and
earphone storage.
16
6 Using the Card-Reader
To use the card interface properly, insert the smart
card, with the chip facing you and towards the
bottom. When you insert the card correctly you will
feel it fit into place with around 50 mm protruding.
6.1 Function selection
Inserting the card automatically activates the CardReader and the display will show the following
message:
S
F
E
U
L
N
E
C
C
T
T
I
O
N
The Card-Reader is waiting for function selection.
Most of the time, you will be prompted during your
internet session to press “Identify”, “Respond” or
“Sign” depending on the application script.
17
6.2 Identify
This function allows generating a One-TimePassword (OTP).
Press the “Identify” button, and you will see the
following message on screen:
E
_
N
T
E
R
P
I
N
Now type your card PIN into the Card-Reader using
the keypad, followed by the "OK" button.
If the PIN is correct a confirmation message will
appear:
P
I
N
C
O
R
R
E
C
T
Then the Card-Reader will display a unique number,
like:
1
2
3
4
C
5
O
6
D
7
E
8
>
18
If you need to hear the code again, press the
"Repeat" button.
6.3 Respond
This function allows generating a Response to a
given Challenge.
Press the “Respond” button, and you will see the
following message on screen:
E
_
N
T
E
R
P
I
N
Now type your card PIN into the Card-Reader using
the keypad, followed by the "OK" button.
If the PIN is correct a confirmation message will
appear:
P
I
N
C
O
R
R
E
C
T
Then the Card-Reader will ask you to type the
Challenge (given by the web page or phone vocal
server):
19
E
N
N
U
T
M
E
B
R
E
R
:
Now type the Challenge into the Card-Reader using
the keypad, followed by the "OK" button.
Once you have started typing the Challenge, display
changes to:
N
U
M
B
E
R
:
Once the Challenge is entered, the Card-Reader will
display the Response, like:
1
2
3
4
C
5
O
6
D
7
E
8
>
If you need to hear the code again, press the
"Repeat" button.
20
6.4 Sign
This function allows generating a signature for an
internet transaction.
Press the “Sign” button, and you will see the
following message on screen:
E
_
N
T
E
R
P
I
N
Now type your card PIN into the Card-Reader using
the keypad, followed by the "OK" button.
If the PIN is correct a confirmation message will
appear:
P
I
N
C
O
R
R
E
C
T
Then the Card-Reader will ask you to type the
transaction data:
E
N
T
E
R
R
E
F
:
21
Now type the Reference into the Card-Reader using
the keypad, followed by the "OK" button.
Then, the Card-Reader will display:
E
A
N
M
T
O
E
U
R
N
T
:
Now type the full Amount, with cents but without the
decimal point, into the Card-Reader using the
keypad, followed by the "OK" button.
Once you have started typing the Amount, display
changes to:
A
M
O
U
N
T
:
0
.
0
0
Once the amount is entered, the Card-Reader will
display the Signature, like:
1
2
3
4
C
5
O
6
D
7
E
8
>
22
If you need to hear the code again, press the
"Repeat" button.
6.5 Menu
Menu button is used to manage the contrast, to
display the A T C (Application Transaction Counter),
and to display the software version.
• Press the "M" button to display the contrast
management screen:
o Press "1" to decrease the contrast.
o Press "3" to increase the contrast.
o Press "OK" button for the Card-Reader
to memorize the contrast level.
o Press "Cancel" button to cancel and
restore the previous contrast setting.
• Press the "M" button again to display the A T
C (Application Transaction Counter). For
example "Counter 65535".
• Press the "M" button again to display the
software version number. For example
"Software VER 0875.11".
23
• Press the "M" button again to display the
contrast management screen again.
At any time during the Menu function, if the
cardholder presses the "Cancel" button, the CardReader returns to the function selection menu.
6.6 Battery level detector
A message "battery low" is displayed when the
batteries reach an alarm level: the user is invited to
change the batteries. The reader can still work for a
few additional sessions.
A second message "no power" is displayed if the
batteries can not deliver enough power and the
session is stopped until the batteries are changed. In
this case all keys are disabled except power On/Off.
24
6.7 Power
After 40 seconds of inactivity (no key depressed) the
reader powers off.


