1
6.4 GPS Cal:
GPS calibration lets you calibrate a wheel probe, gearbox probe, speedo cable or
electronics probe (DSI) via the GPS. It is important that the correct units for
calibration i.e. kilometres or miles are selected, as if they are not correct the
calibration will not be correct.
The GPS calibration menu will only be enabled once the GPS has a valid satellite fix,
and is receiving position data. We recommend that you turn the tripmeter on for one
or two minutes before calibration, this will enable a full satellite fix.
How to use GPS calibration:
1.
2.
3.
4.
5.
6.
Press MENU.
Select CALIBRATION, then press ENTER.
Select GPS cal then press ENTER.
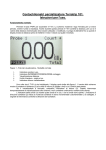
The GPS calibration screen shows ‘00000’.
Press ENTER and start to drive.
The display will show ‘Now drive to set distance’ briefly and show an
animated arrow running across the screen. If there are no pulses being
received from the probe, or the incorrect probe is selected the figure will
remain at 00000. If this is the case, you need to exit auto calibration and
select a different probe using KEY 8 (Probe).
7. After driving approximately 1 km/mi press ENTER at the end of the
driven distance.
8. The display will now show the calibration figure that has been calculated
from the driven distance. Press ENTER to accept and set the calibration to
the shown figure or MENU to exit, and leave calibration at the previous
value.
7.0 Display Menu:
The display menu contains brightness and contrast settings for the internal screen and
the Remote Display, if fitted.
7.1 Screen Brightness:
Use the up and down keys (/\ and \/) to set the screen brightness, and ENTER to set.
MENU exits without setting the screen brightness and the previous set level will
restore.
Page 8 of 20