1
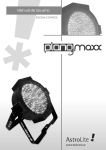
1
SAXON
USER MANUAL
2
INTRODUC TION
Thank you for choosing this Cue Lighting item. Before you start please make sure that there is
no damage caused by transportation. Should there be any, consult your dealer and do not
use the device.
SAFETY INSTRUC TIONS
C AUTIO N!
♦ Please keep this User Manual for future consultation. If you sell the unit
to another user, be sure that they also receive this instruction booklet.
♦ Unp ack and check carefully there is no transp ortation dam age before
using the unit.
♦ Before op erating, ensure that the voltage and freq uency of p ow er
sup p ly m atch the p ow er req uirem ents of the unit.
♦ It’s im p ortant to ground the yellow /green conductor to earth in order to
avoid electric shock.
♦ The unit is for indoor use only. Use only in a dry location.
♦ The unit m ust be installed in a location w ith adeq uate ventilation, at least
50 cm from adjacent surfaces. Be sure that no ventilation slots are
blocked.
♦ Disconnect m ains p ow er before fuse/lam p rep lacem ent or servicing.
♦ Rep lace fuse/lam p only w ith the sam e typ e.
♦ Make sure there is no flam m able m aterials close to the unit w hile
op erating as it is fire hazard.
♦ Use safety cable w hen flying this unit.
♦ Maxim um am bient tem p erature is TA: 40 ℃. Don’t op erate it w here the
tem perature is higher than this.
♦ In the event of serious op erating p roblem , stop using the unit
im m ediately. Never try to rep air the unit by yourself. Rep airs carried out
by unskilled p eop le can lead to dam age or m alfunction. Please contact
the nearest authorized technical assistance centre.
Alw ays use the sam e typ e sp are p arts.
Please read carefully the instructions, w hich includes im p ortant
inform ation about the installation, usage and m aintenance.
♦ Don’t connect the device to any dim m er p ack.
♦ Do not touch any w ire during op eration as high voltage m ight cause
electric shock
Features:
Four operation modes: DMX 512 protocol, auto and master/slave and sound active operating
3
in various modes to form different led effects
DMX-512 connection / connection betw een fixtures
XLR-connection:
If you are using controllers with this light, you can connect the DMX-output of the controller
directly with the DMX-input of the first fixture in the DMX-chain. If you wish to connect
DMX-controllers with other XLR-outputs, you need to use adapter-cables.
Building a serial DMX-chain:
Connect the DMX-output of the first fixture in the DMX-chain with the DMX-input of the next
fixture. Always connect one output with the input of the next fixture until all fixtures are
connected.
O p tional: At the last fixture, the DMX-cable has to be terminated with a terminator. Solder a
120 resistor between Signal (–) and Signal (+) into a 3-pin XLR-plug and plug it in the DMX-output
of the last fixture.
Connection w ith the m ains
Connect the device to the mains with the enclosed power supply cable.
OPERATION
1. DMX 512 protocol
Addressing
The LED DISPLAY on the rear side of the base allows you to assign the DMX fixture address,
which is defined as the first channel from which the item will respond to the controller. If you
set, for example, the address to channel 7, the item will use channel 7 to 14 for control. Please,
be sure that you don’t have any overlapping channels in order to control each item correctly
and independently from any other fixture on the DMX data link. If two, three or more items are
addressed similarly, they will work similarly. At DMX mode you can choose the address from 1
to 512.After you connect the item to the mains, the item starts running. When the item finishes
resetting, d-OO1 will flash in the led display you can then set the desired DMX address by
pressing the UP or DOWN buttons.
Eight DMX channels:
C hannel 1:m otor running
0-190
Motor running directions adjustments
191-255
Motor running
4
C hannel 2:red from small to big brightness(dimmig)
C hannel 3: green from small to big brightness(dimmig)
C hannel 4: blue from small to big brightness(dimmig)
C hannel 5: white from small to big brightness(dimmig)
C hannel 6:master dimmer from small to full brightness
C hannel 7:increasing brightness, then decreasing brightness,
colors follow ing one by one
0-36
CH1/2/3/4/5/6 working
37-73
four colors increasing brightness, then decreasing brightness
74-100
four colors changing
111-147
mixed colors increasing brightness, then decreasing brightness
148-184
mixed colors changing
185-255
strobe from slow to fast, then from fast to slow when ch2/3/4/5/6/ working
C hannel 8: running sp eed adjustm ents
0-244
speed from slow to fast when ch7 at 37-184, the speed adjustment
works
255
sound active
2 . Sound active
Press the MODE button, till BEAT shows in the led display, confirm by pressing ENTER, then the
item will run to the beat of music.
3. Auto
Press the MODE button, the following functions can be achieved by pressing ENTER:
PO-0: run the preset shows: P0-P4 means 5 preset shows, -0 to -9 does color changing
10 speeds;
CF-0: increasing brightness, then decreasing brightness, CF-0 to CF-9 means 10 running
modes;
CC-O: color changes, CC-0 to CC-9 means 10 running modes;
CS00: color selections, CS00 to CS99 means 100 colors;
4. Synchronization & m aster /slave m ode
Take one item and set the item at sound active, or auto as above, then get other items and
press the button MODE, till SUB shows in the led display, confirm by the button of ENTER, then
connect the items to the item at auto/sound active already set by DMX cables, disconnect the
items from DMX controller, the items will wok simultaneously, the item at auto/sound active as
master, the others as slave.
LED DISPLAY:
***D001: DMX setting
***BEAT : sound active
5
***PO-O: preset shows
***PO-0 to PO-9: color changing speed modes
***CF-O: increasing brightness, then decreasing brightness
***CC-O: color changing
***CS00: color selections
***SUB: slave mode
TEC HNIC AL SPEC IFIC ATIONS
Power supply: 90-240V AC 50/60Hz
Power consumption: MAX. 60W
Fuse: 250V 1.0A
DMX-control-channels: 8
DMX-512-connection: 3-pin XLR
Number of LED: 4 MCD LEDs
Flash-rate: max. 10 Hz
ITEM DIMENSION:240*230*240MM
ITEM WEIGHT:3.0KGS
Please note: Inform ation is subject to change w ithout p rior notice.