1
CMOR
Professional Dome
User Manual
Product ranges covered by this manual
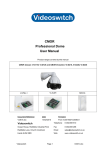
CMOR-D18 & CMOR-D26
Professional Dome
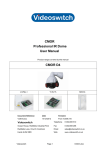
CMOR-ALM-16
CMOR-PSU-1
Options
Document Reference
Date
Firmware
Vc601e.doc
18/02/2009
From Vc001A82
Videoswitch
Telephone
01252-851510
Ocean House, Redfields Industrial Park
Fax
01252-851296
Redfields Lane, Church Crookham
Email
[email protected]
Hants GU52 0RD
Web
www.videoswitch.co.uk
Page 1
Configuring the Dome....................................................4
1.1
Removing the DIP switch cover .............................................................................................4
1.2
Setting the dome address ......................................................................................................5
1.3
Setting the dome protocol ....................................................................................................10
1.4
Setting the baud rate............................................................................................................10
1.5
Setting the RS485 termination .............................................................................................11
1.6
Replacing the DIP switch cover ...........................................................................................11
2
Installing the Dome ................................................13
2.1
Fixing the mounting ring.......................................................................................................13
2.2
Securing the bracket ............................................................................................................14
2.3
Attaching the CMOR Dome .................................................................................................15
2.4
Attaching the umbilical cable ...............................................................................................15
2.5
Fitting the bracket cover.......................................................................................................16
3
Installing Power Supply .........................................17
3.1
Fixing power supply to wall ..................................................................................................17
3.2
Power Supply Connections ..................................................................................................18
3.2.1
Mains Input ......................................................................................................................18
3.2.2
Connections to dome .......................................................................................................18
3.2.3
3.3
Connections to DVR ........................................................................................................19
Alarm Module Connections ..................................................................................................20
3.3.1
Alarm Inputs .....................................................................................................................20
3.3.2
Alarm Grounds .................................................................................................................20
3.3.3
Relay Connections...........................................................................................................20
4
Configuring the Alarm Module ..............................21
4.1
Normally Open or Closed Alarm Inputs ...............................................................................21
4.2
RS485 Termination ..............................................................................................................21
4.3
Setting the alarm module protocol .......................................................................................21
4.4
Setting the alarm module baud rate.....................................................................................22
5
Menus ......................................................................23
5.1
Menu Navigation ..................................................................................................................23
5.1.1
Entering Menu..................................................................................................................23
5.1.2
Moving cursor ..................................................................................................................23
5.1.3
Select ...............................................................................................................................23
5.1.4
Cancel ..............................................................................................................................23
5.1.5
Exit Menu .........................................................................................................................24
5.2
Login ....................................................................................................................................24
5.3
Setup....................................................................................................................................25
5.3.1
Enter date/time.................................................................................................................25
5.3.2
Daylight Saving ................................................................................................................25
5.3.3
Language .........................................................................................................................25
5.3.4
Display .............................................................................................................................25
5.3.5
Passwords .......................................................................................................................25
5.3.6
Datum Check ...................................................................................................................26
5.3.7
Install date/time................................................................................................................26
5.3.8
5.4
Clear Settings ..................................................................................................................26
IR..........................................................................................................................................27
Page 2
5.4.1
IR Mode ...........................................................................................................................27
5.4.2
IR ON level.......................................................................................................................27
5.4.3
IR Off level hysteretic.......................................................................................................27
5.4.4
Auto IR delay ...................................................................................................................27
5.4.5
IR ON times .....................................................................................................................27
5.4.6
5.5
IR Power ..........................................................................................................................27
Camera ................................................................................................................................28
5.5.1
Main camera settings.......................................................................................................28
5.5.2
Context Camera...............................................................................................................29
5.5.3
5.6
Invert Image .....................................................................................................................29
Keyboard..............................................................................................................................29
5.6.1
Restore Mode (Preset & Tours) .......................................................................................29
5.6.2
Restore delay (Preset & Tours) .......................................................................................29
5.6.3
Joystick/Speed Curve ......................................................................................................29
5.6.4
Zoom Ratio ......................................................................................................................30
5.6.5
Max Joystick Speed .........................................................................................................30
5.6.6
Pan Limits ........................................................................................................................30
5.6.7
5.7
Iris key usage...................................................................................................................30
Presets .................................................................................................................................30
5.7.1
Set Preset ........................................................................................................................30
5.7.2
Preset Titles .....................................................................................................................30
5.7.3
Preset Speed ...................................................................................................................31
5.8
Tours ....................................................................................................................................31
5.9
Privacy .................................................................................................................................32
5.10
Alarms ..................................................................................................................................32
5.10.1
New alarm dwell...............................................................................................................32
5.10.2
Alarm cycle time...............................................................................................................32
6
Technical Data ........................................................33
6.1
CMOR-D18 Dome................................................................................................................33
6.1.1
Camera ............................................................................................................................33
6.1.2
IR Illumination ..................................................................................................................33
6.1.3
Power requirements.........................................................................................................33
6.1.4
6.2
Physical and Environmental.............................................................................................33
CMOR-PSU-1 Power Supply ...............................................................................................33
6.2.1
Power requirements.........................................................................................................33
6.2.2
Physical and Environmental.............................................................................................33
6.2.3
6.3
Safety...............................................................................................................................33
CMOR-ALM-16 Alarm Module .............................................................................................34
6.3.1
Alarm Inputs/Outputs .......................................................................................................34
6.3.2
6.4
Physical and Environmental.............................................................................................34
Brackets and Cables ............................................................................................................34
6.4.1
Wall bracket .....................................................................................................................34
6.4.2
Corner adaptor.................................................................................................................34
6.4.3
Swan-neck bracket ..........................................................................................................34
6.4.4
Pendant bracket...............................................................................................................34
6.4.5
6.5
Cables ..............................................................................................................................34
CE Marking ..........................................................................................................................34
Page 3
Configuring the Dome
The CMOR dome is supplied with DIP switches set for the following configuration:
Twisted pair:
Address:
Protocol:
Videoswitch VXP4
Up-the-coax:
Dome
Address
1
1
Baud rate:
9600 baud,
Termination:
ON
BBV compatible
1
8-way DIP switch
2 3 4 5 6 7
8
1
0
0
0
0
0
0
0
Protocol, baud, termination
6-way DIP switch
1 2 3 4 5 6
VXP4&Coax/9600 baud/On
0
0
0
0
0
1
1.1 Removing the DIP switch cover
If you need to change DIP switch settings, you may do so either before or after the dome is
mounted on its bracket, whichever is more convenient.
•
Using a large flat bladed screwdriver, unscrew the DIP switch access screw (A) on
the rear of the dome by turning counter-clockwise
Page 4
1.2 Setting the dome address
•
Set the 8-way switch (A) to the required address (camera number) of the dome as
per the table below. “0” represents OFF (down) and “1” represents ON (up).
Dome
Address
1
8-way DIP switch
2 3 4 5 6 7
8
Dome
Address
8-way DIP switch
1 2 3 4 5 6
7
8
not used
1
2
3
4
5
6
7
8
9
10
11
12
13
14
15
0
1
0
1
0
1
0
1
0
1
0
1
0
1
0
1
0
0
1
1
0
0
1
1
0
0
1
1
0
0
1
1
0
0
0
0
0
0
0
0
0
0
0
0
0
0
0
0
16
17
18
19
20
21
22
23
24
25
26
27
28
29
30
31
0
1
0
1
0
1
0
1
0
1
0
1
0
1
0
1
0
0
0
0
0
0
0
0
0
0
0
0
0
0
0
0
0
0
0
0
0
0
0
0
0
0
0
0
0
0
0
0
Page 5
0
0
0
0
1
1
1
1
0
0
0
0
1
1
1
1
0
0
0
0
0
0
0
0
1
1
1
1
1
1
1
1
0
0
0
0
0
0
0
0
0
0
0
0
0
0
0
0
0
0
0
0
0
0
0
0
0
0
0
0
0
0
0
0
0
0
0
0
0
0
0
0
0
0
0
0
0
0
0
0
0
0
1
1
0
0
1
1
0
0
1
1
0
0
1
1
0
0
0
0
1
1
1
1
0
0
0
0
1
1
1
1
0
0
0
0
0
0
0
0
1
1
1
1
1
1
1
1
1
1
1
1
1
1
1
1
1
1
1
1
1
1
1
1
0
0
0
0
0
0
0
0
0
0
0
0
0
0
0
0
Dome
Address
1
8-way DIP switch
2 3 4 5 6 7
8
Dome
Address
8-way DIP switch
1 2 3 4 5 6
7
8
32
33
34
35
36
37
38
39
40
41
42
43
44
45
46
47
0
1
0
1
0
1
0
1
0
1
0
1
0
1
0
1
0
0
1
1
0
0
1
1
0
0
1
1
0
0
1
1
0
0
0
0
0
0
0
0
0
0
0
0
0
0
0
0
48
49
50
51
52
53
54
55
56
57
58
59
60
61
62
63
0
1
0
1
0
1
0
1
0
1
0
1
0
1
0
1
1
1
1
1
1
1
1
1
1
1
1
1
1
1
1
1
0
0
0
0
0
0
0
0
0
0
0
0
0
0
0
0
0
0
0
0
0
0
0
0
0
0
0
0
0
0
0
0
Dome
Address
1
8-way DIP switch
2 3 4 5 6 7
8
Dome
Address
8-way DIP switch
1 2 3 4 5 6
7
8
64
65
66
67
68
69
70
71
72
73
74
75
76
77
78
79
0
1
0
1
0
1
0
1
0
1
0
1
0
1
0
1
0
0
1
1
0
0
1
1
0
0
1
1
0
0
1
1
0
0
0
0
0
0
0
0
0
0
0
0
0
0
0
0
80
81
82
83
84
85
86
87
88
89
90
91
92
93
94
95
0
1
0
1
0
1
0
1
0
1
0
1
0
1
0
1
1
1
1
1
1
1
1
1
1
1
1
1
1
1
1
1
0
0
0
0
0
0
0
0
0
0
0
0
0
0
0
0
Page 6
0
0
0
0
1
1
1
1
0
0
0
0
1
1
1
1
0
0
0
0
1
1
1
1
0
0
0
0
1
1
1
1
0
0
0
0
0
0
0
0
1
1
1
1
1
1
1
1
0
0
0
0
0
0
0
0
1
1
1
1
1
1
1
1
0
0
0
0
0
0
0
0
0
0
0
0
0
0
0
0
0
0
0
0
0
0
0
0
0
0
0
0
0
0
0
0
1
1
1
1
1
1
1
1
1
1
1
1
1
1
1
1
0
0
0
0
0
0
0
0
0
0
0
0
0
0
0
0
0
0
0
0
0
0
0
0
0
0
0
0
0
0
0
0
1
1
1
1
1
1
1
1
1
1
1
1
1
1
1
1
0
0
1
1
0
0
1
1
0
0
1
1
0
0
1
1
0
0
1
1
0
0
1
1
0
0
1
1
0
0
1
1
0
0
0
0
1
1
1
1
0
0
0
0
1
1
1
1
0
0
0
0
1
1
1
1
0
0
0
0
1
1
1
1
0
0
0
0
0
0
0
0
1
1
1
1
1
1
1
1
0
0
0
0
0
0
0
0
1
1
1
1
1
1
1
1
1
1
1
1
1
1
1
1
1
1
1
1
1
1
1
1
1
1
1
1
1
1
1
1
1
1
1
1
1
1
1
1
0
0
0
0
0
0
0
0
0
0
0
0
0
0
0
0
Dome
Address
1
8-way DIP switch
2 3 4 5 6 7
8
Dome
Address
8-way DIP switch
1 2 3 4 5 6
7
8
96
97
98
99
100
101
102
103
104
105
106
107
108
109
110
111
0
1
0
1
0
1
0
1
0
1
0
1
0
1
0
1
0
0
1
1
0
0
1
1
0
0
1
1
0
0
1
1
0
0
0
0
0
0
0
0
0
0
0
0
0
0
0
0
112
113
114
115
116
117
118
119
120
121
122
123
124
125
126
127
0
1
0
1
0
1
0
1
0
1
0
1
0
1
0
1
1
1
1
1
1
1
1
1
1
1
1
1
1
1
1
1
1
1
1
1
1
1
1
1
1
1
1
1
1
1
1
1
0
0
0
0
0
0
0
0
0
0
0
0
0
0
0
0
Dome
Address
1
8-way DIP switch
2 3 4 5 6 7
8
Dome
Address
8-way DIP switch
1 2 3 4 5 6
7
8
128
129
130
131
132
133
134
135
136
137
138
139
140
141
142
143
0
1
0
1
0
1
0
1
0
1
0
1
0
1
0
1
0
0
1
1
0
0
1
1
0
0
1
1
0
0
1
1
1
1
1
1
1
1
1
1
1
1
1
1
1
1
1
1
144
145
146
147
148
149
150
151
152
153
154
155
156
157
158
159
0
1
0
1
0
1
0
1
0
1
0
1
0
1
0
1
0
0
0
0
0
0
0
0
0
0
0
0
0
0
0
0
1
1
1
1
1
1
1
1
1
1
1
1
1
1
1
1
Page 7
0
0
0
0
1
1
1
1
0
0
0
0
1
1
1
1
0
0
0
0
1
1
1
1
0
0
0
0
1
1
1
1
0
0
0
0
0
0
0
0
1
1
1
1
1
1
1
1
0
0
0
0
0
0
0
0
1
1
1
1
1
1
1
1
0
0
0
0
0
0
0
0
0
0
0
0
0
0
0
0
0
0
0
0
0
0
0
0
0
0
0
0
0
0
0
0
1
1
1
1
1
1
1
1
1
1
1
1
1
1
1
1
0
0
0
0
0
0
0
0
0
0
0
0
0
0
0
0
1
1
1
1
1
1
1
1
1
1
1
1
1
1
1
1
0
0
0
0
0
0
0
0
0
0
0
0
0
0
0
0
0
0
1
1
0
0
1
1
0
0
1
1
0
0
1
1
0
0
1
1
0
0
1
1
0
0
1
1
0
0
1
1
0
0
0
0
1
1
1
1
0
0
0
0
1
1
1
1
0
0
0
0
1
1
1
1
0
0
0
0
1
1
1
1
0
0
0
0
0
0
0
0
1
1
1
1
1
1
1
1
0
0
0
0
0
0
0
0
1
1
1
1
1
1
1
1
1
1
1
1
1
1
1
1
1
1
1
1
1
1
1
1
1
1
1
1
1
1
1
1
1
1
1
1
1
1
1
1
0
0
0
0
0
0
0
0
0
0
0
0
0
0
0
0
Dome
Address
1
8-way DIP switch
2 3 4 5 6 7
8
Dome
Address
8-way DIP switch
1 2 3 4 5 6
7
8
160
161
162
163
164
165
166
167
168
169
170
171
172
173
174
175
0
1
0
1
0
1
0
1
0
1
0
1
0
1
0
1
0
0
1
1
0
0
1
1
0
0
1
1
0
0
1
1
1
1
1
1
1
1
1
1
1
1
1
1
1
1
1
1
176
177
178
179
180
181
182
183
184
185
186
187
188
189
190
191
0
1
0
1
0
1
0
1
0
1
0
1
0
1
0
1
1
1
1
1
1
1
1
1
1
1
1
1
1
1
1
1
0
0
0
0
0
0
0
0
0
0
0
0
0
0
0
0
1
1
1
1
1
1
1
1
1
1
1
1
1
1
1
1
Dome
Address
1
8-way DIP switch
2 3 4 5 6 7
8
Dome
Address
8-way DIP switch
1 2 3 4 5 6
7
8
192
193
194
195
196
197
198
199
200
201
202
203
204
205
206
207
0
1
0
1
0
1
0
1
0
1
0
1
0
1
0
1
0
0
1
1
0
0
1
1
0
0
1
1
0
0
1
1
1
1
1
1
1
1
1
1
1
1
1
1
1
1
1
1
208
209
210
211
212
213
214
215
216
217
218
219
220
221
222
223
0
1
0
1
0
1
0
1
0
1
0
1
0
1
0
1
1
1
1
1
1
1
1
1
1
1
1
1
1
1
1
1
1
1
1
1
1
1
1
1
1
1
1
1
1
1
1
1
Page 8
0
0
0
0
1
1
1
1
0
0
0
0
1
1
1
1
0
0
0
0
1
1
1
1
0
0
0
0
1
1
1
1
0
0
0
0
0
0
0
0
1
1
1
1
1
1
1
1
0
0
0
0
0
0
0
0
1
1
1
1
1
1
1
1
0
0
0
0
0
0
0
0
0
0
0
0
0
0
0
0
0
0
0
0
0
0
0
0
0
0
0
0
0
0
0
0
1
1
1
1
1
1
1
1
1
1
1
1
1
1
1
1
0
0
0
0
0
0
0
0
0
0
0
0
0
0
0
0
0
0
0
0
0
0
0
0
0
0
0
0
0
0
0
0
1
1
1
1
1
1
1
1
1
1
1
1
1
1
1
1
0
0
1
1
0
0
1
1
0
0
1
1
0
0
1
1
0
0
1
1
0
0
1
1
0
0
1
1
0
0
1
1
0
0
0
0
1
1
1
1
0
0
0
0
1
1
1
1
0
0
0
0
1
1
1
1
0
0
0
0
1
1
1
1
0
0
0
0
0
0
0
0
1
1
1
1
1
1
1
1
0
0
0
0
0
0
0
0
1
1
1
1
1
1
1
1
1
1
1
1
1
1
1
1
1
1
1
1
1
1
1
1
1
1
1
1
1
1
1
1
1
1
1
1
1
1
1
1
0
0
0
0
0
0
0
0
0
0
0
0
0
0
0
0
Dome
Address
224
225
226
227
228
229
230
231
232
233
234
235
236
237
238
239
Page 9
1
8-way DIP switch
2 3 4 5 6 7
0
1
0
1
0
1
0
1
0
1
0
1
0
1
0
1
0
0
1
1
0
0
1
1
0
0
1
1
0
0
1
1
0
0
0
0
1
1
1
1
0
0
0
0
1
1
1
1
0
0
0
0
0
0
0
0
1
1
1
1
1
1
1
1
0
0
0
0
0
0
0
0
0
0
0
0
0
0
0
0
1
1
1
1
1
1
1
1
1
1
1
1
1
1
1
1
1
1
1
1
1
1
1
1
1
1
1
1
1
1
1
1
8
Dome
Address
8-way DIP switch
1 2 3 4 5 6
7
8
1
1
1
1
1
1
1
1
1
1
1
1
1
1
1
1
240
241
242
243
244
245
246
247
248
249
250
251
252
253
254
255
0
1
0
1
0
1
0
1
0
1
0
1
0
1
0
1
1
1
1
1
1
1
1
1
1
1
1
1
1
1
1
1
1
1
1
1
1
1
1
1
1
1
1
1
1
1
1
1
0
0
1
1
0
0
1
1
0
0
1
1
0
0
1
1
0
0
0
0
1
1
1
1
0
0
0
0
1
1
1
1
0
0
0
0
0
0
0
0
1
1
1
1
1
1
1
1
1
1
1
1
1
1
1
1
1
1
1
1
1
1
1
1
1
1
1
1
1
1
1
1
1
1
1
1
1
1
1
1
1.3 Setting the dome protocol
•
Set sections 1,2 and 3 of the 6-way switch (B) as per the table below to select the
required protocol. “0” represents OFF (down) and “1” represents ON (up).
Protocol
1
2
3
Videoswitch VXP4 and BBV up-the-coax
Videoswitch VXP4 only
PelcoP
PelcoD
spare
spare
spare
spare
0
1
0
1
0
1
0
1
0
0
1
1
0
0
1
1
0
0
0
0
1
1
1
1
If coax telemetry is not being used, a protocol other than the first one should be selected to
minimise the possibility of spurious commands being received.
1.4 Setting the baud rate
•
Set sections 4 and 5 of the 6-way switch (B) as per the table below to select the
required baud rate. “0” represents OFF (down) and “1” represents ON (up).
•
The default setting is 9600 baud (both switches OFF)
•
PelcoD normally uses 2400 baud
•
PelcoP normally uses 4800 baud
Page 10
Baud rate
4
5
9600
2400
4800
19200
0
1
0
1
0
0
1
1
1.5 Setting the RS485 termination
Set section 6 of the 6-way switch (B) as per the table below to select the termination of the
RS485 twisted pair input. “0” represents OFF (down) and“1” represents ON (up). The default
position in ON (up).
Termination
6
OFF
ON
0
1
The termination switch should be ON if:
•
The dome is the only one connected to the twisted pair
•
The dome is the last one of several domes connected to the twisted pair
•
An alarm module is fitted into the dome power supply
The termination switch should be OFF if:
•
More than one dome is connected to the twisted pair and the dome is not the last in
the line.
1.6 Replacing the DIP switch cover
•
Replace the DIP switch access screw (A) on the rear of the dome
•
Take care that the thread is correctly aligned, that there is no dirt or grit that could
affect the waterproof seal.
•
Using a large flat bladed screwdriver turn clockwise to secure the screw.
•
Do not over-tighten.
Page 11
Page 12
2 Installing the Dome
These installation instructions assume that a standard wall-mount bracket is being used. For
swan-neck, pendant and corner options, refer to their specific instruction sheet.
2.1 Fixing the mounting ring
•
Fix the mounting ring to the wall using four screws (A) of adequate size and
strength to support the weight of the dome and bracket.
•
Fit the umbilical cable, entering either through the wall or via a cable gland as
illustrated below.
Page 13
2.2 Securing the bracket
•
Secure the bracket (B) to the mounting plate (A) using the 4 screws supplied (C)
•
For safety reasons, one of the fixing screws must have washer (D) fitted as shown
below.
•
Position the umbilical cable (E) such that the connector (F) is above the dome
support cradle (G)
Page 14
2.3 Attaching the CMOR Dome
•
Fully loosen the locking ring (C) by rotating clockwise until it nearly touches the top
of the dome
•
Lift the dome (taking care not to lift it using lamps) and place the dome support plate
(A) onto the dome support cradle (B). Note that the curved side of the support plate
goes to the back.
•
Rotate the locking ring (C) counter-clockwise to lock the dome firmly in position.
2.4 Attaching the umbilical cable
•
Plug the waterproof connector on the umbilical cable into the top of the dome
•
Turn the locking ring (A) clockwise to secure the connector
Page 15
2.5 Fitting the bracket cover
•
Locate the two plastic sides of the cover on the metal support bracket
•
Fix together with the supplied screw using the supplied Allen key
Page 16
3 Installing Power Supply
The CMOR-PSU-1 power is supplied in a weatherproof box that may be mounted externally
or internally.
3.1 Fixing power supply to wall
•
Fit the optional alarm module (A) into the power supply using the 4 screws provided.
•
For safety reasons never remove the slotted metal cover (B).
•
Fix the power supply to a wall using a screw in each of the four corner holes (C).
Page 17
3.2 Power Supply Connections
3.2.1 Mains Input
Identification
Mains Power
Live
Live (brown) 240Vac 50Hz
Neutral
Neutral (blue) 240Vac 50Hz
Earth
Earth (Yellow/Green)
3.2.2 Connections to dome
Identification
Umbilical lead to dome
CAM2
White Coax signal (dual camera version only)
GND
White Coax screen (dual camera version only)
CAM1
Black Coax signal
GND
Black Coax screen
RS485 (A)
WHITE
RS485 (B)
ORANGE
+24V
RED
0V
BLACK and Cable screen
Page 18
3.2.3 Connections to DVR
Identification
DVR
CAM2*
Camera input (dual camera version only)
GND
CAM1*
Camera input
GND
RS485 (A)
RS485 (A) or (+) dome output
RS485 (B)
RS485 (B) or (-) dome output
Spare
Not connection
GND
RS485 ground
Identification
DVR
CAM2 (BNC)*
DVR camera input (dual camera version only)
CAM1 (BNC)*
DVR camera input
CAM2 (BNC)
Loop-through provided for test monitor (dual camera
version only)
CAM1 (BNC)
Loop-through provided for test monitor
*Note that the video connection(s) made be made either using the BNC or the screw
terminals, whichever is more convenient.
Page 19
3.3 Alarm Module Connections
3.3.1 Alarm Inputs
Identification
Alarm Inputs
1
2
3
4
5
6
7
8
9
Connect to NO or NC relay
contact of PIRs or other alarm
sources.
10
11
12
13
14
15
16
3.3.2 Alarm Grounds
All alarms grounds are connected together and any may be used for the relay common
outputs of the PIRs or other alarm sources.
3.3.3 Relay Connections
Identification
Alarm Inputs
NO
Connect to DVR alarm input if normally open signal is required
COM
Connect to DVR alarm input ground
NC
Connect to DVR alarm input if normally closed signal is required
Page 20
4 Configuring the Alarm Module
4.1 Normally Open or Closed Alarm Inputs
Set section the switch identified “NO/NC” as per the table below to select whether all the
alarm inputs are connected to sensors with normally open or normally closed outputs. “0”
represents OFF (down) and“1” represents ON (up). The default position in ON (up).
Termination
TERM
Normally Open
Normally Closed
0
1
Note that if Normally Closed is selected, all unused alarm inputs must be linked to ground to
prevent alarms being continuously generated.
4.2 RS485 Termination
Set section the switch identified “TERM” as per the table below to select the termination of
the RS485 twisted pair input. “0” represents OFF (down) and“1” represents ON (up). The
default position in ON (up).
Termination
TERM
OFF
ON
0
1
The termination switch should be ON if:
•
The dome is the only one connected to the twisted pair
•
The dome is the last one of several domes connected to the twisted pair
The termination switch should be OFF if:
•
More than one dome is connected to the twisted pair and the dome is not the last in
the line.
4.3 Setting the alarm module protocol
•
Set sections 1,2 and 3 switch as per the table below to select the required protocol.
“0” represents OFF (down) and “1” represents ON (up).
Protocol
1
2
3
4
Videoswitch VXP4 and BBV up-the-coax
Videoswitch VXP4 only
PelcoP
PelcoD
0
1
0
1
0
0
1
1
0
0
0
0
0
0
0
0
Page 21
The alarm module protocol should be set to be the same as the dome protocol.
4.4 Setting the alarm module baud rate
•
Set sections 5 and 6 of the DIP switch as per the table below to select the required
baud rate. “0” represents OFF (down) and “1” represents ON (up).
•
The default setting is 9600 baud (both switches OFF)
•
PelcoD normally uses 2400 baud
•
PelcoP normally uses 4800 baud
Baud rate
5
6
9600
2400
4800
19200
0
1
0
1
0
0
1
1
The alarm module baud rate should be set to be the same as the dome baud rate.
Page 22
5 Menus
5.1 Menu Navigation
5.1.1 Entering Menu
Different keyboards have different ways of entering the menu system of a dome. Refer to
specific keyboard manual for details.
Common examples are:
•
Videoswitch Vi-K2
Press DOME then press MENU
•
Videoswitch Vi-K3
Press and hold ALT then press DOME MENU
•
BBV (TX400)
Press and hold SHIFT then press 1
•
Pelco (KBD300A)
Enter 95 then press and hold PRESET key
•
DS2
Press and hold * 8,8,910,10,2
5.1.2 Moving cursor
Once in the menu, the joystick may be used for LEFT, RIGHT, UP and DOWN control of the
cursor. On a Videoswitch keyboard, the cursor keys can be used which is more convenient.
•
UP
move the cursor up, or change a value
•
DOWN
move the cursor down, or change a value
•
RIGHT
move the cursor right, or enter a sub-menu
•
LEFT
move the cursor left, or exit a sub-menu. When editing a
title, you may need to go LEFT several times to exit
5.1.3 Select
Where a select key is required (eg setting a preset from within the menu) this is also
dependent on keyboard type.
Common examples are:
•
Videoswitch Vi-K2
-
Press OK
•
Videoswitch Vi-K3
-
Press OK
•
BBV (TX400)
-
Press 1
•
Pelco (KBD300A)
-
Enter 96 then press and hold PRESET key
•
DS2
Press Preset,10, then preset number e.g.1,2
5.1.4 Cancel
Where a cancel key is required (eg cancelling the setting of a preset from within the menu)
this is also dependent on keyboard type.
Common examples are:
•
Videoswitch Vi-K2
-
Press WASH
•
Videoswitch Vi-K3
-
Press ALT and ESC
Page 23
•
BBV TX400
-
Press WASH
•
Pelco
-
Enter 97 then press and hold PRESET key
5.1.5 Exit Menu
Leave the menu by going LEFT out of all levels until you leave the menu. Alternatively, use
the same key combination that was used to enter the menu. The menu will also exit
automatically if not used for 5 minutes.
All changes made will be saved permanently when the menu has been exited. The message
“Saved OK” will flash up on the screen to confirm this
The various branches of the menu system are described below. These may differ slightly
depending on the version of firmware installed in the dome.
5.2 Login
Once you have entered the menu system, go RIGHT to enter the login screen. The login
screen allows you to enter a password to gain access to other menus.
Use RIGHT and LEFT to move the cursor and UP and DOWN to change the digits. When
you have entered the password, go LEFT repeatedly to exit the login screen. A message will
appear on the screen to indicate whether you have successfully logged in, and with what
access rights (User, Supervisor or Installer).
Password levels:
User
111100
Supervisor
222200
Installer
333300
Once logged in, you remain logged in for 5 minutes from last use of the menu, even if you
exit and re-enter the menu. If you want to log out more quickly to prevent unauthorised
access, just enter an invalid password (e.g. 000000).
The login screen also displays this information about the dome:
•
Brand
•
Model
•
Serial Number
•
Firmware revision
•
Alarm module firmware revision (if fitted)
•
Protocol & Baud Rate
•
Dome address
Page 24
5.3 Setup
Use this sub-menu to select general dome configuration settings as below:
5.3.1 Enter date/time
Use UP, DOWN, LEFT and RIGHT to set the date and time.
The format is DD/MM/YY HH:MM:SS.
Move cursor LEFT to exit.
5.3.2 Daylight Saving
Default setting is AUTO which is suitable for use in Europe. Alternatively set to WINTER for
no time change, or to SUMMER to advance the displayed time by one hour.
5.3.3 Language
The language used in the menu and for other messages is selected here.
5.3.4 Display
5.3.4.1 Date/Time Position
The position on the screen of the date and time may be set here using UP and DOWN. It
may also be set to OFF (default) so that it is not displayed.
5.3.4.2 Camera Title
A title for the dome camera may be entered if required using UP, DOWN, LEFT and RIGHT.
Move cursor LEFT to exit.
The position on the screen of the title may be set here using UP and DOWN. It may also be
set to OFF so that it is not displayed.
5.3.4.3 Show Preset During Tours
This option determines whether or not the preset titles are displayed while a tour is in
progress.
5.3.4.4 Preset Text Position
This option specifies where the preset title is displayed when a preset is called. Default is
Bottom-Left.
5.3.4.5 Text Background
The displayed text may be given a black background if required to make it stand out more.
5.3.5 Passwords
5.3.5.1 Installer
The default password 333300 may be changed if required. Take care to make a note of the
new password.
5.3.5.2 Supervisor
The default password 222200 may be changed if required. Take care to make a note of the
new password.
Page 25
5.3.5.3 User
The default password 111100 may be changed if required. Take care to make a note of the
new password.
5.3.6 Datum Check
The dome can be set to perform a datum check every 24 hours, at midnight. This means
that the dome will pan and tilt for a few seconds while it performs a self test and checks its
alignment. It will revert to an existing preset or tour when the process is complete. It is
recommended that the 24 hour option is selected (default)
5.3.7 Install date/time
The date and time of install may be set here to provide a record for future service or
maintenance purposes.
5.3.8 Clear Settings
5.3.8.1 Clear configuration
To clear the menu configuration to the factory defaults, enter this menu, use UP to select
YES and go LEFT to exit.
5.3.8.2 Clear all presets
To clear all the presets, enter this menu, use UP to select YES and go LEFT to exit.
5.3.8.3 Clear all tours
To clear all the tours, enter this menu, use UP to select YES and go LEFT to exit.
5.3.8.4 Clear privacy masks
To clear all privacy settings, enter this menu, use UP to select YES and go LEFT to exit.
5.3.8.5 Clear everything
To clear the configuration, presets and tours, enter this menu, use UP to select YES and go
LEFT to exit.
5.3.8.6 Reboot
To restart the dome (equivalent to power cycling), enter this menu, use UP to select YES
and go LEFT to exit.
Note that any unsaved changes to the configuration will be lost when this is done.
5.3.8.7
Diagnostic Info
•
System
•
Status
•
Camera
•
Telemetry
Page 26
5.4 IR
Options relating to the built-in Infra Red (IR) lamps are set in this sub-menu.
5.4.1 IR Mode
This option determines when the IR lamps are turned on:
Light sensing (default) -
the lamps turn on automatically when it gets dark
Timed
-
the lamps turn on according a time of day schedule
Manual
-
the lamps turn on and off under manual control
5.4.2 IR ON level
Set this number to specify the light level at which the IR lamps turn on. The lower the
number the darker the light has to get before the lamps come on. The default setting is 75.
The current light reading is displayed which can be useful if you want to note the light level
at dusk when you want the IR lamps to come on.
5.4.3 IR Off level hysteretic
The IR lamps are turned off when the light level rises to the ON level plus this hysteretic
value. The default is 125.
5.4.4 Auto IR delay
Set the time in seconds that you want the dome to wait before switching on or off due to a
change in light level. This delay stops the dome responding to short term effects like car
headlights that would otherwise cause the IR lamps to switch.
5.4.5 IR ON times
If the IR Mode is timed, use this option to specify the hours during each day that you want
the IR lamps to be on. A solid block indicates that the lamps will be ON for that hour period.
A dash indicates that they will be OFF. There are a total of 24 positions, one for each hour
of the day. Go LEFT to exit.
5.4.6 IR Power
The power of the IR lamps may be set here. For maximum range set to 100%.
Page 27
5.5 Camera
5.5.1 Main camera settings
5.5.1.1 Video Gain
The video gain may be set from 0 to 7 to compensate for losses in long cable runs. Default
is 0.
5.5.1.2 Video Lift
The high frequency video lift may be set from 0 to 8 to compensate for losses in long cable
runs. Default is 0.
5.5.1.3 Digital Zoom
This option selects whether you want to be able to zoom beyond the optical zoom limit and
use digital zoom. The default setting is OFF.
5.5.1.4 Day Settings (IR OFF)
These settings apply when the IR lamps are not on.
5.5.1.4.1 Shutter Speed
The shutter speed may be slowed down to achieve greater light sensitivity. Normally this
should be set to AUTO.
5.5.1.4.2
Exposure Compensation
5.5.1.4.3 Joystick Focus Mode
There are two settings; Auto & Manual. The default setting for DAY is AUTO.
5.5.1.4.4 Preset Focus Mode
There are two settings; Auto & Stored. The default setting for DAY is AUTO.
5.5.1.4.5 Zoom Limit
The zoom limit can be adjusted from1 – 100%
5.5.1.4.6 Backlight compensation
Backlight compensation can be turned ON or OFF
5.5.1.5 Night Settings (IR ON)
These settings apply when the IR lamps are on.
Page 28
5.5.1.5.1 Shutter Speed
The shutter speed may be slowed down to achieve greater light sensitivity. For night time
operation it may be useful to change this from its default AUTO setting. Longer time periods
will cause blurring of moving images however.
5.5.1.5.2
Exposure Compensation
5.5.1.5.3 Joystick Focus
There are two settings; Auto & Manual. The default setting for NIGHT is Manual.
5.5.1.5.4 Preset Focus Mode
There are two settings; Auto & Stored. The default setting for NIGHT is manual.
5.5.1.5.5
Zoom Limit
5.5.1.5.6
Backlight Compensation
5.5.2 Context Camera
5.5.2.1
Not available
5.5.3 Invert Image
This inverts the image. This option is used only if the dome is mounted upside down.
5.6 Keyboard
This sub menu selects options relating to manual control from the joystick keyboard.
5.6.1 Restore Mode (Preset & Tours)
Set this option if you want the dome to revert to a TOUR or PRESET 1 after a specified
period (in seconds) of inactivity.
If the restore mode is not required select OFF
5.6.2 Restore delay (Preset & Tours)
Select restore delay time in seconds. Select 180 seconds to OFF
5.6.3 Joystick/Speed Curve
This option determines the relationship between the joystick offset and the pan/tilt speed
and the setting is a matter of user preference. If linear, the relationship is proportional. If
quasi-linear or non-linear, the movement is slow to start with and increases rapidly as the
joystick is moved more. The default is quasi-linear.
Page 29
5.6.4 Zoom Ratio
This setting determines how much the pan and tilt slows down as you zoom in and the
setting is a matter of user preference. This slow down helps fine control of the dome position
when zoomed in on a target. The default setting is 16.
5.6.5 Max Joystick Speed
This setting affects pan and tilt and determines how fast the dome moves for a full deflection
of the joystick. Generally control is easier if it is set to less than 100%. The default is 60%.
5.6.6 Pan Limits
5.6.6.1 Use Pan Limits
If you wish to stop the dome from panning all the way round, for example if it is mounted on
a wall or corner, set this option (after you have set the right and left limits). Once set, the
dome will stop if it is panned up to a limit. When moving between presets, the dome will also
stay in the permitted zone rather than taking the shortest route as it would otherwise.
5.6.6.2 Set right limit
Enter this option and pan the dome to the right-most position that you want it to be able to
go to. Press SELECT (or wait 10 seconds) to set the position
5.6.6.3 Set left Limit
Enter this option and pan the dome to the left-most position that you want it to be able to go
to. Press SELECT (or wait 10 seconds) to set the position
5.6.7 Iris key usage
The Iris control keys on the keyboard may be used to either alter the:
Exposure compensation
Brighten or darken the image
Shutter speed
Provide integration and therefore more sensitivity in dark
conditions. Note that the shutter speed can only be
controlled in this way when the IR lamps are ON.
5.7 Presets
5.7.1 Set Preset
•
To set a preset from within the menu, select this option using RIGHT.
•
Use UP and DOWN to select a preset.
•
Move the dome to the required position using the joystick.
•
Wait 10 seconds or press the SELECT key.
•
The new preset is not set
5.7.2 Preset Titles
Each preset may be given a title that is displayed every time it is called up. If no title is
entered, the display will show P1, P2, P3 etc
Page 30
To create a camera title, move joystick/arrow key RIGHT to enter ‘input’ mode. Move
joystick/arrow keys UP/DOWN to select alphanumeric characters.
Move joystick/arrow keys LEFT to save & exit menu.
5.7.3 Preset Speed
The speed at which the dome moves to a preset is set here. The default setting is 60% of
full speed.
5.8 Tours
Tours are sequences of up to 100 presets that the dome moves between automatically,
dwelling for a period at each. The tour is repeated until interrupted by:
•
Manual pan, tilt or zoom
•
Calling up a preset
•
An alarm
5.8.1.1
Tour 1 (to Tour 8)
5.8.1.1.1 Title
If you want a title to be displayed when you select a tour, enter it here. Otherwise the default
T1, T2, T3 etc will be displayed.
5.8.1.1.2 Initialise Tour
Use this option to initialise a tour as follows:
•
Set
Fill the tour with presets. Presets that are not set will be ignored. As more
presets are programmed, they will automatically be included in the tour.
•
Clear
•
Cancel Use LEFT to exit without changing the tour
Clear the tour of all presets
5.8.1.1.3 Edit Tour
Each position of the tour may be edited using this option. Any positions set to “No Preset”
will be ignored when the tour I running.
5.8.1.1.4 Dwell
This is the time in seconds between each preset being selected when the tour is running.
5.8.1.1.5 Speed
This is the speed at which the dome goes to the presets that are called up during a tour.
Page 31
5.9 Privacy
Use this option to set up to 24 privacy zones
Step
Action
1
Select dome MENU from DVR/keyboard
2
Log in (using engineer pass code)
3
Select PRIVACY
4
Move joystick or arrow keys up/down to select a different
MASK number, 1-24)
5
Move joystick/arrow key right
6
Move camera to required view
7
Select OK (Vi K/B) or 01+preset (Pelco K/B), or Preset, 10
,1 (on DS2) or wait 15 seconds until a red mask patch
appears
Red mask patch appears
8
Scroll to next MASK number (using arrow keys or joystick
UP/DOWN)
Blue mask patch appears
9
Move joystick or arrow key to the RIGHT
Cross lines appear
10
For each new mask position, repeat steps 4 to 7
12
When all mask positions have been created , exit menus
& save by moving joystick left TWICE
5.10
Result
Default view MASK 1 appears
Cross lines appear on screen
‘Saving config…’ (appears on
bottom left of screen)
Alarms
If the alarm option is installed in the power supply, the dome will go to presets when an
alarm occurs. Alarms 1 to 16 map to presets 1 to 16 respectively.
Note that if the alarms are connected directly to the digital recorder (DVR) rather than the
alarm option, the following settings have no effect.
5.10.1 New alarm dwell
When a new alarm occurs, the dome will go to the corresponding preset.
If multiple alarms occur, the presets will be called up in sequence. However, the dome will
wait at each preset position for the dwell time set by this option (in seconds).
5.10.2 Alarm cycle time
If alarms still exist after all alarm presets have been visited for the New alarm dwell time, the
presets of the still active alarms will now be toured using the cycle time (in seconds)
specified in this option.
Page 32
6 Technical Data
6.1 CMOR-D18 Dome
6.1.1 Camera
Sony Ex-View Had ¼” CCD
18:1 or 26:1 optical zoom
6.1.2 IR Illumination
Double-hetero AlGaAs LEDs
830nm wavelength
Degradation estimated at 3% per year (not guaranteed)
6.1.3 Power requirements
24V DC, 3Amps Maximum
6.1.4 Physical and Environmental
Colour
Grey (custom colours may be ordered)
Operating Temperature
-35degC to 50degC
Environmental
IP66
Dimensions/Weight
252.4mm x 485mm x 225.8mm (HxWxD), 4.32kg
Dimensions/Weight (Boxed)
385mm x 300mm x 300mm (HxWxD), 4.72kg
6.2 CMOR-PSU-1 Power Supply
6.2.1 Power requirements
Input
100 to 240 Vac 50/60Hz
Output
24Vdc, 3A
6.2.2 Physical and Environmental
Environmental
IP66
Dimensions/Weight
230mm x 140mm x 100mm (LxWxD), 1kg
Dimensions/Weight (Boxed)
340mm x 225mm x 140mm (LxWxD), 1.3kg
6.2.3 Safety
For safety reasons, the internal metal cover must not be removed. There are no user
serviceable parts inside.
Page 33
6.3 CMOR-ALM-16 Alarm Module
6.3.1 Alarm Inputs/Outputs
16 inputs, suit normally open or normally closed triggers
1 change over relay output for signally to DVR
6.3.2 Physical and Environmental
Environmental
IP66 when fitted in PSU)
6.4 Brackets and Cables
6.4.1 Wall bracket
6.4.2 Corner adaptor
6.4.3 Swan-neck bracket
6.4.4 Pendant bracket
6.4.5 Cables
Cables with custom lengths may be ordered.
6.5 CE Marking
This product is CE marked. It has been fully tested and complies with 89/336/EEC
Electromagnetic Compatibility and 73/23/EEC Low Voltage directives, and with EN
60950:2000 safety standards.
Warning: This is a Class A product. In a domestic environment this product may cause
radio interference in which case the user may be required to take adequate measures.
Page 34
Serial Number of dome
Notes
Notes
Page 35