1
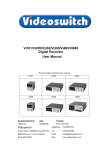
VT Series 2 User Manual Page 1 VT Series 2 User Manual This manual covers the following products: VT - 11 VT - 14A VT - 18A VT - 28A 1-Camera, 1 Monitor Telemetry Transmitter 4-Camera, 1 Monitor Telemetry Transmitter 8-Camera, 1 Monitor Telemetry Transmitter 8-Camera, 2 Monitor Telemetry Transmitter This manual relates to transmitters fitted with software revisions R2.1 to R2.4 Every effort has been made to ensure the accuracy of the information in this manual. However, Video Switch Ltd assumes no liability for losses incurred as a result of out of date information, errors or omissions. As part of a policy of continual product improvement, Video Switch Ltd reserves the right to make changes to product specifications and documentation without notice. No reproduction of this document or any portion of it is permitted without the specific written permission of Video Switch Ltd. Video Switch Ltd 1996, 2002 Video Switch Ltd Units 15 & 16 Redfields Industrial Park Church Crookham Hants GU52 ORD Videoswitch Tel: 01252-851510 Fax: 01252-851296 VT601c.doc VT Series 2 User Manual Page 2 Contents 1. 2. OVERVIEW................................................................................................................................... 3 INSTALLATION........................................................................................................................... 4 2.1 2.2 2.3 Coax Telemetry.............................................................................................................................................................................................................4 Daisy Chain Twisted Pair Telemetry ...........................................................................................................................................................................5 Star Configuration Twisted Pair Operation..................................................................................................................................................................6 3. SWITCHING ................................................................................................................................. 7 3.1 3.2 Manual Switching.........................................................................................................................................................................................................7 Auto Switching .............................................................................................................................................................................................................7 4. TRANSMITTER OPERATION.................................................................................................... 8 4.1 4.2 4.3 4.4 Pan and Tilt...................................................................................................................................................................................................................8 Zoom, Iris and Focus ....................................................................................................................................................................................................8 Auxiliary Functions ......................................................................................................................................................................................................8 Presets............................................................................................................................................................................................................................9 5. ALARM HANDLING.................................................................................................................. 10 5.1 5.2 5.3 Unlatched Alarm Mode.............................................................................................................................................................................................. 10 Latched Alarm Mode ................................................................................................................................................................................................. 10 Alarm Processing ....................................................................................................................................................................................................... 10 6. SWITCHER SET OPERATIONS (NOT VT-11) ....................................................................... 11 6.1 6.2 6.3 6.4 6.5 6.6 6.7 Specify Cameras for Monitor A................................................................................................................................................................................. 11 Specify Cameras for Monitor B (VT-28A only) ....................................................................................................................................................... 11 Set Monitor A Dwell Time ........................................................................................................................................................................................ 11 Set Monitor B Dwell Time (VT-28A only) .............................................................................................................................................................. 11 Set Alarm Hold Time................................................................................................................................................................................................. 11 Set Multiple Alarm Dwell Time................................................................................................................................................................................ 12 Set Alarm Relay Hold Time ...................................................................................................................................................................................... 12 7. RECEIVER SET OPERATIONS ............................................................................................... 13 7.1 7.2 7.3 7.4 7.5 7.6 7.7 7.8 7.9 7.10 7.11 7.12 Video Gain ................................................................................................................................................................................................................. 13 Video Lift ................................................................................................................................................................................................................... 13 Zoom Speed ............................................................................................................................................................................................................... 13 Iris Speed.................................................................................................................................................................................................................... 13 Focus Speed ............................................................................................................................................................................................................... 13 Zoom Polarity ............................................................................................................................................................................................................ 14 Iris Polarity................................................................................................................................................................................................................. 14 Focus Polarity ............................................................................................................................................................................................................ 14 Preset Training........................................................................................................................................................................................................... 14 Preset Patrol Timer .................................................................................................................................................................................................... 14 Alarm Patrol Timer.................................................................................................................................................................................................... 15 Set Presets .................................................................................................................................................................................................................. 15 8. SWITCH OPTIONS .................................................................................................................... 16 8.1 8.2 8.3 8.4 8.5 8.6 8.7 8.8 8.9 Number of Cameras................................................................................................................................................................................................... 17 Random Sequencing .................................................................................................................................................................................................. 17 Alarm Modes.............................................................................................................................................................................................................. 17 Interval Switching Mode............................................................................................................................................................................................ 18 SET Lockout.............................................................................................................................................................................................................. 18 Camera Termination.................................................................................................................................................................................................. 18 Preset on Alarm (not VT-11)..................................................................................................................................................................................... 19 Master/Slave Operation ............................................................................................................................................................................................. 19 Twisted Pair Telemetry Baud Rate ........................................................................................................................................................................... 19 9. TEST MODE................................................................................................................................ 20 9.1 9.2 Joystick Calibration Check........................................................................................................................................................................................ 20 Lens Offset Adjust ..................................................................................................................................................................................................... 20 10. CONNECTOR PIN-OUTS .......................................................................................................... 21 10.1 Alarm Connector........................................................................................................................................................................................................ 21 10.2 Telemetry Connector ................................................................................................................................................................................................. 21 11. SPECIFICATIONS ...................................................................................................................... 22 11.1 11.2 11.3 11.4 11.5 11.6 11.7 Telemetry ................................................................................................................................................................................................................... 22 Switcher...................................................................................................................................................................................................................... 22 Video Inputs & Outputs............................................................................................................................................................................................. 22 Alarms........................................................................................................................................................................................................................ 22 Power Requirements .................................................................................................................................................................................................. 22 Dimensions................................................................................................................................................................................................................. 22 Environmental............................................................................................................................................................................................................ 22 12. SAFETY WARNING ................................................................................................................... 23 Videoswitch VT601c.doc VT Series 2 1. User Manual Page 3 Overview The VT Series 2 desktop telemetry transmitters are used in conjunction with Video Switch receivers to provide remote control of pan & tilt, zoom, iris, focus and auxiliary functions. The VT-11 controls a single camera, whereas the VT-14A, VT-18A and VT-28A incorporate a fully featured switcher section which permit a number of cameras to be selected and controlled. Transmitter Section The transmitters send telemetry control information to receivers. The receivers decode this information and drive the pan and tilt heads, lens and auxiliary functions accordingly. The telemetry information is sent either via the coax that is used to send back the video, or via additional twisted pair cables (RS232 and 20mA). Whichever telemetry method is employed, more than one transmitter may be used to provide multiple (master/slave) control points. The transmitters all have a joystick for the control of pan and tilt. Keys are provided for zoom, iris and focus control, and also for five auxiliary functions. The receivers and their presets, if installed, are set up at the transmitter by key combinations. A security lockout feature is provided to prevent inadvertent alteration of these settings. Switcher Section (not VT-11) All models except the VT-11 provide bounce free manual or automatic switching (sequential or random). Front panel programming specifies the dwell time and which cameras are to be included in the auto sequence for each monitor. The security lockout features also prevents inadvertent alteration of these settings. Alarm inputs are provided for connection to PIR or other detectors associated with each camera. Alarm output relay contacts in the transmitter permit control of an external warning device or a VCR. The alarm hold time, cycle time and the relay hold time are all independently programmable via the front panel keys. Two alarm modes are provided, the unlatched mode being suitable for unattended operation as, the transmitter reverts to normal operation when the alarms end. The latched alarm mode provides an audible warning which the operator must manually acknowledge. Videoswitch VT601c.doc VT Series 2 2. User Manual Page 4 Installation The transmitters may be connected to the receivers in a number of different configurations depending on how the telemetry control is to be transmitted to the receivers. These configurations are described below. 2.1 Coax Telemetry Coax telemetry is the simplest and is suitable where there is a direct coax link between each receiver and the transmitter (earth loop isolating transformers may be used in the coax lines if there are required). Videoswitch VT601c.doc VT Series 2 User Manual Page 5 2.2 Daisy Chain Twisted Pair Telemetry If the video returns to the transmitter via links other than coax cables, then the telemetry must be transmitted to the receivers via twisted pair links. The daisy chain configuration requires, in addition to the video cabling, a twisted pair link from the transmitter to one of the receivers, and then further twisted pair links from each receiver to the next. Where twisted pair cables are shown in the diagram, these could in fact be data links utilising as fibreoptic, microwave, infra-red, leased line, ISDN or PSTN etc. which provide a compatible interface (20mA loop or RS232). Videoswitch VT601c.doc VT Series 2 User Manual Page 6 2.3 Star Configuration Twisted Pair Operation If the video returns to the transmitter via links other than coax cables, then the telemetry must be transmitted to the receivers via twisted pair links. In the star configuration, a VX-18 star expander (typically located near the transmitter) is used to expand the single twisted pair telemetry output of the transmitter into individual outputs for each receiver. Each output connects to a receiver via a twisted pair cable or compatible data link. Videoswitch VT601c.doc VT Series 2 3. User Manual Page 7 Switching 3.1 Manual Switching Individual camera select keys are provided for all cameras (not applicable to VT-11). The VT-28A caters for two monitors and provides a second row of camera select keys. 3.1.1 Manually Selecting a Camera (Monitor A) Press one of the Monitor A camera select keys, identified 1,2,3,4,5,6,7 & 8 (lower row) to display the required camera on Monitor A. Auto mode will be cancelled if previously set. The selected camera is the one which the telemetry transmitter can now control. 3.1.2 Manually Selecting a Camera (Monitor B) The VT-28A transmitter caters for a second monitor. Press one of the Monitor B camera select keys, identified 1,2,3,4,5,6,7 & 8 (upper row) to display the required camera on Monitor B. Auto mode will be cancelled if previously set. 3.2 Auto Switching Auto switching may be used independently on either or both monitors. The dwell time for each monitor may also be programmed, together with which cameras are required to be selected for each monitor (section 8.1). Either sequential or random switching may be specified (section 8.2). 3.2.1 Auto Switching (Monitor A) To set monitor A to auto, press the “AUTO A” key. The unit will step from one camera to the next with the previously programmed dwell time. Only the cameras that have been enabled (see section 8.1) will be selected in the sequence. 3.2.2 Auto Switching (Monitor B) To set monitor B to auto, press the “AUTO B” key. The unit will step from one camera to the next with the previously programmed dwell time. Only the cameras that have been enabled (see section 8.5) will be selected in the sequence. Videoswitch VT601c.doc VT Series 2 4. User Manual Page 8 Transmitter Operation 4.1 Pan and Tilt The joystick is used for pan and tilt control of the camera. Note that the joystick must be in its central position when the transmitter is turned on. AC Receivers Movement of the joystick by a small amount in any direction causes the pan and tilt head to move accordingly. The amount that the joystick is moved has no effect on the operation of the head. DC Receivers When the transmitter is used with a DC receiver (e.g. VR-5) providing variable speed control, then the amount the joystick is moved in a particular direction will control the speed at which the pan and tilt head moves. 4.2 Zoom, Iris and Focus Six keys are provided for the control of lens functions. 4.2.1 Zoom These keys control the zoom in and out of the currently selected camera. Both the zoom speed (section 7.3) and the polarity (section 7.6) may be set. 4.2.2 Iris If the lens uses auto-iris, these keys are not used. If the lens has manual iris control, then these keys open and close the iris of the currently selected camera. Both the iris speed (section 7.4) and the polarity (section 7.7) may be set. 4.2.3 Focus These keys control the focus in and out of the currently selected camera. Both the focus speed (section 7.5) and the polarity (section 7.8) may be set. 4.3 Auxiliary Functions Five auxiliary functions may be controlled from the transmitter (the VR-3 supports only AUX1 and AUX3). The auxiliary keys all have predesignated functions, but may be used to control any other devices (within the power rating of the relays in the receiver). 4.3.1 AUX 1 (Lamp) This is a latched function which operates a relay in the receiver that may be used to control a lamp or any other device. 4.3.2 AUX 2 (Preset Alarms) This latched function is used to switch the alarm detection on and off where an alarm preset option is fitted. If an alarm preset is not being used, the relay in the receiver operated by this function may be used to control any device. 4.3.3 AUX 3 & 4 (Wipe/Wash) A single key is used to control two functions, wipe and wash. The wipe relay is latched and toggles on and off each time the keys is pressed. If the key is held on for more than a second, the wash relay will operate until the key is released again. If wash and wipe are not required, the relays may be used to control any other device. 4.3.4 AUX 5 (Autopan) This is a latched function which operates a relay in the receiver. It is typically used to control an autopan module, but may be used to operate any other device. Note that when left or right panning is performed, if a preset is selected or if an alarm occurs, this function is cancelled. Videoswitch VT601c.doc VT Series 2 User Manual Page 9 4.4 Presets Up to eight presets may be called by pressing the preset keys (identified 1, 2, 3, 4, 5, 6,7 and 8). When a new preset is selected, the receiver will move to the previously stored preset position (to program presets see section 7.11). If more than one preset is selected, the receiver will patrol between all selected presets with a programmable time (to set preset dwell time see section 7.10). If a pan, tilt, zoom, iris or focus adjustment is made, the presets will automatically be cancelled. Videoswitch VT601c.doc VT Series 2 5. User Manual Page 10 Alarm Handling On the VT-14A, VT-18A and VT-28A, an alarm input is provided for each camera. These are for connection to normally open contacts, typically provided by PIR or other types of detector. When a contact closes, an alarm condition is triggered on that channel and preset may be called up on the associated receiver if required (section 0). 5.1 Unlatched Alarm Mode The unlatched alarm mode is suitable for unattended operation as in this mode, the transmitter automatically reverts to normal operation when the alarms end. The audible bleeper is not sounded in unlatched mode. 5.2 Latched Alarm Mode The latched alarm mode provides the same facilities as the unlatched mode but requires that an operator manually cancels the alarm conditions. While any latched or current alarms exist, an internal bleeper beeps once per second until the SET key is pressed. 5.3 Alarm Processing Multiple alarm handling is provided by the transmitter which ensures that any alarmed cameras are displayed on Monitor A for a minimum time, and that multiple cameras with continuing alarm conditions are displayed repeatedly in sequence. Alarm relay contacts provide the facility to control external equipment in the event of an alarm. 5.3.1 Alarm Hold Time When an alarm occurs, the associated camera is selected and displayed on Monitor A for the duration of the Alarm Hold Time (section 6.5). If multiple alarms occur, each camera will displayed in turn, each one for the duration Alarm Hold Time. 5.3.2 Alarm Dwell Time When there is more than one alarm, and all alarmed cameras has been displayed once, the transmitter will then sequence between the alarmed cameras, dwelling on each for the Multiple Alarm Dwell Time (section 6.6). This time may be different to the normal AUTO dwell time. Sequencing will continue for as long as alarm conditions persist or, in latched mode, until the operator presses a key to manually cancel the alarms. When all alarms have cleared, if AUTO mode is selected, normal sequencing will re-start. If AUTO mode is not selected, the last alarmed camera will be left on the display. 5.3.3 Alarm Relay Hold Time When an alarm first occurs, the alarm relay in the transmitter will activate. When all alarms have cleared, the relay will stay energised for the further duration of the Alarm Relay Hold Time (section 6.7) and then turn off again. The relay is typically used for an external warning device, to start and stop a VCR, or to switch a VCR from time lapse mode to real time (3 hour) mode. Videoswitch VT601c.doc VT Series 2 6. User Manual Page 11 Switcher SET Operations (not VT-11) The SET key is used to configure various aspects of the switcher. Note that the SET key lockout (section 8.5) must be turned off before any of these actions can be performed. When the keys are released after a switcher related SET function, there should be two audible bleeps. An error condition is indicated by four bleeps. If this occurs, repeat the setting. 6.1 Specify Cameras for Monitor A The cameras which are included in an auto sequence are either determined by DIL switch settings, or are programmed independently for each monitor using the SET key. Refer to section 8.1 to set the DIL switch . If the programmable option is selected, then the required cameras are chosen as follows: Press and hold the AUTO A key first, then press the SET key, then press various Monitor A camera keys to toggle the LEDs on and off to select the cameras that you wish to be sequenced, then release all keys: [AUTO A], [SET] and [Camera 1, 2, 3, 4, 5, 6, 7, 8] 6.2 Specify Cameras for Monitor B (VT-28A only) The cameras which are included in an auto sequence are either determined by DIL switch settings, or are programmed independently for each monitor using the SET key. Refer to section 8.1 to set the DIL switch . If the programmable option is selected, then the required cameras are chosen as follows: Press and hold the AUTO A key first, then press the SET key, then press various Monitor B camera keys to toggle the LEDs on and off to select the cameras that you wish to be sequenced, then release all keys: [AUTO B], [SET] and [Camera 1, 2, 3, 4, 5, 6, 7, 8] 6.3 Set Monitor A Dwell Time To set the auto dwell time for monitor A, press and hold the “SET” key on, then press and hold the “AUTO A” key on for the required dwell duration. [SET] and [AUTO A] The unit will beep every second. When the required number of seconds has elapsed, release both keys. 6.4 Set Monitor B Dwell Time (VT-28A only) To set the auto sequence dwell time for monitor B, press and hold the “SET” key on, then press and hold the “AUTO B” key on for the required dwell duration: [SET] and [AUTO B] The unit will beep every second. When the required number of seconds has elapsed, release both keys. 6.5 Set Alarm Hold Time To set the Alarm Hold Time, press and hold the SET key and then also press and hold the Monitor A Camera 1 key: [SET] and [Camera 1] Keep both keys held for the required duration. Every second the transmitter will bleep. Videoswitch VT601c.doc VT Series 2 User Manual Page 12 6.6 Set Multiple Alarm Dwell Time To set the Multiple Alarm Dwell Time, press and hold the SET key and then also press and hold the Monitor A Camera 2 key: [SET] and [Camera 2] Keep the keys held for the required duration. Every second the transmitter will bleep. 6.7 Set Alarm Relay Hold Time To set the Alarm Relay Hold Time, press and hold the SET key and then also press and hold the Monitor A Camera 3 key: [SET] and [Camera 3] Every second the transmitter will bleep. If the keys are released after just one beep, a relay hold time of zero will be stored. Further beeps each represent 10 seconds of relay hold time. Videoswitch VT601c.doc VT Series 2 7. User Manual Page 13 Receiver SET Operations All receiver set-up functions involve pressing the SET key and one or more other keys in combination. Note that the SET key lockout (section 8.5) must be turned off before any of these actions can be performed. For all receiver SET operations, always first press and hold down the SET key. Then press the other key(s) as described in the following sections, holding them for about a second to ensure the command has been recognised by the receiver. Then release the keys, making sure that the SET key is released last. Where the Zoom iris and focus keys are referred to, a “↑” indicates the upper key and a “↓” indicates the lower key. 7.1 Video Gain The video gain of the receiver (this feature is not available on VR-3 receivers) may be set to one of eight values from the transmitter (1 is the lowest gain, suitable for short cables, 8 is suitable for up to 1km of coax): [SET], [ALARMS] and [Preset 1, 2, 3, 4, 5, 6, 7 or 8] The gain should be set to obtain the best picture quality. If the gain is set too high, picture quality will suffer and the picture may roll on the monitor. 7.2 Video Lift The video amplifier in the receiver can have its high frequency response modified (this feature is not available on VR-3 receivers) to obtain optimum picture quality. The video lift should be set to minimum for short cable runs, and increased just enough to sharpen vertical edges in the picture. Too much video lift will degrade the picture. To increase the lift, press: [SET], [ALARMS] and [Joystick Up] To decrease the lift: [SET], [ALARMS] and [Joystick Down] Hold until the required setting is obtained, then release all keys. Note that it may take up to 30 seconds to cover the whole range of adjustment. 7.3 Zoom Speed The zoom speed (voltage) may be set to one of eight options by pressing the following keys: [SET], [ZOOM↑] and [Preset 1, 2, 3, 4, 5, 6, 7 or 8] The higher the number selected, the faster the zoom rate. 7.4 Iris Speed The iris speed (voltage) may be set to one of eight options by pressing the following keys: [SET], [IRIS↑] and [Preset 1, 2, 3, 4, 5, 6, 7 or 8] The higher the number selected, the faster the iris rate. 7.5 Focus Speed The focus speed (voltage) may be set to one of eight options by pressing the following keys: Videoswitch VT601c.doc VT Series 2 User Manual Page 14 [SET], [FOCUS↑] and [Preset 1, 2, 3, 4, 5, 6, 7 or 8] The higher the number selected, the faster the focus rate. 7.6 Zoom Polarity If, when the upper and lower zoom keys are pressed, the zoom acts in the opposite direction to that expected, the polarity may be reversed: To select normal polarity press: [SET], [ZOOM↑] and [Joystick Up] To select reverse polarity by press: [SET], [ZOOM↑] and [Joystick Down] 7.7 Iris Polarity If, when the upper and lower iris keys are pressed, the iris acts in the opposite direction to that expected, the polarity may be reversed: To select normal polarity press: [SET], [IRIS↑] and [Joystick Up] To select reverse polarity by press: [SET], [IRIS↑] and [Joystick Down] 7.8 Focus Polarity If, when the upper and lower focus keys are pressed, the focus acts in the opposite direction to that expected, the polarity may be reversed: To select normal polarity press: [SET], [FOCUS↑] and [Joystick Up] To select reverse polarity by press: [SET], [FOCUS↑] and [Joystick Down] 7.9 Preset Training When a receiver is first installed, or if any changes are made to the wiring of presets, the preset training sequence should be run. The training sequence moves the pan and tilt head left, right, up and down, and exercises the lens functions. The receiver monitors the movement and determines whether presets are installed, which of the functions have preset potentiometers, and whether the voltages from the preset potentiometers increases or decreases for a given direction of motion. To instigate the training sequence, press the following keys: [SET], [IRIS↓] and [ZOOM↓] 7.10 Preset Patrol Timer The preset patrol dwell timer is set by issuing a command to start a timer, then issuing another command to stop it. The amount of time that is allowed to elapse between the start and stop commands is Videoswitch VT601c.doc VT Series 2 User Manual Page 15 remembered by the receiver (5 seconds minimum, to a resolution of 5 seconds) and used as the patrol dwell time. Before setting the time you must set AUX2 Off. To start the timer press: [SET], [LAMP] and [AUTOPAN] After the required time has elapsed, stop the timer by pressing: [SET], [LAMP] and [WIPE] 7.11 Alarm Patrol Timer The alarm patrol dwell timer is set by issuing a command to start a timer, then issuing another command to stop it. The amount of time that is allowed to elapse between the start and stop commands is remembered by the receiver (5 seconds minimum, to a resolution of 5 seconds) and used as the patrol dwell time. Before setting the time you must set AUX2 On. To start the timer press: [SET], [LAMP] and [AUTOPAN] After the required time has elapsed, stop the timer by pressing: [SET], [LAMP] and [WIPE] 7.12 Set Presets Up to eight different presets may be set from the transmitter for each receiver in the system. To set a preset, first move the selected camera to the required position and adjust the zoom, iris (if not auto) and focus. This preset position may now be stored by pressing the following keys: [SET], [LAMP] and [Preset 1, 2, 3, 4, 5, 6, 7 or 8] Videoswitch VT601c.doc VT Series 2 8. User Manual Page 16 Switch Options The transmitter is provided with DIL switches, accessible via cut-outs in the base of the unit, for setting various user options. The VT-11 has two DIL switches: • S2 is a 2-way switch located near the rear of the transmitter. • S3 is a 4-way switch located near the front of the transmitter. • S2 Underside view of VT-11 S3 Front The VT-14A, VT-18A and VT-28A have three DILL switches: • S1 is an 8-way switch located near the front of the transmitter. • S2 is an 8-way switch located near the rear of the transmitter. • S3 is a 4-way switch located near the front of the transmitter. Underside view of VT-14A, VT-18A and VT-28A S3 Front S2 S1 The functions of the switches are described in the following pages. The different sections of switch S1 are referred to as S1-1, S1-2, S1-3 etc, and similarly for the other switches. Videoswitch VT601c.doc VT Series 2 User Manual Page 17 8.1 Number of Cameras Three switch sections are used to specify the number of cameras in the system. If there are less than eight cameras, connect them to consecutive camera inputs, starting with input 1. Number of Cameras S1-1 S1-2 S1-3 *Programm able OFF OFF OFF 2 ON OFF OFF 3 OFF ON OFF 4 ON ON OFF 5 OFF OFF ON 6 ON OFF ON 7 OFF ON ON 8 ON ON ON *The Programmable option allows individual selection of which cameras are to be sequenced on the Monitor A output and which cameras are to be sequenced on the Monitor B output by means of SET operations (section 6.1 and 6.2). 8.2 Random Sequencing The transmitters are provided with a random sequence mode which can be used on both Monitor A and Monitor B. This mode is useful when a monitor is on public display for deterrence purposes. The pseudo random sequence is designed to ensure that all cameras will be selected with equal frequency but in a unpredictable order. Set this switch on if you want cameras sequence randomly, and set it off if you want camera to sequence in normal order (1,2,3 etc): S1-5 Sequence Mode OFF Normal ON Random 8.3 Alarm Modes Set this switch off if you do not want alarms latched and if you do not require audible indication of the alarms. Set this switch on if you require alarms to be remembered until manually acknowledged by an operator, and if you want an audible warning of alarms. Videoswitch S1-6 Alarm Mode OFF Unlatched ON Latched VT601c.doc VT Series 2 User Manual Page 18 8.4 Interval Switching Mode This switch should be set off if the cameras are synchronised (gen-locked). It should be set on if the cameras are not synchronised to avoid picture bounce during switching. S1-7 Interval Switching Mode OFF Immediate switch-over at vertical sync ON Blank fields inserted between vertical sync pulses during switch-over 8.5 SET Lockout All SET function for both the switcher set-up and receiver set-up can be locked out. Once the required settings have been made, it is advisable to set the lockout switch to on to avoid accidental alteration of any of the settings. VT-11: S3-1 SET Functions Lockout OFF SET functions not locked out ON SET functions locked out VT-14A, VT-18A and VT-28A: S1-8 SET Functions Lockout OFF SET functions not locked out ON SET functions locked out 8.6 Camera Termination The camera inputs are provided with switchable termination: Switch Camera Input OFF ON S2-1 1 Not Terminated 75Ω Termination S2-2 2 Not Terminated 75Ω Termination S2-3 3 Not Terminated 75Ω Termination S2-4 4 Not Terminated 75Ω Termination S2-5 5 Not Terminated 75Ω Termination S2-6 6 Not Terminated 75Ω Termination S2-7 7 Not Terminated 75Ω Termination S2-8 8 Not Terminated 75Ω Termination Videoswitch VT601c.doc VT Series 2 User Manual Page 19 8.7 Preset on Alarm (not VT-11) When an alarm is detected by the transmitter, preset 1 may automatically be called up. Note that if alarm presets are being used, this switch should be off, as the alarm preset option will perform preset selection at the receiver. S3-1 Preset on alarm OFF Presets unaffected on alarm ON Preset 1 (only) is selected on alarm 8.8 Master/Slave Operation The telemetry transmitter may be set to operate either continuously (single controller mode) or only when a switch is pressed, and for two seconds afterwards (multiple controller mode). When more than one transmitter is connected, it is essential that the multiple controller mode is selected for each transmitter. S3-2 Transmit Mode OFF Single Controller Mode ON Multiple Controller Mode (master/slave) For Master/Slave operation, the video signals from each camera should be looped through from the Master transmitter to the camera inputs of the Slave transmitter using “T” adapters. Further transmitters may be added in a similar way. All transmitter must have the camera termination turned off except for the last in the line, which has termination turned on. If master slave operation is required where the telemetry control is via twisted pairs, the transmitters also have to be linked by twisted pairs. Connect the twisted pair slave input of the Master, to the twisted pair output of the slave transmitter. Other slaves may be added in a similar way. Note that either RS232 or 20mA must be used throughout. 8.9 Twisted Pair Telemetry Baud Rate The Series 2 transmitters may be used to control receivers via twisted pair instead of coax. If twisted pair mode is used, two data rates are available. The data rate must be compatible with the type of receiver used. Videoswitch S3-3 Twisted Pair Telemetry Baud Rate OFF 7800 Baud (Series 1 compatibility) ON 9600 Baud VT601c.doc VT Series 2 9. User Manual Page 20 Test Mode The transmitter has a special test mode which allows the calibration of the joystick to be checked and also permits the lens offset voltages of the receivers to be adjusted. This mode should only be used with great care. To enter test mode, turn on the transmitter while holding on the LAMP, ALARMS, WIPE and AUTOPAN keys. Exit test mode as soon as test mode operations have been complete. To exit, turn off the unit for 5 seconds, then turn on again. 9.1 Joystick Calibration Check When in test mode, the eight preset LEDs are used to indicate the readings obtained from the joystick. The pattern of LEDs should be seen: Joystick central : OFF OFF OFF OFF OFF OFF OFF OFF Joystick pushed fully left or right: OFF ON ON ON OFF OFF OFF OFF Joystick pushed fully up or down: OFF OFF OFF OFF OFF ON ON ON 9.2 Lens Offset Adjust Good access to the receiver is necessary to perform this operation. When in test mode, the lens offset voltages can be increased or decreased by monitoring the each voltage in turn with a voltmeter and pressing: [SET], [WIPE], [AUTOPAN] and [ZOOM↑, IRIS↑ or FOCUS↑] or [SET], [WIPE] , [AUTOPAN] and [ZOOM↓, IRIS↓or FOCUS↓] The voltages should be set to as close to zero as possible (to avoid lens creep). Note that there should be no need in normal use of the receiver to ever perform this operation as offsets are factory set during manufacture. Videoswitch VT601c.doc VT Series 2 User Manual Page 21 10. Connector Pin-outs 10.1 Alarm Connector View of Female 25-way D-type Connector on rear of transmitter (not VT-11): Signal Alarm Input 1 Alarm Input 2 Alarm Input 3 Alarm Input 4 Alarm Input 5 Alarm Input 6 Alarm Input 7 Alarm Input 8 Alarm Common (Ground) Alarm Output - Relay N/O Contact Alarm Output - Relay N/C Contact Alarm Output - Relay Common Pin 8 21 9 22 10 23 11 24 20 12 13 25 10.2 Telemetry Connector View of Female 15-way D-type Connector on rear of transmitter: Signal RS232 Output RS232 Slave Input 20mA Output 20mA Slave Input Grounds Videoswitch Pin 3 2 5 4 1, 6, 7, 8, 9 VT601c.doc VT Series 2 User Manual Page 22 11. Specifications 11.1 Telemetry 11.1.1 Coax Telemetry Output 500kHz on-off keying during vertical blanking interval, transmitted to camera currently selected on monitor A. 11.1.2 Twisted Pair Telemetry Output RS232 or 20mA Current Loop. 7.8kbaud or 2400 baud. Data format: 1 start bit, 8 data bits, 1 parity bit, 1 stop bit. 11.1.3 Twisted Pair Telemetry Slave Input Connect to twisted pair telemetry output of slave transmitter. The same interface type (RS232 or 20mA) must be used by master and slaves. 11.2 Switcher 11.2.1 Auto Dwell Times 1 second to 255 seconds (4 minutes approx.) 11.2.2 Alarm Hold, Cycle and Relay Hold Times 1 second to 255 seconds (4 minutes approx.) 11.3 Video Inputs & Outputs 11.3.1 Video Inputs & Outputs 1V pk-pk, terminated with 75 Ohms (termination may be removed on a per camera basis). PAL colour or monochrome composite video signals. 11.3.2 DC Restoration Outputs are DC restored to <100mV. 11.4 Alarms 11.4.1 Alarm Inputs/Outputs Alarm inputs require normally open contacts to activate (internally pulled up to 5V via 10KΩ resistors). Alarm output is change-over relay contacts, rated at 500mA, 24 Volts ac/dc. 11.5 Power Requirements 220/240Vac 50/60Hz 10W (110Vac available as an option) 11.6 Dimensions 11.6.1 VT-14A, VT-18A, VT-28A 310 mm (wide) x 145 mm (deep) x 60 mm (high) 11.6.2 VT-11 190 mm (wide) x 145 mm (deep) x 60 mm (high) 11.7 Environmental Operating Temperature 0 to +40°C Storage Temperature -20 to +70°C Humidity Videoswitch 5% to 95% non-condensing VT601c.doc VT Series 2 User Manual Page 23 12. Safety Warning q Before connecting the mains supply to the unit, check that the supply voltage corresponds with the voltage indicated on the power rating label on the unit. q To avoid the risk of electric shock, the mains supply must be disconnected from the unit before the cover is removed. q This equipment must be earthed. q The unit is protected with an internally mounted mains fuse. For continued protection against the risk of fire, replace only with the same type and rating of fuse. q This product is supplied with a moulded 13 Amp plug (fitted with a 5A mains fuse) for connection to a standard UK mains socket outlet, or with a European style plug. The wires in the power cable are coloured in accordance with the following code: Videoswitch Green and Yellow Earth (E) Blue Neutral (N) Brown Live (L) VT601c.doc Videoswitch VT601c.doc