1
Chapter 3: Getting Started
Attaching the Cabinet to the Wall
WARNING: The evidence drying cabinet must be secured to a wall stud,
or other suitable wall structure, using the included strap and bracket.
This will minimize the possibility of the unit overturning when in use.
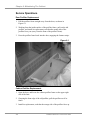
1. Remove the wall bracket secured to the strap, located on the back of
the unit on top.
2. Locate a stud inside the wall directly behind the cabinet’s installation
location.
NOTE: The screws provided with the wall bracket are intended to be
used when attaching the bracket to a wooden wall stud. If your wall is
made of different materials (cinder block, concrete, etc.), you will need to
attach the wall bracket to the wall using an anchor or fastener approved
for that type of construction.
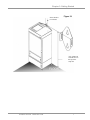
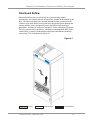
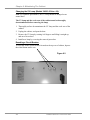
3. Position the bracket, centered on the stud, with the top of the strap slot
79 inches above the floor. Mark the top of each screw hole, as shown
in Figure 3-1.
4. Using a 1/8" (3 mm) drill, drill pilot holes at both marked locations to
a depth of at least 1-½ inches (38 mm).
5. Using a #3 Phillips screwdriver, tighten both bracket screws until the
bracket is secured to the wall.
6. Thread the strap through both bracket slots, and then through both
slots located at the top corners on the rear of the cabinet.
7. Push the cabinet back into its final location, and then tighten the strap
until there is minimal slack in the strap.
6
Product Service 1-800-522-7658