1
Adam Equipment
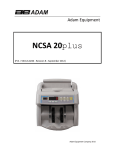
NCSA 20plus
Service Manual
(P.N. 7.00.6.6.0247- Revision A - August 2012)
Adam Equipment Company 2012
1.0 CONTENTS
1.0
1.1
2.0
CONTENTS...........................................................................................1
KEY AND PANEL DESCRIPTION .....................................................2
OPERATION .........................................................................................3
2.1
COUNTING FUNCTION .....................................................................3
2.2
BATCH FUNCTION............................................................................3
2.3
ADD FUNCTION ................................................................................4
2.4
DUBIOUS NOTE DETECTION...........................................................5
3.0
3.1
4.0
SETTING THE SENSITIVITY LEVEL ....................................................6
PARAMETER SETTING TABLE.........................................................6
ERROR MESSAGES, CODES AND SOLUTIONS ................................7
4.1
SENSOR ERROR TABLE ..................................................................7
4.2
BANK NOTE ERROR TABLE.............................................................7
5.0
SERVICE INFORMATION ....................................................................8
5.1
REPLACING THE FEED ROLLERS...................................................8
5.2
REPLACING THE DRIVE BELTS ......................................................9
5.3
REPLACING THE MAIN PCB...........................................................10
5.4 REPLACING THE DISPLAY PCB .....................................................10
5.5
REPLACING THE POWER PCB ......................................................11
5.6
REPLACING SENSORS ..................................................................11
5.7
SENSOR POSITION PICTURE........................................................11
5.8
REPLACING OTHER PARTS...........................................................12
6.0
PARTS LIST AND PICTURES.............................................................12
1
Adam Equipment Company 2012
1.1 KEY AND PANEL DESCRIPTION
[ON/OFF]
The power switch is located on the rear housing. Use this key to
turn the counter ON and OFF.
[START]
Press the [START] key to continue checking following the
detection of a counterfeit note. It can also be used to enter the
parameters for the MG and UV set up and BATCH number.
[BATCH]
Press the [BATCH] key to enter the BATCH mode which enables
you to select the required quantity of notes to be counted.
[ADD]
Press this key to enable accumulation of the counted notes.
[+]
Press this key to increase the quantity in the BATCH display. It
can also be used to select settings in the parameter section.
[-]
Press this key to decrease the quantity in the BATCH display. It
can also be used to select settings in the parameter section.
[MG]
Press this key to select detection using the Magnetism sensor.
[UV]
Press this key to select detection using the Ultra Violet sensor.
2
Adam Equipment Company 2012
2.0 OPERATION
2.1
COUNTING FUNCTION
To count the notes place them in between the guides at the rear of the
machine. The sensor will detect the notes and feed them through displaying
the number of notes counted on the Main Display.
2.2
BATCH FUNCTION
The BATCH function allows you to count a pre determined number of notes.
When in BATCH mode the BATCH LED will light up.
Press the [BATCH] key and the BATCH display will show 100, use the [+] key to
increase the amount by 1, and the [-] key to decrease the amount by 10 to the
figure that you require for each BATCH.
Place the notes into the guides at the rear of the machine and the counter will
feed through the required amount and stop. The Main display should display
and match that of the BATCH display with the correct amount of notes being
in the holder at the front of the machine.
When the notes are removed the counting automatically resumes and feeds
through the remaining notes until the required figure is met again. Remove
the second BATCH and continue until all of the notes are counted.
If there are not enough notes to reach the required amount for a BATCH the
Main display will display a flashing figure of how many notes have been
counted so far. Place more notes into the machine to continue until the
BATCH figure is reached.
Press the [BATCH] key to return to normal counting and the LED will go out.
3
Adam Equipment Company 2012
2.3
ADD FUNCTION
The ADD function allows you to accumulate and show a total number of notes
that are being counted as well as a count for each separate counting process.
When in ADD mode the ADD LED will light up.
Press the [ADD] key and the BATCH display will show 0.
Place the notes into the guides at the rear of the machine and the counter will
feed the notes through. The Main display and the BATCH display will both show
the same amount of notes that have been counted. The counter will continue
to work like this when more notes are added to the machine.
When the notes are removed from the holder at the front and the next amount
of notes are placed into the machine the BATCH display will reset to 0. Once
the notes have been fed through the BATCH display will show the quantity of
this last count only and the Main display will show the total of the two counts.
Continue like this until all of the notes are counted. When finished the Main
display will show you the total of all counting processes that have been made.
The BATCH display will always show the last quantity of notes counted from
when any previously counted notes have been removed from the holder at the
front of the machine.
Press the [ADD] key to return to normal counting and the LED will go out.
Note: ADD and BATCH can be enabled together.
In this case the counter will always stop when the required quantity is met and
then continue when the notes are removed from the holder at the front. The
Main display will accumulate all countings and give a total count at the end and
the Batch display will show the required Batch quantity.
4
Adam Equipment Company 2012
2.4
DUBIOUS NOTE DETECTION
The Magnetism (MG) and Ultraviolet (UV) functions are automatically enabled
on Power up, these functions detect counterfeit notes as the counting process
is performed.
The MG and UV LED’s will be on.
The degree of sensitivity for these can be set by the USER to customise how
they work.
Please see section 5.1 for more details.
When a counterfeit note is detected by the MG sensor the counting process
will stop, the counter will BLEEP and the error message E3 will be displayed
until the note is removed from the holder. Remove the counterfeit note and
press [START] to continue counting.
When a counterfeit note is detected by the UV sensor the counting process will
stop, the counter will BLEEP and the error message E2 will be displayed until
the note is removed from the holder. Remove the counterfeit note and press
[START] to continue counting.
The last note in the holder will always be the counterfeit one.
The MG and UV functions can be de activated by pressing the [MG] and/or [UV]
key once whereby the LED’s will go off.
Chain and half note detection are also enabled and have error codes to
determine which type of detection has been made.
When a detection for any of these have been made please note that the faulty
note will still have been included in the total count on the Main display.
Remove the faulty note and press [START] to resume counting.
Please see error code table in section 6.2 for more details.
5
Adam Equipment Company 2012
3.0 SETTING THE SENSITIVITY LEVEL
Press the [START] key for 3-5 seconds to enter the Parameter setting section.
Press the [+] key to select the parameter and the [-] key to change its setting.
Once settings have been made press the [START] key to return to normal
counting.
3.1
PARAMETER SETTING TABLE
AVAILABLE SETTINGS
DEFAULT
CODE
FUNCTION
OP-A
UV SENSITIVITY
OP-B
MG SENSITIVITY
OP-D
SIZE DETECTION
OP-E
AUTOMATIC OR
MANUAL
YES = AUTOMATIC
NO = MANUAL
YES
OP-U
INCLUDE
DUBIOUS NOTE
IN TOTAL
YES
NO
YES
OFF AND 1-10
1 = LOWEST
10 = HIGHEST
OFF AND 1-10
1 = LOWEST
10 = HIGHEST
YES
NO
6
5
5
YES
Adam Equipment Company 2012
4.0 ERROR MESSAGES, CODES AND SOLUTIONS
4.1
4.2
SENSOR ERROR TABLE
MESSAGE
ERROR
C-1
START SENSOR PROBLEM
C-2
BATCH SENSOR PROBLEM
C-3
LEFT SIDE SENSOR PROBLEM
C-4
RIGHT SIDE SENSOR PROBLEM
C-5
UV SENSOR PROBLEM
C-6
SPEED SENSOR PROBLEM
C-7, C-8,C-9
MG SENSOR PROBLEM
BANK NOTE ERROR TABLE
CODE
ERROR
SOLUTION
HALF NOTE DETECTED
REMOVE NOTE AND PRESS
[START]
DUBIOUS NOTE DETECTED BY UV SENSOR
REMOVE THE NOTE AND
PRESS [START], CHECK THE
UV SENSITIVITY SETTING
E-3
DUBIOUS NOTE DETECTED BY MG SENSOR
REMOVE THE NOTE AND
PRESS [START], CHECK THE
MG SENSITIVITY SETTING
E-5
DUBIOUS NOTE DETECTED BY SIZE
DETECTION SENSOR
REMOVE THE NOTE AND
PRESS [START]
E-9
DUBIOUS NOTE DETECTED BY CHAIN NOTE
DETECTION SENSOR
REMOVE THE NOTE AND
PRESS [START]
E-1
E-2
7
Adam Equipment Company 2012
If any of the error messages appear please check to ensure the sensors are
clean and the areas around them are clear. Clean with a soft cloth and dust
the area with a brush. If the problem persists please contact your dealer.
An adjustment can be made to suit the thickness of the note being counted by
turning the special spring tensioned screw located under the note tray at the
rear of the counter.
Turn this screw clockwise for a thinner note and anti clockwise for a thicker
note.
5.0 SERVICE INFORMATION
Replacement of parts may be necessary when faults occur, the error codes in
table 4.1 help determine where some of the faults may lie and the following
information is a guide how to remove and replace them.
5.1
REPLACING THE FEED ROLLERS
Unscrew the note feeder adjusting screw as far as you can and pull hard
towards you on the note feeder assembly. The assembly should come
out exposing the feed rollers and assembly shaft. Pull the note feeding
guide upwards which should then also come out. Remove the two outer
covers by unscrewing the 5 x screws that attach each one. Remove the
circlip at each end of the shaft and push the shaft through to enable
easy removal of the feed rollers. Removing the large drive belt may also
make this easier to do.
8
Adam Equipment Company 2012
Pull to the side the damaged or worn feed roller from its mounting
wheel and off the shaft. Replace the rollers and make sure they are
firmly secured.
Reposition the shaft, replace both circlips and re fit the drive belt if
removed. Re fit the two side covers, note feeding assembly and guide.
5.2
REPLACING THE DRIVE BELTS
Remove the right side cover to expose the drive assemblies. Pull the old
drive belts from the wheels and replace with a new one making sure
that the drive belts are situated correctly on the wheels then replace
the cover.
9
Adam Equipment Company 2012
5.3
REPLACING THE MAIN PCB
Remove the left side cover to expose the MAIN PCB and speed sensor
assembly. Disconnect all cables and remove the old MAIN PCB and
replace with a new one, Re connect all cables to the PCB.
Unscrew the speed sensor and disconnect the cable from the PCB. Fit
the new sensor, fasten securely and re connect the cable to the PCB.
5.4
REPLACING THE DISPLAY PCB
Lift the handle and lean it towards the rear of the counter, then from
the rear lift the display housing towards the front. Remove the 5 x
screws to expose the display PCB. Remove the 6 x PCB fixing screws and
connector from the PCB and replace the PCB. Refit the cable connector,
screws and housing.
10
Adam Equipment Company 2012
5.5
REPLACING THE POWER PCB
Place the machine onto one side which will expose the service cover
panel, remove the 2 screws and the panel with the power PCB attached
will come away, remove the PCB cover and faulty PCB and replace with
a new one.
5.6
REPLACING SENSORS
When replacing a sensor the old one will need to be removed and the
new one fitted to the PCB or mounting. Various screws have to be
removed to gain access to the sensors.
The START sensor can be changed after removing the note feeder
assembly as explained in section 5.1
The BATCH sensor can be changed following the removal of the 2 x
screws on the front underside of the machine. The new sensor will have
to be fixed using hot melt glue.
The UV, MG and also the LEFT and RIGHT sensors can be changed by
accessing them from the front and also from the top of the machine.
The display unit will need to be pulled forward to expose the top part
for access.
5.7
SENSOR POSITION PICTURE
11
Adam Equipment Company 2012
5.8
REPLACING OTHER PARTS
Other parts such as the large and small motor, transformer and ON/OFF
switch can be changed by removing the side, rear and underside covers
where appropriate.
6.0 PARTS LIST AND PICTURES
NCSA 20plus
Part number
Description
7.00.4.0.0125
NCSA 20plus MAIN PCB
7.00.4.0.0126
NCSA 20plus POWER PCB
7.00.4.0.0127
NCSA 20plus DISPLAY PCB
7.00.4.0.0128
NCSA 20plus ON/OFF SWITCH
7.00.4.0.0129
NCSA 20plus LARGE MOTOR
7.00.4.0.0130
NCSA 20plus SMALL MOTOR
7.00.2.3.0009
NCSA 20plus FEED ROLLERS (SET OF)
7.00.2.3.0010
NCSA 20plus LARGE DRIVE BELT
7.00.2.3.0011
NCSA 20plus SMALL DRIVE BELT
7.00.1.0.0293
NCSA 20plus LEFT AND RIGHT SIDE SENSOR (x2)
7.00.1.0.0294
NCSA 20plus MG SENSOR
7.00.1.0.0295
NCSA 20plus UV SENSOR
7.00.1.0.0296
NCSA 20plus START SENSOR
7.00.1.0.0297
NCSA 20plus SPEED SENSOR
7.00.1.0.0298
NCSA 20plus BATCH SENSOR
7.00.1.0.0299
NCSA 20plus TRANSFORMER
7.00.3.0.0028
NCSA 20plus COMPLETE PACKAGING
12
Adam Equipment Company 2012
MAIN PCB
SPEED SENSOR
DRIVE BELTS
13
Adam Equipment Company 2012
POWER PCB
MOTORS
14
Adam Equipment Company 2012
WARRANTY INFORMATION
Adam Equipment offers Limited Warranty (Parts and Labour) for the components failed due to defects
in materials or workmanship. Warranty starts from the date of delivery.
During the warranty period, should any repairs be necessary, the purchaser must inform its supplier or
Adam Equipment Company. The company or its authorised Technician reserves the right to repair or
replace the components at any of its workshops depending on the severity of the problems. However,
any freight involved in sending the faulty units or parts to the service centre should be borne by the
purchaser.
The warranty will cease to operate if the equipment is not returned in the original packaging and with
correct documentation for a claim to be processed. All claims are at the sole discretion of Adam
Equipment.
This warranty does not cover equipment where defects or poor performance is due to misuse,
accidental damage, exposure to radioactive or corrosive materials, negligence, faulty installation,
unauthorised modifications or attempted repair or failure to observe the requirements and
recommendations as given in this User Manual. Additionally rechargeable batteries (where supplied)
are not covered under warranty.
Repairs carried out under the warranty does not extend the warranty period. Components removed
during the warranty repairs become the company property.
The statutory right of the purchaser is not affected by this warranty. The terms of this warranty is
governed by the UK law. For complete details on Warranty Information, see the terms and conditions
of sale available on our web-site.
15
Adam Equipment Company 2012
Adam Equipment Company 2012
Adam Equipment Company 2012
Manufacturer’s Declaration of Conformity
This product has been manufactured in accordance with the harmonised European standards, following the
provisions of the below stated directives:
Restriction of the use of certain hazardous substances
in electrical and electronic equipment 2011/65/EC (RoSH)
Electro Magnetic Compatibility Directive 2004/108/EC
Low Voltage Directive 2006/95/EC
Adam Equipment Co. Ltd.
Maidstone Road, Kingston
Milton Keynes, MK10 0BD
United Kingdom
FCC COMPLIANCE
This equipment has been tested and found to comply with the limits for a Class A digital device, pursuant to
Part 15 of the FCC Rules. These limits are designed to provide reasonable protection against harmful
interference when the equipment is operated in a commercial environment. The equipment generates, uses,
and can radiate radio frequency energy and, if not installed and used in accordance with the instruction
manual, may cause harmful interference to radio communications. Operation of this equipment in a
residential area is likely to cause harmful interference in which case the user will be required to correct the
interference at his own expense.
Shielded interconnect cables must be employed with this equipment to insure compliance with the pertinent
RF emission limits governing this device.
Changes or modifications not expressly approved by Adam Equipment could void the user's authority to
operate the equipment
WEEE COMPLIANCE
Any Electrical or Electronic Equipment (EEE) component or assembly of parts intended to be incorporated into
EEE devices as defined by European Directive 2002/95/EEC must be recycled or disposed using techniques that
do not introduce hazardous substances harmful to our health or the environment as listed in Directive
2002/95/EC or amending legislation. Battery disposal in Landfill Sites is more regulated since July 2002 by
regulation 9 of the Landfill (England and Wales) Regulations 2002 and Hazardous Waste Regulations 2005.
Battery recycling has become topical and the Waste Electrical and Electronic Equipment (WEEE) Regulations
Adam Equipment Company 2012
are set to impose targets for recycling.
ADAM EQUIPMENT is an ISO 9001:2008 certified global company with more than 35 years
experience in the production and sale of electronic weighing equipment.
Adam products are predominantly designed for the Laboratory, Educational, Health and Fitness,
retail and Industrial Segments. The product range can be described as follows:
-Analytical and Precision Balances
-Compact and Portable Balances
-High Capacity Balances
-Moisture analysers / balances
-Mechanical Scales
-Counting Scales
-Digital Weighing/Check-weighing Scales
-High performance Platform Scales
-Crane scales
- Health and Fitness Scales
-Retail Scales for Price computing
For a complete listing of all Adam products visit our website at www.adamequipment.com
© Copyright by Adam Equipment Co. Ltd. All rights reserved. No part of this publication may be reprinted or
translated in any form or by any means without the prior permission of Adam Equipment.
Adam Equipment reserves the right to make changes to the technology, features, specifications and design of
the equipment without notice.
All information contained within this publication is to the best of our knowledge timely, complete and
accurate when issued. However, we are not responsible for misinterpretations which may result from the
reading of this material.
The latest version of this publication can be found on our Website.
www.adamequipment.com
Adam Equipment Company 2012