1
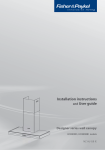
VentSurface
User guide
HC90 and HI120 models
NZ AU GB IE
Contents
Introduction
Safety and warnings
Using your VentSurface
Care and cleaning
Troubleshooting
Warranty and service
Important!
SAVE THESE INSTRUCTIONS
The models shown in this user guide may not be available in all markets and are
subject to change at any time. For current details about model and specification
availability in your country, please visit our website listed on the back cover
or contact your local Fisher & Paykel dealer.
1
3
4
5
9
12
13
2
Introduction
Introducing your VentSurface
Congratulations on your new purchase. Your Fisher & Paykel VentSurface is the ultimate in
extractor hoods, giving you different modes and extraction speeds to suit your changing needs.
Your VentSurface can also operate and turn off automatically and alerts you when it needs
cleaning.
Before using your VentSurface
Make sure the installer has correctly installed your VentSurface.
Read this guide, taking special note of the ‘Safety and warnings’ section.
Make sure the protective blue film covering the stainless steel surfaces has been removed.
Safety and warnings
Your safety is important to us. Please read this
information before using your VentSurface.
WARNING!
Electrical Shock Hazard
Always disconnect the appliance from
the mains electricity supply before
carrying out any servicing or
maintenance operations.
Failure to do so may result in electrical
shock.
3
4
Safety and warnings
WARNING!
Hot Surface Hazard
Make sure the elements or gas burners
of the cooking surface always have
pans/pots on them and never heat the
filter(s) of your appliance directly.
When frying, never leave pans
unattended as there is a risk of the oil
overheating and catching fire.
If reusing frying oil, the risk of fire is
greater.
Never prepare flambé (flame-cooked)
dishes under the appliance.
To avoid fire hazard, make sure that
no grease deposits accumulate on the
surface of the appliance or the filter(s).
Read the instructions on care and
cleaning carefully. There could be a risk
of fire if the instructions are not carefully
followed.
Failure to follow this advice could result
in burns and scalds.
Safety and warnings
5
Important safety instructions
Make sure that the room in which the appliance
is used has adequate ventilation, especially
when other appliances burning gas or other
fuels are being used at the same time.
For island models, make sure the ceiling is able
to withstand the total weight (56 kg) of the
appliance suspended from it. For wall models,
make sure the wall is able to withstand the total
weight (34 kg) of the appliance mounted on it.
Take care when removing filters in order to
prevent the filter falling and causing damage to
the cooking surface.
Do not leave children alone. Children should
not be left alone or unattended in the area
where the appliance is in use. They should never
be allowed to sit or stand on any part of the
appliance. Children or persons with a disability
which limits their ability to use the appliance,
should have a responsible person to instruct
them in its use. The instructor should be satisfied
that they can use the appliance without danger
to themselves or their surroundings.
6
Safety and warnings
Important safety instructions
Young children should be supervised to ensure
that they do not play with the appliance.
Children of less than 8 years old must be kept
away from the appliance unless continuously
supervised. This appliance can be used by
children aged from 8 years and above, and
persons with reduced physical, sensory or
mental capabilities or lack of experience and
knowledge, if they have been given supervision
or instruction concerning the use of the
appliance in a safe way and they understand
the hazards involved. Cleaning and user
maintenance shall not be done by children
without supervision.
If the supply cord of this appliance is damaged,
it must only be replaced by the manufacturer or
its service agent, or a similarly qualified person
in order to avoid a hazard.
Do not use the top surface of the canopy as a
storage shelf or place heavy objects on it.
Do not clean the areas behind the filters.
Do not use harsh/abrasive cleaners, scouring
pads or sharp metal scrapers to clean your
appliance.
Using your VentSurface
7
Control panel features
1
2
3
4
5
6
Fig.1 Control panel
1
2
3
4
5
6
Fan on/off (Stand-by)
Decreases fan speed
Mode, speed and cleaning alert display
Increases fan speed
Timer
Lamps on/off
Using your VentSurface for the first time or after a long holiday
1
2
3
4
5
Make sure your cooker or cooktop is turned off and there are no draughts in the room.
Make sure your VentSurface is on stand-by (ie plugged into a power outlet which is switched on
at the wall but the fan is off ).
Press the
and
buttons simultaneously for three seconds. The VentSurface will beep briefly.
You now have manually recalibrated your VentSurface.
Set the VentSurface to normal or high power mode (see instructions following).
Set the VentSurface to automatic or manual mode (see instructions following).
8
Using your VentSurface
Choosing between normal and high power modes
These two modes give you flexibility and optimum VentSurface performance to suit your
changing cooking activities. Use normal mode for everyday cooking purposes, and high mode
during longer periods of intensive cooking (eg holidays or family gatherings) for more powerful
venting. Your VentSurface operates in normal mode as a default setting.
To change between normal and high power modes
Make sure your VentSurface is on stand-by (ie plugged into a power outlet which is switched on
at the wall but the fan is off ).
2 Press the
button and hold down for approximately three seconds.
3a The letter “L” will show in the display, indicating that you are in normal power mode.
or
3b The letter “H” will show in the display, indicating that you are in high power mode.
4 Press the
button and hold down for approximately three seconds to change to the power
mode you want. The power mode last selected will be activated.
1
Choosing between automatic and manual modes
As a default setting, your VentSurface is set to operate in manual mode. It will revert to the
default manual mode setting whenever you press the
button to turn the VentSurface off
(into stand-by) or unplug it from its power outlet.
To change from manual to automatic mode
Make sure your VentSurface is on stand-by (ie plugged into a power outlet which is switched on
at the wall but the fan is off ).
2 Press the
button and hold down for three seconds. The VentSurface is now in automatic
mode.
3a If the sensors in your VentSurface automatically turn the fan on, a green bar will start looping
around in the display at a speed proportional to the automatically activated fan speed.
3b If the sensors in your VentSurface do not turn the fan on, the letter “S” will appear in the display,
reminding you that your VentSurface is now set to automatic mode. The letter “S” will go out
after 20 minutes if the sensors do not sense any cooking activity, and your VentSurface will revert
to manual mode.
1
Using your VentSurface
9
Using your VentSurface in automatic mode
When the VentSurface is in automatic mode, its sensor will automatically turn the fan on, adjust
button.
its speed and turn the fan off as needed. To illuminate your cooking area, press the
Note: your VentSurface will revert to the default manual mode setting whenever you press the
button to turn the VentSurface off manually (into stand-by) or unplug it from its power
outlet.
To change from automatic to manual mode
or
buttons. The
To return the VentSurface to manual mode but keep it running, press the
fan speed setting will be reduced to the lowest, and “1” will show in the display.
or
button and hold
To return the VentSurface to manual mode and turn it off as well, press the
down for three seconds. The VentSurface will turn off (revert to stand-by).
Using your VentSurface in manual mode
As a default setting, your VentSurface is in manual mode. Depending on your cooking task
(intensity of cooking and nature of food), you can choose between six different fan speed
settings. For tips on which fan speed to use, see ‘Tips for using the VentSurface’.
To use the VentSurface manually
1 Press the
button for two seconds. The fan will turn on and start extracting at speed “3”.
1a To turn the lamps on, press the
button.
2 Use the
and
buttons to modify the fan speed to suit your needs.
button briefly, you can reduce the fan speed one step at a time.
If you press the
button and holding it down for at least one second will reduce the speed
Pressing the
to the lowest level “1”.
button briefly, you can increase the fan speed one step at a time.
If you press the
button and holding it down for at least one second will increase
Pressing the
the speed to the highest level “6”.
3 To turn the VentSurface off (into stand-by), press the
button for two seconds.
3a To turn the lamps off, press the
button.
Notes
If you set the fan to run at the highest speed when in normal power mode (indicated by “6” in
the display), your VentSurface and the lamps will automatically turn off after 10 minutes.
If you set the fan to run at the highest speed when in high power mode (indicated by “6” and “H”
flashing alternately in the display), the speed will be automatically reduced to level “5” after 15
minutes.
You may use the lamps to illuminate the area of your cooker, even if the VentSurface is not in
use.
For your safety, the VentSurface is equipped with a temperature sensor and automatic safety
feature. Even if the VentSurface is in manual mode and turned off (on stand-by), it will turn
itself on automatically if the system detects a sudden and excessive increase in the surrounding
temperature. Depending on the temperature sensed, the VentSurface will automatically turn off
after a set time.
10
Using your VentSurface
Using the timer (in manual mode only)
When the timer is activated
the VentSurface will run for 10 minutes and then turn off automatically.
the selected fan speed will flash in the display while the timer is counting down.
1
2
3
To activate the timer
Select a fan speed between “1” and “5”.
Press the
button briefly, until you hear a short beep.
The timer function is now activated and your VentSurface and the lamps will automatically turn
off after 10 minutes.
Notes on using the timer
You may deactivate the timer before the 10-minute period is over by pressing the
button
briefly until you hear a short beep. The fan speed will stop flashing and the timer is now
deactivated.
You may adjust the fan speed while the timer is counting down.
If the timer is activated and you increase the fan speed to the highest level “6” when in high
power mode, “H” and “6” will flash alternately in the display and the timer will be deactivated. The
speed will be automatically reduced to level “5” after 15 minutes, but the VentSurface will keep
running.
If the timer is activated and you increase the fan speed to the highest level “6” when in normal
power mode, this does not deactivate the timer and it will continue counting down. If you
decrease the fan speed again, this will reset the timer and restart the 10-minute countdown.
Tips for using your VentSurface
Fan speed
1
2
3
Typical cooking task
Gentle simmering of a covered pot and reheating.
Shallow and deep frying, making jam, simmering multiple covered pots.
4
5
Rapid boiling of uncovered pots, char-grilling or searing.
6
Use your VentSurface on high power mode when cooking intensively for an extended period of
time.
Use your VentSurface on normal power mode for general everyday cooking.
For best performance when in manual mode, start using the VentSurface about five minutes
before starting cooking and allow the VentSurface to operate for 10 minutes after you have
finished cooking. The timer function allows you to set the VentSurface to turn off automatically
after 10 minutes.
Care and cleaning
11
Important!
Always disconnect the appliance from the mains electricity supply before carrying out any
servicing or maintenance. Failure to do so may result in death or electrical shock.
Do not let grease deposits accumulate on your VentSurface, as these could create a fire hazard.
Do not use harsh/abrasive cleaners, scourers or sharp metal scrapers to clean your VentSurface.
Do not clean the areas behind the filters.
How do I know when the filters need cleaning/replacing?
Your VentSurface is set up to alert you when you need
to clean the aluminium mesh filter (after 30 hours of
operation) or replace the carbon filter (after 120 hours
of operation).
If the aluminium mesh filter needs cleaning, the letter
“A” will start flashing in the display alternately with the
fan speed setting. See the instructions following.
If you are using an odour-absorbing carbon filter and it
needs replacing, the letter “C” will start flashing in the
display alternately with the fan speed setting. See the
instructions on the following page.
1
2
3
4
5
6
7
8
2
1
Fig.2 Removing the aluminium
mesh filter
To clean the aluminium mesh filter
Stop/reset the cleaning alert signal.
If “A” is flashing in the display alternately with the fan speed setting, turn the VentSurface
off by pressing the
button, then press the
buttons simultaneously and
and
hold down for five seconds until you hear a beep. “8” will show in the display until the alert
signal has been reset.
Unplug the VentSurface from the power outlet or switch off at the wall.
Unclick the magnetic stainless steel cover plate and gently lower it down (Fig.2).
To remove the aluminium mesh filter, pull gently on the release handle with one hand and
support the filter from underneath with the other (to prevent it falling onto the cooking surface).
Wash the aluminium mesh filter by hand using a mild detergent, or in the dishwasher using a
short, 60 oC cycle.
When dry, replace the aluminium mesh filter.
Click the protective cover plate back into place.
Plug the VentSurface back into the power outlet or switch on at the wall.
12
Care and cleaning
To replace the carbon filter
1
2
3
4
5
6
7
8
9
Stop/reset the carbon filter alert signal.
If “C” is flashing in the display alternately with the fan speed setting, turn the VentSurface off
buttons simultaneously and hold down
by pressing the
button, then press the
and
for five seconds until you hear a beep. “8” will show in the display until the alert signal has been
reset.
Unplug the VentSurface from the power outlet or switch off at the wall.
Unclick the front edge of the magnetic stainless steel cover plate and gently lower it down
(Fig.2).
Remove the aluminium mesh filter: pull gently on the release handle with one hand and support
the filter from underneath with the other (to prevent it falling onto the cooking surface). This will
reveal the back carbon filter.
Release the carbon filter by turning the two slotted screw heads 90 degrees with one hand while
supporting the carbon filter with the other.
Fit the replacement carbon filter.
Replace the aluminium mesh filter.
Click the protective cover plate back into place.
Plug the VentSurface back into the power outlet or switch on at the wall.
Care and cleaning
13
Cleaning the stainless steel surfaces
Do not use abrasive cleaners, cloths or pads to clean your VentSurface. Wipe the stainless steel
surfaces often, using warm water and a mild household detergent. The stainless steel may also
be cleaned with a suitable cleaner and polish.
Note: if you choose to use a commercial stainless steel cleaner, please read the label to make
sure it does not contain chlorine compounds as these are corrosive and may damage the
appearance of your VentSurface.
Replacing the lamps
1
2
3
Wall-mounted (HC90) models have two, and island (HI120) models have four lamps. If you should
need to replace the lamps, make sure you are using the correct type of light bulb (G4 halogen
bulbs 10W max. each). Note: bulb replacement is not covered by your warranty.
Unplug the VentSurface from the power outlet or switch off at the wall.
Allow the light bulbs to cool down.
Locate the outer metal ring of the lamp cover. Pressing it with your fingers, rotate it clockwise
firmly, making sure you do not touch the glass cover. The cover will fall out.
Important!
Do not use a screwdriver or any other sharp
metal object to force the lamp cover out, as
doing so may result in the glass chipping.
4
5
6
7
Remove the faulty bulb(s) using a soft
cloth. Do not touch the bulb with your
fingers.
Replace with the new bulb(s) using a soft
cloth. Make sure the new bulb(s) comply
with the specifications above.
Refit the lamp cover. Place the lamp
cover into its hole, making sure it is flush
with the glass surface (1). Using your
fingers, start rotating the outer metal
ring anticlockwise (2). To lock the lamp
cover into place, the small gripping hooks
on the outer rim of the metal ring need
to slide under the black plastic shroud
housing the lamp (similarly to a bayonet
mount mechanism).
Plug the VentSurface in or switch the
power outlet on at the wall.
2
1
Fig.3 Refitting the lamp cover
14
Troubleshooting
Troubleshooting chart
Problem
Cause
What to do
“A “ flashing alternately
with the fan speed
setting.
The aluminium mesh filter needs
cleaning (automatic
alert).
Clean the aluminium mesh filter
following the instructions in
‘Care and cleaning’.
“C” flashing alternately
with the fan speed
setting.
The carbon filter needs
replacing (automatic
alert).
Replace the carbon filter
following the instructions in
‘Care and cleaning’.
“A” or “C” flashing
alternately with the
fan speed setting, with
the fan speed setting
flashing twice.
The filter(s) need cleaning/
replacing and the timer is
activated.
First deactivate the timer; see
the section ‘Using the timer’.
Then see the problems above.
“8” flashing in display
when the VentSurface is
in automatic mode.
The VentSurface has
detected an error in the
automatic sensor.
Return to manual mode.
The VentSurface can still
be used in manual mode.
The lamp cover will not
fall out when rotated
clockwise.
The lamp cover is jammed.
Try jiggling the lamp cover
sideways. If the problem
persists, call your Authorised
Service Centre or Customer
Care.
Warranty and service
15
Manufacturer’s warranty
When you purchase any new Fisher & Paykel rangehood you automatically receive a two year
Manufacturer’s Warranty covering parts and labour for servicing.
Fisher & Paykel undertakes to
Repair or, at its option, replace without cost to the owner either for material or labour any part of
the Product, the serial number of which appears on the Product, which is found to be defective
within TWO YEARS of the date of purchase.
This warranty DOES NOT cover
Service calls which are not related to any defect in the Product. The cost of a service call will be
charged if the problem is not found to be a Product fault. For example:
1. Correcting installation of the product.
2. Instructing you how to use the product.
3. Replacing house fuses or correct house wiring.
4. Correcting fault(s) caused by the user.
5. Noise or vibration that is considered normal, eg fan sounds, regeneration noises or user
warning beeps.
6. Correcting damage caused by pests, eg rats, cockroaches etc.
B Defects caused by factors other than:
1. Normal domestic use or
2. Use in accordance with the Product’s User Guide.
C Defects to the Product caused by accident, neglect, misuse or Act of God.
D The cost of repairs carried out by non-authorised repairers or the cost of correcting such
unauthorised repairs.
E Normal recommended maintenance as set out in the Product’s User Guide.
F Repairs when the appliance has been dismantled, repaired or serviced by other than a Fisher &
Paykel AUTHORISED SERVICE CENTRE or the selling dealer.
G Pick up and delivery.
H Transportation or travelling costs involved in the repair when the product is installed outside the
Fisher & Paykel AUTHORISED SERVICE CENTRE’S normal service area.
A
Service under this manufacturer’s warranty must be provided by an Authorised Service Agent
(refer to the Customer care section for contact details). Such service shall be provided during
normal business hours. This warranty certificate should be shown when making any claim.
This Warranty is an extra benefit and does not affect your legal rights.
Product sold in Australia only
Our goods come with guarantees that cannot be excluded under the Australian Consumer Law.
You are entitled to a replacement or refund for a major failure and for compensation for any
other reasonably foreseeable loss or damage. You are also entitled to have the goods repaired or
replaced if the goods fail to be of acceptable quality and the failure does not amount to a major
failure.
Please keep this User Guide in a safe place.
Do not return to Fisher & Paykel.
16
Warranty and service
Customer care
1
2
Check the things you can do yourself. Refer to your User Guide
and check:
your appliance is correctly installed
you are familiar with its normal operation
If after checking these points you still need assistance please refer to the following:
In New Zealand If you need assistance call...*
Call your Fisher & Paykel retailer who is trained to provide information on your appliance, or if
we can be of any further help, please contact our Customer Care Centre and talk to one of our
Customer Care Consultants.
Toll Free - 0800 FP CARE or 0800 37 2273
Fax: (09) 273 0656
Email: [email protected]
Postal Address: PO Box 58-546. Botany
Auckland 2163
In Australia If you need assistance call...*
Call the Fisher & Paykel Customer Care Centre and talk to one of our Customer Care Consultants.
Toll Free - 1300 650 590
Fax: (07) 3826 9298
Email: [email protected]
Postal Address: PO Box 798, Cleveland QLD 4163
If you need service...*
Fisher & Paykel Australia Pty Ltd has a network of independent Fisher & Paykel Authorised
Service Centres whose fully trained technicians can carry out any service necessary on your
appliance. Our Customer Care Centre can recommend an Authorised Service Centre in your area.
In United Kingdom If you need assistance call...*
Phone: (0845) 066 2200
Fax: (0845) 331 2360
Email: [email protected]
Postal address: Fisher & Paykel Appliances Ltd, Maidstone Road, Kingston, Milton Keynes,
Buckinghamshire, MK10 0BD
In Ireland If you need assistance call...*
Phone: 01800 625 174
Fax: 01800 635 012
Email: [email protected]
Postal address: Fisher & Paykel Appliances Ltd, Unit D2, North Dublin Corporate Park, Swords,
Co. Dublin.
*If you call or write, please provide: name, address, model number, serial number, date of
purchase and a description of the problem. This information is needed in order to better
respond to your request for assistance.
Warranty and service
Product details
Fisher & Paykel Ltd
Model
Serial No.
Date of Purchase
Purchaser
Dealer
Suburb
Town
Country
17
www.fisherpaykel.com
Copyright © Fisher & Paykel 2013. All rights reserved.
The product specifications in this booklet apply to the specific products
and models described at the date of issue. Under our policy of continuous
product improvement, these specifications may change at any time. You
should therefore check with your Dealer to ensure this booklet correctly
describes the product currently available.
NZ AU GB IE
F&P PN - 599479 D
03.2013