1
Setting Up
2
Tools and Parts for Drive Installation
• A screwdriver
• At least one 3.5” or 2.5” SATA drive
(Please visit www.synology.com for compatible drive models.)
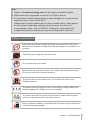
Warning: If you install a drive that contains data, the system will format the drive
and erase all data. If you still need the data, please back it up before installation.
Install Drives
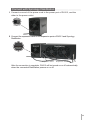
1 Push the upper case in the direction as shown below. Lift the upper case and
set it aside.
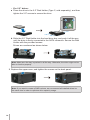
2 Load drives in the drive trays:
• For 3.5” drives: Slide the drive into the hard drive bay, and push it all the
way until it’s firmly connected to the SATA connector. Secure the drive with
the screws provided.
Drives are numbered as shown below.
1
2
9