1
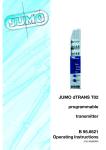
JdTRANS T02 LCD
Programmierbarer
Meßumformer
programmable
transmitter
B 95.6522
Betriebsanleitung
Operating Instructions
01.01/00384950
Bedienübersicht
1 Typenerklärung
JUMO dTRANS T02 LCD
(1) Grundausführung
956522
x
x
x
x
x
x
programmierbarer Messumformer
(2) Eingang (programmierbar)
888
Werkseitig eingestellt (Pt100 DIN vl / 0 … 100°C)
999
Konfiguration nach Kundenangaben1
(3) Ausgang (eingeprägter Gleichstrom - programmierbar)
888
Werkseitig eingestellt (0 … 20mA)
999
Konfiguration nach Kundenangaben
(0/4 … 20mA oder 0/2 … 10V)
(4) Spannungsversorgung
22
AC/DC 20 … 53V, 48 … 63Hz
23
AC 48 … 63Hz, 110 … 240V +10/-15%
(1)
Bestellschlüssel
Bestellbeispiel
(2)
/
(3)
-
(4)
-
956522 / 888 - 888 - 23
1. Bei der Konfiguration nach Kundenangaben sind die
Fühlerart und der Messbereich im Klartext anzugeben
Serienmäßiges Zubehör
- 1 Betriebsanleitung 95.6522
Zubehör
- PC-Setup-Programm, mehrsprachig
- PC-Interfaceleitung mit TTL/RS232-Umsetzer und Adapter
1
2 Installation
Anschlussplan
Anschluss für
Spannungsversorgung
Analoge Eingänge
Thermoelement
Widerstandsthermometer / Potentiometer
in Zweileiterschaltung
RL ≤ 30Ω (RL = Gesamtleitungswiderstand)
Widerstandsthermometer / Potentiometer
in Dreileiterschaltung
Widerstandsthermometer / Potentiometer
in Vierleiterschaltung
2
2 Installation
Widerstandsferngeber in
Dreileiterschaltung
Spannungseingang < 1V
Spannungseingang ≥ 1V
Stromeingang
Analoge Ausgänge
Spannungsausgang
Stromausgang
Digitale Ausgänge
Open-Collector-Ausgang 1
(siehe “Anschlussbeispiele” auf Seite 28)
Open-Collector-Ausgang 2
(siehe “Anschlussbeispiele” auf Seite 28)
3
2 Installation
Installationshinweise
!
Sowohl bei der Wahl des Leitungsmaterials bei der Installation
als auch beim elektrischen Anschluss des Gerätes sind die Vorschriften der VDE 0100 „Bestimmungen über das Errichten von
Starkstromanlagen mit Nennspannungen unter 1000V“ bzw. die
jeweiligen Landesvorschriften zu beachten.
!
Der elektrische Anschluss, sowie Arbeiten im Geräteinneren
dürfen ausschließlich von Fachpersonal durchgeführt werden.
!
Das Gerät allpolig vom Netz trennen, wenn bei Arbeiten spannungsführende Teile berührt werden können.
!
Ein Strombegrenzungswiderstand (Sicherheitsfunktion) unterbricht bei einem Kurzschluss im Messumformer den Netzstromkreis. Die äußere Absicherung der Spannungsversorgung
sollte einen Wert von 1A (träge) nicht überschreiten.
!
In der Nähe des Gerätes keine magnetischen oder elektrischen
Felder, z. B. durch Transformatoren, Funksprechgeräte oder
elektrostatische Entladungen entstehen lassen1.
!
Induktive Verbraucher (Relais, Magnetventile etc.) nicht in Gerätenähe installieren und durch RC- oder Funkenlöschkombinationen bzw. Freilaufdioden entstören.
!
Eingangs-, Ausgangs- und Versorgungsleitungen räumlich voneinander getrennt und nicht parallel zueinander verlegen. Hinund Rückleitungen nebeneinander führen und nach Möglichkeit
verdrillen.
!
Fühlerleitungen verdrillt und abgeschirmt ausführen. Nicht in
der Nähe stromdurchflossener Bauteile oder Leitungen führen.
Schirmung einseitig am Gerät erden.
!
An die Netzklemmen des Gerätes keine weiteren Verbraucher
anschließen.
4
2 Installation
!
Das Gerät ist nicht für die Installation in explosionsgefährdeten
Bereichen geeignet.
!
Ein vom Anschlussplan abweichender elektrischer Anschluss
kann zur Zerstörung des Gerätes führen.
!
Bei störungsbelasteten Netzen (z. B. Thyristorsteuerungen) sollte das Gerät über einen Trenntransformator gespeist werden.
!
Netzschwankungen sind nur im Rahmen der angegebenen Toleranzen zulässig1.
1. siehe Typenblatt
Abmessungen
5
3 Anzeige- und Bedienelemente
LCD-Anzeige
Schnittstelle für
PC-Setup-Programm
Tasten zur Bedienung
ohne Bedeutung, nur
für interne Zwecke
LEDs für Betriebszustand
P = Power LED
S = Status LED
Betriebszustand in der
Bedienerebene
(Normalbetrieb)
Leucht-/Blinkverhalten
Limitkomparator
1 inaktiv
2 inaktiv
Limitkomparator
1 aktiv
2 inaktiv
Limitkomparator
1 inaktiv
2 aktiv
Limitkomparator
1 aktiv
2 aktiv
Overrange
6
3 Anzeige- und Bedienelemente
Leucht-/Blinkverhalten
Betriebszustand in der
Parameterebene
(Programmier-Modus)
Grenzwert von
Limitkomparator 1
Grenzwert von
Limitkomparator 2
Feinabgleich (Nullpunkt)
Feinabgleich (Endwert)
Teach In
(0-%-Wert)
Unterscheidung der Betriebszustände
- Im Betriebszustand Bedienerebene ist die
Power-LED permanent an.
- Im Betriebszustand Parameterebene blinkt die
Power-LED (zu gleichen Teilen an und aus).
7
4 Funktionen und Bedienung
Mit Hilfe der Tasten q, d und i in Verbindung mit der LCD-Anzeige und den in Kapitel 3 „Anzeige- und Bedienelemente“ bereits beschriebenen Blinkzyklen der beiden LEDs „Power“ und „Status“
können Sie den Messumformer bedienen und programmieren.
Bei der Bedienung unterscheiden sich drei Betriebszustände:
- Bedienerebene (Normalbetrieb)
- Parameterebene (Programmier-Modus)
- Konfigurationsebene (Programmier-Modus)
Bedienerebene
In der Bedienerebene befindet sich der Messumformer 2 Sekunden
nach dem Anlegen der Versorgungsspannung, oder wenn die Parameterebene bzw. Konfigurationsebene verlassen wurde.
Parameterebene
In die Parameterebene gelangen Sie aus der Bedienerebene durch
Betätigen der Taste q (mindestens 2 Sekunden lang). In der Ebene
können folgende Funktionen programmiert werden:
- Grenzwert des 1. Limitkomparators
AL1
- Grenzwert des 2. Limitkomparators
AL2
- Feinabgleich (Nullpunkt - 0%)
OUTL
- Feinabgleich (Endwert - 100%)
OUTH
- Teach In
OFFS
Die Parameterebene wird verlassen (beendet), nachdem Sie den
Parameter „Teach In“ editiert haben oder mindestens 20 Sekunden
lang keine Taste oder die Tastenkombination q + d betätigen.
Die einzelnen Parameter können nacheinander verändert werden.
Von Parameter zu Parameter gelangen Sie durch Betätigen der
Taste q.
8
4 Funktionen und Bedienung
Konfigurationsebene
In die Konfigurationsebene gelangen Sie aus der Parameterebene
durch Betätigen der Taste q (mindestens 2 Sekunden lang).
H
Nur wenn in der Anzeige der Parameter OFFS aktiv ist und
die Konfigurationsebene gestartet wird, können die Parameter verändert werden. Ist ein anderer Parameter aktiv,
können Sie die aktuelle Einstellung nur lesen.
In der Ebene können folgende Funktionen programmiert werden:
- Fühlerart
C111
- Linearisierung
C112
- Anzahl der Nachkommastellen
C113
- Einheit des Messwertes
C002
- Netzfrequenz und Temperatur-Kompensation
C114
- Temperaturkompensation-Festwert
C115
- Messwert-Anzeige
C116
- Funktion der Analogausganges
C211
- Signal bei Fühlerbruch/-kurzschluss
C212
- Funktion des Binär-Ausganges 1
C221
- Signal bei Fühlerbruch/-kurzschluss
C222
- Schaltdifferenz (Hysterese) unten
C223
- Schaltdifferenz (Hysterese) oben
C224
- Funktion des Binär-Ausganges 2
C231
- Signal bei Fühlerbruch/-kurzschluss
C232
- Schaltdifferenz (Hysterese) unten
C233
- Schaltdifferenz (Hysterese) oben
C234
9
4 Funktionen und Bedienung
- Frequenz bei Messbereichsanfang
C235
- Frequenz bei Messbereichsende
C236
- Skalierung Startwert
SCL
- Skalierung Endwert
SCH
- Filterzeit
DF
- Gesamtwiderstand bei Widerstandsferngeber
R FE
- Simulation Istwertausgang
C001
Die Konfigurationsebene wird verlassen (beendet), nachdem Sie
den letzten Parameter editiert haben oder mindestens 20 Sekunden
lang keine Taste oder die Tastenkombination q + d kurz betätigen.
Die einzelnen Parameter können nacheinander verändert werden.
Von Parameter zu Parameter gelangen Sie durch Betätigen der
Taste q.
10
4 Funktionen und Bedienung
Werte erhöhen
Beim Programmieren der Parameter dient die Taste i zum Erhöhen
eines Wertes (+).
Werte verringern
Beim Programmieren der Parameter dient die Taste d zum Verringern eines Wertes (-).
Werte übernehmen
Wurde eine Einstellung geändert, müssen Sie die Taste q betätigen, um die Änderung zu übernehmen.
q hat eine doppelte Bedeutung:
- Übernahme von geänderten Werten
- Aufruf des nächsten Parameters
Wertkontrolle
Mit Ausnahme der Parameter OUTL, OUTH und OFFS können Sie alle
aktuellen Werte während der Programmierung mit Hilfe der LCDAnzeige kontrollieren. Eine zusätzliche Kontrolle kann mit Hilfe eines
Spannungsmessers am Spannungsausgang erfolgen.
H
H
Ist die Parameterebene aktiv, wird bei der Programmierung
der beiden Grenzwerte der Analogausgang nicht entsprechend der Eingangsbeschaltung angesteuert, sondern mit
dem aktuellen Grenzwert.
Bitte beachten Sie, dass die Programmierung des Parameters „Teach In“ von der Standardbedienung abweicht.
Siehe “Teach In” auf Seite 14.
11
4 Funktionen und Bedienung
Grenzwerte (Limitkomparatoren) einstellen
Sie können die beiden Grenzwerte AL1 und AL2 mit Hilfe der Tasten
d und i verändern. Der aktuelle Wert wird über den Ausgang ausgegeben. Übernommen wird der Wert durch Betätigen der Taste q.
Die Schaltdifferenzen (Hysterese) können Sie mit den Parametern
C223 und C224 bzw. C233 und C234 einstellen.
Bei der Grenzwertüberwachung stehen zwei Arten zur Verfügung.
Welche eingesetzt wird, können Sie mit Hilfe des Parameters C221
bzw. C231 entscheiden.
Funktionsweise lk7:
Funktionsweise lk8:
Natürlich lassen sich alle Parameter auch mit den als Typenzusatz
erhältlichen PC-Setup-Programm einstellen.
12
4 Funktionen und Bedienung
Feinabgleich (Nullpunkt und Endwert)
Mit Hilfe des Feinabgleiches können Sie den Nullpunkt und die
Steilheit des Ausgangssignales anpassen. Auch hier wird durch Betätigen der Tasten d und i der jeweilige Wert verändert und durch
Betätigen der Taste q übernommen.
Am Ausgang wird der gemessene Istwert ausgegeben. Beim Nullpunkt (OUTL) sollte dieser dem Ausgangssignal 0%, beim Endwert
(OUTH) dem Ausgangssignal 100% entsprechen.
Die Formel für die Berechnung des neuen Istwertes lautet:
Istwert Messwert skaliert × Endwert Nullpunkt
13
4 Funktionen und Bedienung
Teach In
Der Parameter „Teach In“ dient dazu, den 0-%-Wert festzulegen.
Am Ausgang wird während der Programmierung der Nullwert ausgegeben (z.B. 4mA). Durch Betätigen der Tasten d oder i wird
die Übernahme des Wertes ermöglicht und mit q durchgeführt.
Nach einem Timeout ohne Übernahme steht der alte Wert wieder
zur Verfügung.
Beispiel:
Die Stellung eines Ventils wird von einem Potentiometer erfasst.
Das Potentiometer hat einen Bereich von 50 bis 150Ω, wobei 50Ω
dem geschlossenen Ventil entsprechen. Der Messbereich ist wie
folgt programmiert:
- Potentiometer 50 … 150 Ω
- Ausgang 0 … 20mA
Annahme:
Durch mechanische Toleranzen ist die Potistellung jedoch bei geschlossenem Ventil 52Ω, woraus sich ein Ausgangsstrom von
0,4mA ergibt. Der Fehler kann durch die Funktion „Teach In“ wie
folgt beseitigt werden:
- Ventil schließen.
- Parameterebene aufrufen und OFFS auswählen
(am Ausgang sollten dann 0,4mA anliegen).
- Taste d oder i betätigen, worauf sich der Ausgang
auf 0mA ändern muss.
- Änderung durch Betätigen der Taste q bestätigen.
- die Parameterebene verlassen (entweder nach Timeout von 20s
oder durch gleichzeitiges Betätigen von q + d.
14
5 Konfigurations- und Parametertabelle
In den folgenden Konfigurations- und Parametertabellen können Sie
an der durch einen
markierten Stelle (Spalte) Ihre Einstellungen
protokollieren. Die werkseitige Einstellung ist durch eine graue Hinterlegung ( ) gekennzeichnet.
Parameter der Parameterebene
Para- Erklärung
meter
Al1 Grenzwert des
Limitkomparators 1
AL 2 Grenzwert des
Limitkomparators 2
OUTL Feinabgleich 0%
(Nullpunkt)
OTUH Feinabgleich 100%
(Endwert)
OFFS Teach In
Wertewerkseitig X
bereich
0
-1999 …
+9999 Digit
-1999 …
0
+9999 Digit
siehe “Feinabgleich (Nullpunkt
und Endwert)” auf Seite 13
siehe “Feinabgleich (Nullpunkt
und Endwert)” auf Seite 13
siehe “Teach In” auf Seite 14
Parameter der Konfigurationsebene
Messeingang
C111 Messwertgeber
0
1
2
3
4
5
6
7
8
9
10
X
Widerstandsthermometer in 3-Leiter-Schaltung
Widerstandsthermometer in 4-Leiter-Schaltung
Widerstandsthermometer in 2-Leiter-Schaltung
Thermoelement
Spannung bis 1000mV
Spannung bis 10V
Strom
Widerstandsferngeber (wfg)
Poteniometer 3-Leiter-Schaltung
Poteniometer 4-Leiter-Schaltung
Poteniometer 2-Leiter-Schaltung
15
5 Konfigurations- und Parametertabelle
C112 Linearisierung
0
1
2
3
4
5
6
7
8
9
10
11
12
13
14
15
16
17
18
19
20
X
linear
kundenspezifisch
Pt 100 DIN
Pt 500 DIN
Pt 1000 DIN
Pt 100 JIS
Ni 100
Ni 500
Ni 1000
Typ „L“
Typ „J“
Typ „U“
Typ „T“
Typ „K“
Typ „E“
Typ „N“
Typ „S“
Typ „R“
Typ „B“
Typ „D“
Typ „C“
C113 Anzahl der Nachkommastellen
0
1
2
keine Nachkommastelle
1 Nachkommastelle
2 Nachkommsstellen
16
X
5 Konfigurations- und Parametertabelle
C002 Einheit des Messwertes
0
1
2
3
4
5
6
7
8
9
10
11
12
13
14
15
16
17
18
19
20
21
22
23
24
25
26
27
28
(nur wirksam, wenn Parameter C116 = 2
siehe Seite 21)
Einheit
LCD-Anzeige
°C
°C
°F
°F
K
K
bar
mbar
Pa
kPa
s
ms
min
h
d
100ms
ml/s
ml/min
l/s
l/min
l/h
m³/s
m³/min
m³/h
1/s
1/min
1/h
Hz
kHz
MHz
lx
BAR
mBAR
PA
KPA
SEC
mSEC
min
H
d
100mS
mL/S
mL/mn
L/SEC
L/min
L/H
m3/S
m3/mn
m3/H
1/SEC
1/min
1/H
HZ
KHZ
MHZ
LX
17
X
5 Konfigurations- und Parametertabelle
C002 Einheit des Messwertes
29
30
31
32
33
34
35
36
37
38
39
40
41
42
43
44
45
46
47
48
49
50
51
52
53
54
55
56
57
(nur wirksam, wenn Parameter C116 = 2
siehe Seite 21)
Einheit
LCD-Anzeige
mlx
mLX
klx
KLX
cd
cd
mcd
mcd
kcd
Kcd
µm
µm
mm
mm
cm
cm
m
m
km
Km
%
%
‰
‰
ppm
PPM
ppb
PPB
µg
µG
mg
mG
g
G
kg
KG
t
T
µW
µW
mW
mW
W
W
kW
KW
MW
MW
mVA
mVA
VA
VA
kVA
KVA
mVAs
mVAS
VAs
VAS
18
X
5 Konfigurations- und Parametertabelle
C002 Einheit des Messwertes
58
59
60
61
62
63
64
65
66
67
68
69
70
71
72
73
74
75
76
77
78
79
80
81
82
83
84
85
86
(nur wirksam, wenn Parameter C116 = 2
siehe Seite 21)
Einheit
LCD-Anzeige
kVAs
KVAS
J
J
µJ
µJ
mJ
mJ
kJ
KJ
Ws
WS
kWh
KWH
pH
PH
mΩ
mOHM
Ω
OHM
kΩ
KOHM
MΩ
MOHM
mm/s
mm/S
mm/h
mm/H
m/s
m/SEC
m/min
m/MIN
km/h
Km/H
%/s
%/S
m/s²
m/S2
G
G
µl
µL
ml
mL
l
L
hl
HL
m³
M3
µV
µV
mV
mV
V
V
kV
KV
19
X
5 Konfigurations- und Parametertabelle
C002 Einheit des Messwertes
87
88
89
90
91
92
93
94
95
96
97
98
99
100
101
102
103
104
105
106
107
108
109
110
111
112
113
114
115
(nur wirksam, wenn Parameter C116 = 2
siehe Seite 21)
Einheit
LCD-Anzeige
µA
µA
mA
mA
A
A
kA
KA
S
S
mS
mS
µS
µS
nH
nH
µH
µH
mH
mH
H
H
pF
PF
nF
nF
µF
µF
mF
mF
F
F
mm²
mm2
cm²
cm2
m²
m2
km²
Km2
kg/l
KG/L
g/l
G/L
N
N
mN
mN
kN
KN
Nm
Nm
Nmm
Nmm
Nkm
NKm
µV/K
µV/K
20
X
5 Konfigurations- und Parametertabelle
C114 Netzfrequenz / Temperatur-Kompensation
0
1
2
3
50Hz / interne Temperatur-Kompensation
50Hz / feste Temperatur-Kompensation
60Hz / interne Temperatur-Kompensation
60Hz / feste Temperatur-Kompensation
Para- Erklärung
meter
C115 Wert bei fester
TemperaturKompensation
Wertebereich
0 … 100°C
werkseitig
C116 Messwert-Anzeige
0
1
2
X
X
0
X
Prozent
wie Ausgangssignal (mA oder V)
in konfigurierbarer Einheit
(siehe Parameter C002 Seite 17)
Analogausgang
C211 Funktion des Analogausganges
X
0
0 … 20mA
1
4 … 20mA
2
0 … 10V
3
2 … 10V
Eine Inversion der Grenzen können Sie durch Vertauschen der
beiden Parameter SCL und SCH erzielen.
C212 Signal des Ausganges bei
Fühlerbruch/-kurzschluss
0
positiv (22mA bzw. 11V - je nach C211)
1
negativ (0mA bzw. 0V - je nach C211)
21
X
5 Konfigurations- und Parametertabelle
Binär-Ausgang 1
C221 Funktion des Binär-Ausganges 1
X
0
1
2
3
ohne Funktion
lk7
lk8
Fehlerausgang
Mehr Informationen zu lk7 und lk8
entnehmen Sie bitte
“Grenzwerte (Limitkomparatoren) einstellen” auf Seite 12.
C222 Signal des Binär-Ausganges 1 bei
Fühlerbruch/-kurzschluss
0
aktiv
1
inaktiv
2
unverändert
X
Wertewerkseitig
Para- Erklärung
bereich
meter
100
C223 Schaltdifferenz unten 0 … 250
(Hysterese)
Der Wertebereich entspricht 0 … 2,5%.
X
Wertewerkseitig
Para- Erklärung
bereich
meter
100
C224 Schaltdifferenz oben 0 … 250
(Hysterese)
Der Wertebereich entspricht 0 … 2,5%.
X
22
5 Konfigurations- und Parametertabelle
Binär-Ausgang 2
C231 Funktion des Binär-Ausganges 2
X
0
1
2
3
ohne Funktion
lk7
lk8
Frequenzausgang
Mehr Informationen zu lk7 und lk8
entnehmen Sie bitte
“Grenzwerte (Limitkomparatoren) einstellen” auf Seite 12.
C232 Signal des Binär-Ausganges 2 bei
Fühlerbruch/-kurzschluss
0
aktiv bzw. Frequenz C236
1
inaktiv bzw. Frequenz C235
2
unverändert
X
Wertewerkseitig
Para- Erklärung
bereich
meter
100
C233 Schaltdifferenz unten 0 … 250
(Hysterese)
Der Wertebereich entspricht 0 … 2,5%.
X
Wertewerkseitig
Para- Erklärung
bereich
meter
100
C234 Schaltdifferenz oben 0 … 250
(Hysterese)
Der Wertebereich entspricht 0 … 2,5%.
X
Para- Erklärung
meter
C235 Frequenz bei
Messbereichsanfang
X
Wertebereich
10 …
1000Hz
23
werkseitig
10
5 Konfigurations- und Parametertabelle
Para- Erklärung
meter
C236 Frequenz bei
Messbereichsende
Wertebereich
10 …
1000Hz
werkseitig
Wertebereich
-1999 …
+9999 Digit
-1999 …
+9999 Digit
0.0 …
100.0s
0 … 4000Ω
werkseitig
0 … 110%
(110 = ausgeschaltet)
110
X
1000
Weiter Parameter
Para- Erklärung
meter
SCL Skalierung Startwert
SCh
Skalierung Endwert
DF
Filterzeitkonstante
R FE
Gesamtwiderstand
bei Widerstandsferngebern
C001 Simulation
Istwertausgang
24
0
100
0,6
1000
X
6 Hinweise ...
... zur Bedienung innerhalb der Parameter- und Konfigurationsebene
H
Das Betätigen der Taste q als Bestätigung einer Werteingabe setzt voraus, dass vorher ein Wert geändert wurde.
Ist dies nicht der Fall, wird die Betätigung als Aufruf des
nächsten Parameters angesehen.
H
H
H
Soll der Wert bei einer versehentlichen Änderung nicht übernommen werden, ist der Timeout von 20s abzuwarten. Das
Gerät springt dann automatisch in den Normalbetrieb, ohne
die Änderung zu übernehmen.
Überprüfen Sie alle eingegebenen Werte auf ihre Richtigkeit. Der Messumformer selbst überprüft keine Wertebereiche.
Bitte beachten Sie, dass die Programmierung des Parameters „Teach In“ von der Standardbedienung abweicht.
Siehe “Teach In” auf Seite 14.
H
Damit die Parameter der Konfigurationsebene veränderbar
sind, muss die Konfigurationseben aufgerufen werden,
wenn in der Anzeige der Parameter OFFS steht. Ansonsten
können Sie die Parameter nur ablesen aber nicht verändern.
25
6 Hinweise ...
... allgemeiner Art
H
Kann kein Parameter verändert werden, haben Sie vielleicht
mit Hilfe des Setup-Programmes die Bedienung am Gerät
verriegelt. Prüfen Sie die Einstellung durch das Setup-Programm.
Nur, wenn „Bedienerebene“, „Parameterebene“ und „Konfigurationsebene“ auf „Keine“ steht, können alle Einstellungen am Gerät geändert werden.
H
A
Beide Ausgänge (Strom und Spannung) stehen immer
gleichzeitig zur Verfügung. Allerdings besitzt der Ausgang,
der nicht aktiviert wurde, nur eine Genauigkeit von ca. ± 2%
von der Spanne.
Der Frequenz-Ausgang wird nicht angesteuert,
solange die Setup-Schnittstelle aktiv ist.
26
7 PC-Setup-Programm
Mit dem als Typenzusatz erhältlichen PC-Setup-Programm lassen
sich alle Parameter des Messumformers (inkl. der kundenspezifischen Linearisierung) bequem ändern. Über die Setup-Schnittstelle
werden der Messumformer und der PC über das „PC-Interface mit
TTL/RS232-Umsetzer und Adapter“ miteinander verbunden.
Konfigurierbare Parameter:
- TAG-Number (10 Zeichen)
- Analoger Eingang (Sensortyp)
- Anschlussart (2-/3-/4-Leiterschaltung)
- externe oder konstante Vergleichsstelle
- kundenspezifische Linearisierung
- Messbereichsgrenzen (Anfang und Ende)
- Ausgangssignal Strom/Spannung/Frequenz steigend/fallend
- digitales Filter
- Verhalten bei Fühlerbruch/-kurzschluss
- Nachkalibrierung/Feinabgleich
- Gerätekalibrierung
- Grenzwert/Hysterese der Limitkomparatoren
- Datei-Info-Text
Weitere Vorteile des PC-Setup-Programms
- mehrere verschiedene Einstellungen verwalten
- eine Einstellung für mehrere Messumformer
- Einstellung zur Dokumentation ausdrucken
- Bedienung umschaltbar in den GMA-Standard
A
Der Frequenz-Ausgang wird nicht angesteuert,
solange die Setup-Schnittstelle aktiv ist.
27
8 Anschlussbeispiele
Beispiel 1
Anschluss einer SPS an den Open-Collector-Ausgang
Berechnungsbeispiel für RA (Arbeitswiderstand)
Bei dem Beispiel wird von folgenden typischen SPS-Kennwerten
ausgegangen:
- für Signal „1“:
13 … 30V
- für Signal „0“:
-3 … +5V
- Eingangsstrom für Signal „1“:
7mA
Bei einer angenommen Eingangsspannung von 18V/7mA für das
Signal „1“ ergibt sich folgende Berechnung:
24V - 18V
R A 857,14 Ω
7mA
Ergebnis: Gewählt wird ein Widerstand von 820 ⍀.
28
8 Anschlussbeispiele
Beispiel 2
Anschluss eines Relais an den Open-Collector-Ausgang
29
8 Anschlussbeispiele
30
M. K. JUCHHEIM GmbH & Co
Hausadresse:
Moltkestraße 13 - 31, 36039 Fulda, Germany
Lieferadresse:
Mackenrodtstraße 14, 36039 Fulda, Germany
Postadresse:
36035 Fulda, Germany
Telefon: (06 61) 60 03-0
Telefax: (06 61) 60 03-5 00
E-Mail: [email protected]
Internet: www.jumo.de
JdTRANS T02 LCD
programmable
transmitter
B 95.6522
Operating Instructions
Overview of operation
1 Type designation
JUMO dTRANS T02 LCD
(1) Basic version
956522
x
x
x
x
x
x
programmable transmitter
(2) Input (programmable)
888
factory-set (Pt100 DIN vl / 0 — 100°C)
999
configuration to customer specification1
(3) Output (proportional DC current - programmable)
888
factory-set (0 — 20mA)
999
configuration to customer specification
(0/4 — 20mA or 0/2 — 10V)
(4) Supply
22
20 — 53V AC/DC 48 — 63Hz
23
110 — 240V AC +10/-15% 48 — 63Hz
(1)
Order code
Order example
(2)
/
(3)
-
(4)
-
956522 / 888 - 888 - 23
1. For configuration to customer specification,
probe type and range have to be specified in plain text.
Standard accessory
- 1 Operating Instructions 95.6522
Accessories
- PC setup program, multilingual
- PC interface cable with TTL/RS232 converter and adapter
1
2 Installation
Connection diagram
Connection for
Supply
Analog inputs
Thermocouple
Resistance thermometer / potentiometer
in 2-wire circuit
RL ≤ 30Ω (RL = total lead resistance)
Resistance thermometer / potentiometer
in 3-wire circuit
Resistance thermometer / potentiometer
in 4-wire circuit
2
2 Installation
Resistance transmitter in
3-wire circuit
Voltage input < 1V
Voltage input ≥ 1V
Current input
Analog outputs
Voltage output
Current output
Digital outputs
Open-collector output 1
(see “Connection examples” on page 28)
Open-collector output 2
(see “Connection examples” on page 28)
3
2 Installation
Installation notes
!
The choice of cable, the installation and the electrical connections must conform to the requirements of VDE 0100 “Regulations for the installation of power circuits with nominal voltages
below 1000V”, or the appropriate local regulations.
!
The electrical connection, as well as work inside the unit, must
only be carried out by qualified personnel.
!
Ensure that the instrument is completely isolated from the supply before carrying out work where live components may be
touched.
!
A current limiting resistor (safety function) interrupts the supply
circuit in the transmitter in the event of a short-circuit. The external fusing of the supply voltage should not be rated above
1A (slow).
!
Avoid magnetic or electric fields, such as caused by transformers, mobile phones or electrostatic discharge in the vicinity of
the instrument1.
!
Do not install inductive loads (relays, solenoid valves etc.) close
to the instrument. Use RC networks, spark quenchers or freewheel diodes for interference suppression.
!
Route input, output and supply cables separately, and not parallel to each other. Run out and return cables next to each other
and twisted, if possible.
!
Probe cables must be twisted and shielded. Do not run them
close to current-carrying cables or components. Earth the
shielding at one end on the instrument.
!
Do not connect any additional loads to the supply terminals of
the instrument.
4
2 Installation
!
The instrument is not suitable for installation in areas with an
explosion hazard.
!
Any electrical connection which deviates from the connection
diagram may result in the destruction of the instrument.
!
In supply networks that are subject to interference (e.g. thyristor
controls), the instrument should be supplied via an isolating
transformer.
!
Supply fluctuations are only permissible within the specified
tolerances1.
1. see Data Sheet
Dimensions
5
3 Displays and controls
LCD display
interface for
PC setup program
buttons for operation
without significance,
for internal purposes
only
LEDs for operational status
P = Power LED
S = Status LED
Operational status at the
operating level
(normal operation)
Illumination/blink behavior
Limit comparator
1 inactive
2 inactive
Limit comparator
1 active
2 inactive
Limit comparator
1 inactive
2 active
Limit comparator
1 active
2 active
Overrange
6
3 Displays and controls
Operational status at the
parameter level
(programming mode)
Illumination/blink behavior
Limit for
limit comparator 1
Limit for
limit comparator 2
Fine calibration (zero)
Fine calibration (full scale)
Teach-in
(0 % value)
Differentiation of the operational states
- in the Operating level status, the
power LED is on permanently.
- in the Parameter level status, the
power LED blinks (equally on and off).
7
4 Functions and operation
You can operate and program the transmitter by using the q, d
and i buttons in conjunction with the LCD display and the blink cycles of the “Power” and “Status” LEDs, which have already been
described in Chapter 3 “Displays and controls”.
In use, three operating states can be distinguished:
- Operating level (normal operation)
- Parameter level (programming mode)
- Configuration level (programming mode)
Operating level
The transmitter is at the operating level 2 seconds after power-on,
or after leaving the parameter or configuration level.
Parameter level
From the operating level, you can access the parameter level by
pressing the q button (for at least 2 seconds). The following functions can be programmed at this level:
- Limit value for limit comparator 1
AL1
- Limit value for limit comparator 2
AL2
- Fine calibration (zero point - 0%)
OUTL
- Fine calibration (full scale - 100%)
OUTH
- Teach-in
OFFS
The parameter level is exited (quit)
- after editing the “Teach-in” parameter,
- if no button has been pressed for at least 20 seconds,
- or by pressing the button combination q + d.
The individual parameters can be altered, one after another. You
can step from one parameter to the next by pressing the q button.
8
4 Functions and operation
Configuration level
You can access the configuration level from the parameter level by
pressing the q button (for at least 2 seconds).
H
The parameters can only be modified when the parameter
OFFS is active in the display and the configuration level has
been started. If another parameter is active, you can only
read the current setting.
The following functions can be programmed at this level:
- Probe type
C111
- Linearization
C112
- Number of decimal places
C113
- Unit of measurement
C002
- Supply frequency and temperature compensation
C114
- Fixed value for temperature compensation
C115
- Measurement display
C116
- Function of the analog output
C211
- Signal on probe break/short-circuit
C212
- Function of the logic output 1
C221
- Signal on probe break/short-circuit
C222
- Lower switching differential (hysteresis)
C223
- Upper switching differential (hysteresis)
C224
- Function of the logic output 2
C231
- Signal on probe break/short-circuit
C232
- Lower switching differential (hysteresis)
C233
- Upper switching differential (hysteresis)
C234
9
4 Functions and operation
- Frequency at the range start
C235
- Frequency at the range end
C236
- Start value for scaling
SCL
- End value for scaling
SCH
- Filter time
DF
- Total resistance for resistance transmitter
R FE
- Simulation of measurement output
C001
The configuration level is exited (quit)
- after editing the last parameter,
- if no button has been pressed for at least 20 seconds,
- or by briefly pressing the button combination q + d.
The individual parameters can be altered, one after another. You
can step from one parameter to the next by pressing the q button.
10
4 Functions and operation
Incrementing values
When programming the parameters, the i button is used to increase a value (+).
Decrementing values
When programming the parameters, the d button is used to decrease a value (-).
Accepting values
If a setting has been altered, the q button has to be pressed to accept the alteration.
q has a twofold function:
- Acceptance of altered values
- Calling the next parameter
Value check
With the exception of the parameters OUTL, OUTH and OFFS, all
present values can be checked during programming with the aid of
the LCD display. A voltmeter can be used at the voltage output, as
an additional check.
H
H
If the parameter level is active, the analog output will not be
operated according to the input circuit connection when
programming the two limit values, but with the momentary
limit value.
Please note that the programming of the “Teach-in” parameter deviates from the standard operation.
See “Teach-in” on page 14.
11
4 Functions and operation
Setting the limit values (limit comparators)
You can alter the two limit values AL1 and AL2 by using the d and i
buttons. The momentary value will be produced via the output. The
value is accepted by pressing the q button.
The switching differential (hysteresis) can be set using the parameters C223 and C224 or C233 and C234.
Two functions are available for limit monitoring. With the help of the
parameter C221 or C231, you can decide which one to use.
Function lk7:
Function lk8:
Of course, all parameters can also be set using the PC setup program, which is available as an extra code.
12
4 Functions and operation
Fine calibration (zero point and full scale)
Fine calibration can be used to adjust the zero point and the slope
of the output signal. Here, too, the d and i buttons are available
for altering the appropriate value, and for accepting it by pressing
the q button.
The converted value is produced at the output. At zero point (OUTL),
this should correspond to the output signal 0%, at full scale (OUTH),
to the output signal 100%.
The formula for calculating the new (converted) value is:
output (converted) value = measurement (input) valuescaled x full scale + zero point
13
4 Functions and operation
Teach-in
The “Teach-in” parameter serves to define the 0% value.
During programming, the zero point is produced at the output (e.g.
4mA). This value is accepted by pressing the d or i button and
executed with q. After a time-out without acceptance, the old value
will be available again.
Example:
The position of a valve is detected by a potentiometer. The potentiometer covers the range 50 to 150Ω, with 50Ω corresponding to the
valve closed. The range is programmed as follows:
- Potentiometer 50 — 150 Ω
- Output 0 — 20mA
The following is assumed:
However, because of mechanical tolerances, the potentiometer position with the valve closed is 52Ω, which results in an output current of 0.4mA. Thanks to the “Teach-in” function, this error can be
eliminated as described below:
- Close valve
- Call the parameter level and select OFFS
(0.4mA should then be present at the output).
- Press the d or i button – the output must now
change to 0mA.
- Confirm alteration by pressing q.
- Exit the parameter level (either after a time-out of 20sec or by
simultaneously pressing q + d.
14
5 Configuration and parameter tables
You can record your settings in the configuration and parameter tables below, in the position (column) marked with
. The factory
settings are shown on a gray background ( ).
Parameters at the parameter level
Para- Explanation
meter
Al1 Limit value of
limit comparator 1
AL 2 Limit value of
limit comparator 2
OUTL Fine calibration 0%
(zero)
OTUH Fine calibration 100%
(full scale)
OFFS Teach-in
Value range factory
X
setting
0
-1999 to
+9999 digit
-1999 to
0
+9999 digit
see “Fine calibration (zero point
and full scale)” on page 13
see “Fine calibration (zero point
and full scale)” on page 13
see “Teach-in” on page 14
Parameters at the configuration level
Measurement input
C111 Transducer
0
1
2
3
4
5
6
7
8
9
10
X
Resistance thermometer in 3-wire circuit
Resistance thermometer in 4-wire circuit
Resistance thermometer in 2-wire circuit
Thermocouple
Voltage up to 1000mV
Voltage up to 10V
Current
Resistance transmitter
Potentiometer 3-wire circuit
Potentiometer 4-wire circuit
Potentiometer 2-wire circuit
15
5 Configuration and parameter tables
C112 Linearization
0
1
2
3
4
5
6
7
8
9
10
11
12
13
14
15
16
17
18
19
20
X
linear
customized
Pt 100 DIN
Pt 500 DIN
Pt 1000 DIN
Pt 100 JIS
Ni 100
Ni 500
Ni 1000
Type L
Type J
Type U
Type T
Type K
Type E
Type N
Type S
Type R
Type B
Type D
Type C
C113 Number of decimal places
0
1
2
no decimal place
1 decimal place
2 decimal places
16
X
5 Configuration and parameter tables
C002 Unit of measurement
0
1
2
3
4
5
6
7
8
9
10
11
12
13
14
15
16
17
18
19
20
21
22
23
24
25
26
27
28
X
(only effective if parameter C116 = 2
see page 21
Unit
LCD display
°C
°C
°F
°F
K
K
bar
mbar
Pa
kPa
s
ms
min
h
d
100ms
ml/s
ml/min
l/s
l/min
l/h
m³/s
m³/min
m³/h
1/s
1/min
1/h
Hz
kHz
MHz
lx
BAR
mBAR
PA
KPA
SEC
mSEC
min
H
d
100mS
mL/S
mL/mn
L/SEC
L/min
L/H
m3/S
m3/mn
m3/H
1/SEC
1/min
1/H
HZ
KHZ
MHZ
LX
17
5 Configuration and parameter tables
C002 Unit of measurement
29
30
31
32
33
34
35
36
37
38
39
40
41
42
43
44
45
46
47
48
49
50
51
52
53
54
55
56
57
X
(only effective if parameter C116 = 2
see page 21
Unit
LCD display
mlx
mLX
klx
KLX
cd
cd
mcd
mcd
kcd
Kcd
µm
µm
mm
mm
cm
cm
m
m
km
Km
%
%
‰
‰
ppm
PPM
ppb
PPB
µg
µG
mg
mG
g
G
kg
KG
t
T
µW
µW
mW
mW
W
W
kW
KW
MW
MW
mVA
mVA
VA
VA
kVA
KVA
mVAs
mVAS
VAs
VAS
18
5 Configuration and parameter tables
C002 Unit of measurement
58
59
60
61
62
63
64
65
66
67
68
69
70
71
72
73
74
75
76
77
78
79
80
81
82
83
84
85
86
X
(only effective if parameter C116 = 2
see page 21
Unit
LCD display
kVAs
KVAS
J
J
µJ
µJ
mJ
mJ
kJ
KJ
Ws
WS
kWh
KWH
pH
PH
mΩ
mOHM
Ω
OHM
kΩ
KOHM
MΩ
MOHM
mm/s
mm/S
mm/h
mm/H
m/s
m/SEC
m/min
m/MIN
km/h
Km/H
%/s
%/S
m/s²
m/S2
G
G
µl
µL
ml
mL
l
L
hl
HL
m³
M3
µV
µV
mV
mV
V
V
kV
KV
19
5 Configuration and parameter tables
C002 Unit of measurement
87
88
89
90
91
92
93
94
95
96
97
98
99
100
101
102
103
104
105
106
107
108
109
110
111
112
113
114
115
X
(only effective if parameter C116 = 2
see page 21
Unit
LCD display
µA
µA
mA
mA
A
A
kA
KA
S
S
mS
mS
µS
µS
nH
nH
µH
µH
mH
mH
H
H
pF
PF
nF
nF
µF
µF
mF
mF
F
F
mm²
mm2
cm²
cm2
m²
m2
km²
Km2
kg/l
KG/L
g/l
G/L
N
N
mN
mN
kN
KN
Nm
Nm
Nmm
Nmm
Nkm
NKm
µV/K
µV/K
20
5 Configuration and parameter tables
C114 Supply frequency/temperature compensation X
0
50Hz / internal temperature compensation
1
50Hz / fixed temperature compensation
2
60Hz / internal temperature compensation
3
60Hz / fixed temperature compensation
Para- Explanation
meter
C115 value with fixed
temperature
compensation
Value range factory
setting
0
0 — 100°C
C116 Measurement display
0
1
2
X
X
percent
as output signal (mA or V)
in configurable unit
(see parameter C002 page 17)
Analog output
C211 Function of the analog output
X
0
0 — 20mA
1
4 — 20mA
2
0 — 10V
3
2 — 10V
The limits can be inverted by swapping the two parameters
SCL and SCH.
C212 Signal of output on
probe break/short-circuit
0
positive (22mA or 11V - according to C211)
1
negative (0mA or 0V - according to C211)
21
X
5 Configuration and parameter tables
Logic output 1
C221 Function of the logic output 1
X
0
1
2
3
no function
lk7
lk8
fault output
You will find additional information on lk7 and lk8 in
“Setting the limit values (limit comparators)” on page 12.
C222 Signal of logic output 1 on
probe break/short-circuit
0
active
1
inactive
2
unchanged
X
Value range factory
Para- Explanation
setting
meter
100
C223 Lower switching
0 — 250
differential (hysteresis)
The value range corresponds to 0 — 2.5%.
X
Value range factory
Para- Explanation
setting
meter
100
C224 Upper switching
0 — 250
differential (hysteresis)
The value range corresponds to 0 — 2.5%.
X
22
5 Configuration and parameter tables
Logic output 2
C231 Function of the logic output 2
X
0
1
2
3
no function
lk7
lk8
Frequency output
You will find additional information on lk7 and lk8 in
“Setting the limit values (limit comparators)” on page 12.
C232 Signal of the logic output 2 on
probe break/short-circuit
0
active or frequency C236
1
inactive or frequency C235
2
unchanged
X
Value range factory
Para- Explanation
settting
meter
100
C233 Lower switching
0 — 250
differential (hysteresis)
The value range corresponds to 0 — 2.5%.
X
Value range factory
Para- Explanation
setting
meter
100
C234 Upper switching
0 — 250
differential (hysteresis)
The value range corresponds to 0 — 2.5%.
X
Para- Explanation
meter
C235 Frequency at
range start
X
Value range factory
setting
10
10 —
1000Hz
23
5 Configuration and parameter tables
Para- Explanation
meter
C236 Frequency at
range end
Value range factory
setting
1000
10 —
1000Hz
X
Value range factory
setting
0
-1999 to
+9999 digit
-1999 to
100
+9999 digit
0.0 —
0.6
100.0sec
0 — 4000Ω
1000
X
Additional parameters
Para- Explanation
meter
SCL Scaling start value
SCh
Scaling end value
DF
Filter time constant
R FE
Total resistance for
resistance transmitters
C001 Simulation of
measurement output
0 — 110%
(110 =
switched off)
24
110
6 Tips ...
... on operation within the parameter and configuration
levels
H
Pressing the q button to confirm a value entry requires that
a value has previously been modified.
If this is not the case, the confirmation will be interpreted as
a call of the next parameter.
H
If, after an accidental alteration, the value is not to be accepted, just wait for the time-out of 20sec. Afterwards, the
instrument will automatically jump back to normal operation, without accepting the alteration.
H
Please check that all entered values are correct. The transmitter itself does not check value ranges.
H
Please note that the programming of the “Teach-in” parameter differs from the standard operation.
see “Teach-in” on page 14.
H
In order to be able to modify the parameters at the configuration level, the configuration level has to be called up when
the display shows the parameter OFFS. If this is not the case,
you can read the parameters, but you cannot modify them.
25
6 Tips ...
... of a more general nature
H
If none of the parameters can be modified, then you may
have locked the operation on the instrument through the
setup program. Please check the setting using the setup
program.
Instrument operation
Inhibits:
Operating level:
Parameter level:
Configuration level:
none
none
none
The instrument settings can only be modified when “Operating level”, “Parameter level” and “Configuration level” are
set to “none”.
H
A
Both outputs (current and voltage) are always available at
the same time. However, the output that has not been activated only has an accuracy of approx. ± 2% of full scale.
The frequency output will not be operated as long as the
setup interface is active.
:
26
7 PC setup program
The PC setup program, which is available as an extra, can be used
to modify all parameters of the transmitter (including the custom linearization) with ease. Through the setup interface, the transmitter
and the PC are linked via the “PC interface with TTL/RS232 converter and adapter”.
Configurable parameters
- TAG number (10 characters)
- analog input (sensor type)
- connection circuit (2-/3-/4-wire circuit)
- external or constant cold junction
- custom linearization
- range limits (start and end)
- output signal current/voltage/frequency rising/falling
- digital filter
- response to probe break/short-circuit
- recalibration/fine calibration
- instrument calibration
- limit value/differential of the limit comparators
- file-info text
Additional benefits of the PC setup program
- manage several settings
- one setting for several transmitters
- print out setting for documentation
- operation can be switched to GMA standard
A
The frequency output will not be operated as long as the
setup interface is activated.
27
8 Connection examples
Example 1
Connecting a PLC to the open-collector output
Calculation example for RA (working resistance)
In this example, the following typical PLC characteristics are assumed:
- for signal “1”:
13 — 30V
- for signal “0”:
-3 to +5V
- input current for signal “1”:
7mA
An assumed input voltage of 18V/7mA for signal “1” results in the
following calculation:
24V - 18V
R A 85.14 Ω
7mA
Result: A resistance of 820 ⍀ will be selected.
28
8 Connection examples
Example 2
Connecting a relay to the open-collector output
29
8 Connection examples
30
M. K. JUCHHEIM GmbH & Co
JUMO Instrument Co. Ltd.
Street address:
Moltkestraße 13 - 31
36039 Fulda, Germany
Delivery address:
Mackenrodtstraße 14
36039 Fulda, Germany
Postal address:
36035 Fulda, Germany
Phone: +49 (0) 661 60 03-0
Fax:
+49 (0) 661 60 03-5 00
E-Mail: [email protected]
Internet: www.jumo.de
JUMO House
Temple Bank, Riverway
Harlow, Essex CM20 2TT, UK
JUMO PROCESS CONTROL INC.
735 Fox Chase,
Coatesville, PA 19320, USA
Phone: 610-380-8002
1-800-554-JUMO
Fax:
610-380-8009
Phone: +44 (0) 1279 63 55 33
E-Mail: [email protected]
Fax:
+44 (0) 1279 63 52 62
E-Mail: [email protected] Internet: www.JumoUSA.com