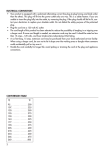
1
User Manual QuantiGene® ViewRNA Chemiluminescent Assay P/N 16861 Rev.A 100520 For research use only. Not for use in diagnostic procedures. Trademarks Affymetrix® and are trademarks of Affymetrix, Inc. QuantiGene is a registered trademark exclusively licensed to Affymetrix, Inc. All other trademarks are the property of their respective owners. Limited License Subject to the Affymetrix terms and conditions that govern your use of Affymetrix products, Affymetrix grants you a nonexclusive, non-transferable, non-sublicensable license to use this Affymetrix product only in accordance with the manual and written instructions provided by Affymetrix. You understand and agree that, except as expressly set forth in the Affymetrix terms and conditions, no right or license to any patent or other intellectual property owned or licensable by Affymetrix is conveyed or implied by this Affymetrix product. In particular, no right or license is conveyed or implied to use this Affymetrix product in combination with a product not provided, licensed, or specifically recommended by Affymetrix for such use. Citing QuantiGene ViewRNA Chemiluminescent Assay in Publications When describing a procedure for publication using this product, please refer to it as the QuantiGene ViewRNA Chemiluminescent Assay. If a paper cites a QuantiGene product and is published in a research journal, the lead author(s) may receive a travel stipend for use at a technology conference or tradeshow by sending a copy of the paper to our technical support group at [email protected] or via fax at (510) 818-2610. Disclaimer Affymetrix, Inc. reserves the right to change its products and services at any time to incorporate technological developments. This manual is subject to change without notice. Although this manual has been prepared with every precaution to ensure accuracy, Affymetrix, Inc. assumes no liability for any errors or omissions, nor for any damages resulting from the application or use of this information. Copyright © 2010 Affymetrix Inc. All rights reserved. Contents Chapter 1 Introduction . . . . . . . . . . . . . . . . . . . . . . . . . . . . . . . . . . . . . . . . . . . . . . . . . . . 1 About This Manual . . . . . . . . . . . . . . . . . . . . . . . . . . . . . . . . . . . . . . . . . . . . . . . . . . . . . . . . 1 QuantiGene ViewRNA Chemiluminescent Assay Basics . . . . . . . . . . . . . . . . . . . . . . . . . . . . . 1 How it Works . . . . . . . . . . . . . . . . . . . . . . . . . . . . . . . . . . . . . . . . . . . . . . . . . . . . . . . . . . 1 QuantiGene ViewRNA Chemiluminescent Assay Specifications . . . . . . . . . . . . . . . . . . . . . 2 Required Materials . . . . . . . . . . . . . . . . . . . . . . . . . . . . . . . . . . . . . . . . . . . . . . . . . . . . . . . . 2 QuantiGene ViewRNA Chemiluminescent Assay . . . . . . . . . . . . . . . . . . . . . . . . . . . . . . . . 2 QuantiGene ViewRNA Chemiluminescent Assay Kit Components . . . . . . . . . . . . . . . . . . . 2 QuantiGene ViewRNA Chemiluminescent Assay Probe Sets . . . . . . . . . . . . . . . . . . . . . . . . 3 (Optional) Upstream Cell Viability Assay . . . . . . . . . . . . . . . . . . . . . . . . . . . . . . . . . . . . . . 3 Required Materials Not Provided . . . . . . . . . . . . . . . . . . . . . . . . . . . . . . . . . . . . . . . . . . . . 4 Chapter 2 Experimental Design and Assay Optimization. . . . . . . . . . . . . . . . . . . . . . . . 7 Overview . . . . . . . . . . . . . . . . . . . . . . . . . . . . . . . . . . . . . . . . . . . . . . . . . . . . . . . . . . . . . . 7 Selecting the Appropriate Plate Type . . . . . . . . . . . . . . . . . . . . . . . . . . . . . . . . . . . . . . . . . 7 Optimizing Cell Number . . . . . . . . . . . . . . . . . . . . . . . . . . . . . . . . . . . . . . . . . . . . . . . . . . 7 Replicates . . . . . . . . . . . . . . . . . . . . . . . . . . . . . . . . . . . . . . . . . . . . . . . . . . . . . . . . . . . . . 7 Assessing Background for New Projects . . . . . . . . . . . . . . . . . . . . . . . . . . . . . . . . . . . . . . . 7 Using New Probe Sets . . . . . . . . . . . . . . . . . . . . . . . . . . . . . . . . . . . . . . . . . . . . . . . . . . . . 8 Optimizing Assay Conditions for a New Cell Type . . . . . . . . . . . . . . . . . . . . . . . . . . . . . . . 8 Chapter 3 Assay Procedures for Automated or Batch Processing . . . . . . . . . . . . . . . . . 9 Overview . . . . . . . . . . . . . . . . . . . . . . . . . . . . . . . . . . . . . . . . . . . . . . . . . . . . . . . . . . . . . . 9 Assay Workflow . . . . . . . . . . . . . . . . . . . . . . . . . . . . . . . . . . . . . . . . . . . . . . . . . . . . . . . .9 Using a Residual Volume Assay Format . . . . . . . . . . . . . . . . . . . . . . . . . . . . . . . . . . . . . . . 9 Important Procedural Notes . . . . . . . . . . . . . . . . . . . . . . . . . . . . . . . . . . . . . . . . . . . . . . . 10 Preparing Reagents . . . . . . . . . . . . . . . . . . . . . . . . . . . . . . . . . . . . . . . . . . . . . . . . . . . . . 10 Fixing Cells and Treating with Protease . . . . . . . . . . . . . . . . . . . . . . . . . . . . . . . . . . . . . . 12 Performing Hybridizations . . . . . . . . . . . . . . . . . . . . . . . . . . . . . . . . . . . . . . . . . . . . . . . . 13 (Optional) DNA Stain Standardization . . . . . . . . . . . . . . . . . . . . . . . . . . . . . . . . . . . . . . . 16 Chapter 4 Troubleshooting . . . . . . . . . . . . . . . . . . . . . . . . . . . . . . . . . . . . . . . . . . . . . . 19 No or Weak Signals . . . . . . . . . . . . . . . . . . . . . . . . . . . . . . . . . . . . . . . . . . . . . . . . . . . . . 19 Non-Uniform Signal Across the Plate . . . . . . . . . . . . . . . . . . . . . . . . . . . . . . . . . . . . . . . . 20 High Background Signal . . . . . . . . . . . . . . . . . . . . . . . . . . . . . . . . . . . . . . . . . . . . . . . . . 20 Appendix A Liquid Handling Recommendations . . . . . . . . . . . . . . . . . . . . . . . . . . . . . . . 21 Fluidic Handling Systems . . . . . . . . . . . . . . . . . . . . . . . . . . . . . . . . . . . . . . . . . . . . . . . . .21 iv QuantiGene® Reporter Gene Assay User Manual Minimum Requirements . . . . . . . . . . . . . . . . . . . . . . . . . . . . . . . . . . . . . . . . . . . . . . . . . 21 Setup Recommendations . . . . . . . . . . . . . . . . . . . . . . . . . . . . . . . . . . . . . . . . . . . . . . . . .21 Wash Protocol Settings for BioTek ELx 405 Select . . . . . . . . . . . . . . . . . . . . . . . . . . . . . . 21 Appendix B Dehydrating Cells for Storage or Shipping . . . . . . . . . . . . . . . . . . . . . . . . . 23 About the Dehydration Procedure . . . . . . . . . . . . . . . . . . . . . . . . . . . . . . . . . . . . . . . . . .23 Procedure . . . . . . . . . . . . . . . . . . . . . . . . . . . . . . . . . . . . . . . . . . . . . . . . . . . . . . . . . . . . 23 Appendix C 96- and 384-Well Compatible Plates . . . . . . . . . . . . . . . . . . . . . . . . . . . . . . 25 Compatible Plates . . . . . . . . . . . . . . . . . . . . . . . . . . . . . . . . . . . . . . . . . . . . . . . . . . . . . . 25 Appendix D Optimizing Assay Conditions for a New Cell Type . . . . . . . . . . . . . . . . . . . 27 Initial Optimization and Assessment of Assay Backgrounds . . . . . . . . . . . . . . . . . . . . . . . 27 Additional Optimization . . . . . . . . . . . . . . . . . . . . . . . . . . . . . . . . . . . . . . . . . . . . . . . . . 28 Appendix E Alternative Assay Procedure (Manual Processing) . . . . . . . . . . . . . . . . . . . 29 Overview . . . . . . . . . . . . . . . . . . . . . . . . . . . . . . . . . . . . . . . . . . . . . . . . . . . . . . . . . . . . . 29 Assay Workflow . . . . . . . . . . . . . . . . . . . . . . . . . . . . . . . . . . . . . . . . . . . . . . . . . . . . . . . 29 Important Procedural Notes . . . . . . . . . . . . . . . . . . . . . . . . . . . . . . . . . . . . . . . . . . . . . . . 29 Preparing Reagents . . . . . . . . . . . . . . . . . . . . . . . . . . . . . . . . . . . . . . . . . . . . . . . . . . . . . 29 Fixing Cells and Treating with Protease . . . . . . . . . . . . . . . . . . . . . . . . . . . . . . . . . . . . . . 33 Performing Hybridizations . . . . . . . . . . . . . . . . . . . . . . . . . . . . . . . . . . . . . . . . . . . . . . . . 34 (Optional) DNA Stain Standardization . . . . . . . . . . . . . . . . . . . . . . . . . . . . . . . . . . . . . . . 35 1 Introduction About This Manual The QuantiGene ViewRNA Chemiluminescent Assay is an in situ hybridization method for quantification of target RNA, in the cytoplasms of fixed cells. This manual provides complete instructions for performing QuantiGene ViewRNA assays for adherent cells in either: An automated format for 96- or 384-well plates or A manual format for 96-well plates QuantiGene ViewRNA Chemiluminescent Assay Basics The QuantiGene ViewRNA Chemiluminescent Assay is a novel RNA in situ hybridization solution, based on patent-pending Probe Set design and proprietary signal amplification technology. Signal amplification is predicated on specific hybridization of adjacent Probe Set oligonucleotides to a target RNA (see How It Works below), resulting in excellent signal-to-noise ratios. How it Works Figure 1.1 QuantiGene ViewRNA Chemiluminescent Assay Basics 2.0 Substrate PreAmp1 Amp1 LP-AP Target Detection Step 1: Prepare Sample. Adherent cells on a solid surface are fixed and permeabilized. Step 2: Hybridize Probe Set. A gene-specific Probe Set hybridizes to the target mRNA. For clarity, only single oligonucleotide pairs are shown, however, a typical Probe Set contains 20 or more oligonucleotide pairs. The Probe Set interacts specifically with PreAmplifier, Amplifier, and Label Probe-AP to generate amplified signal. Step 3: Amplify Signal. Signal amplification is performed via sequential hybridization of PreAmplifier, Amplifier, and the Label Probe-AP. Step 4: Detection. Addition of Substrate1 generates a luminescent signal that is proportional to the amount of target mRNA present in all the cells in each well. The signal is measured and quantified by a luminometer. 1 Lumigen® APS-5 2 QuantiGene® Reporter Gene Assay User Manual QuantiGene ViewRNA Chemiluminescent Assay Specifications Table 1.1 QuantiGene ViewRNA Chemiluminescent Assay Specifications Item Value Limit of Detection (LOD) < 20,000 transcripts per assay wella Limit of Quantification (LOQ) < 40,000 transcripts per assay wellb Detection Range 2 logsc Plex Level 1 Sample Types Adherent cells Plate Format 96- or 384-well microplate Automation Compatibility Yesd Detection Mode Chemiluminescence a Defined as signal greater than background plus 3 standard deviations of the background. b Defined as the signal just above the lowest signal that obtains an 80-120% spike recovery. c Defined as the assay window that consistently achieves an 80-120% accuracy of fold change. d Batch or full automation using standard automation equipment. Contact Technical Support for protocol details and assistance in setting up your automation system. Required Materials QuantiGene ViewRNA Chemiluminescent Assay The QuantiGene ViewRNA Chemiluminescent Assay is comprised of 2 modules (each sold separately): QuantiGene ViewRNA Chemiluminescent Assay Kit QuantiGene ViewRNA TYPE 1 Probe Set QuantiGene ViewRNA Chemiluminescent Assay Kit Components The components of the QuantiGene ViewRNA Chemiluminescent Assay Kit and their recommended storage conditions are listed below. This Assay Kit must be used in conjunction with QuantiGene ViewRNA TYPE 1 Probe Sets. The QuantiGene ViewRNA Chemiluminescent Assay Kit is available in multiple sizes. Refer to the package insert for quantities of individual components supplied. Kits have a shelf life of 6 months from date of receipt when stored as recommended. Table 1.2 QuantiGene ViewRNA Chemiluminescent Assay Kit Components and Their Storage Conditions Component Description Storage Amplifier (Amp 1) DNA in aqueous buffered solution –20 °C PreAmplifier (PreAmp 1) DNA in aqueous buffered solution –20 °C Label Probe (LP-AP) Alkaline phosphatase-conjugated oligonucleotide in aqueous buffered solution 2-8 °C Protease Enzyme in aqueous buffered solution 2-8 °C Substratea Chemiluminescent substrate 2-8 °C Probe Set Diluent Aqueous solution containing formamide and detergent 2-8 °C Chapter 1 | Introduction 3 Table 1.2 QuantiGene ViewRNA Chemiluminescent Assay Kit Components and Their Storage Conditions Component Description Storage Amplifier Diluent Aqueous solution containing formamide and detergent 2-8 °C Label Probe Diluent Aqueous solution containing detergent 2-8 °C Detergent Solution Aqueous buffered solution containing detergent 15-30 °C Pre-Hybridization Buffer (PreHyb Buffer) Aqueous buffered solution 15-30 °C Protease Stop Buffer Aqueous buffered solution 15-30 °C Storage Buffer Aqueous buffered solution 15-30 °C Wash Buffer Component 1 (Wash Comp 1) Aqueous solution containing detergent 15-30 °C Wash Buffer Component 2 (Wash Comp 2) Aqueous buffered solution 15-30 °C a Lumigen® APS-5 QuantiGene ViewRNA Chemiluminescent Assay Probe Sets In addition to the Assay Kit, a QuantiGene ViewRNA TYPE 1 Probe Set specific to your target must be purchased separately. Probe Sets are available in multiple sizes. Refer to the package insert for details on Probe Set design and specificity. QuantiGene ViewRNA Probe Sets should be stored at –20 °C and have a shelf life of 12 months from date of receipt. Table 1.3 QuantiGene ViewRNA Chemiluminescent Probe Sets Component Description QuantiGene ViewRNA TYPE 1 Probe Set RNA-specific oligonucleotides for use with the PreAmp 1/Amp 1/LP-AP in the QuantiGene ViewRNA Chemiluminescent Assay Storage –20 °C Visit www.panomics.com for the most up-to-date listing of available QuantiGene ViewRNA TYPE 1 Probe Sets. By Request QuantiGene ViewRNA TYPE 1 Probe Sets can be designed and synthesized at no additional cost. Please provide the accession number (including version or gi number) or RNA sequence with your By Request order. (Optional) Upstream Cell Viability Assay The QuantiGene Cell Viability Reagent provides a simple, reliable and sensitive means for quantifying cell proliferation and viability upstream of QuantiGene, QuantiGene Plex and QuantiGene ViewRNA Plate-Based assays. This homogeneous assay utilizes the non-fluorescent redox dye resazurin, which is converted by metabolically active cells, to resorufin, a highly fluorescent product (Ex 530-570 nm; Em 590-620 nm). Table 1.4 QuantiGene Cell Viability Reagent Component Description QuantiGene Cell Viability Reagent Non-fluorescent redox dye in aqueous solution Storage –20 °C 4 QuantiGene® Reporter Gene Assay User Manual Required Materials Not Provided Other materials required to perform the QuantiGene ViewRNA Chemiluminescent Assay that are not included in the are listed here. Table 1.5 Required Materials Not Provided Required Material Source Part Number or Model Nuclease-free water Major laboratory supplier 100% Ethanol (optional) Sigma Aldrich or equivalent 459844 10X PBS Ambion or equivalent AM9625 37% Formaldehyde Fisher Scientific F79-1 WARNING: Formaldehyde is a poison and irritant. Avoid contact with skin and mucous membranes. 96- or 384-well tissue culture plates compatible with chemiluminescent assays See “Appendix III: 96and 384-Well ImagingCompatible Plates” on page 24 QuantiGene Incubator Temperature Validation Kit Affymetrix QS0517 Incubation oven with the following specifications: 40 ± 1 °C that does not deviate by more than 1 °C when opening/closing Uniform temperature throughout the entire incubator Prefer 90% humidity Automation-friendly Affymetrix QS0700 (120V) QS0710 (220V) QS0701 (120V) QS0711 (220V) Picogreen DNA stain solution Invitrogen or equivalent WARNING: Picogreen is a possible mutagen. Avoid contact with skin and mucous membranes. or Liconic or Thermo Cytomat models recommended for automation P7581 Chapter 1 | Introduction Table 1.5 Required Materials Not Provided Required Material Source Luminescence detector with the following features: Reads standard 96- or 384-well plates -21 moles of luciferase Sensitivity >3 x 10 Dynamic range >8 logs Well-to-well uniformity ±5% -5 Cross-talk: < 5 x 10 Fluorescent detection module (optional for DNA stain) Ex 480 nm/Em 520 nm Turner Biosystems IMPORTANT: Make sure your luminometer meets or exceeds minimum performance specifications. Part Number or Model Modulus II Microplate Reader with Microplate Reader (P/N 9310010) Luminescence Module (P/N 9310020) and Fluorescent Module (P/N 9310040) A fluidic dispenser and plate washer, sold separately or together as outlined below Fluidic handling system 96- or 384-channel pipet that meets or exceeds the following specifications: 15-70 μL ± 5% volume dispensing 5-20 μL/sec rate of aspiration/dispense Replace or wash tip between dispensing Thermo Scientific Matrix Beckman Coulter PlateMate 2 x 3 Agilent Technologies (Velocity11) or equivalent Bravo Plate washer that meets or exceeds the following specifications: 30-200 μL ± 5% volume 96 or 384 channels Angle-dispensing tip Plate stacker Automation capable Minimal dead volume BioTek ELx 405 model with high throughput pump option Combination washer dispenser BioTek ELx406 Biomek FX or NX 5 6 QuantiGene® Reporter Gene Assay User Manual 2 Experimental Design and Assay Optimization Overview In this section, we provide recommendations for experimental design and optimizing assay conditions. Selecting the Appropriate Plate Type Firm adherence of cells to the plate is essential for a successful assay. Selection of the assay plate should be based on the following criteria: Strong Cell Attachment Better adherence to the plate means that fewer cells will be lost during the processing, resulting in better assay precision. The goal should be 80-95% confluence from start to finish of the assay procedures. Plastic-bottomed cell culture plates are typically better for cell attachment than glass-bottomed plates. For optimal cell adhesion, plates can be coated with extracellular matrices such as poly-D-lysine, MatriGel or collagen to enhance cell attachment. Luminometer Compatibility Luminometers may have limitation in the plate-type compatibility. Please ensure the plates are compatible with your luminometer. See Table 1.5 on page 4 for specifications. Low Background and Low Cross-talk with the QuantiGene ViewRNA Chemiluminescent Assay Plates must have acceptable background levels to achieve required sensitivity and assay precision. Some plate coatings may induce non-specific binding of the QuantiGene ViewRNA Chemiluminescent Assay amplification system resulting in high backgrounds. To assess plate background, run a no-cells control described below in Assessing Background for New Projects on page 7. In general, higher plate opacity reduces the cross-talk between wells. Automation-friendly Use a plate type that follows the ANSI-recommended specifications. The plate should also have a lid to control evaporation. Optimizing Cell Number The detection range of this assay is 20,000-2,000,000 RNA transcripts per assay well. The samples should be within this range in order to obtain reliable quantitation. Perform the assay at 25, 50, 75, and 100% cell confluency with experimental condition that would induce maximal expression of the target gene. The result should show an increase of signal in proportion to the cell number. The optimal cell number is the maximal cell number before saturation of signal occurs. Replicates Perform all assays in triplicate. Assessing Background for New Projects It is important to assess the source of background signals when running a new assay. The results can be evaluated using a luminometer. We recommend running the following controls: 8 QuantiGene® Reporter Gene Assay User Manual No Cells. Designate at least 2-3 wells that contain no cells and undergo the entire assay procedure. This control enables you to assess the background associated with non-specific binding of signal amplification reagents to the well and/or well coating. The intensity for these wells should be lower than wells that contain cells only and wells that contain no probe sets. See Troubleshooting on page 19 for more information. Cells Only. This control enables you to assess the level of luminescence the cells are contributing to the assay background. No Probe Set. Designate 2-3 wells that undergo the entire assay procedure with the probe set omitted. This control enables you to assess the non-specific binding of amplification reagents to the cell. Negative Control Probe Set. Designate 2-3 wells that contain Probe Set targeting a gene that is not expressed in the target cell. This control enables you to assess the specificity of the assay. For example, using a Probe Set designed to detect the sense strand of 18S RNA. Positive Control Probe Set. Designate 2-3 wells that contain a Probe Set targeting a housekeeping gene (such as GAPDH), or another gene that is expected to be expressed. Using New Probe Sets When using a Probe Set for the first time, we recommend running the assay with a positive control in which the target gene is expressed. Optimizing Assay Conditions for a New Cell Type When working with a new sample type, optimization of cell density, formaldehyde fixation and Protease digestion are key factors. In the initial experiment, we recommend that you start with 80-95% cell density, a 30 minute fixation time, and a 10 minute incubation time with Protease dilutions 1:1,000, 1:2,000, 1:4,000, and 1:8,000. This approach should work for most sample types. In some cases, it may be necessary to evaluate additional cell densities and fixation times of 15 and 60 minutes. Under fixation and over treatment with Protease will result in high cell loss. Cell loss can be checked using a bright field microscope. See Optimizing Assay Conditions for a New Cell Type on page 27 for sample plate layouts for the optimization conditions. The selection criteria for the optimal fixation and Protease treatment conditions are the balance of cell loss and maximum signal to background ratio. The following criteria should be used to select the optimal assay conditions: Least cell lost. The majority of cell loss typically occurs after the Protease treatment. We recommend that you verify the cell density after the Protease treatment using a bright field microscope. If the cell confluence is greater than 50%, proceed with the assay. Lowest background. Highest signal/background ratio (= signal from well with Probe Set/signal from well without Probe Set). Best assay precision between replicate wells. 3 Assay Procedures for Automated or Batch Processing Overview The following procedures can be completed in one long day, or split between 2 days. IMPORTANT: These procedures are optimized for using 96- or 384-well multichannel pipettor and microplate washer. It is not ideal for manual microplate manipulation. See “Alternative Assay Procedure (Manual Processing) on page 29. IMPORTANT: Before starting this procedure, carefully review the recommendations in Optimizing Assay Conditions for a New Cell Type on page 27. Assay Workflow Sample preparation. Adherent cells must be plated in 96- or 384-well format and allowed to firmly adhere to the plate before starting the Assay Procedure. Preparing reagents Prewarm reagents Prepare working reagents Fix cells (optional stop point) Permeabilize cells and digest with Protease Perform hybridizations Hybridize Probe Set (optional stop point) Sequentially hybridize PreAmp 1, Amp 1, and LP-AP Addition of chemiluminescent substrate Detect RNA using plate luminometer DNA stain standardization (optional) Using a Residual Volume Assay Format To minimize cell detachment from the bottom of the plate, the following procedures leave a residual volume in each well, at each step. At the end of each step there is always a minimum volume of 15 µL/well in a 384-well format and 30 µL/well in a 96-well format. See Liquid Handling Recommendations on page 21 for more information. 10 QuantiGene® Reporter Gene Assay User Manual This figure illustrates what residual volume is, the volume remaining after aspiration. Figure 3.1 Residual Volume Aspirate Residual Volume All quantities of buffers used in these procedures take into account the presence of this residual volume. If you must increase the residual volume, to further minimize cell disruption, adjust the quantities of the assay reagents proportionally so that they match the residual volume. NOTE: If making this procedural modification, additional assay reagents may need to be purchased. IMPORTANT: If you are working in 96-well formats and are using manual pipetting, please refer to Alternative Assay Procedure (Manual Processing) on page 29 for a procedure that does not utilize residual volumes. Important Procedural Notes Hybridization reactions must be carried out at 40 ±1 °C. Verify and monitor oven temperature using the QuantiGene Incubator Temperature Validation Kit. Protect samples from light after the addition of Substrate. Before opening reagents supplied in microfuge tubes, briefly centrifuge to collect contents at the bottom of the tube. PreHyb Buffer, Probe Set Diluent, Amplifier Diluent, and Label Probe Diluent stored at 4 °C must be prewarmed to 40 °C for 30 minutes to redissolve any precipitates. If necessary, Probe Set/PreAmp 1/Amp 1/LP-AP reactions can be left in wells at room temperature for 30 minutes before placing at 40 °C. If necessary, Probe Set/PreAmp 1/Amp 1/LP-AP reactions can be left in wells at room temperature for 30 minutes before washing steps. PreHyb Buffer must be kept at 40 °C at all times during the procedure to prevent precipitation. Preparing Reagents To prepare reagents: 1. Thaw/warm the following reagents: Prewarm PreHyb Buffer, Probe Set Diluent, Amplifier Diluent, and Label Probe Diluent to 40 °C for 30 minutes. Thaw Probe Sets, PreAmp 1, and Amp 1 and place on ice. Chapter 3 | Assay Procedures for Automated or Batch Processing 11 Bring Substrate to ambient temperature and protect from light. IMPORTANT: PreHyb Buffer must remain at 40 °C during the entire procedure to prevent precipitation. 2. Prepare the appropriate volume of the following reagents: 1X PBS 8% Formaldehyde Solution in 1X PBS (prepare fresh each time). Prepare 2.9 mL for one 96-well and 5.8 mL for one 384-well plate. Add overage appropriately. WARNING: Formaldehyde is a poison and irritant. Avoid contact with skin and mucous membranes. 3. Prepare Wash Buffer. For example, to a 1,000-mL graduated cylinder, add the following in this order: 800 mL double-distilled water (ddH2O) 3 mL Wash Buffer Comp 1 5 mL Wash Buffer Comp 2 Adjust volume to 1 liter with ddH O 2 One liter is sufficient for approximately four 96-well or two 384-well plates. Scale preparation according to the number of plates to be processed and include overage to accommodate priming volumes of plate washers. 4. For Step 5-Step 9, prepare an appropriate volume of working reagents. Plan for 30 µL/well for 96-well and 15 µL/well for 384-well plates and include overage to accommodate automation equipment dead volumes. Keep working reagents at room temperature until use. Working reagents, except LP-AP, are good for 2 days. If unused on the day of preparation, store at 4 °C overnight and rewarm to 40 °C for 30 minutes before use. 5. Prepare Protease Working Solution. Dilute Protease 1:4,000 (or concentration optimized for your cell type) with room temperature 1X PBS. Vortex briefly to mix. IMPORTANT: The Protease dilution used in this example should be sufficient for a majority of cell lines. If you observe high cell loss or no signal, the optimal dilution needs to be determined. Refer to Optimizing Assay Conditions for a New Cell Type on page 27 for more information. 6. Prepare Working Probe Set. Dilute TYPE 1 Probe Set, 1:50 in 40 °C prewarmed Probe Set Diluent. Vortex briefly to mix and keep at room temperature. WARNING: Probe Set Diluent contains formamide, a teratogen, irritant, and possible carcinogen. Avoid contact with skin and mucous membranes. Table 3.1 Working Probe Set Preparation Component μL Per Well (384-well plate) μL Per Well (96-well plate) Probe Set Diluent (prewarmed) 14.7 29.4 QuantiGene ViewRNA TYPE 1 Probe Set 0.3 0.6 Total volume 15 30 12 QuantiGene® Reporter Gene Assay User Manual 7. Prepare Working PreAmp 1. Dilute PreAmp 1, 1:250 in 40 °C prewarmed Amplifier Diluent. Vortex briefly to mix and keep at room temperature. WARNING: Amplifier Diluent contains formamide, a teratogen, irritant, and possible carcinogen. Avoid contact with skin and mucous membranes. Table 3.2 Working PreAmp 1 Preparation Component μL Per Well (384-well plate) μL Per Well (96-well plate) Amplifier Diluent (prewarmed) 14.94 29.88 PreAmp 1 0.06 0.12 15 30 Total volume 8. Prepare Working Amp 1. Dilute Amp 1, 1:250 in 40 °C prewarmed Amplifier Diluent. Vortex briefly to mix and keep at room temperature. Table 3.3 Working Amp 1 Preparation Component µL Per Well (384-well plate) μL Per Well (96-well plate) Amplifier Diluent (prewarmed) 14.94 29.88 Amp 1 0.06 0.12 15 30 Total volume 9. Prepare Working Label Probe. Dilute LP-AP, 1:1000 in 40 °C prewarmed Label Probe Diluent. Vortex briefly to mix and keep at room temperature. Table 3.4 Working Label Probe Preparation Component μL Per Well (384-well plate) μL Per Well (96-well plate) Label Probe Diluent (prewarmed) 14.985 29.97 LP-AP 0.015 0.03 15 30 Total volume Fixing Cells and Treating with Protease To fix and treat cells: 1. Fix cells in Formaldehyde Solution: WARNING: Formaldehyde is a poison and irritant. Avoid contact with skin and mucous membranes. A. Aspirate medium from cells leaving defined residual volume and wash two times with 1X PBS. Refer to the table below for volumes. B. Aspirate the final 1X PBS wash, dispense 8% Formaldehyde Solution, and incubate for 30 minutes at room temperature. Chapter 3 | Assay Procedures for Automated or Batch Processing 13 C. Aspirate the Formaldehyde Solution and gently wash three times with 1X PBS. Table 3.5 Fixing Cell Volumes Per Well Residual Vol (µL) 1X PBS Vol (µL) 8% Formaldehyde Solution Vol (µL) 96-well plate 30 150 30 384-well plate 15 80 15 NOTE: Optional. At this point, the assay can be stopped by dehydration and storage at –20 °C. See Dehydrating Cells for Storage or Shipping on page 23 for a procedure. 2. Permeabilize cells with Detergent Solution: A. Dispense Detergent Solution and incubate for 3 minutes at room temperature. B. Aspirate Detergent Solution and wash twice with 1X PBS. Table 3.6 Detergent Volumes Per Well Residual Vol (µL) Detergent Vol (µL) 1X PBS Vol (µL) 96-well plate 30 30 150 384-well plate 15 15 80 3. Digest with Working Protease Solution: A. Aspirate the 1X PBS from the plate, dispense Protease Working Solution, cover plate with plate lid, and incubate for 10 minutes at room temperature. B. Aspirate the Protease solution and wash 5 times with 1X PBS. C. Aspirate 1X PBS, dispense Protease Stop Buffer, and pipet up and down twice to mix. D. Aspirate Protease Stop Buffer and dispense fresh Protease Stop Buffer. Pipet up and down to mix. E. Proceed to hybridization procedure. Samples may sit in Protease Stop Buffer for up to 30 minutes. Table 3.7 Protease and Stop Buffer Volumes Per Well Residual Vol (μL) Diluted Protease Vol (μL) 1X PBS Vol (μL) Protease Stop Buffer Vol (μL) 96-well plate 30 30 150 30 384-well plate 15 15 80 15 Performing Hybridizations To perform hybridizations: 1. Hybridize target Working Probe Set: A. Aspirate Protease Stop Buffer and dispense Working Probe Set. B. Cover plate with plate lid and incubate plate for 3 hours at 40 ±1 °C. Table 3.8 Working Probe Set Volumes Per Well Residual Vol (µL) Working Probe Set Vol (µL) 96-well plate 30 30 384-well plate 15 15 14 QuantiGene® Reporter Gene Assay User Manual 2. Aspirate the Working Probe Set and wash 3 times with Wash Buffer. Include a 30 second soak at the last wash step. Table 3.9 Wash Buffer Volumes Per Well Residual Vol (µL) Wash Buffer Vol (µL) 96-well plate 30 150 384-well plate 15 80 3. Optional. Plates can be stored in Storage Buffer at 4 °C for up to 24 hours. To continue without storage, proceed to Step 4. Prepare for storage: A. Aspirate Wash Buffer and dispense Storage Buffer. B. After storage, aspirate Storage Buffer and wash the plate twice with Wash Buffer. IMPORTANT: Ensure that the refrigeration is at 4 °C. Lower temperatures will cause precipitation of Storage Buffer resulting in significant cell loss. Table 3.10 Storage and Wash Buffer Volumes Per Well Residual Vol (μL) Storage Buffer Vol (μL) Wash Buffer Vol (μL) 96-well plate 30 30 150 384-well plate 15 15 80 4. Hybridize Working PreAmp 1: If continuing from Step 3, make sure working reagents stored at 4 °C have been prewarmed and are ready (see Preparing Reagents on page 10). A. Aspirate Wash Buffer, dispense PreHyb Buffer prewarmed to 40 °C, and pipet up and down twice to mix. B. Aspirate PreHyb Buffer and dispense Working PreAmp 1. C. Cover plate with plate lid and incubate at 40 ±1 °C for 60 minutes. Table 3.11 Working PreAmp 1 Volumes Per Well Residual Vol (μL) PreHyb Buffer Vol (μL) Working PreAmp 1 Vol (μL) 96-well plate 30 30 30 384-well plate 15 15 15 5. Aspirate the Working PreAmp 1 and wash 3 times with Wash Buffer. Include a 30 second soak at the last wash step. Table 3.12 Wash Buffer Volumes Per Well Residual Vol (μL) Wash Buffer Vol (μL) 96-well plate 30 150 384-well plate 15 80 Chapter 3 | Assay Procedures for Automated or Batch Processing 15 6. Hybridize Amp 1: A. Aspirate Wash Buffer, dispense PreHyb Buffer prewarmed to 40 °C, and pipet up and down twice to mix. B. Aspirate PreHyb Buffer and dispense Working Amp 1. C. Cover plate with plate lid and incubate at 40 ±1 °C for 60 minutes. Table 3.13 Working Amp 1 Volumes Per Well Residual Vol (μL) PreHyb Buffer Vol (μL) Working Amp 1 Vol (μL) 96-well plate 30 30 30 384-well plate 15 15 15 7. Aspirate the Working Amp 1 and wash 3 times with Wash Buffer. Include a 30 second soak at the last wash step. Table 3.14 Wash Buffer Volumes Per Well Residual Vol (μL) Wash Buffer Vol (μL) 96-well plate 30 150 384-well plate 15 80 8. Hybridize Working Label Probe (LP-AP): A. Dispense PreHyb Buffer prewarmed to 40 °C, and pipet up and down twice to mix. B. Aspirate PreHyb Buffer and dispense Working Label Probe. C. Cover plate with plate lid and incubate at 40 ±1 °C for 60 minutes. Table 3.15 Working Label Probe Volumes Per Well Residual Vol (μL) PreHyb Buffer Vol (μL) Working LP-AP Vol (μL) 96-well plate 30 30 30 384-well plate 15 15 15 9. Wash 5 times with Wash Buffer: A. Aspirate the Working Label Probe and wash 5 times with Wash Buffer. Include a 2 minute soak at each wash step. IMPORTANT: Reduction in soaking time and number of washes will increase background significantly. NOTE: Dispense 1X PBS after the last wash if waiting time is longer than 30 minutes before the plate will be processed. Table 3.16 Wash Buffer Volumes Per Well Residual Vol (μL) Wash Buffer Vol (μL) 1X PBS Vol (μL) 96-well plate 30 150 150 384-well plate 15 80 80 16 QuantiGene® Reporter Gene Assay User Manual 10. Remove all trace of buffer by aspirating all solution including residual volume from each well and proceed to the next step immediately. IMPORTANT: Ensure the Substrate is at room temperature before use. IMPORTANT: Protect sample plates from light after adding Substrate. 11. Dispense Substrate to each well. Table 3.17 Substrate Volume Per Well Substrate Vol (μL) 96-well plate 100 384-well plate 50 12. Incubate at room temperature for 5 minutes. 13. Place the plate in the luminometer and read. Set integration (read) time to 0.2 seconds. For best results, read the plate within 15 minutes. (Optional) DNA Stain Standardization This procedure should be performed when variable cell loss is observed between wells and you want to normalize the chemiluminescent signal to cell number. To stain DNA: 1. Aspirate the Substrate, leaving residual volume in the well, and wash 3 times with 1X PBS. Include a 30-second soak at the last wash step. Table 3.18 1X PBS Volumes Per Well Residual Vol (μL) 1X PBS Vol (μL) 96-well plate 30 150 384-well plate 15 80 2. Place the sample plate in the fluorescent reader and read the green fluorescent signal at Ex 480 nM/ Em 520 nM to measure the green fluorescent background. NOTE: After the washing step, cells still retain some residual luminescent signal from the QuantiGene ViewRNA Chemiluminescent Assay. It is necessary to measure the green fluorescent background before staining. 3. Dilute 1:100 Quant-iT Pico green dsDNA staining reagent (Invitrogen P/N P7581) with 1X PBS. Dispense diluted staining reagent to each well. Table 3.19 Pico Green Reagent Volume Per Well Picogreen Staining Reagent Vol (μL) 96-well plate 30 384-well plate 15 4. Incubate at room temperature for 3 minutes. Chapter 3 | Assay Procedures for Automated or Batch Processing 17 5. Aspirate Picogreen staining reagent and wash 3 times with 1X PBS. Include a 30 second soak at the last wash step. Keep sample in PBS after final wash. Table 3.20 1X PBS Volumes Per Well Residual Vol (μL) 1X PBS Vol (μL) 96-well plate 30 150 384-well plate 15 80 6. Measure DNA stained green fluorescent signal: A. Place sample plate in the fluorescent reader. Read green fluorescent signal at Ex 480 nM/Em 520 nM. B. Subtract background obtained in Step 2. 18 QuantiGene® Reporter Gene Assay User Manual 4 Troubleshooting No or Weak Signals Table 4.1 Troubleshooting No or Weak Signal Probable Cause Recommended Action Inadequate Protease digestion Optimize Protease digestion conditions as described in Optimizing Assay Conditions for a New Cell Type on page 27. Over-fixing cells Do not exceed the recommended fixation time for your cell type. Over/under permeabilization Perform time titration of permeabilization step for 1-10 minutes. Inappropriate hybridization temperature Hybridization reactions must be carried out at 40 ±1 °C. Use a QuantiGene Incubator Temperature Validation Kit to verify and monitor the temperature. Incorrect Use of Probe Sets, PreAmp 1, Amp 1 and/or LP-AP Ensure that Working Solutions are prepared properly and used in the correct order. Poor cell retention Titrate cell numbers, fixation, and Protease treatments. Try using different plate type to ensure good cell adhesion. Try coating the plating surfaces with different extracellular matrices such as MatriGel or Poly-D-lysine. Use 5.0 μL/sec dispensing/aspiration speed to minimize cell detachment. Use residual volume protocol. If necessary, increase amount of residual volume. The volume of all reagents in all steps must be increased proportionally. For example, if there is 60 μL of residual volume, then 60 μL of reagents must be used. Use adherent cells and ensure cells are firmly adhered to the plate prior to the assay. Number of target RNA molecules below limit of detection Increase cell number. Low alkaline phosphatase activity Do not allow the plate the stand dry for more than 5 minutes between removing wash buffer and adding QG 2.0 substrate. Check the expiration date of LP-AP. It has a shelf life of 6 months from date of receipt. Make sure the Substrate is at room temperature before use. Luminometer does not have the required sensitivity Only use luminometers that meet or exceed the minimum performance specifications (see Required Materials Not Provided on page 4). 20 QuantiGene® Reporter Gene Assay User Manual Non-Uniform Signal Across the Plate Table 4.2 Troubleshooting Non-Uniform Signal Probable Cause Recommended Action Samples were allowed to dry Once the samples have been rehydrated, do not allow the cells to dry at any stage. Do not use less than the recommended volumes of any hybridization solution for your sample type. Use residual volume method or leave recommended volume after each wash step. This will minimize the chance of a well drying out completely. Non-uniform aspiration/dispensing of the multi-channel pipettor Correct and verify uniform volume for aspiration and dispense of all pipet tips. Insufficient mixing of reagents Pre-warm hybridization buffers to re-dissolve any precipitates before use. Keep PreHyb Buffer at 40 °C at all times before adding to the plate. Briefly vortex all working hybridization solutions to mix well before use. High Background Signal Table 4.3 Troubleshooting High Background Signal Probable Cause Recommended Action Samples were allowed to dry Once the in situ part of the assay is started, do not allow the cells to dry at any stage. Do not use less than the recommended volumes of any hybridization solution for your sample type. Leaving recommended residual volume after each wash step will minimize the chance of a well drying completely. Insufficient washing Make sure you wash according to the procedure. Non-specific binding of Probe Set, PreAmp, Amp, or Label Probe to the plate Hybridization reactions must be carried out at 40 ±1 °C. Use a QuantiGene Incubator Temperature Validation Lit to verify and monitor the temperature. Try using different plate types or coating material to ensure minimum nonspecific binding activity (see Compatible Plates on page 25 for recommendations). A Liquid Handling Recommendations Fluidic Handling Systems Pipetting Stations Platermate 2x3 Biomek FX or NX Agilent (Velocity11) Bravo Plate Washers BioTek ELx 405 Select Pipetting Station and Plate Washer Combination BioTeK EL 406 Minimum Requirements 96- or 384-channel pipette head 80 µL ± 5% pipette capacity (30 µL is acceptable but will result in increased processing time) Tips can be replaced or washed between dispensings Setup Recommendations The goal of these recommendations is to minimize cell loss. Start with a dispense/aspirate rate to 5 µL/sec. Slowly increase the flow rate, making sure that cells are not detaching in the process. If the liquid handling is setup properly, 80% of the cells will remain following the procedure. If you use the recommended residual volume protocol, dispense/aspirate rates of 20 µL/sec could be achieved. Set a residual volume to remain after each aspiration, 15 µl/well for 384-well plates and 30 µL/well for 96-well plates. This amount of residual liquid is accounted for in the assay procedures and will minimize cell detachment. If you must increase the residual volume, adjust the quantities of the assay reagents proportionally so that they match the residual volume. Wash Protocol Settings for BioTek ELx 405 Select IMPORTANT: Settings might require some adjustment since different instruments of the same model can behave differently. Table A.1 Wash Protocol Settings Method Setting Number of Cycles Per assay protocol Wash format Plate Soak/Shake Per assay protocol 22 QuantiGene® Reporter Gene Assay User Manual Table A.2 Wash Protocol Settings Cont. Aspirate 96-Well Plate 384-Well Plate Asp height Plate-dependent Plate-dependent Horizontal asp pos -45 (-2.057 mm) -25 (-1.143 mm) Horiz y asp pos 00 00 (00.00 mm) Aspiration rate 1 (3.0 mm/sec) 01 (3.0 mm/sec) Aspiration delay 0 0000 (msec) Crosswise aspiration No No Final aspiration Yes Yes Final aspiration delay 0 0000 (msec) Dispense 96-Well Plate 384-Well Plate Dispense volume 150 μL/well 80 μL/well Dispense flow rate 01 01 Dispense height 120 120 (15.240 mm) Horizontal disp pos -35 (-1.600 mm) -15 (-0.686 mm) Horiz Y disp pos 00 00 (0.000 mm) Bottom wash first No No Prime by start No No B Dehydrating Cells for Storage or Shipping About the Dehydration Procedure Use this procedure if you want to temporarily stop the assay after fixing the cells. Following dehydration, store the cells at –20 °C for up to 2 months or until ready to use. When ready to use, follow the procedure for rehydrating the cells before continuing with the permeabilization step. IMPORTANT: Following the dehydration-rehydration steps, plates with Matrigel (but not poly-D-lysine or collagen) coatings might have a significant increase in background. Verify that this will not be an issue before preparation and storage of multiple plates. Procedure The 50 µL/well volume in this procedure is specific for 384-well plates. If you are using 96-well plates, increase the volume from 50 µL/well to 100 µL/well. IMPORTANT: Do not apply the residual volume technique to this procedure. To dehydrate cells for storage or for shipping: 1. To dehydrate cells: A. Aspirate the final 1X PBS wash, then dispense 50 µL/well 50% ethanol. B. Incubate at room temperature (RT) for 2 minutes. C. Aspirate 50% ethanol, then dispense 50 µL/well 70% ethanol. D. Incubate at RT for 2 minutes. E. Aspirate 70% ethanol, then dispense 50 µL/well 100% ethanol. F. Aspirate 100% ethanol, then dispense 50 µL/well fresh 100% ethanol. G. Cover the plate with its lid and seal with parafilm. H. Store at –20 °C. Cells can be stored for several weeks. Proceed to step 3 when you are ready to run the rest of the assay. I. Proceed to step 2 if you plan to ship the plate. IMPORTANT: Glass bottom plates may crack when stored at –20 °C. In this case, store at 4 °C for up to 48 hours. 2. To prepare for shipping: A. Aspirate the ethanol. B. Seal the plate with an adhesive seal. C. Ship the plate overnight at 4 °C. D. Immediately upon receipt of the plate, add 100% ethanol and store at –20 °C. 3. When ready to run the rest of the assay, rehydrate the cells: A. Aspirate 100% ethanol, and dispense 50 µL/well 70% ethanol. B. Incubate at RT for 2 minutes. C. Aspirate 70% ethanol, and dispense 50 µL/well 50% ethanol. D. Incubate at RT for 2 minutes. E. Aspirate 50% ethanol and dispense 50 µL/well 1X PBS. 24 QuantiGene® Reporter Gene Assay User Manual F. Incubate at RT for 10 minutes. G. Proceed to Step 2 on page 13, and continue with the permeabilization of the cells. C 96- and 384-Well Compatible Plates Compatible Plates Below is a table of plates that have been shown to work with our assay. Please refer to Selecting the Appropriate Plate Type on page 7 for criteria to consider when selecting a plate. Table C.1 Compatible Plates Format Vendor Cat. No. Bottom Coating 384-well Greiner 781098 PS, μ-clear Cell-culture treated Greiner 781080 PS, solid Cell-culture treated Greiner 665098 PS, μ-clear Cell-culture treated Costar 3917 PS, solid Cell-culture treated 96-well 26 QuantiGene® Reporter Gene Assay User Manual D Optimizing Assay Conditions for a New Cell Type Initial Optimization and Assessment of Assay Backgrounds In the initial experiment, we recommend you start with 80-95% cell density, 30 minute fixation time, and a 10 minute incubation time with 4 different Protease dilutions. Refer to Assessing Background for New Projects on page 7 for details on recommended controls for assessing backgrounds. The table below is a recommended plate map for an initial optimization assay. Table D.1 Recommended Plate Map for Optimization Row Control Type A-B No cells C-D Cells only E-F No Probe Set G-H Negative control Probe Set I-J Positive control Probe Set K-L New Probe Set Protease Dilution 1:1,000 for well columns 1-6 1:2,000 for well columns 7-12 1:4,000 for well columns 13-18 1:8,000 for well columns 19-24 From each optimization experiment, select the optimal conditions based on the following criteria: Least cell loss Lowest background Highest signal/background ratio Best assay precision between replicate wells and plates for cell number, low background, and high signal/background ratio In some cases, finding the optimal conditions may require an additional experiment. See the following section for a description of a plate map for further optimization. 28 QuantiGene® Reporter Gene Assay User Manual Additional Optimization If acceptable data is not obtained during the initial optimization assay, it may be necessary to evaluate additional cell densities and/or fixation times. A recommended plate map is provided below. Table D.2 Recommended Plate Map for Additional Optimization Protease Dilution Row Fixation Time (min) A B Control Type No Probe Set 15 Positive control Probe Set C New Probe Set D No Probe Set E 30 Positive control Probe Set F New Probe Set G No Probe Set H I 45 Positive control Probe Set New Probe Set 1:1,000 for well columns 1-6 1:2,000 for well columns 7-12 1:4,000 for well columns 13-18 1:8,000 for well columns 19-24 E Alternative Assay Procedure (Manual Processing) Overview The following procedures can be completed in one long day, or broken down between 2 days. Cells must be plated in 96-well format and allowed to adhere at least 1 day before starting the Assay Procedure. This alternative manual processing assay procedure is different from the batch/automated procedure the kit was designed for. The manual processing method does not leave a “residual volume”, hence the solutions required for running the manual method need to be less concentrated than the solutions used in the batch/automated method. To prepare working solutions for the manual processing assay see below, Preparing Reagents on page 29. Using this manual processing procedure requires more reagents per assay plate, therefore the number of assays per assay kit will be reduced. IMPORTANT: This alternative procedure is optimized for using multichannel pipettor for manual microplate manipulation. IMPORTANT: Before starting this procedure, carefully review Experimental Design and Assay Optimization on page 7. Assay Workflow Prepare cells by fixing, permeabilizing, and digesting with Protease Perform hybridizations Analyze plate Important Procedural Notes Hybridization reactions must be carried out at 40 ±1 °C. Verify and monitor oven temperature using the QuantiGene Incubator Temperature Validation Kit. Protect samples from light following addition of Substrate. Before opening reagents supplied in microfuge tubes, briefly centrifuge to collect contents at the bottom of the tube. PreHyb Buffer, Probe Set Diluent, Amplifier Diluent, and Label Probe Diluent stored at 4 °C must be prewarmed to 40 °C for 30 minutes to redissolve any precipitates. Preparing Reagents To prepare reagents for alternative processing procedure: 1. Thaw/warm the following reagents: Prewarm PreHyb Buffer, Probe Set Diluent, Amplifier Diluent, and Label Probe Diluent to 40 °C for 30 minutes. Thaw Probe Sets, PreAmp 1, and Amp 1 and place on ice. Bring Substrate to room temperature and protect from light. 2. Prepare the appropriate volume of the following reagents: 1X PBS. 250 mL is sufficient for one 96-well plate. 30 QuantiGene® Reporter Gene Assay User Manual 4% Formaldehyde Solution in 1X PBS (prepare daily). 7.2 mL is sufficient for one 96-well plate. WARNING: Formaldehyde is a poison and irritant. Avoid contact with skin and mucous membranes. 3. Prepare Wash Buffer. For example, to a 1,000-mL graduated cylinder, add the following in this order: A. 800 mL double-distilled water (ddH2O) B. 3 mL Wash Buffer Comp 1 C. 5 mL Wash Buffer Comp 2 D. Adjust to 1 liter with ddH2O Scale preparation according to the number of plates to be processed. 200 mL is sufficient for processing one 96-well plate. 4. For steps 5-16, prepare an appropriate volume of working reagents. Plan for 60 µL/well for 96-well plates and include overage to accommodate the use of reagent reservoirs. Volumes sufficient for one 96-well plate are provided throughout the procedures. Keep working reagents at room temperature until use. Working reagents, except LP-AP, are good for 2 days. If unused the day of preparation, store at 4 °C overnight and rewarm to 40 °C for 30 minutes before use. Swirl working reagents to visually verify there are no precipitates. 5. Prepare Working Detergent Solution by diluting stock Detergent Solution 1:1 with 1X PBS and then vortexing briefly to mix. 8 mL is sufficient for one 96-well plate. 6. Prepare Working Protease Solution by diluting Protease 1:8,000 (or optimized concentration for your cell type) with room temperature 1X PBS and then vortexing briefly to mix. 8 mL is sufficient for one 96-well plate. IMPORTANT: The Protease dilution used in this example should be sufficient for a majority of cell lines. If you observe high cell loss or no signal, the optimal dilution should be determined. Refer to Optimizing Assay Conditions for a New Cell Type on page 27 for more information. 7. Prepare Working Protease Stop Buffer by diluting stock Protease Stop Buffer 3:1 with 1X PBS and then vortexing briefly to mix. Prepare enough for the assay and also for the preparation Working Probe Set Diluent (see Figure E.1 and Table E.1). 13 mL (9.75 mL stock Protease Stop Buffer plus 3.25 mL 1X PBS) is sufficient for one 96-well plate. Chapter E | 31 Figure E.1 Workflow for Preparation and Usage of Working Protease Stop Buffer, Probe Set Diluent, and Probe Set Working Protease Stop Buffer (13 mL) 3:1, Protease Stop Buffer:1X PBS Assay Procedure: Fixing cells and treating with Protease (8 mL) Working Probe Set Diluent (8 mL) 1:1, Probe Set Diluent:Working Protease Stop Buffer Working Probe Set (8 mL) 1:100, Probe Set:Working Probe Set Diluent Table E.1 Workflow for Preparation and Usage of Working Protease Stop Buffer, Probe Set Diluent, and Probe Set Buffer/Diluent Formula Required for... Working Protease Stop Buffer 3:1, Protease Stop Buffer:1X PBS Assay procedure: Fixing Cells and Treating with Protease on page 33 Working Probe Set Diluent Working Probe Set Diluent 1:1, Probe Set Diluent:Working Protease Stop Buffer Working Probe Set Working Probe Set 1:100, Probe Set:Working Probe Set Diluent Assay procedure: Performing Hybridizations on page 34 8. Prepare Working Probe Set Diluent by diluting stock Probe Set Diluent, prewarmed to 40 °C, 1:1 with Working Protease Stop Buffer (see Figure E.1 and Table E.1) and then vortexing briefly to mix. WARNING: Probe Set Diluent contains formamide, a teratogen, irritant, and possible carcinogen. Avoid contact with skin and mucous membranes. 8 mL is sufficient for one 96-well plate. 9. Prepare Working Probe Set by diluting Probe Set 1:100 with Working Probe Set Diluent (see Figure E.1 and Table E.1) and then vortexing briefly to mix. 8 mL is sufficient for one 96-well plate. Table E.2 Working Probe Set Preparation Component Vol (μL) Per Well (96-well plate) Working Probe Set Diluent (prewarmed) 59.4 Probe Set 0.6 Total volume 60 10. Prepare Working Storage Buffer by diluting stock Storage Buffer 1:1 with nuclease-free water and then vortexing briefly to mix. 8 mL is sufficient for one 96-well plate. 11. Prepare Working PreHyb Buffer by diluting stock PreHyb Buffer, prewarmed to 40 °C, 1:1 with nuclease-free water and then vortexing briefly to mix. 32 QuantiGene® Reporter Gene Assay User Manual Prepare enough for the preparation of Working Amplifier Diluent and Working Label Probe Diluent (see Figure E.2 and Table E.3). 13 mL is sufficient for one 96-well plate. Figure E.2 Workflow for Preparation and Usage of Working PreHyb, PreAmp 1, Amp 1, and Label Probe Working PreHyb Buffer (13 mL) 1:1, PreHyb Buffer:nuclease-free water Working Amplifier Diluent (16 mL) 1:1, Amplifier Diluent:Working PreHyb Buffer Working Label Probe Diluent (8 mL) 1:1, Label Probe Diluent:Working PreHyb Buffer Working PreAmp 1 (8 mL) Working Amp 1 (8mL) Working Label Probe (8 mL) 1:500, PreAmp 1:Working Amplifier Diluent 1:500, Amp 1:Working Amplifier Diluent 1:2000, LP-AP:Working Label Probe Diluent Table E.3 Workflow for Preparation and Usage of Working PreHyb, PreAmp 1, Amp 1, and Label Probe Buffer/Diluent Formula Required for... Working PreHyb Buffer 1:1, PreHyb Buffer: Nuclease-free water Working Amplifier Diluent Working Label Probe Diluent Working Amplifier Diluent 1:1, Amplifier Diluent:Working PreHyb Buffer Working PreAmp 1 Working Amp 1 Working PreAmp 1 1:500, PreAmp 1:Working Amplifier Diluent Assay procedure: Performing Hybridizations on page 34 Working Amp 1 1:500, Amp 1:Working Amplifier Diluent Assay procedure: Performing Hybridizations on page 34 Working Label Probe Diluent 1:1, Label Probe Diluent:Working PreHyb Buffer Working Label Probe Working Label Probe 1:2000, LP-AP:Working Label Probe Diluent Assay procedure: Performing Hybridizations on page 34 12. Prepare Working Amplifier Diluent by diluting stock Amplifier Diluent, prewarmed to 40 °C, 1:1 with Working PreHyb Buffer and then vortexing briefly to mix ad keep at room temperature. WARNING: Amplifier Diluent contains formamide, a teratogen, irritant, and possible carcinogen. Avoid contact with skin and mucous membranes. Prepare enough for the preparation of Working PreAmp 1 and Working Amp 1 (see Figure E.2 and Table E.3). 16 mL is sufficient for one 96-well plate. 13. Prepare Working Label Probe Diluent by diluting stock Label Probe Diluent, prewarmed to 40 °C, 1:1 with Working PreHyb Buffer and then vortexing briefly to mix (see Figure E.2 and Table E.3). 8 mL is sufficient for one 96-well plate. 14. Prepare Working PreAmp 1 by diluting PreAmp 1, 1:500 with Working Amplifier Diluent and then vortexing briefly to mix and keep at room temperature (see Figure E.2 and Table E.3). Chapter E | 33 8 mL is sufficient for one 96-well plate. Table E.4 Working PreAmp 1 Preparation Component Vol (μL) Per Well (96-well plate) Working Amplifier Diluent 59.88 PreAmp 1 0.12 Total volume 60 15. Prepare Working Amp 1 by diluting Amp 1, 1:500 with Working Amplifier Diluent Buffer and then vortexing briefly to mix and keep at room temperature (see Figure E.2 and Table E.3). 8 mL is sufficient for one 96-well plate. Table E.5 Working Amp 1 Preparation Component Vol (μL) Per Well (96-well plate) Working Amplifier Diluent 59.88 Amp 1 0.12 Total volume 60 16. Prepare Working Label Probe by diluting LP-AP 1:2000 with Working Label Probe Diluent and then vortexing briefly to mix and keep at room temperature in the dark (see Figure E.2 and Table E.3). 8 mL is sufficient for one 96-well plate. Table E.6 Working Label Probe Preparation Component Vol (μL) Per Well (96-well plate) Working Label Probe Diluent 59.97 LP-AP 0.03 Total volume 60 Fixing Cells and Treating with Protease To fix and treat cells: 1. Fix cells in 4% Formaldehyde Solution: WARNING: Formaldehyde is a poison and irritant. Avoid contact with skin and mucous membranes. A. Invert plate containing cells over appropriate receptacle and gently expel contents, then invert plate on a clean, dry paper towel for 1-2 seconds. Gently wash 2 times with 150 µL/well 1X PBS. B. Remove (as above) the final 1X PBS wash, add 60 µL/well 4% Formaldehyde Solution, cover plate with plate lid and incubate for 30 minutes at room temperature. C. Remove (as above) the Formaldehyde Solution and gently wash 3 times with 150 µL/well 1X PBS. NOTE: Optional. At this point, the assay can be stopped by dehydration and storage at –20 °C. See Dehydrating Cells for Storage or Shipping on page 23 for a procedure. 2. Permealize cells with Working Detergent Solution: A. Add 60 µL/well Working Detergent Solution and incubate for 3 minutes at room temperature. 34 QuantiGene® Reporter Gene Assay User Manual B. Invert plate over appropriate receptacle and gently expel contents, then invert plate on a clean, dry paper towel for 1-2 seconds. C. Add 150 µL/well 1X PBS. 3. Digest with Working Protease Solution: A. Invert plate over appropriate receptacle and gently expel contents, then invert plate on a clean, dry paper towel for 1-2 seconds. Add 60 µL/well Working Protease Solution, cover plate with plate lid, and incubate for 10 minutes at room temperature. B. Remove (as above) the Working Protease Solution and gently wash 3 times with 150 µL/well 1X PBS. C. Remove (as above) 1X PBS and add 60 µL/well Working Protease Stop Buffer. D. Proceed to hybridization procedure. Samples may sit in Working Protease Stop Buffer for up to 30 minutes. Performing Hybridizations To perform hybridizations: 1. Hybridize target Working Probe Set: A. Invert plate over appropriate receptacle and gently expel contents, then invert plate on a clean, dry paper towel for 1-2 seconds. Add 60 µL/well Working Probe Set. B. Cover plate with plate lid and incubate plate for 3 hours at 40 ± 1 °C. 2. Invert plate over appropriate receptacle and gently expel contents, then invert plate on a clean, dry paper towel for 1-2 seconds. Wash 3 times with 150 µL/well Wash Buffer. 3. Optional. Plates can be stored at 4 °C for up to 24 hours. To continue without storage, proceed to Step 4. Prepare for storage: A. Invert plate over appropriate receptacle and gently expel contents, then invert plate on a clean, dry paper towel for 1-2 seconds. Add 60 µL/well Working Storage Buffer. B. Plate is now ready for storage. Cover with plate lid, wrap with parafilm, and store at 4 °C. C. After storage, remove (as above) Working Storage Buffer and wash the plate 2 times with 150 µL/ well Wash Buffer before hybridizing to the PreAmp 1. IMPORTANT: Ensure that the refrigeration is at 4 °C. Lower temperatures will cause precipitation of Storage Buffer resulting in significant cell loss. 4. Hybridize Working PreAmp 1: If continuing from Step 3 following storage, make sure working reagents stored at 4 °C have been prewarmed and are ready. See Preparing Reagents on page 29. A. Invert plate over appropriate receptacle and gently expel contents, then invert plate on a clean, dry paper towel for 1-2 seconds. Add 60 µL/well Working PreAmp 1. B. Cover plate with plate lid and incubate at 40 ±1 °C for 60 minutes. 5. Invert plate over appropriate receptacle and gently expel contents, then invert plate on a clean, dry paper towel for 1-2 seconds. Wash 3 times with 150 µL/well Wash Buffer. 6. Hybridize Working Amp 1: A. Invert plate over appropriate receptacle and gently expel contents, then invert plate on a clean, dry paper towel for 1-2 seconds. Add 60 µL/well Working Amp 1. B. Cover plate with plate lid and incubate at 40 ±1 °C for 60 minutes. 7. Invert plate over appropriate receptacle and gently expel contents, then invert plate on a clean, dry paper towel for 1-2 seconds. Wash 3 times with 150 µL/well Wash Buffer. Chapter E | 35 8. Hybridize Working Label Probe (LP-AP): A. Invert plate over appropriate receptacle and gently expel contents, then invert plate on a clean, dry paper towel for 1-2 seconds. Add 60 µL/well Working Label Probe. B. Cover plate with plate lid and incubate at 40 ±1 °C for 60 minutes. 9. Invert plate over appropriate receptacle and gently expel contents, then invert plate on a clean, dry paper towel for 1-2 seconds. Wash 5 times with 150 µL/well Wash Buffer. Include a 2-minute soak during each wash. IMPORTANT: Reduction in soaking time and number of washes will increase background significantly. 10. Invert plate over appropriate receptacle and gently expel contents, then invert plate on a clean, dry paper towel for 1-2 seconds. NOTE: Ensure that Substrate is at room temperature before use. IMPORTANT: Protect sample plate from light after adding Substrate. 11. Dispense 100 µL/well Substrate to each well. 12. Incubate at room temperature for 5 minutes. 13. Place the plate in the luminometer and read. Set integration (read) time to 0.2 seconds. For best results, read plate within 15 minutes. (Optional) DNA Stain Standardization This procedure should be performed when variable cell loss is observed in certain wells and you want to normalize the chemiluminescent signal to cell number. To stain DNA: 1. Invert plate over appropriate receptacle and gently expel contents, then invert plate on a clean, dry paper towel for 1-2 seconds. Wash 3 times with 150 µL/well 1X PBS. Include a 30-second soak at the last wash step. 2. Add 30 µL/well 1X PBS and place the sample plate in the fluorescent reader and read the green fluorescent signal at Ex 480 nM/Em 520 nM to measure the green fluorescent background. NOTE: After the washing step, cells still retain some residual luminescent signal from the ViewRNA Chemiluminescent Assay. It is necessary to measure the green fluorescent background before staining. 3. Invert plate over appropriate receptacle and gently expel contents, then invert plate on a clean, dry paper towel for 1-2 seconds. 4. Dilute 1:200 Quant-iT Picogreen dsDNA staining reagent (Invitrogen P/N P7581) with 1X PBS. Add 50 µL/well diluted staining reagent to each well. 5. Incubate at room temperature for 3 minutes. 6. Invert plate over appropriate receptacle and gently expel contents, then invert plate on a clean, dry paper towel for 1-2 seconds. Wash 3 times with 150 µL/well 1X PBS. Include a 30-second soak at the last wash step. 7. Measure DNA stained green fluorescent signal: A. Add 30 µL/well 1X PBS and place sample plate in the fluorescent reader. Read green fluorescent signal at Ex 480 nM/Em 520 nM. B. Subtract background obtained in Step 2. 36 QuantiGene® Reporter Gene Assay User Manual