1
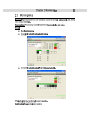
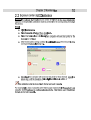
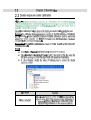
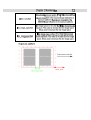
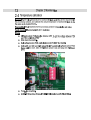
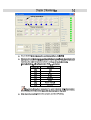
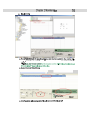
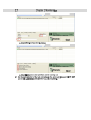
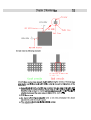
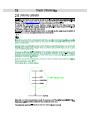
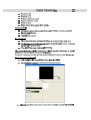
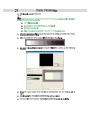
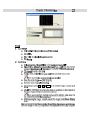
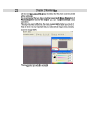
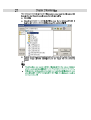
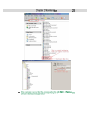
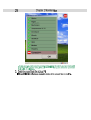
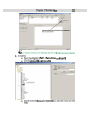
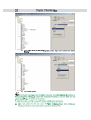
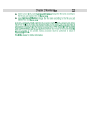
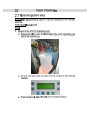
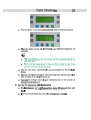
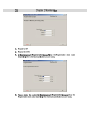
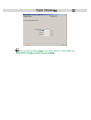
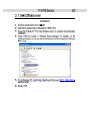
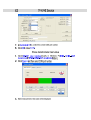
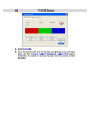
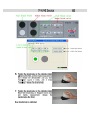
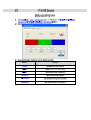
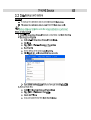
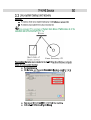
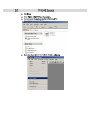
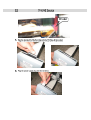
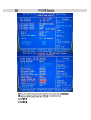
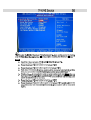
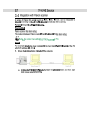
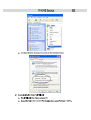
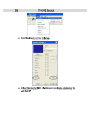
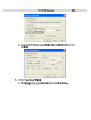
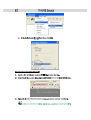
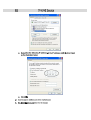
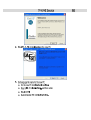
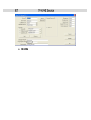
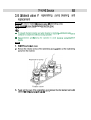
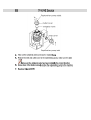
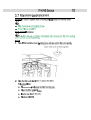
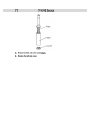
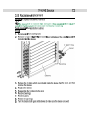
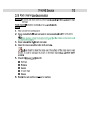
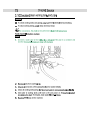
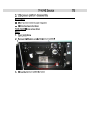
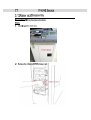
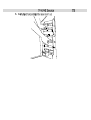
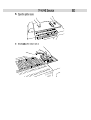
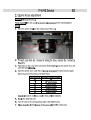
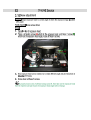
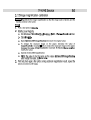
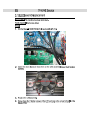
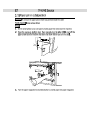
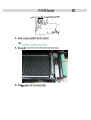
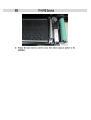
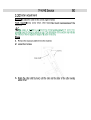
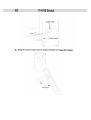
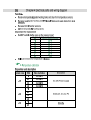
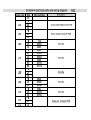
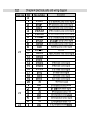
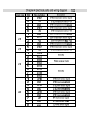
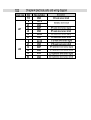
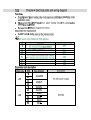
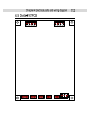
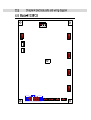
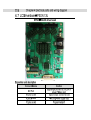
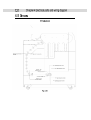
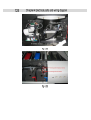
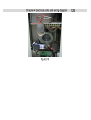
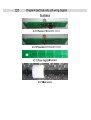
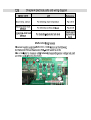
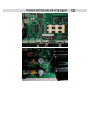
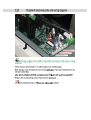
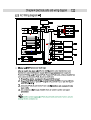
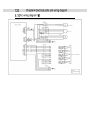
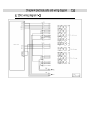
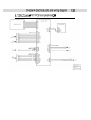
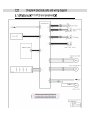
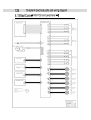
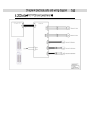
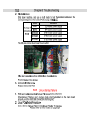
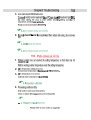
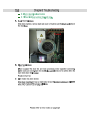
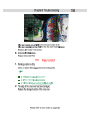
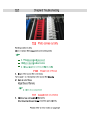
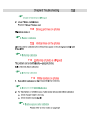
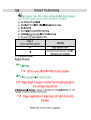
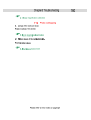
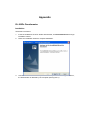
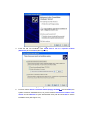
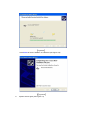
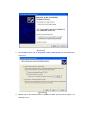
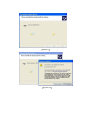
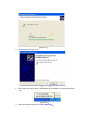
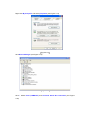
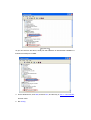
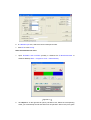
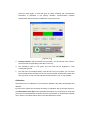
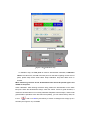
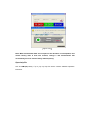
Appendix
DL-202Ps Densitometer
Installation
The detail is as follows:
1.
Insert the installation CD of DL-202Ps densitometer, click Densitometer.msi to begin
installation wizard.
2.
Follow the installation wizard to complete installation.
3.
Connect densitometer to the computer. With a Beep sound and the green LED on,
the densitometer is detected by the computer (See Figure3-1).
4.
Figure3-1
Insert the CD into CD-ROM. Click Install from a list or a specific location
(Advanced) and click Next (See Figure 3-2)
Figure3-2
5.
Put a tick before Search removable media (floppy, CD-ROM ) and click Next, the
system will search installation drive; Or, put a tick before Include this location in the
search and click Browse to open densitometer drive path and click Next to search
installation drive (See Figure 3-3)
Figure3-3
Click Continue Anyway (see Figure 3-4 and Figure 3-5)
Figure3-4
Figure3-5
Click Finish to finish installation of USB drive (see Figure 3-6)
Figure3-6
6.
System search again (see Figure 3-7)
Figure3-7
7.
Click Install from a list or a specific location (Advanced) and click Next (see
Figure 3-8)
Figure3-8
4.
Repeat step 5 until serial port drive installation finishes (see Figure3-9, Figure 3-10
and Figure 3-11)
Figure3-9
Figure3-10
Figure3-11
5.
Click Finish (see Figure 3-12)
Figure3-12
6.
After finishing the above steps, densitometer drive installation is finished (see Figure
3-13)
Figure3-13
7.
Check densitometer serial port in Device Manager
Right click My Computer and select properties (see Figure 3-14)
Figure3-14
Click Device Manager (see Figure 3-15)
Figure3-15
Click + before Ports (COM&LPT) and Universal Serial Bus controllers (see Figure
3-16)
Figure3-16
As you can see from the above, serial port and USB drive of densitometer installation is
finished. Its serial port is COM3.
4. On the Windows PC, click Start, and then Run, and then key in \\10.1.1.1\winsoftware,
and then enter.
5. Run Config.
6. In Calibration port box, select the correct COM port number.
7. Click OK to close Config.
Show densitometer test value
1.
Open DL-202Ps User Interface (Usually in Windows PC E:\DoLi\Densimeter or
Windows Desktop Start -> Programs-> Doli -> Densitometer).
Figure3-17
2.
Click Open>>> on the right side to open a pull-down menu; Select the corresponding
COM, you will hear beep sound and LED turns red (duration: about 0.5 S) from green
and turns green again; A scroll bar pops up (keep scrolling) and corresponding
information is displayed in the primary interface; Communication between
densitometer and its software is established. (see Figure 3-18)
Figure3-18
3.
Primary interface: After successful communication, you can see the name, version,
product ID and corresponding information on the top.
4.
The respective value of red, green and blue LED will be displayed in their
corresponding areas.
5.
The next line is for hardware testing. Click R-Led to turn on red LED, you can check
from the bottom hole; the same is true of G-Led and B-LED. Click Buzzer to beep and
click any button to stop. Click G-Indicator and B-Indicator to turn on top indicator.
Calibration
The bottom line is for calibration. It is used with a calibration strip when densitometer has
deviation
Input the three values into the boxes according to calibration strip in left-right sequence.
Click Send Refer-value (W) to save (densitometer beeps). Put the aperture on white test
point, hold on to densitometer for about 6 seconds, the indicator on densitometer will flash
once, and then the values will be shown up at the RGB colour blocks.
Figure3-19
Figure 3-20
Calibration strip
In calibration strip, the Test point is used for densitometer calibration; Calibration
value is the value of R, G and B of the test point. For the sake of getting correct color of
photo, please keep these areas clean! Keep calibration strip safe! Make sure no
scratch!
When measuring, the hole of the densitometer base should be placed right in the
middle of Test point.
Check calibration: After finishing the above step, position the densitometer on the white
test point. When the densitometer beeps, check the values. If there is great deviation, it
means the densitometer is not correctly calibrated. Repeat the above steps; if there is still
great deviation (deviation within 001-002 is acceptable), you can restore factory data; Go
to icon
, hold on to Ctrl key and left key of mouse. A dialogue box will pop up in 5
seconds (see Figure 3-21). Click OK.
Figure 3-21
Note: When densitometer data are corrupted or the deviation is unacceptable, first
restore factory data. If fault still remains, change a new densitometer. We
recommend you not to restore factory data frequently.
Open help file
Left click Help (Hotkey: F1) to pop up help file which contains detailed operation
instruction.