1
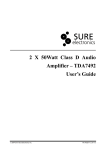
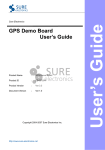
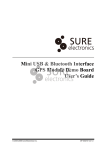
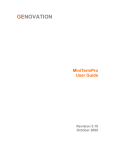
20x4 LCD Smartie Asset
User’s Guide
© 2004-2011 Sure Electronics Inc.
DE-LP14111_Ver1.1
20X4 LCD SMARTIE ASSET
USER’S GUIDE
Table of Contents
Chapter 1. Overview ..........................................................................................................1
1.1 Overview .............................................................................................................. 1
1.2 Quick Start ........................................................................................................... 2
1.2.1 Installation.................................................................................................................. 2
1.2.2 Connection................................................................................................................. 2
1.2.3 Run LCD Smartie...................................................................................................... 3
1.2.4 Select Sure-LCD V1.0 As Your Application ....................................................... 5
1.2.5 How to Use Tips Function...................................................................................... 7
Chapter 2. Tips for Usage................................................................................................ 11
Chapter 3. Mechanical Drawing......................................................................................12
Chapter 4. Appendix ........................................................................................................14
Chapter 5. Contact Us .....................................................................................................17
© 2004-2011 Sure Electronics Inc.
DE-LP14111_Ver1.1_Page i
20x4 LCD Smartie Asset
NOTES:
Product Version
:
Ver 1.0
Document Version
:
Ver 1.0
DE-LP14111_Ver1.1_Page ii
© 2004-2011 Sure Electronics Inc
20X4 LCD SMARTIE ASSET
USER’S GUIDE
Chapter 1. Overview
1.1 Overview
Thanks for using this 2004 LCD Smartie Asset by Sure Electronics. It features an
easy-to-install aluminum alloy housing which makes this product shapely and durable to
be used in many applications. It’s also populated with a mirror screen which blocks your
eyes from seeing the inside but ensuring perfect display effect when the item is
powered.
Its basic functions include displaying system information of your computer, such as
Everest status, MBM status (Your CPU temperature, fan/cooler speed, etc.), BBC world
news (or any other RSS feeds), WinAmp status (currently playing tracks title, length,
position, etc), network status (speed, total bytes, etc), CPU speed, free disk space,
memory usage, E-mail details, game status and many others. Features like ambient
temperature display, conversion between ℃and ℉, feedback current LCD contrast
ratio, backlight brightness level, tips function and product info are added. In addition,
users may adjust the contrast ratio of LCD display and backlight brightness.
FIGURE 1-1 OVERVIEW
© 2004-2011 Sure Electronics Inc.
DE-LP14111_Ver1.1_Page 1
20x4 LCD Smartie Asset
FIGURE 1-2 ACCESSORY
1.2 Quick Start
1.2.1 Installation
First, install LCD Smartie application, Sure-LCD 1.1 and CP2102 driver. All of them are
available on the following links:
LCD_smartie_v5.4:
http://www.sureelectronics.net/drivers/lcd_smartie_v5.4.zip
Sure-LCD V1.1
http://www.sure-electronics.net/download/Sure-LCD_1.0.zip
CP2102 driver:
http://www.sureelectronics.net/goods.php?id=393.
1.2.2 Connection
Connect LCD Smartie and computer with mini USB cable like shown in figure 1-3. LCD
will display the defaulted graphs like shown in figure 1-4.
FIGURE 1-3 SCHEMATIC OF CONNECTION WITH MINI USB
DE-LP14111_Ver1.1_Page 2
© 2004-2011 Sure Electronics Inc
Overview
FIGURE 1-4 DIS[LAY SCHEMATIC AFTER POWER-UP
1.2.3 Run LCD Smartie
1. Click “Setup” at the lower left corner of the main page to perform the following
configuration (as shown in figure 1-5)
FIGURE 1-5 SIMULATION DISPLAY INTERFACE
Select “matrix.dll” from the “Display Plugin” drop-down list under “Screens” tab. Fill the
COM port name in “Startup Parameters” under “Display settings”, the communication
speed is 9600bps (As shown in figure 1-6).
FIGURE 1-6 SELECT PLUG-IN AND FILL IN PORT NAME
Port name can be obtained by the following means: Right-click “My Computer” and
locate “Silicon Labs CP210x USB to UART Bridge” after Properties→Hardware→Device
Manager→Ports. The content in its following bracket is the port name.
Select “4x20” from the “LCD size” drop-down list under the “Screen” tab of Display
Settings, as shown in figure 1-7. Click “OK” or “Apply” at the lower right-hand corner to
enable communication. After that, the display on LCD will be consistent with what is
being simulated with LCD Smartie.
© 2004-2011 Sure Electronics Inc.
DE-LP14111_Ver1.1_Page 3
20x4 LCD Smartie Asset
FIGURE 1-7 SELECT THE TYPE OF LCD DISPLAY
2. Other settings can be conducted after LCD functions normal.
To adjust the contrast ratio and brightness, just drag the slide bar.
To turn the backlight of LCD off, click the small icon at the lower right-hand corner and
select “Commands”->”Backlight Off”, like shown in figure 1-5. With the same path, you
can turn on the backlight again.
An example of how the time of PC is displayed. In the left task bar of LCD Smartie,
highlight “Uptime short (days, hours, minutes)” first and click “Insert -->” button and
“$UpTims” will appear in the place where cursor flashed, as shown in figure 1-8. Click
“Apply” will make the LCD display the time of your PC system, as shown in figure 1-9.
FIGURE 1-8 SELECT THE CONTENTS TO BE DISPLAYED
DE-LP14111_Ver1.1_Page 4
© 2004-2011 Sure Electronics Inc
Overview
FIGURE 1-9 SIMULATION DISPLAY
1.2.4 Select Sure-LCD V1.0 As Your Application
1. If you select Sure-LCD V1.0 as your application, a 16×2 sized LCD simulator screen
(blue backlight & white character) will pop up like shown in figure 1-10
FIGURE 1-10 A 16×2 SIZED LCD SIMULATOR SCREEN
2. Right-click the simulator and select “Config” in the popped up window and a
configuration page will be displayed as shown in Figure 1-11. Select “4*20” from “LCD
Size” drop-down list like shown in Figure 1-12 and a 20×4 sized simulator pops up like
shown in Figure 1-13.
FIGURE 1-11 A CONFIGURATION PAGE
© 2004-2011 Sure Electronics Inc.
DE-LP14111_Ver1.1_Page 5
20x4 LCD Smartie Asset
FIGURE 1-12 LCD SIZE SELECTION
FIGURE 1-13 A 20×4 SIZED SIMULATOR
3. Select “Com3” from “Com” drop-down list of “Com Settings” and click “Start” button to
establish a communication as shown in Figure 1-14. The content displayed here is for
reference only.
FIGURE 1-14 ESTABLISH A COMMUNICATION
FIGURE 1-15 EDIT MEMO
4. The following is an example of how to use this application. Select command “About
me” from “Select” drop-down list under “Command Group” and then click “Send” like
shown in Figure 1-16. You will read from the simulator screen 20040202000 like shown
in Figure1-17
FIGURE 1-16 SELECT COMMAND “ABOUT ME”
DE-LP14111_Ver1.1_Page 6
© 2004-2011 Sure Electronics Inc
Overview
FIGURE 1-17 VERSION NUMBER
1.2.5 How to Use Tips Function
1. Firstly, select “Send Memo to MCU” from “Select” under “Command Group” as shown
in Figure 1-18.
FIGURE 1-18 SELECT COMMANDS FOR TIPS EDIT
2. In the interface of “Edit Memo”, edit content of tips as shown in Figure 1-19 with
entering maximum 20 letters (including spaces) in each row and 10 rows at most.
FIGURE 1-19 EDIT TIPS
3. Close the configuration page. Right-click the simulator screen and select “Exist” as
shown in Figure 1-20. Tips will be displayed on LCD screen soon afterwards.
FIGURE1-20 TIPS WILL BE DISPLAYED ON LCD SCREEN
© 2004-2011 Sure Electronics Inc.
DE-LP14111_Ver1.1_Page 7
20x4 LCD Smartie Asset
The tips are displayed progressively and repeatedly like shown in Figure 1-21. The
interval of adjacent contents is approximately 3 seconds. The last screen will last for
about 10 seconds. When the content of tips doesn’t exceed 4 rows, the content
displayed will be automatically switched between defaulted power-on content and the
tips.
DE-LP14111_Ver1.1_Page 8
© 2004-2011 Sure Electronics Inc
Overview
FIGURE 1-21 A FLOW SIMULATING THE DISPLAY OF TIPS
5. Restart LCD Smartie or Sure-LCD, tips display will end.
© 2004-2011 Sure Electronics Inc.
DE-LP14111_Ver1.1_Page 9
20x4 LCD Smartie Asset
Note: Figure 1-1- Figure1-21 are provided for reference only
DE-LP14111_Ver1.1_Page 10
© 2004-2011 Sure Electronics Inc
20X4 LCD SMARTIE ASSET
USER’S GUIDE
Chapter 2. Tips for Usage
1
If the contrast ratio, backlight brightness and displaying contents vary after running
LCD Smartie application, it proves that LCD display has successfully received the
info from LCD Smartie.
2
The backlight brightness can be adjusted only when the backlight is turned on.
Otherwise, the backlight brightness cannot be adjusted once the backlight is turned
off. LCD display will turn the backlight off upon receiving the command of “Turn
backlight off” even when the communication is in progress. Therefore, the backlight
brightness cannot be adjusted by the slider bar and users need to click “Backlight
off” first and click “Backlight On” again. Please refer to item 4 in Quick Start for
details.
3
Katakana will be displayed if the characters sent by your computer exceed the
range of common ASCII code.
4
Please refer to http://lcdsmartie.sourceforge.net/ for more details about LCD Smartie.
5
Do not use LCD Smartie and Sure-LCD simultaneously.
6
Tips will not be displayed once the power is off. If you send newly-created tips to
7
You may refer to help of application for use of Sure-LCD.
MCU, previous tips will be replaced.
© 2004-2011 Sure Electronics Inc.
DE-LP14111_Ver1.1_Page 11
20X4 LCD SMARTIE ASSET
USER’S GUIDE
Chapter 3. Mechanical Drawing
FIGURE 4-1 MECHANICAL DRAWING OF THE HOUSING
FIGURE 4-2 MECHANICAL DRAWING OF THE LEFT PANEL
DE-LP14111_Ver1.1_Page 12
© 2004-2011 Sure Electronics Inc.
20x4 LCD Smartie Asset
FIGURE 4-3 MECHANICAL DRAWING OF THE RIGHT PANEL
Note: The unit is mm.
© 2004-2011 Sure Electronics Inc.
DE-LP14111_Ver1.1_Page 13
20X4 LCD SMARTIE ASSET
USER’S GUIDE
Chapter 4. Appendix
Command Set
No
Command to MCU
Command
Description
Applicable in
MCU to PC
LCD
Smartie
Started with
0xFE,0x47 ,0x01, i and
1
followed by 20
characters (range of i is
0x01~0x04)
2
3
4
Sure-LCD
Display 20
characters that
followed in row i of
-
Y
Y
-
Y
Y
-
Y
Y
-
Y
Y
-
Y
Y
-
Y
N
N
Y
N
Y
LCD
started with 0xFE,0x50
Adjust LCD contrast
and followed by a hex
ranging from
ranging from 0x01~0xFE
0x01~0xFE
started with 0xFE,0x98
Adjust backlight
and followed by a hex
brightness ranging
ranging from 0x01~0xFE
from 0x01~0xFE
0xFE,0x46
Turn backlight off
Turn backlight on
5
0xFE,0x42,0x00
(with the latest
configuration)
Started with 0xFE,0x4E, i
6
and followed by 8 hex
numbers (range of i is
0~7)
Customize character
pattern of
0~7CGRAM
Request MCU to
7
0xFE,0x63
send LCD contrast
reading
Request MCU to
8
0xFE,0x62
send LCD backlight
reading
DE-LP14111_Ver1.1_Page 14
CR 1~CR254
represents contrast
values at different
levels
BKLT 1~BKLT254
represents backlight
brightness at different
level
© 2004-2011 Sure Electronics Inc.
20x4 LCD Smartie Asset
abcdpeltrrr
abcd:Indicates the size
of LCD screen, e.g.:
1602, 2004
P: indicates whether
RX8025 exists or not, 1
indicates yes, 0
indicates no and USB
is adopted. 24C04 is
only available in higher
version.
e: indicates the size of
EEPROM, 2n Kbit such
9
0xFE,0x76
Request MCU to
as 2 indicates 22 Kbit,
send version
i.e. 4Kbit.
number
l: indicates whether a
N
Y
N
Y
photosensitive resistor
exists or not, 0
indicates no, 1
indicates yes.
t: indicates whether a
thermal resistor (or
LM75) exists or not. 0
indicates no, 1
indicates thermal
resistor exists, 2
indicates LM75 exists.
rrr: defaulted as 000,
reserved
abc°d
abc: temperature
reading. If the absolute
value of the
temperature is less
than 99, “a” will be null,
if less than 10, “b” will
10
0xFE,0x77
Request MCU to
be null. “°” is degree. d
send temperature
is C or F, indicates
centigrade and
Fahrenheit.
The returned value of
temperature ranges
from 0 to 60℃ (32 to
140℉). If the value is
over the range, “Temp
© 2004-2011 Sure Electronics Inc.
DE-LP14111_Ver1.1_Page 15
Appendix
Out of Range” will be
returned.
Refer to 10 for the way
Started with 0xFE,0x57
11
and followed by i (the
range of i is 0x01~0x04)
of display, the contents
display temperature
will be aligned left
in row i of LCD
when display, while the
N
Y
-
N
Y
-
N
Y
-
N
Y
-
N
Y
-
N
Y
remaining is space
e.g. Temp:26℃
12
13
14
15
0xFE,0x53,0x75
Establish
0x72,0x65
communication
Started with
Save tips and
0xFE,0x48,0x01, i and
simulate contents
followed by 16 or 20
displayed in row i,
characters (range of I is
the minimum of i is
0x01~0x0a in hex)
0x02 in 16*2 LCD.
Started with 0xFE,0x57
Set temperature
and followed by i (i is
type: F: Fahrenheit
either 0x46 or 0x43)
C: centigrade
0xFE,0x64
Turn LCD display
ON or OFF
Close application
16
0xFE,0x66
and this command
can also be used to
start tips
Note: Please enter start command (command in the 12th row) first after power-on, or other commands will
not response to the ports.
DE-LP14111_Ver1.1_Page 16
© 2004-2011 Sure Electronics Inc
20X4 LCD SMARTIE ASSET
USER’S GUIDE
Chapter 5. Contact Us
Sure Electronics Co., Ltd.
East zone, 3F, Building 6
Jingang Technology Innovation Center
No.108 Ganjiabian Rd (ZIP: 210000)
Qixia District
Nanjing
P.R.China
Tel:
+86-25-68154800-860
Fax:
+86-25-68154891-832
Website:
www.sure-electronics.com
Email:
[email protected]
© 2004-2011 Sure Electronics Inc.
DE-LP14111_Ver1.1_Page 17