1
Operating Instructions
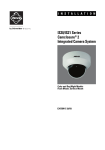
Camera Head
Model No.
GP-KS822H
Camera Control Unit
Model No.
ON
GP-KS822CU
DC
POW
G
ER P-KS
822
CU
OFF
AW
C
ATW
MAN
U
STA
RT
WH
IT
BALE
IMA
G
NOR ORIE E
NT
MAL
BRIG
ROTA
HTN
AU
ESS
MANTO
U
CAM
ERA
LIVE
/FR
E
Cable : Option
Before attempting to connect or operate this product,
please read these instructions carefully and save this manual for future use.
We declare under our sole responsibility that the product to which this
declaration relates is in conformity with the standards or other normative
documents following the provisions of Directives EEC/73/23 and
EEC/89/336.
Wij verklaren als enige aansprakelijke, dat het product waarop deze
verklaring betrekking heeft, voldoet aan de volgende normen of andere
normatieve documenten, overeenkomstig de bepalingen van Richtlijnen
73/23/EEC en 89/336/EEC.
Wir erklären in alleiniger Verantwortung, daß das Produkt, auf das sich
diese Erklärung bezieht, mit der folgenden Normen oder normativen
Dokumenten übereinstimmt. Gemäß den Bestimmungen der Richtlinie
73/23/EEC und 89/336/EEC.
Vi erklærer os eneansvarlige for, at dette produkt, som denne
deklaration omhandler, er i overensstemmelse med standarder eller
andre normative dokumenter i følge bestemmelserne i direktivene
73/23/EEC og 89/336/EEC.
Nous déclarons sous note seule responsabilité que le produit auquel se
réfère la présente déclaration est conforme aux normes ou autres
documents normatifs conformément aux dispositions des directives
CEE/73/23 et CEE/89/336.
Vi deklarerar härmed värt fulla ansvar för att den produkt till vilken
denna
deklaration
hänvisar
är
i
överensstämmelse
med
standarddokument, eller andra normativa dokument som framställs i
EEC-direktiv nr. 73/23 och 89/336.
Nosotros declaramos bajo nuestra única responsabilidad que el producto
a que hace referencia esta declaración está conforme con las normas u
otros documentos normativos siguiendo las estipulaciones de las
directivas CEE/73/23 y CEE/89/336.
Ilmoitamme yksinomaisella vastuullamme, että tuote, jota tämä ilmoitus
koskee, noudattaa seuraavia standardeja tai muita ohjeellisia asiakirjoja,
jotka noudattavat direktiivien 73/23/EEC ja 89/336/EE. säädöksiä.
Vi erklærer oss alene ansvarlige for at produktet som denne erklæringen
gjelder for, er i overensstemmelse med følgende normer eller andre
normgivende dokumenter som følger bestemmelsene i direktivene
73/23/EEC og 89/336/EEC.
Noi dichiariamo sotto nostra esclusiva responsabilità che il prodotto a
cui si riferisce la presente dichiarazione risulta conforme ai seguenti
standard o altri documenti normativi conformi alle disposizioni delle
direttive CEE/73/23 e CEE/89/336.
Caution:
Before attempting to connect or operate this product,
please read the label on the top and bottom.
For U.S.A
NOTE: This equipment has been tested and found to comply with the limits for a Class A digital device, pursuant to
Part 15 of the FCC Rules. These limits are designed to provide reasonable protection against harmful interference
when the equipment is operated in a commercial environment. This equipment generates, uses, and can radiate
radio frequency energy and, if not installed and used in
accordance with the instruction manual, may cause harmful
interference to radio communications.
Operation of this equipment in a residential area is likely to
cause harmful interference in which case the user will be
required to correct the interference at his own expense.
CAUTION
RISK OF ELECTRIC SHOCK
DO NOT OPEN
CAUTION: TO REDUCE THE RISK OF ELECTRIC SHOCK,
DO NOT REMOVE COVER (OR BACK).
NO USER-SERVICEABLE PARTS INSIDE.
REFER SERVICING TO QUALIFIED SERVICE PERSONNEL.
SA 1965
FCC Caution: To assure continued compliance, (example use only shielded interface cables when connecting to computer or peripheral devices). Any changes or modifications
not expressly approved by the party responsible for compliance could void the user’s authority to operate this equipment.
The lightning flash with arrowhead symbol,
within an equilateral triangle, is intended to
alert the user to the presence of uninsulated
"dangerous voltage" within the product's
enclosure that may be of sufficient magnitude to constitute a risk of electric shock to
persons.
The serial number of this product may be found on the surface of the unit.
You should note the serial number of this unit in the space
provided and retain this book as a permanent record of your
purchase to aid identification in the event of theft.
The exclamation point within an equilateral
triangle is intended to alert the user to the
presence of important operating and maintenance (servicing) instructions in the literature accompanying the appliance.
Model No.
Serial No.
SA 1966
WARNING: To prevent fire or electric shock hazard, do not expose this appliance to rain or moisture. The apparatus shall not be
exposed to dripping or splashing and that no objects filled with liquids, such as vases, shall be placed on the apparatus.
-2-
IMPORTANT SAFETY INSTRUCTIONS
1) Read these instructions.
2) Keep these instructions.
3) Heed all warnings.
4) Follow all instructions.
5) Do not use this apparatus near water.
6) Clean only with dry cloth.
7) Do not block any ventilation openings. Install in accordance with the manufacturer's instructions.
8) Do not use near any heat sources such as radiators, heat registers, stoves, or other apparatus (including amplifiers) that
produce heat.
9) Do not misuse the polarized or grounding-type plug. A polarized plug has two blades with one wider than the other. A
grounding-type plug has two blades and a third grounding prong. The wide blade or the third prong are provided for your
safety. If the provided plug does not fit into your outlet, consult an electrician for replacement of the obsolete outlet.
10) Protect the power cord from being stepped on or pinched particularly at plugs, convenient receptacles and the points
where they exit from the apparatus.
11) Only use attachments/accessories specified by the manufacturer.
12) Use only with the cart, stand, tripod, bracket, or table specified by the manufacturer, or sold with the apparatus. When a
cart is used, use caution when moving the cart/apparatus combination to avoid injury from tip-overs.
S3125A
13) Unplug this apparatus during lightning storms or when unused for long periods of time.
14) Refer all servicing to qualified service personnel. Servicing is required when the apparatus has been damaged in any way,
such as when the power-supply cord or plug is damaged, liquid has been spilled or objects have fallen into the apparatus,
the apparatus has been exposed to rain or moisture, does not operate normally, or has been dropped.
-3-
CONTENTS
IMPORTANT SAFETY INSTRUCTIONS ......................................................................................................................................................3
FEATURES .................................................................................................................................................................................................5
PREFACE ...................................................................................................................................................................................................5
PRECAUTIONS ..........................................................................................................................................................................................6
MAJOR OPERATING CONTROLS AND THEIR FUNCTIONS .....................................................................................................................7
SYSTEM BLOCK DIAGRAM........................................................................................................................................................................7
PREPARATIONS .......................................................................................................................................................................................10
SPECIFICATIONS .....................................................................................................................................................................................11
STANDARD ACCESSORIES ....................................................................................................................................................................11
OPTIONAL ACCESSORIES ......................................................................................................................................................................11
-4-
PREFACE
FEATURES
Panasonic's GP-KS822CU and GP-KS822H Industrial Color
Camera overcomes space limitations that have complicated
many video applications. Weight of only 14 g {0.035 lbs}, this
remarkably compact camera measures only two-thirds of an
inch in diameter and less than two inches in length. With the
380 000-pixel for NTSC (440 000-pixel for PAL), 1/2-inch CCD
pick-up device, horizontal resolution is more than 480 lines,
and signal-to-noise ratio is 50 dB. Brightness Switch and knob
lets you obtain the video level to your preference. This CCU
has a Freeze function for a still image and a Image Orientation
function for rotating an image.
1. 1/2 inch Interline CCD image sensor.
2. 480 lines of horizontal resolution.
3. 6 lx {0.6 footcandles} at F1.4 of minimum scene illumination.
4. 50 dB of signal to noise ratio.
5. Selectable trough the Lens Auto Tracing White Balance
(ATW), Auto White Balance Control (AWC) or Manual White
Balance Control.
6. Automatic Gain Control (AGC) and Electric Light Control
(ELC) are available.
7. Brightness Switch and knob enables to adjust the video
level to your preference.
8. The preset 1, preset 2 and automatic setting mode are
provided for Light Measurement Area Selection.
9. 2-memory AWC mode is available.
10. Freeze function
11. Image Orientation function
12. DC 12 V operation
13. 2 m {6.6 ft.} and 3.8 m {12.5 ft.} cable length between
camera head and camera control unit with optional camera cable.
14. S-VHS Video Output is provided.
-5-
PRECAUTIONS
• Do not attempt to disassemble the camera.
To prevent electric shock, do not remove screws or cover.
There are no user-serviceable parts inside. Refer servicing
to qualified service personnel.
• How to take care of this camera.
After turning OFF the DC power switch, clean it with a dry
cloth. If it is difficult to remove the dirt or dust, clean it up
with a cloth applied the neutral cleanser.
Use the lens cleaning tissue paper(may be available at
your local camera store) for lens cleaning.
• Do not expose the camera or camera control unit to rain or
moisture, or do not try to operate it in wet areas.
Do take immediate action if ever the camera or camera
control unit do become wet. Turn power off and refer servicing to qualified service personnel.
Moisture can damage the camera and camera control unit
and also create the danger of electric shock.
• Connect this to a DC 12 V, min. 600 mA CLASS 2 Power
supply only.
• After using the camera, turn OFF the DC power switch and
put the lens cap on the camera head.
• Ambient Temperature range
Do not install the camera in the place which is beyond
10 °C to 45 °C {50 °F to 113 °F}.
• Every necessary procedures with regard to install this
product should be made by qualified service personnel or
system installers.
• Do not drop anything inside the camera.
Dropping metal for example inside the camera could permanently damage the unit.
Caution:
Connecting or disconnecting camera cable to/from the camera control unit must be done after turning OFF the DC
power switch. Otherwise, the camera head may be damaged.
• Never crush or pinch the camera cable.
Do not bend the camera cable into a curve whose radius
is too small.
• Whether the camera is in use or not, never face it toward
the sun.
Do use caution when operating the camera in the vicinity
of spot lights or other lights and light reflecting objects.
• Do not loosen the chassis of the camera head.
• Do not connect Panasonic GP-KS162CU and GP-KS822H,
nor GP-KS822CU and GP-KS162H.
-6-
SYSTEM BLOCK DIAGRAM
GP-KS822 Standard Configuration
Camera Head, Tripod Attachment, Camera Control Unit.
GP-KS822H
FOCUS LOCK
Optional
Camera Cable
GP-CA162/2: 2 m
GP-CA162/38: 3.8 m
WHITE
BAL.
DC POWER
ON
OFF
AWC
ATW
MANU
BRIGHTNESS
GP-KS822
AUTO
ROTA.
MANU
CAMERA
START
R
Camera Head
(GP-KS822H)
IMAGE
ORIENT.
NORM.
B
LIVE/FREEZE
Camera Control Unit GP-KS822CU
Optional Accessories
Wide Angle Lens
GP-LM3TA
Wide Angle Lens
GP-LM7TA
Pinhole Lens
GP-LP12TA
Tele Angle Lens
GP-LM15TA
C-Mount Adaptor
GP-AD22TA
Tele Angle Lens
GP-LM24TA
MAJOR OPERATING CONTROLS AND THEIR FUNCTIONS
Camera Control Unit GP-KS822CU
!5!7!9@1
q
we
DC POWER
y
WHITE
BAL.
IMAGE
ORIENT.
AWC
ATW
MANU
ON
OFF
r
u
o
AWC1
AWC2
S-VIDEO OUT
GP-KS822
NORM.
AUTO
ROTA.
MANU
B
!1
!6!8@0 @2
DC 12V IN
VIDEO
OUT 1
CAMERA
R
!3
BRIGHTNESS
START
Switch Label
!0
VIDEO
OUT 2
LIVE/FREEZE
Put
t
i
!4
When using in this mode, please put the
Switch Label (the Switch Label is enclosed).
Camera Head GP-KS822H
GP-KS822H
FOCUS LOCK
@3
-7-
!2
Camera Control Unit GP-KS822CU
o Brightness control knob
This controls the ELC & AGC of the target level or video
level.
q DC Power On/Off Switch (DC POWER, ON/OFF)
w Auto White Balance Control Button (AWC START)
The white balance can be set by pressing this button when
the White Balance Selection Switch (r) is set to the AWC
position.
!0 Camera Cable Connector (CAMERA)
This 16-pin connector is used for connection of camera
cable.
Caution: Connecting or disconnecting the camera cable
must be done after turning OFF the Power ON/OFF
switch.
e White Balance Indicator
r White Balance Selection Switch (WHITE BAL,
AWC/ATW/MANU)
AWC: The white balance is automatically set and fixed by
detecting the characteristic/color temperature of light
source through the lens and controlling the gain of red
and blue signal.
The White Balance Indicator blinks during the setting.
When the setting is successfully performed, the White
Balance Indicator turns off.
When the setting fails, the White Balance Indicator
turns on.
ATW: The white balance is automatically and continuously
set by detecting the characteristic/color temperature of
light source through the lens and controlling the gain of
red and blue signal even if the characteristic/color temperature varies.
MANU: The R/B gain of the white balance can be adjusted
manually by means of the R and B gain controls.
!1 S-VHS Video Output Connector (S-VIDEO OUT)
The Luminance (Y) and chroma (C) signals for S-VHS VTR
or monitor are provided at the connector.
!2 EVR Adjustment Connector
This connector is used to connect with the EVR.
!3 Video output Connectors (BNC) (VIDEO OUT 1,2)
A composite video signals is provided at this connector.
!4 DC 12V Input Terminals (DC 12 V IN)
These terminals accept an external DC source supplying
nominal power of 12 V, min. 600 mA
CAUTION: CONNECT THIS TO A DC 12 V CLASS 2
POWER SUPPLY ONLY.
Caution: To prevent fire or shock hazard, the UL listed wire
VW-1 style 1007 should be used for the cable for DC
12 V Input Terminal.
t R/B Gain Controls (R/B)
These controls are used to adjust the R and B gain of the
white balance.
These controls work only when the White Balance Selection
Switch (AWC/ATW/MANU) is set to MANU.
on
off
!5 Electronic Light Control (ELC) On/Off Switch
When shooting the objects under the high light condition,
the lighting can be controlled by the electronic shutter
mode. This is used to disable the ELC function.
y Image Orientation Selection Switch
(IMAGE ORIENT., NORM./ROTA.)
NORM.: The shot image is outputted normally.
ROTA. : The shot image rotates 180 degrees.
on
off
!6 AGC On/Off Switch
When shooting the objects under the low light condition,
the video level can be controlled by the gain of the video
amplifier. This switch is used to disable the AGC function.
u Brightness Selection Switch (BRIGHTNESS,
AUTO/MANU)
AUTO: When this switch is set to the AUTO position, the
ELC On/Off Switch (!5) and AGC Switch (!6) becomes
effective. The ELC & AGC of the target level changes
by rotating the BRIGHTNESS control knob.
MANU: When this switch is set to the MANU position, the
video level is adjustable by means of the BRIGHTNESS
control knob.
Note:
Since the variable range of MANU is limited depending
on the shot image conditions, normally use in AUTO.
on
off
!7 2-Memory AWC Mode On/Off Switch
By turning on this switch, the two kinds of white balance
can be memorized.
The function of the White Balance Selection Switch is
changed as shown below by turning on this switch.
WHITE
BAL.
AWC
ATW
MANU
AWC 1
AWC 2
on
i Live/Freeze Button (LIVE/FREEZE)
The image carries out toggle operation of Freeze/Live by
pressing down the button.
!8 Mirror/Rotate Selection Switch
off
When the Image Orientation Selection Switch is set to the
ROTA., this switch becomes effective. By turning on this
switch, the shot image changes to the MIRROR (right-andleft reversal) image .
-8-
on
off
!9/@0 Light Measurement Area Selection Switch
The back light sensing zone can be set in the BRIGHTNESS AUTO mode.
00: OFF (All of the screen)
01: Preset 1 (Pattern 1 Sensing Zone)
10: Preset 2 (Pattern 2 Sensing Zone)
Sensing
Zone
Preset 1
Preset 2
11: Automatic Sensing Zone (The sensing zone is automatically set according to the object.)
on
off
@1 Aperture Level Selection Switch
The aperture level can be selected by this switch. High
level can be obtained by turning on this switch. Low level
can be obtained by turning off this switch.
on
@2 Cable Selection Switch
off
This switch is provided for the camera cable GP-CA162/2
and GP-CA162/38. When using the camera cable GPCA162/38, turn on this switch.
Camera Head GP-KS822H
@3 Focus Lock Ring
This ring is used to secure the Focus Ring.
-9-
PREPARATIONS
Caution: Keep the DC Power switch of the camera in the OFF
position through the installation.
GP-KS822H with GP-AD22TA and optional Cmount lens
1. Remove the front cap of the camera head and confirm that
the surface of the optical filter of the camera head is clean.
GP-KS822H with GP-LM3TA, GP-LM7TA, GPLM15TA or GP-LP12TA
1. Remove the front cap of the camera and confirm that the
surface of the optical filter of the camera head is clean.
Front Cap
Front Cap
If the surface of the optical filter is dirty or dusts are on it,
clean it up with a blower brush which is for film camera
lenses (may be available at your local camera store) or
supplied lens cleaning paper.
2. Attach the optional C-mount lens to the C-mount Adaptor
GP-AD22TA by rotating it clockwise.
If the surface of the optical filter is dirty or dusts are on it,
clean it up with a blower brush which is for film camera
lenses (may be available at your local camera store) or
supplied lens cleaning tissue paper.
2. Rotate the focus lock ring fully clockwise.
Mount the Pinhole Lens, Wide-angle Lens or Super Wideangle Lens to the camera by rotating it clockwise slowly.
3. Rotate the focus lock ring fully
Mount the lens and C-mount adaptor by rotating them
clockwise slowly.
Focus Lock Ring
Focus Lock Ring
Caution: If the optional C-mount lens size exceeds 50.8
mm {2”} in diameter, 70 mm {2-3/4”} in length and 300
g {0.66 lbs} in weight, both the camera and lens
should be secured.
-10-
SPECIFICATIONS
Pick-up Device :
Horizontal Resolution :
Minimum Scene Illumination :
Signal to Noise Ratio :
Video Output :
Scanning System :
Synchronization :
White Balance :
AGC:
ELC:
Brightness:
Light Measurement Area:
Image Orientation:
Freeze:
Aperture Compensation:
Function Switches:
Controls:
Power Source :
Camera Cable Length :
Ambient Temperature :
Dimensions :
Weight :
For NTSC : 1/2-inch Interline transfer CCD image sensor with 768 (H) x 494 (V) pixels
For PAL : 1/2-inch Interline transfer CCD image sensor with 752 (H) x 582 (V) pixels
480 lines
6 lx {0.6 footcandles} (F1.4 with AGC ON more than 30 IRE of Y signal with set up)
50 dB (Standard condition, Y signal)
1.0 V[P-P]/75 Ω, composite video, BNC connector x 2)
2:1 Interlace
Internal Sync only
Auto Tracing White Balance(ATW)/Auto White Balance Control(AWC)/Manual(MANU)
ON/OFF (Approx. 12 dB gain at AGC on position)
ON/OFF
MANUAL/AUTO
FULL/PRESET1/PRESET2/AUTO
NORMAL/ROTATE or NORMAL/MIRROR
FREEZE/LIVE
HIGH/LOW
Auto White Balance Control Button
White Balance Selection Switch (AWC/ATW/MANU (Manual))
Image Orientation Selection Switch (NORM. (Normal) / ROTA. (Rotate))
Brightness Selection Switch (AUTO/MANU (Manual))
Live/Freeze Button
ELC On/Off Switch
AGC On/Off Switch
2-Memory AWC Mode On/Off Switch
Mirror/Rotate Selection Switch
Light Measurement Area Selection Switch
Aperture Level Selection Switch
Cable Selection Switch
White Balance R/B Gain Control
Brightness Control
12 V DC, 450 mA
GP-CA162/2 Cable 2 m {6.6 ft.}
GP-CA162/38 Cable 3.8 m {12.5 ft.}
10 °C to 45 °C {50 °F to 113 °F}
Camera Head :
17 (Diameter) x 35.5 (D) mm {2/3” (Diameter) x 1-1/2”(D)}
Camera Control Unit : 120 (W) x 36 (H) x 157 (D) mm {4-11/16” (W) x 1-7/16” (H) x 6-1/8” (D)}
Camera Head :
14 g {0.035 lbs}
Camera Control Unit : 530 g {1.2 lbs}
Weight and dimensions indicated are approximate.
Specifications are subject to change without notice.
STANDARD ACCESSORIES
• Operating Instructions (this Document)
OPTIONAL ACCESSORIES
.
.
.
.
.
•
•
•
•
•
Camera Cable GP-CA162/2 or GP-CA162/38
C-mount Adaptor GP-AD22TA
Wide Angle Lens GP-LM3TA or GP-LM7TA
Pinhole Lens GP-LP12TA
Tele Angle Lens GP-LM15TA or GP-LM24TA
-11-
For U.S., Canadian and Puerto Rican fields:
Panasonic System Solutions Company,
Unit Company of Panasonic Corporation of North America
Security Systems
www.panasonic.com/security
For customer support, call 1.877.733.3689
Executive Office: Three Panasonic Way 2H-2, Secaucus, New Jersey 07094
Zone Office
Eastern: Three Panasonic Way, Secaucus, New Jersey 07094
Central: 1707 N. Randal Road, Elgin, IL 60123
Southern: 1225 Northbrook Parkway, Suwanee, GA 30024
Western: 6550 Katella Ave., Cypress, CA 90630
For the other fields:
Matsushita Electric Industrial Co., Ltd.
Osaka, Japan
http://www.panasonic.co.jp/global/
Panasonic Canada Inc.
5770 Ambler Drive,Mississauga,
Ontario, L4W 2T3 Canada (905)624-5010
http://www.panasonic.ca
Panasonic Sales Company
Division of Panasonic Puerto Rico Inc.
San Gabriel Industrial Park 65th Infantry Ave. KM. 9.5 Carolina
P.R. 00985(809)750-4300
© 2005 Matsushita Electric Industrial Co., Ltd. All Rights Reserved.
NM0405-0
3TR003578AAA
Printed in Japan