1
6. Maintain dry, clean socks! Change midday for afternoon comfort and
warmth.
7. Use single pair of medium weight socks. Select wool blend,
polypropylene®, or thermax® type socks to wick moisture away and
keep feet dry and warm.
8. Do not use thick socks, neoprene socks, or reflective sock liners as
these keep heat from toes.
9. Do not use cotton or other moisture absorbing socks.
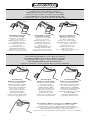
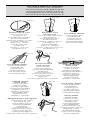
ATTACHING BATTERY PACKS (Fig. 1-3, 8-13)
1. Slide Battery Pack Wire Clip SECURELY over boot top (see point 2
below), boot or shoe laces, or attach to strap such as Velcro® power
strap on ski or snowboard boot. (Fig. 1-2)
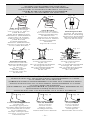
2. NOTE: DO NOT SLIDE BATTERY PACK OVER SLIPPERY
MATERIAL SUCH AS SKI BOOT PLASTIC AS THE EASIER IT SLIDES
ON, THE EASIER IT WILL SLIDE OFF. SECURELY ATTACH
BATTERY PACK AT ALL TIMES. (Fig. 3)
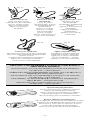
3. Mounting Bracket Accessory (optional). For simple, secure, quick
attachment of Battery Packs to ski or hard shell snowboard boots.
(Fig. 10)
4. Strap Bracket Accessory (optional). For simple, secure, quick
attachment of Battery Packs to ski or snowboard boot power straps.
(Fig. 9)
5. Slide Strap Bracket Accessory (optional). For Battery Pack Power
Plus m4 and m3 only. Provides simple, secure, quick attachment of
Battery Packs to ski or snowboard boot power straps. (Fig. 8)
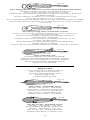
6. Velcro® Attachment Strap Accessory (optional). Strap around leg at
or above calf or around boot top. Battery Pack clips over Strap.
(Fig. 11)
7. Extension Cord Accessory (optional). Run Cord underneath pant leg
and plug into Battery Pack at waist height (80 cm Cord) or chest
height (120 cm Cord). (Fig. 12-13)
1.
2.
3.
4.
POSITIONING BATTERY PACKS (SKI & SNOWBOARD BOOTS)
(Fig. 4-7)
Positioning Battery Pack HIGH on back of boot permits pant leg to
cover Battery Pack but increases potential chair lift damage. (Fig. 4)
Positioning Battery Pack LOW on back of boot reduces potential
chair lift damage but increases potential damage while walking
down stairs. (Fig. 5)
Positioning Battery Pack on TOP FRONT of boot permits pant leg to
cover Battery Pack, eliminates potential chair lift and stair damage,
and is convenient when adjusting setting. (Fig. 6)
Positioning Battery Pack on TOP LATERAL SIDE of boot (see Strap
Bracket and Slide Strap Bracket drawings) permits pant leg to cover
Battery Pack, eliminates potential chair lift and stair damage, and is
convenient when adjusting setting. (Fig. 7)
RECHARGING BATTERY PACKS
• CAUTION - WARRANTY: Use Hotronic’s White Plug Recharger
ONLY for Power Plus m4 and Power Plus m3 Battery Packs. Using
other than Hotronic’s White Plug Recharger voids Warranty.
• CONDITIONING CHARGE: When Battery Pack is new or has not
been used for more than 2 months, it is very important to charge
Battery Pack for 48 to 72 hours uninterrupted. Conditioning Charge
brings new, unused, or unconditioned Battery Pack to full capacity
potential.
• FULLY CHARGED IN 3 HOURS OR LESS: Hotronic’s White Plug
Recharger detects when Battery Pack is fully charged and
automatically switches to trickle current recharging after
approximately 3 hours or less of full current recharging. Fully
charged, properly conditioned Battery Pack reaches full capacity
potential. Fully charged, unconditioned Battery Pack does NOT
reach full capacity potential. (See Conditioning Charge.)
-9-