1
SC-507 Security Kit
INSTALLATION MANUAL
Applied Machines: d-Color MF360/MF280/MF220
COLOR MFP: 36 ppm/28 ppm/22 ppm
Product Code: A0ED
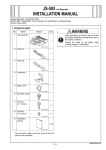
I. Accessory parts
No.
Name
II. Installation procedures
Shape
1. Turn off the machine and unplug the power cord
from the power outlet.
2. Remove the cover from the right side of the
machine as shown in the illustration
(four screws).
Q’ty
1. DSC board
1
A0Y9IXC001DA
2. Screw B
(3 × 6 mm)
2
4040IXC046DA
3. Installation
manual
1
set
4980IXC019DA
A09NIXC024DA
3. Remove the shield cover (two screws).
After unpacking, be sure to get rid of the
packaging materials and keep them out of
the reach of children.
Putting the head in the plastic bag
involves danger of suffocation.
Note:
This manual provides the illustrations of the accessory parts and machine that may be slightly different in shape from yours. In that case, instead of
the illustrations, use the appearance of your
machine to follow the installation procedure. This
does not cause any significant change or problem
with the procedure.
Y111210-0
A0Y9IXC007DA
E-1
Installation Manual
III. Setting the security kit
4. Attach the furnished DSC board to the shield
cover removed in step 3 (Furnished two screws)
1. Plug the power cord into the power outlet and
turn on the machine.
2. Display the Service Mode screen.
(For details of how to display the Service Mode
screen, see the service manual.)
3. Touch “System 2.”
4. Touch “Option Board Status.”
5. Touch “Set" of DSC1.
6. Touch “END.”
IV. Security setting
A0Y9IXC004DA
Note:
The following setting should be performed by the
Administrator.
5. Insert the DSC board and secure it with two
screws.
Note:
• When inserting the board, align it with the slits.
• Use the screws removed in step 3.
1. Select the function to be used as follows:
Utility/Counter → Administrator Settings → Enter
the Administrator Password → Security Settings
→ Security Details
2. Touch
two times.
3. Touch “Copy Guard.”
4. Touch “Yes.”
5. Touch “Password Copy.”
6. Touch “Yes.”
7. Touch “OK.”
8. Turn OFF and ON the Main Power Switch.
A0Y9IXC008DA
6. Reinstall the cover removed in step 2 (four
screws).
Installation Manual
E-2
Y111210-0