1
User Manual
1
Using this manual
Thanks for your purchase of TAPfuture TAPpad sieres MID, the device is convenient for
portable use, let you learn, work or play games outside of the door.
Please read this manual before using the device, and attention safety precautions so that you
are using the device safely and correctly.
*This manual instructions built on the Google Android OS default setting, maybe there are
some difference between the screenshots/images and what you are using. The performance of
this product is improving. And we are sorry for no offering more information if it is improved.
If you have any questions please consult your dealer or local service.
*Applications and their functions may vary by country , region or hardware. Zhongxiang
Technology is not responsible for performance issues caused by third-party applications.
*You can access www.tapfuture.com to upgrade the device, or consult your dealer.
* Please keep this manual for future reference.
2
Copyrights
Copyright © 2011 众享科技|TAPfuture
This user manual is protected under international copyright laws.
No part of this user manual may be reproduced, distributed, translated, or transmitted in any
form or by any means, electronic or mechanical, including photocopying, recording, or storing
in any information storage and retrieval system, without the prior written permission of
Zhongxiang Technology Co., Ltd.
Trademarks
TAPFUTURE and TAP logo is trademark of Shenzhen Zhongxiang Technology Co.,Ltd.
* Android and relative logo s are trademarks of Google, Inc..
* Java™ is trademark of Sun Microsystems, Inc.
* Wi-Fi• ®, the Wi-Fi CERTIFIED logo, and the Wi-Fi logo are registered trademarks of the
Wi-Fi Alliance.
* All other various trademarks, brand names and logos not mentioned here are for reference
purposes only, and not for sale, the marks are the property of the respective owners.
3
Contents
Contents:
Product package……………………………………………………………………..
Product instruction…………………………………………………………………..
Application…………………………………………………………………………..
Product upgrade……………………………………………………………………..
4
Please check your package box for the following items.
MID device
Power adapter
PC data cable
User Manual
Warranty Card
* You can buy other accessories from local dealer.
Attention:
Don’t disassemble.
Avoid overloading.
Avoid extreme humidity, extreme heat and direct sunlight.
Avoid object and liquid entry.
Don’t use the parts and accessories that have not been provided by the manufacturer,
unauthorized substitution may cause trouble.
5
Charge the battery
The device has a built in battery, before using the device for first time, you must charge the
battery.
*Use only approved chargers by Zhongxiang Technology Co.,Ltd, unauthorized chargers may
cause batteries to explode or damage your device.
* When your battery is low, the device will emit a warning tone and display a low battery
message. The battery icon will also be empty and turn red. If the battery level becomes too
low, the device will automatically power off. Recharge your battery to continue using your
device.
6
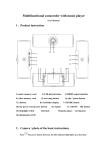
Key Instruction
1
2
12
3
9
10
11
4
5
6
7
8
1,ON/OFF
2, Volume +/-
3,MicroSD Slot
4,USB jack
5,Reset
6, USB jack
7,Earphone jack
8,Backspace
9,Menu
10,Home
11,MIC
12,Camera
7
ON/OFF KEY: Long press ON/OFF key, Tablet PC turns on/off. When it is open, press
ON/OFF key to lock screen and entering sleeping mode. Long press ON/OFF key, then it will
popup mode selection window, there are silent mode and shut down for option.
Volume Key: Press + to increase the volume, press – to reduce the volume.
Backspace key: Press backspace key to back to the previous operation or previous interface.
Menu Key: Press Menu Key to display Menu lists, press menu key again to close Menu lists.
Long press Menu key to open/close virtual key. When the screen is locked, press menu key to
startup screen; Press it again to unlock the screen. (If you have set the unlock mode, you
should unlock the screen according to your settings.)
Home key: In option program, menu or webpages, press home key to back the main interface.
Long press Home key, then display the applications opened recently.
Reset: Recovery factory Settings.
* Before reset, please backup your files.
8
Interface Instruction
Prompt message
Status bar
Browser key
Application list key
Setting key
Applications
Widget
9
Main interface equal to the computer desktop, you can place application shortcuts and widgets.
1, Message notification bar: The status bar on the top of screen, icons show on the left, it
means to remind you what application is running now. Slide down to check system tips.
* Reading tips. When prompting message displayed on status bar, click it and open notification
list on the screen with your finger. Click selection window to open prompt message,click clear
notification on the top of the tip column to read the full message,close the tip column.
2, Status bar: Icons show on the right to remind you about alarm setting, WiFi connection and
battery charge, etc.
3, Application: Press and hold down the application. The delete button will appear in the
application list button place. Drag the application to the delete button and you can delete the
application.
4, Widgets: Press the space of main inferface last 1-2 seconds, then display” Add to main
interface”, select widgets to add application or other operations.
5, Setting
Status bar icon instructions
10
mute
charging
Uploading & downloading
3G service connecting &
data exchanging
Alarm clock
SD card
capacity
finished downloading
Wi-Fi service connected &
available
Playing music
shortage
of
Battery power changes
11
Application list
Home key
*Click to back to the main interface.
Click application list key to pop out the application interface. Here will show all the
applications.You can click any application by your finger and enter it.
Press and hold down the application icon and the shortcut will be added to the main interface.
Press “Home” key in the application list interface to back to the main interface.
12
Language settings
1, Click “Setting” icon,
2, Click “Language & keyboard”.
3, Select “Select language”.
4,Click to select the language in the list.
13
Screen brightness settings
1, Click “Settings” icon
2, Click “Display”
3, Click “Brightness”
*The users can adjust the brightness
according to the need
14
Screen standby Settings
1, Click “Settings” icon
2, Click “Display”
3, Click”screen timeout”
*You can select the screen timeout
according to need.
15
SD card mount & unmount
When SD card is correctly connected with device.
1, Click “setting” key
2, Click”SD card and MID storage” to check
connection status of SD card.
SD card installation
Select “Mount SD card” to mount the SD card.
* select “format SD card”, then format SD card.
16
Unmount SD card
select “unmount SD card” and unmount SD card.
*HDMI device output (For HDMI version)
1, Click setting�Display
17
2, On screen interface can find TV output option.
Click “TV Mode”, choose vedio output mode.
4, Click” TV Resolution”, set TV resolution.
18
5, Click”TV HDCP”, choose TV supports.
Camera/Camcorder setting
Click “Camera icon”
in application lists to enter
*Note: Please make sure you have inserted SD card when using.
Select Camera or camcorder mode to take picture or camcorder.
19
* Camcorder Mode
Camera/camcorder
mode switch
* Camera Mode
Take picture
20
USB Connection Setting
1, It will display this icon when an USB is connected.
2, When USB is connected, following works more
if need to use files saved in SD card by computer.
2.1,Press status bar and drag down, then following
information will be showed:
21
2.2, Select” USB connected”, the following information will be showed.
*Attention: One is built-in memory, the other is SD card.
2.3, Click “turn on USB storage device” to install, then can use USB device via computer.
The picture is for correct connection.
2.4, When need to remove USB device, click “close USB storage device” to remove safely.
Wi-Fi Setting
22
WiFi Setting
Click “WIFI setting” from application lists to enter WIFI setting interface.
Or click memu key to open, then select”Wireless & Networks” enter into WIFI setting
interface.
1, Click Wi-fi to open
23
2, Click “Wi-Fi setting ”, automatically
search the available wireless networks.
3,Input wireless network password and
click “Connect”.
24
*Tablet PC connect to Wi-Fi with the following way:
1, Enter into main inferface to click Menu Key
2, Click setting
3, Click “Wireless & networks” key to open”Wi-Fi”
network
4, Click “Wi-Fi setting”, automatically search the
available wireless networks
5, Select Wi-Fi network to connect
6, Input password to enter
7, Click “connect”.
*Attention:
Tablet PC will consume much power when connecting Wifi, please close Wifi when don't use
it.
25
Web browsing
Attention: before using browser, please make sure Wifi service is open.
Click “Browser” icon to enter into interface, input website to enjoy internet
Install application
Open the file browser and find the application on the storage, then click to install according to
the tips.
uninstallation interface
26
Uninstall application
Click”Setting” � ”application” � ”Manage application” � then Click”Uninstall” to uninstall
application.
27
Music Player
Music player
28
Video Player
Video player
Enter display interface. Long press the interface to pause the play and short press to turn to the
control interface.
Click “video size” to switch between the full screen and the original size. Long press the
volume key to enter the silent mode.
29
Picture Brower
Picture browser
1, Click to enter the gallery interface, It will
automatically scan out the pictures and
videos in the SD card.
2, Click the picture to the picture browser
interface.
30
3, Click to open the picture
Email Settings
1, Click EMAIL icon to enter the interface.
31
2, Input the account and password. Click “Next”. Set all the items according to the prompt.
Then you can login the mail box to receive and send emails.
3, Select the account type.
32
* Notice: Above setting operation is for reference only. Users should set according to actual
situation.
Clock Settings
1, Clock
33
2. Click “Alarm Setting” and enter the
following interface.
3.Add alarm. Click “Add alarm” and
enter the following interface to set
correctly.
34
System upgrade
Thanks for using our products.
We will release system plug-in or system upgrade file to optimize our products. According to
your use, if you wana update the device, please check official website www.tapfuture.com to
download the upgrade files, and then upgrade as below steps. If questions you can contact us
or your local dealer.
1, Copy the upgrade files to root of the MicroSD card.
2, Put the MicroSD card into the MicroSD slot of the device.
3, Press the “Volume +” and press “ON/OF” key at the same time.
4, Upgrade screen shows on the device, wait few seconds until the upgrade completed.
5, Turn off the device according to the notification after finish upgrade. And then turn on,
the device working on updated system.
35
Specification
CPU
Screen
Memory
NEC EV2 Dual Core
Display
7inch LCD
Resolution
800x480
Flash ROM
NAND Flash, support 4GB/8GB/16GB/32GB
RAM
512MB Mobile DDRII
Antenna
Built in antenna
Wifi
802.11 b/g/n
3G
3G dongle WCDMA/EVDO
G-sensor
Yes
Camera
Front camera 0.3Mega pixels
Audio format support
mp3,wma,ogg,aac,flac,ape,wav, etc.
Video format support
H.263 ,H.264,mpeg2,mpeg4, wmv9, mvb,avi,dat,vob,
mkv, ts, flv, etc.
36
Picture
Input/Output
jpg,jpeg,gif,png, etc.
Touch panel
IPS capacitive touch screen
Speaker
Built in
Earphone
3.5mm Jack
MIC
Built in
SD / MMC
Support MicroSD card, max32GB
USB
USB 2.0 (Mini Port) x1, USB2.0 Host (Mini Port) x 1
1. ON/OFF, Reset
2. Volume +, Volume 3. Backspace, Home, Menu
Keys
Battery
Adapter
Certification
Type
Built in 3.7V 4100mhA Li-Po
Working time
5-8hours
Output
Mini USB,
DC-Jack , 5V , 2A
3C, CE,FCC, RoHS
37