1
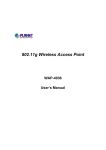
IEEE 802.11b Wireless LAN USB Adapter
UR012i
User’s Manual
Version: 1.1
—
Dec 2002
Copyright Statement
No part of this publication may be reproduced, stored in a retrieval system, or
transmitted in any form or by any means, whether electronic, mechanical,
photocopying, recording or otherwise without the prior writing of the publisher.
Windows™ 98SE/2000/ME/XP/CE are trademarks of Microsoft® Corp.
Pentium is trademark of Intel.
All copyright reserved.
1
Regulatory Information
Federal Communication Commission Interference Statement
This equipment has been tested and found to comply with the limits for a Class B
digital device, pursuant to Part 15 of the FCC Rules. These limits are designed to
provide reasonable protection against harmful interference in a residential installation.
This equipment generates, uses and can radiate radio frequency energy and, if not
installed and used in accordance with the instructions, may cause harmful interference
to radio communications. However, there is no guarantee that interference will not
occur in a particular installation. If this equipment does cause harmful interference to
radio or television reception, which can be determined by turning the equipment off
and on, the user is encouraged to try to correct the interference by one of the
following measures:
- Reorient or relocate the receiving antenna.
- Increase the separation between the equipment and receiver.
- Connect the equipment into an outlet on a circuit different from that to
which the receiver is connected.
-
Consult the dealer or an experienced radio/TV technician for help.
FCC Caution: To assure continued compliance, (example - use only shielded
interface cables when connecting to computer or peripheral devices) any
changes or modifications not expressly approved by the party responsible for
compliance could void the user's authority to operate this equipment.
This device complies with Part 15 of the FCC Rules. Operation is subject to the
following two conditions: (1) This device may not cause harmful interference,
and (2) this device must accept any interference received, including
interference that may cause undesired operation.
IMPORTANT NOTE:
FCC Radiation Exposure Statement:
This equipment complies with FCC radiation exposure limits set forth for an
uncontrolled environment. This equipment should be installed and operated
with minimum distance 20cm between the radiator & your body.
This transmitter must not be co-located or operating in conjunction with any
other antenna or transmitter.
2
Table of Contents
REGULATORY INFORMATION
2
1. WELCOME
4
1.1 KIT CONTENTS
1.2 MAIN FEATURES OF WLAN USB ADAPTER
1.3 WIRELESS NETWORKING SCENARIOS
1.4 ADVANTAGES FOR USING WIRELESS NETWORK
2. QUICK START TO WIRELESS NETWORKING
5
7
8
10
11
2.1 INSTALLATION
2.2 CONNECTING TO AN EXITING NETWORK
2.3 ADDITIONAL NOTE FOR WINDOWS XP
3. STEP-BY-STEP INSTALLATION GUIDE
11
13
14
15
3.1 INSTALL THE IEEE802.11B WLAN DRIVER / UTILITY
16
3.1.1 ADDITIONAL SETUP PROCESSES
20
21
22
3.2 VERIFYING THE DRIVER/UTILITY
3.3 IEEE802.11B USB WLAN UTILITY
3.3.1 DISABLE WINDOWS XP ZERO-CONFIGURATION
3.4 BASIC SETTING FOR INFRASTRUCTURE MODE
3.5 BASIC SETTING FOR 802.11AD HOC MODE/AD HOC MODE
3.6 ADVANCED SETTINGS
3.7 ENCRYPTION FUNCTION
3.8 REMOVE YOUR USB ADAPTER
3.9 UNINSTALL THE IEEE802.11B USB WLAN UTILITY / DRIVER
4. USING THE UTILITY
4.1 LAN STATUS TAB
4.2 LINK INFORMATION TAB
4.3 SITE SURVEY TAB
23
24
25
27
28
30
31
32
32
33
4.4 DIAGNOSTIC TAB
4.5 ABOUT TAB
5. NETWORK APPLICATION
33
34
34
35
5.1 SURVEYING THE NETWORK NEIGHBORHOOD
5.2 FILE SHARING
5.3 USING THE SHARED FOLDER
6. PRODUCT SPECIFICATIONS
35
36
37
38
3
1. Welcome
Thank you for purchasing our IEEE802.11b Wireless LAN USB Adapter, and
welcome to Wireless LAN—the easy way to wireless networking.
This user guide introduces to you the IEEE802.11b Wireless LAN USB Adapter and
describes the most common configurations, which will help you connect to your
network easily.
Please read this manual to get familiar with the IEEE802.11b Wireless LAN. This
manual contains detailed instructions in operation of this product. Please keep this
manual for future reference.
As this product is designed to run under Microsoft Windows, it is recommended that
to be installed by people who are familiar with the installation procedures for network
operating systems under Microsoft Windows.
4
1.1 Kit Contents
The IEEE802.11b USB Wireless LAN kit should include the following items: One
USB Adapter, One USB Cable, One CD, Quick Start Guide and User’s Guide.
a. One USB Adapter
b. One USB Cable
c. One Adapter
d. One Clip-Stand
e. One CD including:
1. IEEE802.11b USB WLAN Utility & Driver software
2. Acrobat Reader
3. User Manual PDF file
5
f. Multi-Language Quick Start Guide (Booklet)
g. User’s Guide (Booklet)
If any of the items mentioned above are damaged or missing, please contact your
distributor.
6
1.2 Main Features of WLAN USB Adapter
A
B
A. Status LED
Off: No wireless activity
Blinking: Searching for the Access Point (disconnected)
Steady Red: Connected to Access Point, or, being in 802.11 Ad Hoc mode (either
connected or disconnected).
B. USB Connector
USB WLAN Adapter features:
1.
2.
3.
4.
5.
6.
High-speed wireless connection, up to 11 Mbps
IEEE802.11b (DSSS) standard for 2.4 GHz Wireless LAN
Plug-and-Play installation
Solid design with an integrated antenna
Full mobility and seamless cell-to-cell roaming
Automatic scale back at per packet level
USB WLAN Adapter supports:
1. Automatic load balancing for optimized bandwidth
2. Advanced power management
3. Windows98SE, ME, 2000, XP, XP 2nd edition (subject to availability) and
Windows CE (subject to availability).
7
1.3 Wireless Networking Scenarios
As our IEEE802.11b Wireless LAN USB Adapter is interoperable and compatible
with other IEEE 802.11b compliant products from other manufacturers, it offers you
the most freedom to establish your ideal wireless network. Therefore, after installing
IEEE802.11b USB Wireless LAN, you can connect your computer to:
a. A Peer-to-Peer Workgroup of IEEE802.11b compliant wireless devices.
b. A LAN (Local Area Network) constructed by Access Point(s) or other
IEEE802.11b compliant systems.
c. Share your Internet access by using just one connection, share printers and other
peripheral devices, share data and image files between networked PCs, play
multi-player games, and use other network enabled sharing resources.
8
A. Peer-to-Peer Networking:
An Ad Hoc Network could be easily set up with some PCs and this IEEE802.11b
WLAN USB Adapter or our other WLAN devices. Therefore, it is very suitable
to build a network for temporary use, such as for demonstration in exhibition, for
new sales point/branch use and alike.
B. Cooperate LAN (Local Area Network):
With some IEEE802.11b USB WLAN Adapters and Access Points, it is easy to
construct a LAN with access to Internet for enterprise use.
The construction is quite easy that the USB Adapter and Access Point will
automatically work at the most suitable frequency when Access Point is set within
the proper range.
In addition, commonly manufacturers will bundle the Site-Survey tool for users to
check the communication quality.
9
1.4 Advantages for Using Wireless Network
IEEE802.11b WLAN USB Adatper can wirelessly transmit and receive data,
minimizing the need for wired connections, at a speed of up to eleven megabit per
second. With the IEEE802.11b WLAN USB Adapter you can locate your PC
wherever you want without wires and cables.
The IEEE802.11b WLAN USB Adapter provides LAN users with an access to
real-time information anywhere in their organization. The mobility provides
effectiveness and efficiency, which are not available under wired networks.
The IEEE802.11b WLAN USB Adapter configuration is easy to switch between
peer-to-peer networks, suitable for a small number of users, and full infrastructure
networks of thousands of users that allow roaming around a broad area.
Therefore, you may see many advantages for adopting Wireless Networking as
follows:
Less Space Limits: The USB Adapter provides access to network services
without wires; therefore, it gives you more freedom to allocate and style your
living and working space. In addition, in some areas where is hard or expensive
to connect to wired networks, such as historic buildings, classrooms or mobile
connectivity, then you can count on wireless networking.
Flexible Workgroups and Lower Cost: For workspaces that are frequently
reconfigured for temporarily use such as demo in exhibitions, wireless
networking is easy to set up of lower total cost—and all equipments are
recyclable. You do not have to remove the old wires and then build up the new
ones again and again.
Networked Conference Rooms: Users can access the network as they move from
a meeting to another, getting the access to information/data and the ability to
communicate decisions while “on the go”.
Ad Hoc Networking: On site consulting and small workgroups may increase
productivity with quick network setup and collaboration software.
Branch office Networking: With an Access Point to bridge between the LAN and
Internet, wireless networking provides an easy to install, use and maintain
network for a remote or sales office.
Campus-Wide Network Mobility: The roaming capabilities allow enterprise to set
up easy to use wireless networks that cover the entire campus transparently.
10
2. Quick Start to Wireless Networking
2.1 Installation
1.
Insert the installation CD.
WLAN Utility and Driver.
It automatically starts the setup program for
2.
Follow the installation wizard to complete the software installation process.
3.
CONNECT THE USB ADAPTER TO YOUR COMPUTER USING THE
USB CABLE.
11
4.
Operation System will detect new device and verify the driver automatically.
You may check it in “Device Manager”. See details of verifying the driver in
User’s Guide Chapter 3.2.
Note! During installation procedure, each operating system may prompt different
specific options:
Windows 98SE: The system will request the original Windows CD during the
installation process. When the installation is finished, you’ll have to restart your
computer.
Windows Me: Please restart your computer when the installation is finished.
Windows 2000/XP: Select “Install the software automatically” when the window
with this option appears, and then click “Next” to continue installation.
12
2.2 Connecting to an Exiting Network
1.
Double click the shortcut icon. The IEEE 802.11b WLAN Utility window appears.
You can also see a small red icon in Windows System Tray.
Disconnected
2.
Select “Site Survey” tab. From the list, you can check the informations of each
network, and then choose one network to join.
13
3.
Select “Setting” tab. Enter the chosen SSID, select a proper Network Type and
then click “Apply”. Click “OK” button when appears.
4.
In the “LAN Status” tab, you can check the Access Point SSID, Access Point
MAC, Signal Strength and Signal Quality of the connected network. Once
connected, the Status Icon in the Windows System Tray will then change the
color accordingly.
5.
For details of each tab in IEEE802.11b WLAN Utility, please read User’s Guide
Chapter 4.
2.3 Additional Note for Windows XP
In Windows XP, it is recommended that you use the IEEE 802.11b WLAN Utility.
Please check User’s Guide Chapter 3.3.1 to disable the Zero-Configuration
14
3. Step-by-Step Installation Guide
This section will lead you through the installation of USB Adapter and IEEE802.11b
USB WLAN software in details. People who are familiar with the installation and
settings of wireless device may refer to quick start guide to establish a network in a
snap.
To establish your wireless network connection, the following steps should be
executed:
1. Install the software by using the installation CD.
2. Install the USB Wireless LAN Adapter.
3. Install the required network protocols to communicate with your network.
Mostly, you will need to set the TCP / IP protocol.
The product is designed to operate under Windows 98SE, ME, 2000, XP, XP 2nd
edition (subject to availability) and Windows CE (subject to availability). The
installation procedure is about the same. Please follow up the installation wizard
that provided by your system to install the software.
15
3.1 Install the IEEE802.11b WLAN Driver / Utility
Note: Please install the IEEE802.11b WLAN Driver & Utility before inserting
the IEEE802.11b Wireless LAN USB Adapter.
1. Insert the installation CD. Insert the installation CD into your CD-ROM
drive. The setup program automatically starts.
2. Click “Next”. Select “Install IEEE802.11b WLAN Driver and Utility” and
then click “Next” to go on the installation.
3. Click “Next”.
16
4. Click “Yes”.
5. Read the destination folder and click “Next”. The default destination folder
is displayed in the setup dialog box. Click “Next” to go on to Step 7. You
may change the default folder by clicking “Browse” to select the destination
folder you prefer (go on to Step 6). Click “ Next” to go to the next screen.
17
6. Select the Program Folder and click “Next”.
7. Click “Next”.
8. Click “Yes”. You are asked whether to add an IEEE802.11b USB WLAN
Utility shortcut to your desktop. Click “Yes” to create one.
18
9. The user manual is published in Portable Document Format (PDF). If Acrobat
Reader does not exist in your system, the following message will be prompted
to automatically enter the Acrobat Reader installation screen. Please follow the
instructions to complete the Acrobat Reader installation.
10. Click “Finish”. The installation is complete.
11. For the installation of IEEE802.11b Wireless LAN USB Adapter, please refer
to the next chapter 3.2 “Install the USB Adapter”.
12. After software installation, connect the USB Adapter to your PC/notebook
with the USB cable.
19
3.1.1 Additional Setup Processes
During software installation procedure, each operating system may prompt different
specific options:
1. Windows 98SE: The system may request the original Windows CD during the
installation process. You will be asked to add some necessary protocols and to
edit some networking settings. Please check with the network administrator for
the values of the settings. When the installation is finished, you’ll have to restart
your computer.
2. Windows Me: You will be asked to add some necessary protocols and to edit
some networking settings. Please check with the network administrator for the
values of the settings. Please restart your computer when the installation is
finished.
3. Windows 2000: You will be asked to add some necessary protocols and to edit
some networking settings. Please check with the network administrator for the
values of the settings. Select “Install the software automatically” when the
window with this option appears, and then click “Next” to continue installation.
4. Windows XP: Select “Install the software automatically” when the window with
this option appears, and then click “Next” to continue installation.
20
3.2 Verifying the Driver/Utility
1. Windows 98SE/Me:
Step 1. Right-click “My Computer” icon on the desktop and choose “Properties”.
Step 2. Select “Device Manager” tab and open “Network adapters”. You should
see your WLAN miniUSB Adapter in the list. Highlight it and click
“Properties” button.
Step 3. From the “Device status”, you should see the line “This device is working
properly”. If, instead, you see error messages displayed, please remove
this Adapter (highlight this Adapter and click “Remove” button). Restart
your PC and go through the installation process again.
2. WINDOWS 2000:
Step 1. Right-click “My Computer” icon on the desktop and choose “Properties”.
Step 2. Select “Hardware” tab and click “Device Manager”. Open “Network
adapters”. You should see your WLAN miniUSB Adapter in the list.
Right-click this Adapter and choose “Properties”.
Step 3. From the “Device status”, you should see the line “This device is working
properly”. If, instead, you see error messages displayed, please uninstall
this Adapter (right-click this Adapter from the “Network adapters” list and
choose “Uninstall”). Restart your PC and go through the installation
process again.
3. WINDOWS XP:
Step 1. Click “Start>Control Panel> System”.
Step 2. Select “Hardware” tab, and click “Device Manager”. Open “Network
adapters”. You should see your WLAN miniUSB Adapter in the list.
Right-click this Adapter and choose “Properties”.
Step 3. From the “Device status”, you should see the line “This device is working
properly”. If, instead, you see error messages displayed, please uninstall
this Adapter (right-click this Adapter from the “Network adapters” list and
choose “Uninstall”). Restart your PC and go through the installation
process again.
21
3.3 IEEE802.11b USB WLAN Utility
IEEE802.11b USB WLAN Adapter has its own management software, named
IEEE802.11b USB WLAN Utility, and users can control all functions provided with it.
The Utility icon
appears in the Windows System Tray after clicking the
IEEE802.11b USB WLAN Utility shortcut on your desktop. The Utility includes six
tabs: LAN Status, Setting, Site Survey, Link Information, Diagnostic and About.
The definition of the color of the Utility icon is as follows:
Connected (Green)
Low quality (Yellow)
Disconnected (Red)
In Ad Hoc mode, in one workgroup, the Channel and SSID of each station must be the
same—therefore they can communicate with each other within the local LAN
properly. Moreover, all connected computers should have the same net ID and subnet
ID.
To open IEEE802.11b Utility, please double click the status icon in the Windows
System Tray.
To open IEEE802.11b Utility under Windows XP, please refer to chapter 2
“Quick Start to Wireless Networking”, step 9~step 15.
22
3.3.1 Disable Windows XP Zero-Configuration
In Windows XP, it is recommended that you use the IEEE 802.11b WLAN Utility.
Right after the installation, before opening the Utility, please follow the steps below to
disable the Windows XP Zero Configuration:
1. Go to “Control Panel” and double click “Network Connections”.
2. Right-click “Wireless Network Connection” of “WLAN miniUSB Adapter”, and
select “Properties”.
3. Select “Wireless Networks” tab, and uncheck the check box of “Use Windows to
configure my wireless network settings”, and then click “OK”.
23
3.4 Basic Setting for Infrastructure Mode
To connect with an Access Point, please follow the process below:
1.
Select the “Setting” tab
2.
Select “Infrastructure” for Network Type
3.
Select or enter the correct SSID
4.
Press the “Apply” button.
SSID is the group name that will be shared by every member of
your wireless network .You will only be able to connect with an
Access Point (AP), which has the same SSID. Note that the SSID
will be case sensitivity.
Channel is not active in Infrastructure Mode.
Profiles allows you to save five sets of default settings. After
entering the values of the settings (SSID, Network Type, Channel
etc.), set a name in the Profiles field. Click “Apply” button.
24
3.5 Basic Setting for 802.11Ad Hoc Mode/Ad Hoc Mode
If you have more computers and only want to place them in a local area network, or
you want to communicate directly without using an Access Point or any connection to
a wired network, then you can select the “802.11 Ad Hoc” mode or “Ad Hoc” mode
on your WLAN Utility.
“802.11 Ad Hoc” is the official standard set by IEEE Organization whereas “Ad Hoc”
is a pre-standard. Therefore we recommend you to select the “802.11 Ad Hoc”
mode.
Please note that “802.11 Ad Hoc” mode and “Ad Hoc” mode are not compatible. If
you select the “802.11 Ad Hoc” mode, then all computers of your workgroup should
be set as the “802.11 Ad Hoc”—vice versa with the “Ad Hoc” mode.
A. 802.11 Ad Hoc
Please follow the procedures below to set the “802.11 Ad Hoc”:
1.
2.
3.
4.
Select “Setting” tab.
Select “802.11 Ad Hoc” for Network Type.
Type in the SSID, which you want to use in your 802.11 Wireless LAN.
Press the “Apply” button.
Every member of your peer-to-peer network must set to the same
SSID, which is case sensitive.
25
You must select a SSID if you use the 802.11 Ad hoc.
If you have trouble connecting other brands’ IEEE 802.11b devices using the
“802.11 Ad Hoc” mode, please try “Ad Hoc” mode. The next section shows
you the basic setting of the “Ad Hoc” mode.
B. Ad Hoc Mode
Please follow the procedures below to set the “Ad Hoc” Mode:
1.
2.
3.
4.
Select the “Setting” tab.
Select “Ad Hoc” for Network Type.
Select the correct channel. (The channel of all computers in one
workgroup must be the same.)
Press the “Apply” button.
Channel shows radio channel numbers used for networking. Channel
number must be the same between stations so computers can communicate in
the same local LAN. It can be changed only under the Ad Hoc Mode.
26
3.6 Advanced Settings
Click the “Advance” button in the Setting page to edit the advanced settings for your
IEEE802.11b Wireless LAN USB Adapter.
Regarding the transmission rate, there are four options:
A.
B.
C.
D.
Fully Auto (Default)
Fixed 11Mbps
Fixed 5.5Mbps
Auto 1 or 2 Mbps
You may select and change transmission rate by clicking the pull-down button.
If you enable the “Power Saving” mode, the USB Adapter can work with low power
consumption but the throughput may slow down.
27
3.7 Encryption Function
You may enhance the security of your network by enabling the “Encryption” function.
The WEP Required Mode enables you to define the encryption keys that your
IEEE802.11b Wireless LAN USB Adapter should use.
Caution:
If you wish to enable the “Encryption” function, you must enable this function
for all computers of your network, and the WEP key needs to be the same for
all IEEE802.11b stations.
Follow the steps below to set your WEP Required Mode:
(1) Select one mode from the drop down menu of WEP required Mode and set
the WEP key. Four modes are available:
A. Manual 64 bits (ASCII)
B. Manual 128 bits (ASCII)
C. Manual 64 bits
D. Manual 128 bits
(2) Press “Apply” button when finish the WEP setting.
a. Select “Manual 64 bits (ASCII)” and enter a 5-digit WEP Key.
28
b. Select “Manual 128 bits (ASCII)” and enter a 13-digit WEP Key.
c. Select “Manual 64 bits” and enter a 10-digit WEP Key.
d. Select “Manual 128 bits” and enter a 26-digit WEP Key.
29
3.8 Remove your USB Adapter
If you do not need the wireless connectivity of your IEEE802.11b USB WLAN
Adapter, you can unplug and remove your USB Adapter directly.
Note: When removing the IEEE802.11b WLAN USB Adapter, you will lose your
connection to the network. Make sure you have closed all files and network
applications (such as e-mail) prior to removing the USB Adapter.
30
3.9 Uninstall the IEEE802.11b USB WLAN Utility / Driver
Note:
In Windows XP or 2000: Do not remove your IEEE802.11 USB WLAN Adapter
until the Utility/Driver is uninstalled.
In Windows 98SE or Me: Remove your IEEE802.11b USB WLAN Adapter before
the Utility/Driver is uninstalled.
1. Make sure the Utility is closed.
2. Open Control Panel, and then click Add or Remove Programs >
IEEE802.11bWLAN Utility > Remove
3. Follow the uninstall wizard to complete the uninstallation.
4. Click “Finish” when uninstallation is completed.
31
4. Using the Utility
4.1 LAN Status Tab
If you want to know the connecting status in Infrastructure Mode or 802.11 Ad Hoc
Mode, choose LAN Status tab in IEEE802.11b WLAN Utility window.
1. Infrastructure Mode:
•
The SSID and MAC of the access Point, which your computer connects to,
will appear in the screen if you choose the Infrastructure Mode.
•
Double click the Access Point SSID (under the Infrastructure Mode) to access
to the Microsoft Network Neighborhood folder to find other remote on-line
computers.
•
You can see the status of the Link Quality and Signal Strength under the LAN
status page.
2. 802.11 Ad Hoc Mode / Ad Hoc Mode:
•
The station Name and MAC address of your station will appear if you choose
the 802.11 Ad Hoc Mode (or Ad Hoc Mode).
•
Double click the right name to display the content of your computer or double
click Network Neighbors to access to the Microsoft Network Neighborhood
folder to find other remote on-line computers.
•
Click “Rescan” to find current available computers in the network.
32
4.2 Link Information Tab
The Link Information tab shows information of Current Channel, Current
Transmission Rate, Own MAC Address, Current Connection State, Wireless Network
Adapter IP Address, Wireless Network Adapter Subnet Mask, and Wireless Network
Adapter Default Gateway.
4.3 Site Survey Tab
This tab gives you all the information of each Access Point within the communication
range, so that you can select the Access Point with the strongest signal for better
performance.
33
4.4 Diagnostic Tab
Click “Start Diagnostic” button to check errors in hardware, firmware, and software
of your USB Adapter. In case of any errors occur, please click “View Error details”
button and print it out to present to your dealer or distributor.
4.5 About Tab
This tab provides you the version information of Firmware, Driver and Utility.
34
5. Network Application
This section consists of the network applications of IEEE802.11b WLAN USB
Adapter, including:
To Survey the network neighborhood
To Share Your Folder with Your Network Member(s)
To Share Your Printer with Your Network Member(s)
To Access the Shared Folder(s)/File(s) of Your Network Members(s)
To Use the Shared Printer(s) of Your Network Member(s)
In fact, the network applications of IEEE802.11b WLAN USB Adapter are the same
as they are in a wired network environment. You may refer to the following 3
examples of Surveying the Network Neighborhood, File Sharing and Using the
Shared Folder.
5.1 Surveying the Network Neighborhood
When multiple base stations are up and running in your wireless network, you can use
the procedure described below to display the other computers:
1. Double-click My Network Places to display all stations in your Microsoft
Windows Network Group.
2. To display other workgroups in the network environment, double-click Entire
Network.
3. If there is a second network operating system running in your network
environment (for example a Novell NetWare network), the “Entire Network”
window will also display available servers running under the second network
operating system. If you click on these servers, you may be asked to enter
your user name and password that applies to the other network operating
system. If you cannot find it, verify whether the other wireless computers are:
Powered up and logged on to the network.
Configured to operate with identical Microsoft Network settings
concerning:
Networking Protocol.
Wireless Network Name.
To enable the sharing of Internet access, you should set your IEEE802.11b WLAN
USB mode as “Infrastructure” and connect to the access point.
35
5.2 File Sharing in Windows XP
IEEE802.11b WLAN USB Adapter allows the sharing of files between computers
that are logged onto the same wireless network. If you want to share your folder “My
Documents” with other computers of the wireless network, please highlight the
folder “My Documents” and drag it to Shared Documents folder.
Sharing files in the IEEE802.11b wireless network will be like sharing files on a
wired LAN.
36
5.3 Using the Shared Folder
If you would like to access a shared folder stored in other stations of same network,
please follow the process below:
1.
Double-click the “My Network Places” icon, and then double-click the
computer where the shared folder is located.
2.
Double-click the folder you want to connect to.
3.
Now you may open the needed file(s).
Note: If a password is required, the Windows will prompt a password column to
you. Then you need to enter the password that had been assigned to this shared
folder.
37
6. Product Specifications
Frequency range
2.4G ~ 2.4835Ghz
Modulation
technique
DSSS (Direct Sequence Spread Spectrum) with
BPSK (1Mbps), QPSK (2Mbps), and CCK (5.5 and
11Mbps)
Core Logic
Intersil Prism 3.0
MAC+BB: ISL3871 (upgrade to 3871A)
Direct Down Conversion Transceiver: ISL3684
VCO: ISL3084
Power Amplifier: ISL3984
Host interface
USB V1.1
Dimension
- external: 48.1mm(W)*71.2mm(L)*15.3mm(H)
Weight
- external: 28g
Form factor
-MiniUSB type B
Channels support
Operation voltage
Power consumption
-
US/Canada: 11 (1 ~ 11)
Major European countries: 13 (1 ~ 13)
France: 4 (10 ~ 13)
Japan: 13 (1 ~ 13) or 14th
5V +/- 10%
-
Transmission mode: 250mA (Max.)
Receives mode: 250mA (Max.)
Power saving mode: 100mA (Max.)
Multipath delay
125ns at 11Mbps, 250ns at 5.5Mbps
Output power
13-17dBm
Operation range
-
Indoor: 35 ~100 meter @ 11Mbps (Estimated)
Outdoor: 300 meter @ 11Mbps (Estimated)
Sensitivity
@PER <0.08
11Mbps < -84dBm
5.5Mbps < -86dBm
2Mbps < -88dBm
1Mbps < -90dBm
Operation system
Windows 98SE, Me, 2K, XP, and
XP 2nd edition (subject to availability)
Windows CE (subject to availability)
Security
64-bit, 128-bit WEP encryption
Transfer data rate
11Mbps, 5.5Mbps, 2Mbps, 1Mbps, auto-rate
38
Operation
temperature range
0oC ~ 60oC
Storage temperature
range
-20oC ~ 65oC
Humidity
(non-condensing)
5% ~90%
Warranty
1 year standard warranty, 3 years optional
EMC certificate
-
FCC Class B part 15.247 (USA)
IC RSS210 (Canada)
ETSI 300 328, ETSI300 826 (Europe)
ARIB STD-T66, RCR STD-33 (Japan, subject
to customer’s request)
Media access
protocol
CSMA/CA with ACK
LED indicator
WLAN LED: indicates networking activity
-
Flash: searches Access Point
Always light: Data transfer
Antenna
Alone device: single antenna
User friendly
1.1 meters USB cable to extend connection
39