1
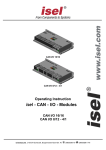
isel - CAN - I/O - Module User Manual for CAN In-/Output-module 16/16 CAN In-/Output-module 8/12-4/1 isel Germany AG, D-36124 Eichenzell, Bürgermeister-Ebert-Str. 40 (06659)981-0 (06659)981-776 About this manual: The information, technical data and dimensions contained in this print are up-to-date when published. Any possible misprints and mistakes cannot be excluded however. We are thankful for any suggestion for improvement and indication of mistakes. Please note that the used software- and hardware descriptions of each individual company are generally subject to protection of trademarks and patent law. All rights reserved. It is not permitted to reproduce or electronically process, duplicate or spread any part of our prints in any way (print, copy etc.) without written permission of isel-automation. Manufacturer: isel Germany AG Bürgermeister-Ebert-Straße 40 D-36124 Eichenzell Tel.: (06659) 981-0 Fax: (06659) 981-776 Email: [email protected] http://www.isel.com Part.-No.: 970321 BE004 Status: 08/2008 CB Contents 1 Introduction ......................................................................................................... 1 2 Safety guidelines ................................................................................................ 2 3 Technical specifications .................................................................................... 3 4 3.1 General ........................................................................................................ 3 3.2 Module overview .......................................................................................... 4 3.3 Plug allocation .............................................................................................. 5 3.4 DIP Switches ................................................................................................ 8 3.5 Usage ........................................................................................................... 9 3.5.1 Base connection 9 3.5.2 Digital inputs 9 3.5.3 Digital outputs 10 3.5.4 Analog output 11 3.5.5 Analog input 13 3.5.6 Diagnosis 13 Integration into the control software (ProNC, Remote) ................................. 14 4.1 Settings in the module management .......................................................... 14 4.2 Settings within the Control-Administration .................................................. 16 4.3 Version information .................................................................................... 17 4.4 Diagnosis function ...................................................................................... 18 4.5 Status information ...................................................................................... 18 isel - CAN - I/O – User Manual 1 Introduction The CAN-I/O-Module is an Input/output-module for peripheral automation by linking intelligent modules to the CAN-Bus (Controller Area Network). Such modules are: Positioning modules for numerical axes, e.g. IMD10 – IMD40 from iselautomation, HF-Inverter for working spindles, I/O-Modules for binary (analog) Input/output, e.g. CAN-I/O-Modules from iselautomation. All CAN-Modules are intelligent, that means they have at least one microprocessor with integrated and on chip CAN-Controller. The CAN-I/O-Modules follow the CANopen- Standard Device profile for I/O-Modules: CiA Draft Standard Proposal DS301 V4.0 und DS401 V2.0. The advantages of using I/O-Modules with CAN interface are: - The binary (analog) Inputs and Outputs are available close to the process sensors (inputs) as well as to the actuators (outputs). A costly, susceptible and EMC sensitive cabling to the (central) CNC-Controller (CNC-Master, CNC-Control) will be cancelled. - Additional modules can be integrated and configured in a simply way: 1. Plug node to CAN-Bus 2. Set a new node address for the I/O module 3. Assign the respective software driver (DLL) to the application software (ProNC or Remote) - There are extensive diagnostic- and test-possibilities because every CAN-I/OModule is intelligent. That means, that the modules are able to give status information and error-information to the CNC-Master on demand. Page - 1 isel - CAN - I/O – User Manual 2 Safety guidelines The CAN-I/O-Modules 16/16 resp. 8/12-4/1 are designed to current technical and recognized rules. The device may only be used if it is in correct condition. Any faults have to be eliminated immediately. Neither children nor non-authorized persons are allowed to put the device into operation. The device may only be used for the intended use, i.e. I/O operations. All work on the module must be executed from authorized personal regarding electrical industry rules and accident prevention regulations. Assembly and use of operating material has to be according to the standards of conformity declaration. In case of in proper use even the observation the respective rules and standards does not protect against physical damages and damage to property. Do not expose the device to high humidity or high vibrations. Please take care of the instruction manual. Be sure that all users know the instructions. Ignoring the instruction manual can lead to damage, heavy physical damage or to death. Page - 2 isel - CAN - I/O – User Manual 3 Technical specifications 3.1 General box size: weight: 85mm (B) x 180mm (H) x 28mm (T) 260 g safety class: IP20 power supply: power consumption: 24VDC (logic voltage), 24VDC (process voltage) 160mA (logic and relay) ILoad depends on external electrical circuit ambient temperature: storage temperature: relative humidity: 5°C bis +40°C -25°C bis +70°C max. 95% CAN - IO - 16/16 digital inputs: digital outputs: 16 16 analog output: 1 optocoupler (input current about. 8mA) 8 x relays, Imax < 5A 8 x electronic, Imax < 350mA (thermic short-circuit protection) 0V – 10V over 8Bit D/A converter (if the analog output is used the eight electronic digital outputs can not be used for binary output) CAN - IO - 8/12 - 4/1 digital inputs: digital outputs: 8 12 optocoupler (input current ca. 8mA) 4 x relays, Imax < 5A 8 x electronic, Imax < 350mA (thermic short-circuit protection) 0V – 10V over 8Bit D/A transformer 0V – 10V, 16Bit resolution analog output: analog inputs: 1 4 fuse: 250mA/250V quick Page - 3 isel - CAN - I/O – User Manual 3.2 Module overview CAN-IO-16/16 CAN-IO-8/12- 4/1 Page - 4 isel - CAN - I/O – User Manual 3.3 Plug allocation Supply voltage Phoenix Mini Combicon 2 pins modul CAN-IO 16/16 CAN-IO 8/12-4/1 connector X1 X1 pin 1 2 1 2 signal GND +24V GND +24V description supply voltage GND supply voltage +24V supply voltage GND supply voltage +24V CAN In, CAN Out RJ45 connector modul CAN- IO 16/16 CAN-IO 8/12-4/1 connector pin 1 2 3 X2 CAN In 4 X3 CAN Out 5 6 7 8 1 2 3 X2 CAN In 4 X3 CAN Out 5 6 7 8 signal n.c. n.c. n.c. CAN_H CAN_L CAN_GND n.c. n.c. n.c. n.c. n.c. CAN_H CAN_L CAN_GND n.c. n.c. Page - 5 description not connected not connected not connected signal CAN high signal CAN low GND not connected not connected not connected not connected not connected signal CAN high Signal CAN low GND not connected not connected isel - CAN - I/O – User Manual Input ports Phoenix Mini Combicon 8 x 2 pins module connector CAN- IO 16/16 X4 In 1 and X5 In 2 CAN-IO 8/12-4/1 X4 In 1 pin bottom 1 2 3 4 5 6 7 8 pin top 9 10 11 12 13 14 15 16 pin bottom 1 2 3 4 5 6 7 8 pin top 9 10 11 12 13 14 15 16 Page - 6 signal +24V +24V +24V +24V +24V +24V +24V +24V signal In 1 In 2 In 3 In 4 In 5 In 6 In 7 In 8 signal +24V +24V +24V +24V +24V +24V +24V +24V signal In 1 In 2 In 3 In 4 In 5 In 6 In 7 In 8 description description bit 0 bit 1 bit 2 bit 3 bit 4 bit 5 bit 6 bit 7 description description bit 0 bit 1 bit 2 bit 3 bit 4 bit 5 bit 6 bit 7 isel - CAN - I/O – User Manual Output ports Phoenix Mini Combicon 8 x 2pol. module CAN- IO 16/16 CAN-IO 8/12-4/1 connector X6 Out 1 X7 Out 2 X6 Out 1 X7 Out 2 pin bottom 1 2 3 4 5 6 7 8 pin top 9 10 11 12 13 14 15 16 pin bottom 1 2 3 4 5 6 7 8 pin top 9 10 11 12 13 14 15 16 signal GND GND GND GND GND GND GND GND signal Out 1 Out 2 Out 3 Out 4 Out 5 Out 6 Out 7 Out 8 description description bit 0 bit 1 bit 2 bit 3 bit 4 bit 5 bit 6 bit 7 GND GND GND GND GND GND GND GND Out 1 Out 2 Out 3 Out 4 Out 5 Out 6 Out 7 Out 8 bit 0 bit 1 bit 2 bit 3 bit 4 (not on X7) bit 5 (not on X7) bit 6 (not on X7) bit 7 (not on X7) Analog output Phoenix Mini Combicon 2 pins module CAN-IO 16/16 CAN-IO 8/12-4/1 connector pin 1 X8 AnaOut 2 1 X8 AnaOut 2 signal analog Out GND analog Out analog Out GND analog Out Page - 7 description reference for analog output analog output (0 – 10V) reference for analog output analog output (0 – 10V) isel - CAN - I/O – User Manual Analog inputs Phoenix Mini Combicon 2 pins module connector pin bottom signal CAN- IO 16/16 CAN-IO 8/12-4/1 - X9 AnaIn description - pin bottom 1 2 3 4 pin top 5 6 7 8 - signal GND GND GND GND description reference for analog input 1 reference for analog input 2 reference for analog input 3 reference for analog input 4 Analog In 1 Analog In 2 Analog In 3 Analog In 4 analog input 1 analog input 2 analog input 3 analog input 4 3.4 DIP Switches The node address of a CAN module is used to clearly identify the device on the CAN bus. We submit the following assignment of the modules node address: Module 1. positioning module 2. positioning module 3. positioning module additional positioning module 4. I/O-module (fisrt) 5. I/O-module (second) additional I/O-modules 6. HF- converter additional HF-converter Node address Node address 1 Node address 2 Node address 3 Node address 4-9 Node address 16 Node address 17 Node address 18 and 19 Node address 10 Node address 11,12 or 13 CAN Node address (S1 – S5) The switches S1 – S5 are used to set the CAN node address. Possible values are 1 to 31. Node address 16 17 … 31 S1 off on S2 off off S3 off off S4 off off S5 on on on on on on on Page - 8 isel - CAN - I/O – User Manual Baud rate (S6 – S7) The switches S6 and S7 are used to set the baud rate. Following values are possible: Baud rate 1 MBit/s 500 KBit/s 125 KBit/s 20 KBit/s S6 off on off on S7 off off on on Terminating resistor (S8) Switch S8 is used to switch a termination resistor on or off. If the switch is on a 120 Ohm resistor is enabled. 3.5 Usage Be sure that the jumper settings are correct before you build in the CANI/O module. 3.5.1 Base connection If you have configured the DIP switches the module can be built in to the intended mounting place. Now the 24V-power supply (logic voltage) must be connected with X1 (see connection assignment). Also the CAN- bus interface connection must be plugged in (CAN In must be connected) If the CAN-I/O-module is the last device in the CAN-topology the DIPswitch 8 must be set to “on” to enable the terminating resistor. 3.5.2 Digital inputs The digital inputs of the CAN-I/O-modules are realized using 24V-DC process voltage can be integrate to the respective application as follows: The input load is about 8mA. Page - 9 isel - CAN - I/O – User Manual 3.5.3 Digital outputs The digital outputs of the CAN-I/O-modules switch 24V-DC process voltage. Integrate the outputs as follows: The relay outputs of Port1 (X6) can be rated with 5A, the outputs of Port2 (X7) up to 350mA. If the integrated D/A converter is used Port2 is reserved. That means Port2 is not longer available for digital outputs. To prevent confusions you can deactivate Port2 by removing Jumper1. Through this the Port2 LEDs are also deactivated. Page - 10 isel - CAN - I/O – User Manual 3.5.4 Analog output You can use this output for controlling an external device (e.g. HF converter). If the analog output ist used, Port2 is no longer available for digital outputs. Output current not more than 15mA! CAN-I/O 16/16 Jumper settings Jumper plugged: - if the analog output is in use the LED from output Port A2 signalizes the binary analog output value. Delivery state: - Jumper not plugged, galvanic separation of 24V process voltage and 24V logic voltage. If you plug the jumpers there is no galvanical separation! This may be effects damages on the CAN-I/O-Module. Page - 11 isel - CAN - I/O – User Manual CAN-I/O 8/12 - 4/1 Jumper settings Delivery state: - Jumper not plugged, galvanic separation of 24V process voltage and 24V logic voltage. If you plug the jumpers there is no galvanical separation! This may be effects damages on the CAN-I/O-Module Page - 12 isel - CAN - I/O – User Manual 3.5.5 Analog input The module CAN-I/O-8/12-4/1 has 4 analog Inputs with an input voltage range from 0V to10V with a resolution of 10Bit. On these inputs you can directly connect e.g. sensors. The inputs have an input impedance of 2kOhms and provides an internal RC filter. 3.5.6 Diagnosis Diagnosis of the modules is possible by using the status LED. This LED signals 3 different states: LED duty cycle 10% 50% 90% state No error normal operation Uncritical error or warning Critical error (NMT error, output error) Page - 13 isel - CAN - I/O – User Manual 4 Integration into the control software (ProNC, Remote) 4.1 Settings in the module management At first the Interface-DLL which opens the connection between ProNC/Remote and CAN-IO-Device must be set-up. If not already available, copy the files IoCan.DLL and IoCan.INI into a new sub-directory of the CNCworkbench - directory. Our suggestion for the new directory: {ProgramPath}\CNCWorkbench\Control\Can\ After the files are copied the application must get to know the new IO-deviceTherefore start ProNC/Remote and open the Setup-dialog for the control with the help of the command "Setup – Control…". The following dialog will be appear: Page - 14 isel - CAN - I/O – User Manual Follow the commands to get the USB-IO device into the modul management: Choose in the tree view the IO-Modul which is not in use and name it e.g CAN-IO16/16" or "CAN IO". Click on ">>" next to the Edit field "Modul DLL". Choose the "IoCan.DLL" in the "\CNCWorkbench\Control\Can" directory. The Edit field "Modul initialisation file" shows automatically the “CNCWorkbench\Control\Can\IoCan.INI" file. You don’t need to rename the file. Click on "Setup" (in case nothing will happen, choose another IO-Modul from the tree view and after that choose the IO-Modul for the CAN-IO). Click on "Setup" to open the Setup dialog. In this dialog you can set different settings for the module. The most important setting are the node address of the module. The default value for the address is 16. Furthermore you can set initialization values for digital and analog output ports. If you start the software (ProNC/Remote) these values will be set. Page - 15 isel - CAN - I/O – User Manual 4.2 Settings within the Control-Administration To get access to the IO-module within the Control-Administration one setting in the top level must be changed. Open the "Extended settings-IO" - Dialog as follows. Highlight in the tree structure "IO modules". Click on "Extended settings" on the right side. You can see the following dialog: The IO-module "IoCan.DLL" needs a logical Input/Output port number to access the In-/Output-functions. Mind the following notes: Highlight a free logical port, for example: input 1 Choose in "Available IO modules" the "CAN IO 16/16". Choose in the list "Logical port" the 1. Click on "Assign selection“ Click on “OK” to close the dialog After that the “Assigned IO modul“ and the ”Logical port in module“ in the highlighted row should be as shown in the picture. Now you must do the described steps for all logical output ports, analog output and analog input. You find these entries by scrolling down in the list field. Close the dialog “Control modules and settings” over the button “Close & Initialize” to reinitialize the new modules. Page - 16 isel - CAN - I/O – User Manual The following lines shows the use of local input ports, output ports, analog output and analog input of the different modules. CAN- IO- 16/16 Local input ports: Port 1 und Port 2 Local output ports: Port 1 und Port 2 Local analog output: Port 1 If the analog output ist used, Port2 (X7) is no longer available for digital outputs. You must clear the entry for this port in the list. CAN- IO- 8/12- 4/1 Local input ports: Port 1 Local output ports: Port 1 und Port 2 Local analog output: Local analog inputs: Port 1 Port 1 - 4 At the local output port 2 you can only use the outputs 1-4 (A2.1, A2.2, A2.3 and A2.4). 4.3 Version information Inside the module management you can show version information of the used module DLL and the connected device type by pressing the button “Version“. Page - 17 isel - CAN - I/O – User Manual 4.4 Diagnosis function This button allows you to access input/output functions of the connected CAN-I/Omodule. In this dialog you can e.g. switch outputs separately or you can check the state of inputs. 4.5 Status information Over the button “Status” you can check whether the process voltage is connected to the device. If there is no process voltage connected you can not measure 24V potential on the load connectors. Page - 18